WooCommerce Wishlists allows visitors to create an unlimited number of lists, add products, and make them private or public.
- Guest can store them for 30 days
- Registered users can save them indefinitely
- Download the .zip file from your WooCommerce account.
- Go to: WordPress Admin > Plugins > Add New to upload the file you downloaded with Choose File.
- Activate the extension.
More information at:
Installing and Managing Plugins.
This is an overview of features available to a store manager with WooCommerce Wishlists.
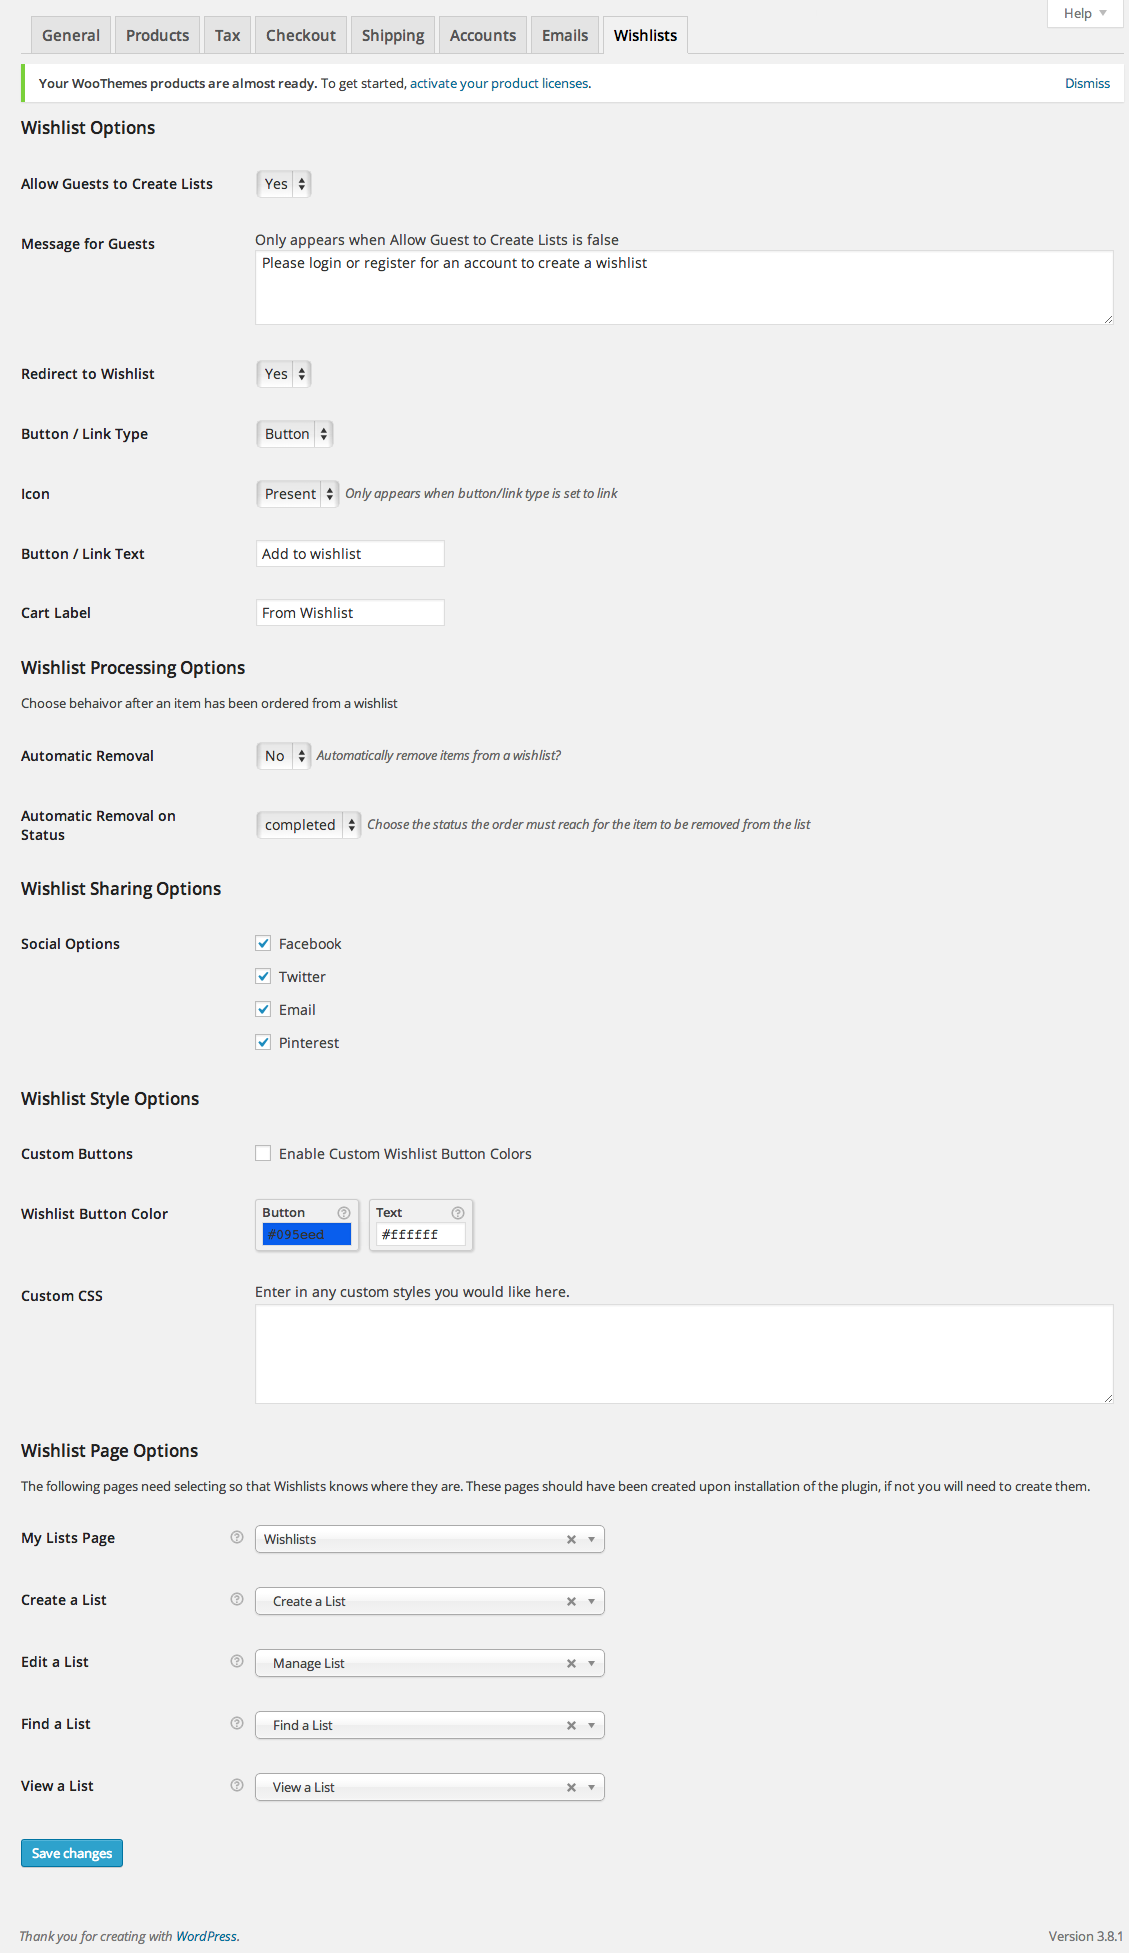
Settings for the extension can be found under the Wishlists tab of the WooCommerce Settings page.
Allow Guests To Create Lists
This option controls the ability for unauthenticated users to create lists. If you want anyone, with or without an account to create lists, leave this setting as “Yes”. Setting the option to “No” will hide the wishlist buttons from products and will require the user to logon before they can create a list.
Message for Guests
When a user who is not authenticated attempts to access the Create a List page they will be presented with this message. You can customize it to encourage the user to register for an account so they can create lists. This only applies when Allow Guests to Create Lists is “No”
Redirect to Wishlist
After the users adds an item to their wishlist they can be automatically redirected to the list. Set this to no if you want the user to remain on the product and not be redirected.
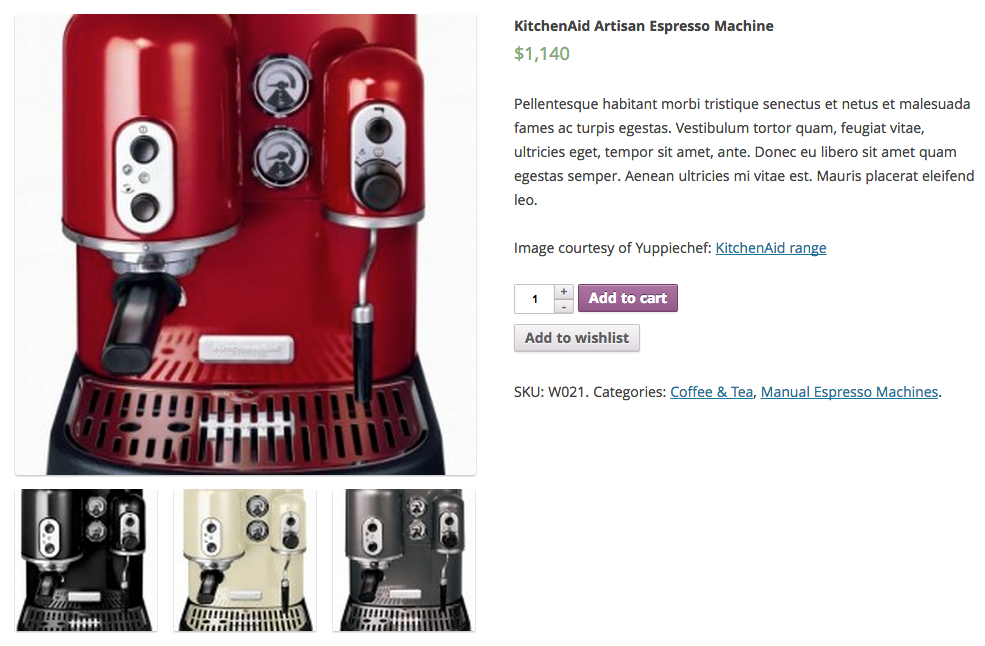
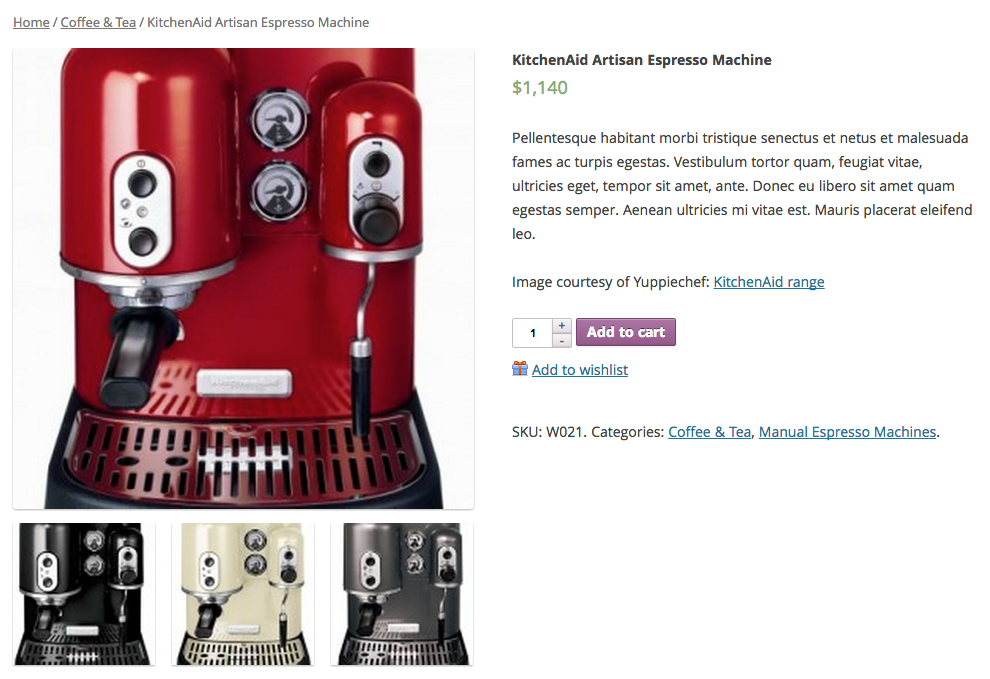
Button / Link Type
When the add to wishlist content is displayed on a single product it can either be a text link, or a button which looks similar to the Add to Cart button. Choose the type you would like to use here.
Button Type:

Link Type:
 Icon
Icon
Wishlist has two icons built in for the link type. You can choose the present, star or none to display the text link with no icon.
 Button / Link Text
Enter the text you would like to display for the “Add to Wishlist” button or link. This text will be displayed on the Single Product.
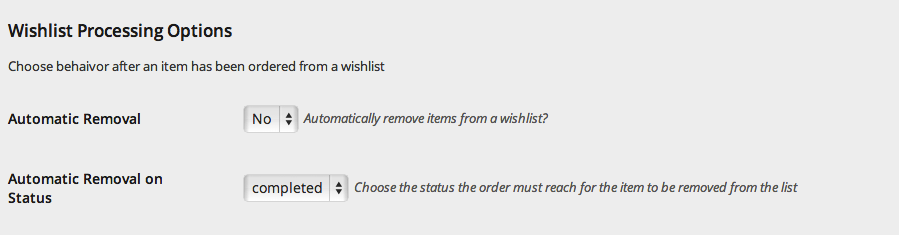
Wishlist Processing Options
With these options you can setup products to be removed from a wishlist if purchased, and you can determine what the order status is when they should be removed.
Social Options
Wishlist has sharing built in for Facebook, Twitter, Email and Pinterest. Choose which options you would like to make available for your users.
 Custom Buttons
Wishlist by default will use the styling options from the theme and from WooCommerce itself. You can choose to override these colors for your Wishlist button which is displayed on the Single Product page. You can choose to set the color of the Button and the color of the Text displayed in the button.
Custom CSS
If you would like to customize some aspect of the styling of the Wishlist plugin you can enter those style rules here. Note, it is not required to enter in custom styles into this section, it is provided as a convenience so you do not have to modify your theme to make a few simple adjustments.
Wishlist needs a few pages in WordPress to display the various screens to the end users. Each page is for one of the functions of Wishlist ( View, Edit, Create, Find ). When you activate the plugin, default pages are created for you and the required wishlist short code is automatically added to them. You can choose other pages to better suit your store. If you choose a custom page be sure to add the correct shortcode.
Wishlist Menu Configuration
Wishlist does not automatically add pages to any menus you might have and does not provide automatic links to any of it’s pages. To allow users to create and search for other lists you will need to add links to these the primary pages, My Lists, Find a List and Create a List, somewhere on your site. You can add them to your main menu viaGo to
Appearance > Menus, or anywhere on your site that you would like.
My Lists Page
This is the page where a user can manage and create their own list/s.
Shortcode required on this page: [wc_wishlists_my_archive /]
Create a List
This is the page where a user will create new lists
Shortcode required on this page: [wc_wishlists_create /]
Edit a List
This is the page where a users edits their own lists.
Shortcode required on this page: [wc_wishlists_edit /]
Find a List
This is the page where a user can search for others public lists.
Shortcode required on this page: [wc_wishlists_search /]
View a List
This is the page where users view single wishlists.
Shortcode required on this page: [wc_wishlists_single /]
This is an overview of the features provided by WooCommerce Wishlists to users of your site.
Overview
The wishlist plugin is designed to allow users of your site to add items to a wishlist. Users will have the ability to create multiple wishlists, control the sharing visibility of those lists, and choose to share the list via Twitter, Facebook, Pinterest and Email.
Adding Items to a List
To add an item to a Wishlist click on the provided Add to Wishlist button or link. If you do not have a wishlist already one will automatically be created for you and the item will be added to it. If you already have a list you will be shown a popup which allows you to select which list you would like to add the item to. If you want to add the item to a new Wishlist, you can choose to create a new wishlist and add the item all in one step.
If you are not logged in your list will be created as a temporary list. Temporary lists are based on cookies and will be available only on the same computer and browser you used when the item was created. If you clear your cookies, or the cookie has expired your list will no longer be accessible. If you do add items to a temporary list you can always logon and the lists will automatically saved to your account. Once a list has been saved to your account, it will remain until you delete it.
View and Manage Lists
You can view and manage your lists from two different sections of the site. You can navigate to the “Wishlists” page and access all your lists. If you are logged into your account on the site you will see the wishlists available from your “My Account” page.
Editing a List
To edit a list you have already created click on the title of the list. This will bring you to the “Manage List Page”.
From this page you can view and manage the items in your list, and change the sharing and basic Wishlist information.
List Items
On the List Items tab you will see a list of items you have previously added to your list and a set of actions you can perform on those items. To apply an action to item(s) in your list, check the item(s), select the action from the drop down menu and click Apply Action. Your selected action will be applied to each item you selected. Check the top checkbox to select all items at once.
The actions available to you are:
- Add to Cart – Adds all the selected items to the cart.
- Update Quantities -This will update the quantities for the selected items. Be sure to change the quantity on the individual line items by adjusting the Quantity field.
- Remove From List – This will remove the selected items from your list.
- Create a New List – This action will take you to the create a list screen. After you create a new list, the items you previously selected will be added to the list and removed from the original.
List Settings
On the settings tab you will have options for editing the list itself. You can choose the privacy of your list and update the title, name and email associated with the list.
- Title – This sets the title of your list.
- Description – Add a description if you would like. Other will see this when viewing your public or shared list.
- Privacy Settings
- Public – Anyone can search for and see the list. Users will be able to search for your list using the name and email you provide.
- Shared – Only people with the link you share will be able to see the list. The list will not appear in search results.
- Private – The list is only viewable by you and can not be shared with others and will not appear in search results.
- First Name, Last Name – Your first and lat name and Email Associated with the List
- Email Address – Your email associated with the List
Enter in the appropriate information if you are creating a public list or plan to share you list with others. Others will be able to find public lists by searching for the information you enter here.
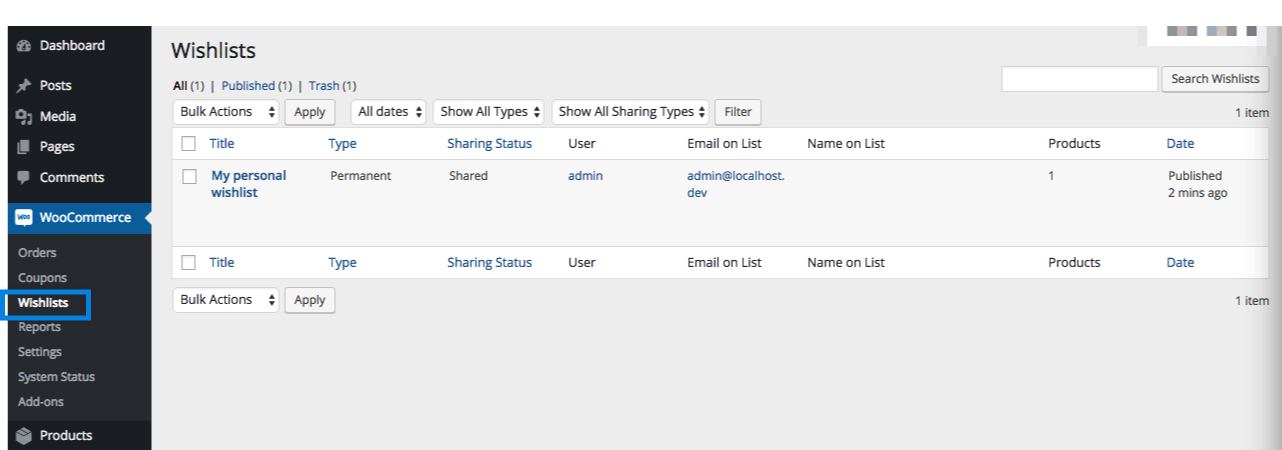
Shop managers can easily see the different wishlists in the WordPress Dashboard by going to:
WooCommerce > Wishlists.
There are times you will want to make a wishlist for a customer. To accomplish this, follow the instructions below:
- Download the User Switching plugin.
- Install the plugin on your WordPress site.
- Activate the plugin.
- Go to WordPress Dashboard > Users > All Users
- Select the Account you would like to create the wishlist on and select “Switch To”.
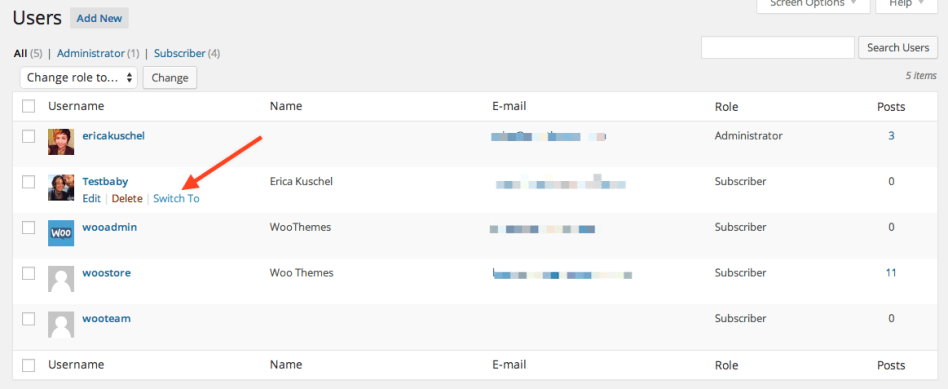
You can now go to your store and create a Wishlist through the storefront like a normal customer. When you are done creating the Wishlist and have saved it, to switch back to your admin account, go to the top right corner of your browser and select “Switch back to [Your Account Name Here]”.

The next time they log in, the wishlist will be there waiting for them at
http://www.YourURL.com/my-lists/.
Only if you set it to be removed. The option to do this can be found by heading to
WooCommerce > Settings > Wishlists:
Not as is. It would need to be
customized.
Not at this time. Store owners wishing to take a deposit on a wishlist item would need to consider
customization.
You can override any templates from the wishlist addon by duplicating files located in the
woocommerce-wishlist/templates folder within the
wp-content/themes/your-theme-folder/woocommerce/.
Questions & Support
Have a question before you buy?
Please fill out this pre-sales form.
Already purchased and need some assistance?
Get in touch the developer via the Help Desk.
 Link Type:
 Icon
Wishlist has two icons built in for the link type. You can choose the present, star or none to display the text link with no icon.
Icon
Wishlist has two icons built in for the link type. You can choose the present, star or none to display the text link with no icon.
 You can now go to your store and create a Wishlist through the storefront like a normal customer. When you are done creating the Wishlist and have saved it, to switch back to your admin account, go to the top right corner of your browser and select “Switch back to [Your Account Name Here]”.