Installation
↑ Back to top- Ensure you have the latest version of WooCommerce.
- Unzip and upload the plugin’s folder to your /wp-content/plugins/directory.
- Activate the extension from the Plugins menu in WordPress.
Getting Started
↑ Back to topTo create a Mix and Match product, start by choosing the new Mix and Match product type from the product type dropdown in the Product Data metabox.
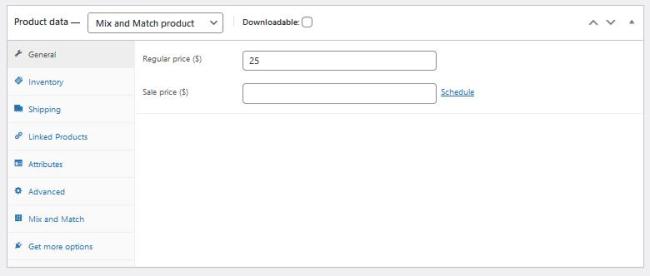
For a fixed-price container you can set the price of the container via the Regular price setting. For “per-item” pricing the Regular price can also serve as an optional base price for the container.
Then, to configure your container, navigate to the Mix and Match panel by clicking on the Mix and Match tab.
Container Size Restrictions
↑ Back to topMix and Match supports a minimum and maximum container size. To set the number of items required to complete a Mix and Match assortment, click the Mix and Match tab in the product data metabox. Enter the desired numbers in the Minimum container size and Maximum container size text fields.

Notes:
- For a fixed-size bundle (ie: a 6 pack) both the minimum and maximum container sizes should be set to the same number.
- For an unlimited number of items (limited by stock quantities available) to be purchased in any one container, leave the Maximum container size empty.
- To allow purchase of an empty container, set the Minimum container size to 0
Adding Products
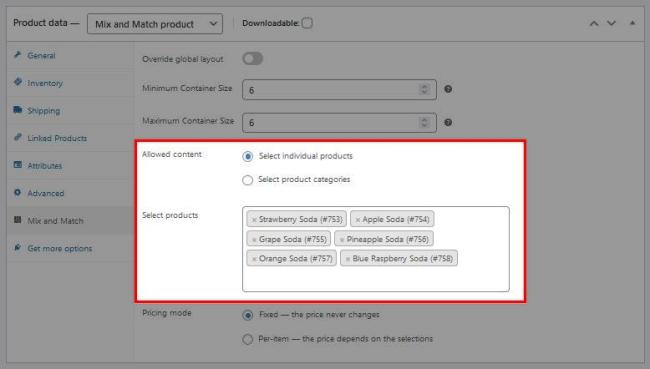
↑ Back to topThe two ways to populate a Mix and Match product’s optional child products are 1. selecting individual products of 2. selecting products by category. Category contents can be handy if you have a rapidly changing inventory and products are added and removed quickly.
Individual products – In the Select products field, enter the name of your product. Mix and Match will then return a list of potential matching products. Click on the product to add it to the list of products that may be selected as an option in the Mix and Match product.
Product categories – In the Select categories field, enter the name of your category. Mix and Match will then return a list of potential matching categories. Click on the desired category to add it to the list of categories that will be queried to generate the Mix and Match product options.
NB: You can hold CTRL (or CMD) to click on multiple matches in the same search.
Don’t forget to update the product to ensure new options are published.
Supported Product Types
↑ Back to topOnly Simple and fully-defined Variation products are allowed in a Mix and Match container. Other product types (such as Variable, Grouped, External) and partially-defined variations with an any attribute are not allowed. For example, a supported variation would look like Shirt, Color: Blue but not Shirt, Color: Any.
NB: Category contents currently only queries simple products in the selected categories.
Display Settings
↑ Back to topMix and Match offers global and per-product layout settings. The global settings are available in the Customizer. The best way to access the Customizer is to visit a Mix and Match product page on the front-end while logged in. Click on the “Customize” link in the admin toolbar and it should open the Customizer. From there, navigate to WooCommerce > Mix and Match Products
If your theme does not support the Customizer (likely, if it’s a theme that supports Full Site Editing) you can access the settings via the admin menu under Themes > Customize Mix and Match
Global Layout Options
↑ Back to top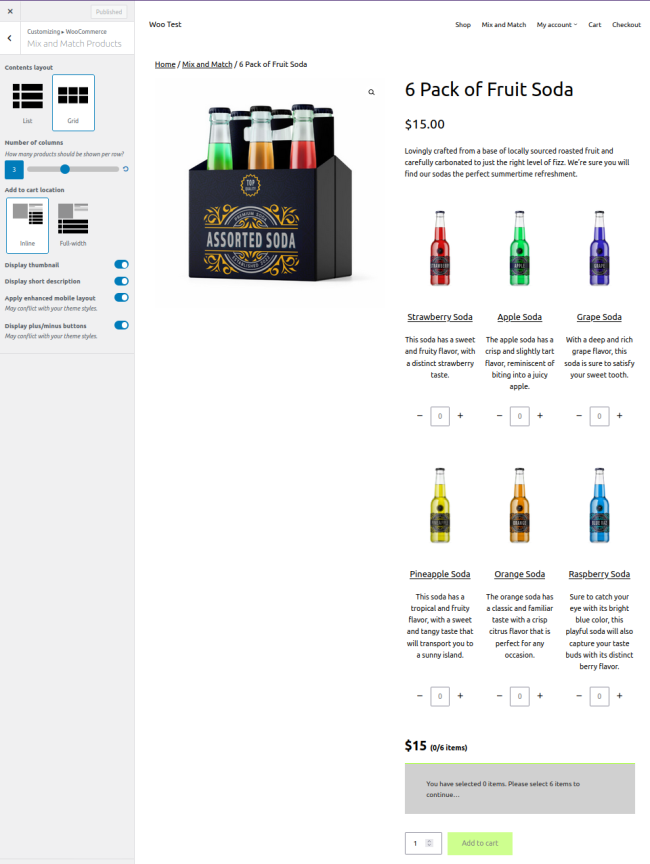
Contents Layout
This setting controls the layout of the optional child products on the single-product page. The available options are:
- the default List (tabular) layout
- a Grid layout, ideal for displaying lots of product options.
If Grid layout is chosen, you will also see a range slider to control the number of columns… from 1 to 6.
Add to Cart Form Location
This setting controls where the optional child products and the add to cart button will display. The available options are:
- Inline – the default location that is typically in the Product Summary
- Full-wdith – moves the add to cart form after/below the Product Summary.
Note: This feature may not work with themes that have already moved or customized the add to cart form location.
Display Thumbnail
Toggled on by default.
When disabled this will hide the product thumbnail for the optional child products.
Display Short Description
Toggled off by default.
When enabled this will display the short description for each of the optional child products.
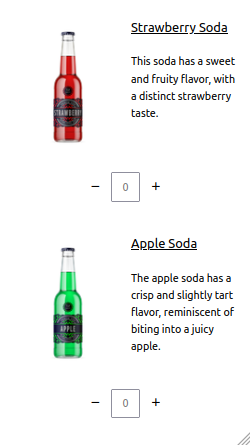
Apply Enhanced Mobile Layout
Toggled off by default.
When enabled this will change the way the optional products display on smaller screens. Both grid and tabular layouts will resolve to this single column layout where the image and title make up 2 columns with the quantity input directly underneath.
Tabular layouts especially do not always resolve well at mobile sizes. And grids that resolve to 1 column per row can make it difficult to scroll through all the products at mobile sizes. This layout can make it easier to navigate the options on mobile devices.
Display Plus + / Minus – Buttons
Toggled off by default as many themes will provide their own plus/minus buttons.
When enabled this will display a plus and minus button next to the quantity input for each optional product. Buttons can make it easier for you customers to select their options… especially on mobile devices.
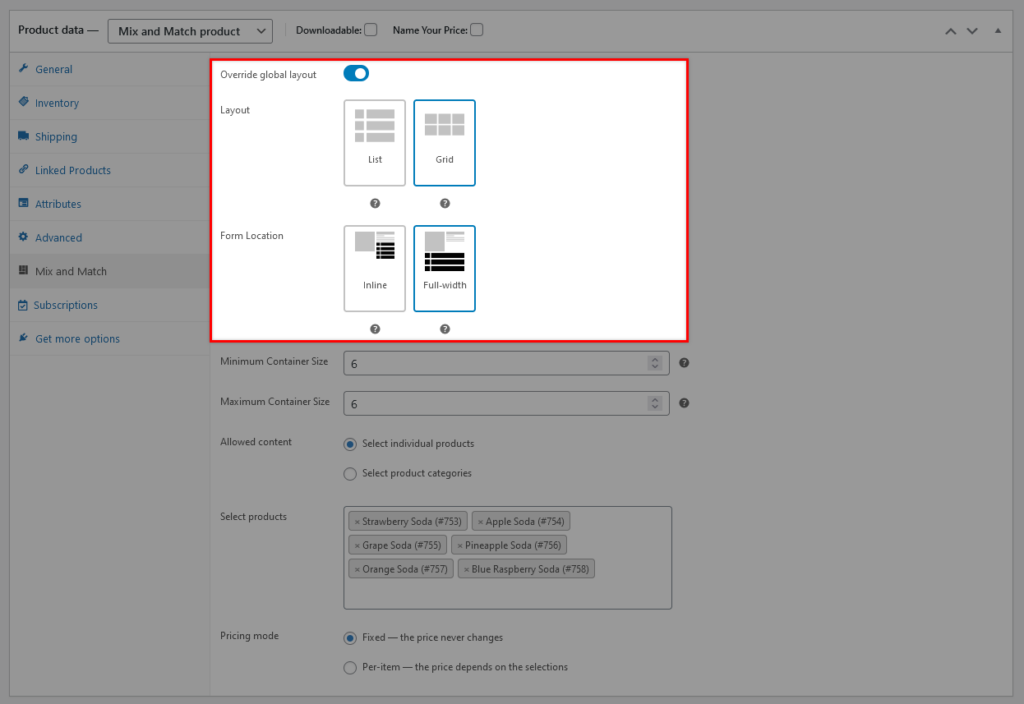
Per-product Layout Overrides
↑ Back to topIn the Mix and Match panel of the product data metabox, there is a toggle for “Override global layout”. When enabled, you will see options for Layout and Form Location. The options are the same as for the global, but the chosen settings will be enforced for this particular product only.
Pricing Settings
↑ Back to topFixed vs. Per-Item Pricing
The Mix and Match product type provides two pricing modes:
- Fixed price – The regular|sale price set in the General tab is always the price, regardless of selected contents.
- Per-item – The total price is calculated as the sum of the regular|sale price (a base price) plus the price of all selected contents. Note that the total price is displayed dynamically near to the Add to Cart button when per-item pricing is active.
Even when using fixed pricing mode, all product options must have a price in order to be purchasable.
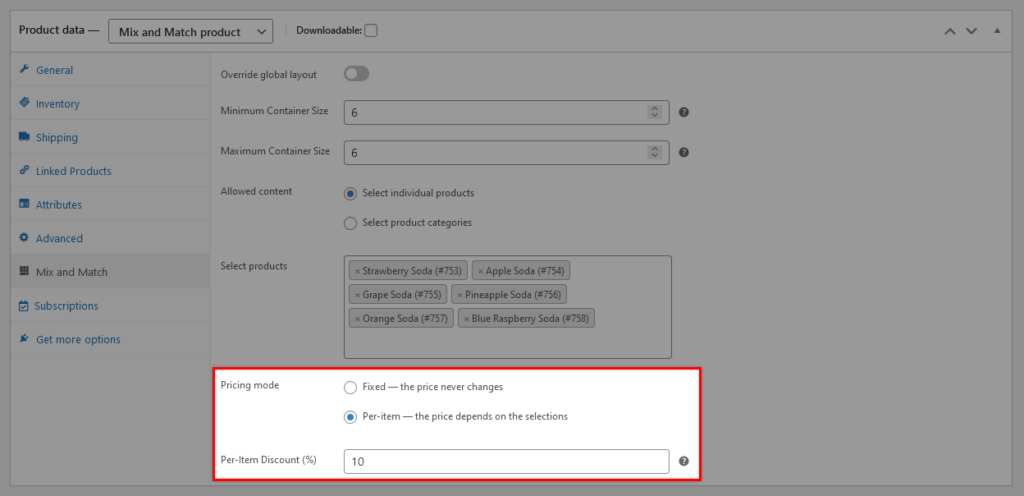
Discounts
Mix and Match assortments that are in per-item pricing mode support a flat, percentage discount. This percentage is applied to each product and only when the product is purchased as part of a Mix and Match assortment.
By default, Mix and Match will apply this discount to the child product’s regular price. If you wish to discount from the child product’s sale price, you can use the following snippet in your theme’s functions.php file.
add_filter( 'woocommerce_mnm_item_discount_from_regular', '__return_false' );Shipping Settings
↑ Back to topThe shipping settings can be found in the Shipping panel of the product data metabox.
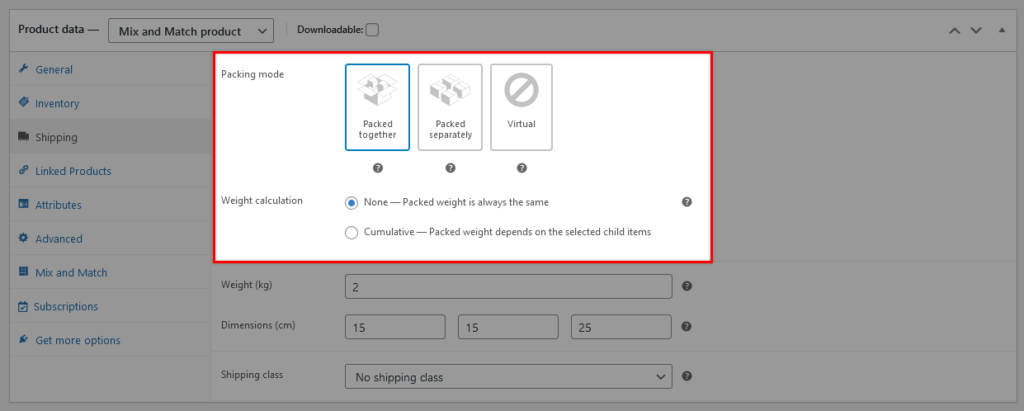
Packing Mode
Mix and Match offers 3 packing modes, though Packed Separately and Virtual are similar assuming the contents of the mix and match product are themselves virtual. The available modes are:
- Packed together – All selected items are assembled or packaged together and shipped as a single unit. You can then define the physical properties (dimensions, weight) and/or shipping class of the Mix and Match “container”, as you would with any other product.
Weight Calculation
If packed together, the package’s weight can either be calculated as:
- None – the weight is fixed
- Cumulative – the weight is the sum of the weights of the selected contents.
- Packed separately – All selected items are shipped individually in their original packaging and the shipping properties of all packaged items must be retained.
Additional Physical Container
If packed separately, you can optionally enable an additional physical package and define it’s physical propoerties and/or shipping class.
Virtual -All selected items are virtual and nothing is shipped.
Inventory Management
↑ Back to topBy default, the sale of a product in a Mix and Match assortment will have the same effect on its stock as an individual sale – there are no separate inventory settings for individual assorted items. However, by clicking on the Inventory settings tab, stock management can be enabled at the Mix and Match container level. This can be useful for keeping track of Mix and Match assortment sales, or setting sale limits on the assortment as a whole.
Examples
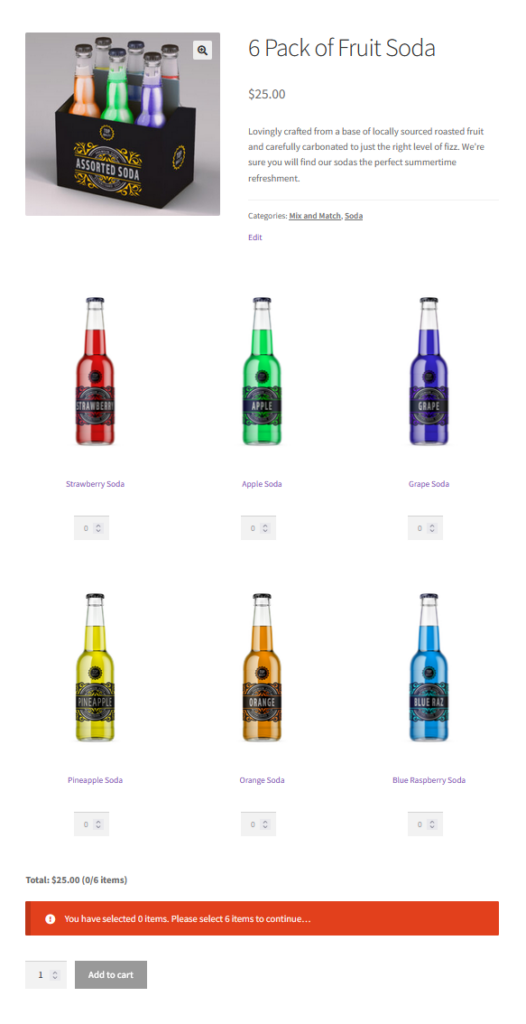
↑ Back to topExample #1 – Static Pricing
The 6 Pack of Fruit Soda mix and match assortment is a great example of a group of items that are all very similar in cost and shipping weight and selling them together might be beneficial. The customer can choose any 6 sodas from the 6 available soda in any configuration they desire.
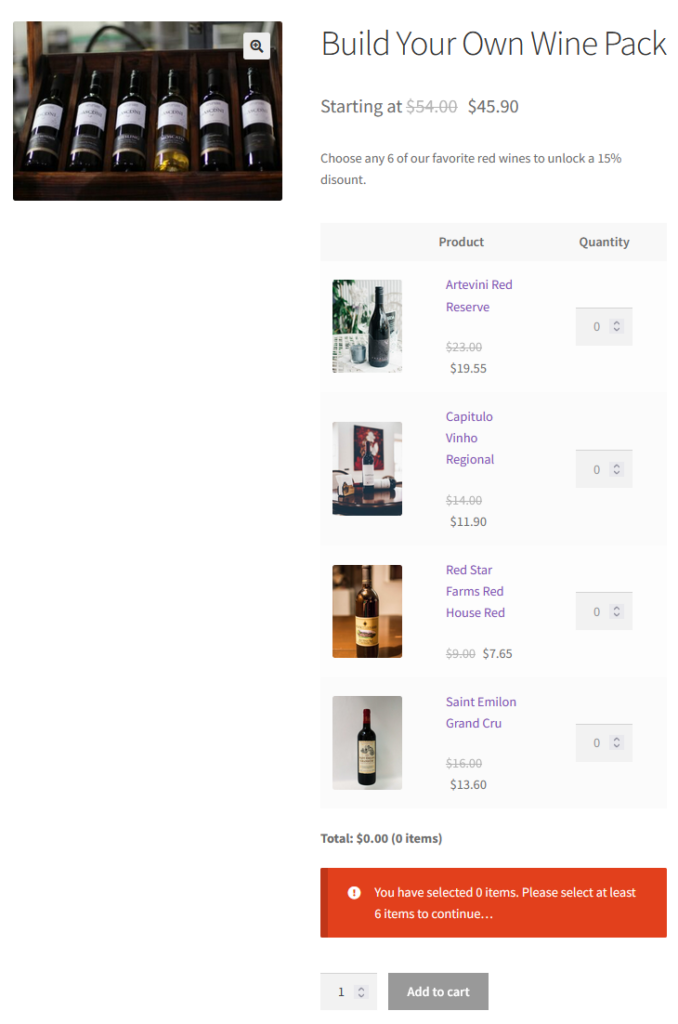
Example #2 – Dynamic Pricing
The Build Your Own Wine Pack mix and match assortment permits an unlimited number of bottles of wine. The customer must choose at least 6 bottle to be able to purchase the pack. This pack is configured with “per item pricing” so that the price is calculated depending on what items are selected. For example, certain bottles are more expensive than others.
Cart and Checkout
↑ Back to topThe Cart and Checkout process of purchasing a Mix and Match product is as straightforward as with any other product. All individual items are added normally to the cart, organized under a container item – the Mix and Match container product.
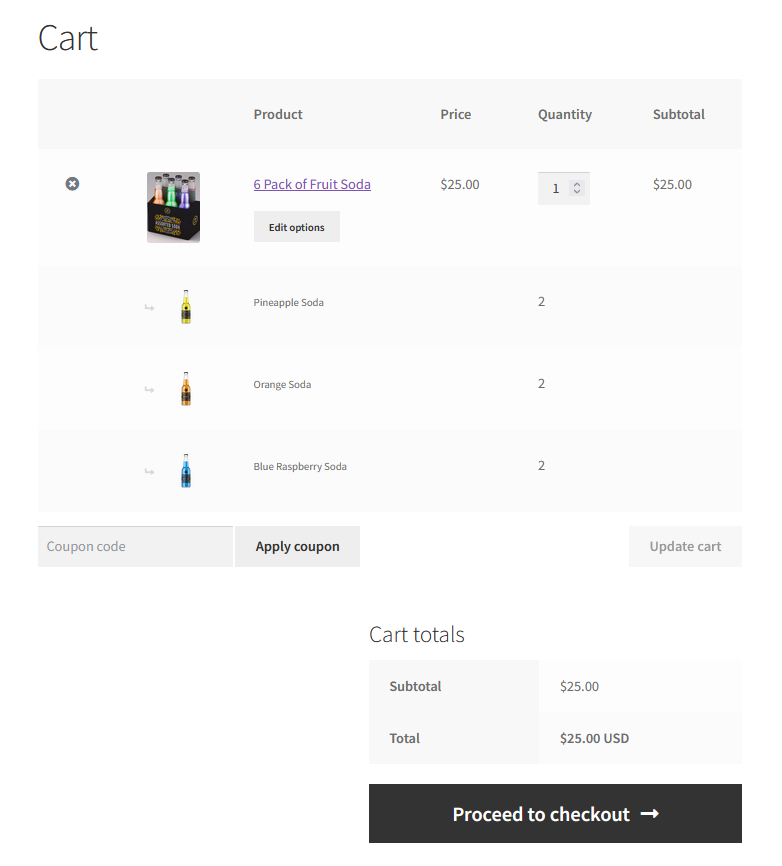
In-cart quantity selectors of child items are disabled: The quantity of each item is always kept in sync with the quantity of the container – or, more precisely, the quantity of the container multiplied by the quantity of that particular item. Changes can be made by adjusting quantity at the container level only.
Exception: If a Mix and Match assortment contains an item that is sold individually, its quantity will be locked at 1 and the container quantity cannot be adjusted.
Questions & Support
↑ Back to topHave a question before you buy? Please fill out this pre-sales form.