Create product add-ons using Gravity Forms
↑ Back to topThis extension requires the Gravity Forms plugin.
Setup and Configuration
↑ Back to top
This file contains bidirectional Unicode text that may be interpreted or compiled differently than what appears below. To review, open the file in an editor that reveals hidden Unicode characters.
Learn more about bidirectional Unicode characters
| add_filter( 'woocommerce_gforms_strip_meta_html', 'configure_woocommerce_gforms_strip_meta_html' ); | |
| function configure_woocommerce_gforms_strip_meta_html( $strip_html ) { | |
| $strip_html = false; | |
| return $strip_html; | |
| } |
Getting Started
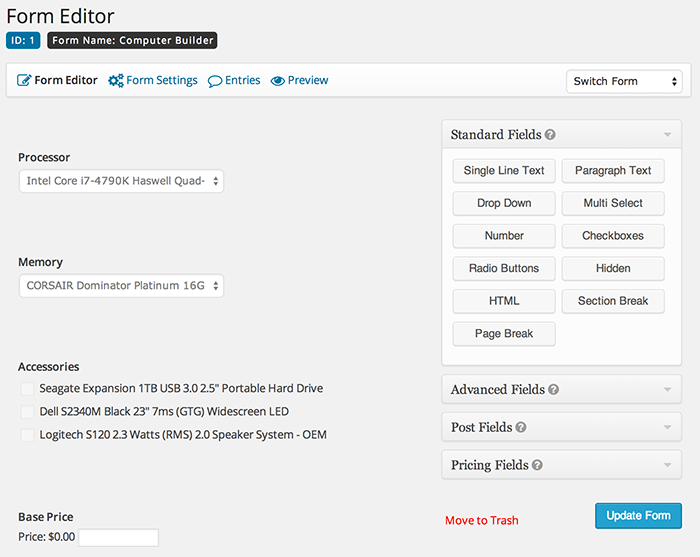
↑ Back to topGravity Forms Product Add Ons does not change or add anything to the actual configuration of the form itself. The extension will use the form you have already built using the standard method to build a Gravity Form.
To configure the form, do so as though you were creating a form with no connection to WooCommerce.
In the example below, the form is configured to use pricing fields. When using pricing fields, Gravity Forms requires a product and total field. Typically you add a hidden product field to the form and set its price to the price at which you require customizations.
- I recommend adding the form to a temporary post or page, or using the Form Preview to get it working properly.
- Make sure that you submit an entry so you can validate that a regular Gravity Forms submission creates the entry with the correct information
- Once you have the form configured as required, and after it is attached to a product it will be displayed as you require.
 Add a Product field (from the Pricing Fields section) to the form in order to configure the base customization price and set it to $0.00:
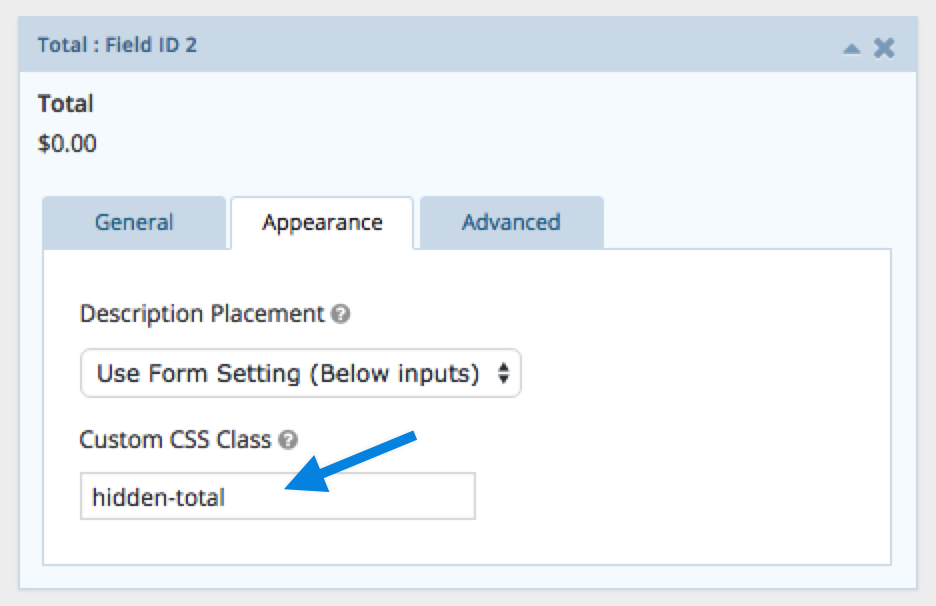
 Gravity Forms Product Add-On requires that at least one Total field (from the Pricing Fields section) be present on the form. Add a total field to the form. In this example, we are using the built-in dynamic price calculations on our single product page. To prevent the customizations total from being displayed twice on the single product page (once in the dynamically calculated price area and once in the gravity form itself), add a class of “hidden-total” to CSS Class Name under the Appearance tab in the field configuration:
 To add options to your form, use the Option field type from Gravity Forms. You can use other controls, such as the standard dropdown, but you must use the option field if your option has a cost associated.
Note: If you have options that have a cost associated, you must use the Product Option field type, not standard drop-down fields, radio buttons, checkboxes, etc. This is standard for how Gravity Forms works. If you have trouble creating the product form, Gravity Forms documentation has several good examples.
Once you have built your form and are satisfied with the functionality, create or edit an existing WooCommerce product. Please note that in order for the form to display on the front end, you will need to have either a price or a 0 in the Regular Price field (for more information, see FAQ below).
Select the form you wish to use.
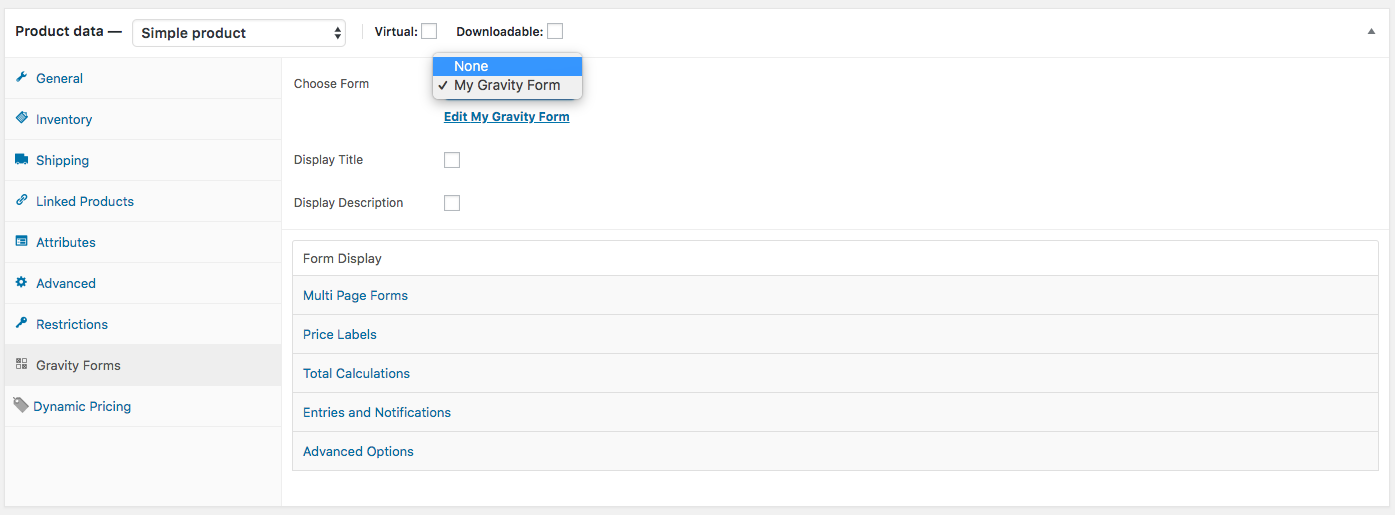 With Gravity Forms Add-On enabled, you have options for linking the form, displaying the Gravity Form title and description, and displaying alternative price titles throughout the store. You also have the ability to control how the dynamically calculated price is displayed on the single product page.
Price Labels
↑ Back to top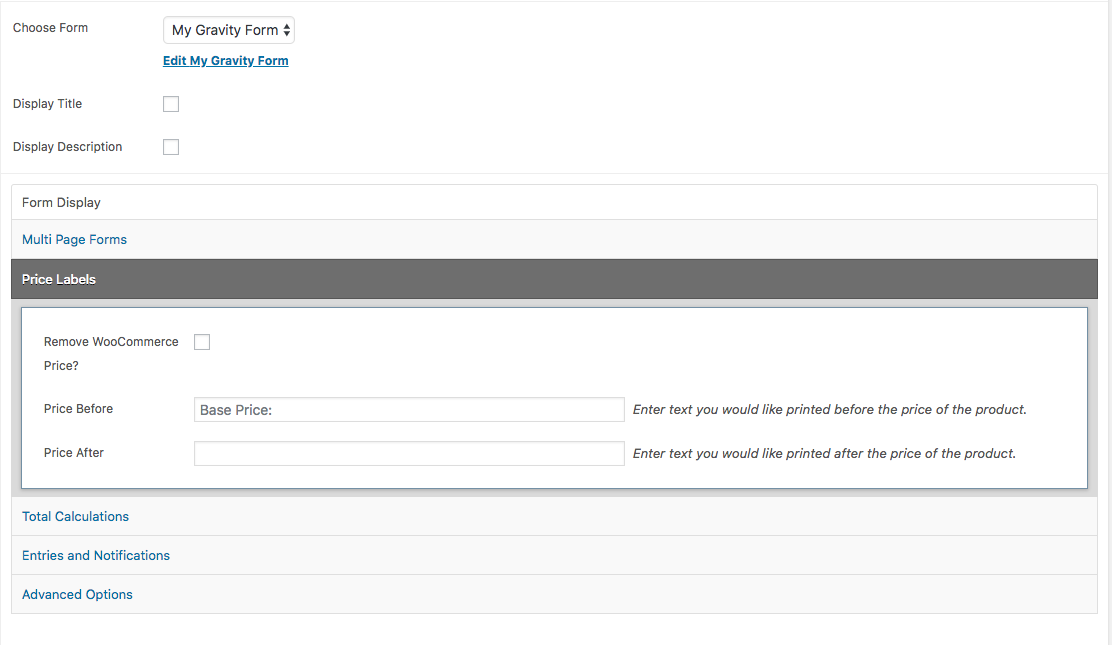
Remove WooCommerce Price
↑ Back to topPrice Before
↑ Back to topPrice After
↑ Back to topTotal Calculations
↑ Back to top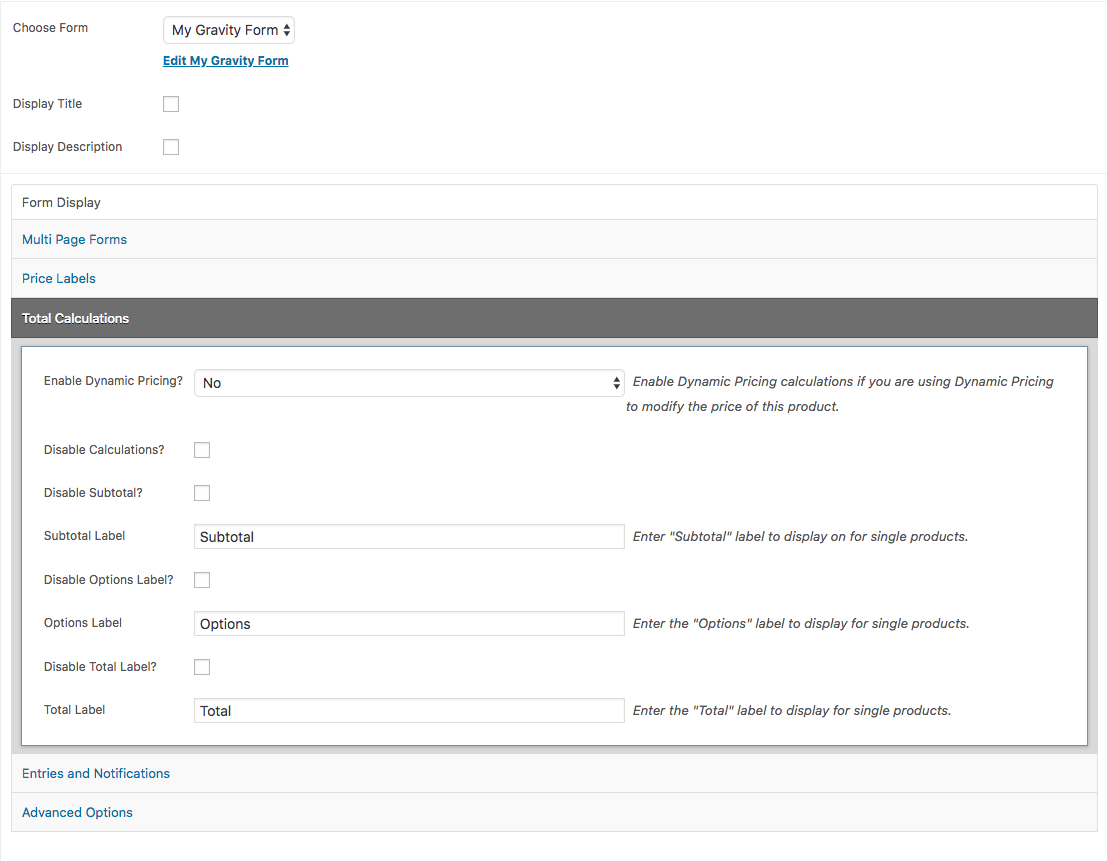
Enable Dynamic Pricing
↑ Back to topDisable Calculations
↑ Back to topDisable Subtotal
↑ Back to topSubtotal Label
↑ Back to topDisable Options Total
↑ Back to topOptions Label
↑ Back to topDisable Total Label
↑ Back to topTotal Label
↑ Back to topEntries and Notifications
↑ Back to top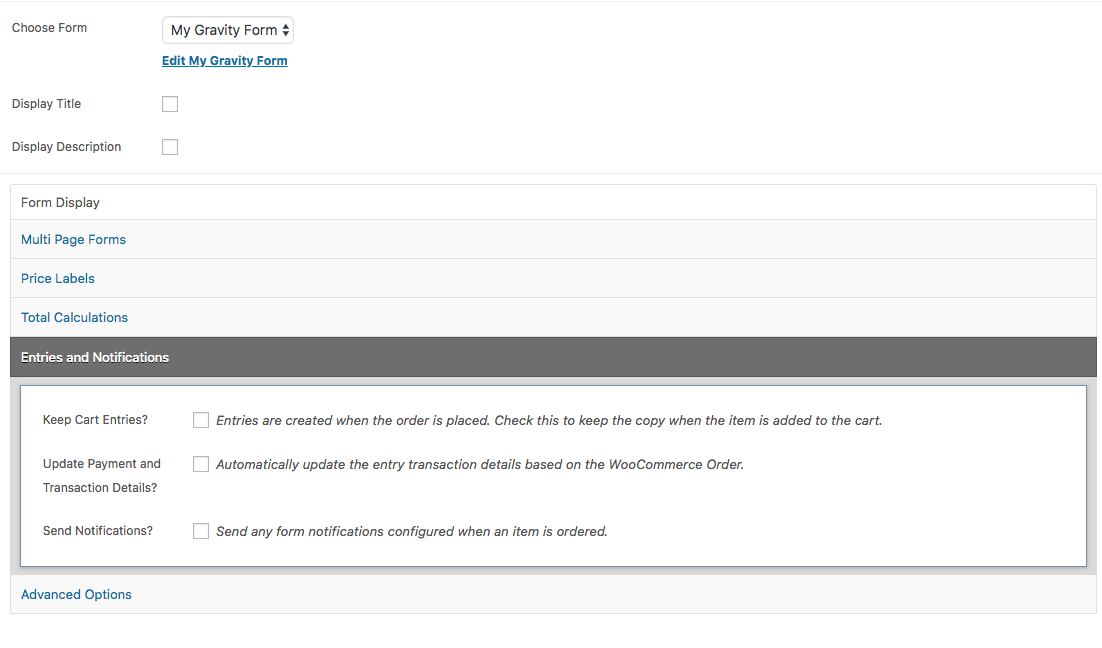
Keep Cart Entries
↑ Back to top Note, normally this is not very useful since you have no link between the entry and the cart to which it was added.
The entries created during the actual checkout process are properly linked to their associated order items.
Note, normally this is not very useful since you have no link between the entry and the cart to which it was added.
The entries created during the actual checkout process are properly linked to their associated order items.
Update Payment and Transaction Details
↑ Back to topSend Notifications
↑ Back to topAdvanced Options
↑ Back to top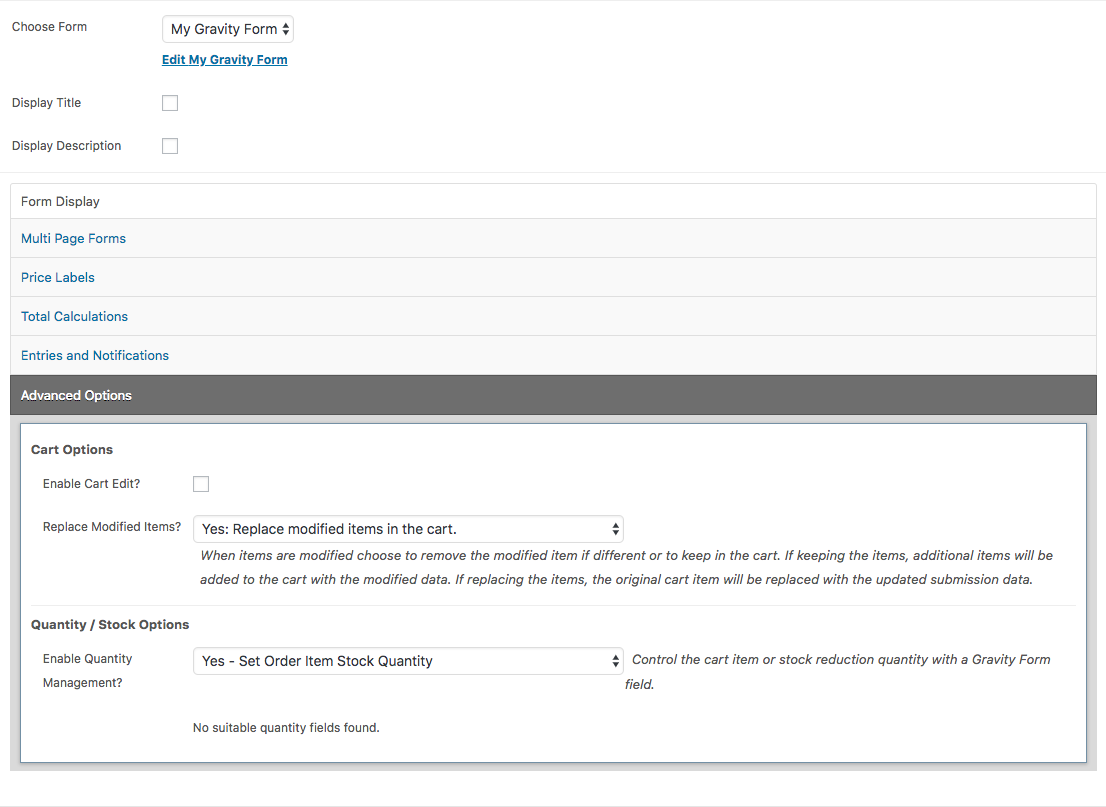
Enable Cart Edit
↑ Back to topReplace Modified Items
↑ Back to topQuantity / Stock Options
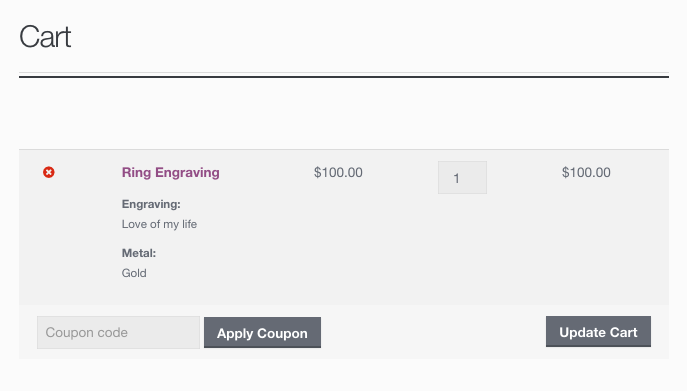
↑ Back to top When a customer purchases a product linked to a Gravity Form, here is how the add-on information displays:
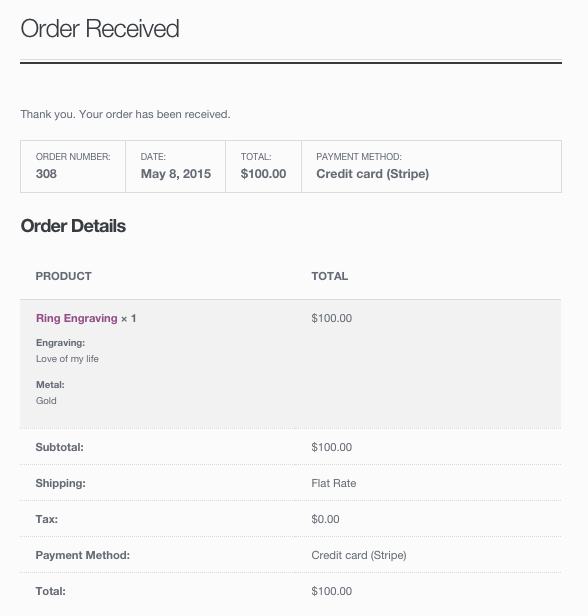
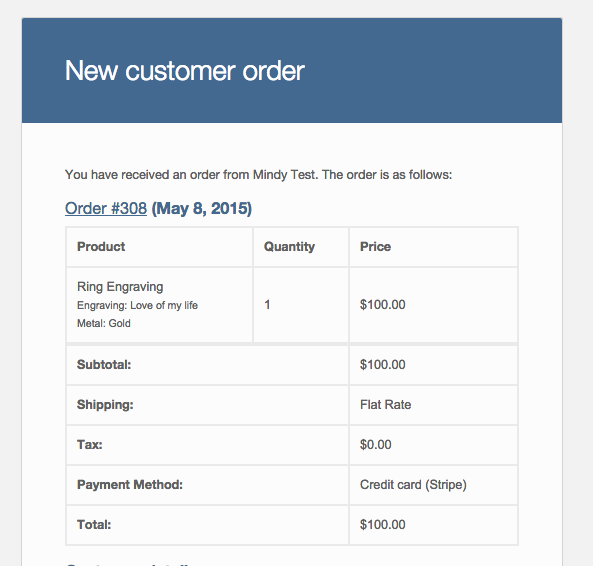
WooCommerce Order Information
↑ Back to top
Gravity Form Entry Information
↑ Back to top The entries themselves will have additional data provided by the parent WooCommerce order.
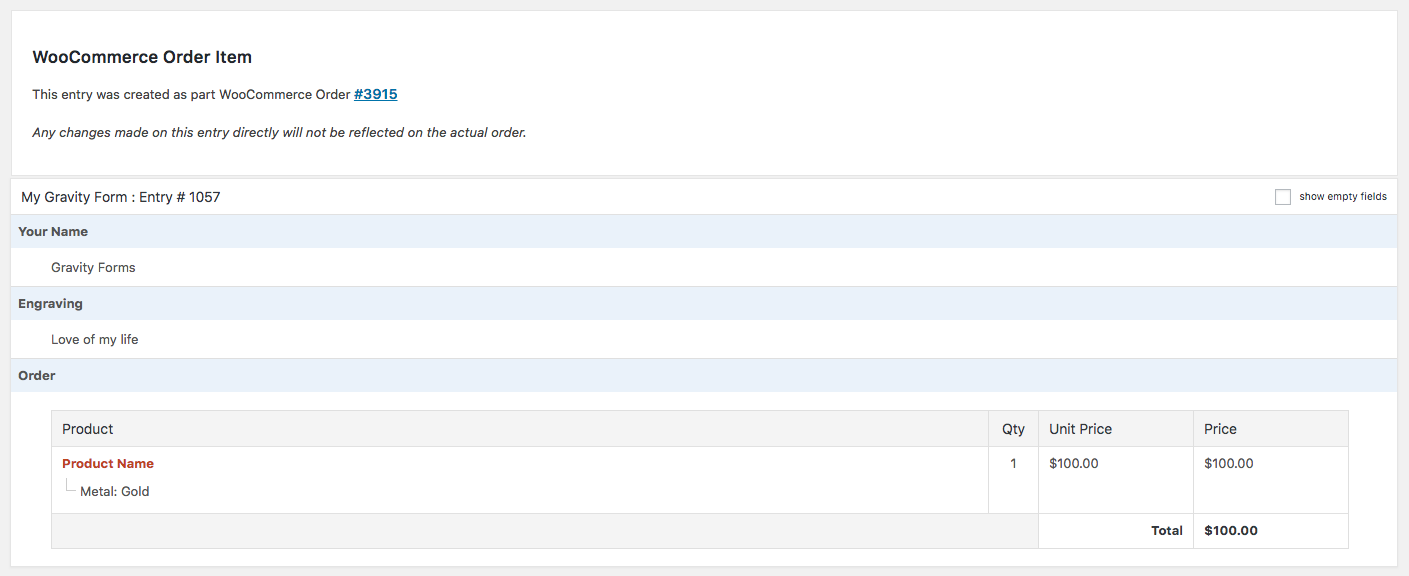
Gravity Form Entry Transaction Information
↑ Back to top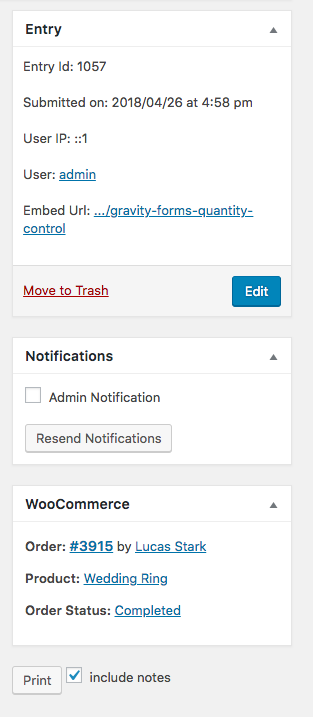
Supported Gravity Form Fields and Features
↑ Back to topStandard Fields
- Single Line Text
- Drop Down
- Number
- Radio Buttons
- HTML
- Paragraph Text
- Multi Select
- Checkboxes
- Hidden
- Section Break
Advanced Fields
- Name
- Time
- Address
- Date
- Phone
- Website
- File Upload
- List ( Partial support, the column values are stored in WooCommerce as a CSV list of data, not the raw HTML )
- Product
- Option – Drop Down
- Option – Check-boxes
- Option – Radio buttons
- Total
- Quantity
- Shipping
Forms that are AJAX-enabled are not currently supported with Gravity Forms Product Add-Ons
Quick Tips
↑ Back to top- Any license level of Gravity Forms will work with this extension.
- If you are having trouble with a form, calculations or conditional logic, ensure that the form works as expected on a regular post or page. Often times, calculated fields or conditional logic is not configured as expected and it’s easier to track this down when using the gravity form alone and without an attached product.
- Ensure that you avoid using custom confirmation settings on the form. Leave the default confirmation set to text with an empty message.
FAQ
↑ Back to topWhat is the best way to use these forms while keeping my website fast?
↑ Back to topWhy are duplicate entries created?
↑ Back to topWhy won’t Gravity Forms show on the front end?
↑ Back to top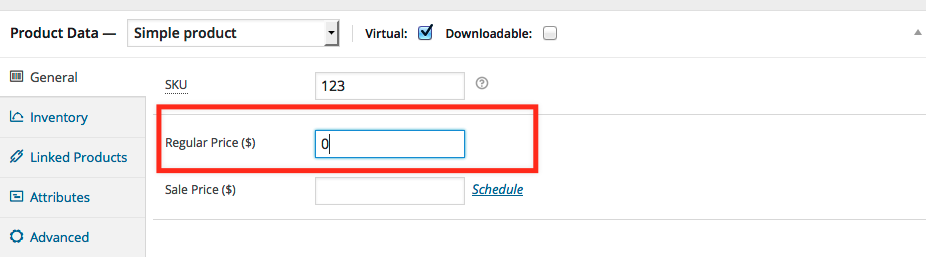 The Gravity Form will also not display if you have any fatal JavaScript errors on your site caused by your theme or other plugins. Gravity Forms itself uses JavaScript to display the form, and if there is a fatal script error before the form is completely rendered it won’t be displayed. You can check for this condition by using Google Chrome Developer Tools and checking the Console to see if there are any errors. If there are you should contact the Theme or Plugin Author to help resolve those.
Can I use Gravity Forms Add-Ons to send emails?
↑ Back to topWhy do my forms redirect to a page URL that ends with /:/?
↑ Back to topWhy are my Options and Totals not correctly adding costs?
↑ Back to topWhy doesn’t this work with the Gravity Forms Partial Entries add-on?
↑ Back to topPartial Entries is a 3rd party add-on for Gravity Forms, which collects data for partially completed, but not submitted, forms. Since the actual form entries for Gravity Forms are not important to the WooCommerce cart / order process (see FAQ re: duplicate entries), this add-on is not compatible with our Gravity Forms Product Add-ons extension.