Installation
↑ Back to top- Download the .zip file from your WooCommerce account.
- Go to: WordPress Admin > Plugins > Add New and Upload Plugin with the file you downloaded with Choose File.
- Install Now and Activate the extension.
Setup and configuration
↑ Back to topTo access the plugin’s settings, locate “OPMC Cookie GDPR” in the left sidebar.
Configuration options:
↑ Back to topCustomize GDPR notice message
↑ Back to top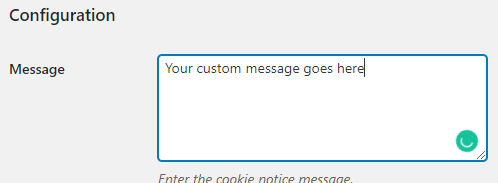
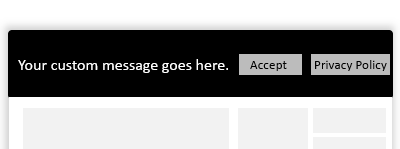
Use the Message field to change what message is displayed along the bottom of the screen. For the best user experience, we recommend that you keep it short, clear and to the point.
Customize button text
↑ Back to top
By default, a button appears at the end of the form which says “OK”. When clicked, this allows cookies. You may want to customize what the button’s text says by editing this field.
Location Settings
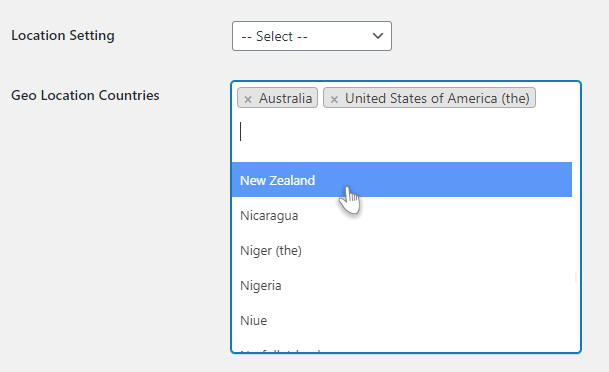
↑ Back to top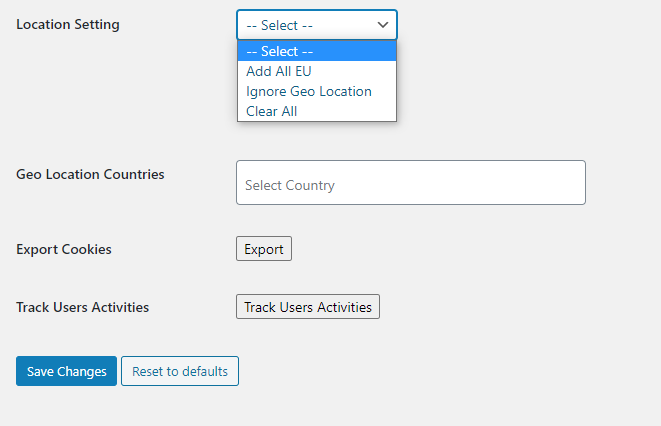 — Select — – This will allow you to add countries in Geo Location Countries tab. By adding countries, your clients in those countries will be asked for their consent by displaying the GDPR Cookies banner on your website. Click on Save Changes button at the bottom to make it effective.
 Add All EU- Loads all countries in the European Union including the United Kindom.
*Note: You cannot modify this list.
Add All EU- Loads all countries in the European Union including the United Kindom.
*Note: You cannot modify this list.
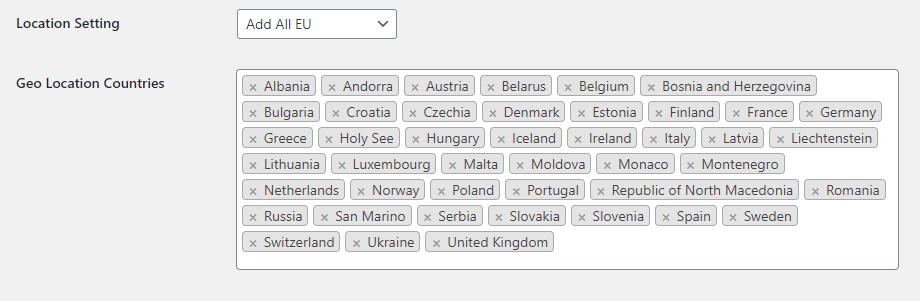 Ignore Geo Location- When you select and save this option GDPR Cookies will be disabled for all countries.
*Note: You cannot modify this list.
Clear All- Clears all countries you have selected previously in Geo Location Countries. Click Save changes to make it effective. However, when Clear all is selected you have option to add countries of your preference to make cookies consent banner visible on your website for that specific country or countries you have selected.
Ignore Geo Location- When you select and save this option GDPR Cookies will be disabled for all countries.
*Note: You cannot modify this list.
Clear All- Clears all countries you have selected previously in Geo Location Countries. Click Save changes to make it effective. However, when Clear all is selected you have option to add countries of your preference to make cookies consent banner visible on your website for that specific country or countries you have selected.
Enable, disable and customize the privacy policy link
↑ Back to topConfigure options related to the form’s privacy policy link.
Enable Privacy Policy Link: Toggles the privacy policy link on and off. Disable if you wish to hide it. Customize the text shown in the privacy policy link using the field directly below.
Page link: Select your privacy policy link from a drop-down of all pages saved to WordPress.
Custom link: Add a custom link to your privacy policy page. Just place the URL in the field. Useful for external links or websites with a privacy policy that is not saved within WordPress.
- _blank – Select this option to open the privacy policy link in a new tab.
- _self – Select this option to open the privacy policy link in the same tab.
Allow users to refuse cookies
↑ Back to topWhen enabled, the Refuse Cookies option lets users say no to cookies on your website. When this happens, no information will be stored about them, either third-party or locally.
Reload the page after cookies are accepted
↑ Back to topBy enabling the “Reloading” checkbox, the page will reload if the user accepts the cookie agreement. This is useful if you have content which can only be displayed for users who have accepted the agreement.
Automatically accept cookie notice on scroll
↑ Back to topBy enabling the “On Scroll” checkbox, the notice will automatically be accepted and disappear when the user scrolls down the page.
The necessary distance the user needs to scroll can be customized within this setting. By default it is set to 100px.
Change cookie expiry
↑ Back to topUse the “Cookie Expiry” dropdown to change how long cookies will last for. Choose from a list of options, ranging from 1 hour to infinity (no expiry).
Change placement of GDPR cookie notice script
↑ Back to topUse the “Script Placement” option to choose whether you want the notice to be loaded within the header or footer of your page. If you select header, it will be loaded before most of the page’s content. If you select footer, it will be loaded after everything else.
Loading in the header means that users will see the notice sooner. However, loading in the footer can reduce the time needed before your page becomes fully interactive, allowing for faster load times.
Track with Google analytics
↑ Back to topIn the Google Analytics section of the settings page, you can choose to enable tracking. Simply tick the checkbox, then paste your tracking code into the field underneath.
Customize the design of your cookie notice
↑ Back to topScroll down the plugin’s settings page until you find the Design heading. Below are settings which can change the color, position, animation and more.
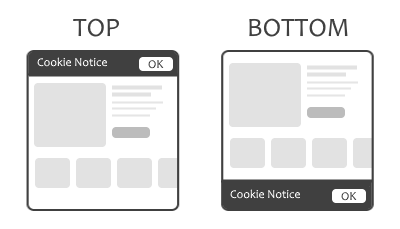
Change the position of your cookie notice
↑ Back to topUse the Position option to determine whether your notice appears at the top or bottom of the page.
Add an animation effect
↑ Back to topWhen the user accepts the notice, an animation can be enabled to dismiss the notice. Choose from three options – Fade, Slide and None.
Choose a button style
↑ Back to top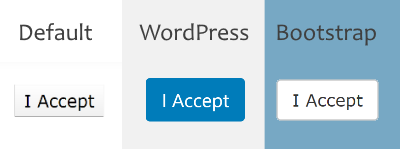
Use the Button Style option to change the appearance of your notice’s buttons.
- None – Uses the default style for buttons within the WordPress theme you are using.
- WordPress – A style similar to the buttons within the WordPress admin dashboard. Blue with white text.
- Bootstrap – Borrows button design from the Bootstrap framework.
Add a CSS class to your button
↑ Back to topUse the Button Class field to add a class to your button, allowing for easy editing within CSS.

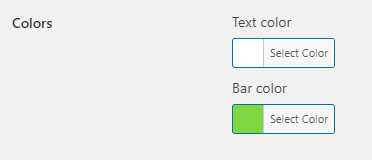
Change color of text and background
↑ Back to topThe notice’s color can easily be adjusted in the settings.
Track user activity
↑ Back to topTo see who is accepting/declining your website’s notice, navigate to OPMC Cookie GDPR > Track User Activities. You will be presented with a table showing how people interact with your form.
From here, you can view and sort by Cookie ID, email address, user ID and the page URL they responded to your notice on.
Export Data
↑ Back to top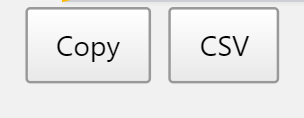
Exporting your user information is easy. Simply click the “Copy” button in the top-left corner to copy all information to the clipboard,, or click “CSV” to export all data as a CSV file.