Overview
↑ Back to topAs of August 2023, First Data / Fiserv upgraded Payeezy / Global Gateway / GGe4 to Clover Payments (read more about this change here). You do not need to take any action as part of this upgrade and the plugin will continue to work properly. This documentation is no longer maintained. If you need help setting up the Clover integration, please see the documentation here.
For full documentation, please see the plugin documentation here. This document will walk through getting credentials for, and configuring, the Payeezy JS mode for the plugin.
Get Account Credentials
↑ Back to top- Register webhook URL with Payeezy. You will need to fill out this form in order to register your site’s webhook URL with Payeezy.Tip: the webhook URL will look like
https://mystore.test/wc-api/wc-first-data/webhookand you can copy this directly from the gateway’s settings page.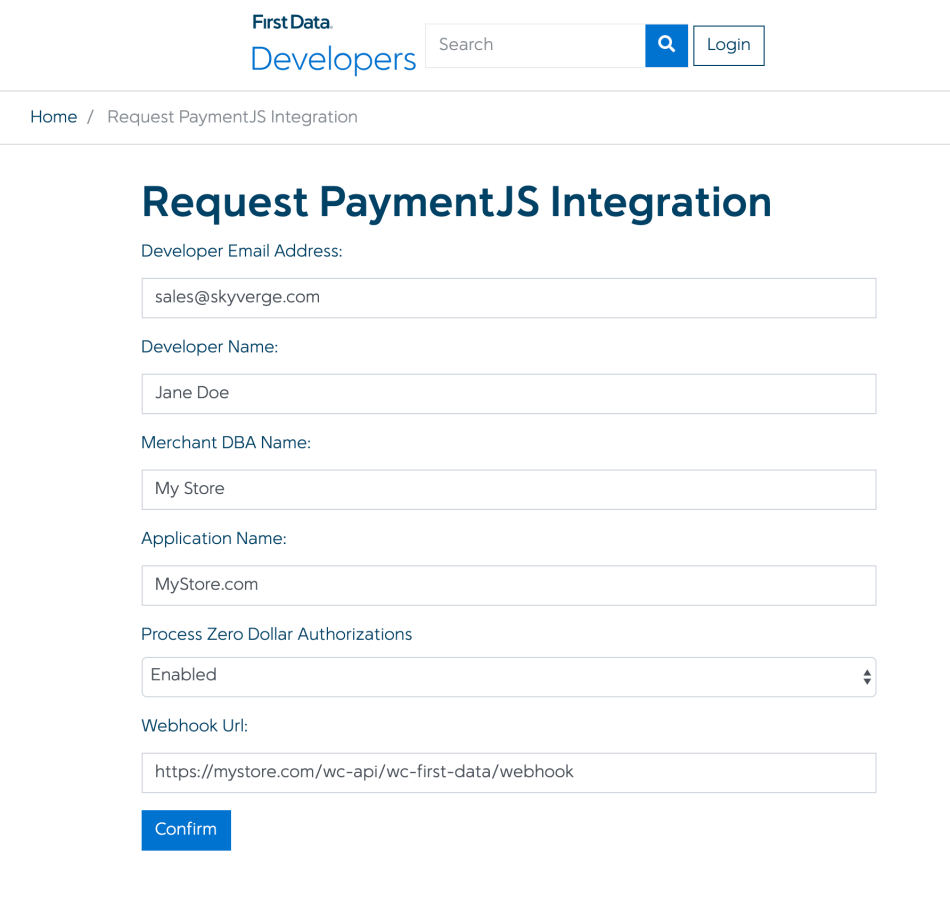
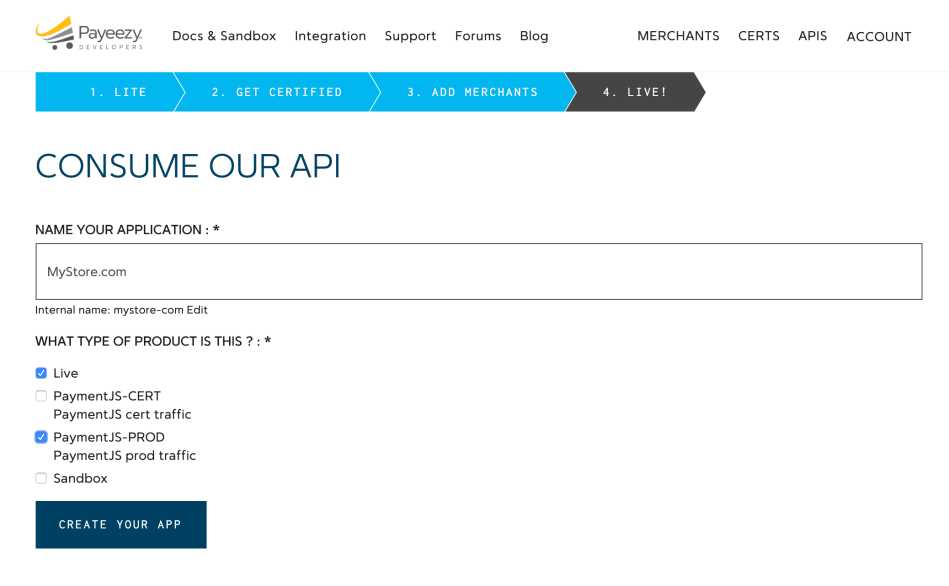
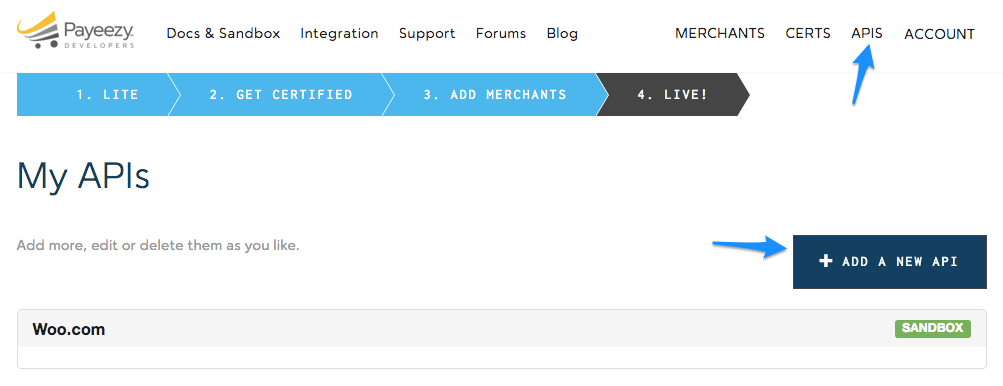
- Log into your Payeezy account, click APIs and select Add a New API.

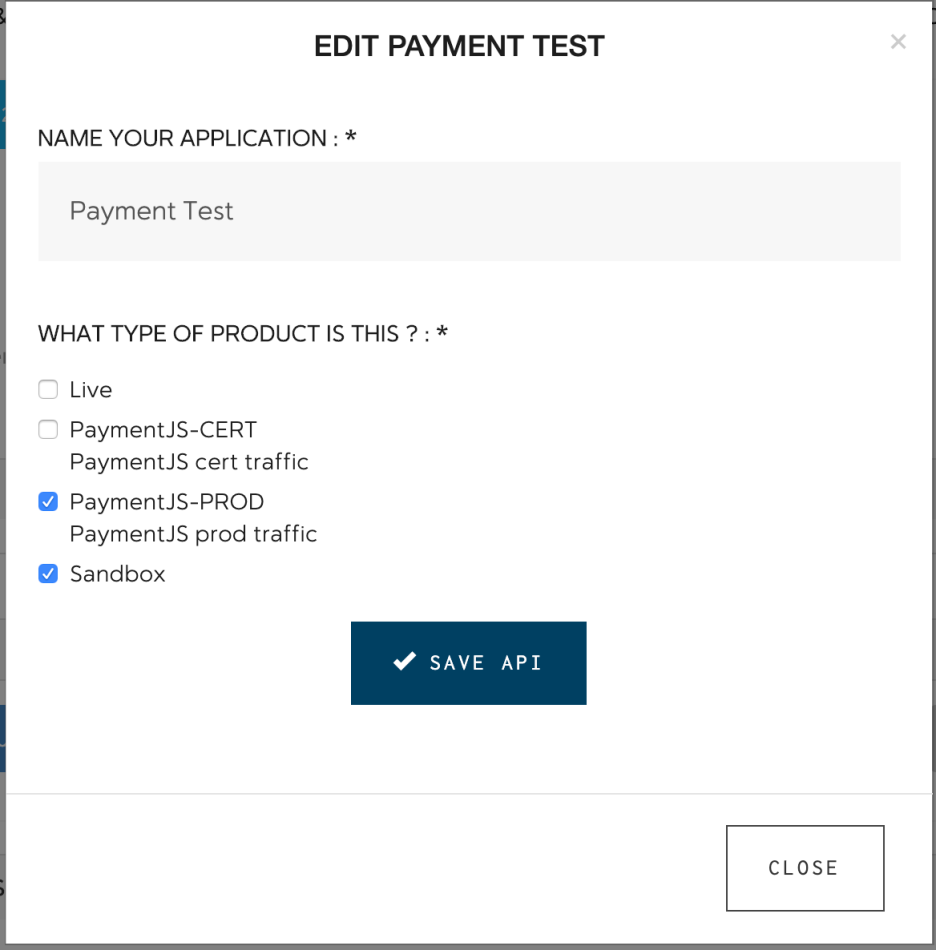
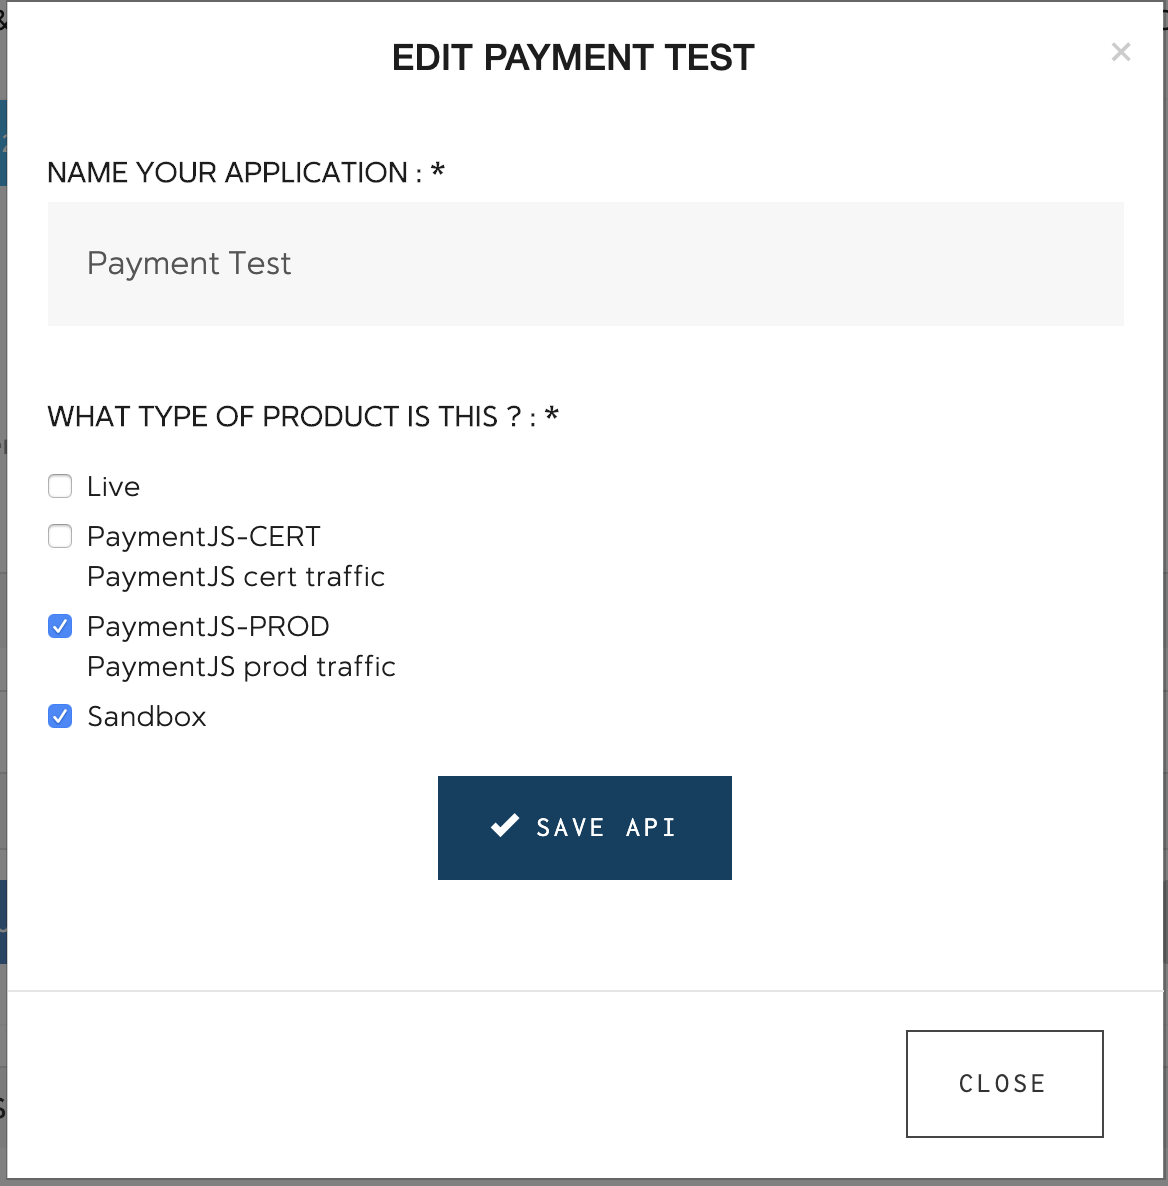
- Name your application and select your environment. Select “Live” and “PaymentJS-PROD” to process live payments through Payment.JS.
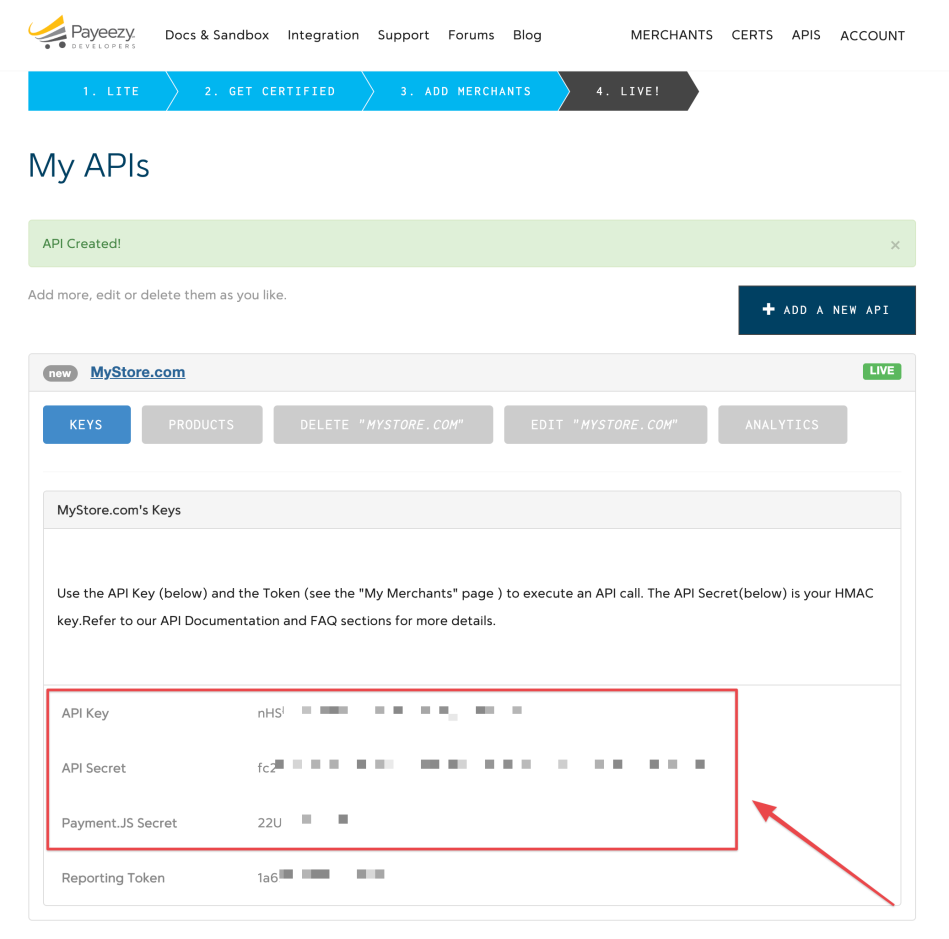
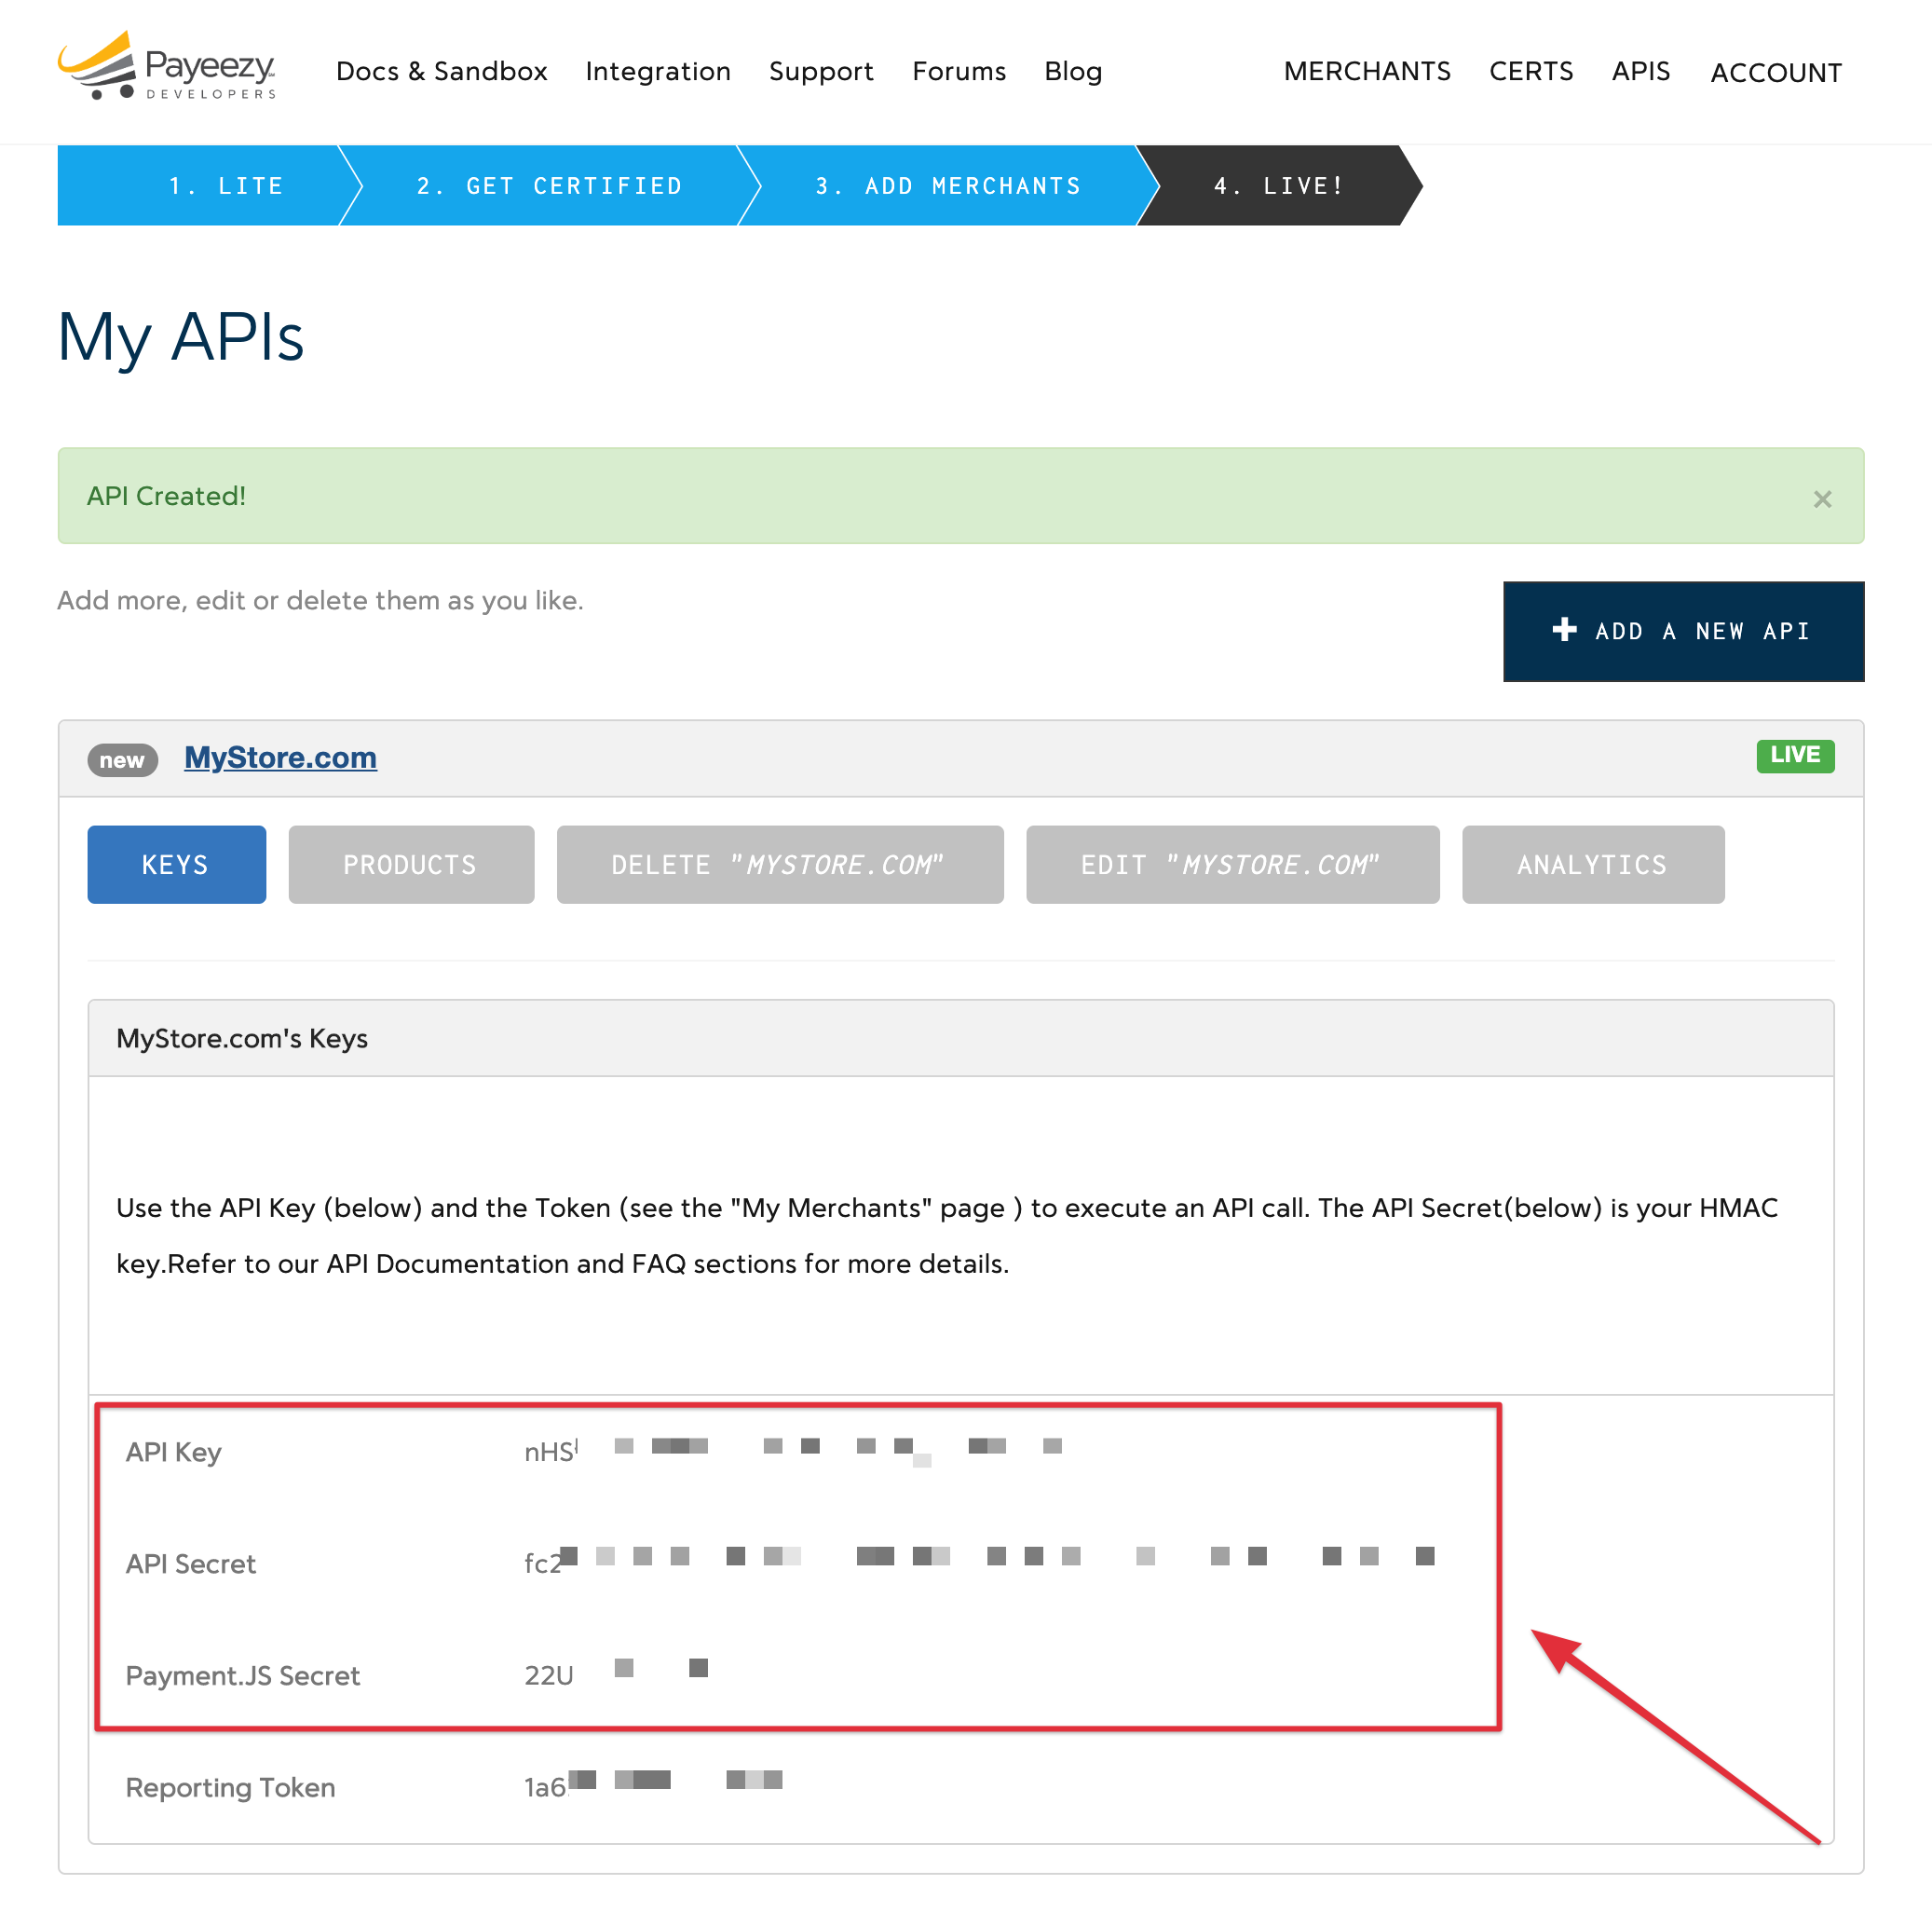
- Once your application is created, copy your API Key, API Secret, and Payment.JS Secret. Save these in the plugin’s Connection Settings.
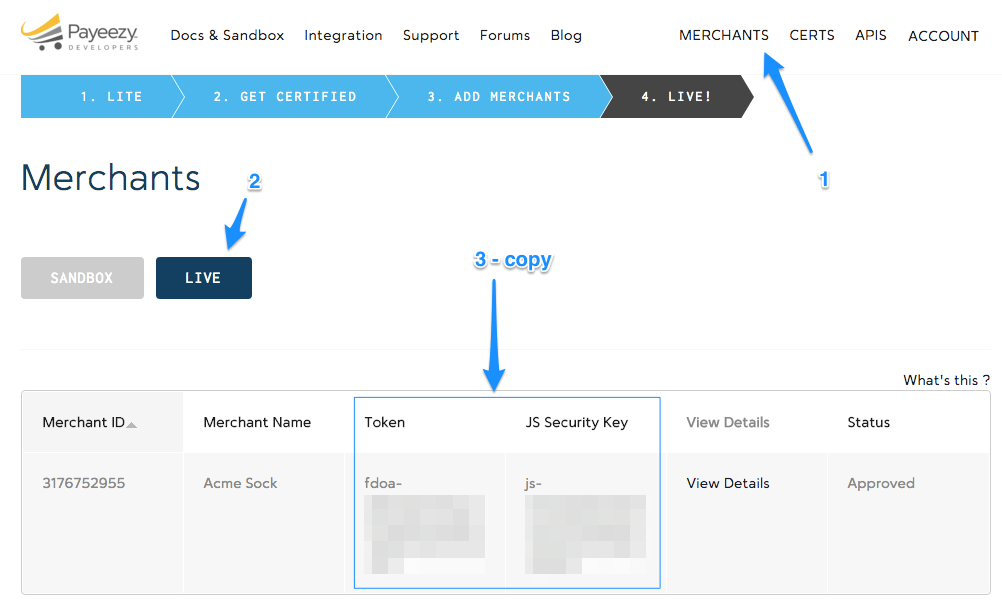
- Now go to Merchants and select the Live tab to get your account-specific live credentials. If you want test credentials, select the Sandbox tab. Copy your Merchant Token and JS Security Key. Save these in the plugin’s Connection Settings.


If you want to enable TransArmor Tokenization to securely save cards, you must call your First Data rep to enable this and to get a TransArmor Token.
Gateway Settings
↑ Back to topGeneral Settings
↑ Back to top- Enable / Disable – Enable to allow customers to use this gateway to checkout.
- Title – The name of the payment method customers will see during checkout.
- Description – The description of the payment method customers will see during checkout. Limited HTML is allowed.
- Transaction Type – This controls how transactions are submitted to First Data. You may choose either “Charge” or “Authorization”. If you select “Authorization”, you must manually capture and settle payments in your First Data control panel or on the WooCommerce orders screen after the transaction has been submitted. This defaults to “Charge”.
- Charge Virtual-Only Orders – (Shown if Transaction Type is set to “Authorization”) Enable this to force charges on order containing only virtual items so they’re captured immediately instead of authorized (for example, to grant download access right away).
- Accepted Card Types – This controls the card logos that display during checkout. This is purely cosmetic and has no affect on the cards actually accepted by your merchant account.
- Required Transarmor Entitlement – Check this to certify that your Payeezy account has Transarmor enabled. You must configure TransArmor Multi-Pay Tokenization on your First Data account to use this gateway mode. This will also let your customers securely save their card information to their account for future checkout and enable full support for WooCommerce Subscriptions or Pre-Orders.
- Detailed Decline Messages – Enable to display detailed messages to customers to provide reasoning for declines when possible instead of a generic error message.
- Debug Mode – Enable this if you are having issues correctly processing transactions. You can either log API requests / responses directly to the checkout / thank you page, save them to the WooCommerce Error Log (found under WooCommerce > System Status > Logs) or both. All debugging messages are cleaned of sensitive information before display, but as a best practice, please do not enable this unless you are having issues with the plugin and disable it once your issues are resolved.
- Environment – You can set your site to process transactions in the production or demo environment depending on the type of account you have. If you are not sure, your account is most likely a production account. Make sure that your Gateway credentials match your configured environment.
Connection Settings
↑ Back to top- Share connection settings – Enabling this will allow you to use connection / authentication settings between the credit card and eCheck gateways. If this is enabled, you’ll need to enter First Data gateway credentials under the eCheck settings to process transactions.
- API Key – This is the API Key for the currently selected environment. The API Key is not the same as your login name. Follow the steps above to find your API Key.
- API Secret: This is the API Secret for the currently selected environment. The API Secret is not the same as your account password. Follow the steps above to find your API Secret.
- Merchant Token – This is the Merchant Token used for the enhanced security in your merchant. Follow the steps above to find your Merchant Token.
- Payment.JS Secret – This is the Payment.JS Secret used to authenticate the Payment.JS script. Follow the steps above to find your JS Security Key.
- Transarmor Token – This is the TransArmor Token for your merchant account. You must get this information from your First Data representative when enabling TransArmor Tokenization.
- JS Security Key – This is the JS Security Key used for the enhanced security in your merchant. Follow the steps above to find your JS Security Key.
Soft Descriptor Settings
↑ Back to top- Soft Descriptors – Enable this to allow the use of soft descriptors. First Data allows a single merchant account to be used across 150 different websites. This is achieved through the use of “Soft Descriptors”. The soft descriptor allows for a secondary business name, address, and phone to be recorded into the customers credit card transactions. Note that First Data must enable soft descriptors for your merchant account.
Enabling soft descriptors will show additional settings; these settings should reflect the business information for this website.
Switching to Payment.JS
↑ Back to top- Register webhook URL with Payeezy. You will need to register the webhook URL with Payeezy as described above.
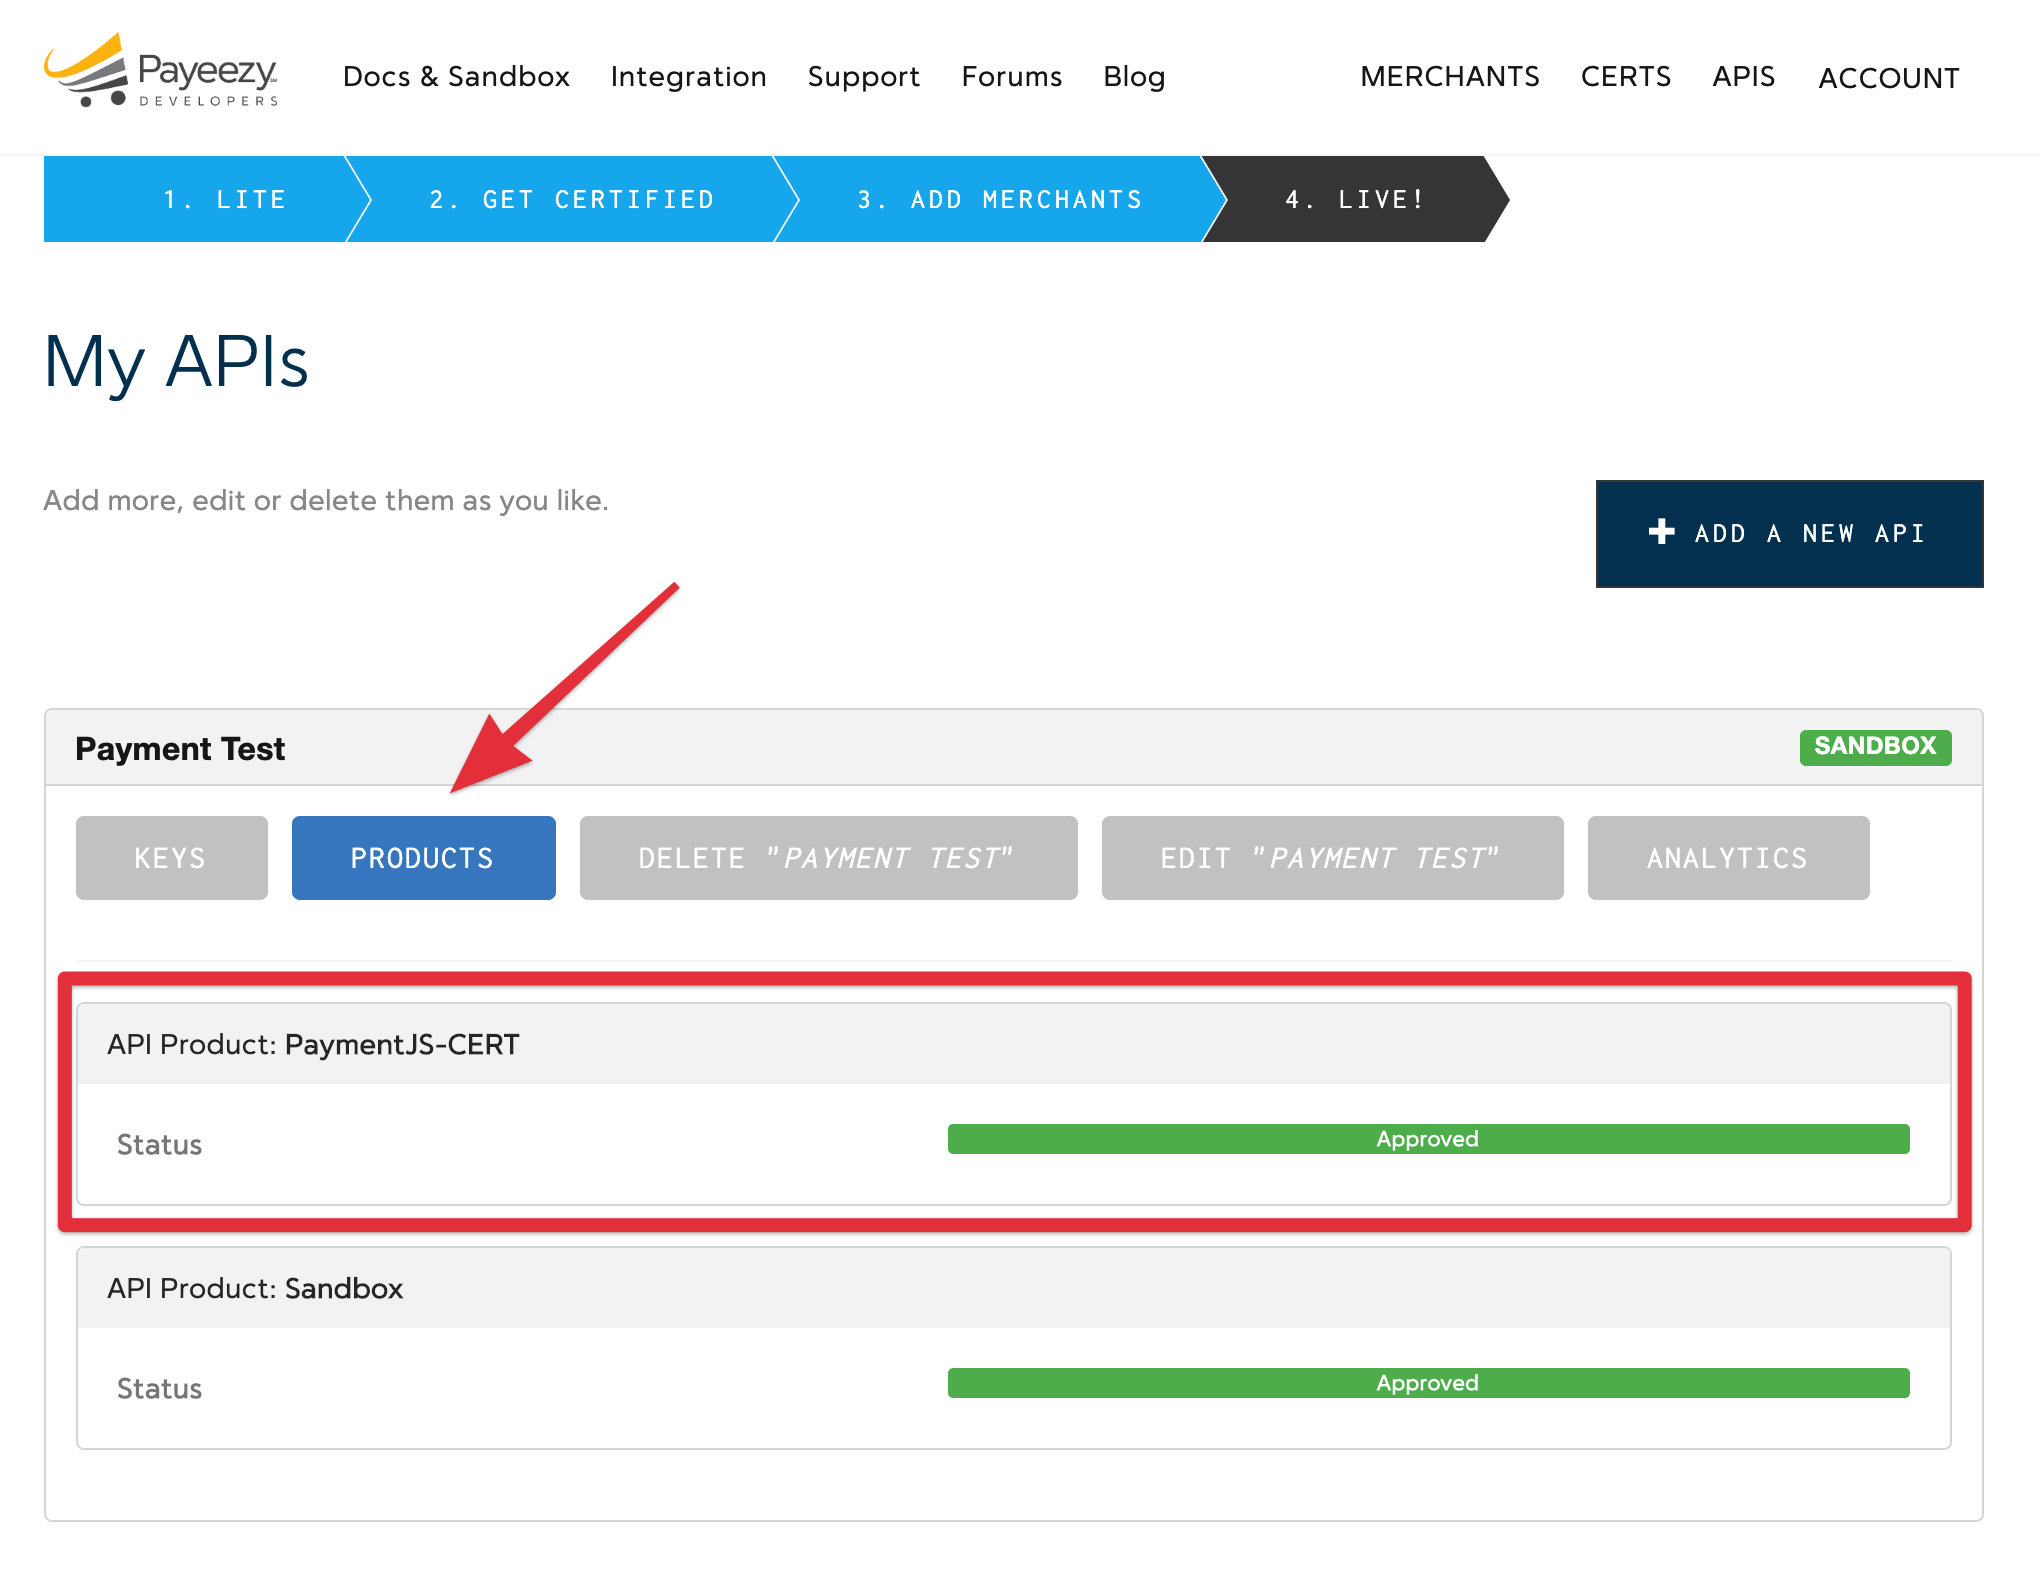
- Ensure that Payment.JS is enabled. Log into your Payeezy account, click APIs, expand the API for your site, then head to the “Products” tab and ensure that Payment.JS is enabled.
 If the “Payment.JS-PROD” product is not enabled, click on the “Edit” tab to enable it.
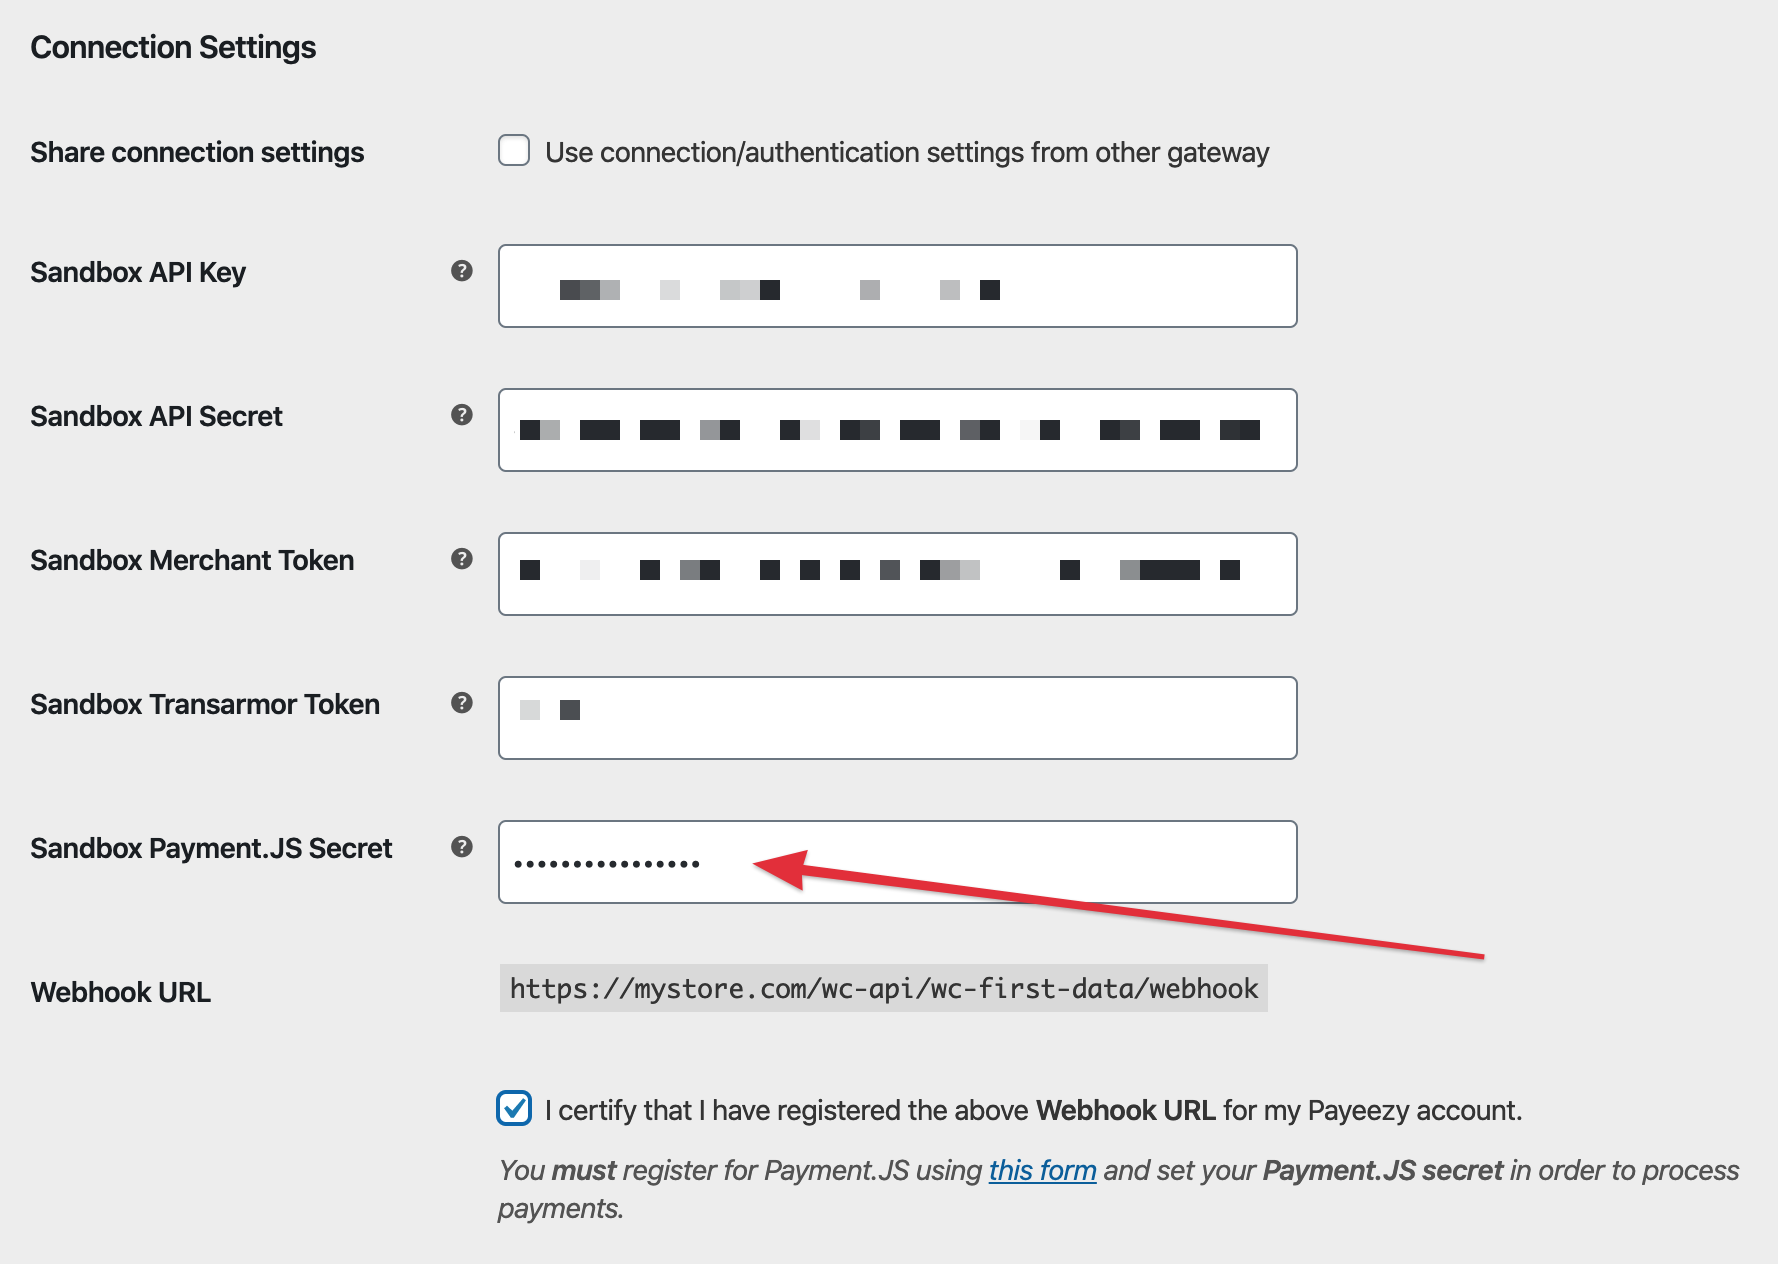
- Configure the Payment.JS Secret. Head back to the “Keys” tab of your Payeezy API app and copy the Payment.JS Secret:
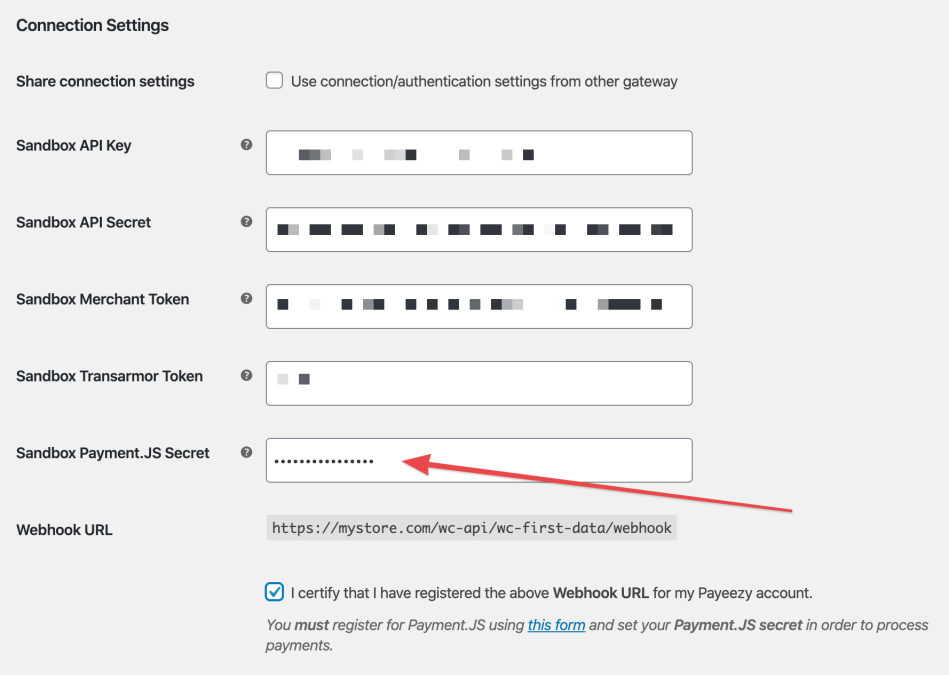
 Head to the plugin’s settings under WooCommerce > Settings > Payments > Payeezy Credit Card and paste in the Payment.JS Secret then ensure that the “Webhook URL” setting is enabled.

Additional Documentation
↑ Back to topreturn to the main documentation