Use WooCommerce Dropshipping to send automated order notification emails to your wholesale dropshippers when new orders arrive via your WooCommerce store.
It groups ordered products by supplier, and then sends them to each supplier with a list of products purchased from them. Your dropshipping partners can then ship orders to customers.
WooCommerce Dropshipping also generates a packing slip PDF file, and attaches it to the order notification email.
Your dropshippers can print the packing slip, and add it to the customer’s shipment for easy blind dropshipping.
With Amazon Affiliate support for WooCommerce, you can have Amazon products directly in your store that you’re an affiliate for.
1. Installation
↑ Back to top- Download the .zip file from your WooCommerce account.
- Go to: WordPress Admin > Plugins > Add New and Upload Plugin with the file you downloaded with Choose File.
- Install Now and Activate the extension.
More information at: Installing and Managing Plugins.
2. Getting Started with the Dropshipping Plugin:
↑ Back to topTo access the Dropshipping Plugin Settings navigate to WooCommerce > Settings > Dropshipping.
Under the Dropshipping settings you will see 5 sub-menus accessible by clicking the tab. These sub-menus are:
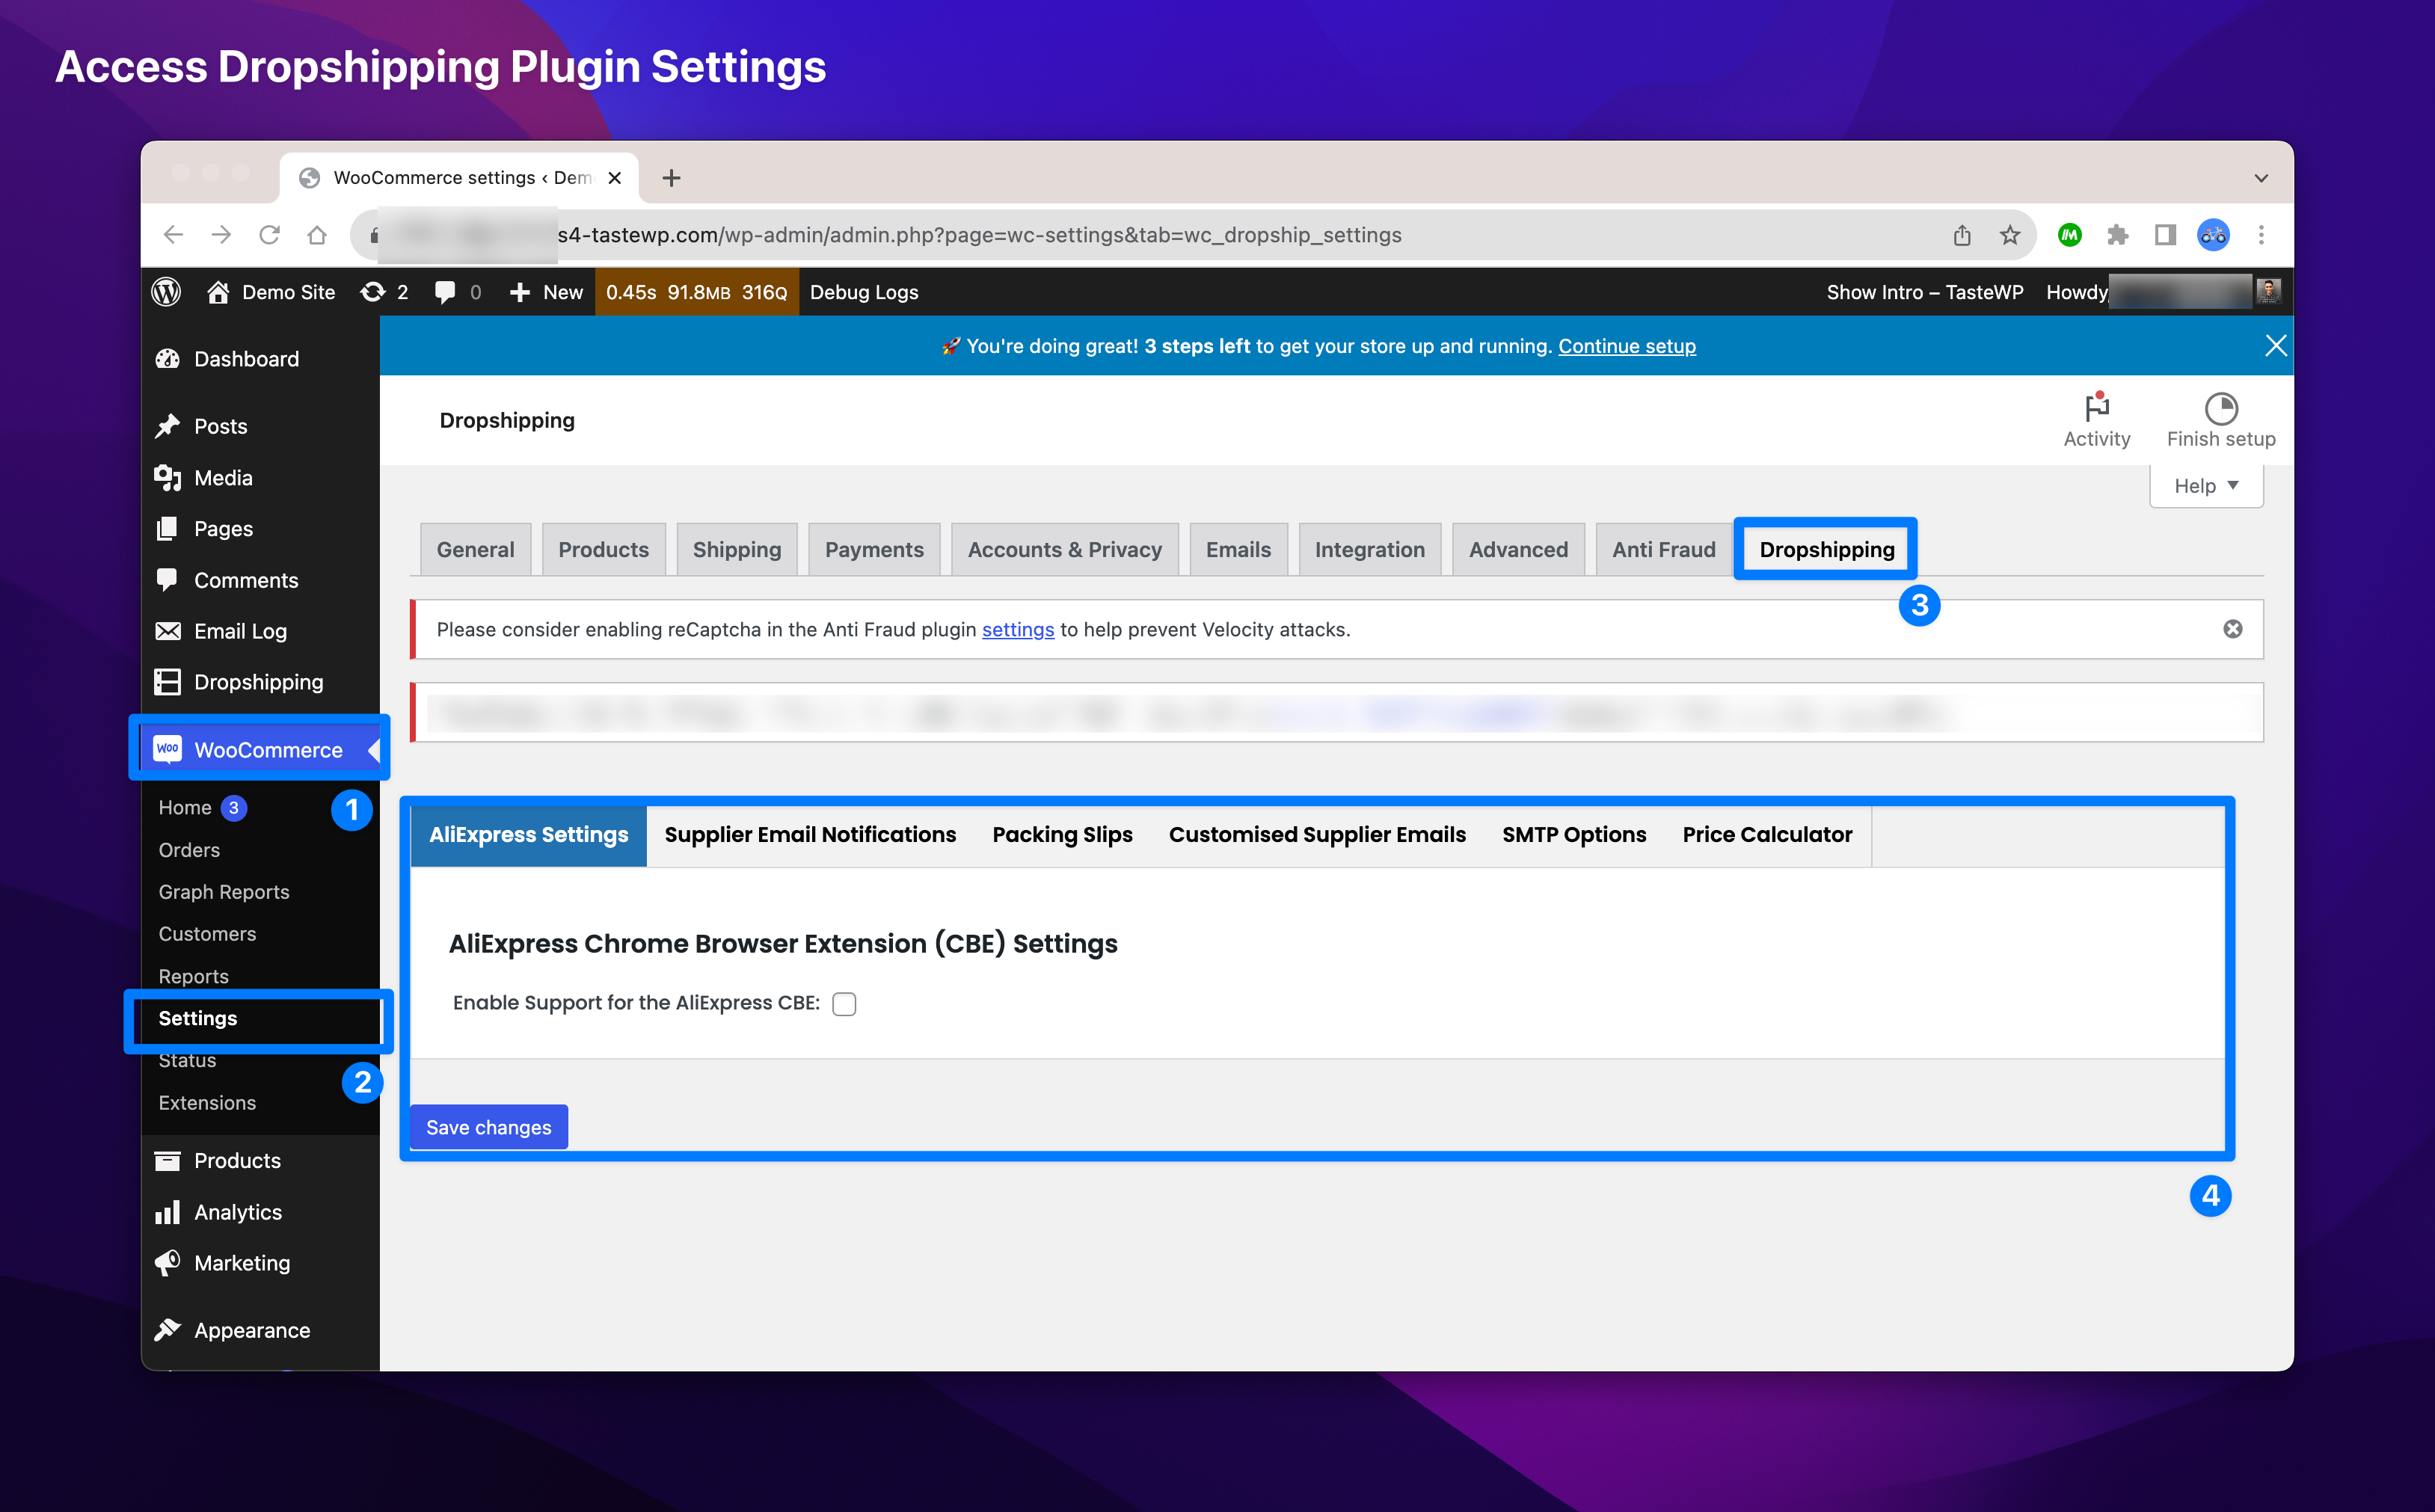
- AliExpress Settings:
WooCommerce > Settings > Dropshipping > Aliexpress Settings - Supplier Email Notifications Settings:
WooCommerce > Settings > Dropshipping > Supplier Email Notifications - Packing Slips Settings:
WooCommerce > Settings > Dropshipping > Packing Slips - Customised Supplier Emails Settings:
WooCommerce > Settings > Dropshipping > Customised Supplier Emails - SMTP Options Settings:
WooCommerce > Settings > Dropshipping > SMTP Options - Price Calculator Settings:
WooCommerce > Settings > Dropshipping > Price Calculator
AliExpress Settings: This menu contains settings to for working with the OPMC Chrome Browser Extension. With the Chrome browser extension installed you will be able to integrated and import products directly from Aliexpress into your Dropshipping Store. Choose, configure, and import products with our supporting Chrome browser extension. Within this plugin setting section you will be able to enable API Support and generate the API key for to integrate with the Dropshipping Chrome Browser Extension.
Supplier Email Notifications: The supplier email notifications menu contains the settings which are used for supplier notifications and communications. When an order is made on your store, naturally it progresses through the WooCommerce Order Statuses. If an order reaches the processing status the plugin will automatically trigger features to notify suppliers to process orders. The settings here include enabling/disabling emails to suppliers, including links to the order, and also the email text options. Additionally you can configure supplier CSV File import from this section.
Packing Slips: The packing slip menu and settings contains all the inputs to configure the packing slip options. Packing slips are documents which are shared with suppliers containing order data and packing instructions. In this section you can enable/disabling the packing slip creation feature, update the Headers, Products, Company Details, Footer and Sender Details for the Packing Slips. Additionally you can select the order data which is included in the packing slip including Customer Details, Tax Options and Total Options. Additionally settings related to creating drop shipping suppliers can be enabled here.
Customised Supplier Emails: The customised supplier emails section contains style based settings for customising supplier emails. This includes style options for the packing slip, supplier emails, and more.
SMTP Options: SMTP Options contains the settings for configuring your emails with the Dropshipping Plugin and your WooCommerce Store. If you are using SMTP on your WooCommerce store you will need to configure these options.
Price Calculator: The Dropshipping Pricing Calculator makes working with store profits and margins easy. To get started use the settings in the Pricing Calculator to adjust the margins and values automatically assigned to products imported with the Dropshipping Plugin.
How to read the documentation?
↑ Back to topThe Dropshipping for Woocommerce plugin is a robust plugin with many features. Here is the best way to get started based on the type of store you own:
- Dropshipping Store with Aliexpress: For store owners wanting to use the Aliexpress integration features we recommend looking at the Aliexpress Settings documentation to generate your API Key and integrate with the CBE. Next, you will want to setup supplier and assign products to the right suppliers, our section on Working with Suppliers covers all the processes involved with setting up suppliers. Finally, you will need to prepare for working with your suppliers, read the documentation for Packing Slips or Supplier Dashboard. Once your store orders come in the plugin makes it easy to ensure your suppliers are updated and orders are dispatched automatically.
- Dropshipping Store with Local Suppliers Only: For store owners working with local suppliers you will not need to use the Aliexpress Settings. For working with local suppliers you will want to setup supplier and assign products to the right suppliers, our section on Working with Suppliers covers all the processes involved with setting up suppliers. Next, you will need to prepare for working with your suppliers, read the documentation for Packing Slips or Supplier Dashboard. Once your store orders come in the plugin makes it easy to ensure your suppliers are updated and orders are dispatched automatically by your local supplier.
- Importing Products without Fulfilment Features: Store owners sometimes need to quickly import products and populate all fields in their WooCommerce store. However, they do not require/want the automated options for notifying suppliers. You can use your CBE as described in Aliexpress Settings or our Amazon Integration to import products. Features related to packing slip generation and supplier dashboards will not be used in this case.
Additionally, the plugin offers a number of features and methods to notify and work with suppliers. Based on your store requirements and suppliers use the following to quickly get started:
- Working with Suppliers using the Supplier Dashboard: Using the supplier dashboard makes working with suppliers on your store easy. The supplier dashboard is a customised view of your WooCommerce store which can be accessed by your suppliers using a login. From this dashboard suppliers can view new orders, query order details, updating shipping information, download packing slips and complete orders. Read the Dropshippping Dashboard section to understand how the dashboard works. You should also read the sections about setting up and working with Dropshipping Suppliers.
- Working with Suppliers using Email / CSVs / Packing Slips: For some store owners and/or suppliers all orders can be automated via email. Using this method automated packing slips are sent via email to suppliers when a new order is placed. Customising the order and customer data included in the packing slip can be completed from the Packing Slips settings. To create and work with suppliers read the sections about setting up and working with Dropshippnig Suppliers.
Setup and Configuration
↑ Back to topSetting up AliExpress Dropshipping Integration
↑ Back to topWooCommerce Dropshipping has a Chrome extension that allows you to easily integrate with Aliexpress and import products into your store. Follow the steps below to configure this extension and integrate your store with Aliexpress.
Install free Chrome extension by clicking here or by clicking on the notification shown in your WooCommerce dashboard and pin to your chrome browser.
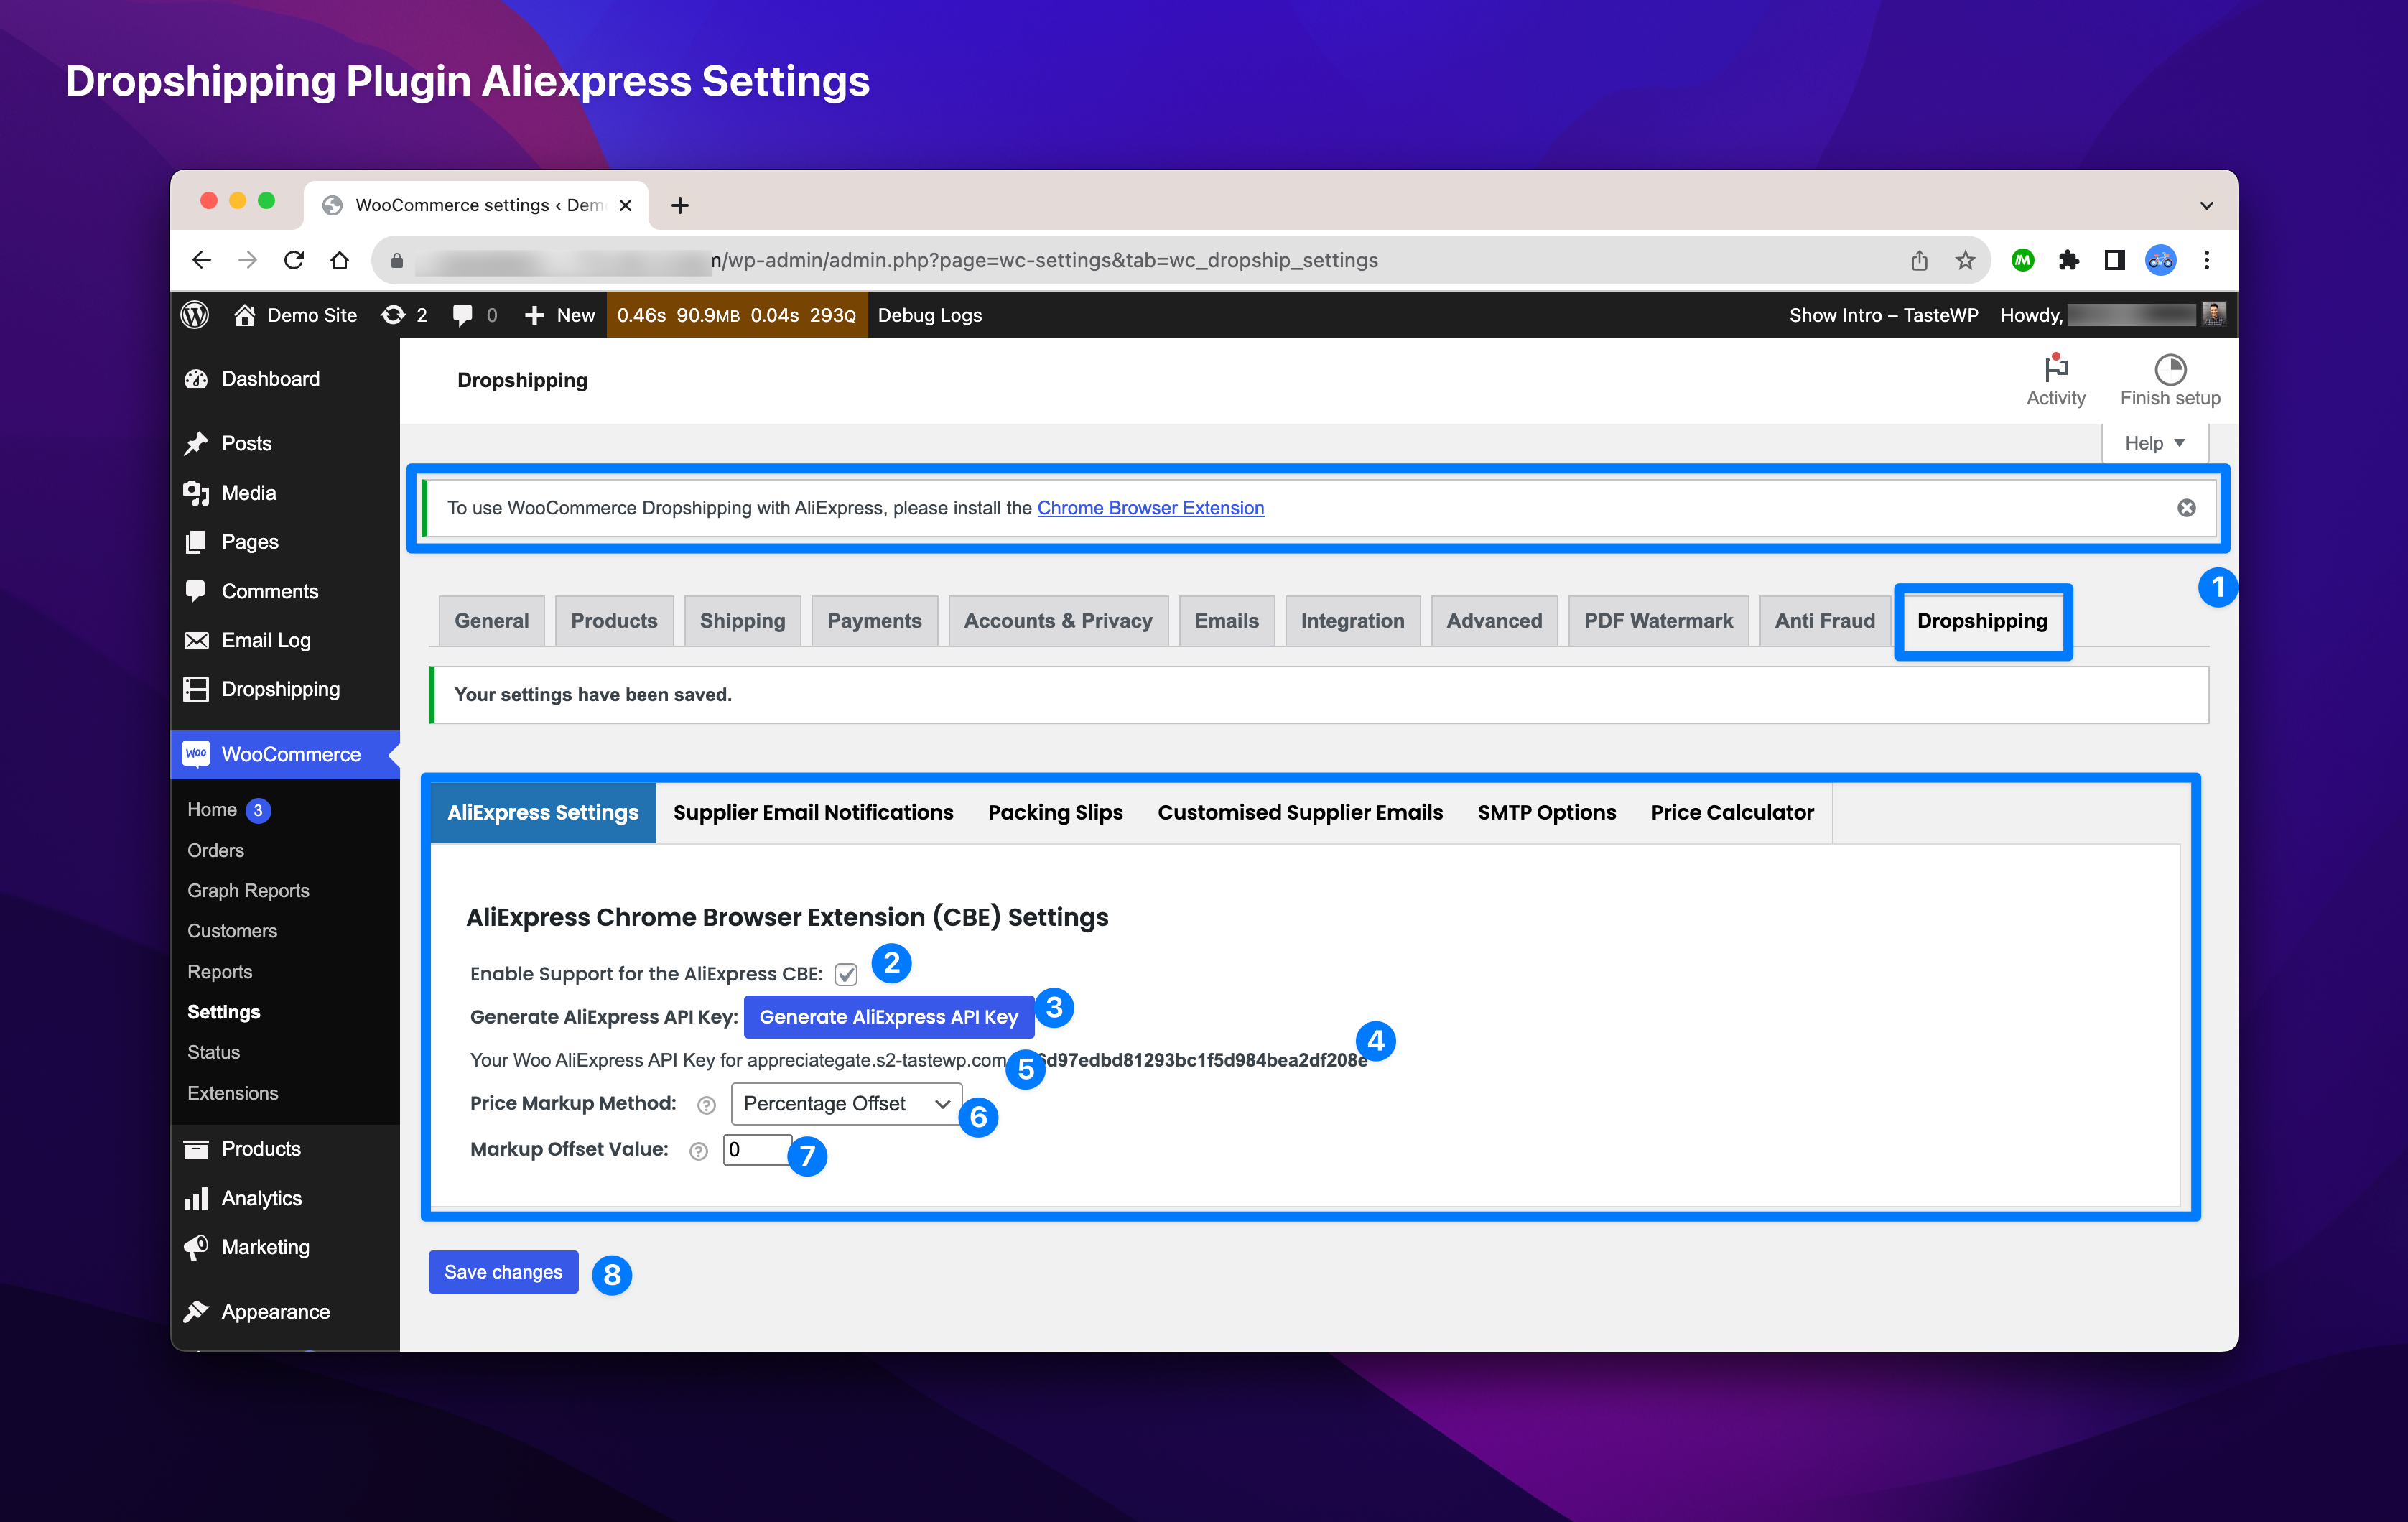
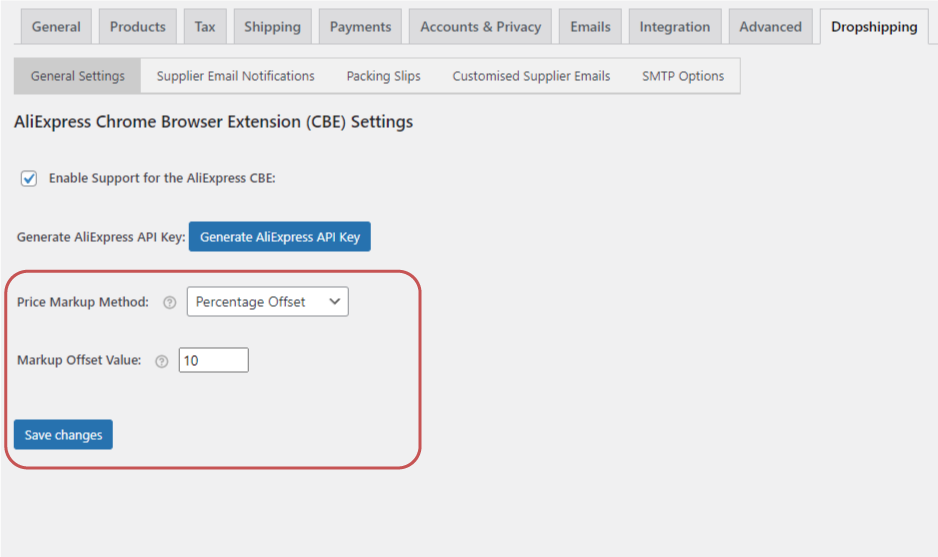
Dropshipping Aliexpress Settings page options:
- Chrome Browser Extension Banner: Upon first install the plugin will create a banner to alert and provide you with a link to download the supporting Chrome Browser Extension. Use this link to view the CBE Page, and close the banner.
- Enable Support for Aliexpress CBE Toggle: Enable this option to access the Aliexpress Settings fields.
- Generate Aliexpress API Key: Button to generate the API Key. This can only be triggered once. Once the button is pressed, the plugin will generate an API key for the integration with the CBE. This is displayed below.
- URL & API Key: The API Key Generated but they Dropshipping Plugin. The URL is also provided here for your store.
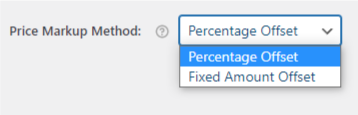
IMPORTANT: When inputting this into the CBE, please ensure you include the secure transfer method meaning always use the format: ‘https://yourdomain.com’ or ‘http://yourdomain.com’. Remove any trailing ‘/’ and ensure you are using the correct prefixes for the transfer protocol and sub-domains. - Price Markup Method: Setting used to adjust the import configuration and pricing. Options are Percent Offset or Fixed Amount. Products imported from Aliexpress will be automatically marked up to provide a provide for the store owner. You can choose to have this as a percent or fixed amount.
- Markup Offset Method: Value used for the Price Markup Method. If the Price Markup Method is Percent Offset, then the value will represent a percentage. If the Price Markup Method is Fixed Amount, then the value will represent dollars (or other local store currency).
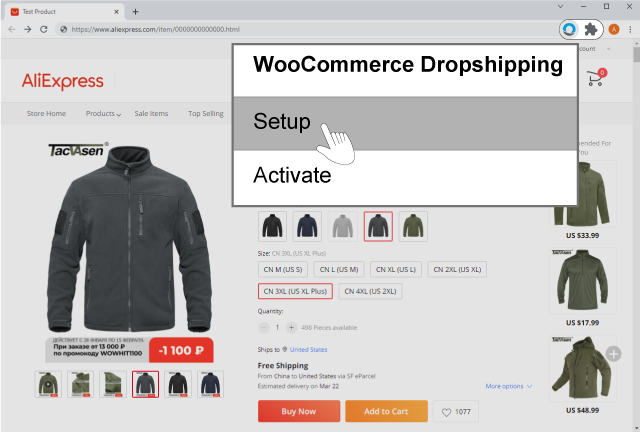
Configuring the Chrome Browser Extension (CBE):
- To setup the CBE, visit AliExpress and open any product page.
- Next, find the plugin’s icon in the top-right of your chrome browser and click it and navigate to setup tab.
- Next you will need to enter your WooCommerce store URL and API key.
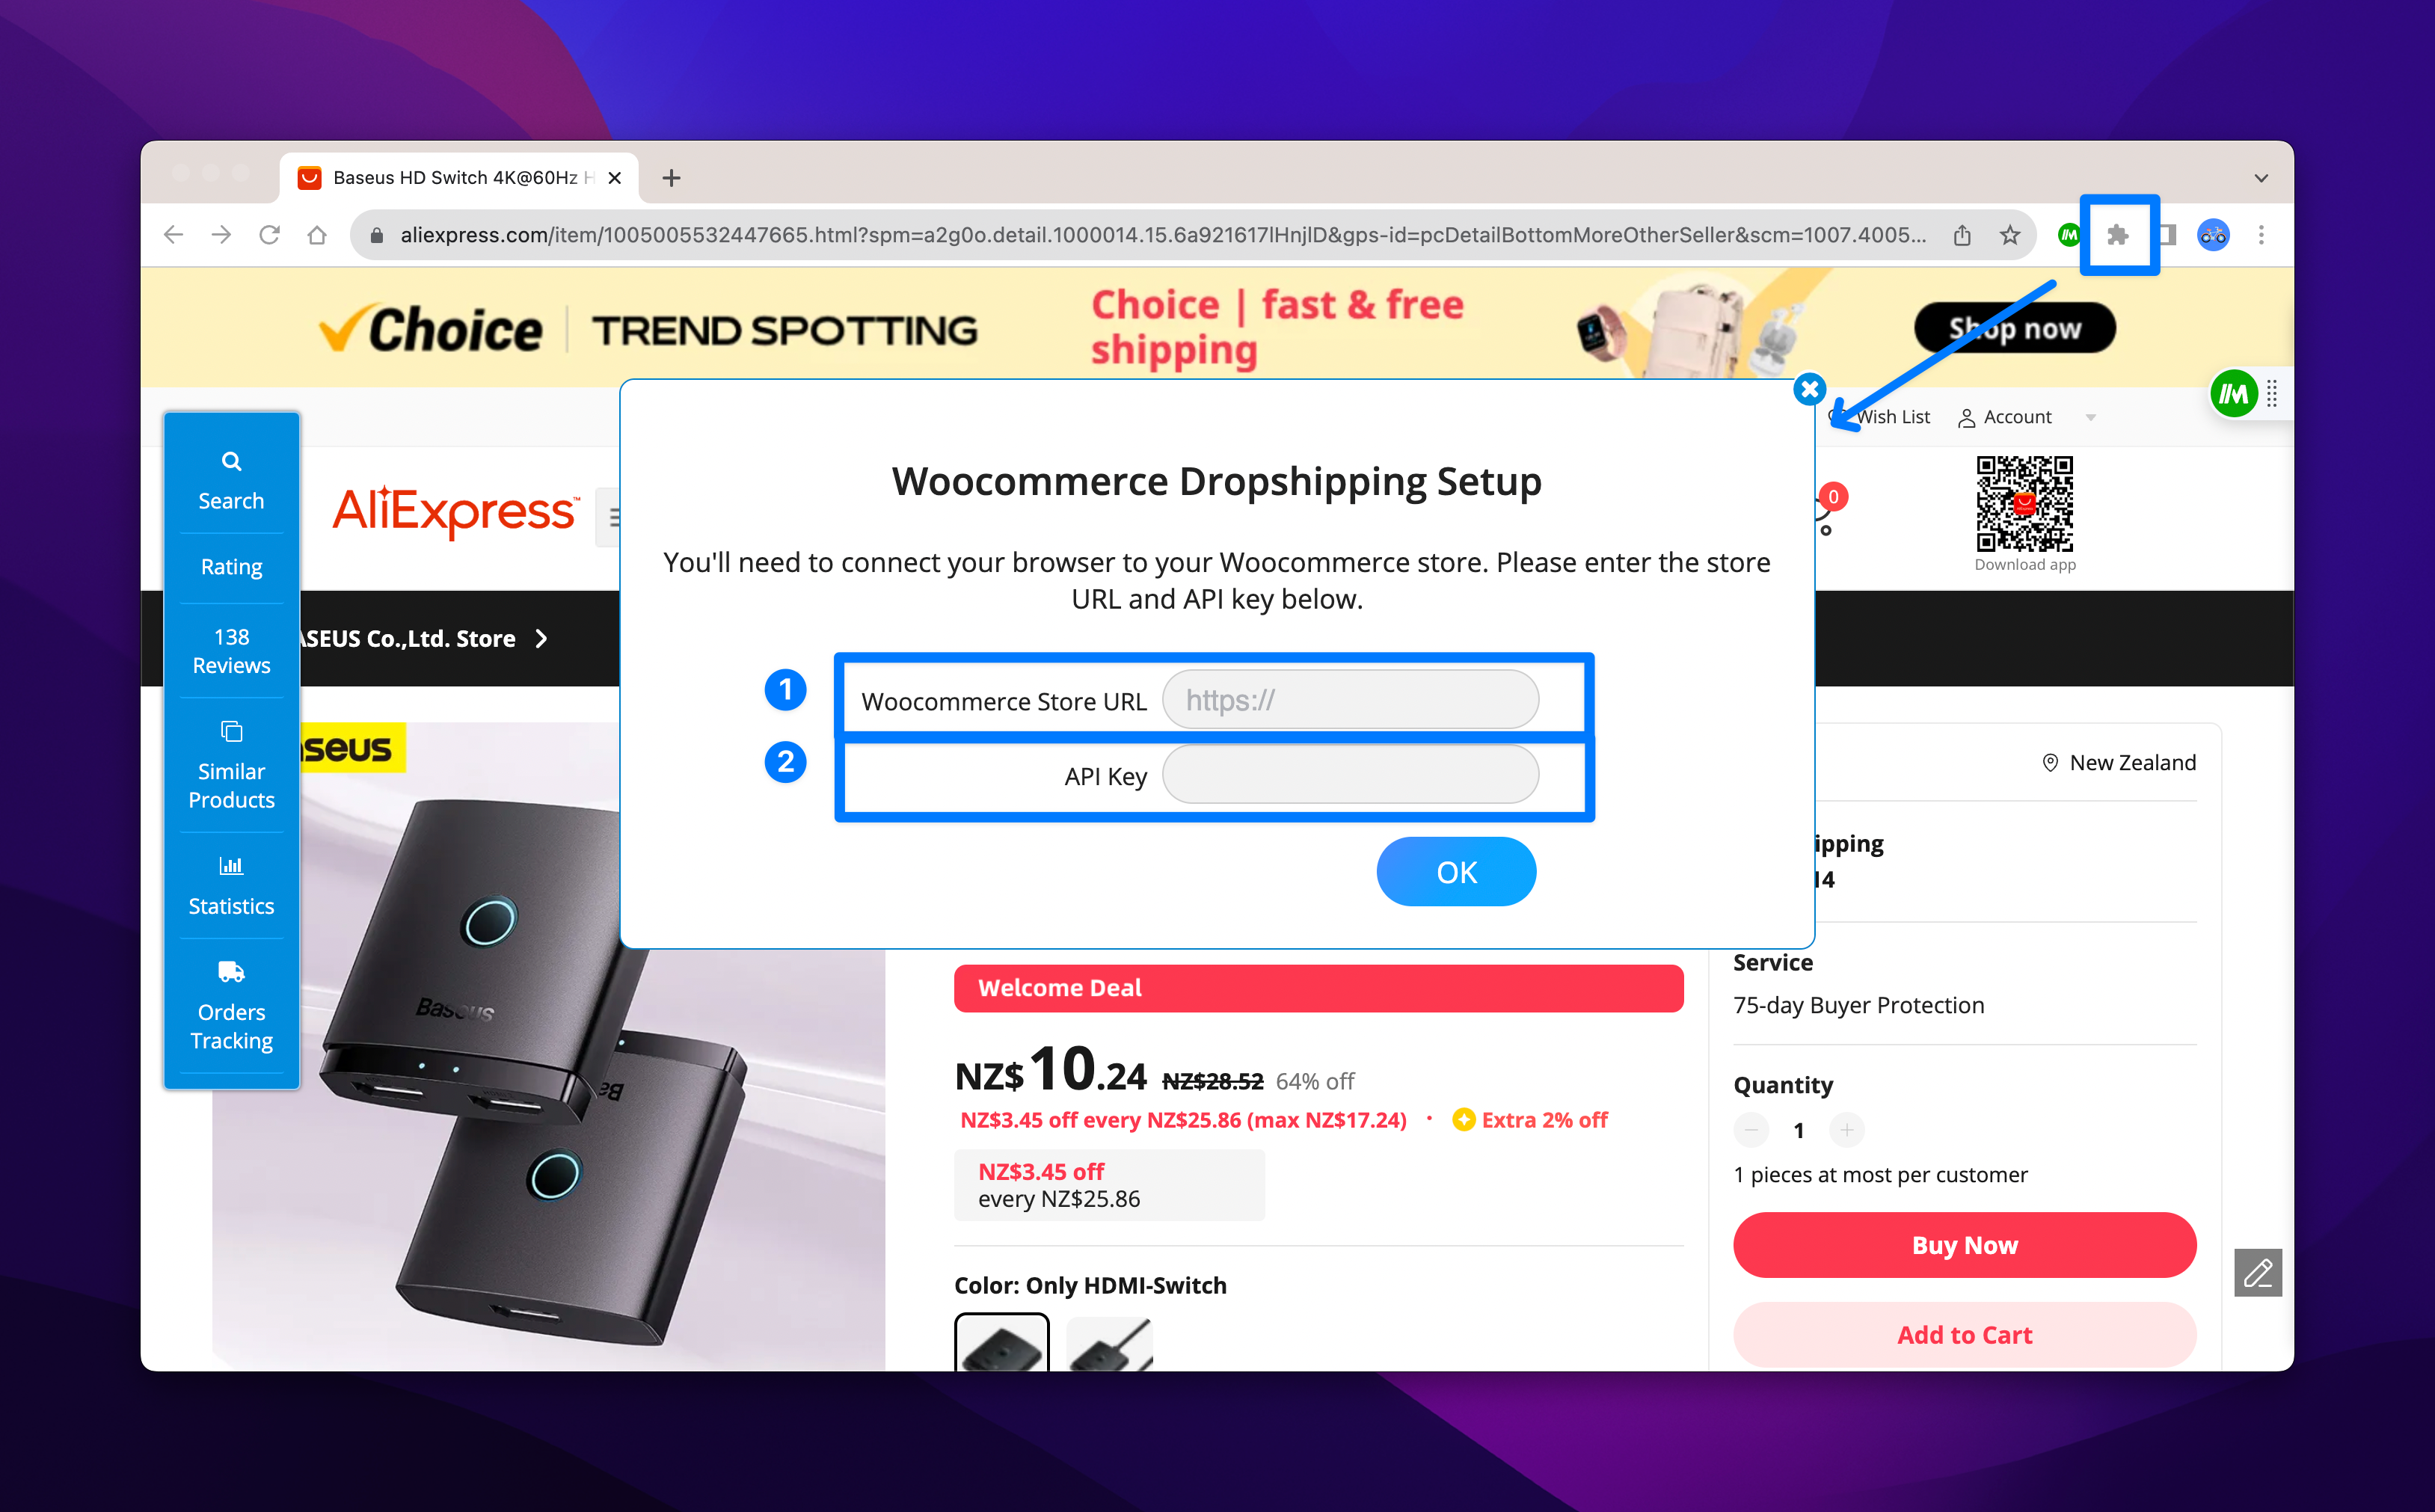 a. WooCommerce Store URL: The URL is also provided here for your store.b. API Key: The API Key Generated but they Dropshipping Plugin.
IMPORTANT: When inputting this into the CBE, please ensure you include the secure transfer method meaning always use the format: ‘https://yourdomain.com’ or ‘http://yourdomain.com’. Remove any trailing ‘/’ and ensure you are using the correct prefixes for the transfer protocol and sub-domains.Once this is done, blue bar will appear on top of your AliExpress product and category pages and a sidebar on product pages only. Now, you are ready to start importing products from AliExpress to your WooCommerce store.
3. Working with the AliExpress Dropshipping Integration
1. AliExpress Products integrated with Your Dropshipping Store
↑ Back to topBasic Product Page Setup for Importing Product from Product Page
To import a product, simply navigate to the product page on AliExpress. A blue bar will appear across the top of your screen with the following information to help you import product from AliExpress to your Woo powered store:
- Add Product – Instantly adds product to store after changes are made.
- Add to Queue – Adds Product to View Queue list after editing product.
- View Queue – Provide Information of all products you have added to Queue to be sent to your store.
2. Adding Simple or Variable Product to Your WooCommerce Store
↑ Back to top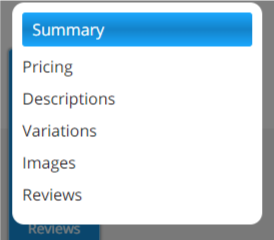
Click “Add Product” if you want to add a product instantly to your WooCommerce powered store after making changes while staying on AliExpress product page using WooCommerce Dropshipping google chrome extension.
Plugin retrieves all details of the product from product page and gives options to edit these fields to your liking. You’ll see the following information about the product on left side of your screen after clicking Add to Queue or Add Product button.
Summary
Summary has the following four sections:
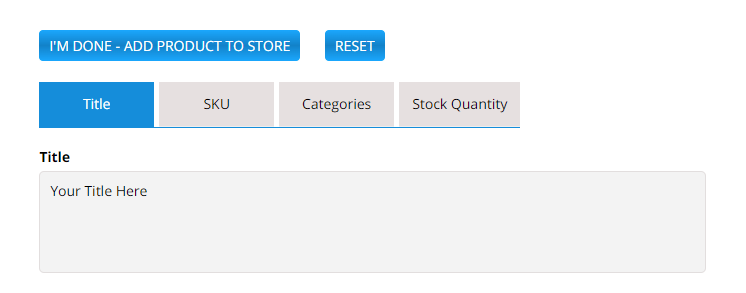
Title – Here you can make changes to the title of the product.
SKU – Unique stock keeping unit number of the product available on AliExpress. SKU helps trace back your products on AliExpress to update product stocks, variations and orders when customers purchase the item from your store. [Note: SKU should not be changed for better working.]

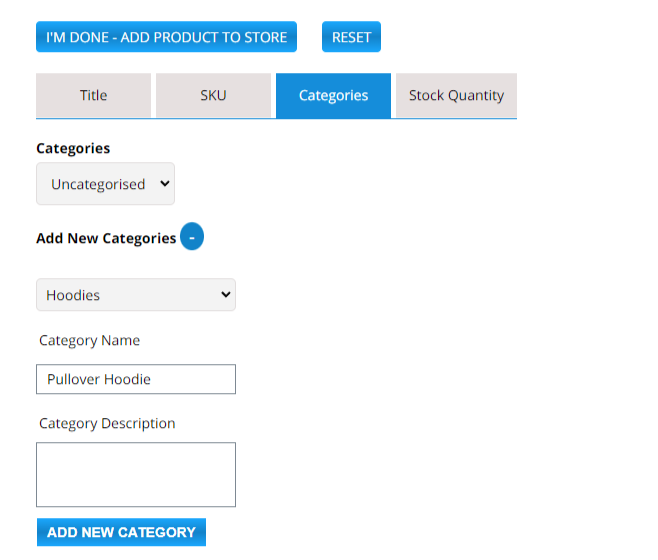
Categories – Adds products to a specific category on your store.
You can also create a new category or a sub-category by clicking on + icon next to Add New Categories by adding needed information here.

Stock Quantity – Gives information about number of items available on AliExpress.
Pricing
In pricing tab, you can see the following information related to the product:
- Price
- Regular Price
- Sale Price
- Shipping Charges
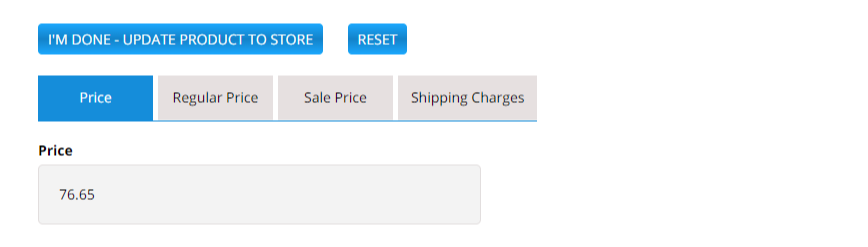
This pricing tab is dependent on the Profit margin settings available in WooCommerce > Settings >Dropshipping > General Settings under Generate AliExpress API Key button.
The profit margin can be added to pricing of AliExpress products by setting up markup value from this tab.
These profit margins can be added based on Percentage or Fixed Amount offset.
For example,
A product is sold on AliExpress at $100.
Condition A
If we set markup method to Percentage Offset and set offset value to 10, you’ll see Price of the product in Pricing tab to be $110. That is the original $100 plus the 10% percentage of set which would be in this case $10 making a total of $110.
Condition B
If we set markup method to Fixed Amount Offset and set the offset value to 24, you’ll see Price of the product in Pricing tab to be $124. That is the original $100 plus the $24 fixed amount making a total of $110.
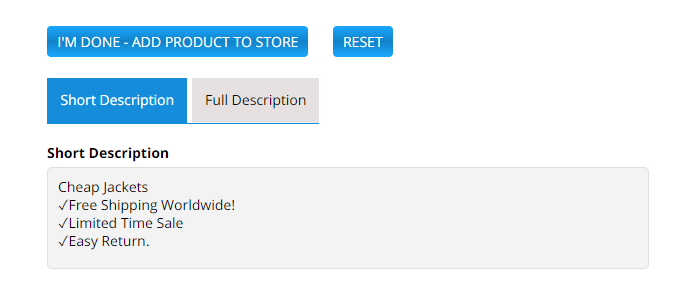
Descriptions
Description tab provides bath short and full description of the product. You can tweak this information to your liking.
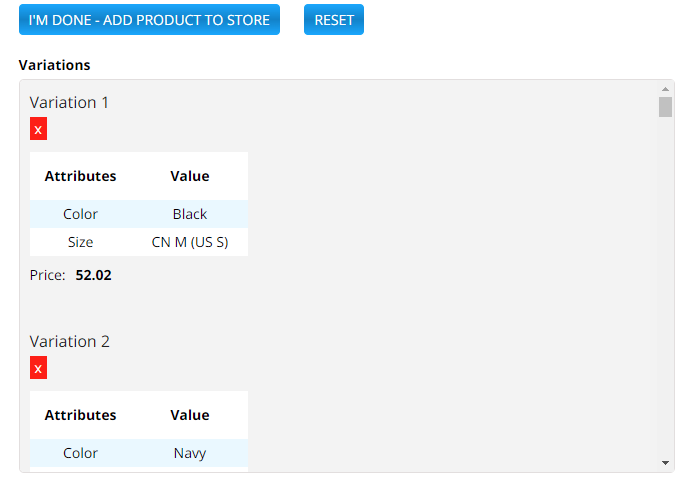
Variations
In Variations tab, you’ll get all the attributes of your product that are applicable to your selected product. You can also delete variations that you don’t want to share with your customers by clicking on red cross buttons on every variation available here.
Images
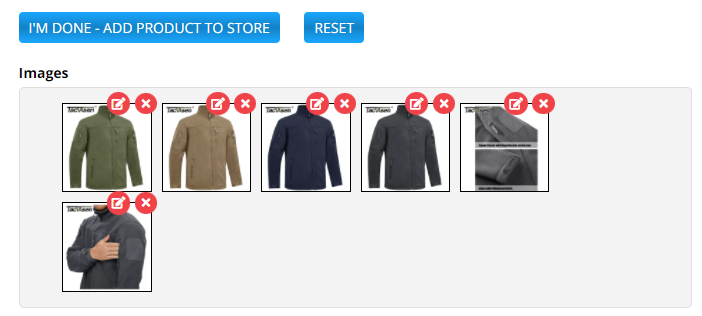
From images tab, remove images that you don’t think are necessary simply by clicking on red cross button.
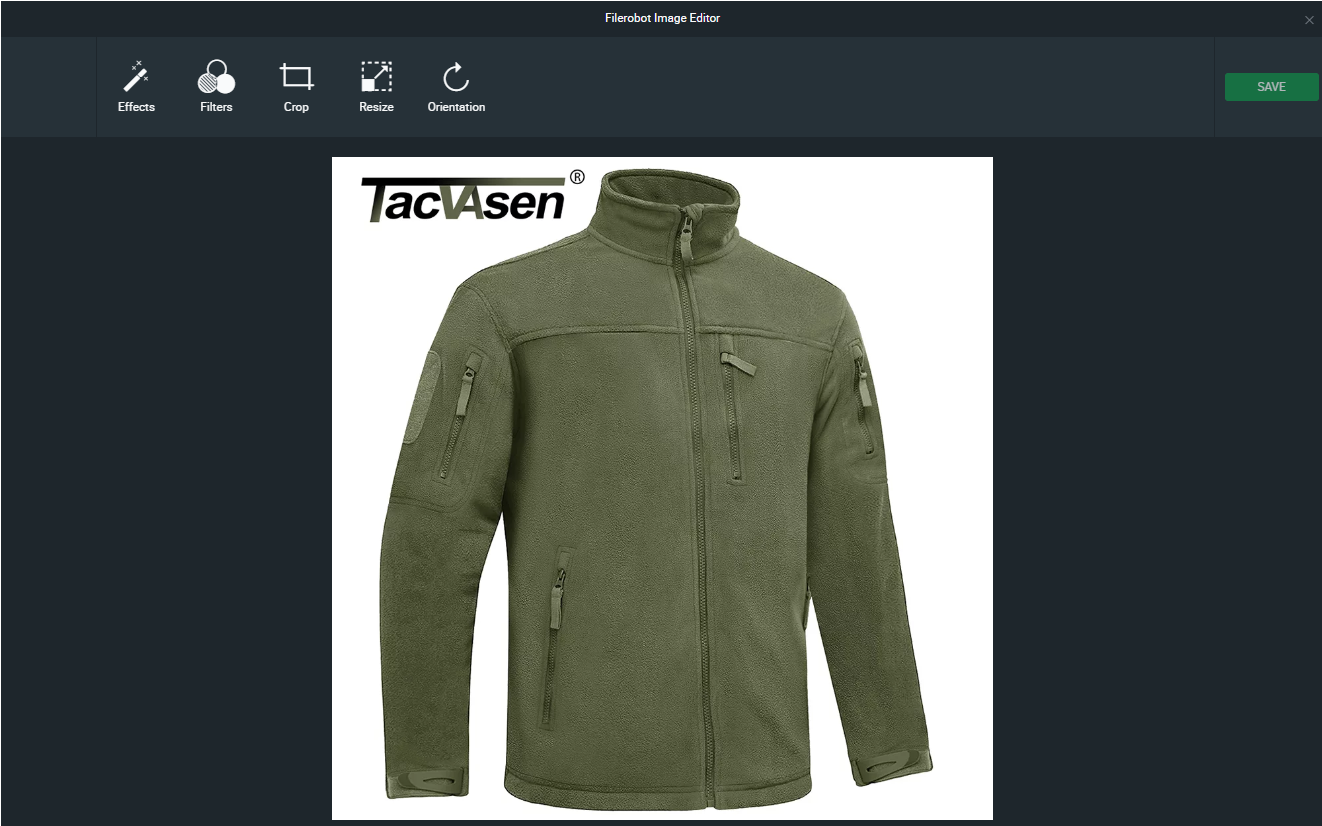
Additionally, edit images using our image editor by clicking on the edit button to add an effect, resize, crop or changing orientation of your selected image.
Reviews
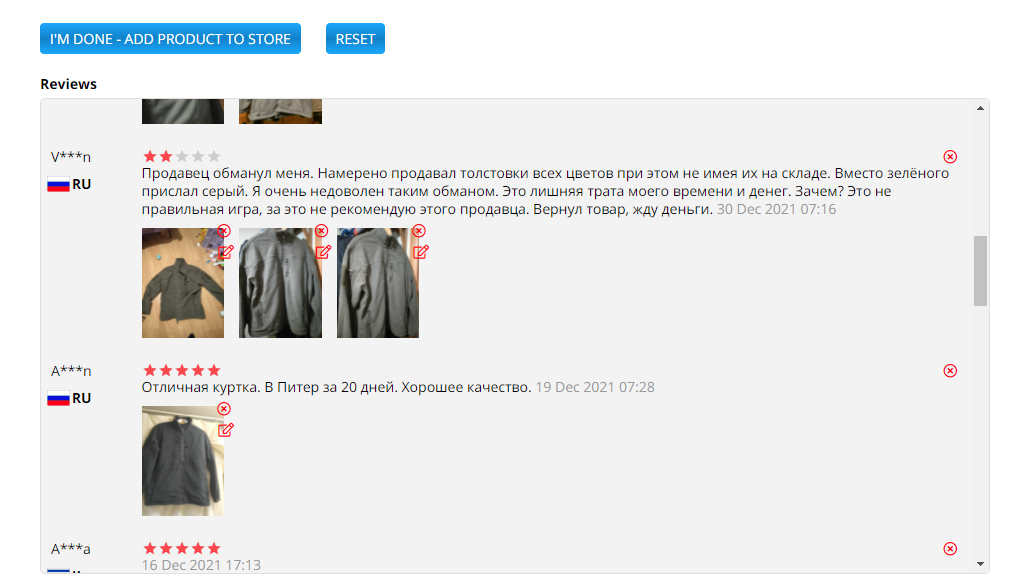
Add reviews with images to your store, to let your customers know how product looks like when they receive it.

Once you have finished editing the product, click I’M DONE – ADD PRODUCT TO STORE Your product will now be synced into your WooCommerce Store. The top bar will look like this.
3. Adding Simple or Variable AliExpress Product to Queue
↑ Back to topIf you want to list a product in your Queue after making changes and want to export it later, click “Add to Queue”. Rest of the process will be the same we had for “Add Product” button.

4. WooCommerce Dropshipping Chrome Extension sidebar function
↑ Back to topSidebar functions are operational on product page only.
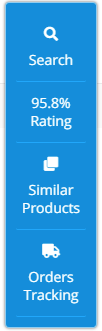
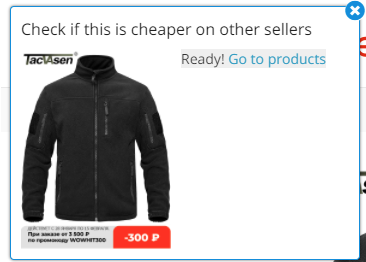
Search- By clicking on search you will be able to search for all similar products from other sellers/stores.
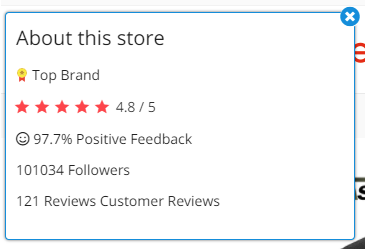
Rating- Rating gives you insights of the store/ seller.
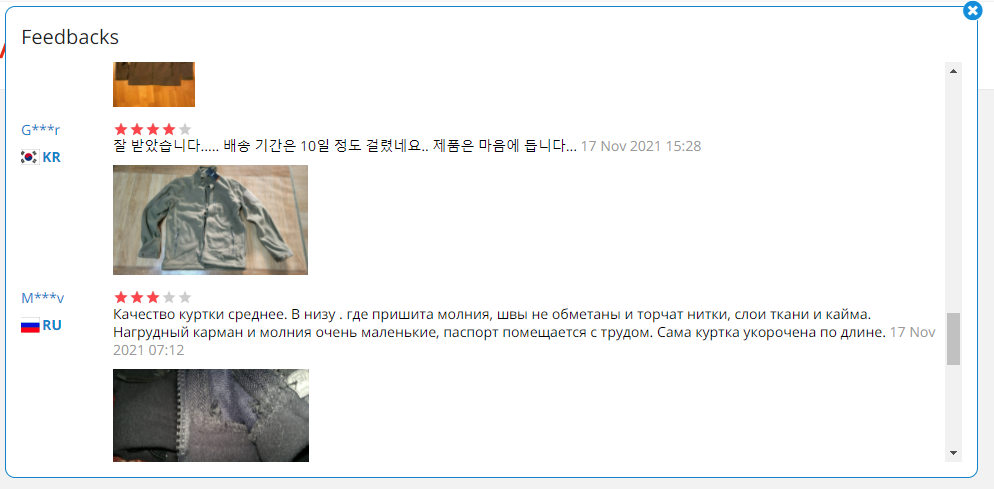
Reviews- Reviews provides information on total number of reviews and on clicking display reviews with pictures by customers only.
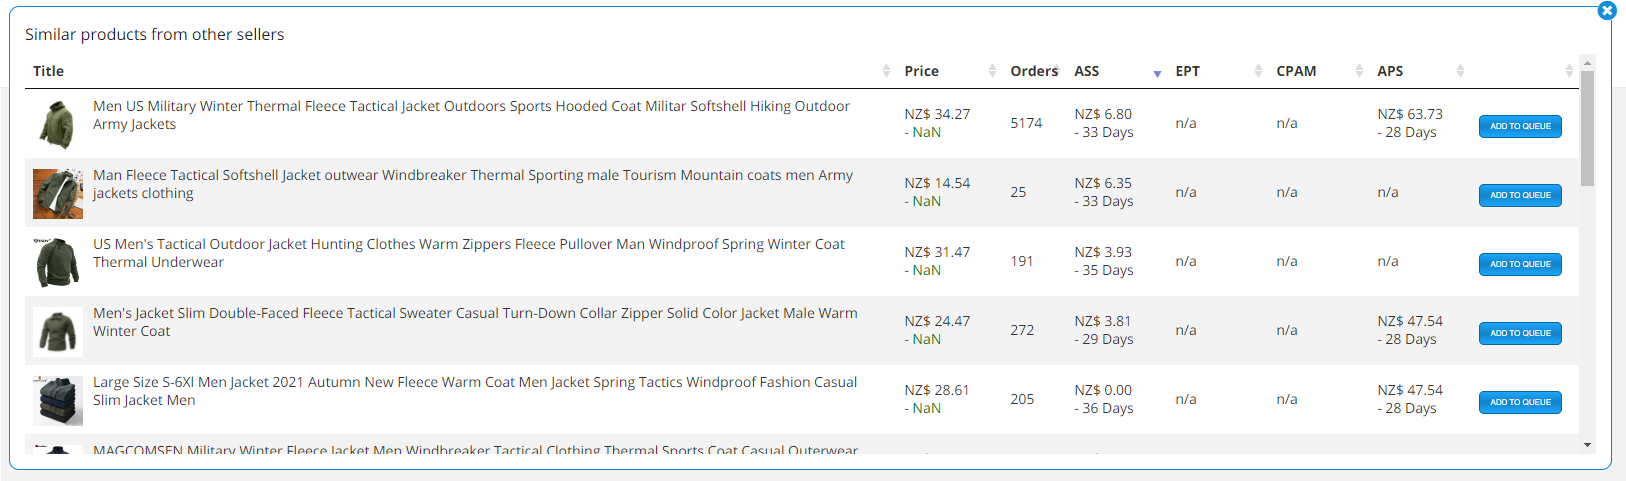
Similar Products- This gives detailed information on similar products on AliExpress. You can also sort these products by title, price, shipping methods, and number of orders.
Orders Tracking- With order tracking you can check the status of the product you have bought for your customer from AliExpress.
5. Importing Products in Bulk
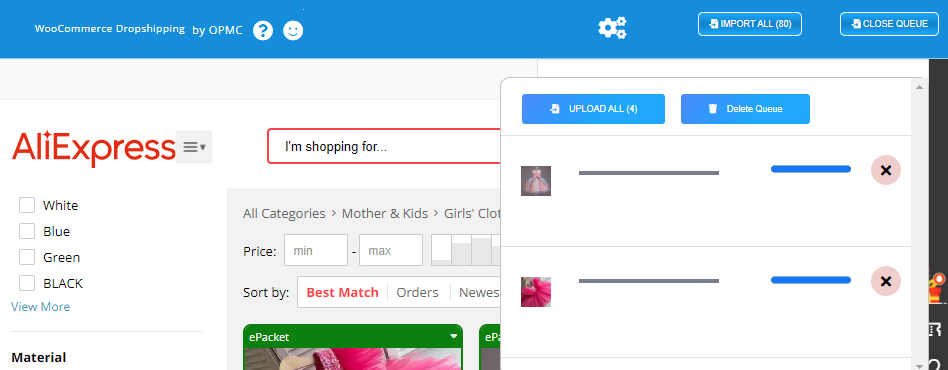
↑ Back to topWith WooCommerce dropshipping chrome extension activated, visit any of your related category page on AliExpress you can do the following actions :
- filter products by country and shipping method by clicking on below mentioned icon

- import all products on that page at once by clicking on import all
- Add product to queue by clicking on add to queue displayed on products.
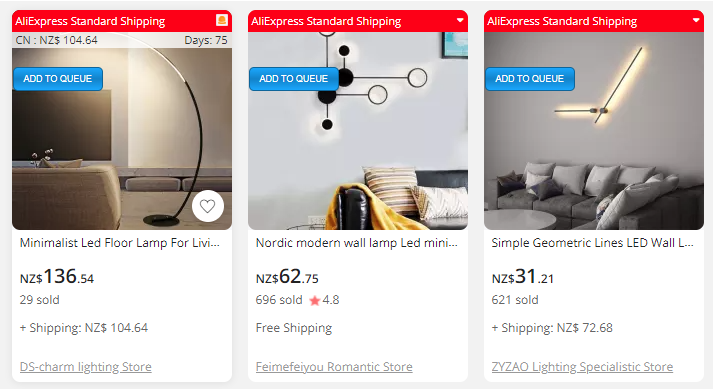
- Make changes to products in queue by clicking View Queue. On clicking View Queue a drop down menu will be displayed from you can upload all product in queue or delete any unnecessary product you have added by mistake or you got a better alternate for that.
4. Working with Suppliers
↑ Back to top1. Adding Suppliers
↑ Back to topSuppliers are a new user type created in WooCommerce when you install and activate the Dropshipping Plugin. Suppliers are created and edited within the Supplier page. To create suppliers navigate to the supplier page: WooCommerce > Products > Suppliers
Please note: Before creating suppliers you should configure your supplier settings in the plugin settings page. To configure your plugin settings for suppliers, learn how to access the Supplier Email Notifications and Packing Slips in the get started section.
To create a new supplier you will need a supplier name and email address for the supplier:
- Go to: WooCommerce > Products > Suppliers.
- Enter Name and Email Address(es) fields (required). Other fields are optional.
- Enter the values for the Name and Email Address. The slug and account number can be unique to your store and any value you choose.
- Click Add New Dropshipping Supplier. to create a new supplier.
- You will see the suppliers listed on the right hand side of the screen. From here you will also be able to import inventory for this supplier, view the supplier email and total number of products in the count field.

Common issues when working with suppliers:
- Suppliers are not able to access their account:
When a supplier account is created by the store owner this creates a new supplier type user in the Woocommerce store. If you would like to automatically email your suppliers their login credentials when you create a supplier account, please enable the settings found under the packing slip option. The setting is called and should be enabled before creating a supplier account: When an admin creates a new supplier, send registration details to the supplier’s email. - The Setting is enabled as described above, however the supplier has not received the email:
The email is triggered when the supplier is first created. The email will automatically be triggered if the setting is enabled. First check if your store is sending emails and delivering them correctly. A common issue is not having SMTP configured correctly on your store or within the Plugin settings. We recommend using a free WP Email Logging plugin to ensure you are tracking all emails being sent from yours store. - Suppliers are still unable to access their accounts, they need to reset a password:
Because the Dropshipping plugin creates users within the WooCommerce system you can also use the WooCommerce based user workflows to reset access for suppliers. To do this simply navigate to the main WooCommerce User section where you can update and reset all user types including Admin and also Supplier type users.
2. Assign Products to Dropshipping Suppliers
Once you have created Supplier on your WooCommerce store you will want to add and configure the products for each supplier. To connect a product to a supplier start by creating a product in your store and following these steps:
- Go to: WooCommerce > Products.
- Hover over a product, and click Edit. You will directed to the Product Overview page.
- Go to the right column and find the a new metabox called Drop Ship Supplier.
- Within the meta box there is one input field. Select a supplier from the dropdown. The Dropdown will list all created suppliers on your store.
- Once a supplier is assigned to the product. Save or Update the product to save the mapping of product to the chosen supplier.

3. Supplier Inventory
↑ Back to topImport inventory from CSV
Suppliers with a CSV of their inventory can import SKUs and other information using WooCommerce Dropshipping.
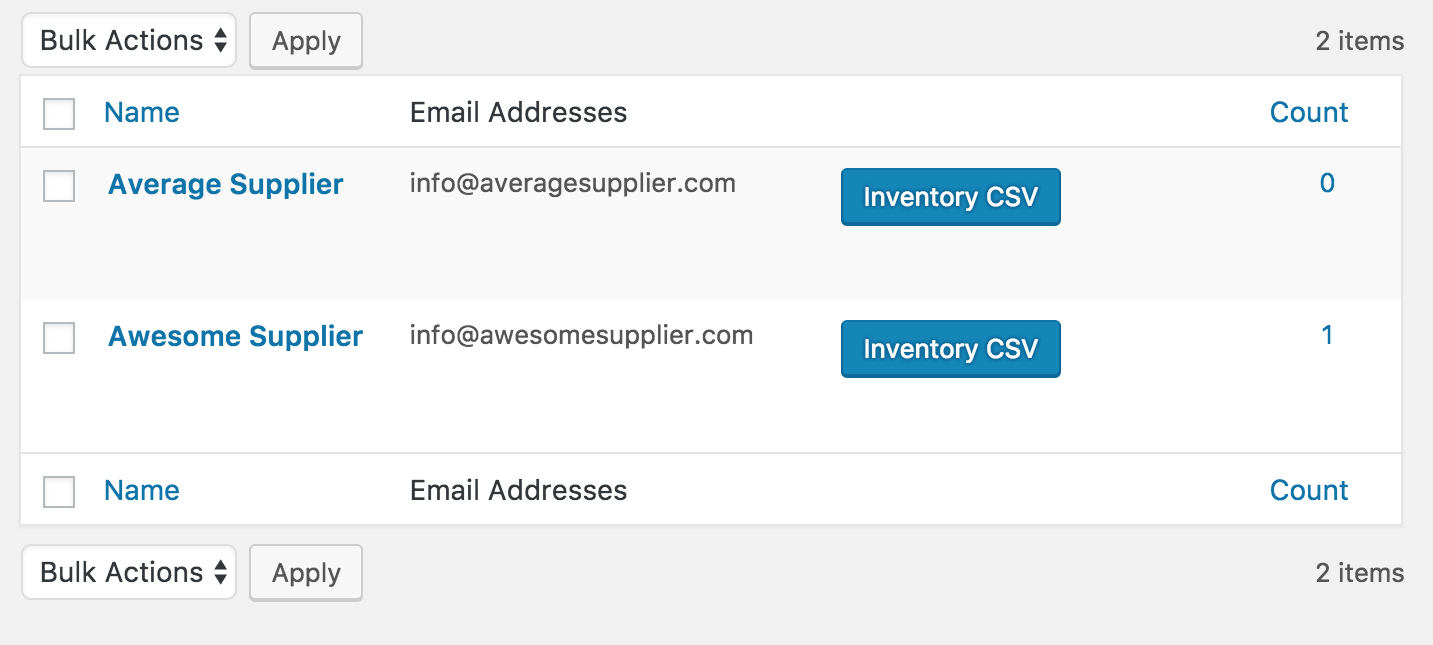
- Go to: WooCommerce > Products > Suppliers.
- Find the supplier on the list.
- Select Inventory CSV to begin the import process.
- Choose File.
- Update.
Configure Supplier Inventory CSV Settings
Supplier inventory CSV files can be configured on a per-supplier basis. The two methods currently supported are:
- Quantity on Hand –With this format your supplier is sending a spreadsheet containing the quantity they have in their remaining inventory. Any number above zero means that the product is still in stock.
- In-Stock Indicator –With this format your supplier is indicating whether a SKU is still in stock or not. Often this is in “Y/N” format, or “1/0” in indicate in stock and out of stock. No quantities.
To set how a supplier’s inventory CSV is processed:
- Go to: WooCommerce > Products > Suppliers.
- Hover over the supplier, and click Edit.
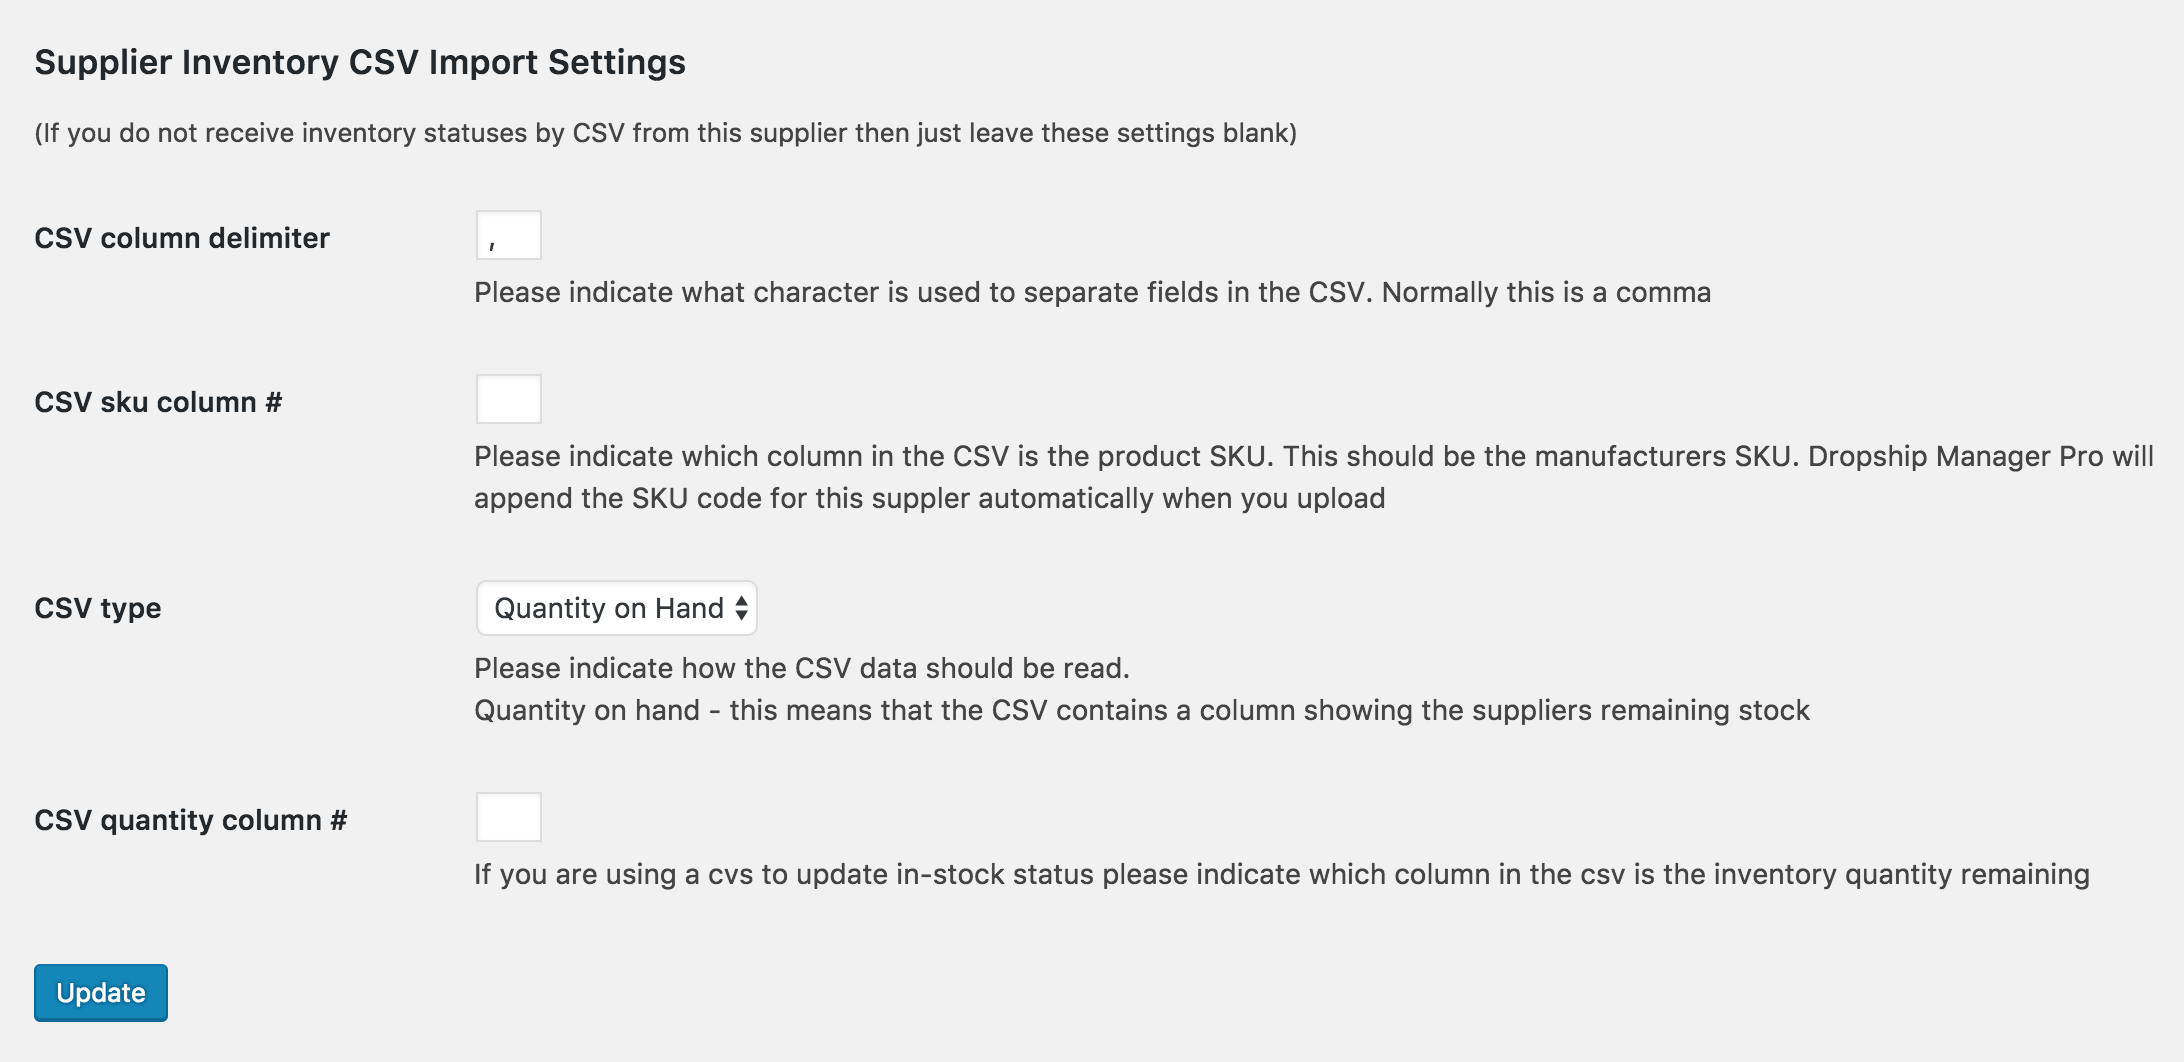
- Scroll down to Supplier Inventory CSV Import Settings.
- Complete each field
- CSV column delimiter — Character to separate fields, e.g., Comma (,)
- CSV sku column # — Enter a number for the SKU.
- CSV type — Explained above.
- CSV quantity column # — Enter a number for updating in-stock inventory.
- Update.
4. Customize your packing slips
↑ Back to topWhen customising packing slips you can choose from two options:
1. Customizing the default packing slip for all suppliers.
2. Customizing a packing slip for one supplier.
1. Default packing slip – For All Suppliers.
Default packing slip can be configured by providing the following information by visiting the Packing Slips Settings page. From here you can configure and attach a PDF of packing slip with the email sent to suppliers. The emails are sent whenever order is placed by your customer on your store. This packing slip will also be available in the Suppliers Dropshipping Dashboard account which they can easily download by clicking on Download packing slip button.
2. Customize your packing slip for all suppliers.
- In the directory of your theme, create a new directory called “woocommerce-dropshipping”
- In the plugins/woocommerce-dropshipping directory, there is a file named “packingslip.html”
- Copy this file into your newly created myTheme/woocommerce-dropshipping/ directory.
- File should now exist at: “myTheme/woocommerce-dropshipping/packingslip.html”
- Edit the packingslip.html file. Note: Not all HTML features convert well to PDF. Simple works best.
3. Packing slip for a single supplier
Override your default packing slip with a custom one.
- On the Supplier edit screen, note the slug of the supplier for which you create a custom packing slip.
- In the directory of your theme, create a new directory called “woocommerce-dropshipping”
- In the plugins/woocommerce-dropshipping directory, there is a file named “packingslip.html”
- Copy this file into your newly created myTheme/woocommerce-dropshipping/ as SLUG_packingslip.html.
- File should now exist at: “myTheme/woocommerce-dropshipping/SLUG_packingslip.html”
- Note: Code must be the value on the supplier edit screen
- Edit the packingslip.html file. Note: Not all HTML features convert well to PDF. Simple works best.
This method will create a custom packing slip for your specific supplier. You can add multiple packing slips for multiple suppliers by repeating the same process.
4. Packing Slip Common Configurations
- Customise the packing slip to include the customer Address. I want the order slip to Display the customer’s shipping information, i.e. Company name, Customer Name, Address’.
Use the following settings enabled under the Company Details settings in the Packing Slip submenu settings page. Enable the address options you would like to include. The options are the Customer Shipping Address and Customer Billing Address.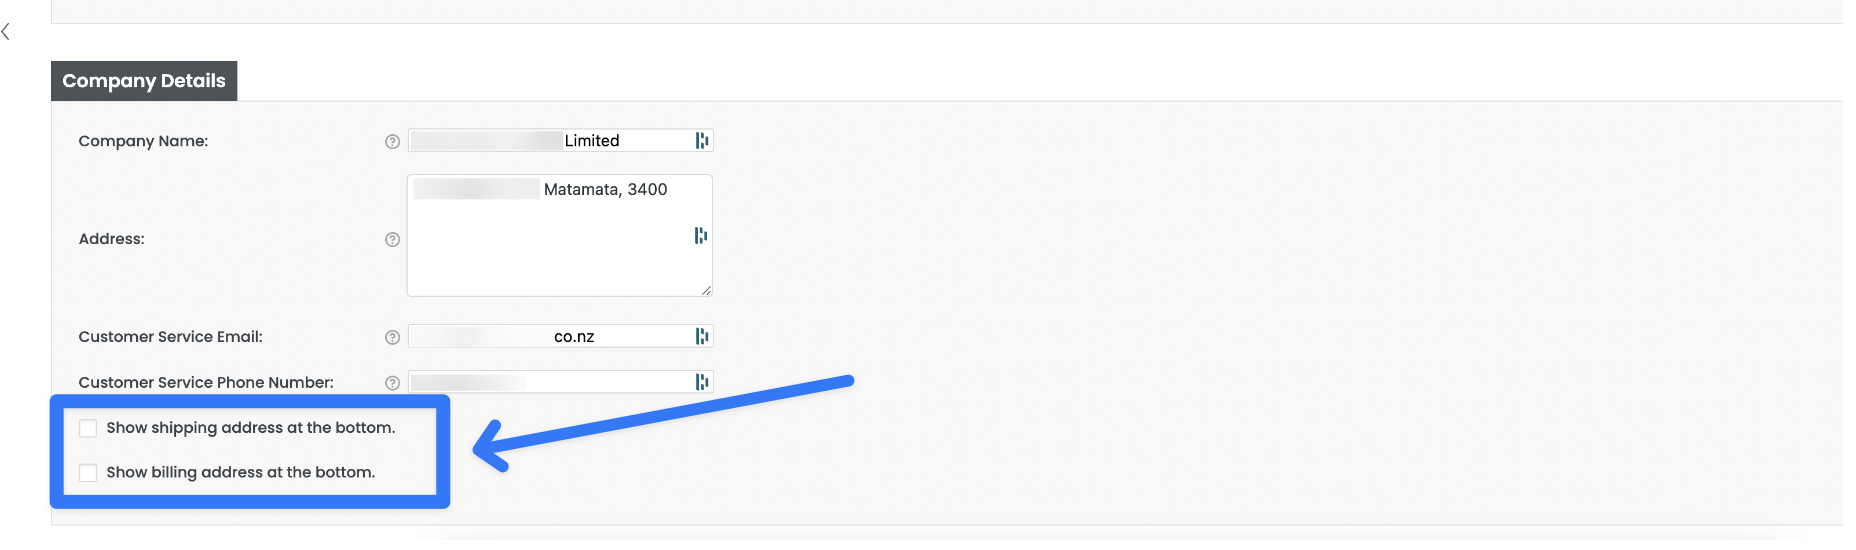
6. Set up supplier email notifications
↑ Back to topAdding Email Order Note
To configure your email notifications:
- Go to: WooCommerce > Settings > Dropshipping > Supplier Email Notifications.
- Enter a note you wish displayed for Supplier Email Notifications.

Displaying ‘Order link’ in supplier email
To allow supplier to redirect to order link directly from supplier email enable this feature and Save changes.

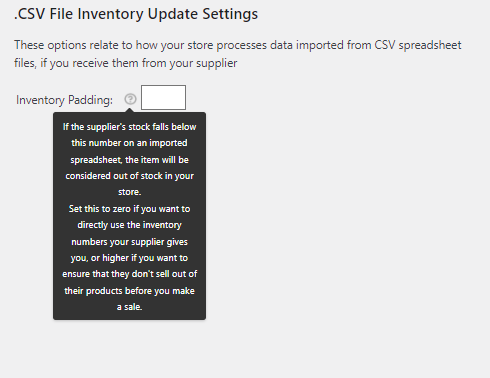
Setting suppliers Inventory Out of Stock point
If you want to mark products sent by your supplier out of stock when they reach a certain threshold, you can do it from this Inventory Padding field available under WooCommerce > Settings > Dropshipping > Supplier Email Notifications > .CSV File Inventory Update Settings.
For example, if you want to mark products less than 5 in stock as out of stock, write 5 in front of Inventory Padding and save changes. Zero in this field means the product will be in stock until it is reached zero.
7. Customising Supplier Emails
↑ Back to topFor styling background colour of email, font colours and font sizes of different sections of supplier email and packing slips, goto: WooCommerce > Settings > Dropshipping > Customised Suppliers Emails.
Packing Slip
This will change font size and colour of the Title on Packing Slip for supplier.
To change Text colour, select a colour from the palette or simply add a hex code or RGB colour.
For font size, set the size in pixels. For example, 24px for 24-pixel font.
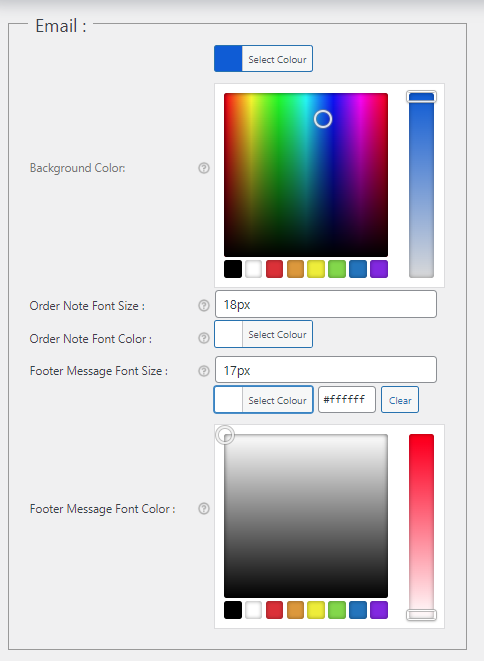
Email Background, Order Note and Footer Message
This section styles the following:
- The background colour of the supplier email – simply select a colour from the palette or add a hex code or RGB colour code.
- Font size of Order Note – set the font size in pixels. For example, 24px for 24-pixel font.
- Font colour of Order Note – select font colour from the palette or add a hex code or RGB colour code.
- Font size of Footer Message – set the font size in pixels. For example, 24px for 24-pixel font.
- Font colour of Footer Message – select a font colour from the palette or add a hex code or RGB colour code.
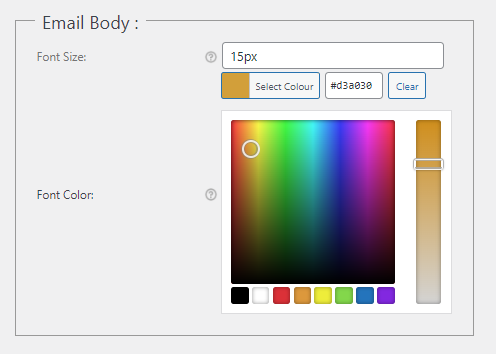
Email Body
This section changes size and colour of email body text.
Font Size – set the font size in pixels. For example, 24px for 24-pixel font.
Font Color – select a font colour from the palette or add a hex code or RGB colour code.
Email Bottom
This section changes the size and colour of the text at the bottom of the supplier email.

Note: If you want to further enhance your suppliers’ emails and packing slip overall look, install Pro Add-on for WooCommerce Dropshipping on top of WooCommerce Dropshipping.
5. Amazon Affiliate Support
↑ Back to top1. Setting up Amazon Affiliate Integration
↑ Back to topTo get started with Amazon’s affiliate marketing program with WooCommerce Dropshipping plugin sign up to any Amazon Affiliate marketing program. To Configure your Amazon Affiliate support:
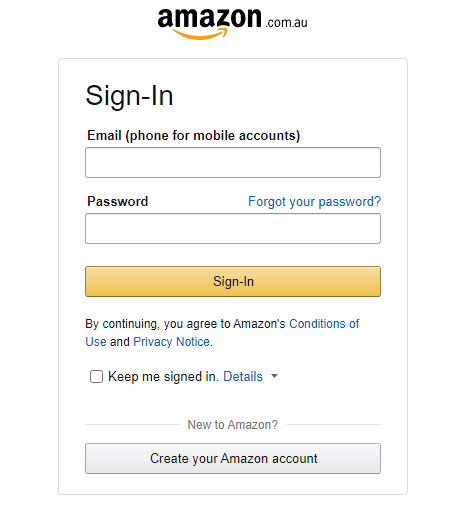
- Visit the Amazon Associates Central homepage and click “Sign-up”
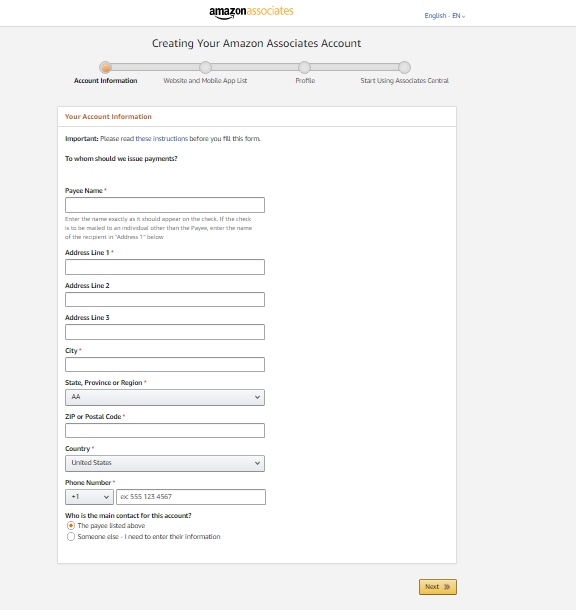
- Fill up your account information of the person or entity you want Amazon to issue payments and click Next.
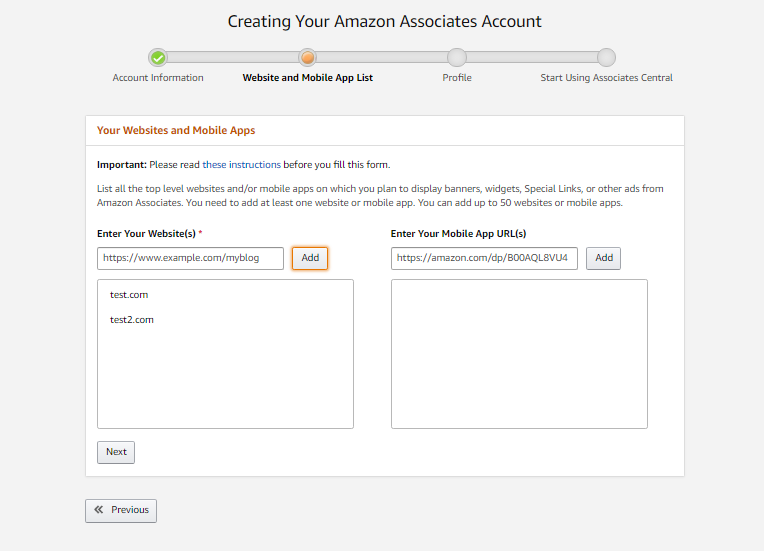
- Add your website or Mobile App URLs and click Next.
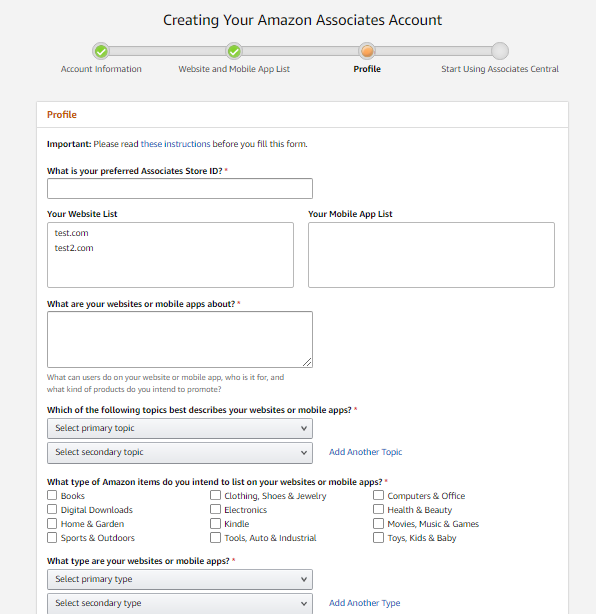
- Enter Associate store ID (affiliate account name), your targeted categories of products at Amazon, and other generic information about your websites and mobile apps. Click Finish.
- Verify your account, enter your tax information and payment method. You are all set up with Amazon affiliate program.
2. Importing products from Amazon Affiliate Dashboard into your WooCommerce store
↑ Back to topFor Importing products from Amazon to your WooCommerce store, follow below-mentioned steps:
- Sign in to Amazon Associates Central.
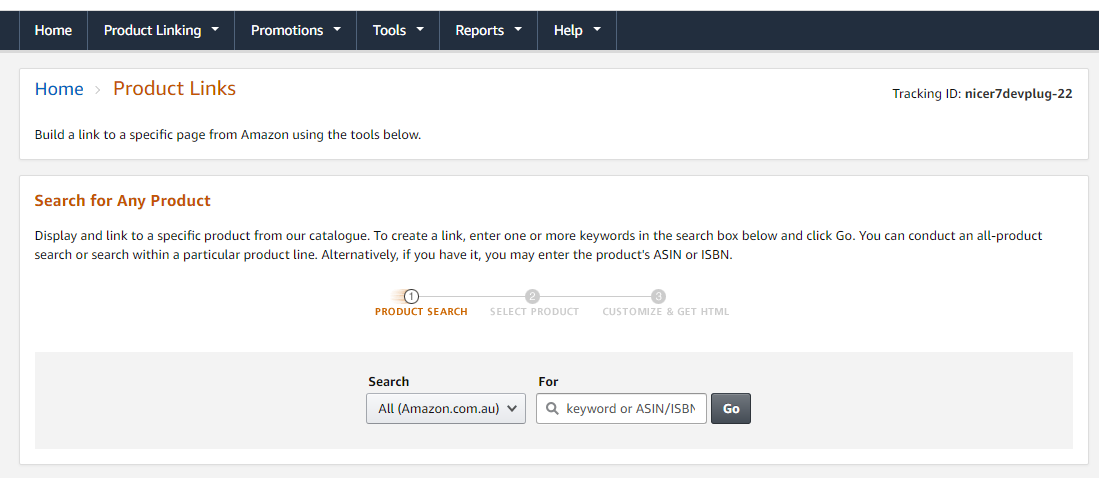
- Hover over Product Linking and select Product links.
- Search for any product using keyword, ASIN or ISBN and click Go.
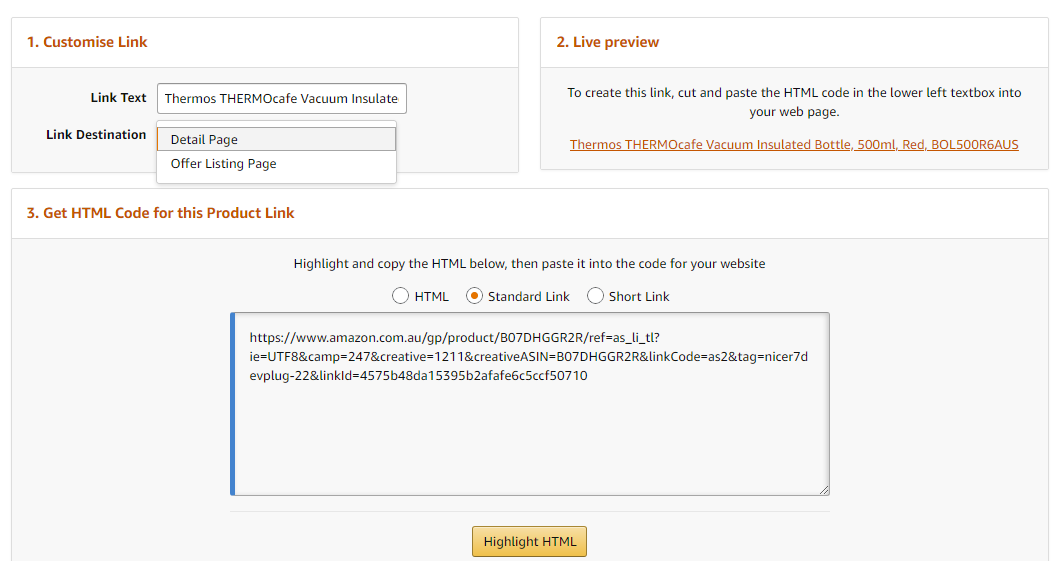
- When the product appears, click on get links tab.

- Select Detail Page from Link Destination tab.
- Choose Standard link from option 3 and Copy the URL mentioned.
- Goto: WordPress Dashboard> Products> Add New.
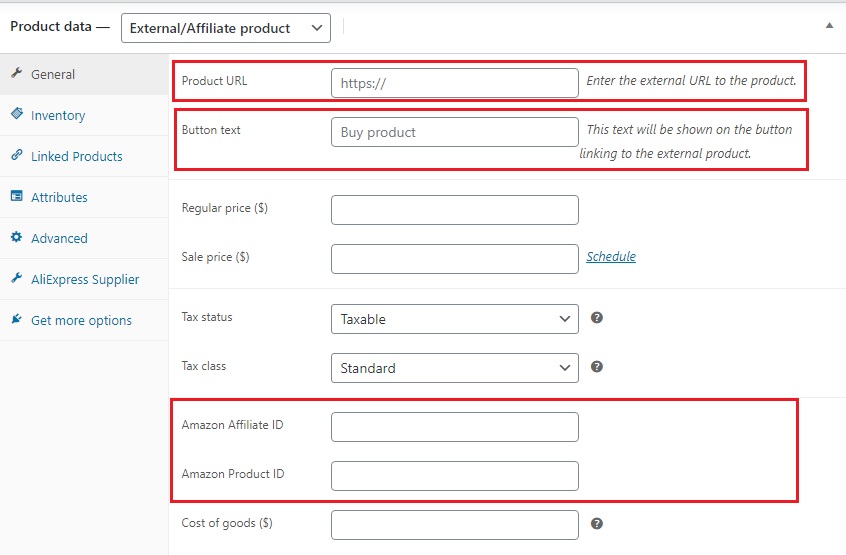
- Go to Product Data tab and select the External/Affiliate Product.
- Paste the link in Product URL tab.
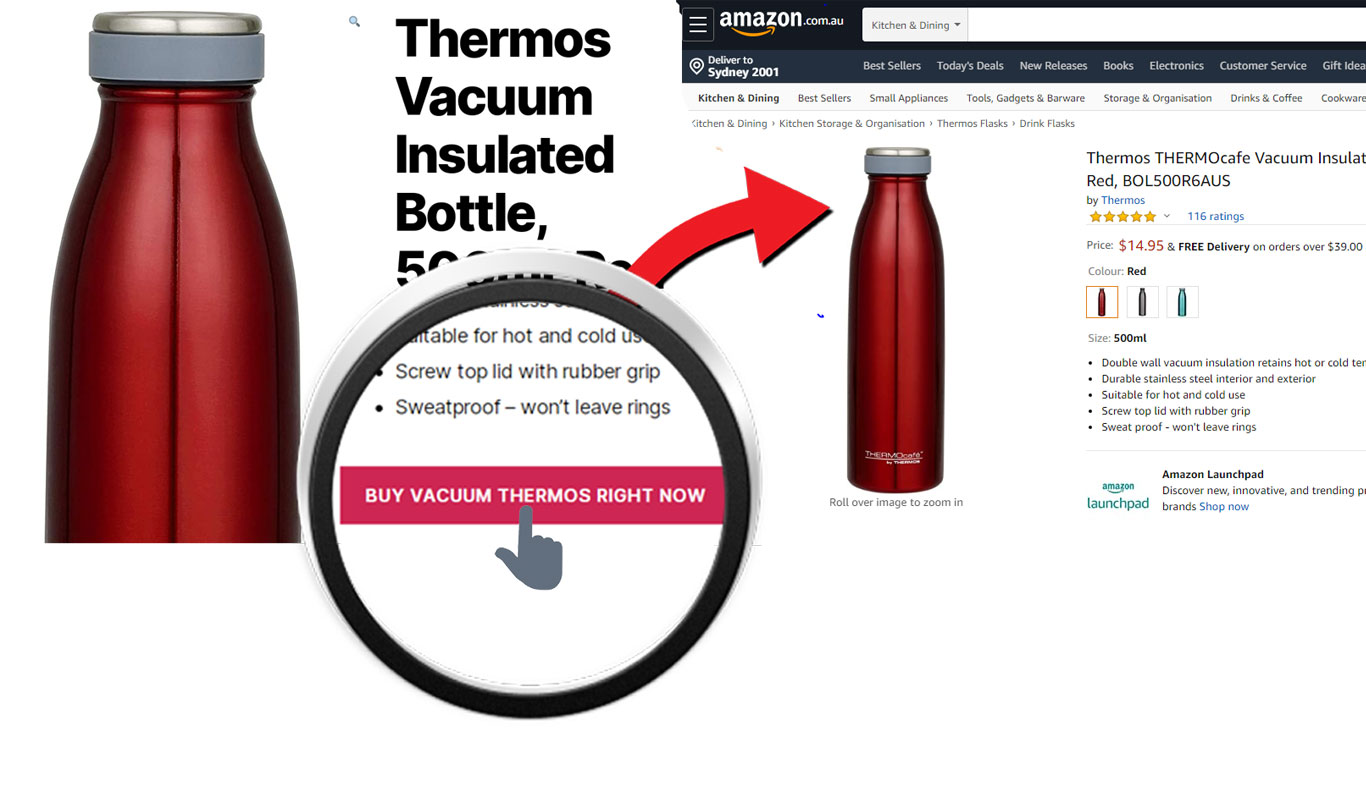
- Add text that you want to display on your Call-to-Action button in the Button text tab.
- Copy-paste product images and fill up rest of the information for the product like Product name, general and short descriptions, while keeping in mind Legal policies or Conditions of Use & Sale for Amazon affiliate program. Publish your product page.
(Note: We suggest not to mention price for Amazon affiliate products, as prices of Amazon are volatile. )
3. How Amazon Affiliate support for WooCommerce Dropshipping works for customers?
↑ Back to topWhen customers visit the product and click on the Call-to-Action button, they are automatically redirected to Amazon product page.
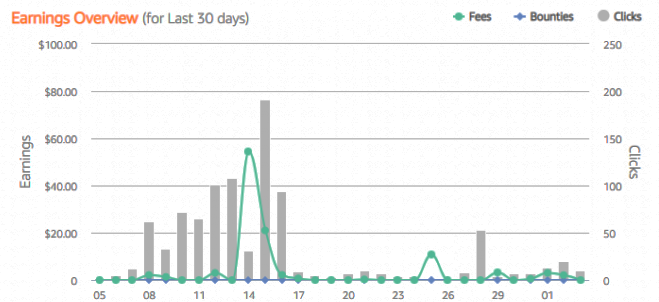
4. How would you get notified about the conversion or click-through?
↑ Back to topWhen your potential customers click on the call-to-action button, you’ll see a grey bar at Amazon Associates’ Dashboard. When you’ll have a successful conversion and earned a fee or bounty you’ll see green and blue spikes respectively. You will also get notified via email.
6. FAQ
↑ Back to top1. How will my drop-ship supplier bill me for the order?
↑ Back to topOften a supplier will allow for NET 30 or charge to your credit card on file. Ultimately how this happens is between you and your drop-ship supplier.
2. How to bulk import and export local suppliers dropshipping products?
↑ Back to topImporting and exporting local suppliers dropshipping products work similar to WooCommerce built-in CSV importer and exporter available at WordPress dashboard > Products next to Add New button in products tab. See the documentation here for details.

After importing products from this you can manually assign suppliers to products that are recently added to your store.
3. Can I bulk-assign suppliers to my existing products?
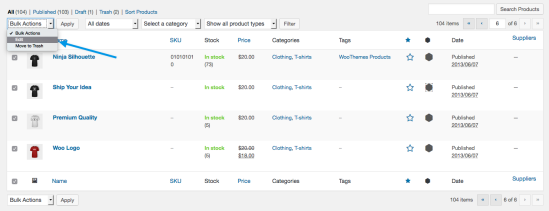
↑ Back to topYes! From the Products page, check the boxes next to the products you want to assign a supplier to and choose Edit from the Bulk Actions menu and click Apply:
Then enter the name of the supplier in the Supplier field:
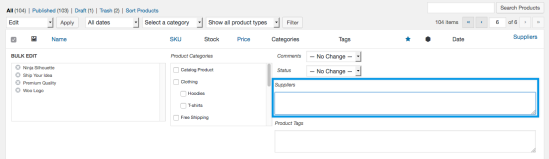
Please note: If the supplier you are assigning already exists, the name of the supplier has to match exactly or it will create a new supplier with the name that you enter (though, it is not case sensitive).
4. Why am I not getting an email for downloadable and virtual products?
↑ Back to topAs for intangible products, shipping isn’t involved, so the orders are updated only in your WooCommerce Orders section and you can check it right there. However, email is sent to your customers, as it is important to get them notified about the product status.
5. What should I do if I want to send supplier the packing slip with the amount they sell product to me and not at what I am selling to my client for ease of business?
↑ Back to top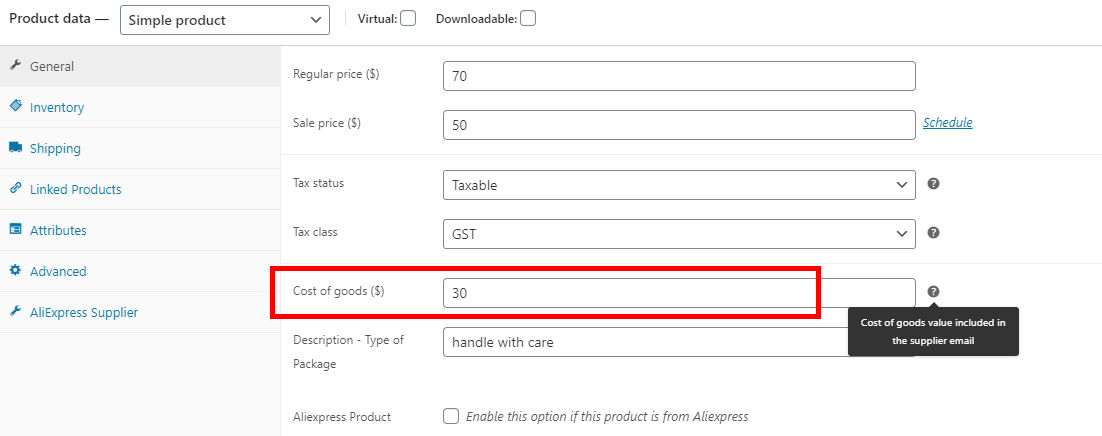
We have added a separate tab for this called “Cost of Goods” on your product editor next to sale price and regular price.
If you want to send your supplier packing slip with the amount they sell product to you mention the price of the product at which you are buying from your seller in Cost of goods tab.
- Now, goto WooCommerce > Settings > Emails and click Dropshipping Notifications.
- Scroll down to Miscellaneous Packing Slip Options
- Make sure you have checked “Show total price in packing slip” and Show “Cost of Goods” instead of the store’s actual “Selling Price” of products in the packing slip”.

6. Can the plugin be used to import the shipping costs from Aliexpress?
↑ Back to topNo the plugin does not import the Aliexpress costs.
This can be set when importing as a fixed value or markup. However the shipping costs is not synced in real time with the Aliexpress Shipping Calculations.
7. What does the following error mean and how do I resolve this when using the Dropshipping for WooCommerce Plugin?
“Error message: Uncaught Error: Call to undefined function cal_days_in_month()”
The issue happens because your PHP version doesn’t have calendar support — this is necessary for the plugin to work.
Pease ask your hosting service provider about this.
7. How do you access the Supplier Dashboard Account?
Suppliers Dropshipping Dashboard can be accessed by using supplier credentials to sign into your WordPress site. An user logged into your WooCommerce site who has the type supplier will automatically be able to access the site and view the dashboard once they have logged in.
Questions & Support
Have a question before you buy? Please fill out this pre-sales form.
Already purchased and need some assistance? Get in touch the developer via the Help Desk.