↑ Back to top
The WooCommerce Conditional Content plugin lets you easily configure alerts, messages, advertisements and additional product content based on a set of rules that you configure to target specific conditions through out your store.
↑ Back to top
The first step in creating conditional content is to create a content block with the content of your choosing. Conditional Content Blocks are created from the WooCommerce Menu -> Content Blocks. The interface is the same as creating a new post or other entry in the system. Choose Add New Content Block to get started writing your conditional content.
↑ Back to top
Use the Rules section to configure the conditions which must be met in order for the content to display. You can choose from the following rule types.
Single Product Output Rules ( these rules can only be used to show or hide content on a Single Product page, since they require data from the current product being viewed ).
Products
Specific Products – Choose what products this content should show up on.
Product Types – Choose to display the content on all products which are of a particular type.
Product in Categories – Choose to display the content on all products in a particular set of categories.
Products with Attributes – Display the content on products that have specific attributes.
Product Price Range – Content will display on products that are in this price range.
Stock
Stock Status – Display the content on products that are in or out of stock.
Stock Level Range – Display the content on products which have inventory in a particular range.
Sales
Sale Start and End dates – Display the content when the product is on sale between these dates.
Sale Status – Display when the product is or is not on sale.
General Output Rules – These rules can be used to further filter Single Product rules, or to define rules that show up else where on the site. Since these rules do not rely on product specific data, they can be used to configure content to show up anywhere on your store.
Membership
Specific Roles – Display the content to specific user roles.
Specific Users – Display the content to specific users.
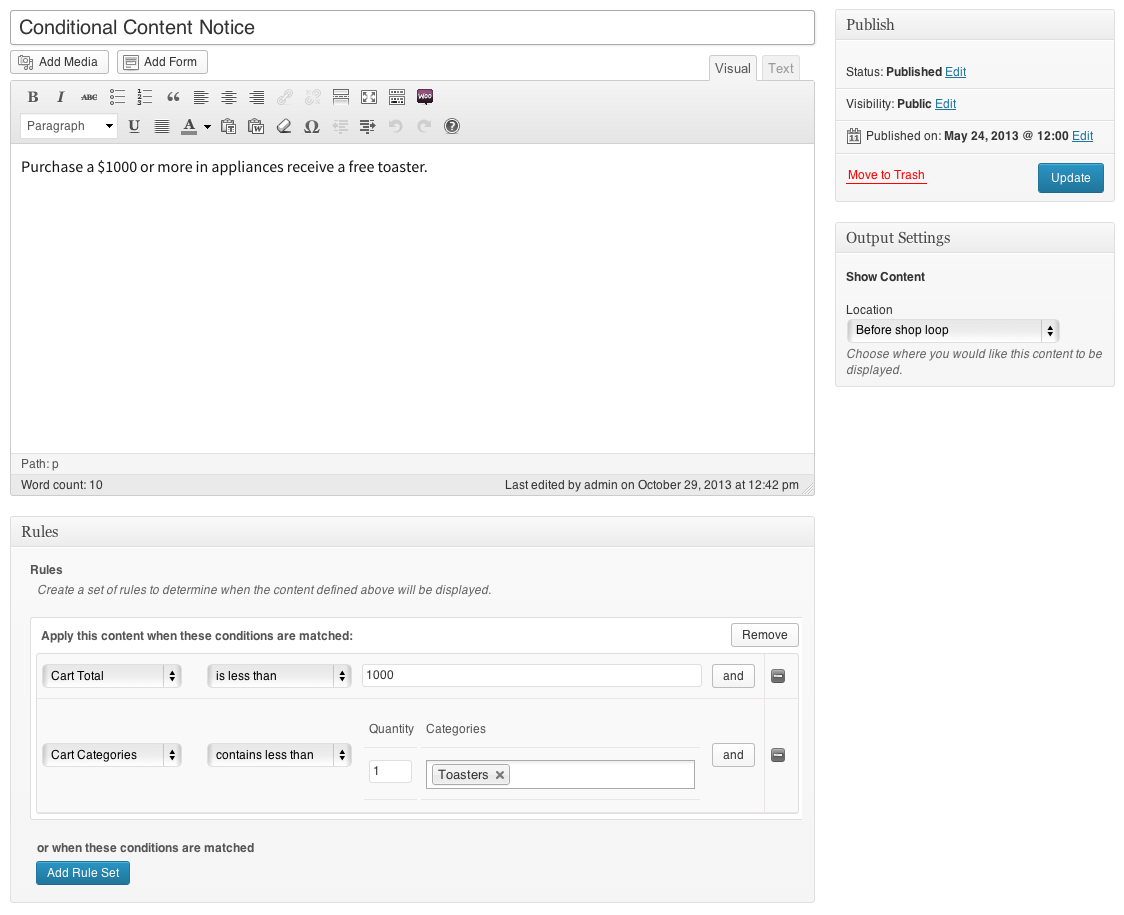
Cart
Cart Total – Display the message when the cart total is more or less than a particular value.
Cart Products – Display the message when particular products are in the cart, at a specific quantity level..
Categories of Products in Cart – Display the message when products from categories are in the cart, at a specific quantity level.
Geography
Country – Display the content block when a user is or is not in a specific country. ( Added in 1.1.5 )
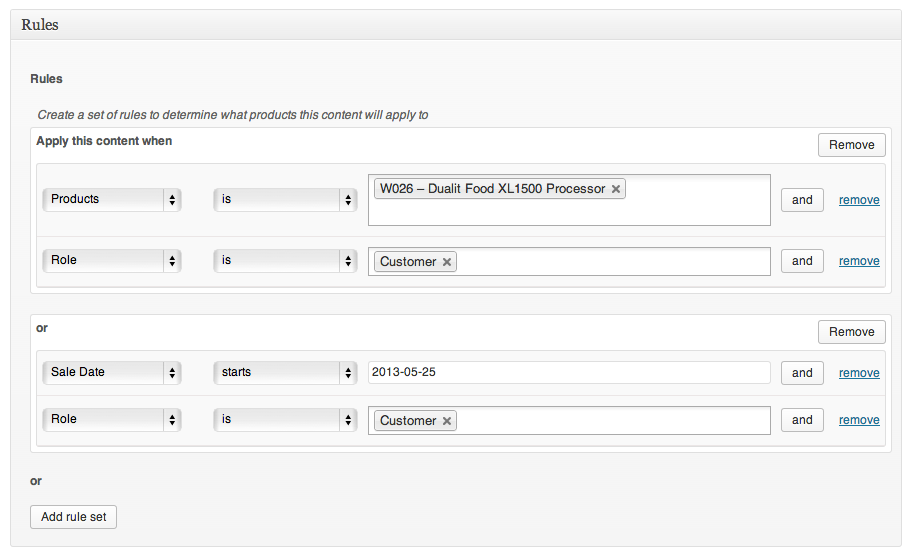
The rule builder has a simple interface for creating a complex set of rules. When you click the “and” button, you are creating a set of rules that must all match. If you need to create an OR statement, click add rule set. When you add a rule set, you will be provided additional sections to add more rules to.
In the following example we have configured a rules that match the following condition. If the product is the Dualit Food XL1500 Processor and the user is in the customer role OR if the product has a sale starting on May 25th and the user is a customer, display the content.
Conditional Content Rule Builder Example
↑ Back to top
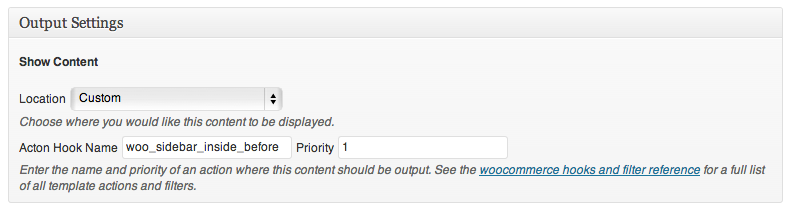
Use the Output Settings location to configure where in your theme the content will display. A predefined set of hooks and actions are provided. See the WooCommerce action and filter reference for an idea of where these hooks are triggered. You can also enter in your own hook and priority to get the content to display in any arbitrary location. To enter your own action, choose Custom and enter the name of the action in the box provided.
Note: Use of Single Product rules will only display the content on the Single Product page, regardless of the action you choose.
In the following example we are choosing to display the content in the sidebar, by hooking into the WooFramework action, woo_sidebar_inside_before. If we used General Output rules, this content would display whenever the sidebar is displayed and the conditions are met. If we used Single Product rules as well, the content would display in the sidebar of Single Products when the conditions were met.
Conditional Content Location Settings ExampleExample of conditional content displayed when an item is running low on stock.Overview of the easy to use rule selectorExample of showing a sale on all items in a particular category.
↑ Back to top
Conditional content can be used to assist in displaying custom pricing structures to your customers. These pricing structures could be pricing rules you have defined in Dynamic Pricing or other coupon or discount plugins.
The way to display the pricing structures is to match the conditional content rules to that of your pricing structure and create content to inform the user of the price structures.
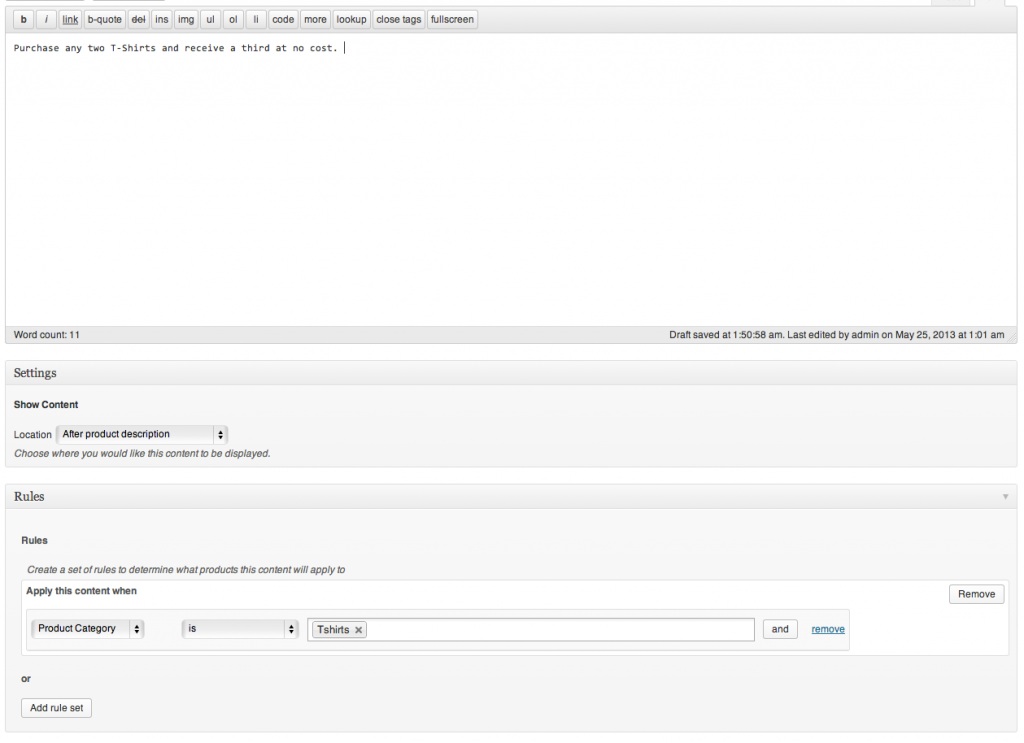
For example, you have a Dynamic Pricing rule that says: Buy One T-Shirt, receive a second T-Shirt for free. You could create Conditional Content with rules of “Cart Quantity of T-Shirt is One and Product Category is T-Shirt”. Use a location filter, such as “After Product Summary” and enter in the text you would like to display to your shoppers when the conditions are met. This allows you to display your custom messages, custom calls to action or generic price tables, when they would make the most sense to your shoppers.
The actual pricing table, sale bubble, call to action, etc.. for the Conditional Content block is up to you to provide. Examples could include include creating a pricing table in the editor, or by using a plugin such as Pricing Tables or creating a call to action bubble, again, provided by you in the content editor of the Conditional Content block.
↑ Back to top
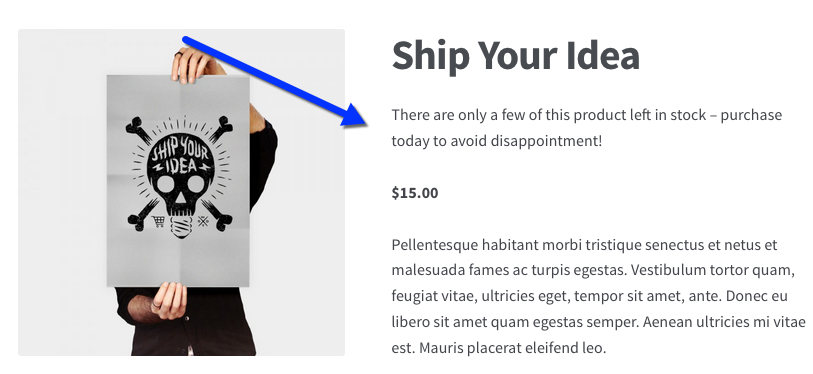
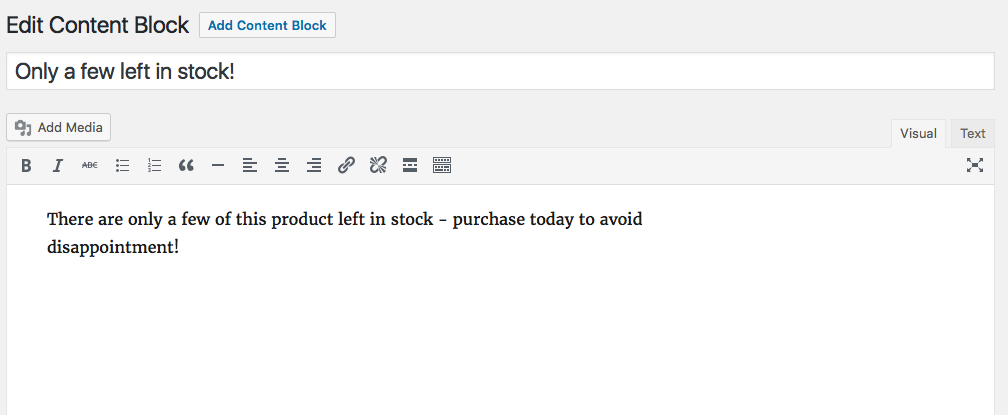
In this example, we’d like to show a content block to let customers know there are only a few items left in stock. It will be set up to show after the product title.
This is what the customer sees:


 This is what the customer sees: