Advanced Shipping Packages allows you to split your cart up into separate shipping packages. Each of these packages is shown separately in the cart and checkout pages and the products that are inside. Each shipping package gets its own shipping rate based on your setup. Using conditional logic, you can create the packages when you want and with the products you want.
Other documentation
↑ Back to top- How to create a fallback package
- How to setup partial free shipping with packages
- Advanced Shipping Packages – Conditions explained
Installation
↑ Back to top- Download the .zip file from your WooCommerce.com account.
- Go to: WordPress Admin > Plugins > Add New and Upload Plugin with the file you downloaded with Choose File.
- Install Now and Activate the extension.
Setup and Configuration
↑ Back to top- Go to: WooCommerce > Settings > Shipping > Packages.
- Enable Advanced Shipping Packages.
 Change Default package name if wanted. All products that do not match the conditions of any of the packages you create, will be added to this default package. The default name is “Shipping”.
Creating a Shipping Package
↑ Back to top- Select Add shipping package.
- Enter a title.
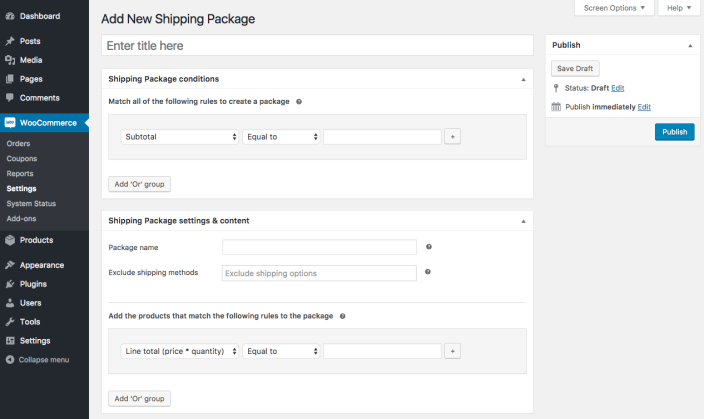
- Add rules to split the order. The first section determines when a package should be created.
- Cart: Subtotal, Quantity, Contains product, Coupon, Weight, Contains shipping class, Contains category
- User details: Zipcode, City, State, Country, User role
- Product: Width, Height, Length, Stock, Stock status
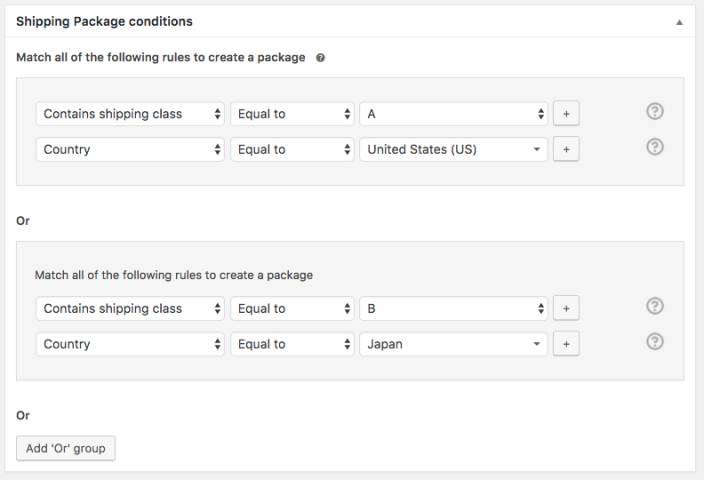
 All the conditions within a condition group must match before the cart is split.
- If wanted, Add ‘Or’ group. You can set a new number of rules that all must be met. Packages will be created if one of those condition groups is met.
- Cart contains products of shipping class “A”, and it is being shipped to the United States; OR
- Cart contains products of shipping class “B”, and it is being shipped to Japan
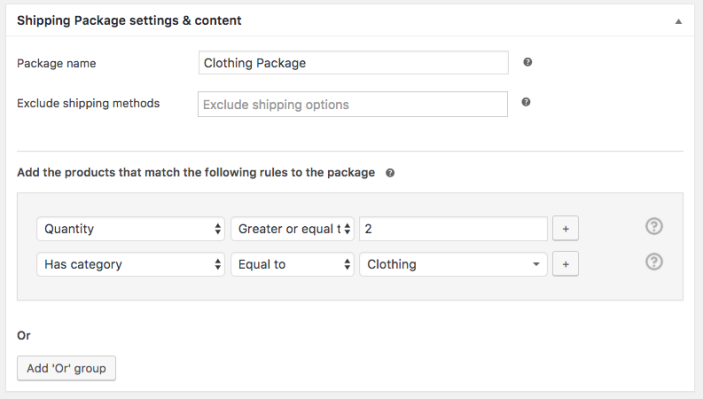
Package Settings & Determine Which Products to Include in the Package
↑ Back to top- Name the Shipping Package. This will be visible in the cart and at checkout.
- If wanted, exclude shipping options. If you do so, the method excluded will not be available for the shipping package. That method will however still be available for the rest of the products.
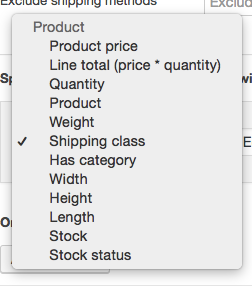
- Choose the rules to add products to the shipping package. These settings work with the same condition logic as the first section. If the conditions of a group are met, products matching these conditions will be combined in one package.
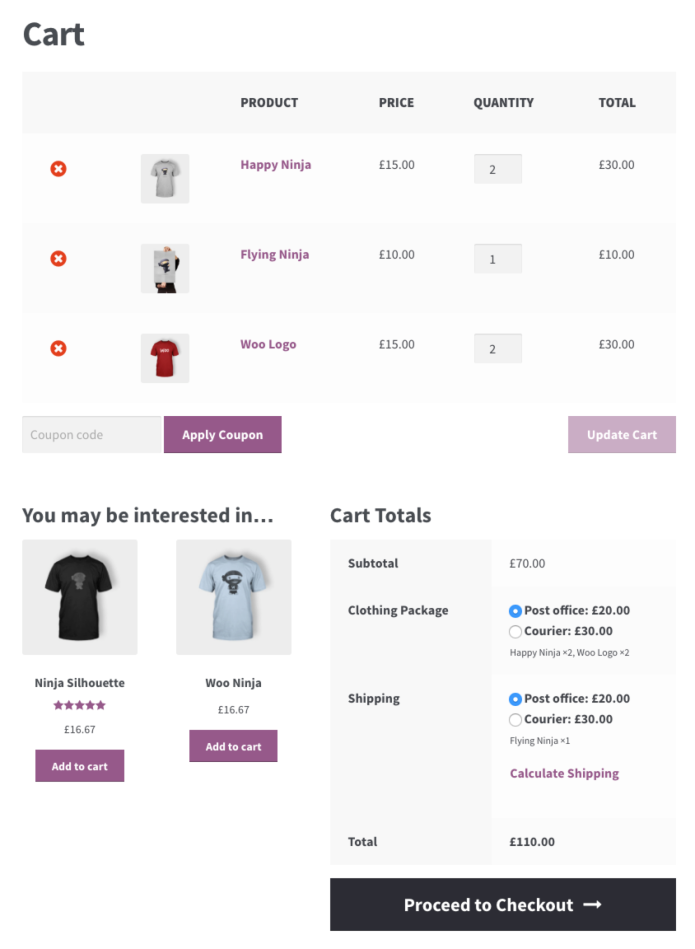
 In the example below, all products in the cart that have a quantity of 2 or more, and are in the category ‘Clothing’ will be put in the clothing package. So if they add 2 Woo Logo t-shirts, 2 Happy Ninja t-shirts, and 1 Flying Ninja t-shirt. The Woo Logo and the Happy Ninja ones will be added to the package, and not the flying Ninja one.
Order and priority of shipping packages
↑ Back to top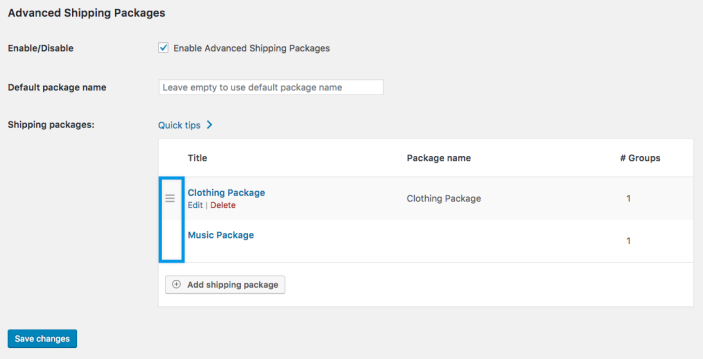
Usage
↑ Back to top