Thank you for choosing WebShop and WooCommerce to create your online store.
Installation
↑ Back to topAfter downloading the WebShop theme zip, we recommend installing it via your site’s WordPress dashboard.
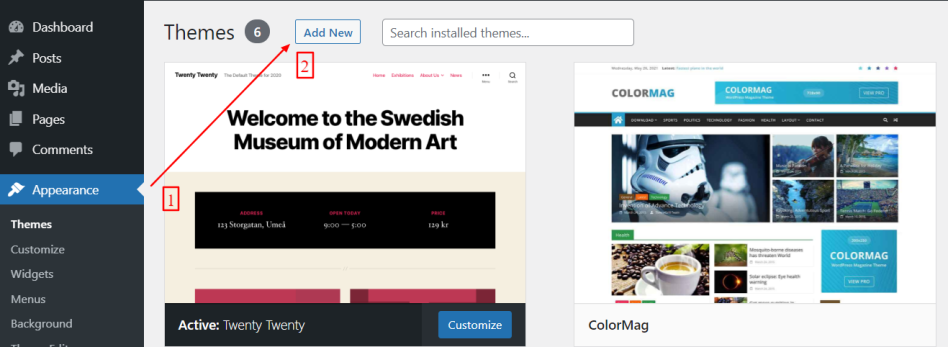
- From your WordPress Dashboard, go to Appearance > Themes and click on Add New button.
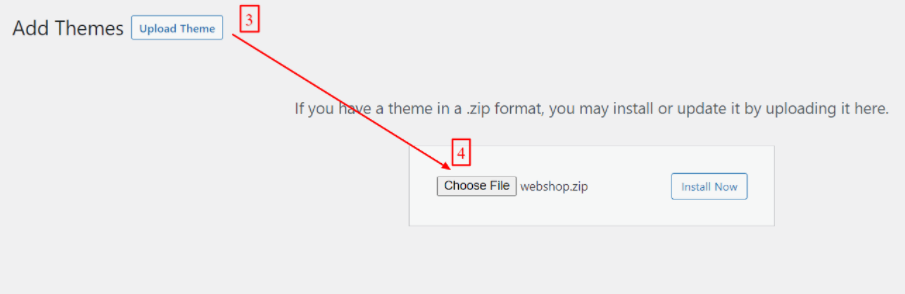
- It’ll redirect you to a new page. Click the Upload Theme button.
- Upload the webshop.zip file you have downloaded from WooCommerce.com to the upload area and click the Install Now button.
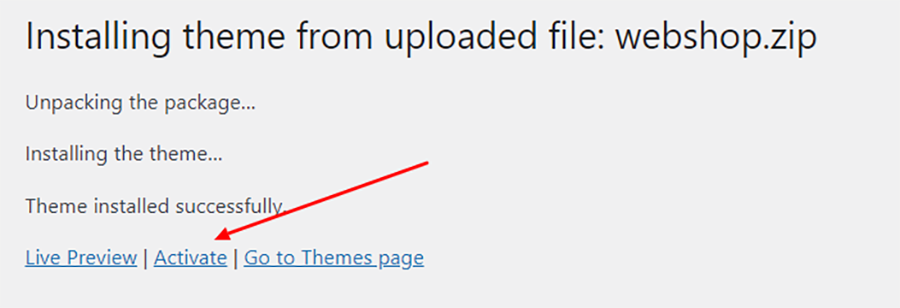
- After upload is successful, click the Activate link to activate the theme.
These steps are demonstrated via screenshots below:
Import Demo Site
↑ Back to topWebShop comes with a pre-built demo site which you can import into your site and start editing content. You do not need to have any website designing and development knowledge allowing you to focus on creating content for your site. Even if you want to change settings in the imported site, this is explained in detail in the customization section of this documentation page.
We recommend importing the demo site in a fresh or empty WordPress installation only.
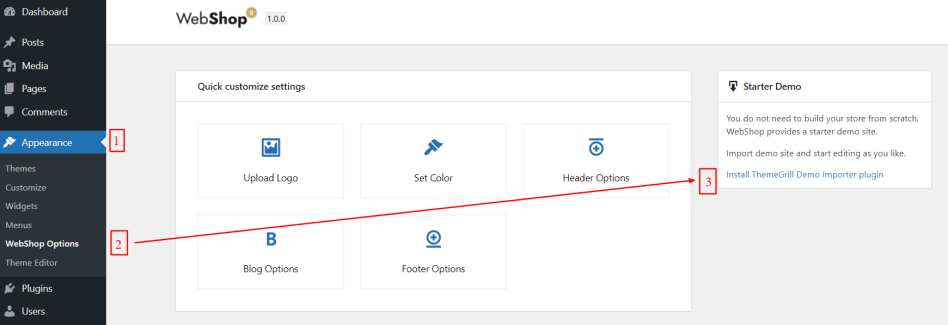
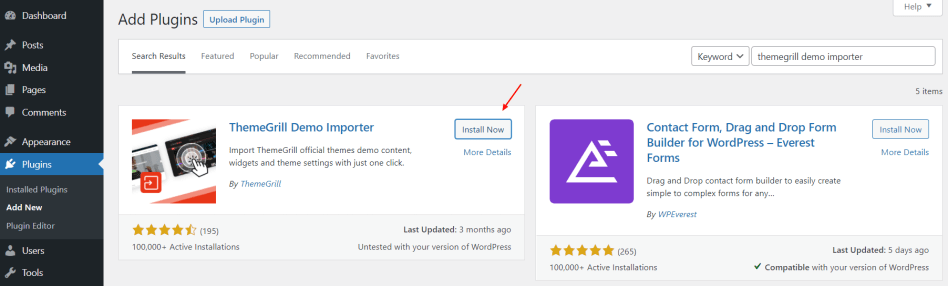
After activating the WebShop theme, go to Appearance > WebShop Options and click the Install ThemeGrill Demo Importer plugin link.
It’ll redirect you to the WordPress plugin installation page. Click the Install Now button on the side of the ThemeGrill Demo Importer box.
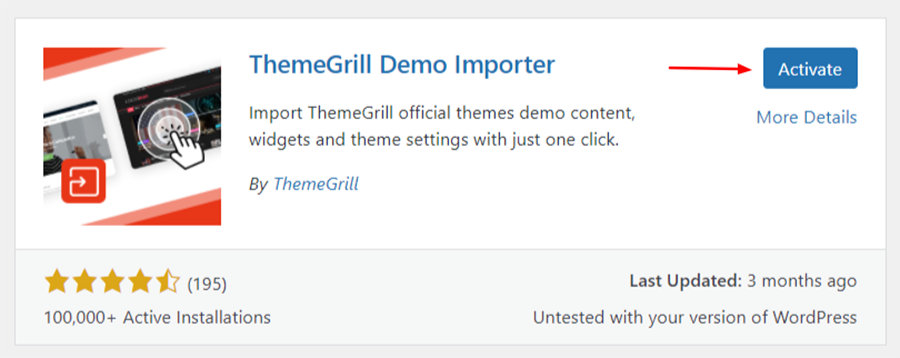
Activate ThemeGrill Demo Importer plugin.
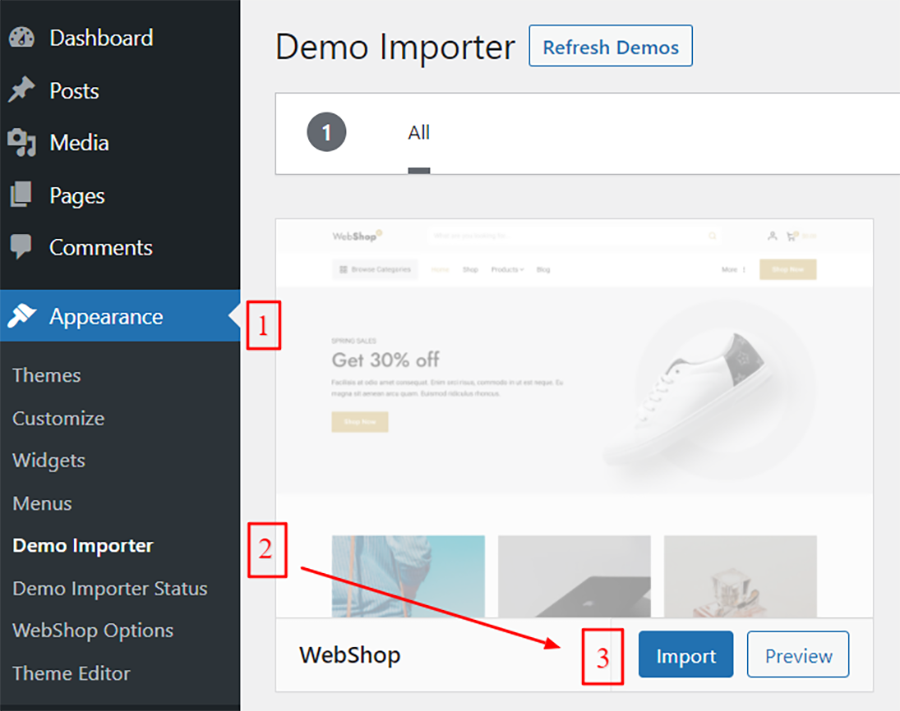
Now, Go to Appearance > Demo Importer. You should see the WebShop demo as shown in the screenshot below.
Hover over the box and click the Import button.
The confirmation box with a heads-up message will appear. Read those carefully and click the Confirm button if all points look good to you.
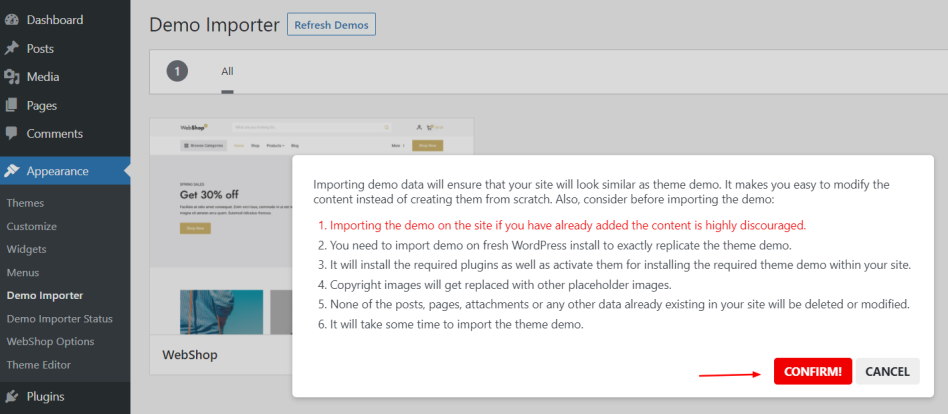
After you confirm, it will proceed with the demo import.
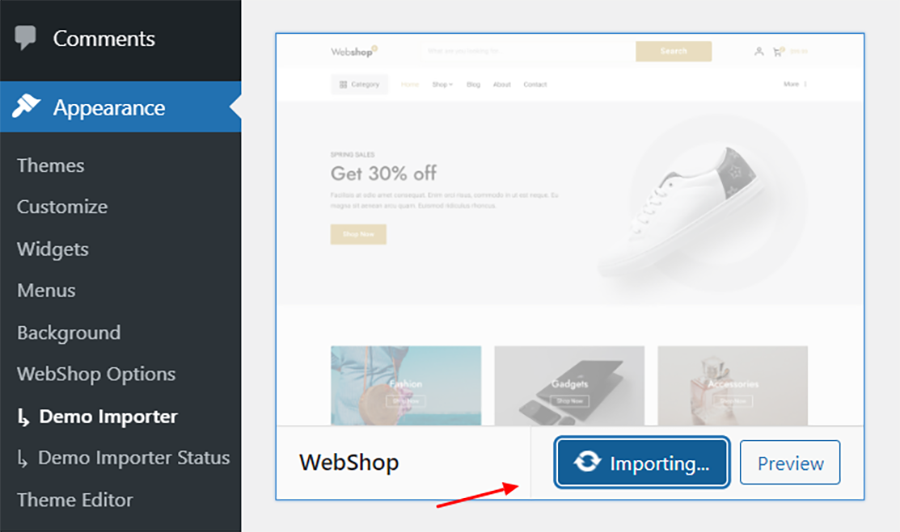
Once the demo is imported, the button text on the box changes to Live Preview and you’ll see the message saying Imported as shown in the screenshot below. Click the Live Preview button to see the imported content on your site.

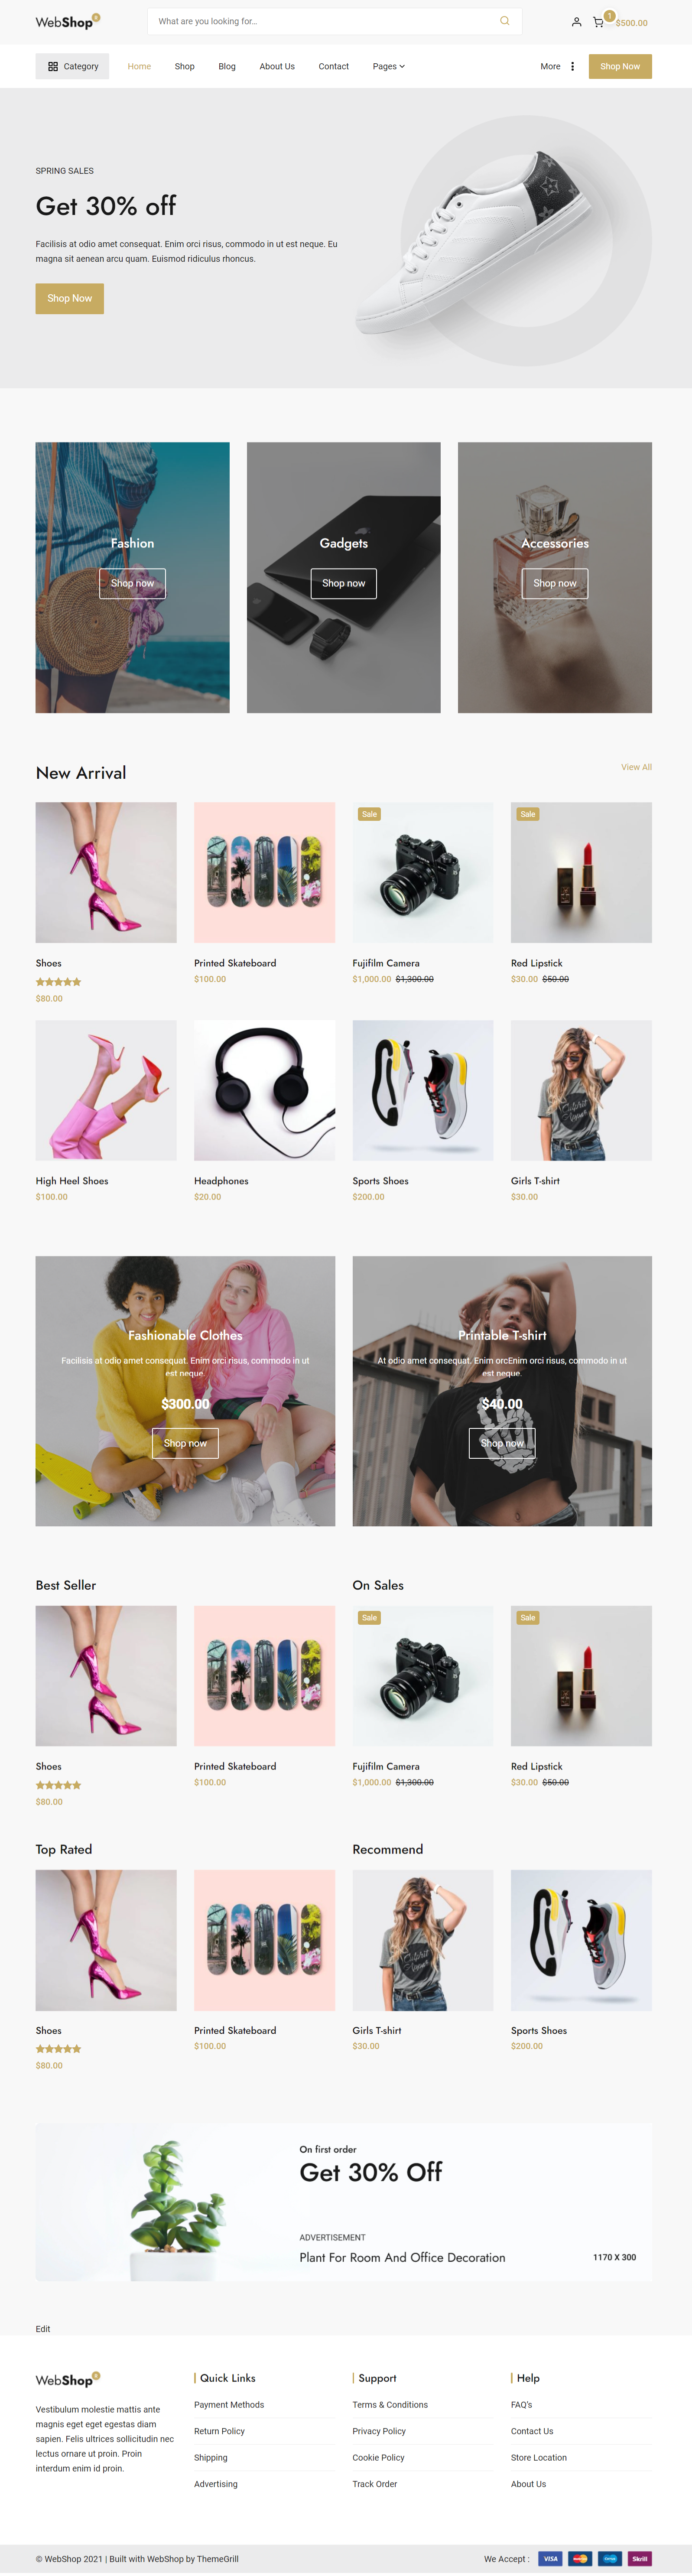
Your site now should look like the WebShop demo site as shown in the screenshot below:
Now, it’s time to edit the content of your site like posts, pages, products, images, etc. Go through the documentation below for the details.
Setting Up Homepage
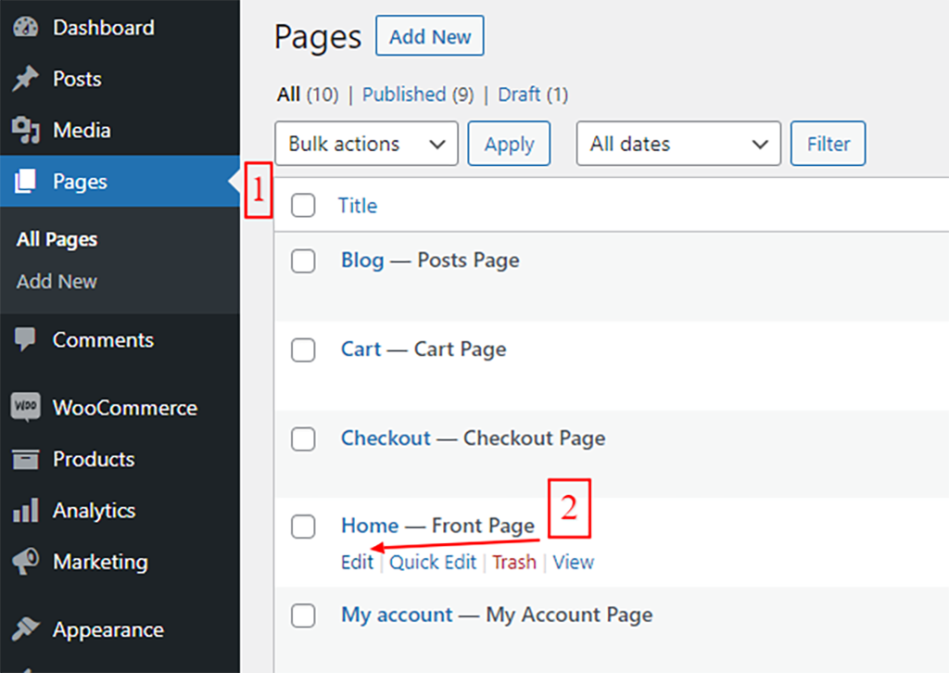
↑ Back to topIf you have imported a demo site, the homepage is already set up. You can just change the content of the page. For that, go to Appearance > Pages and hover over the page that says Front Page and click Edit link as shown in the screenshot below:
If you’re setting up a homepage on your own, follow the steps below:
Setting Up a Static Front Page
↑ Back to topWebShop provides a quick way of setting up a Homepage. Being a Gutenberg-based WooCommerce theme, we recommend using Gutenberg blocks for creating the homepage of your site.
- Go to WordPress Dashboard > Settings > Reading.
- Under Your homepage displays, choose the Homepage and Posts Page.
- Homepage: Appears on the front of your site.
- Posts Page: Blog page that shows posts listing.
You need to go to WordPress Dashboard > Page to create pages if you have not already created pages for home and blog.

- Click Save Changes.
- Open your homepage of your site.
- It should show the content of the page you selected as Homepage rather than post listing.
Set Page Template for Homepage
↑ Back to top- Access the home page WordPress Dashboard as below:
- Go to Pages.
- Hover over the item from the list that says Front Page.
- Click Edit.
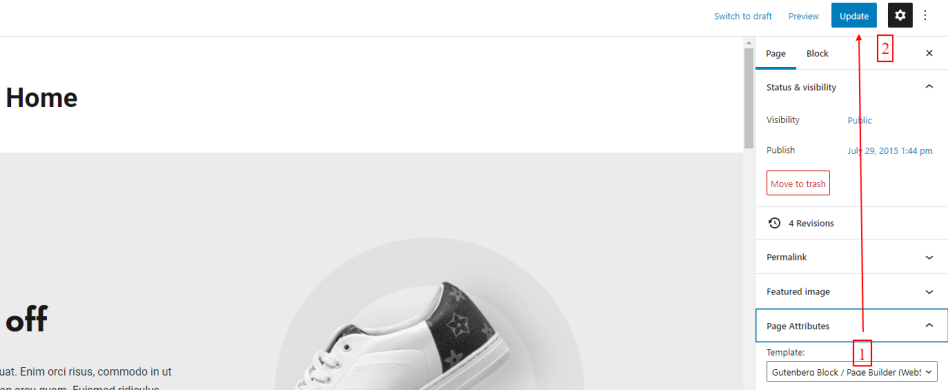
- On the right side of the home page edit screen, click on the Page Attributes.
- From the dropdown under Template, select Gutenberg Block / Page Builder (WebShop).
- Click Update button.
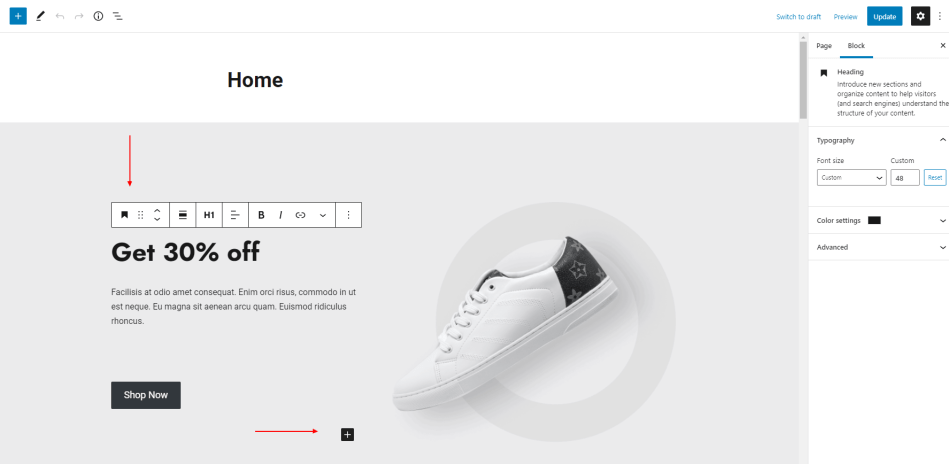
Designing Home Page Using Gutenberg Blocks
↑ Back to topWebShop works very well with Gutenberg blocks that come with WordPress by default or WooCommerce plugin. After installing WooCommerce, you can add Gutenberg blocks just like in our demo site to design a homepage.
More detail at Gutenberg Editor.
Customization
↑ Back to topThe overall customizations for the site’s design can be done via options available in WordPress Dashboard > Appearance > Customize. Basically, options are arranged in the following ways:
- Global: Affects globally throughout the site. For example: primary colors, site layout, sidebar layouts etc.
- Section-wise: Options for header, footer and content area.
- WooCommerce: Customize WooCommerce page, products, design.
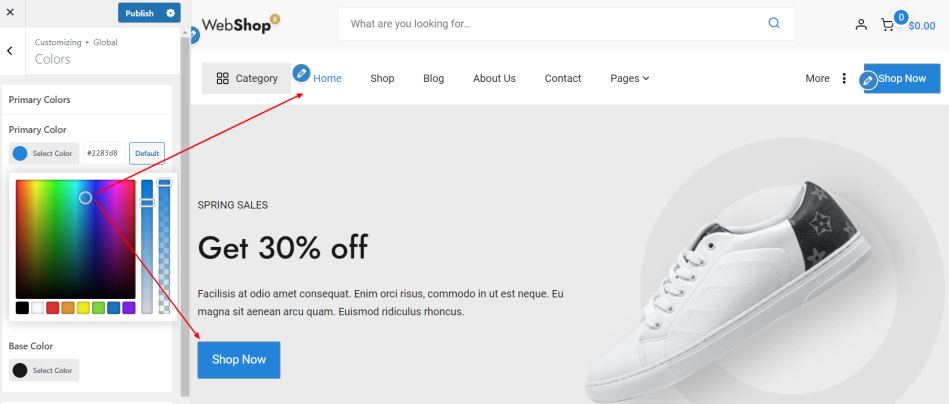
Global Settings
↑ Back to topLocation: WordPress Dashboard > Appearance > Customize > Global
Features:
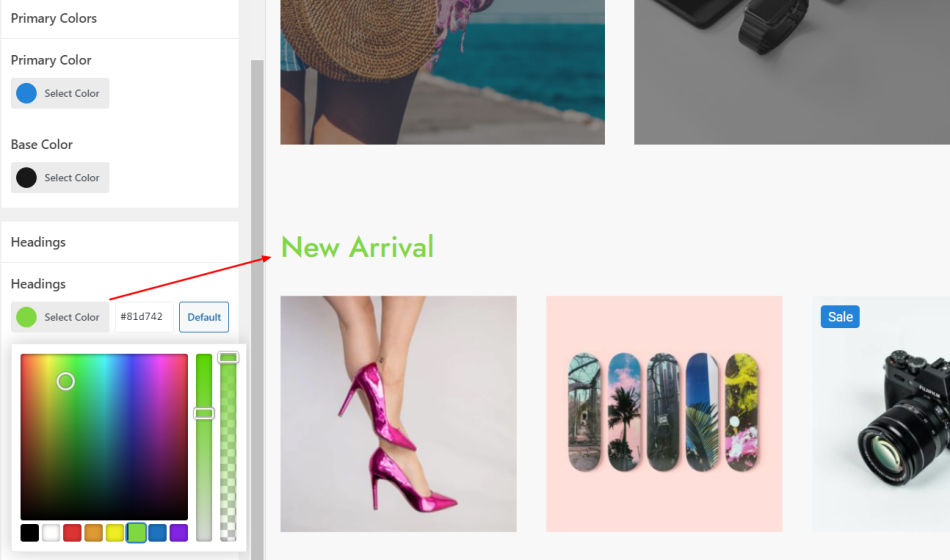
Colors: Change the primary color, content, and headings color of your site.
- Layout:
- Change width of the container that wraps site’s content.
- Change width of the sidebar area.
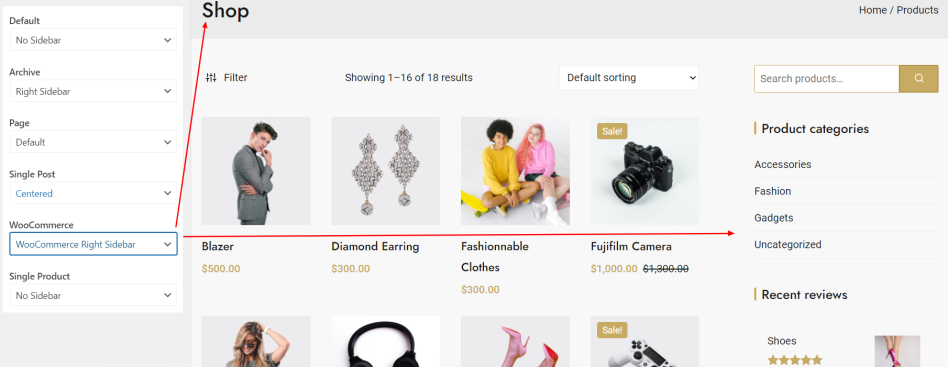
- Choose from different sidebar styles for post, page, archive, WooCommerce and Single Product pages.
- Available sidebar layouts: Right Sidebar and No Sidebar (Full Width)
- Note: Single post has an extra layout called Centered which takes the fixed and lesser width of the container and aligns centered. You can use it if you do not want to show the sidebar on single posts. This makes the posts more readable.
Header Settings
↑ Back to topLocation: WordPress Dashboard > Appearance > Customize > Header
Features:
- Retina Logo: Upload 2X times the size of Normal logo. Example: If your normal logo size is 120*60 then upload 240*120 sized logo. Then, your site’s logo will display nicely on retina devices as well. Note: You need to upload the normal logo as well for normal devices.
- Logo Height: Change size of the logo that appears on your site.
- 3 Menus:
- Primary Menu: Main menu with important links.
- Secondary Menu: Suitable for collection of specific-type links like product categories.
- Tertiary Menu: Use if you want to show more links in the menu.
- Option to change header search placeholder text: Change the text ‘What are you looking for…‘ to any other text of your choice.
- Header Actions: Enable/disable header icons for Account, Cart including amount and number of items on it.
- Header Button: Encourage your audience to go to your important pages like Shop, Contact page etc using this header button. It is fully customizable with button text, link, opening link in a new tab and color options.

- Page Header: Provides the information for where the user currently is browsing. It includes page title and breadcrumbs which you can enable/disable.
- Colors:
- Change the normal and hover colors for Site Title.
- Header background color.
- Menu, sub menu, hamburger colors.
- Secondary toggle button and menu colors and background colors.
WooCommerce Settings
↑ Back to topLocation: WordPress Dashboard > Appearance > Customize > WooCommerce
Customize your WooCommerce shop, product and checkout pages to increase your Sale Conversion Rate. WebShop provides key features like showing the checkout panel after clicking the Add to Cart button, distraction-free checkout page, etc.
Features:
- Checkout Panel After Add to Cart: Encourage users to proceed to checkout immediately after clicking Add to Cart button.
- Distraction-Free View: Remove distractions like sidebar, footer widgets, header elements like menus, search, icons, etc.

- Filter: Show Filter button on the upper part of shop and product category pages. This allows users to filter products by entering their requirements.
- Sale Badge: Change sale badge text, 2 positions are available, and style it as well.
- Image Area Width: Change the width of the image/product gallery area in single product page.
- Product Elements: Show/hide product title, rating, price, Add to Cart button, product tab & meta information in single product.
- Related & Upsell Products: Encourage users to purchase similar or upsell products they are currently looking at.
- Store Notice: Stylize store notice provided by WooCommerce.
- Spacing: Change horizontal and vertical gap between products.
- Alignments: Align product image and content to left, center or full available area.
- Colors: Change color of product title, price, sale badge.
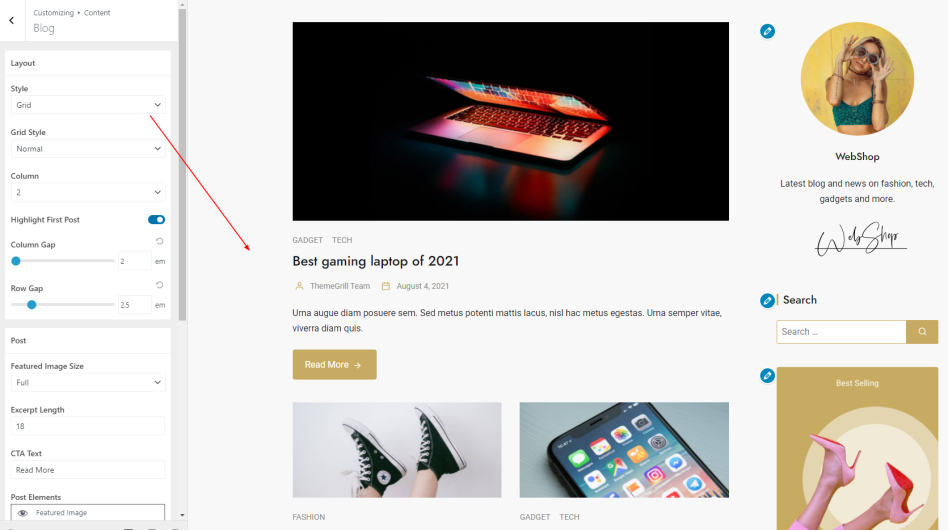
Blog/Content Settings
↑ Back to topLocation: WordPress Dashboard > Appearance > Customize > Content
Blog content on your eCommerce site helps you grow your presence on search engines like Google. Keeping this in mind, we provide lots of blog-related options allowing you to choose the best way to present your articles on your site.
Features:
- Layout:
- Grid: Show articles on various columns grid.
- List: List articles with an image on the left, and content on the right.
- Overlay: Give a unique design with content over a beautiful background image.
- Highlight First Post: Give attention to the first article by making it full width while your blog is on 2 columns grid layout option.
- Spacing: Change horizontal and vertical gaps between articles.
- Featured Image Size: Select a thumbnail image size suitable for the blog layout you selected.
- Change Excerpt Length and Read More CTA button text.
- Post Elements: Show/hide article elements like title, excerpt, content, CTA, featured image, and meta content (category, author, date, comment).
- Numbered Pagination: Easily navigate from one post listing to another post listing page by clicking numbered buttons.
- Infinite Load by Button: Load all articles on the same blog page without reloading the page by clicking the Load More button.
- Infinite Scroll: Load all articles as you go down scrolling helping to boost engagement on your blog.
- Related Posts: Encourage users to read similar posts after reading a post.
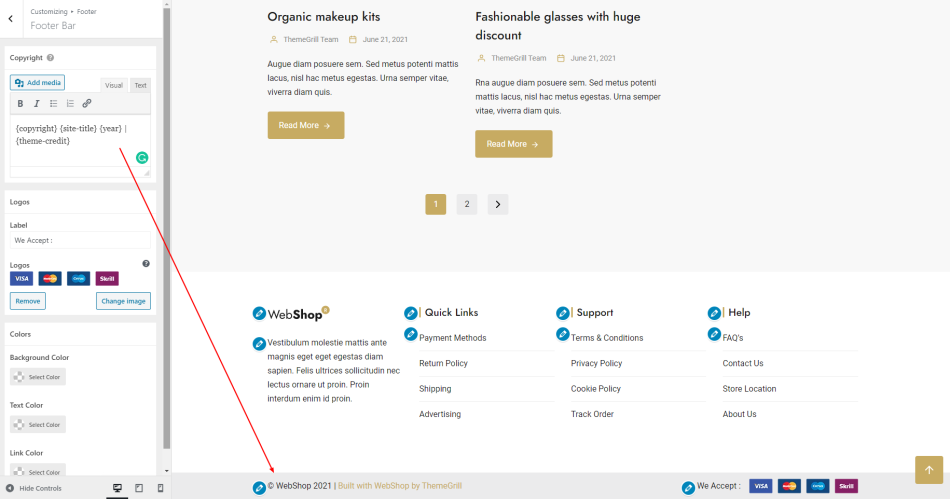
Footer Settings
↑ Back to topLocation: WordPress Dashboard > Appearance > Customize > Footer
WebShop has 2 footer sections: footer column area and footer bottom bar.
Features:
- Footer Column Area: Add WordPress widgets to 4 columns available in the footer area. Background color option to the whole section and color options for each elements like widget title, text, link, list link, list separator are provided.
- Copyright: Change the default copyright text provided by the theme.
- Logo Upload: Upload collection of logos suitable for showcasing partners associating with your business.
- Scroll to Top: Button that appears when users scroll down so that they can click it to get back to top of the page.
- Colors: Change background color of footer bar and color of footer text, links, etc.
Child Theme
↑ Back to topIf you want to add your own custom code to the WebShop theme, then the best way is to use a child theme. Read the article below and use the ready-made child theme for WebShop:
A child theme allows you to change small aspects of your site’s appearance yet still preserve your theme’s look and functionality. It inherits the look and feel of the parent theme and all of its functions, but can be used to make modifications to any part of the theme.
Child Theme: WordPress Theme Developer Handbook