The product variation table plugin for WooCommerce allows store owners to display the table for all the product variations on the product page.
- Download Product Variation Table for WooCommerce and have your .zip file
- At the WordPress admin panel, go to the Plugins section, and click ‘Add New’ to upload and install the plugin you just downloaded from WooCommerce.
- Upload the .zip file to proceed with the installation.
- Wait until the plugin installs. After successful installation, activate the plugin, and move on to configuration settings.
At the WooCommerce admin panel, go to WooCommerce >Settings>Variation Table to configure the general settings for the variation table plugin. Here you will find the four Tabs of the Variation Table General Settings, Display Settings, Table Settings, and Export Buttons Settings.
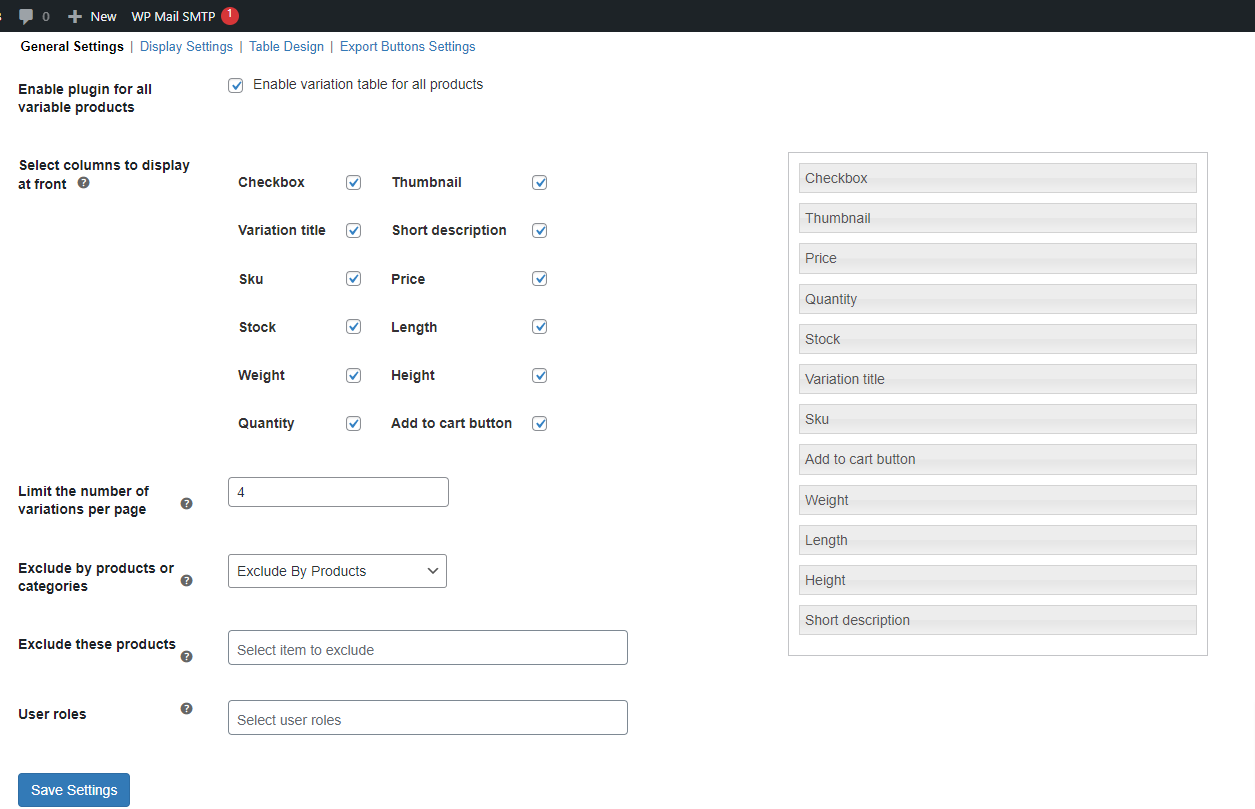
In this section, you can configure the following settings:
- Enable variation table plugin for all products.
- Select the product variations table data to be shown at the front. The following options can be selected:
- Checkbox
- Thumbnail
- Variation Title
- Short Description
- SKU
- Price
- Stock
- Length
- Weight
- Height
- Quantity
- Add to Cart Button
These tabs are displayed in the order you select them. You can reorder and rearrange these tabs with simple drag and drop to create custom product variation tables.
- Select the number of product variations to be displayed per page.
- Choose to exclude specific products and categories.
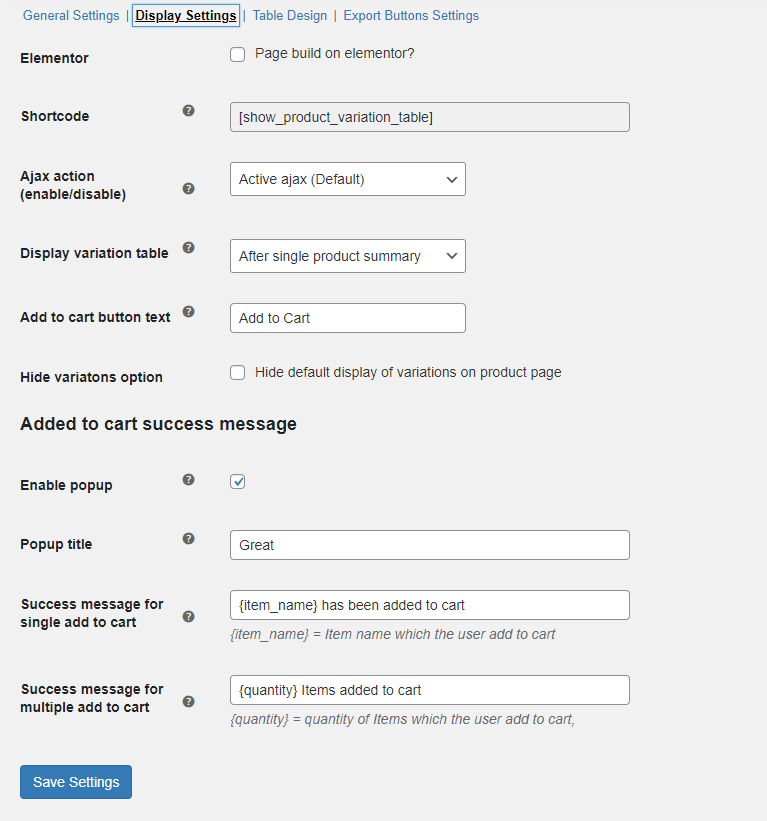
You can set the following in the display settings.
- Elementor: (Enable the checkbox if your page is built on Elementor builder.)
- Short Code: (Add shortcode to display variation table for page builders like elementor)
- Ajax Action: (Enable/disable Ajax action or choose page refresh)
- Display Variation Table: (Display variation table before/after single product summary)
- Add to cart Button Text: (Customize text for the “Add to Cart” button)
- Hide Variation Option: (Check this option to hide the default display of variations on the product page)
Added to Cart Success Message
- Enable Popup: Click on the checkbox to enable the added to cart success message popup.
- Popup Title: Enter the title you want to display on the popup.
- Success Message for Single Add to Cart: Here enter the message that you want to display in the popup in case of single add to cart.
- Success Message for Multiple Add to Cart: Add the custom text for multiple add to cart success messages for the popup.
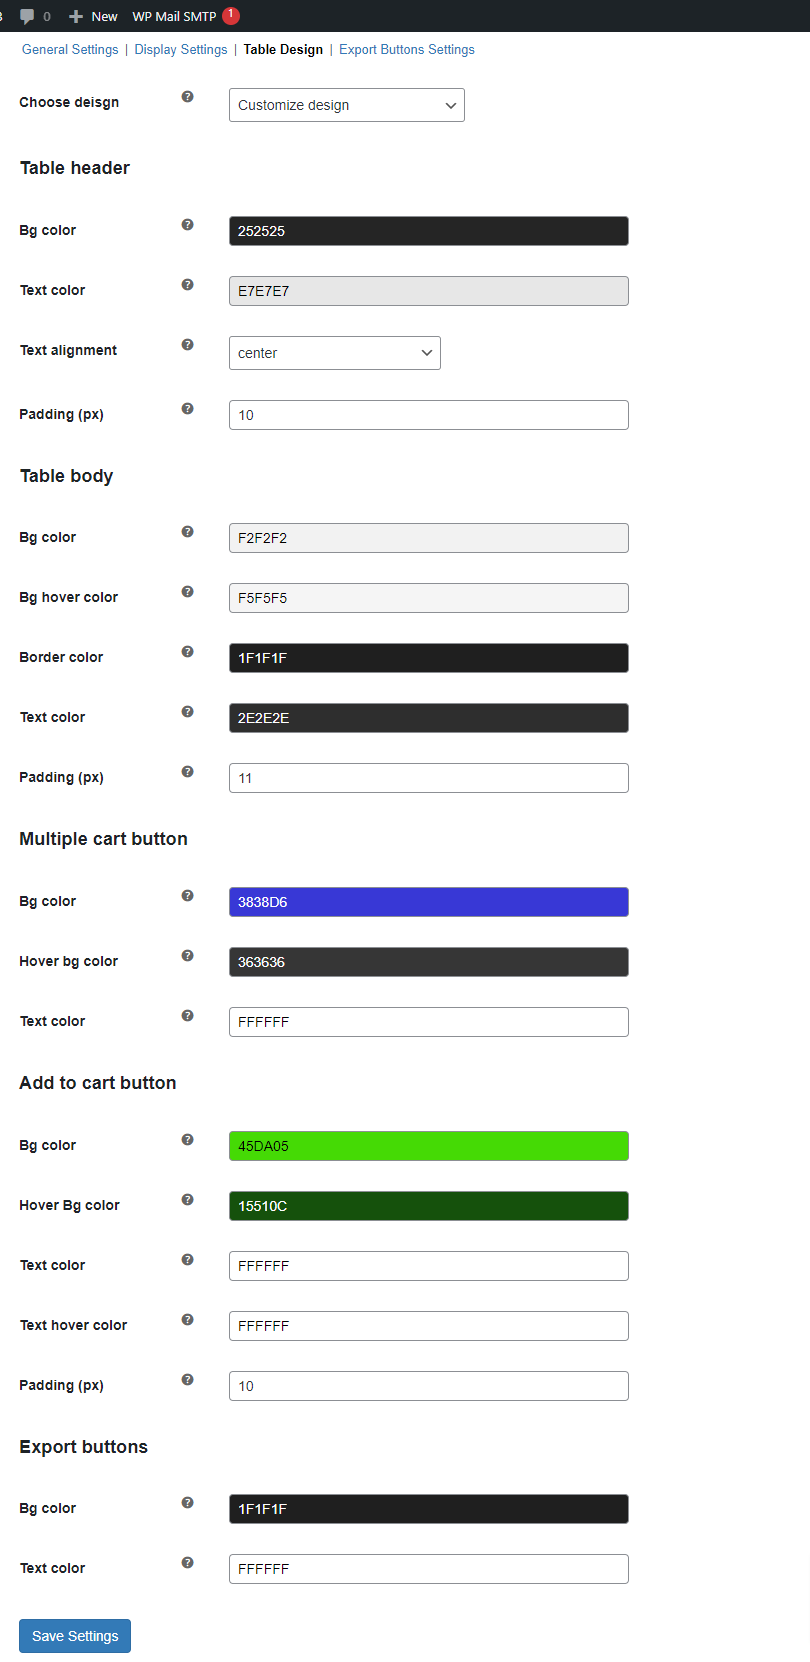
Here you can choose the design for the product variation table. You can either choose the default design or customize the table design. You can customize the following settings:
- Customization for Variation Table Header
-
-
- The Background color of the table header
- Text color of the table header
- Text alignment i.e, left, middle, or right.
- Padding for table header.
- Customization for Table Body
-
-
- Background Color
- Background Hover Color
- Border Color
- Text Color
- Padding Value
- Customization for the Multiple cart button
-
-
- Background color
- Hover Background Color
- Text Color
- Customization for the Add to cart button
-
-
- Background Color
- Hover Background Color
- Text Color
- Text Hover Color
- Padding
- Customization for the Export buttons
-
-
- Background Color
- Text Color
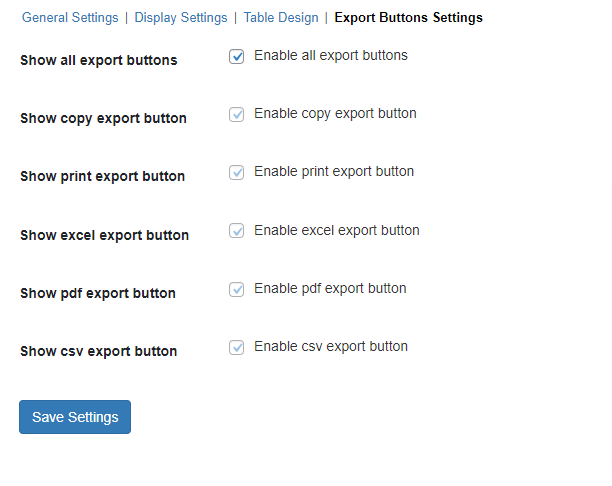
 In this tab, you can select from the various Export Buttons which you want to display on the product page. You can enable/disable the following export buttons:
- All Export Buttons
- Copy Export Button
- Print Export Button
- Excel Export Button
- PDF Export Button
- CSV Export Button
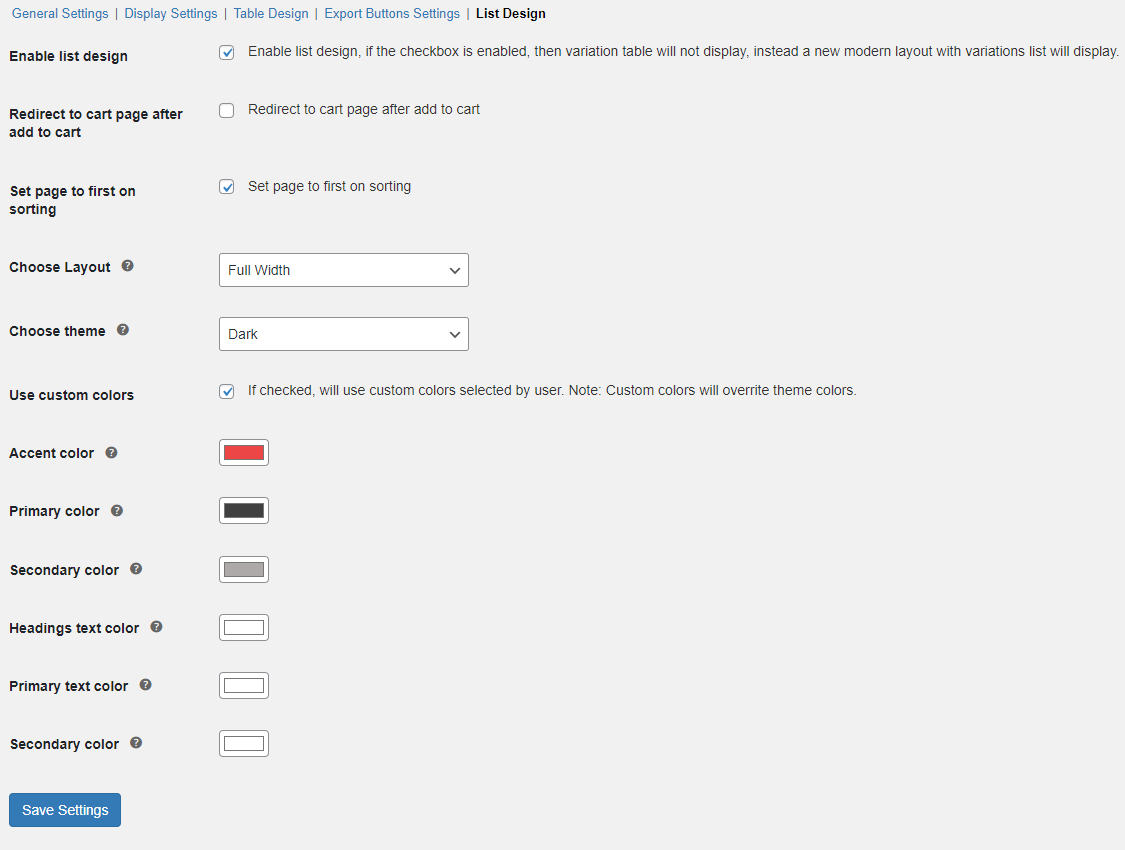
 In this section of the Woo Variation Table plugin, you can enable and configure the list design for WooCommerce product variations.
- Enable list design: Click the checkbox in order to enable list design to display product variations.
- Redirect to cart page after add to cart: Enable the checkbox if you want to redirect customers to the cart page after the product(s) are added successfully to the cart.
- Set page to first on sorting: Click the checkbox in order to set page to first sorting.
- Choose layout: Choose the preferred layout for the list design. Choose from the dropdown, from the following:
- Choose theme: Choose the theme you want to set for the list design. You can set the theme as:
- Use custom colors: Check the box if you want to use custom colors for the list design. This will override the default theme colors that you have selected previously.
- Accent color: Select the accent color using the color picker.
- Primary color: Choose the primary color for the list design.
- Secondary color: Select the secondary color.
- Headings text color: Select the color you want to set for the headings text.
- Primary text color: Use the color picker to select the primary text color.
- Secondary text color: Select the secondary text color.
 At the WooCommerce admin panel, go to Products and add or edit any variable product. In product settings move to the Product Data section and click the Variation Table tab.
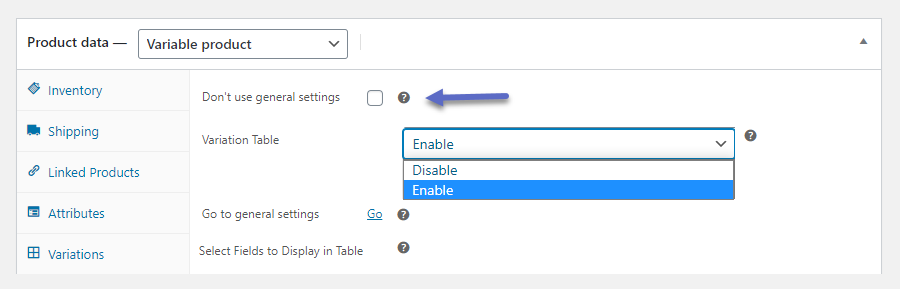
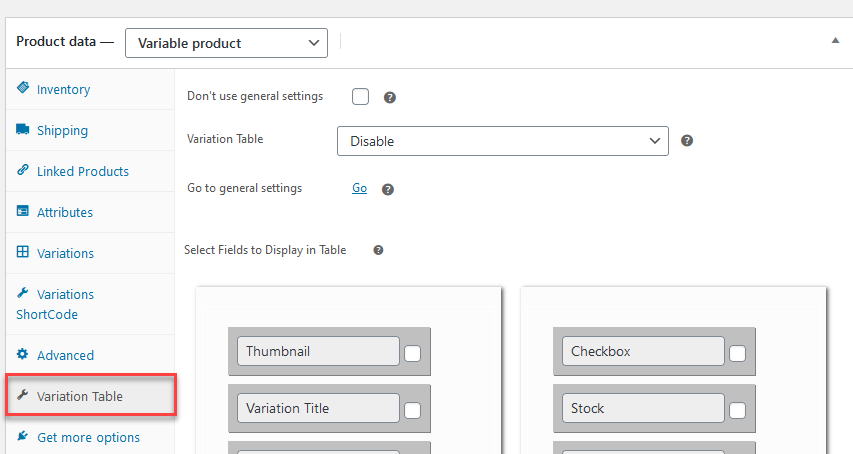 In this tab, you have the option to use General Setting configurations or product-specific configurations.
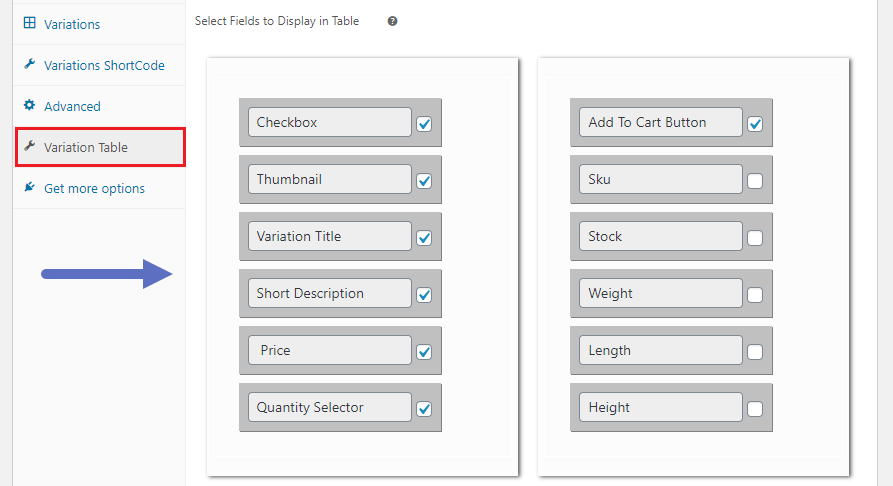
 Here you will find all the data for variations such as Title, Price, Image, Short Descriptions, Stock, etc. on product level. You can choose the data you want to display in the table.
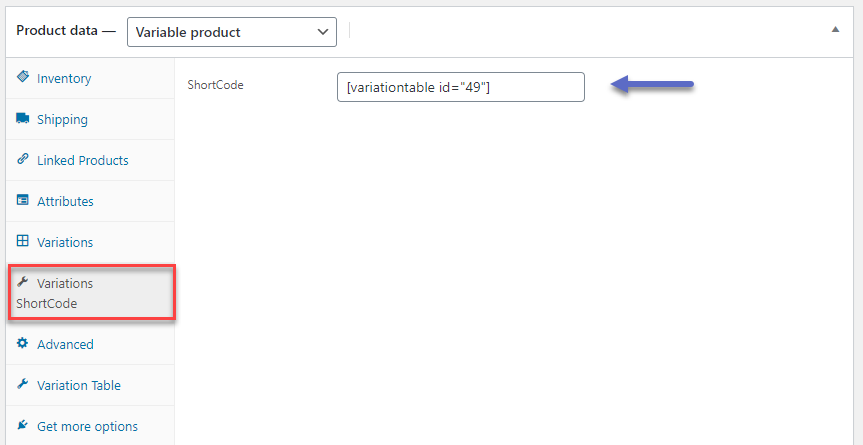
 You can also use the shortcode specified in the the Variation Shortcode tab to display the table anywhere on the product page.
- How to add a product variation table in WooCommerce?
After installing the WooCommerce variable product table plugin go to WooCommerce >Settings>Variation Table. From the general settings section, you can enable product variation table for all the products or exclude specific products.
- How to customize the product variation table?
In the general settings section of the WooCommerce attributes table, you can select from multiple columns that you want to display including Checkbox, thumbnail, variation title, short description, SKU, price, and much more. Moreover, you can also arrange the position of these columns by the simple drag and drop method.
- Can I display the variation table on builders like elementor?
The WooCommerce variation table plugin enables you to display the product variation table on most common page builders by simply adding a shortcode.