Overview
↑ Back to topAs of WooCommerce 8.3, Cart and Checkout blocks are available as the default experience. WooCommerce Twilio SMS Notifications has not yet been updated to be compatible with those blocks, so we recommend following this guide to revert to Cart/Checkout shortcodes. Additional plugin updates will soon be released to ensure compatibility with the new block checkout. Please check out this page for the latest updates or reach out to our support team with any questions!
Installation
↑ Back to top- Download the extension from your WooCommerce dashboard.
- Go to Plugins > Add New > Upload and select the ZIP file you just downloaded.
- Click Install Now and then Activate.
- Click the Configure link and read the next section to learn how to setup the plugin.
Setup and Configuration
↑ Back to topFinding your Twilio credentials
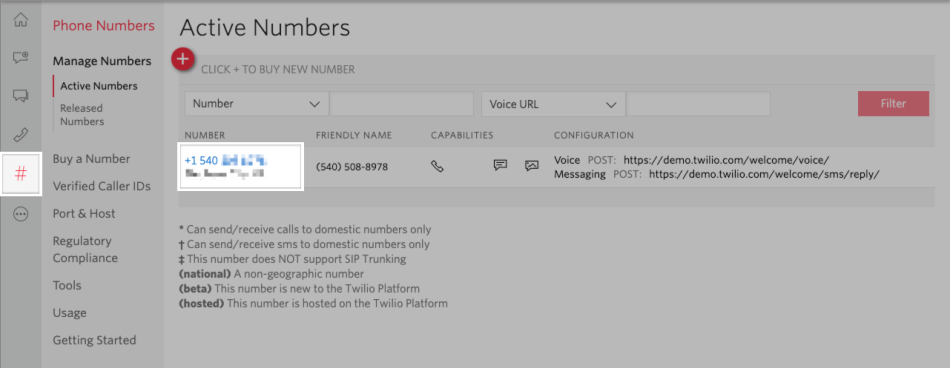
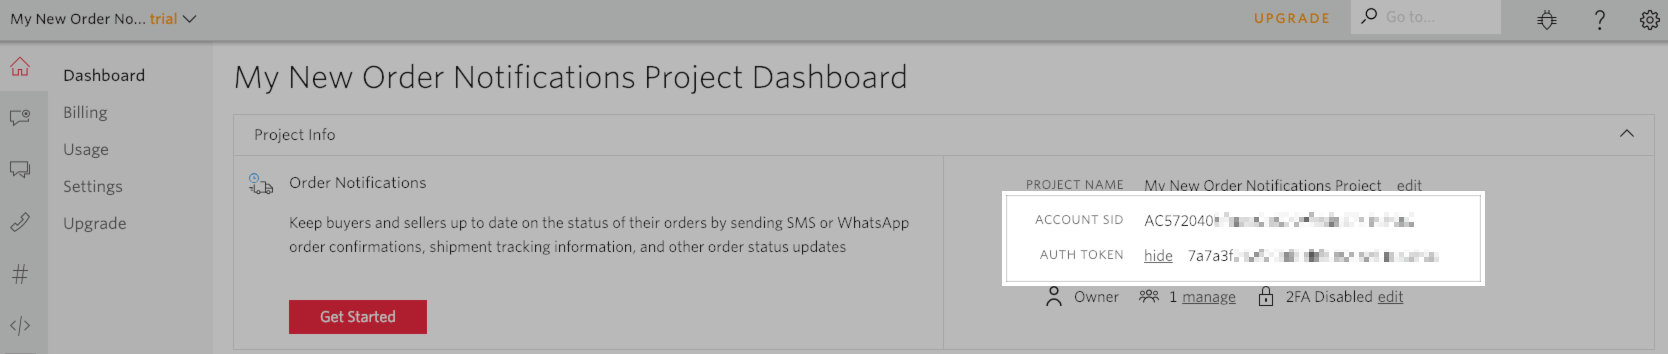
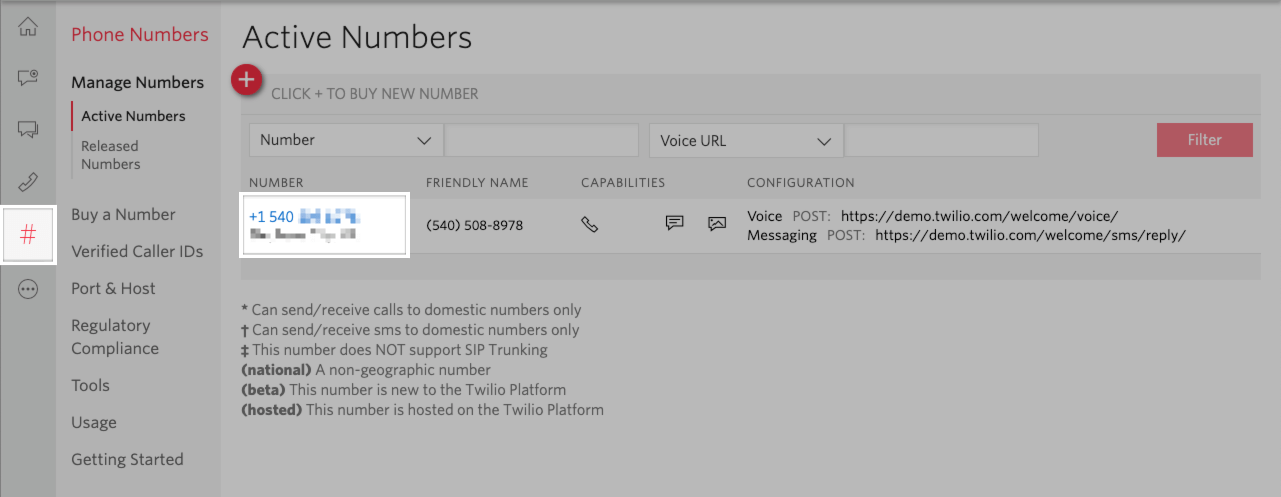
↑ Back to top- Log into your Twilio console.
- Copy your Account SID and Auth Token to enter in your Connection Settings.

- Select the # to go to the Phone Numbers menu and copy the phone number that you will enter in your Connection Settings as your From number.
Extension Settings
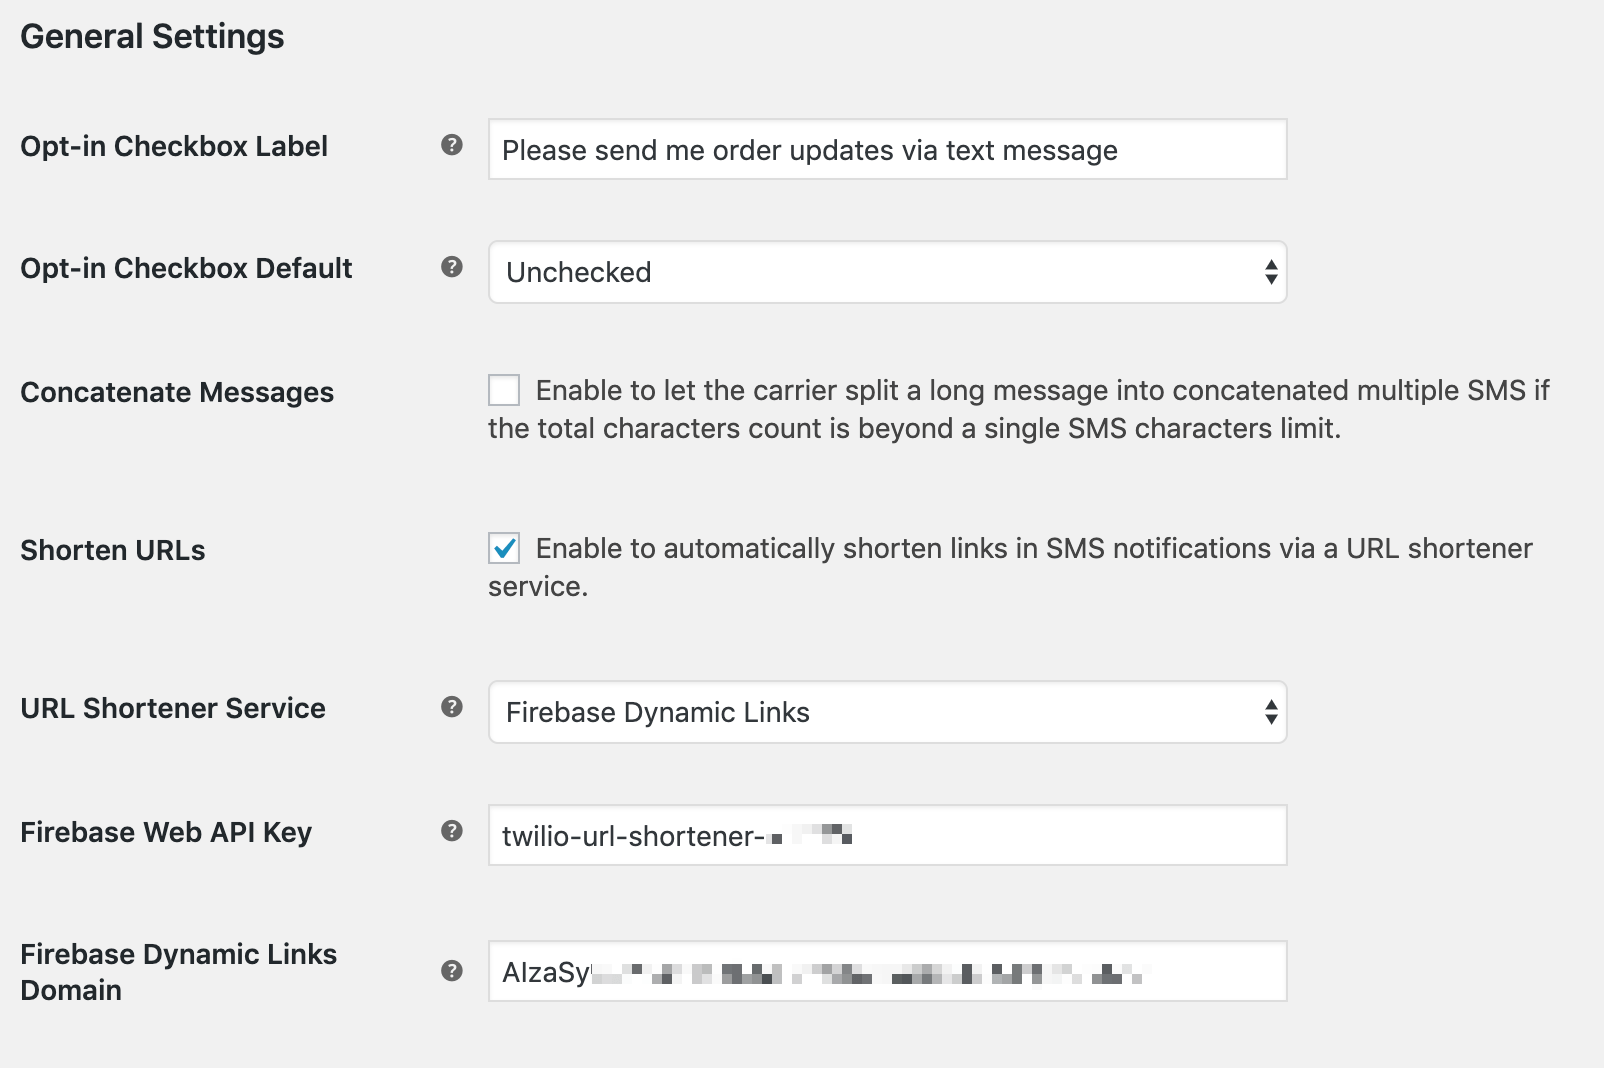
↑ Back to topGeneral Settings
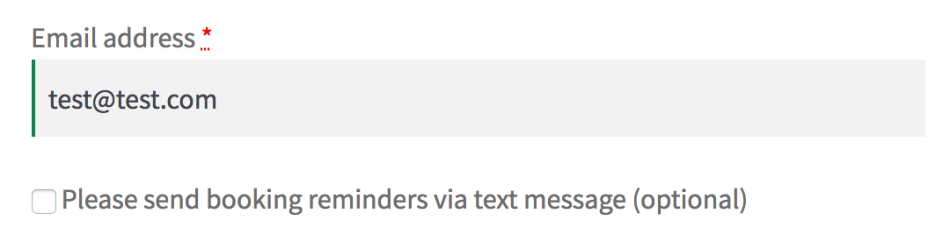
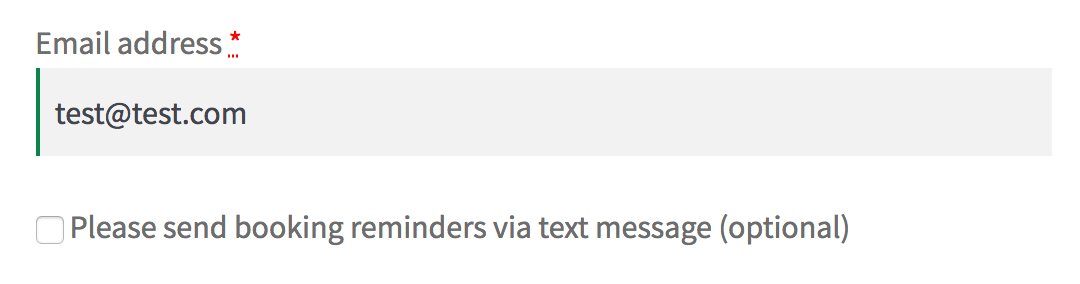
- Opt-in Checkbox Label – The text for the opt-in checkbox on the checkout page.
If you leave this field blank, the opt-in checkbox is disabled and ALL customers will receive SMS updates. Be very sure you want to do this.
- Opt-in Checkbox Default – The default state for the opt-in checkbox on the checkout page; we recommended leaving this as un-checked.
- Concatenate Messages – Check to allow mobile carrier to divide long messages into multiple messages if the total character count exceeds the SMS characters limit. If disabled, long messages may be cut off with ellipsis (“…”) at the end of truncated messages.
- Shorten URLs – Automatically shorten all URLs in SMS messages.
- URL Shortener Service – Use the Firebase Dynamic Links API to short URLs.
- Firebase Web API Key – Enter your firebase project API key. Click here for instructions on generating the API key.
- Firebase Dynamic Links Domain – Enter your custom Firebase subdomain, without adding the http:// or https:// it.
Admin Notifications
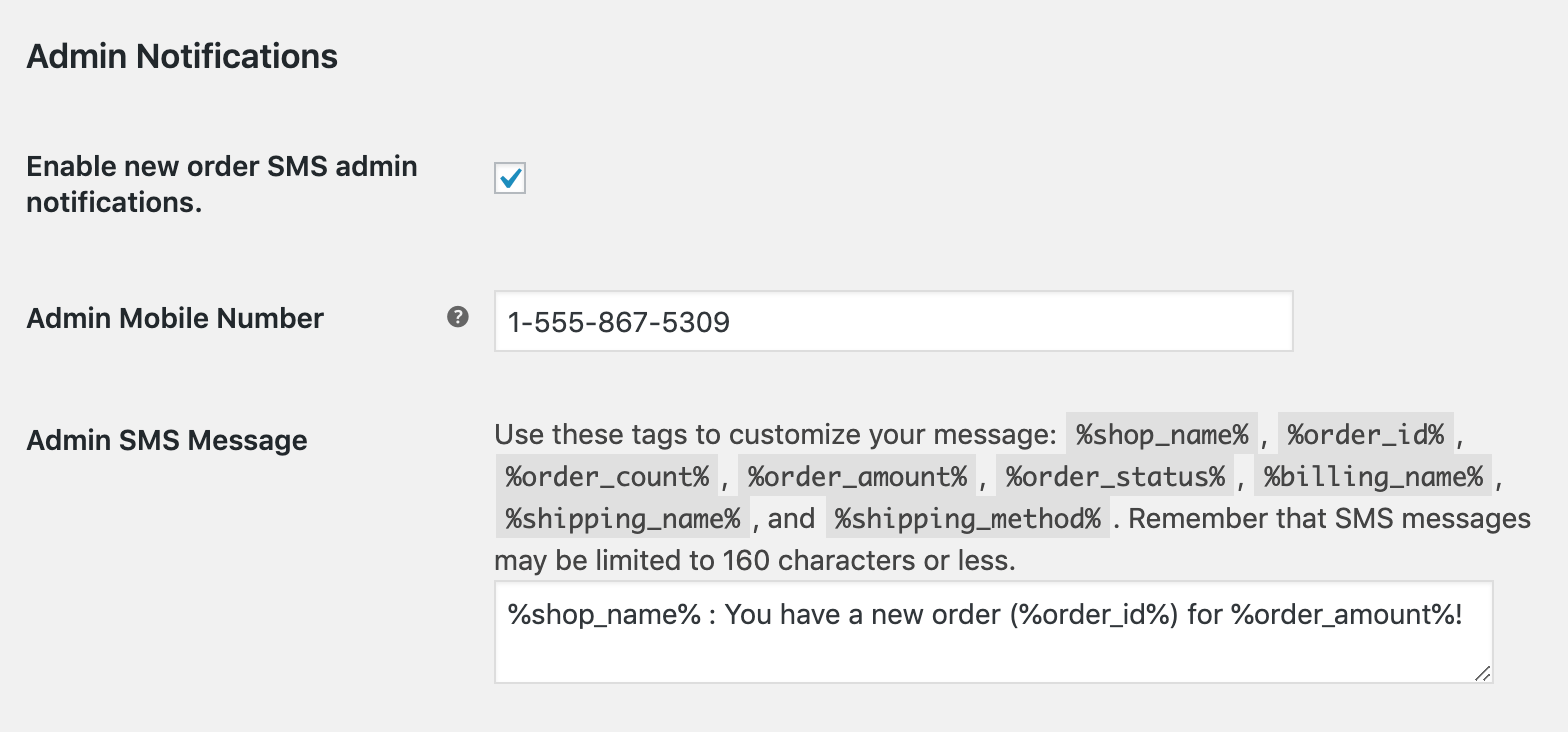
- Enable new order SMS admin notifications – If enabled, SMS messages will be sent to the admin mobile number.
- Admin Mobile Number – Enter the number(s) to send new order notifications to. Include your country code if outside the US. Send notifications to multiple numbers by separating them with a comma.
- Admin SMS Message – Customize the message that is sent to admins for new orders. You can include message variables (as listed below) to include additional information in this message.
Customer Notifications
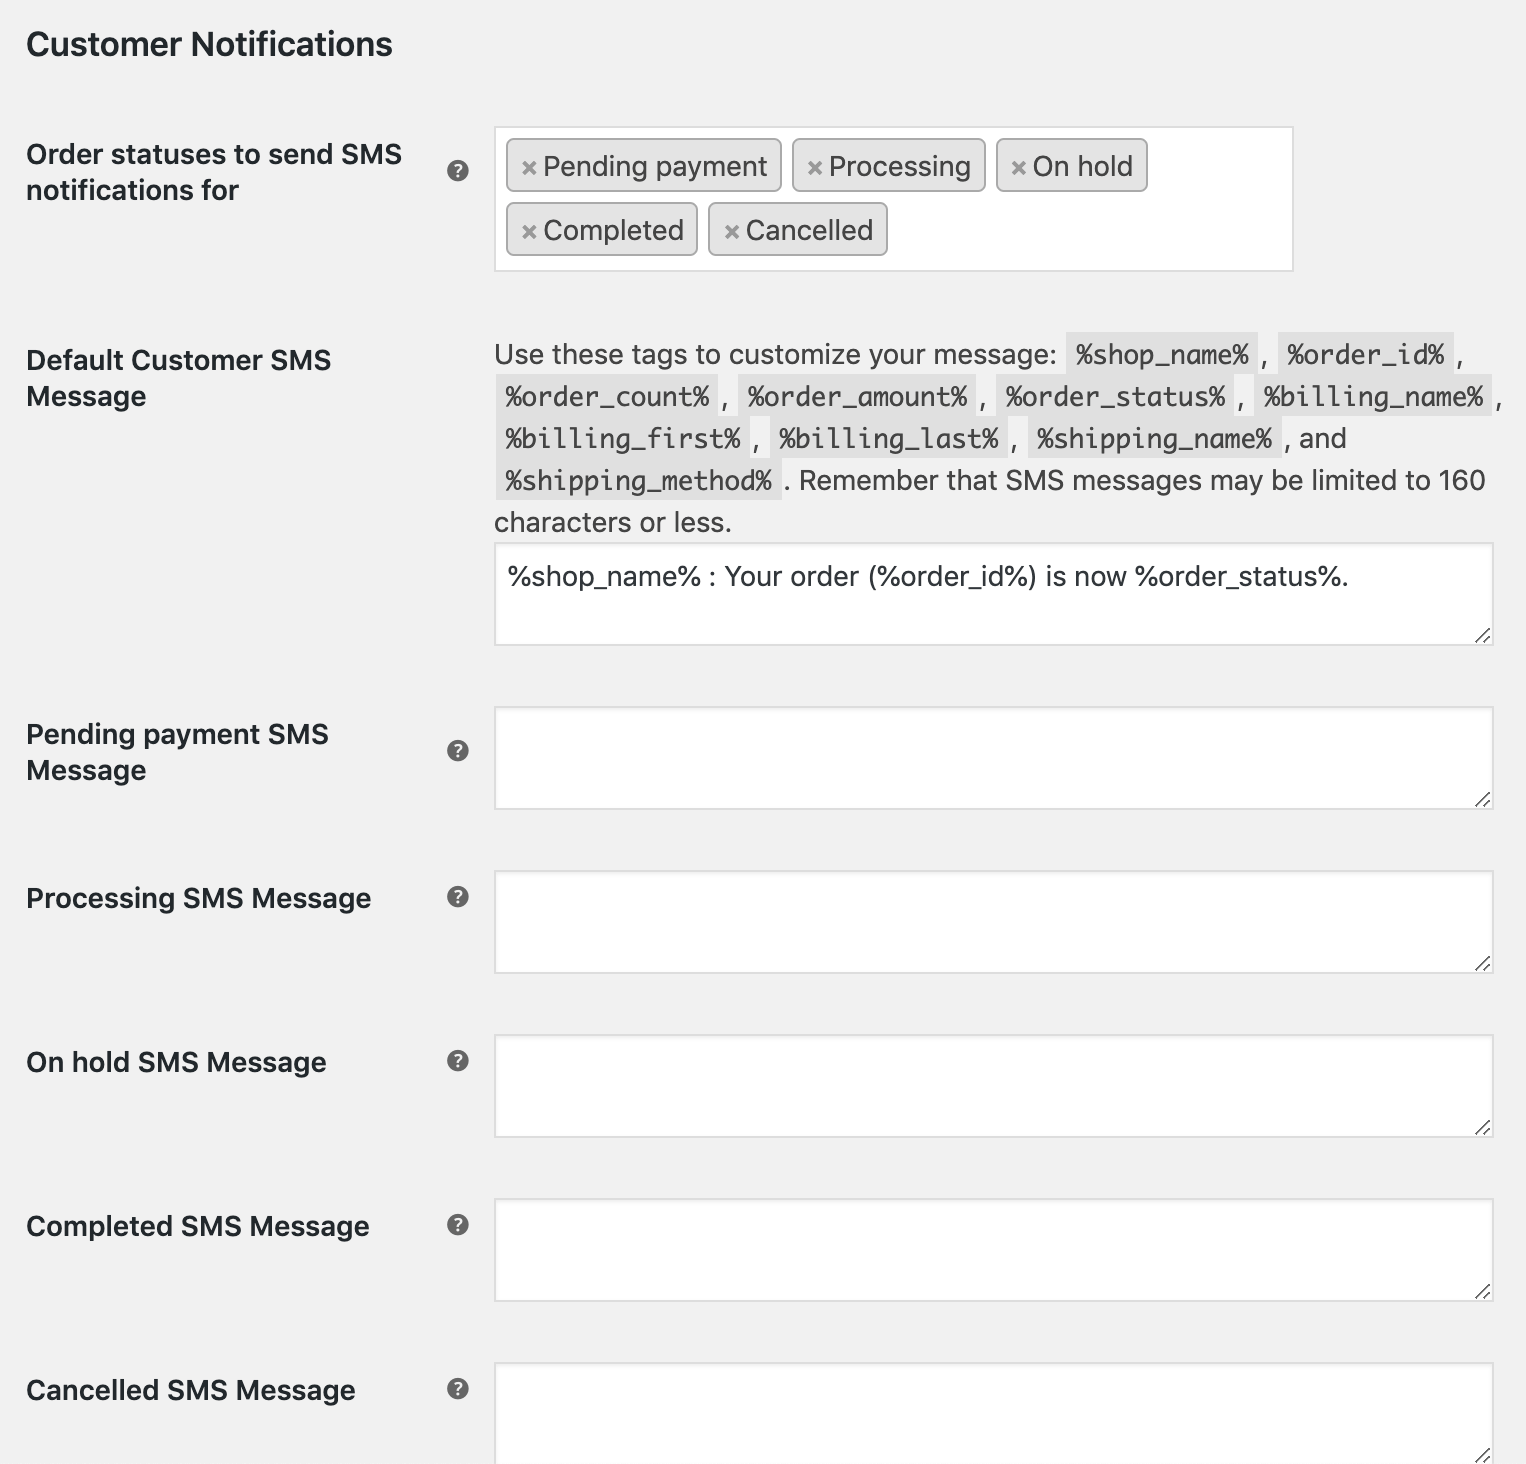
- Order statuses to send SMS notifications for – Add the statuses that you want to send SMS updates for. Note that SMS updates are sent when an order changes to these statuses. For example, an SMS update will be sent when an order changes from Processing to Completed status if you add “Completed” to this list.
- Default Customer SMS Message – The default message template used if there’s no customized template for a given status.
- SMS Messages – You can customize each status’s message template, including custom statuses created with Order Status Manager. For example, you could add a coupon code to the Completed message template for 10% off the next order to help drive additional sales.
Return SMS Message
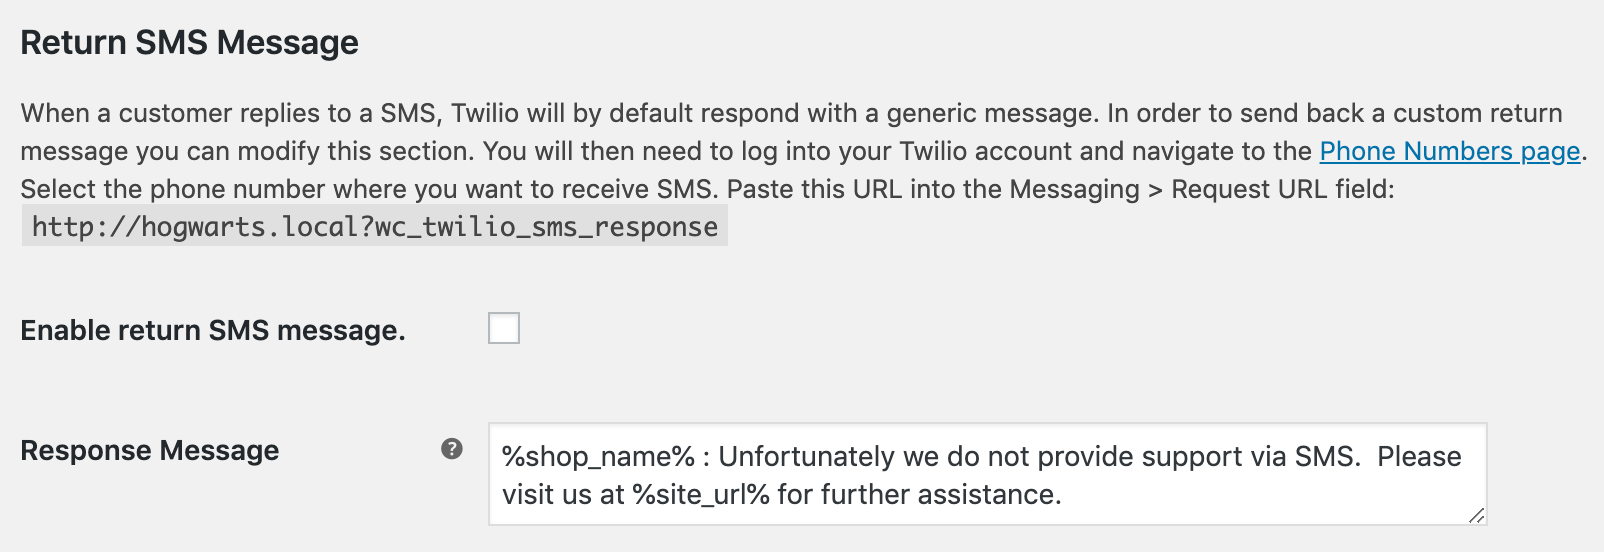
- Enable return SMS message – Check to send customized return messages via Twilio when a customer replies to your automated SMS. See below for setup tips.
- Response Message – Enter the custom response message to be sent in return messages (under 160 characters). Leave blank to store response messages in your Twilio account but not respond.
Sender ID Settings
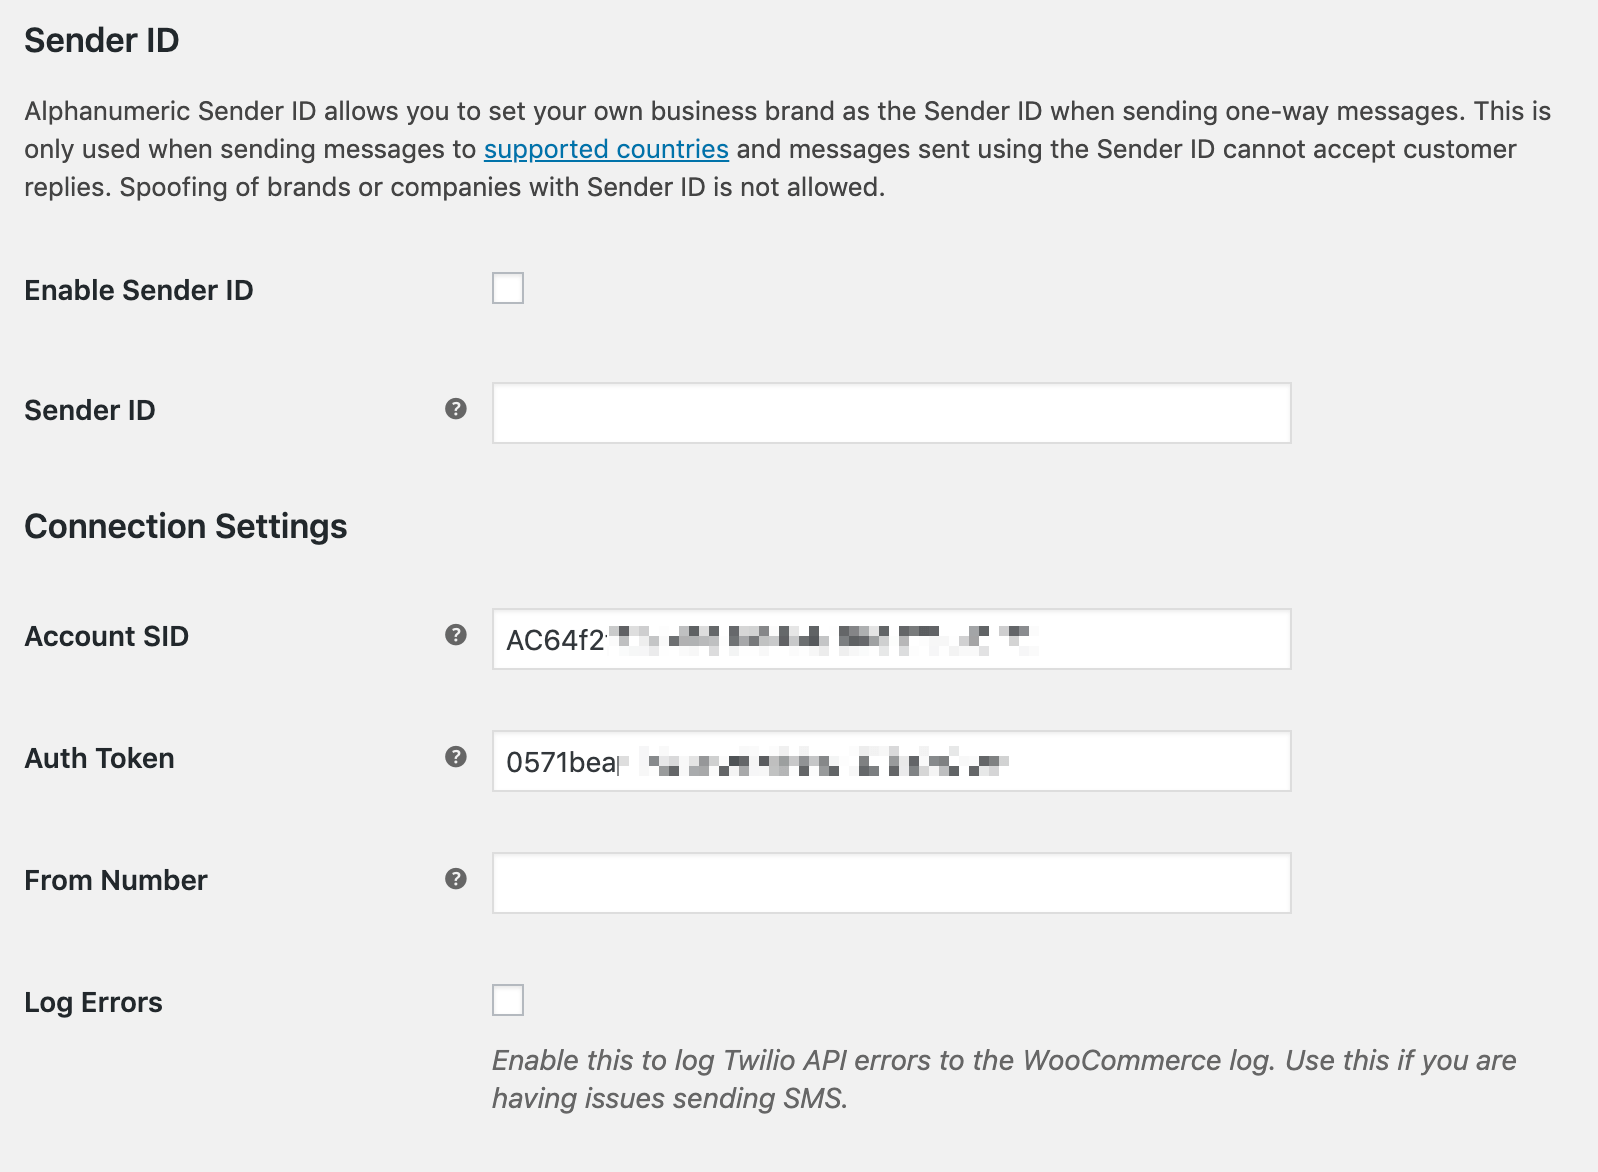
- Enable Sender ID – Check to use your company’s name as the sender ID for one-way messages. This is only supported for certain countries.
- Sender ID – Enter your alphanumeric sender ID for messages.
Connection Settings
Follow the instructions above to get your Twilio credentials for this section.- Account SID – Credential available in your Twilio account console.
- Auth Token – Credential available in your Twilio account console.
- From Number – The number that Twilio will send your SMS messages from. You may enter any purchased number here (even a shortcode). Keep in mind that if you have not purchased Twilio Credit, you will only be able to send SMS messages to your verified sandbox number.
- Log Errors – Log any errors to the PHP error log. Remember that errors with sending SMS messages for customers are logged as Order Notes regardless of this setting. For best performance, please only enable this if you experience issues with the plugin.
Send Test SMS
Send a test message to confirm your connection by entering a Mobile Number and Message and clicking Send. If you’re using a trial Twilio account, the Mobile Number must already be verified in your account. Message variables will not be replaced in a test message since they have no data.
Firebase Dynamic Links
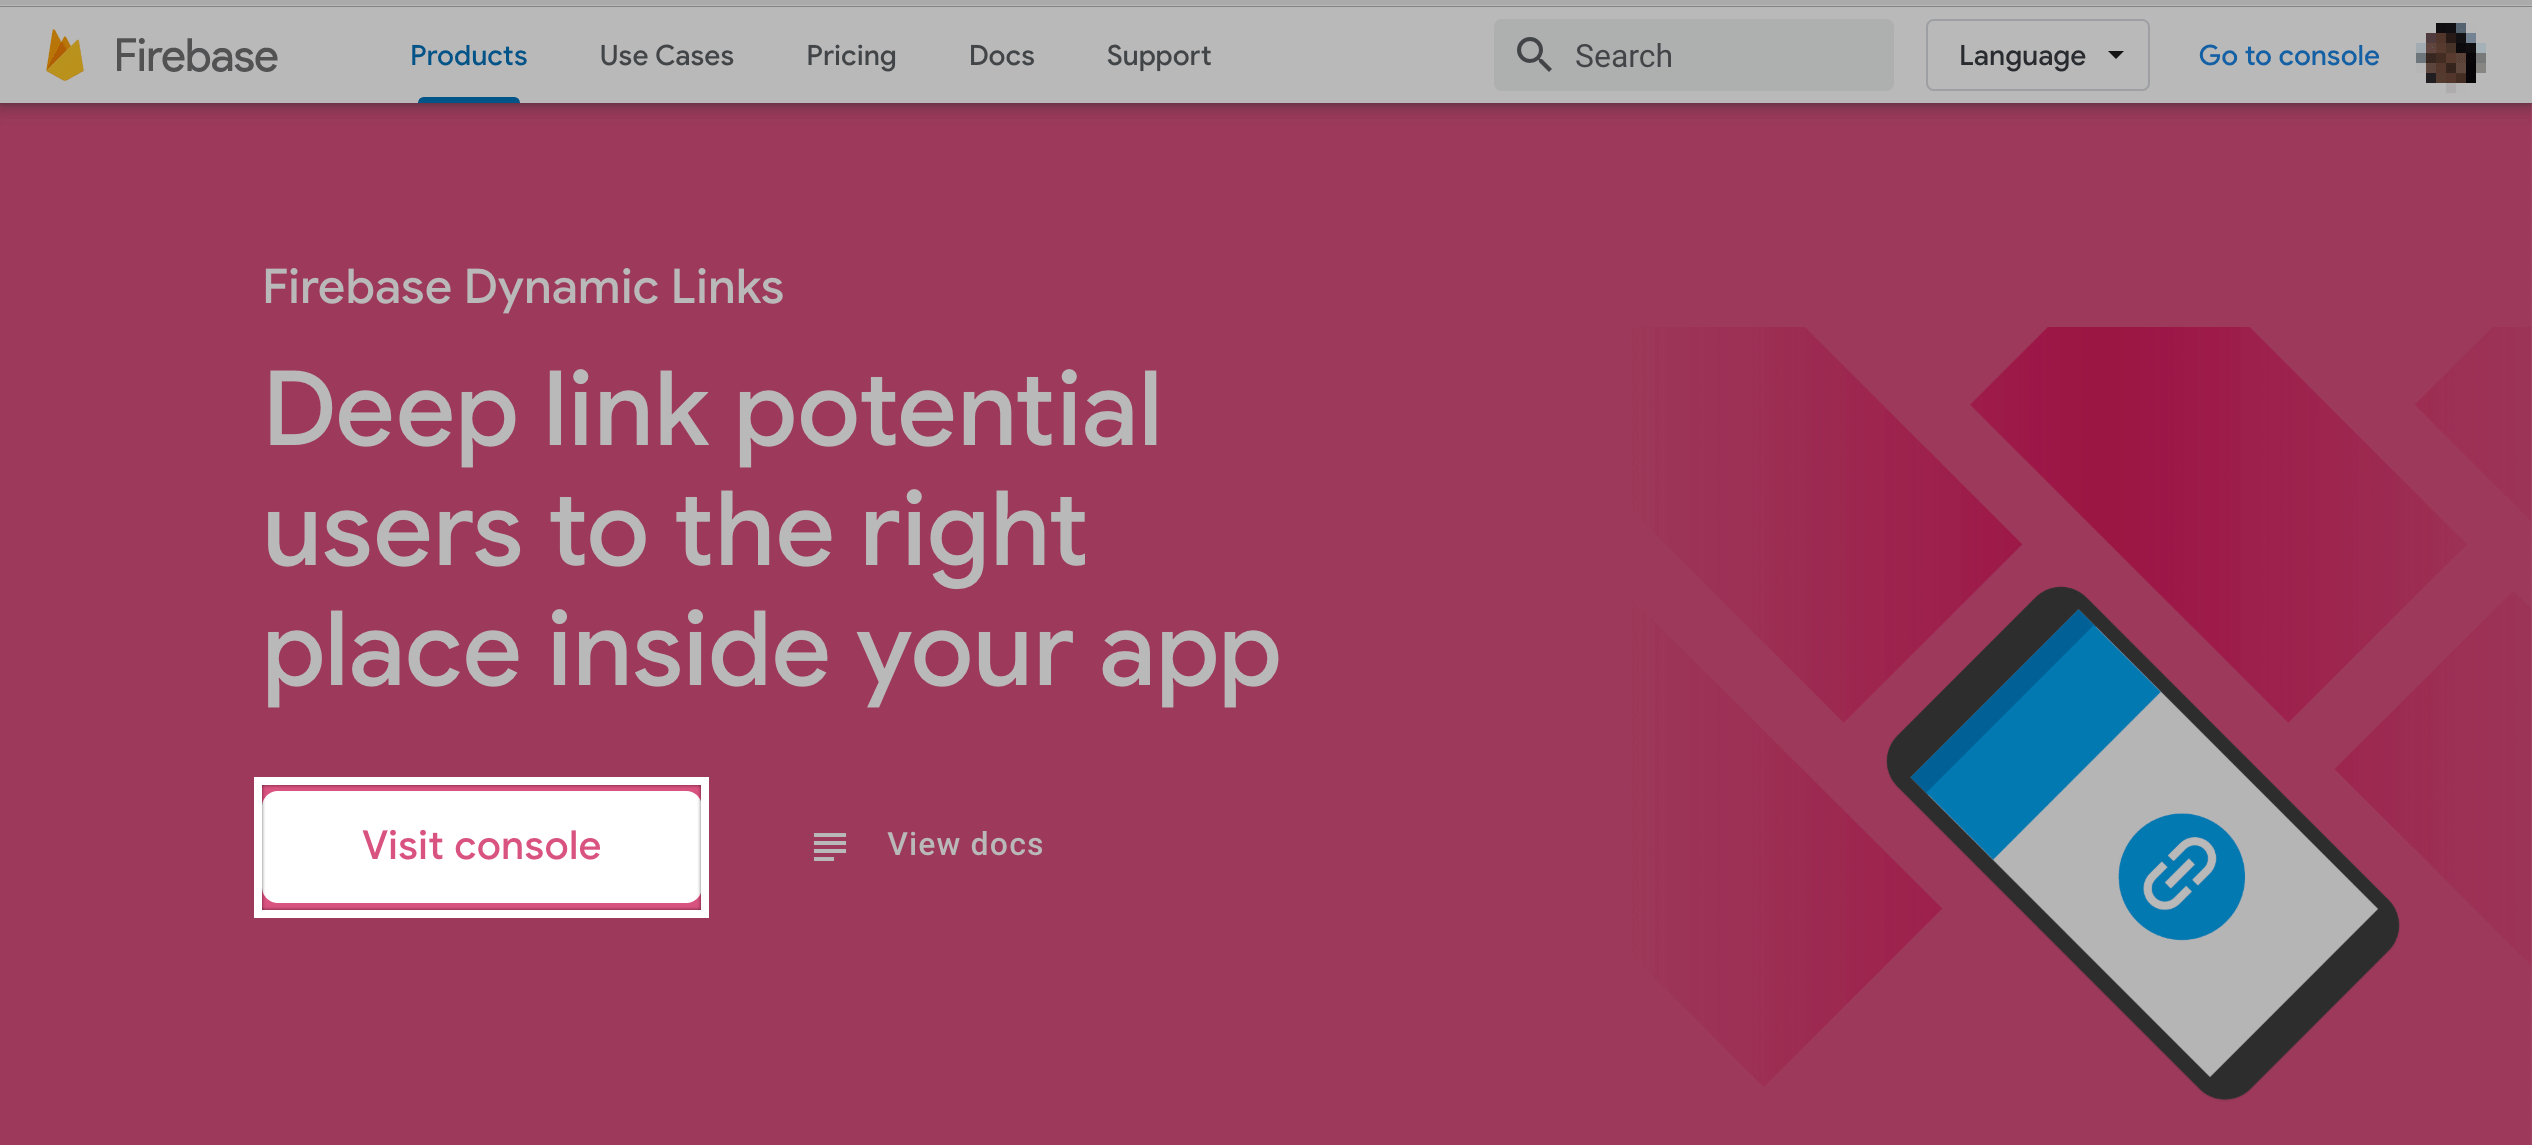
↑ Back to top- Log into your Google account, then go to Firebase.
- Click Visit Console.

- Click Add project.
- Enter a name for your project, such as “Twilio URL Shortener” and click Continue.
- Proceed through any additional configuration steps and click Create project.
- Once your project is ready, click Continue to navigate to the project page.
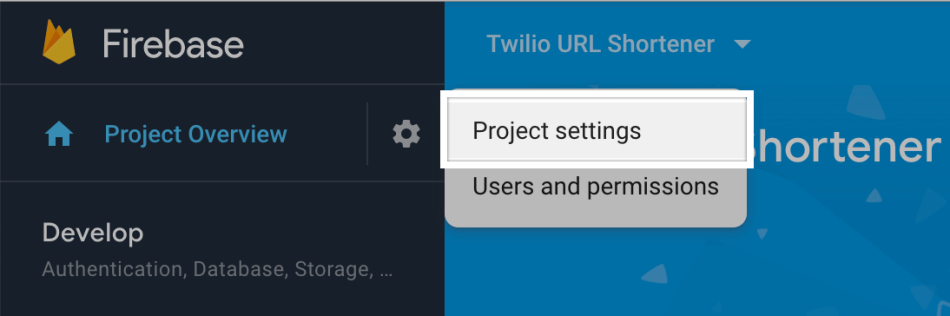
- Click the Settings wheel icon and select Project settings.
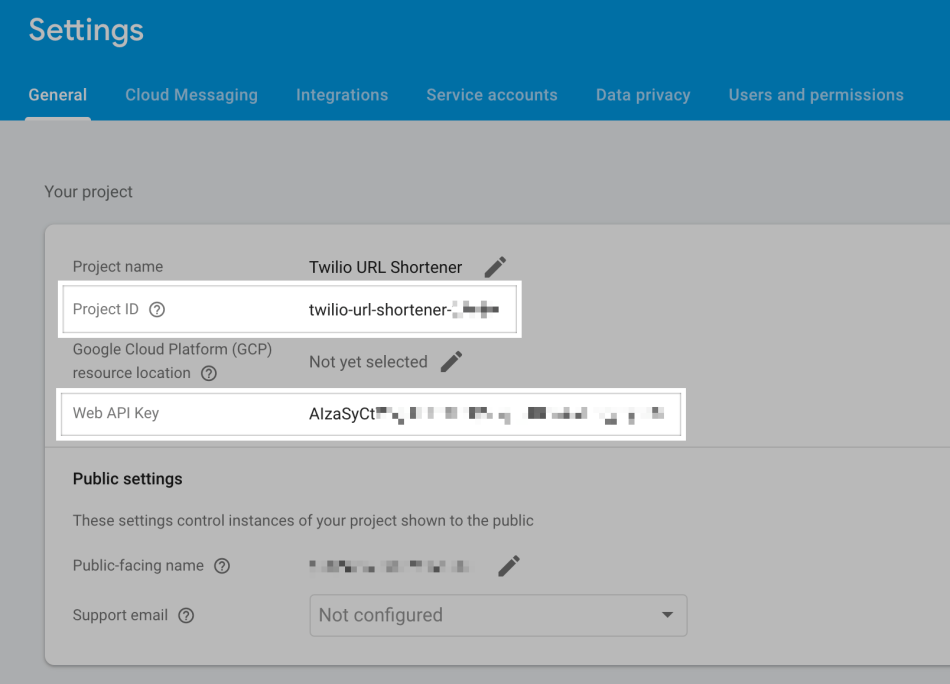
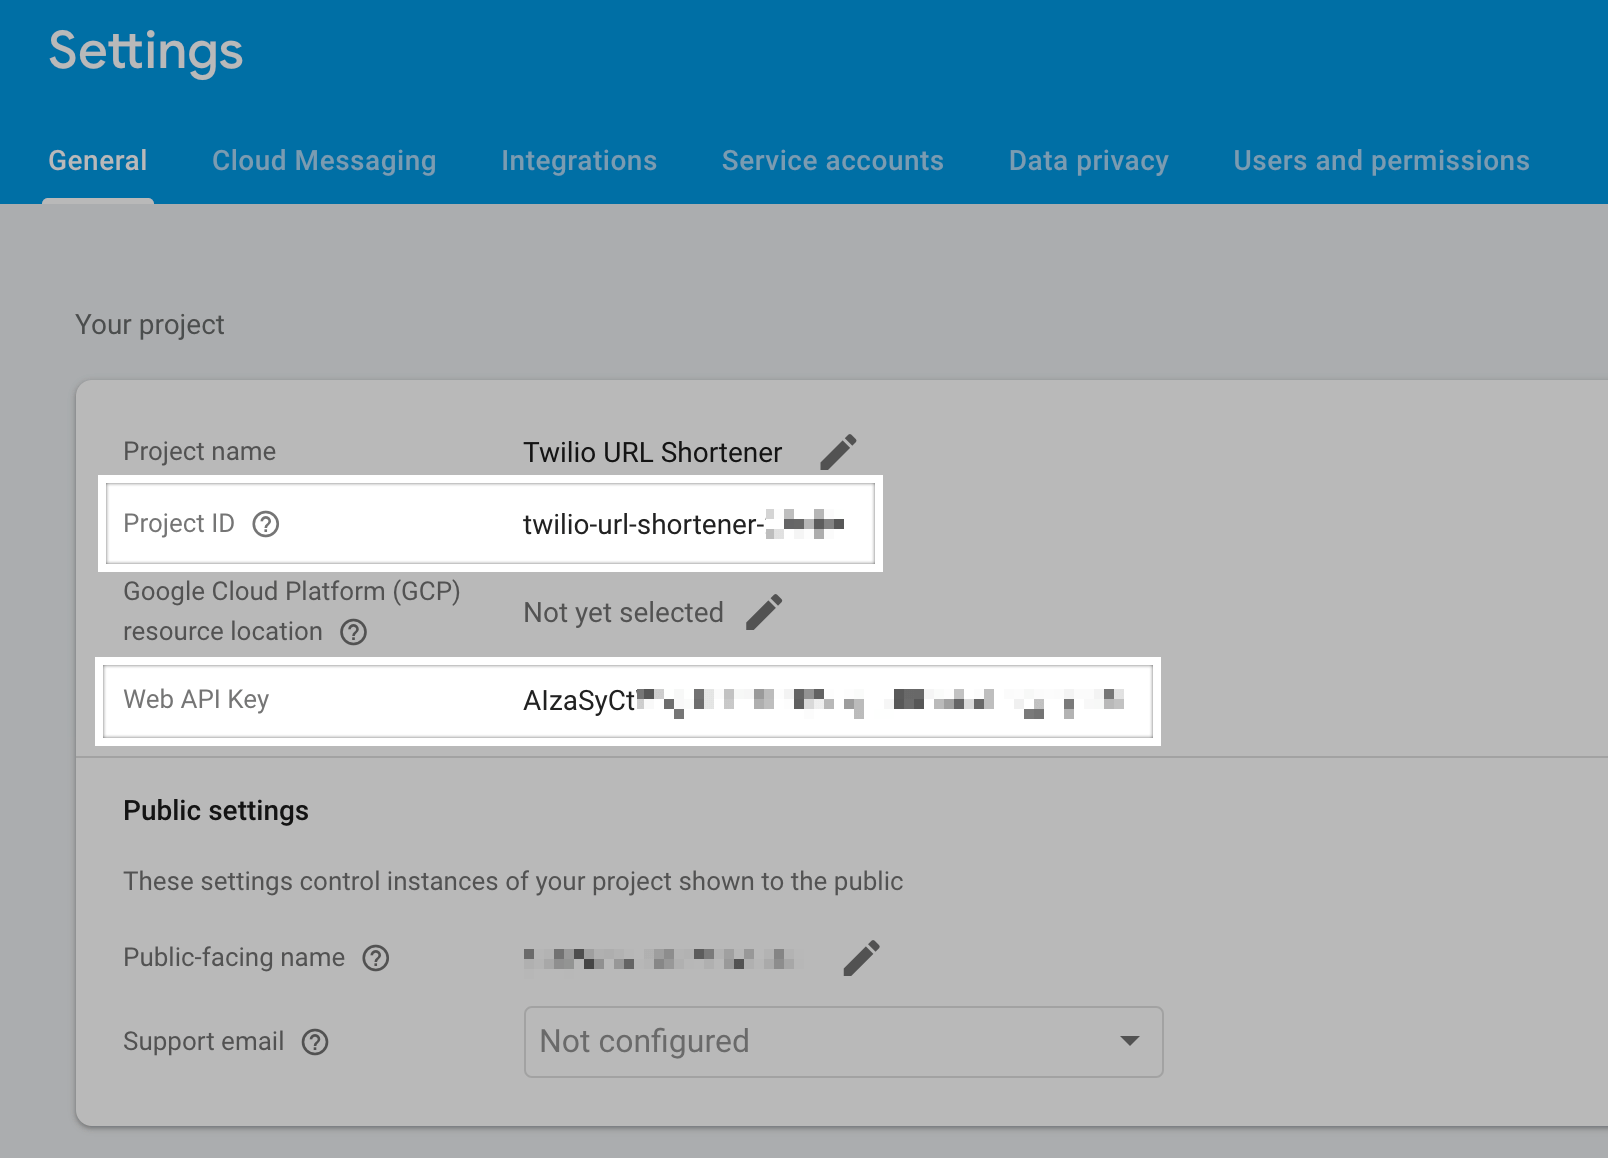
- Copy the Project ID and the Web API Key to enter in the plugin settings.

Message Variables
↑ Back to top%shop_name%– the name of your site%order_id%– the order number/ID%order_count%– the number of orders the customer has placed%order_amount%– the total amount of the order%order_status%– the status of the order%billing_name%– the customer full name from the billing information%billing_first%– the customer first name from the billing information%billing_last%– the customer last name from the billing information%shipping_name%– the name used in the order shipping information%shipping_method%– the shipping method for the order
Return SMS Setup
↑ Back to topThanks for the message. Configure your number's SMS URL to change this message. Reply HELP for help. Reply STOP to unsubscribe. Msg & Data rates may apply.You can create a customized response message instead by enabling the Return SMS Message setting and by enabling this in your Twilio account by following the steps below:
- Log into your Twilio account and navigate to the Phone Numbers page.
- Select the phone number where you want to receive SMS.
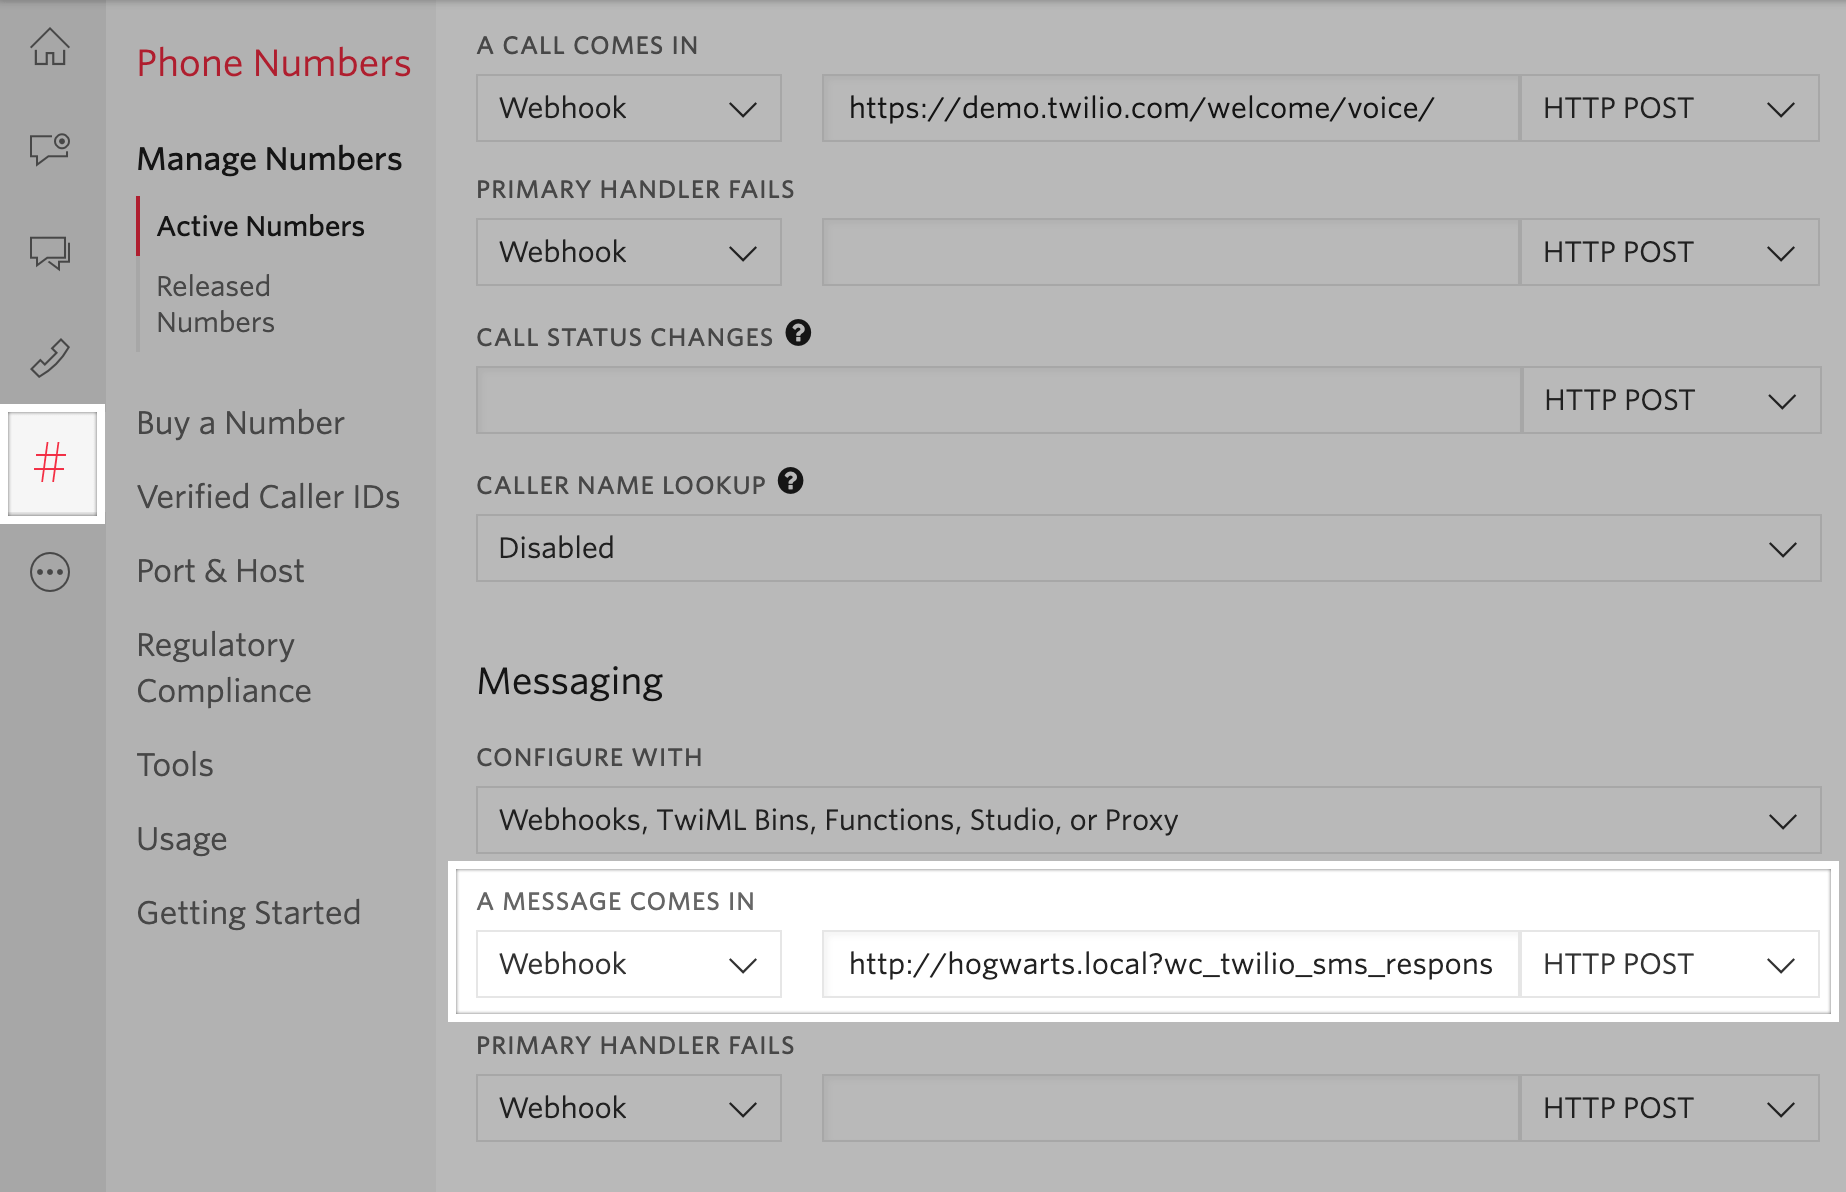
- Paste the URL from the Return SMS Message settings into the Messaging > A message comes in field:

Bookings Integration
↑ Back to topBookings Settings
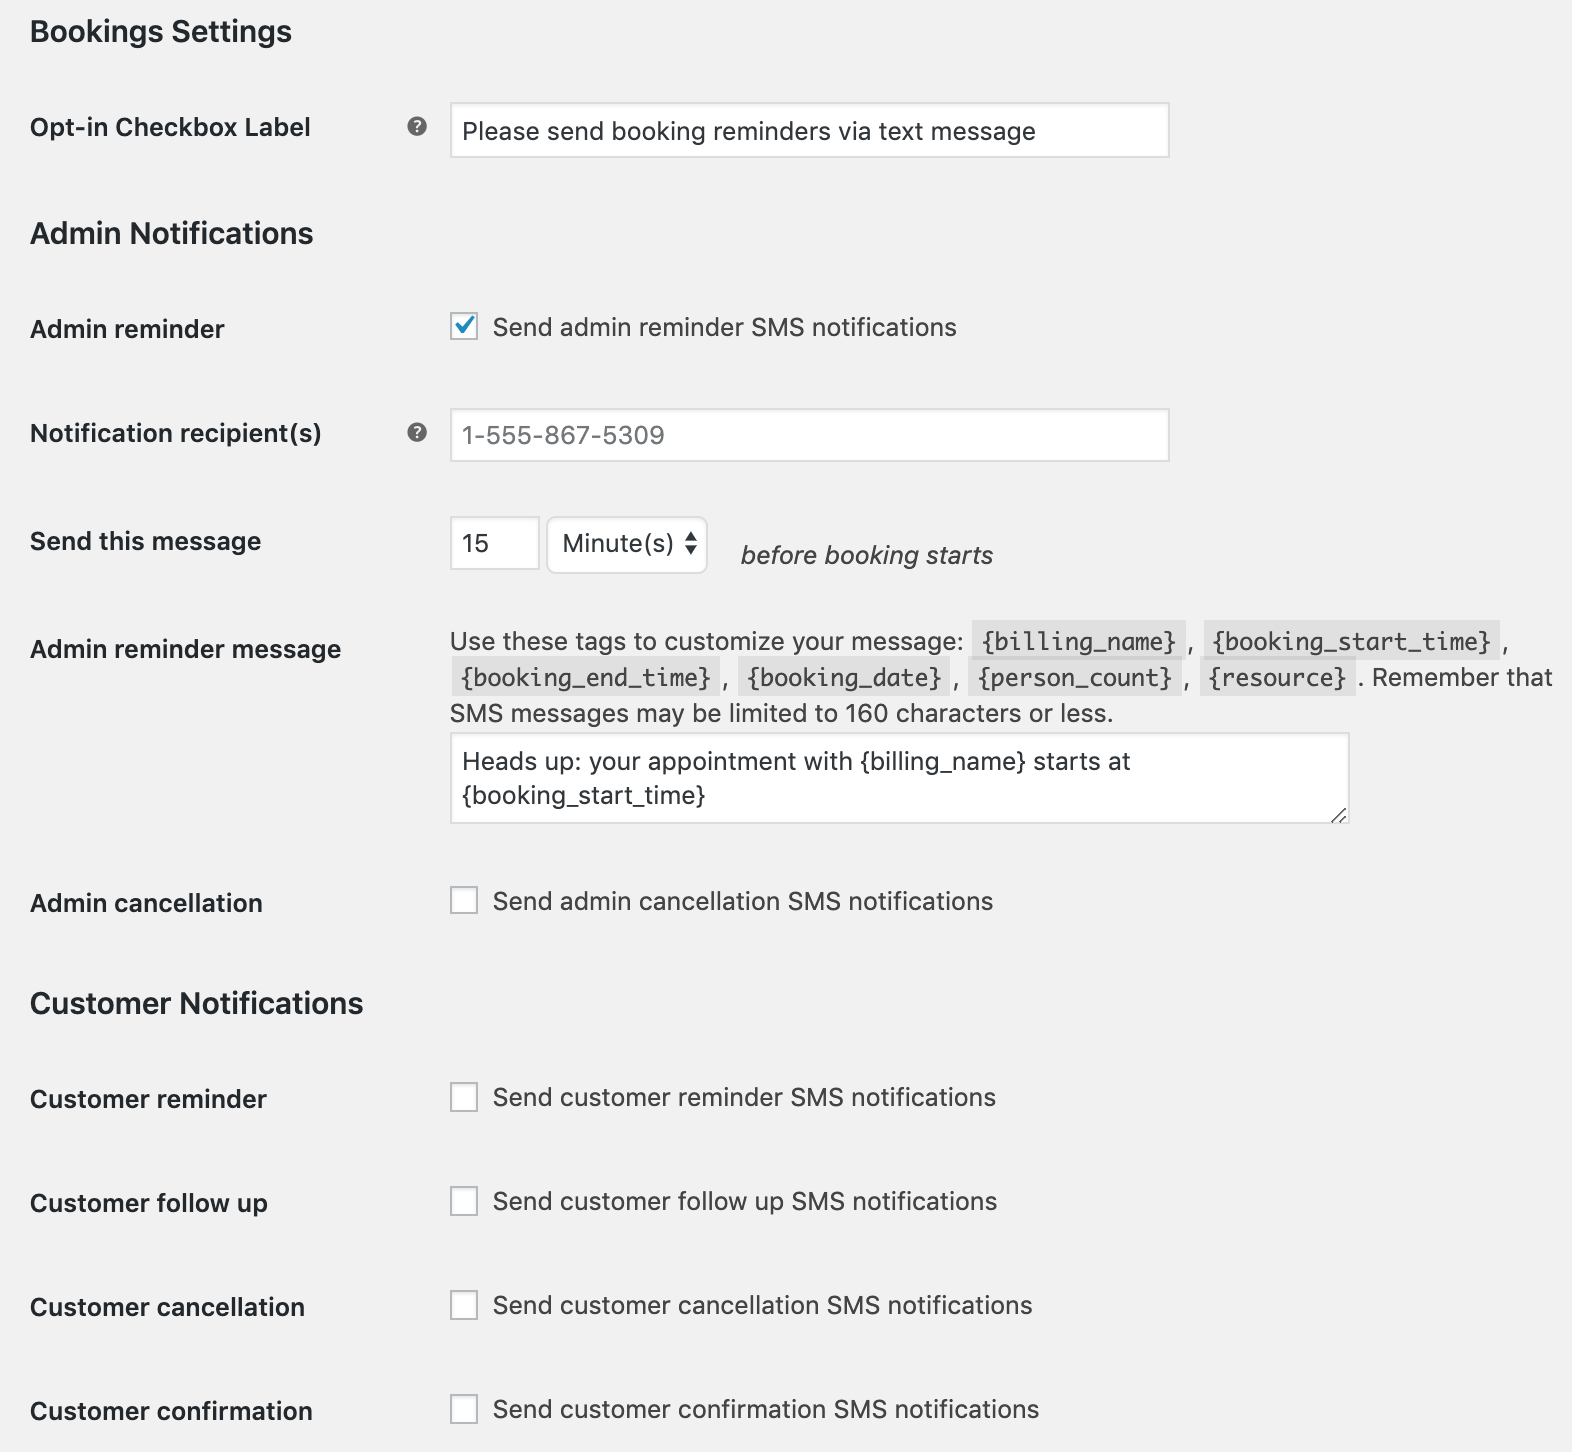
↑ Back to top- Opt-in Checkbox Label – Change the opt-in label displayed at checkout if the cart contains a booking product. If not set, this will use the default checkbox label under SMS > General settings.
Admin booking notifications
- Admin reminder – Enable to send admin users a reminder before a booking begins. When enabled, you can then enter a comma-separate list of recipients, determine when the reminder should be sent, and customize the message.
- Admin cancellation – Enable to send admin users a notification when a booking is cancelled. When enabled, you can then enter a comma-separate list of recipients and customize the message.
Customer booking notifications
- Customer reminder – Enable to send customers a reminder before a booking begins. When enabled, you can then determine when the reminder should be sent and customize the message.
- Customer follow up message – Enable to send customers a follow up after a booking is completed. When enabled, you can then determine when the reminder should be sent and customize the message.
- Customer cancellation – Enable to send customers a cancellation notice when a booking is marked as cancelled. When enabled, you can customize the message.>.
- Customer confirmation – Enable to send customers a notification when a booking is confirmed and moves to “Confirmed” status. When enabled, you can customize the message.
Bookings Merge Fields
↑ Back to top{shop_name}– the name of your site{billing_name}– the customer full name from the billing information{booking_start_time}– the booking’s start time{booking_end_time}– the booking’s end time{booking_date}– the booking’s date (uses the site’s date format){person_count}– if the booking has a “persons” field, inserts the person count for the booking{resource}– if the booking has a resource, inserts the selected resource for the booking
Bookable Product Settings
↑ Back to top
Troubleshooting
↑ Back to top- Follow the setup instructions to ensure the Account SID and Auth Token are correct.
- Enable logging and look in WooCommerce > Status > Logs for error messages to pinpoint the source of the problem.
- Remember that SMS messages aren’t 100% reliable and sometimes may get lost. Try sending yourself a test SMS to see if you are sending and receiving SMS messages correctly.
- If a test message is unsuccessful or error logs don’t indicate the problem’s source, please contact support with your error log information.
Frequently Asked Questions
↑ Back to topA: You can indeed! Please ensure that you’re running WooCommerce Twilio version 1.6.0 or newer.
Q: Does WooCommerce Twilio SMS Notifications comply with GDPR?
A: Absolutely! If an order has had customer data deleted or anonymized, Twilio’s order meta will update to remove the opt-in for customer SMS notifications. That way, we won’t attempt to deliver updates for anonymized data.
Q: Can I schedule a message to be sent at a certain time or within business hours?
A: Scheduling SMS to be sent later is currently not possible with our plugin. This is because Twilio’s API does not currently support scheduled messages.
Q: Are there any additional fees associated with the purchase of the Twilio SMS Notifications plugin?
A: While there are no additional fees to use the Twilio SMS Notifications plugin, you are still subject to the subscription and usage fees for Twillo’s SMS services. For more information, please visit Twillo’s SMS Pricing Page.
For Developers
↑ Back to topPlease note that this section and samples are intended for developers, and we cannot help out with customizations like this as per our support policy.
Want to extend this plugin? Great! Here are few commonly-used filters to help you out:
Filters the generated shortened URL:
apply_filters( 'wc_twilio_sms_shorten_url', $shortened_url, $url )Filters message content before merge tags being replace:
apply_filters( 'wc_twilio_sms_customer_sms_before_variable_replace', $message, $order )Filters message content after merge tags being replaced:
apply_filters( 'wc_twilio_sms_customer_sms_after_variable_replace', $message, $order )Filters the “to” phone number used for the customer:
apply_filters( 'wc_twilio_sms_customer_phone', $order->billing_phone, $order )Here’s an example of how to do variable replacement for the Shipment Tracking extension and the Sequential Order Numbers Pro extension. https://github.com/godaddy-wordpress/wc-plugins-snippets/blob/master/woocommerce-twilio-sms-notifications/add-new-message-variables.php