Tipping for WooCommerce is a plugin for accepting tips on WooCommerce checkout page.
Installation
↑ Back to top- Download the .zip file from your WooCommerce account.
- Go to: WordPress Admin > Plugins > Add New and Upload Plugin with the file you downloaded with Choose File.
- Install Now and Activate the extension.
More information at: Install and Activate Plugins/Extensions.
Setup and Configuration
↑ Back to topTo set up your store with Tipping for WooCommerce:
- Go to: WooCommerce> Settings> Tipping
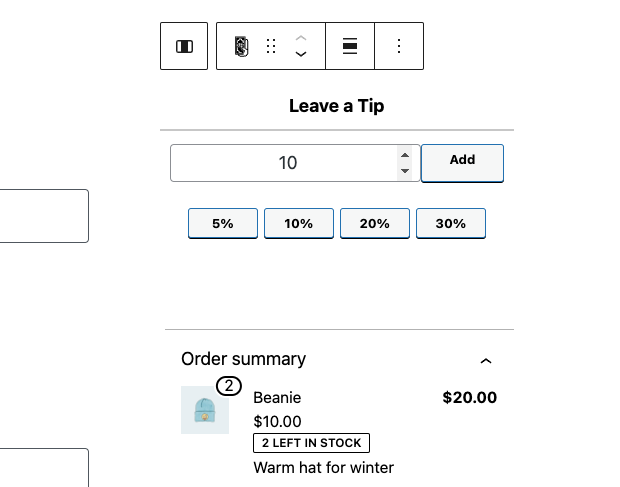
- Complete the “Title” (This is how the title for the Tipping feature will appear). You can add something like “Leave a Tip”.
- Check the “Enable Tipping Title” if you want this this title to be visible on Checkout Page. Otherwise leave it unchecked
- By checking the option “Enable Tipping Percentage Buttons” will add some predefined “tipping buttons” to be able to leave a Tip based on the current order Total.
- If you have checked the above option, be sure that you have completed also the tipping percentage options with comma separated on the next field “Percentages” like e.g:10,20,30,40 .
- On the next option you will have to select how these buttons you want to be displayed . There are 3 options available at the moment. Percentage, Tip Amount, Both of them
- You can use also Styling Options to change the colours of Tipping Box according to your theme’s colours.
- Check the option Enable Tipping Feature
- Save changes.
Usage
↑ Back to top- When a Customers is on Checkout Page a new option within Order Review Section will appear to be able to Leave a Tip
- Customer can select either from predefined Tipping options or set his own tip value and press Add Tip
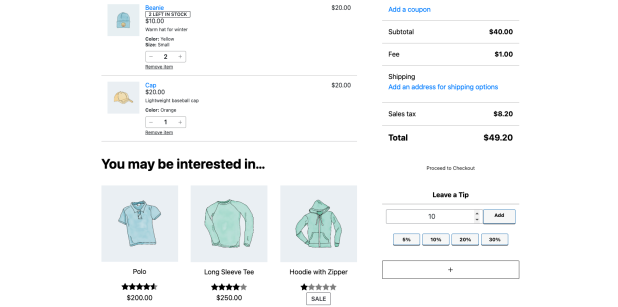
- The Tip added as Fee on Order
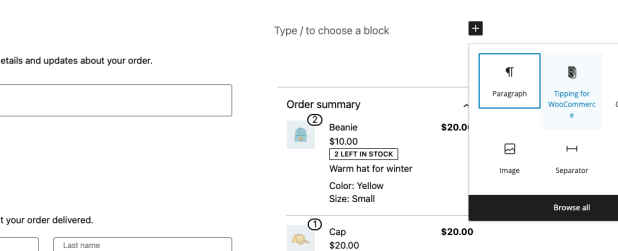
Checkout Block Support
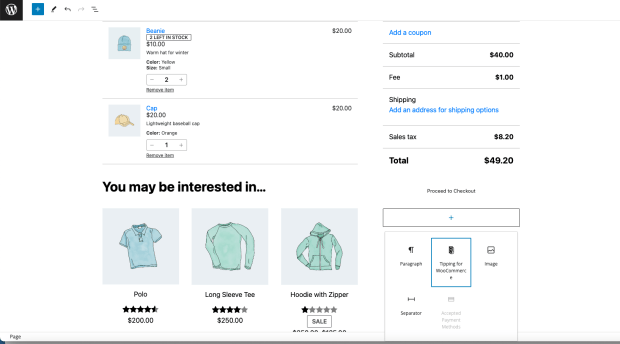
↑ Back to topTipping for WooCommerce supports also the new Block Based Checkout. You can insert the Tipping Block inside Order Summary .
Tipping for WooCommerce is a plugin for accepting tips on WooCommerce checkout page.
Installation
↑ Back to top- Download the .zip file from your WooCommerce account.
- Go to: WordPress Admin > Plugins > Add New and Upload Plugin with the file you downloaded with Choose File.
- Install Now and Activate the extension.
More information at: Install and Activate Plugins/Extensions.
Setup and Configuration
↑ Back to topTo set up your store with Tipping for WooCommerce:
- Go to: WooCommerce> Settings> Tipping
- Complete the “Title” (This is how the title for the Tipping feature will appear). You can add something like “Leave a Tip”.
- Check the “Enable Tipping Title” if you want this this title to be visible on Checkout Page. Otherwise leave it unchecked
- By checking the option “Enable Tipping Percentage Buttons” will add some predefined “tipping buttons” to be able to leave a Tip based on the current order Total.
- If you have checked the above option, be sure that you have completed also the tipping percentage options with comma separated on the next field “Percentages” like e.g:10,20,30,40 .
- On the next option you will have to select how these buttons you want to be displayed . There are 3 options available at the moment. Percentage, Tip Amount, Both of them
- You can use also Styling Options to change the colours of Tipping Box according to your theme’s colours.
- Check the option Enable Tipping Feature
- Save changes.
Usage
↑ Back to top- When a Customers is on Checkout Page a new option within Order Review Section will appear to be able to Leave a Tip
- Customer can select either from predefined Tipping options or set his own tip value and press Add Tip
- The Tip added as Fee on Order
Checkout Block Support
↑ Back to topTipping for WooCommerce supports also the new Block Based Checkout. You can insert the Tipping Block inside Order Summary .
Cart Block Support
↑ Back to topAdditionally can be added also inside the new Cart Block based .
Reports
↑ Back to topYou can access also Reports of Tips by navigating to
WooCommerce > Reports .
You will noticed that 2 new metrics has been added.
- total amount of tips (it’s the sum of the tips for the specified period )
- orders with a tip (the total number of orders where a customer left a tip)

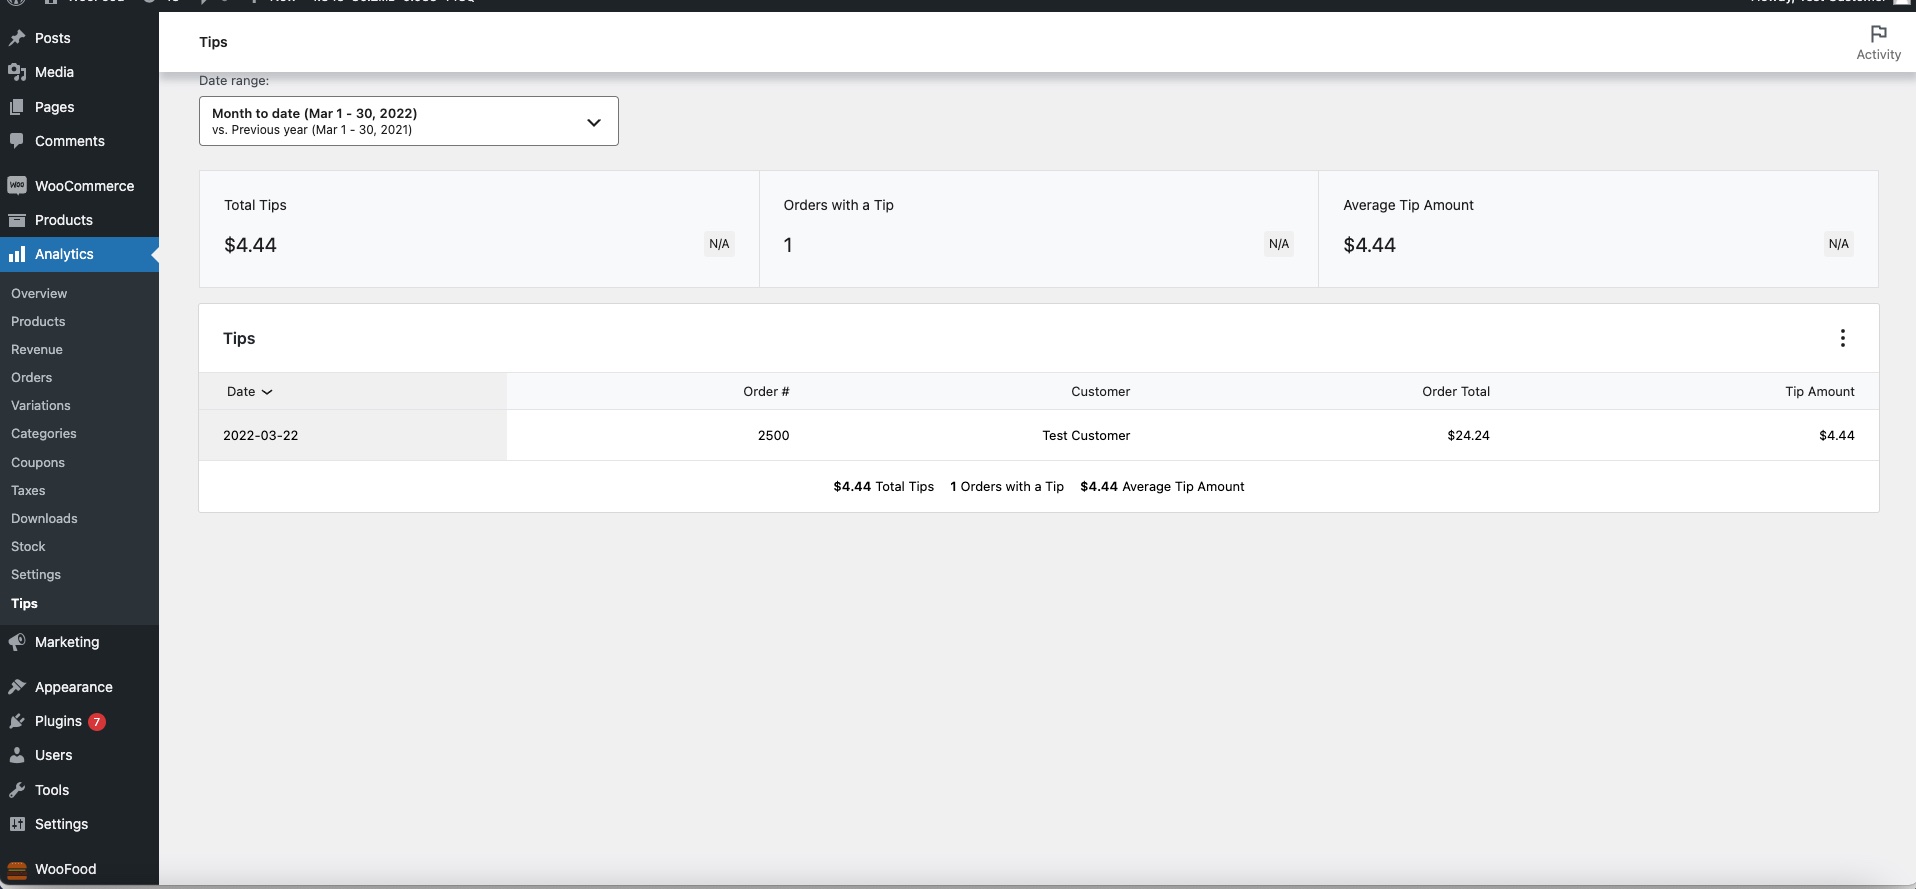
Analytics
↑ Back to topAnalytics are also supported by Tipping for WooCommerce where can be accessed from Analytics > Tips
Troubleshooting
↑ Back to topKnown errors or issues and how to solve them.
Developers
↑ Back to topYou can use the filter wpslash_tipping_enabled_filter to disable or enable the Tipping Feature on Checkout Page .
You can use the above filter like the following example
Reports
↑ Back to topYou can access also Reports of Tips by navigating to
WooCommerce > Reports .
You will noticed that 2 new metrics has been added.
- total amount of tips (it’s the sum of the tips for the specified period )
- orders with a tip (the total number of orders where a customer left a tip)
Analytics
↑ Back to topAnalytics are also supported by Tipping for WooCommerce where can be accessed from Analytics > Tips
Troubleshooting
↑ Back to topKnown errors or issues and how to solve them.
Developers
↑ Back to topYou can use the filter wpslash_tipping_enabled_filter to disable or enable the Tipping Feature on Checkout Page .
You can use the above filter like the following example
add_filter("wpslash_tipping_enabled_filter", "wpslash_tipping_enabled_filter");
function wpslash_tipping_enabled_filter($bool)
{
   return false;

}