TaxJar for WooCommerce provides sales tax calculations, reporting and filing for WooCommerce merchants and developers.
Visit TaxJar.com to learn more
about TaxJar for WooCommerce.
- WordPress 4.0+
- WooCommerce 3.0+
- A TaxJar account with API token
- Download the TaxJar for WooCommerce Extension.
- Go to: WordPress Admin > Plugins > Add New and Upload Plugin with the file you downloaded with Choose File.
- Install Now and Activate the extension.
More information at:
Install and Activate Plugins/Extensions.
- Go to: https://www.taxjar.com/woocommerce
- Request a free demo to review your sales tax obligations with a TaxJar team member, and sign up for the plan that’s best for your business.
- Or, start TaxJar free trial by entering your email address and password. Please note: If you have more than 1,000 orders per month, you will need an upgraded TaxJar Professional account to get access to real-time sales tax calculations through the TaxJar API.
- Enter preferences for three steps – Your information, Select data sources, Start import.
- Most will want Store Integration > WooCommerce or CSV Import.
- It’s also possible to skip the Data and Import steps and complete later.
On your WordPress/WooCommerce site:
- Go to: WooCommerce > TaxJar
- Click the “Connect” button. The popup will automatically close and your WooCommerce store will be linked to your TaxJar account. Note: If your business exceeds 1,000 orders per month, you will be prompted to upgrade your account to TaxJar Professional in order to activate real-time sales tax calculations through the TaxJar API.
- Fill out the rest of your settings. TaxJar requires your city and zip code from which you ship products to calculate sales tax. We automatically detect your country and state based on your WooCommerce configuration.
- If you have multiple nexus states where you need to collect sales tax, make sure they’re added to your TaxJar account. Click the “Sync Nexus Addresses” button to import your nexus addresses into WooCommerce.
- Check the box next to “Enable TaxJar Calculations”.
- If you plan to use TaxJar for sales tax reporting and filing, check the box next to “Enable order downloads to TaxJar” for TaxJar to connect and download the transactions on your store for AutoFile and reporting features.
Click “Save changes”. You’re now up and running with TaxJar!
- Save changes.
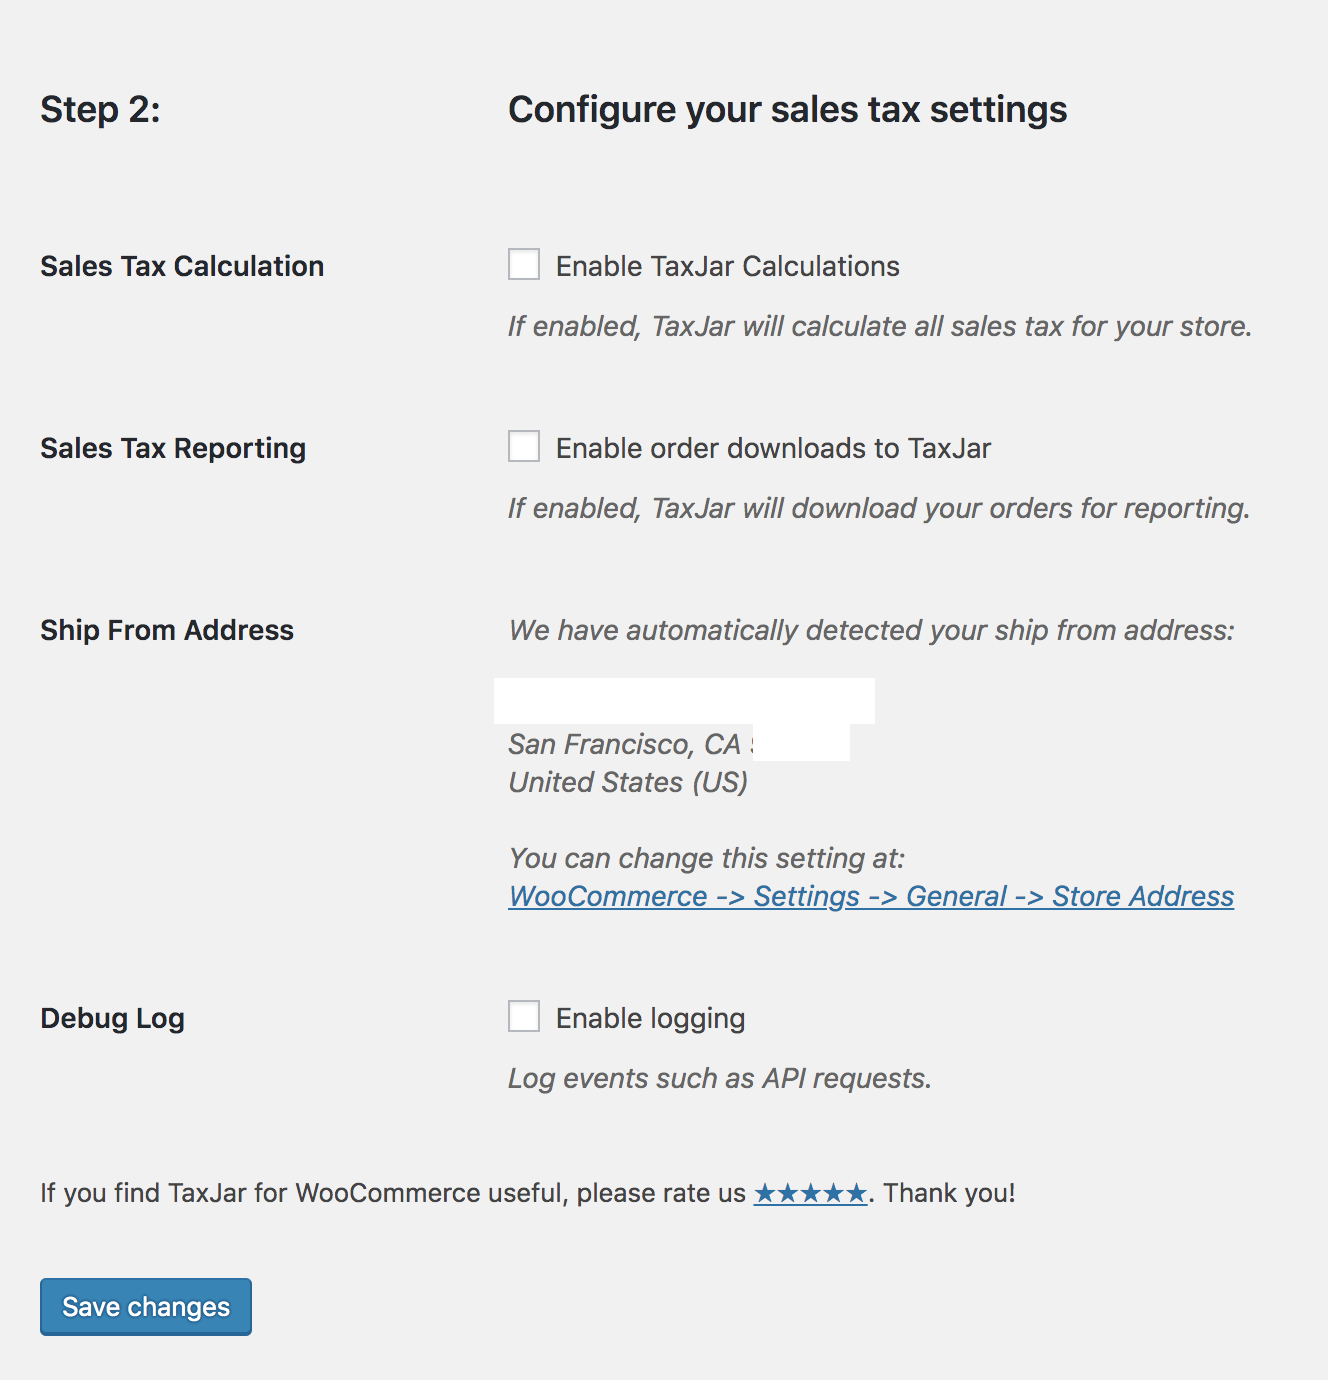
- Go to: WooCommerce > Settings > General and verify your Store Address BEFORE enabling TaxJar. TaxJar automatically detects your Ship From Address by looking at your Store Address.
- If you make changes, don’t forget to Save changes.
- If everything is correct, no need to save.
- Go back to: WooCommerce > Settings > Integration.
- Tick the box for Enable TaxJar Calculations.
- Sales Tax Reporting is covered in the section below, and the box for Enable order downloads need not be ticked at this time.
- Tick the box for Enable logging under Debug Log. Optional but recommended as it can be helpful for troubleshooting purposes.
- Save changes.
Once TaxJar is enabled for your WooCommerce store, a list of nexus states/regions appears under the Sales Tax Calculations checkbox.

- If none appear, you need to select:
- Sync Nexus Addresses if you recently made changes.
or
- Manage Nexus Locations and edit/delete/add them in your TaxJar account, and then Sync.
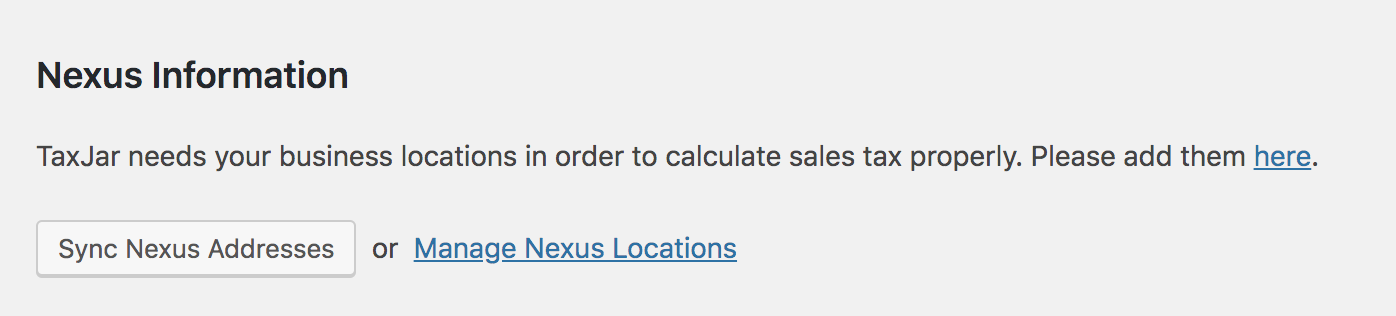
Confirm that all of your Nexus addresses are saved in TaxJar.
Currently TaxJar supports:one region from your Store Address in
other countries
If you’re unsure where you need to collect sales tax, read our post on
Sales Tax Nexus Defined. We also provide
Sales Tax Guides for each U.S. state.
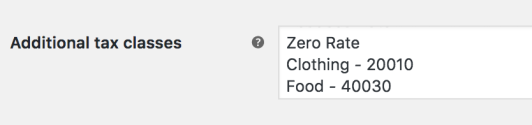
To exempt certain product categories such as clothing from sales tax, create a custom tax class and assign it to your products:
- Go to: WooCommerce > Settings > Tax.
- Next to “Additional tax classes” there’s a box where you can type in a new tax class.
- To set up a clothing tax class, add “Clothing – 20010” on a new line:
- Once you add a new tax class, make sure your products are assigned to the new tax class. When editing a product, change the tax class to “Clothing – 20010” under the General tab and save it:
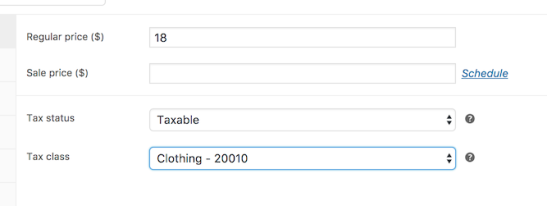 Now we’ll pass a product tax code with this product when making calculations through our sales tax API. For variable products, make sure each variation tax class is set to “Same as parent”:

To exempt customers from sales tax, edit a given user in the WordPress admin panel and update the options listed under TaxJar Sales Tax Exemptions:
- Go to: Users > All Users.
- Edit a customer / user.
- To exempt the customer, change “Exemption Type” to “Wholesale / Resale”, “Government”, or “Other”:

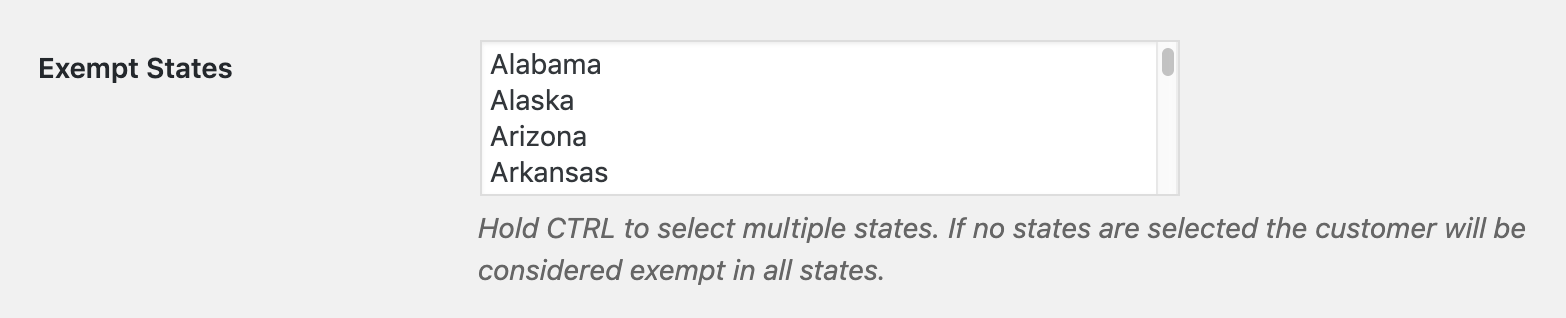
- To exempt the customer in one or more states, use the multi-select field to select the states. If no states are selected, the customer will be exempt in all states:
- Click the “Update User” button at the bottom of the screen to save the customer and sync them to TaxJar.
To import orders into TaxJar for sales tax reporting and filing, perform the following steps:
- Go to: WooCommerce > TaxJar.
- Tick the box for Sales Tax Reporting:

- Save changes.
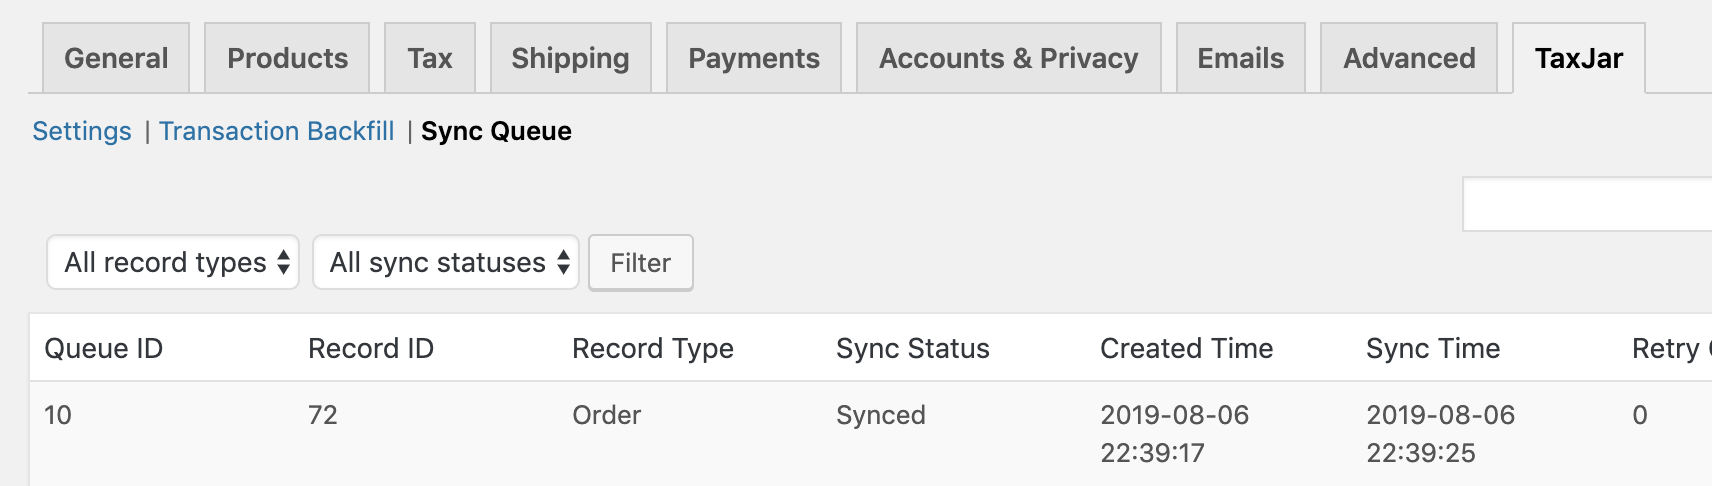
Our plugin will automatically sync your orders to TaxJar through the API. You can see how this works behind-the-scenes by going to the TaxJar tab under
WooCommerce > Settings and clicking the “Sync Queue” link:
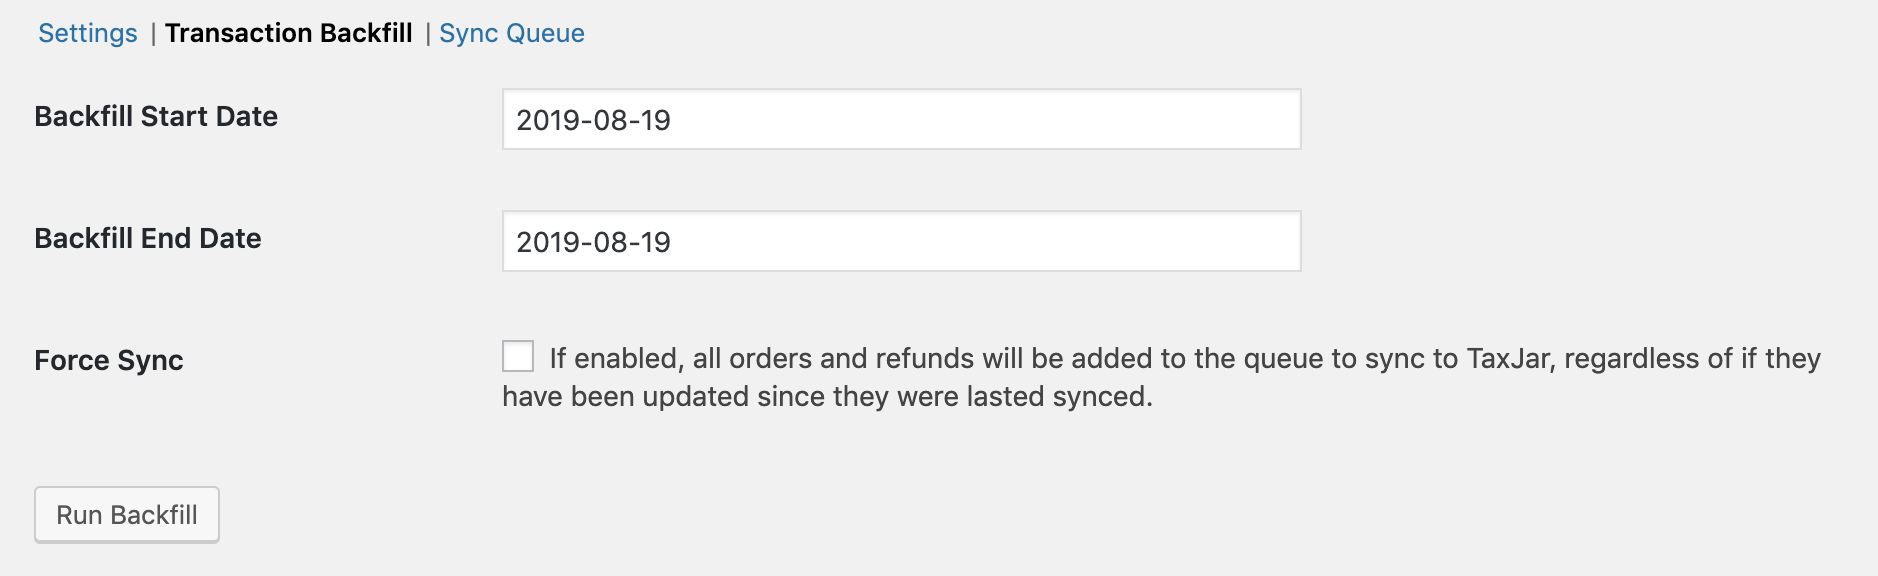
If you need to backfill your historical WooCommerce orders into TaxJar, use the Transaction Backfill tool:
Your store seems to be calculating sales tax correctly, but how many TaxJar API calls are made per order?
The latest version of our plugin only makes live API calls when the order resides in a state where you have Nexus. This saves you a lot of API calls and money.
API calls are cached using the WordPress Transients API. If you have a customer repeatedly loading the checkout page without changing their shipping info, your store will not make additional API calls. On average, the TaxJar API integration makes 2-3 API calls per order in a Nexus state.
API calls are only made under three conditions:
- Checkout process for a nexus state
- Cart shipping and tax estimate for a Nexus state
- Calculating taxes from an order inside WooCommerce > Orders
Our TaxJar API integration hooks onto the
woocommerce_after_calculate_totals action, only if sales tax calculations are enabled.
After a customer completes an order using the TaxJar API, our plugin stores the rate region ID and sales tax amount (both order and shipping tax) in your database.
Once enabled, TaxJar will automatically import your order and refund transactions from WooCommerce through our API. Orders must be in a
completed or
refunded status for TaxJar to import them. This ensures that only completed orders and refunds are imported into the system.
Previous versions of our plugin (before version 3.0) used the WooCommerce REST API to import transactions on a nightly basis. Our plugin generated API keys after enabling order downloads to TaxJar. If you’ve already upgraded to version 3.0 or later, we automatically migrated your connection to our new transaction sync. You’ll no longer use the TaxJar app to backfill older transactions. Instead, use the Transaction Backfill tool under
WooCommerce > Settings > TaxJar to push historical orders into TaxJar.
TaxJar supports checkout calculations powered by TaxJar API in
more than 30 countries, including VAT in the EU and Canada. To perform international calculations, set the country as your
Store Address under
WooCommerce > Settings > General.
To troubleshoot, go to
Connect Your WooCommerce Account article. Ensure that:
- Your server meets WooCommerce system requirements.
- Your PHP memory limit is 64 MB or higher (128 MB+ recommended). If you’re unsure, contact your hosting provider.
Have a question or need assistance?
Get in touch with TaxJar experts.
To help us help you, please include the TaxJar plugin version in your support email and any relevant log entries. You can find the plugin version under
Plugins > Installed Plugins.