Guides
↑ Back to topHow to install and configure the plugin?
↑ Back to top1. Install & activate the plugin
Start in your WordPress Dashboard, navigate to Plugins > Add New. Upload the plugin zip file obtained from WooCommerce Marketplace to install and activate this plugin.
2. Install Google Tag Manager
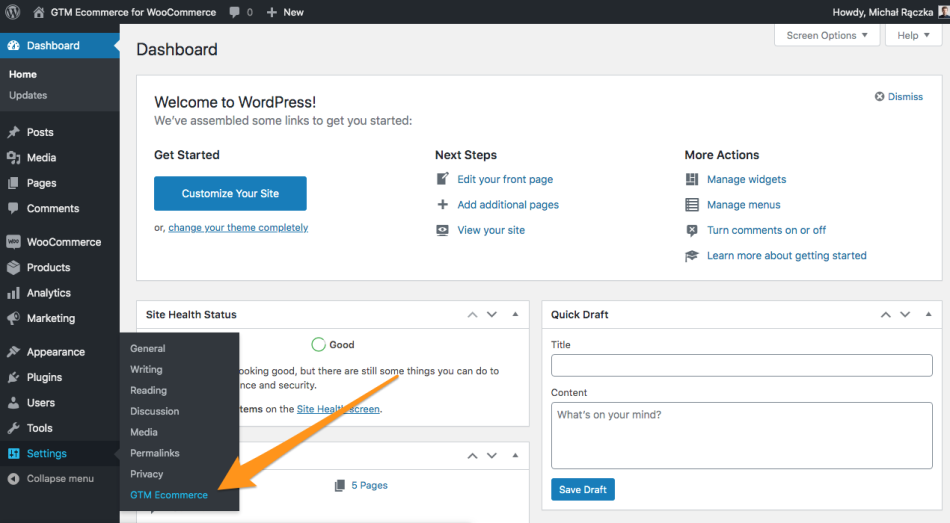
Now it’s time to embed the main Google Tag Manager snippet to your WooCommerce shop. If you haven’t done it before using another plugin or directly in the theme code you can navigate to Settings > GTM Ecommerce and fill in two text areags at the top of the settings. The snippets to paste in those fields can be found in Admin pane in Google Tag Manager. Go to Container > Install Google Tag Manager.
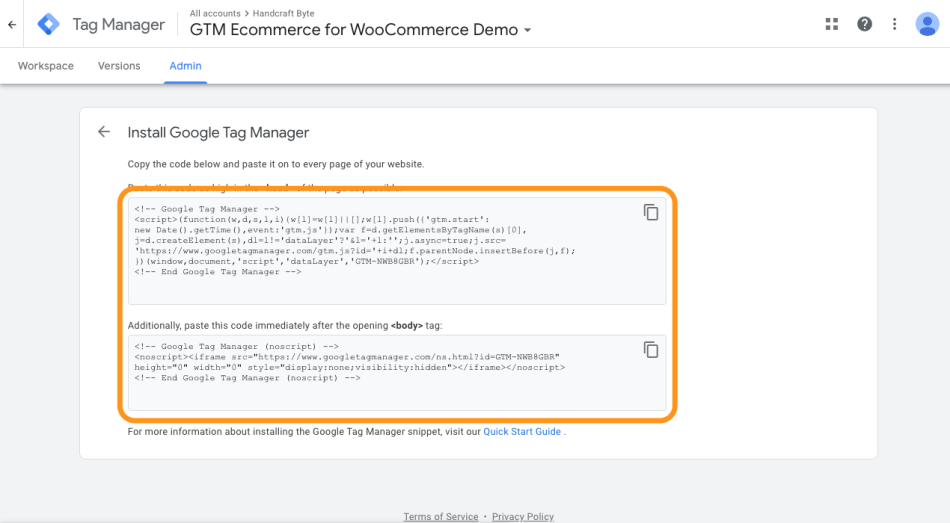
This will show you two fields to copy code from and paste in respective fields in WordPress Dashboard.

Once pasted scroll down and hit Save Settings.
3. You are ready to integrate!
After the GTM snippets are saved the plugin will start pushing events to DataLayer and Google Tag Manager.
Now it’s time to configure Google Tag Manager to forward this data to selected tools. We know this may be a cumbersome activity to create all GTM Tags, Triggers and Variables one by one manually, that’s why our plugin comes with handy presets that are easy to import in few simple steps to any GTM container.
Continue to next guides:
How to integrate Google Analytics GA4 with WooCommerce?
How to import any GTM container preset?
How to integrate Google Analytics GA4 with WooCommerce?
↑ Back to top1. Install and configure Google Tag Manager for WooCommerce plugin
First, make sure that Google Tag Manager for WooCommerce plugin is up and live in your WooCommerce shop.
You can follow this guide in case of doubts.
2. Prepare GTM GA4 property
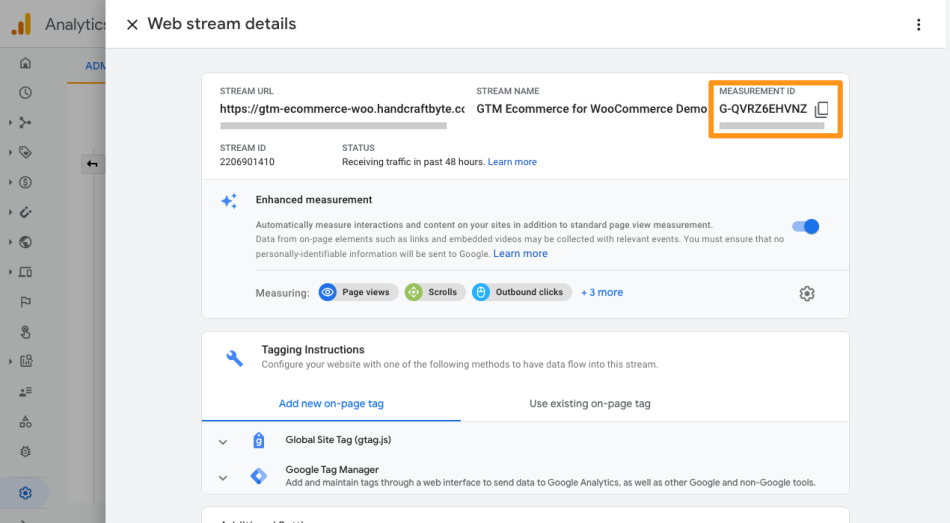
Next prepare a new GA4 property and obtain the GA4 Measurement ID.
Go to your GA4 property, click the gear icon in the bottom left, and select Data Streams. If you haven’t done that before you will need to create a new Web stream. Once you are in the correct stream, copy the Measurement ID.

3. Download GA4 preset
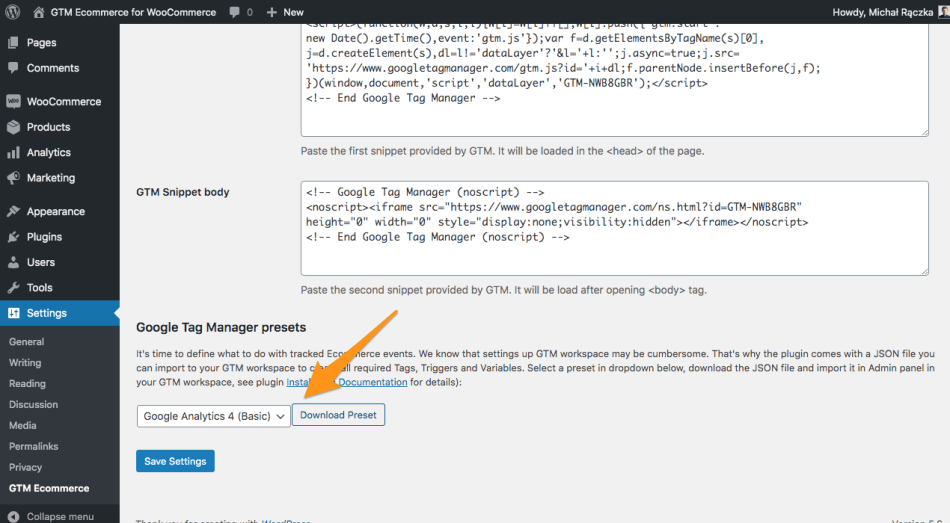
After that navigate back to your WordPress instance and go to Settings > GTM Ecommerce. These are the settings of our plugin and if you scroll to the bottom you will find a dropdown with a few GTM container presets. Select Google Analytics 4 (Basic) and click Download Preset. That will download and save ga4-basic.json file to your computer.


4. Import GA4 preset
The next step is to import the preset you have just downloaded into your GTM Workspace.
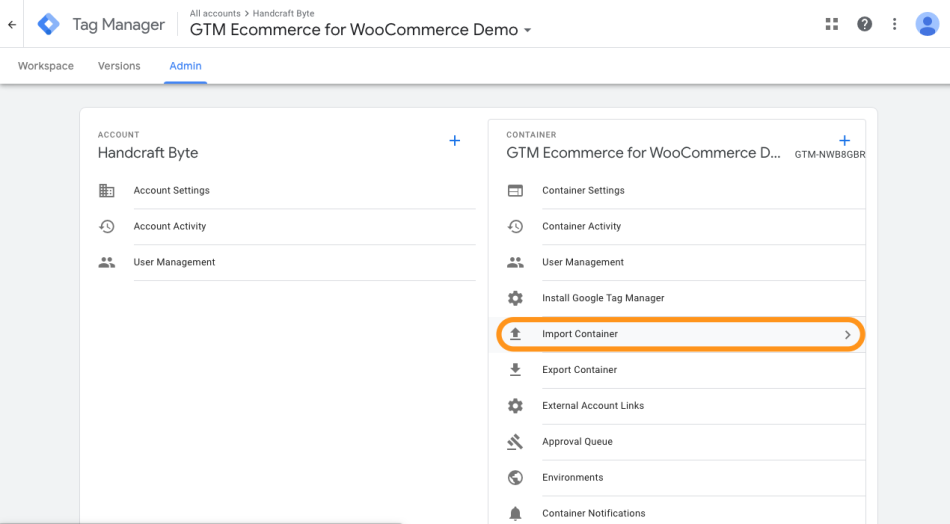
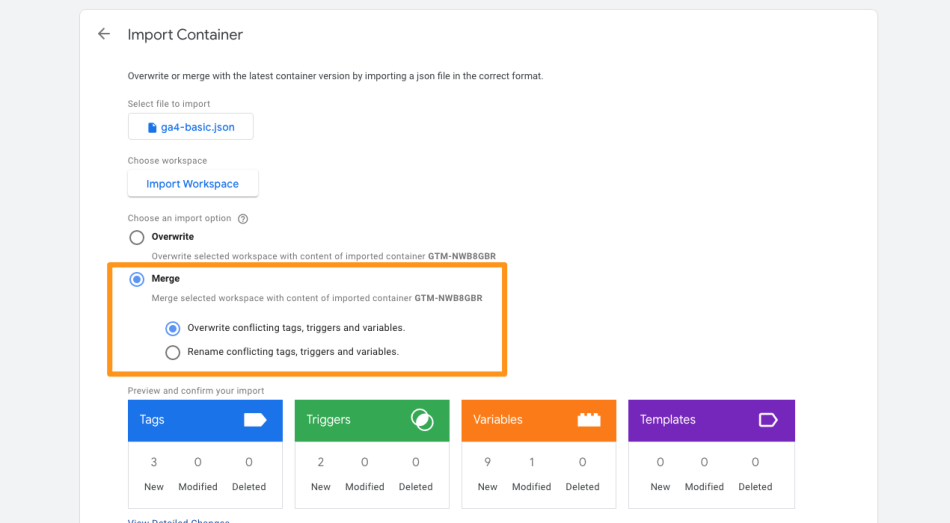
Navigate to GTM Workspace and go to Admin > Import container. In the new screen select the ga4-basic.json file and your Workspace (usually default one). Next select Merge as the import option and Overwrite conflicting tags, triggers and variables. as the sub-option. It’s very important to make sure those two options are selected.
Import screen gives you a quick way to preview all the changes import will make to your workspace. Now you can click Confirm. This will bring the changes as draft so you will have opportunity to review and adjust everything before going live.

5. Update GTM container and publish it!
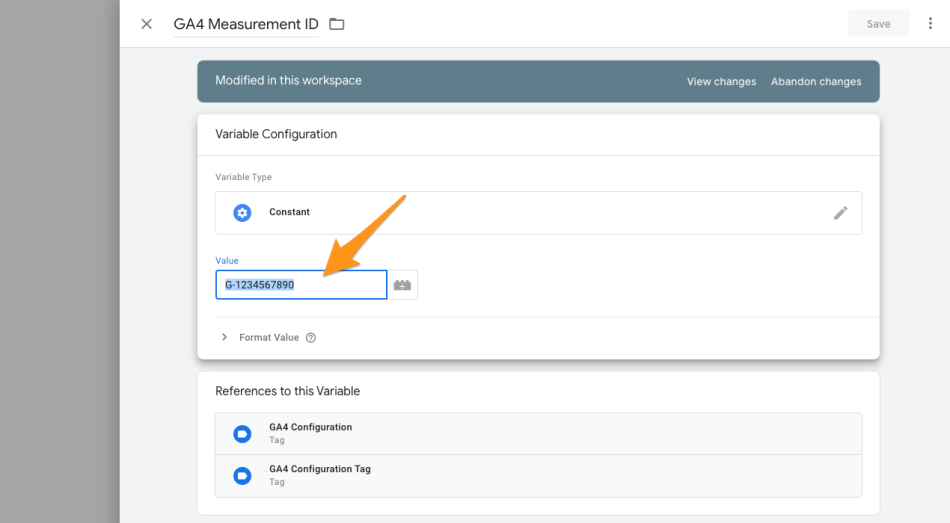
The last step is to find the GA4 Measurement ID variable. It can be found on the overview screen that shows all the changes you have just imported, or on the Variables list.
Open this variable and edit it’s value pasting the Measurement ID for your GA4 property.

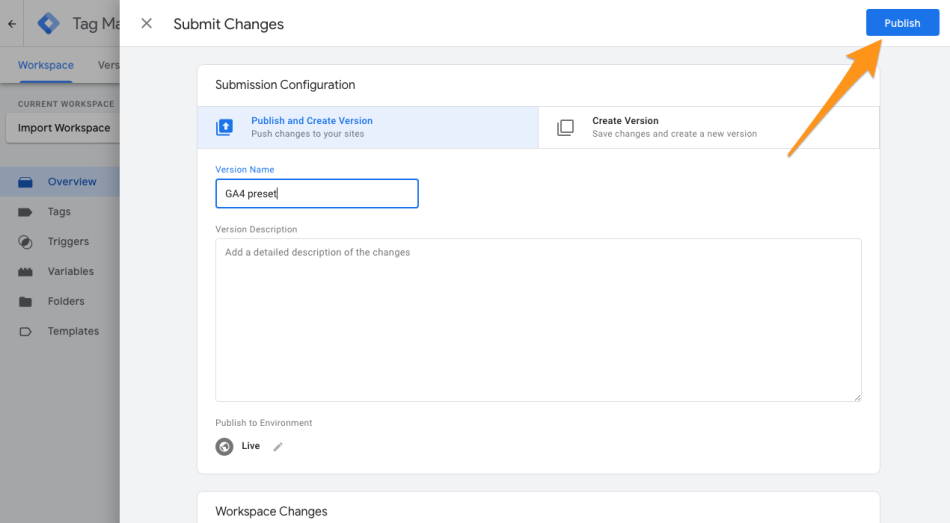
Save the change and publish everything to your end users!

You can confirm data is tracked in GA4 realtime screen.

How to import any GTM container preset?
↑ Back to topThis is a general guide on how to import GTM container presets provided by Google Tag Manager for WooCommerce plugin.
1. Download preset for selected tool
First go to Settings > GTM Ecommerce and scroll down to see dropdown with all available presets.
IMPORTANT: the list of available presets depends on the version (free vs paid) of the plugin that you use.
Once correct preset is selected in the dropdown hit Download Preset button to get special JSON file.
2. Import preset in Google Tag Manager
In Google Tag Manager go to the Admin tab of your workspace. Click Import Container. Choose the container file you have just downloaded. Decide which workspace it should go to. Then select Merge and Overwrite conflicting tags, triggers and variables. as import options.
Once you are sure you have the correct options selected hit Confirm to create Tags, Variables, and Triggers.
3. Review the changes and publish it
When the container preset is imported those changes will be applied to your GTM Workspace, but they won’t be deployed to end-users yet. This allows you to review all changes and apply any modifications as needed before publishing to the production page.
To make things clear all tags, triggers and variables from the preset are assigned to respective GTM Folder with the name of the preset (some presets may bring in two folders if more complex).
Most of the presets will require at least one manual change which will be setting the ID of the service to integrate with (GA4 Measurement ID or UA Settings). You will usually find them as one of the Variables, but please check documentation specific for your preset.
Once all the required changes are done you can hit Submit and type in your change description.
Your new Google Tag Manager integration is live now!
Reference
↑ Back to topSupported Events and Properties
↑ Back to topEvents
- add to cart
- items
- purchase
- purchase details
- items
- begin checkout
- items
- remove from cart
- items
- select item
- items
- view item list
- items
- view item
- items
Properties
- items
- item_name
- item_id
- price
- item_brand
- item_category
- item_coupon
- item_variant
- item_list_name
- item_list_id
- index
- quantity
- purchase details
- transaction_id
- affiliation
- value
- tax
- shipping
- currency
- coupon
Available GTM Presets
↑ Back to top- GA4 Advanced
- all supported events
- Universal Analytics Advanced
- all supported events (GA4 events are transformed into legacy format)
- Facebook Pixel Advanced
- view content
- add to cart
- initiate checkout
- purchase
- Google Ads Advanced
- purchase conversion