Sales Agent For WooCommerce manages sales agents and their customers. Sales agent for WooCommerce gives you everything you need to calculate commissions on every order.
Store Owner’s Guide – Basic Concepts
↑ Back to topInstallation
↑ Back to top- Download the plugin zip file from WordPress
- Navigate to the WordPress Admin Dashboard > Plugins
- Click on the Add New button in the top left corner.
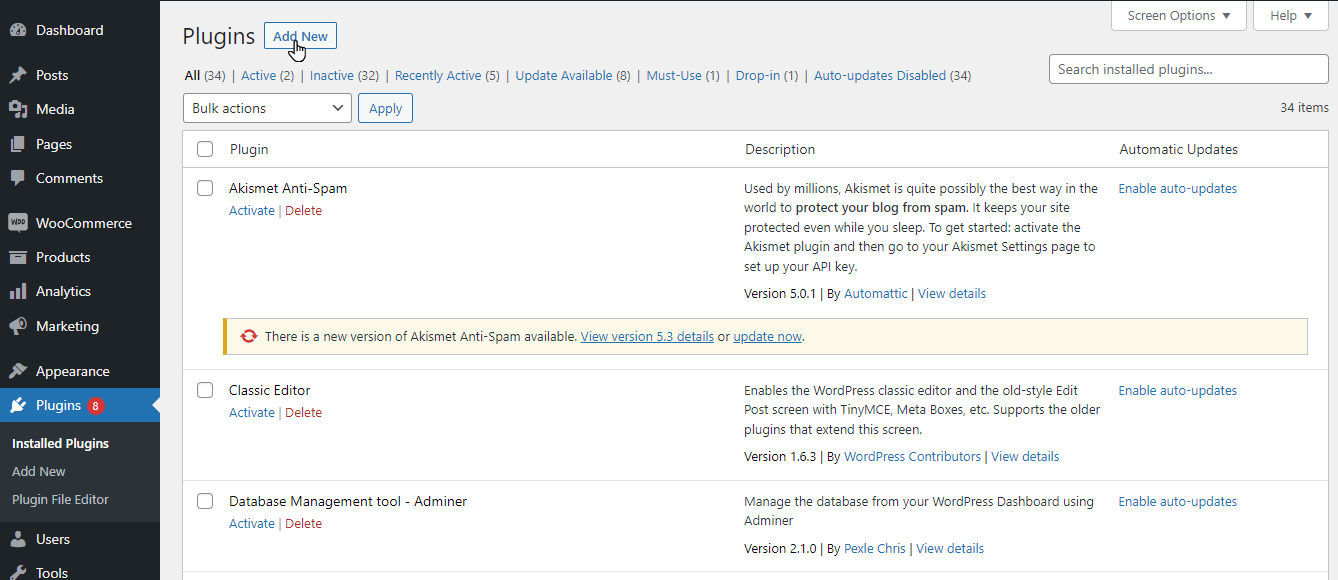
- Click the Upload plugin button and upload the zip file of the plugin which you have downloaded earlier.
- Click the “Install now” button.
- Once installed, click the “Activate” link.
Commission System
↑ Back to top- Admin can set a commission system from the drop-down menu for the agent.
- Go to Admin Dashboard => Sales Agent => Commission Category.
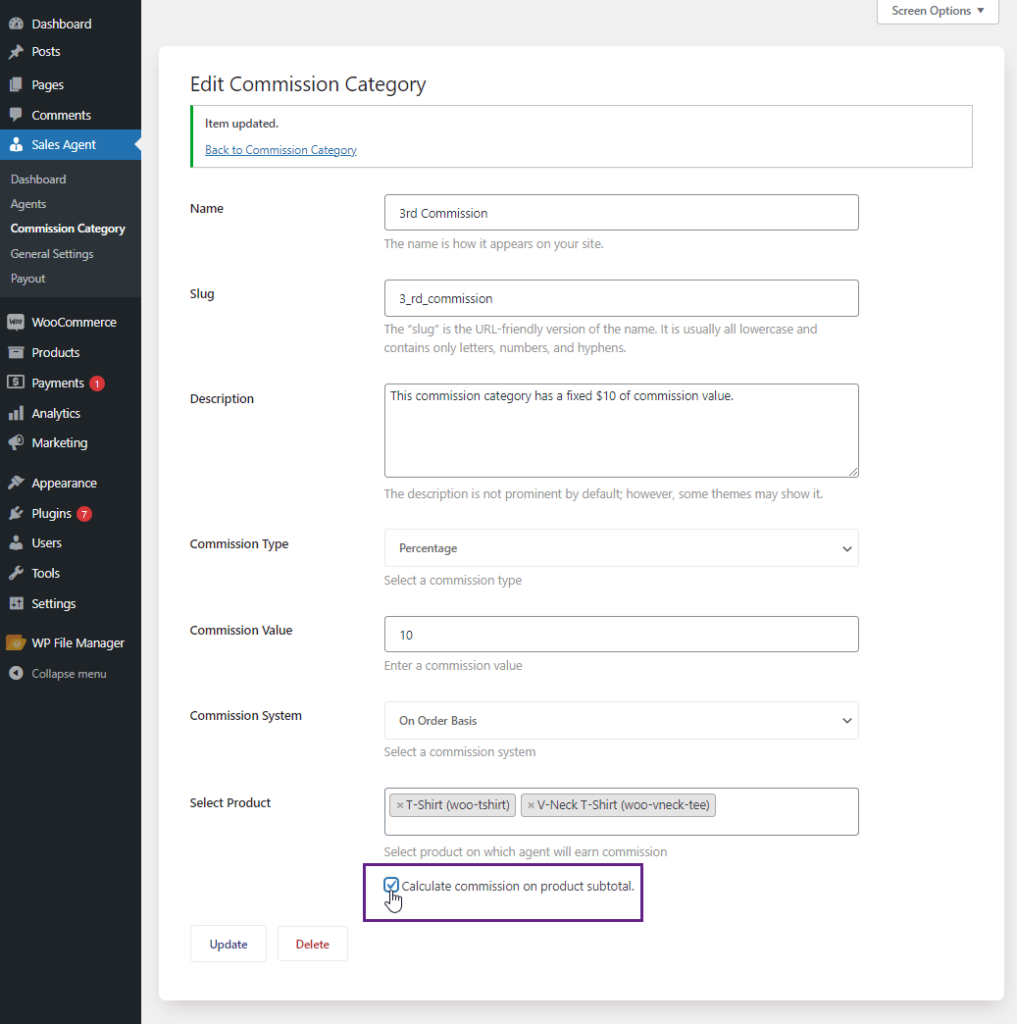
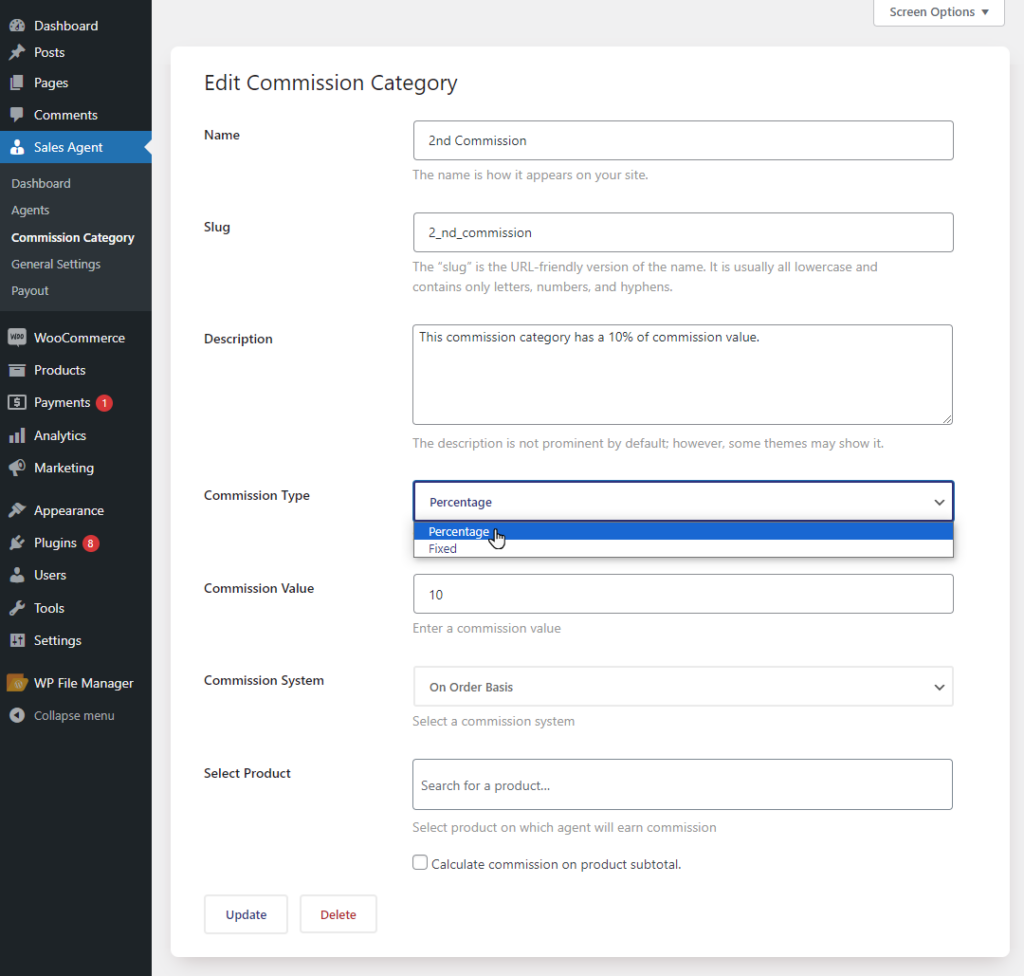
- Set-up the Commission Category or Edit the existing commission.
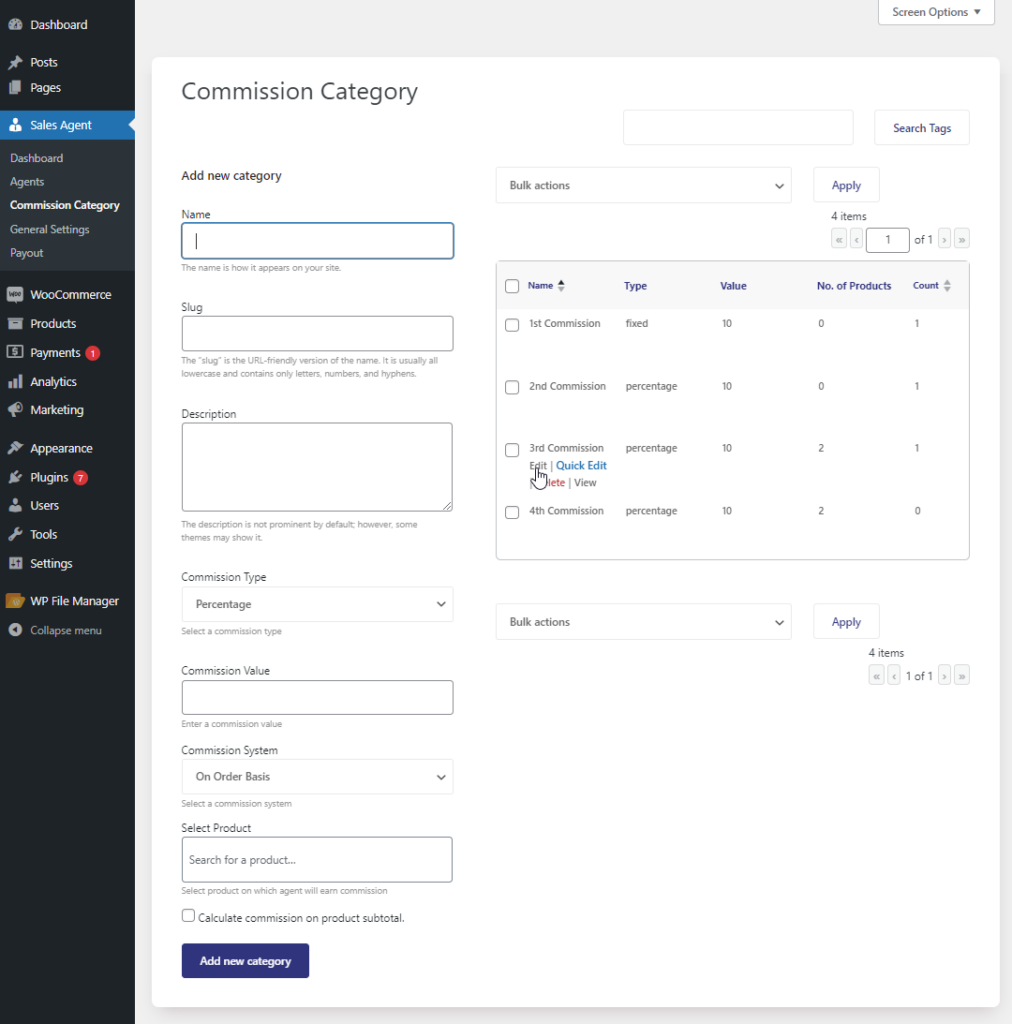
- Navigate Commission Type, select Percentage from the drop-down menu.

On Order Basis
↑ Back to top- Navigate Commission System.
- Select On Order Basis from the drop-down menu.

Select Product
- Navigate Select Product.
- Select products in the multi-selector box, on which the agent will get commission.
- Click on Update.
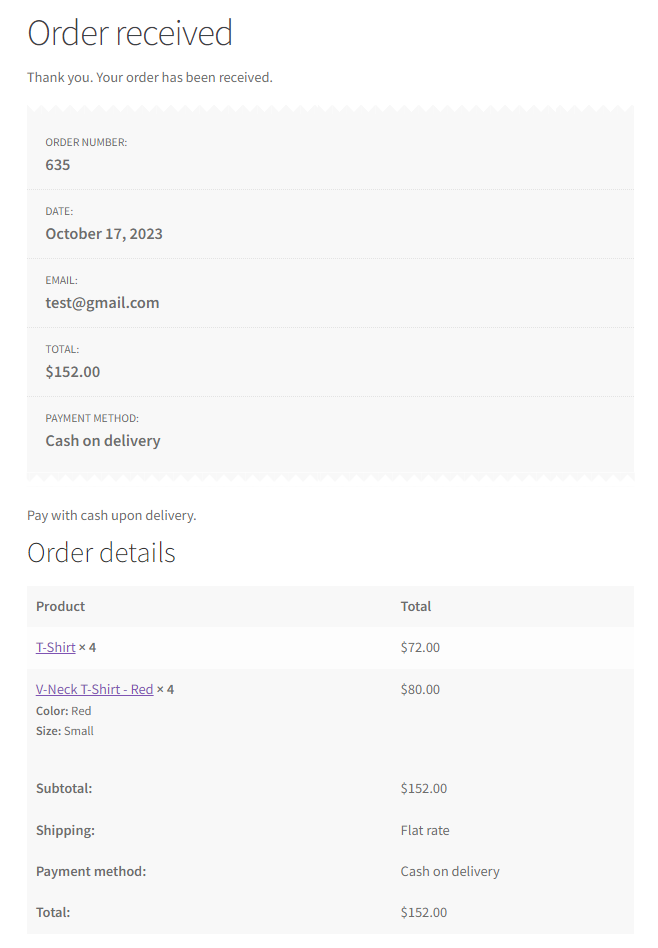
Calculate Commission On Single-Product
- If the check-box is not checked, then the agent will get the commission on a single product, no matter how much the quantity customers buy.
- Login with a Sales Agent Account.
- Go to My Account.
- Navigate and click on Agent Customers.
- Search required customers.
- Navigate and click on Make Order.
- Agent will be redirected to the Customer Account.
- Go to the Shop Page.
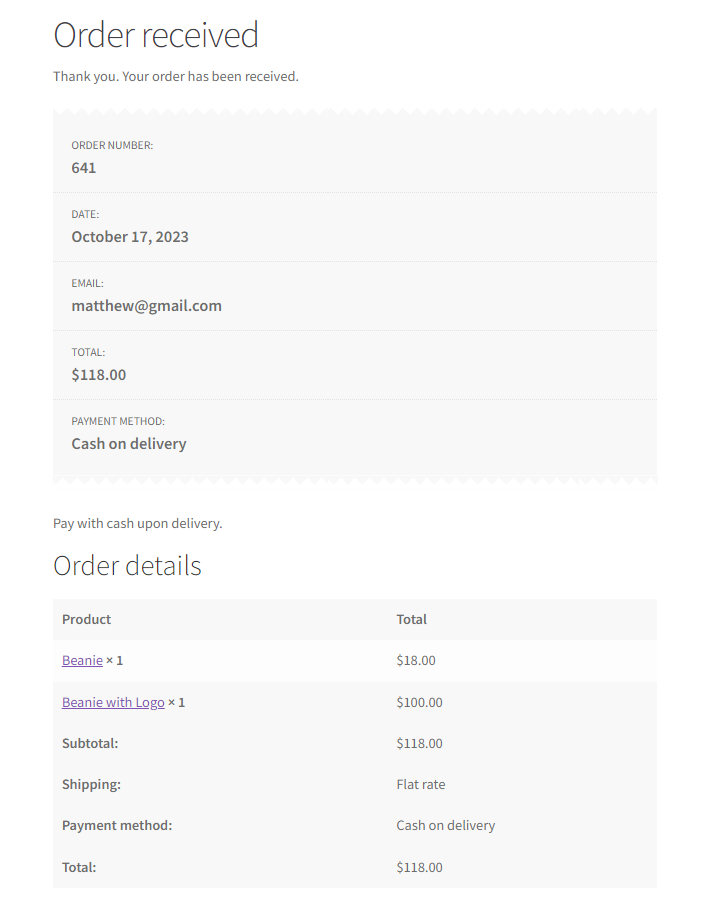
- Place an order of products on which the agent will get the commission.
- Navigate to Admin Dashboard => WooCommerce => Orders.
- Navigate to the order, click on it to view the order details.
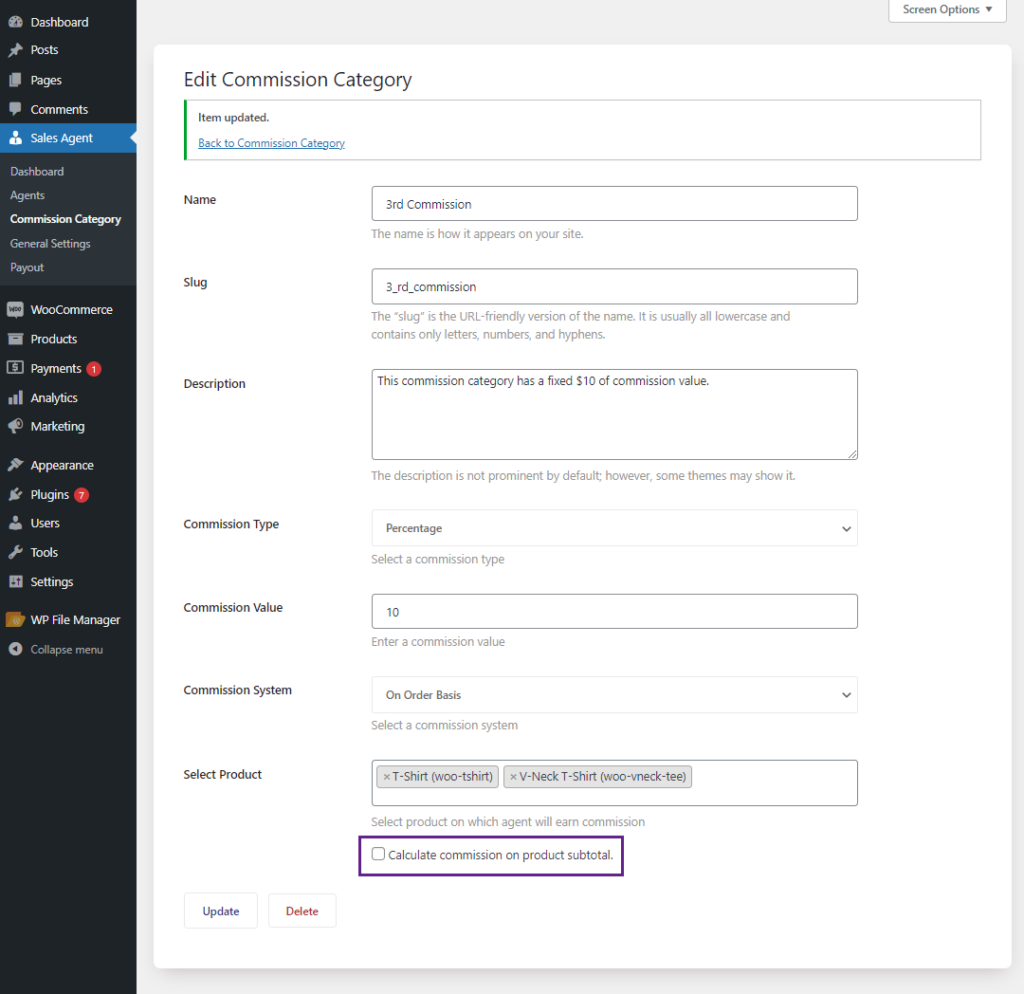
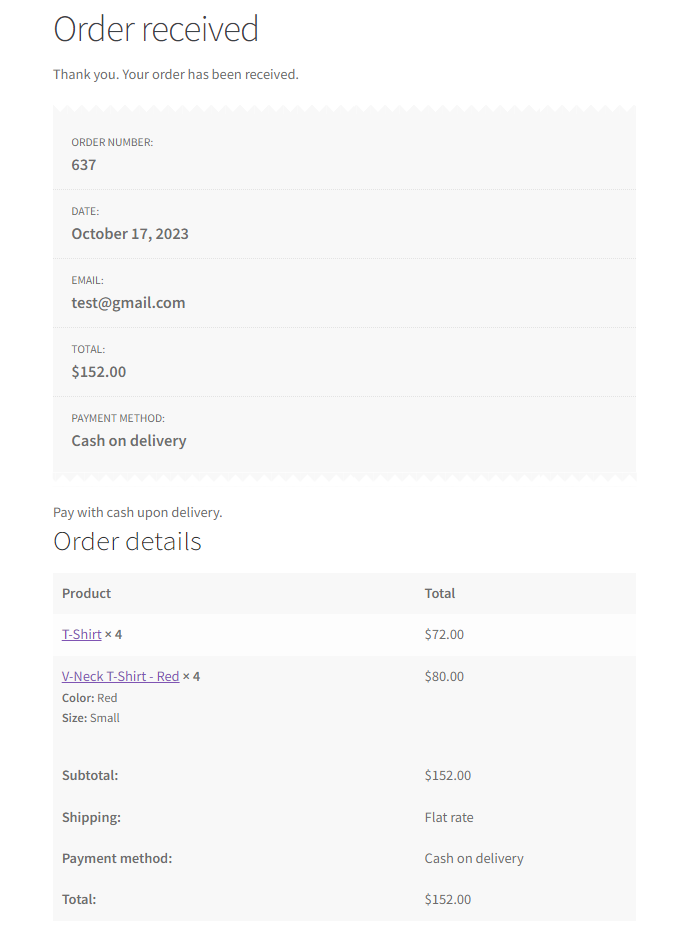
Calculate Commission On Product Total
- If the check-box is checked, then the agent will get the commission on the product Total.
- Login with a Sales Agent Account.
- Go to My Account.
- Navigate and click on Agent Customers.
- Search required customers.
- Navigate and click on Make Order.
- Agent will be redirected to the Customer Account.
- Go to the Shop Page.
- Place an order of products on which the agent will get commission.
- Navigate to Admin Dashboard => WooCommerce => Orders.
- Navigate to the order, click on it to view the order details.
On Earning Basis
↑ Back to top- On Earning Basis allows the admin to set a target amount that needs to be sold by the sales agent in the set deadline inorder to achieve the commission.
- Admin can set commission type from the drop-down menu for the customer.
- Go to Admin Dashboard => Sales Agent => Commission Category.
- Set-up the Commission Category or Edit the existing commission.
For Percentage Commission Type
- Navigate to the Commission Type, select Percentage from the drop-down menu.
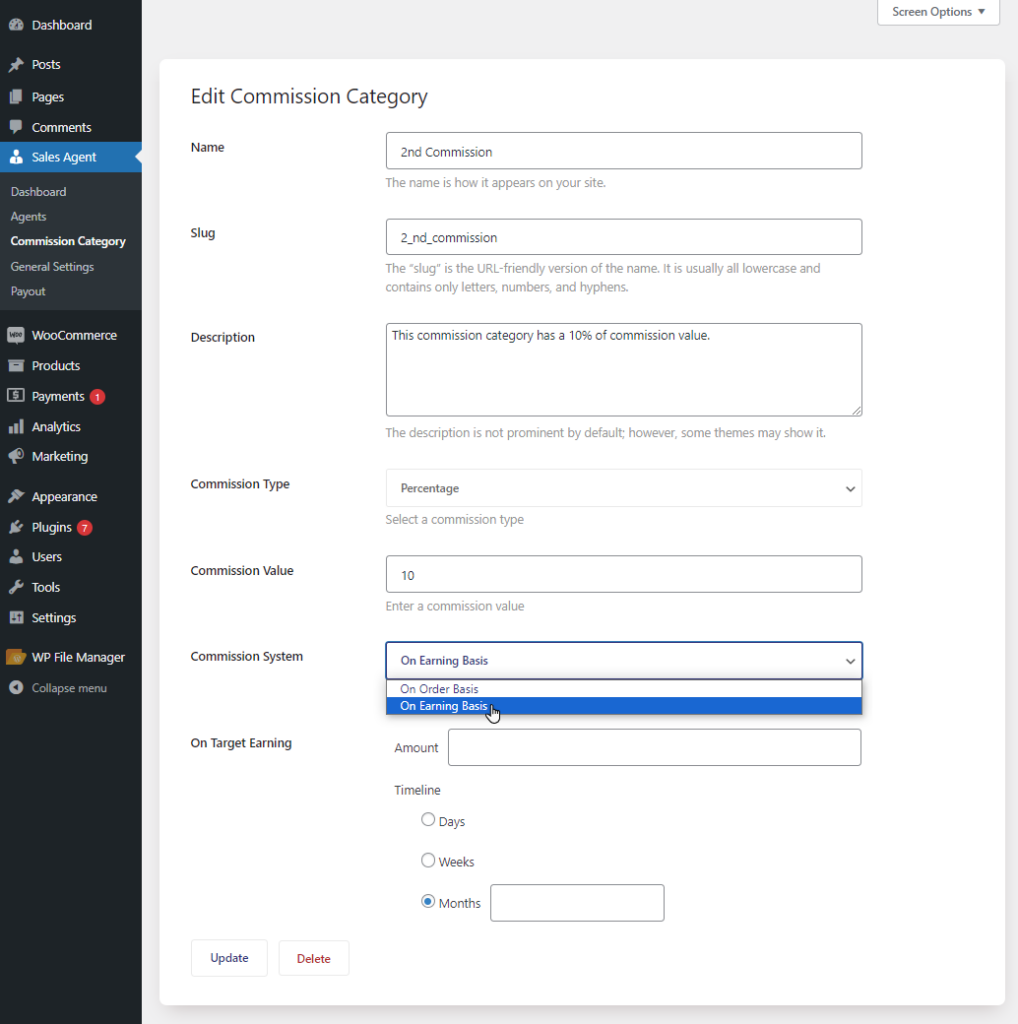
- Navigate to the Commission System.
- Select On Earning Basis from the drop-down menu.
On Target Earning
- Navigate On Target Earning.
- Enter the targeted Amount in the box, on which the agent will get commission.
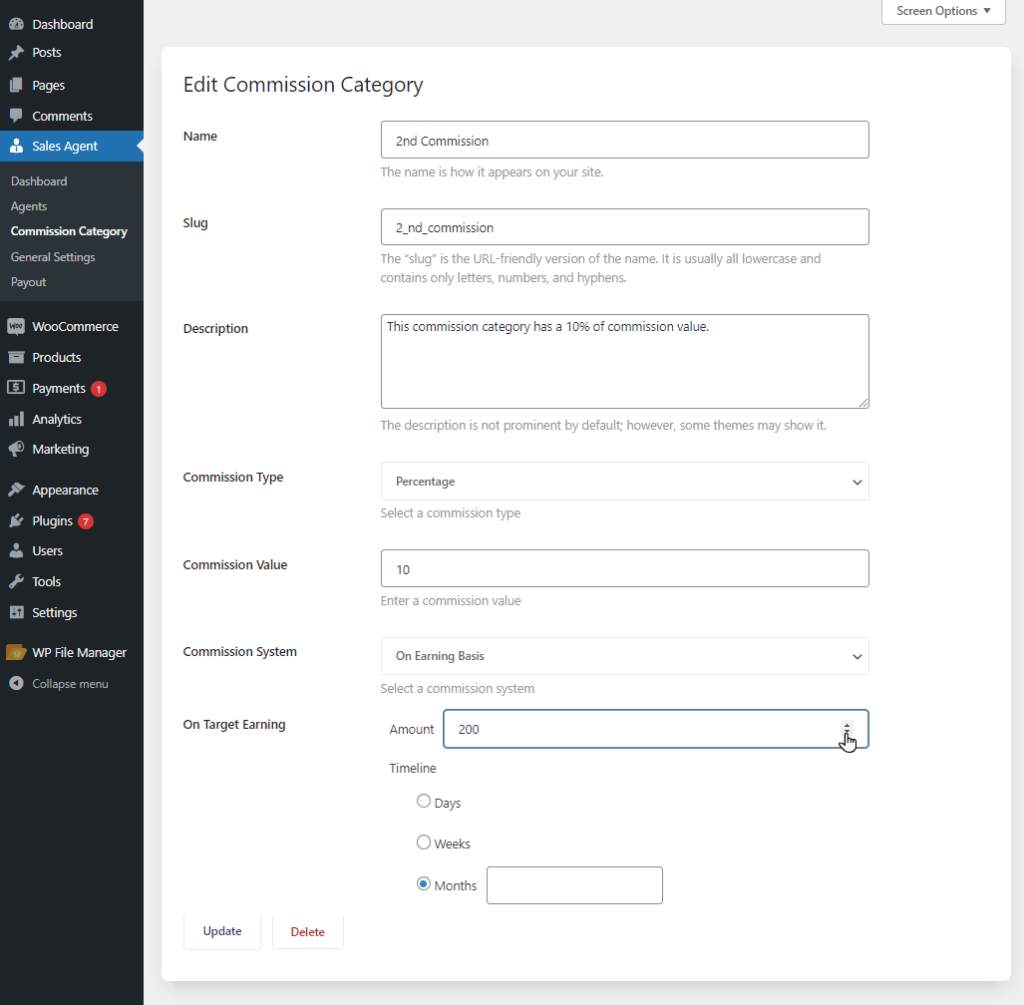
- Select the Timeline, enter the number of days, weeks or months on which it will end the agent commission.
- Agent commission depends on this timeline, if the agent completes the orders equivalent or greater than the given Target Amount in the set Timeline, only then the agent will receive the commission amount.
- Click on the Update button.

Front-End
- Login with a Sales Agent Account.
- Go to My Account.
- Click on the Agent Customers.
- Search required customers.
- Navigate and click on Make Order.
- Agent will be redirected to the Customer Account.
- Go to the Shop Page.
- Place an order of products on which the agent will get commission.
- Navigate to Admin Dashboard => WooCommerce => Orders.
- Navigate order, click on it to view the order.
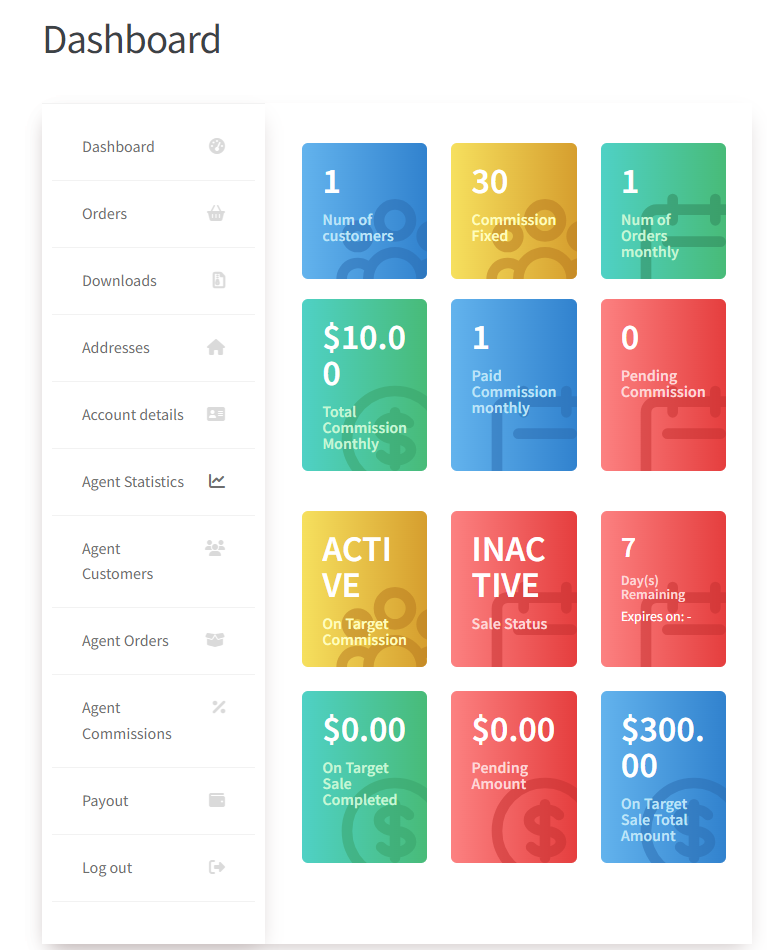
Agent Dashboard
- Agents can check their statistics.
- Navigate My Account => Agents Statistics.
- If there is no On Target Commission for sales agents then the status will display INACTIVE and the rest of the boxes will be hidden except On Target Based Commission.
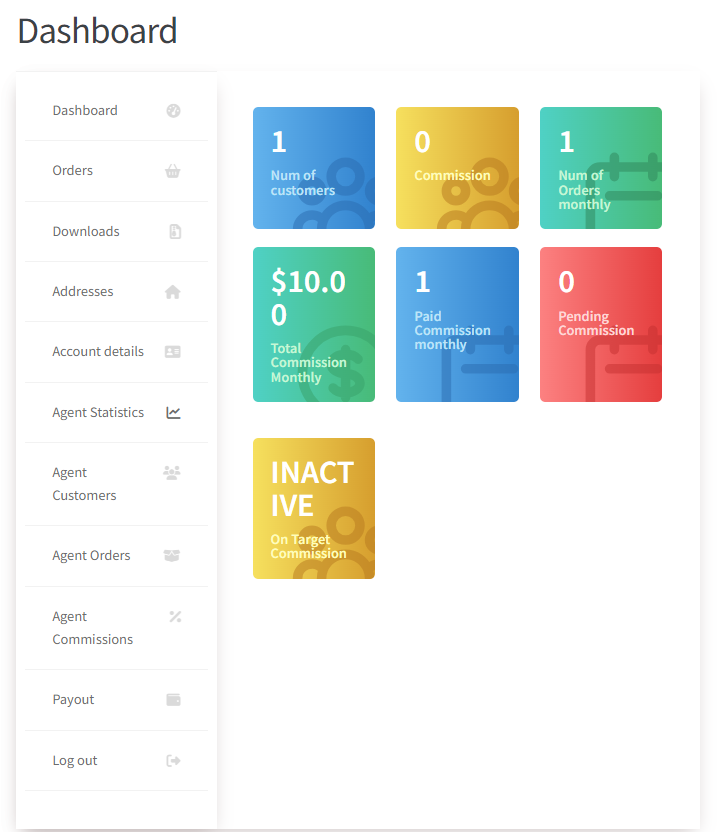
- When an agent is added in the commission category, status will be ACTIVE in the On Target Based Commission box and Sale Status will display INACTIVE.
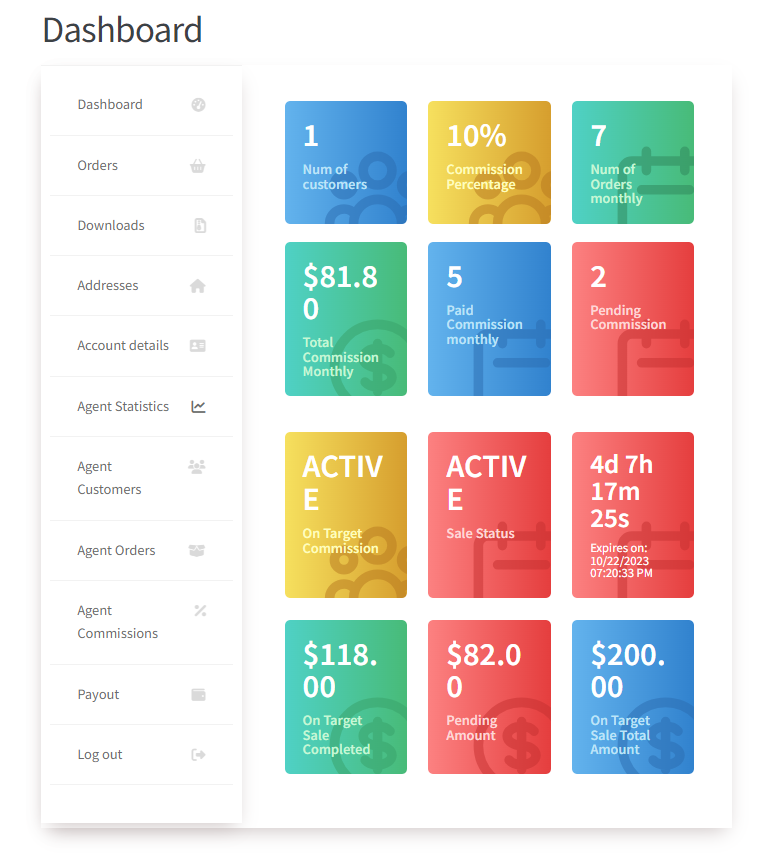
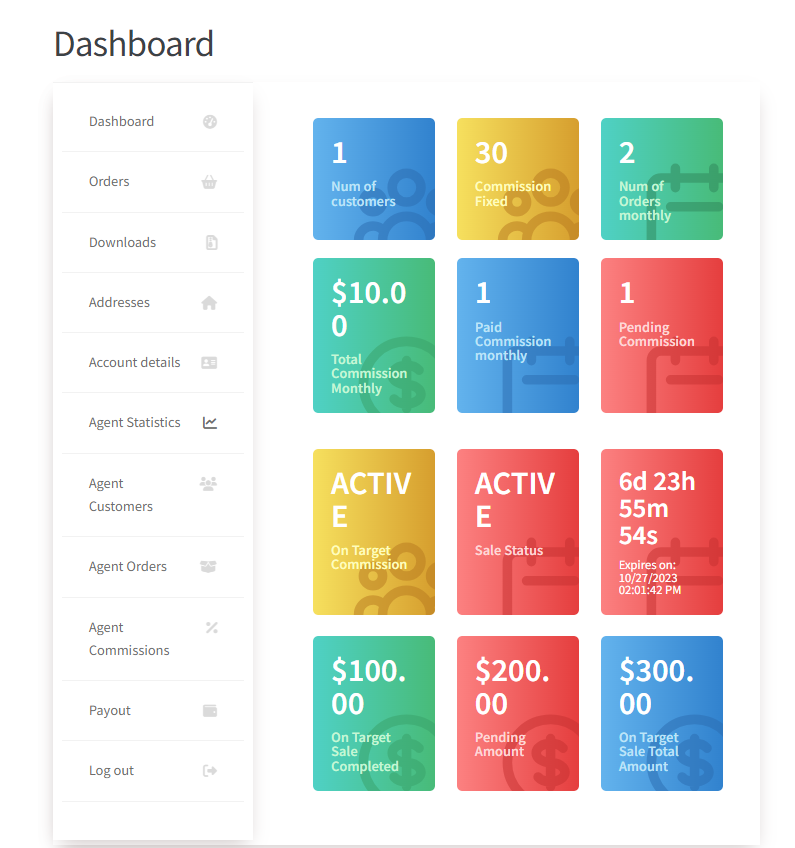
- When On Target Basis is selected and the target basis commission system is active, the agent dashboard will show following:
- When the agent makes his first sale only then the Commission timer (Days remaining) will be started and the Sale Status will display ACTIVE.
- On Target Commission : Active/Inactive. This will update when an agent has assigned an On Target Commission category.
- Sale Status: This shows if the sales agent has started the sale yet or not. If the sale has been started, the status will be ACTIVE, if the agent has not yet started any sale it will be INACTIVE.
- On Target Sale Completed: This will be the amount that is earned up till now by the agent out of the total amount. It will become 0 when reset or deadline is ended.
- Pending Amount: This is the remaining amount that the agent needs to earn to get commission.
- On Target Sale Total Amount: This is the total target amount set by the admin.
- Days Remaining: This is the remaining days set by the admin in which the agent has to complete the targeted order amount in order to earn the commission.
- This will change dynamically, if the admin has selected 3 Months from the back-end, then these 3 Months will be converted into days i.e 90 Days and these 90 Days will be displayed in this box.
- This box will also display the Expires on Time. This will be the date and time when this commission timeline will end.
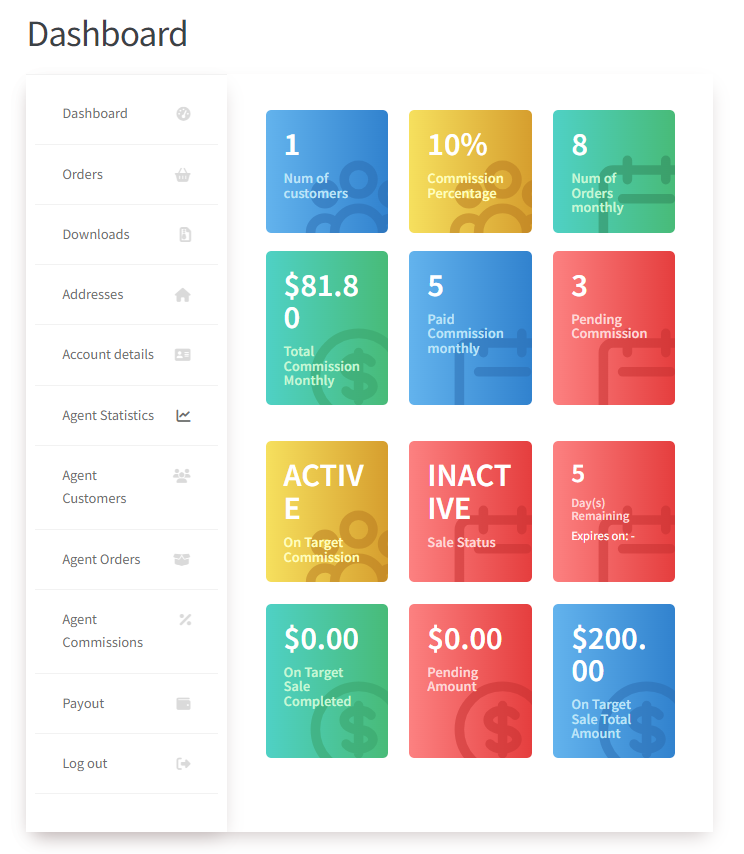
- When the deadline is ended i.e Days Remaining is zero, all the boxes will be reset and Sales Status will display INACTIVE.
- When agents achieve the targeted amount, in their statistics, the Sales Status will be INACTIVE and On Target sale Completed will become zero.
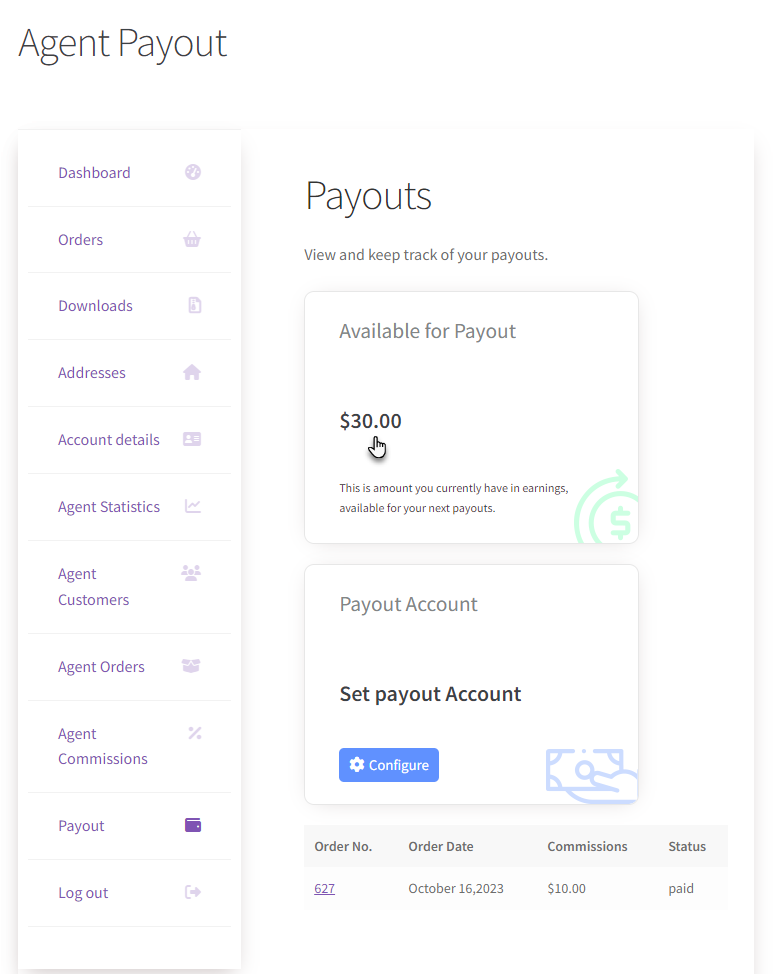
- Navigate to the Agent Dashboard => My Account => Payout.
- The commission amount earned by the agent after selling the orders equivalent to the target amount is shown in the agent payout.
For Fixed Commission Type
- Navigate Commission Type, select Fixed from the drop-down menu.
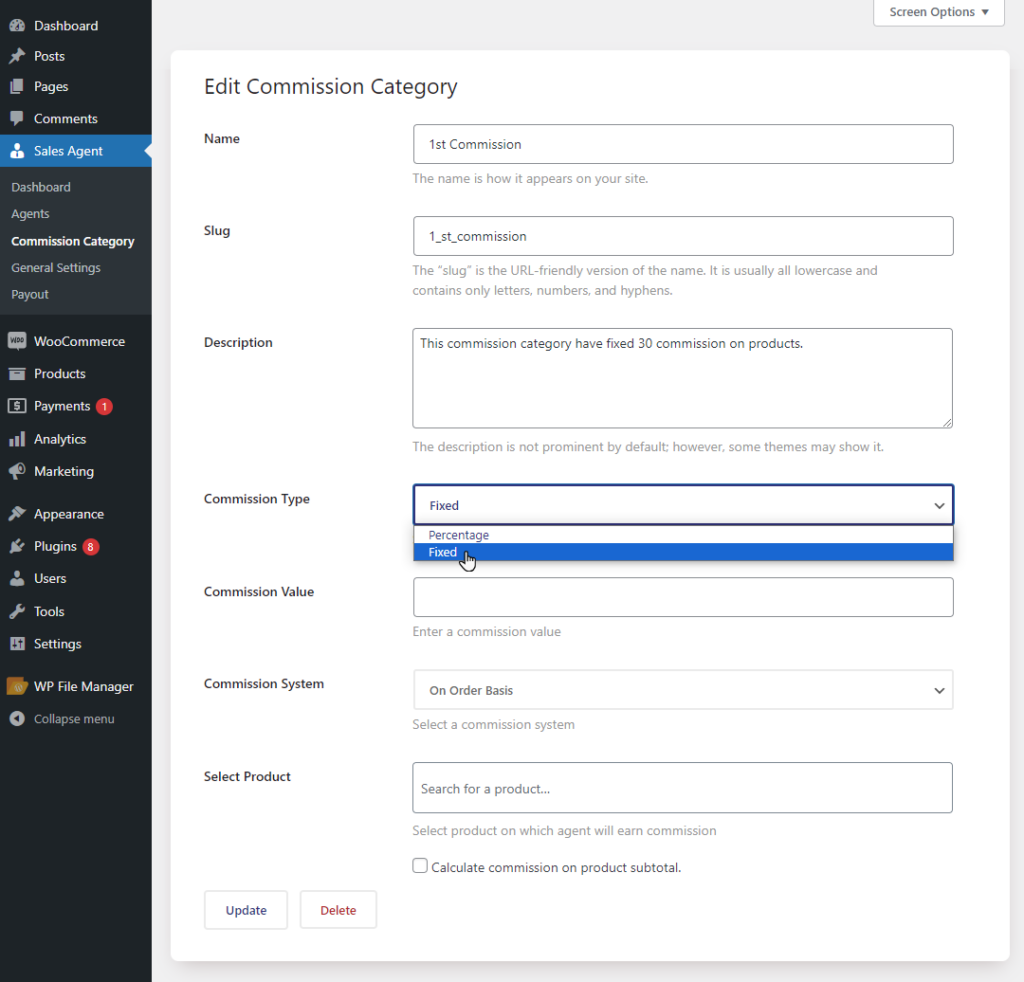
- Navigate Commission System.
- Select On Earning Basis from the drop-down menu.
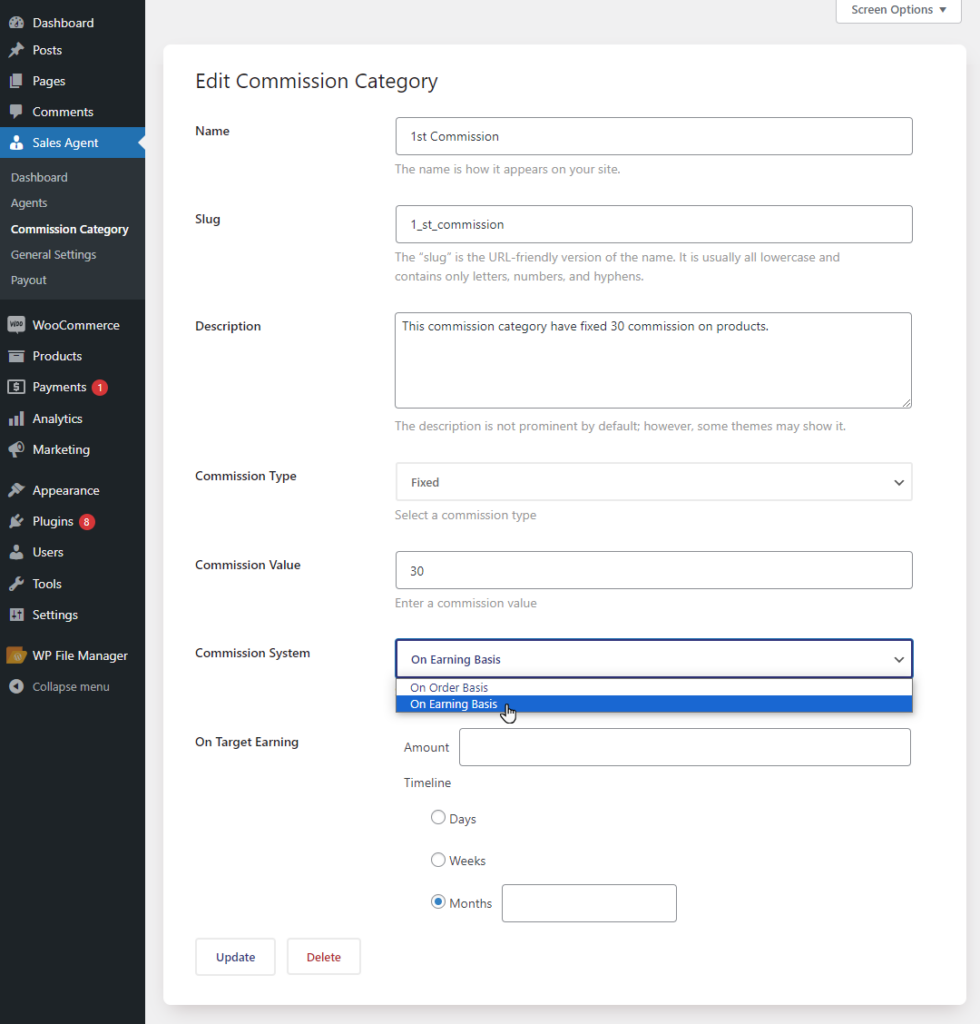
On Target Earning
- Navigate On Target Earning.
- Enter the targeted Amount in the box, on which the agent will get commission.
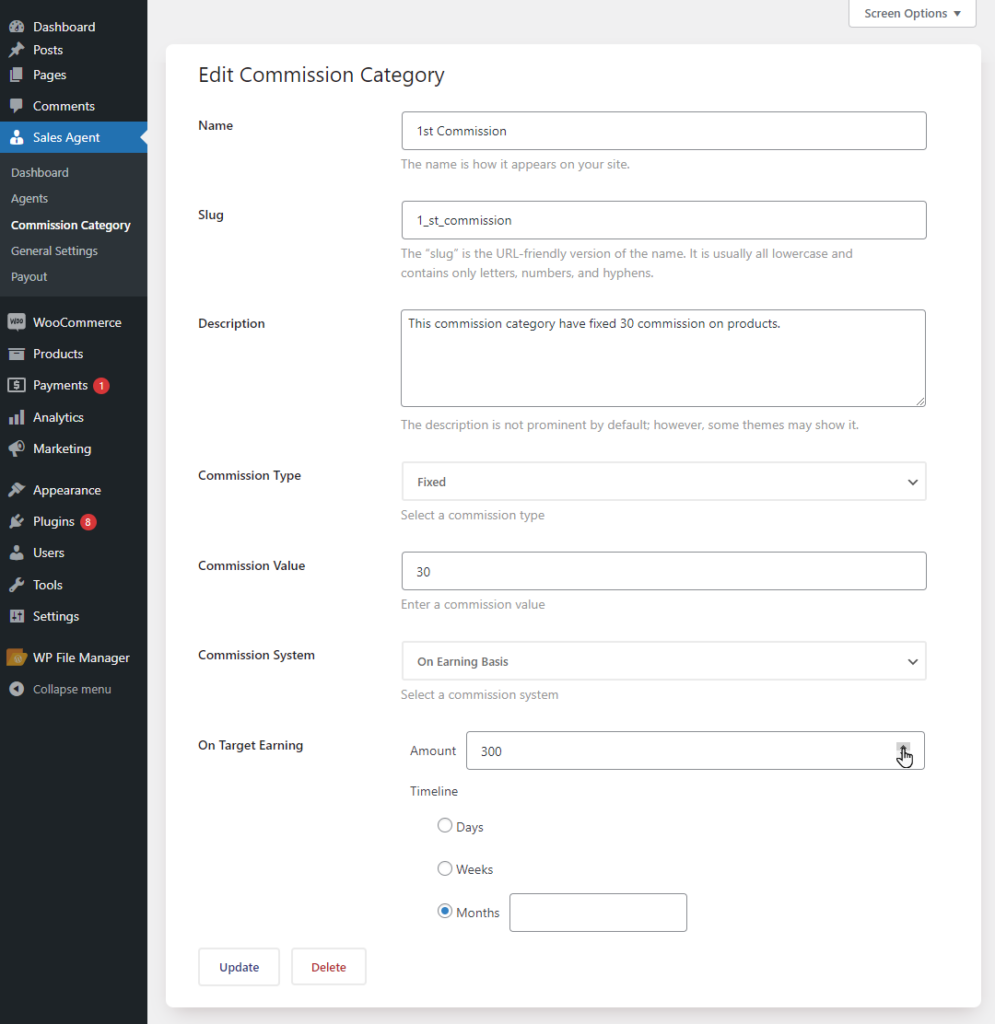
- Select the Timeline, enter the number of days, weeks or months on which it will end the agent commission.
- Agent commission depends on this timeline, if the agent completes the orders equivalent or greater than the given Target Amount in the set Timeline, only then the agent will receive the commission amount.
- Click on the Update button.
Front-End
- Login with a Sales Agent Account.
- Go to My Account.
- Navigate and click on Agent Customers.
- Search required customers.
- Navigate and click on Make Order.
- Agent will be redirected to the Customer Account.
- Go to the Shop Page.
- Place an order of products on which the agent will get commission.
- Navigate to Admin Dashboard => WooCommerce => Orders.
- Navigate order, click on it to view the order.
Agent Dashboard
- Agents can check their statistics.
- Navigate My Account => Agents Statistics.
- If there is no On Target Commission for sales agents then the status will display INACTIVE and the rest of the boxes will be hidden except On Target Based Commission.

- When an agent is added in the commission category, status will be ACTIVE in the On Target Based Commission box.
- When the agent makes his first sale only then the Commission timer (Days remaining) will be started and the Sale Status will display ACTIVE.
- The amount of the completed order will be added in the On Target Sale.
- The remaining target amount will be displayed in the Pending Amount.
- When the deadline is ended i.e Days Remaining is zero, all the boxes will be reset and Sales Status will display INACTIVE.
- When agents achieve the targeted amount, in their statistics, the Sales Status will be INACTIVE and On Target sale Completed will become zero.
- Navigate to the Agent Dashboard => My Account => Payout.
- The commission amount earned by the agent after selling the order equivalent to the target amount is shown in the agent payout.
Number Of Orders
↑ Back to top- Admin can view the Number Of Orders agent receives.
- Navigate to the Admin Dashboard => Sales Agent => Agents.
- Navigate to the Number Of Orders column in the agents table.
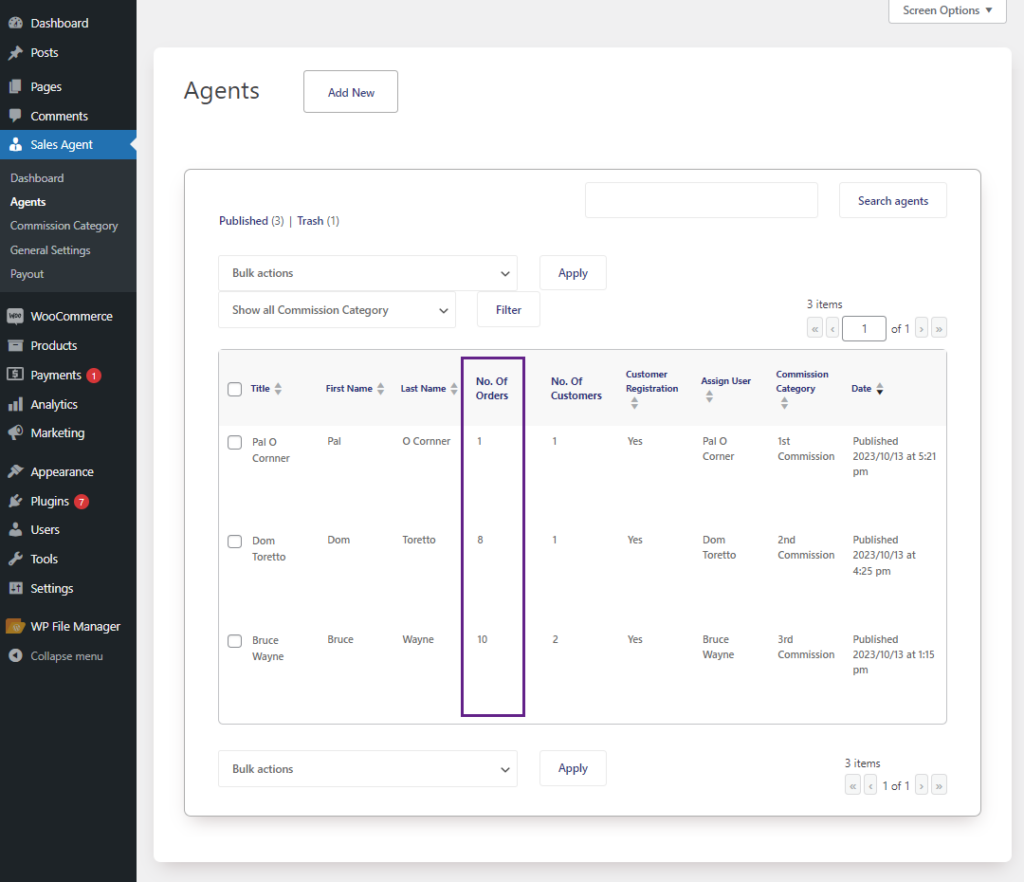
- Admin can also check the Total Orders while editing an Agent.
Note: Total Orders are only for read only, admin can not Edit in it.
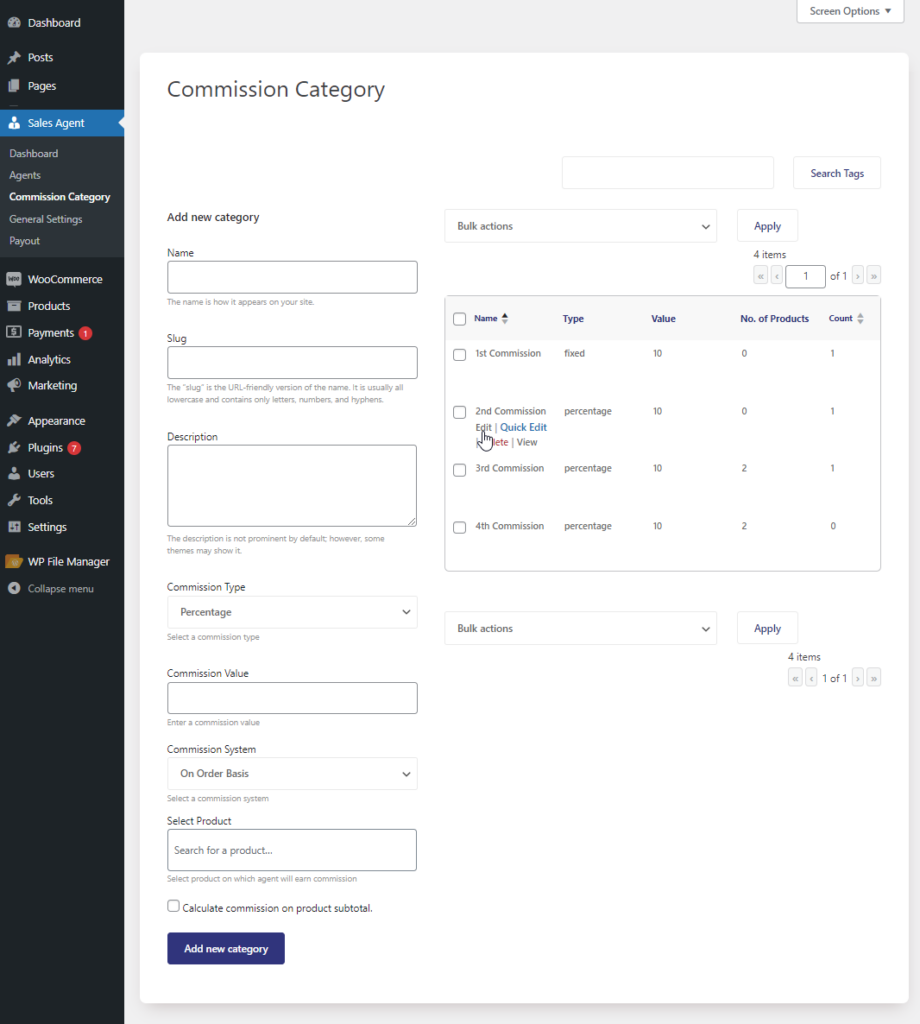
Commission Category
↑ Back to topHow to add a commission category?
↑ Back to top- Navigate to Admin Dashboard → Agents → Commission Category.

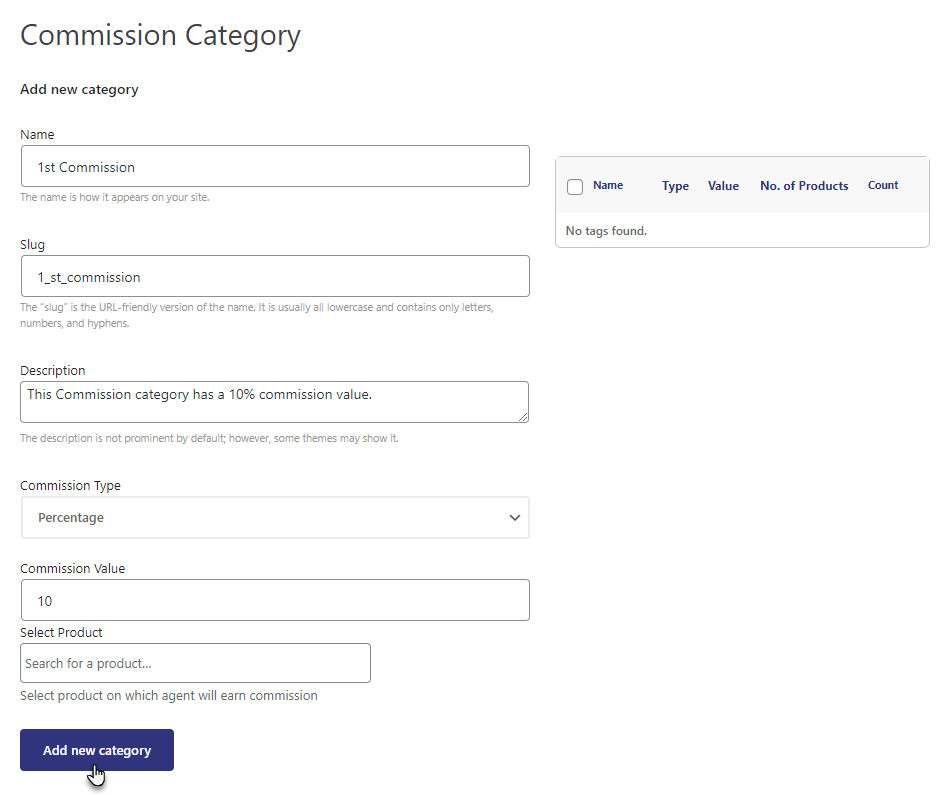
- Once you’re on the Commission Category page, you can add a new commission category by filling in the required fields mentioned on the page’s left side.
- Set the Name for the commission category.
- Set the Slug for the commission category.
- Set the Description for the commission category.
- Select the Commission Type (Fixed or Percentage) for the commission category.
- Set the Commission Value for the commission category.
- Select the product in the Select Product option on which the sales agent will earn the commission.
- Click on the Add new category button.
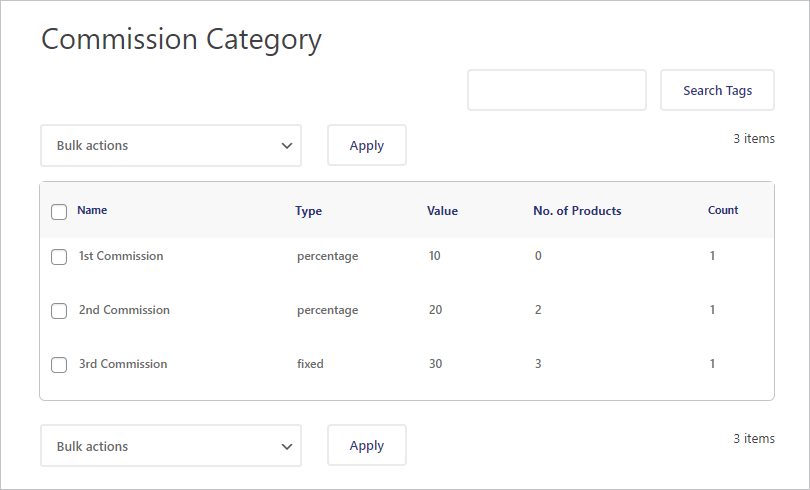
- Once you’re Commission Category is successfully created, it will appear on the right side of the page.
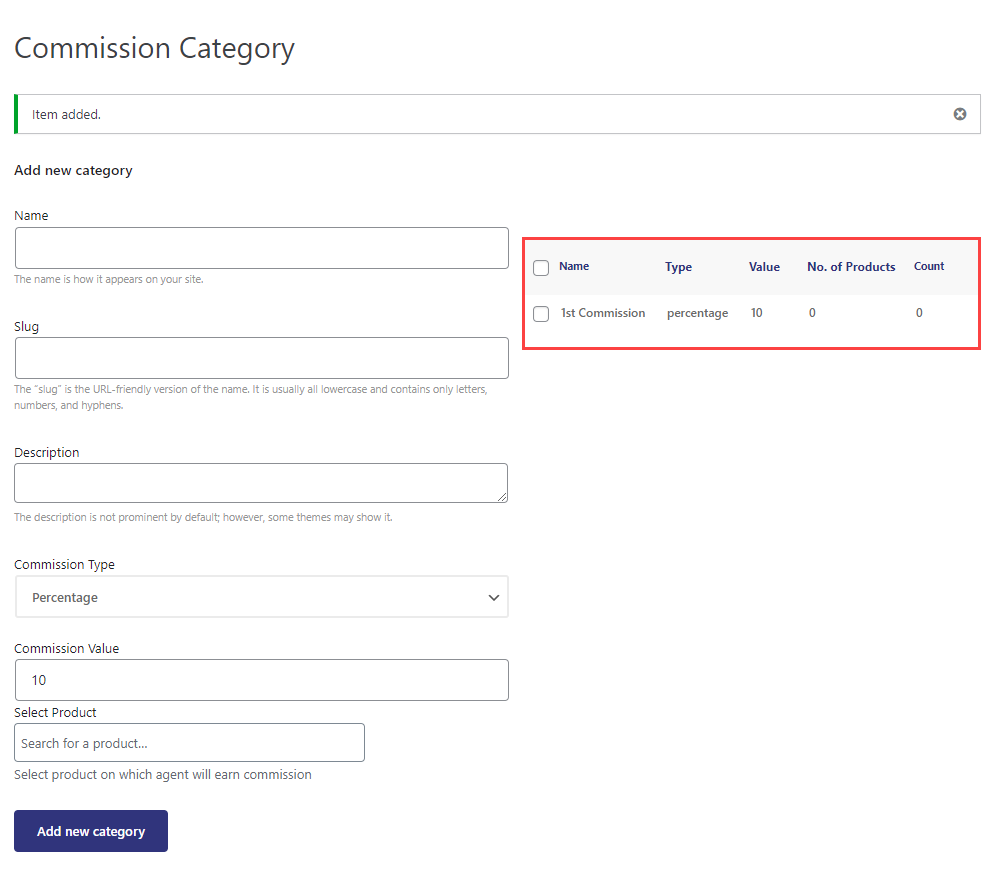
- Similarly, you can create multiple commission categories according to your requirements.
Commission List
↑ Back to topInside the Commission List:
- Admin can view commission list/details.
- Admin can edit commission list/details.
How to view the commission list?
↑ Back to top- Go to agents → Commission List
- Admin can search by agent name and filter by date [from: to]
- Admin can export all commissions [export will be applied only if a search is applied]
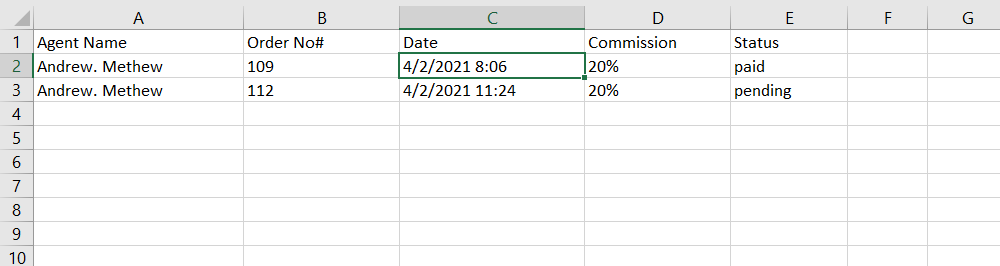
- Agent Name
- Order number
- Order date
- Commission value
- Order Status
- Option to edit or delete
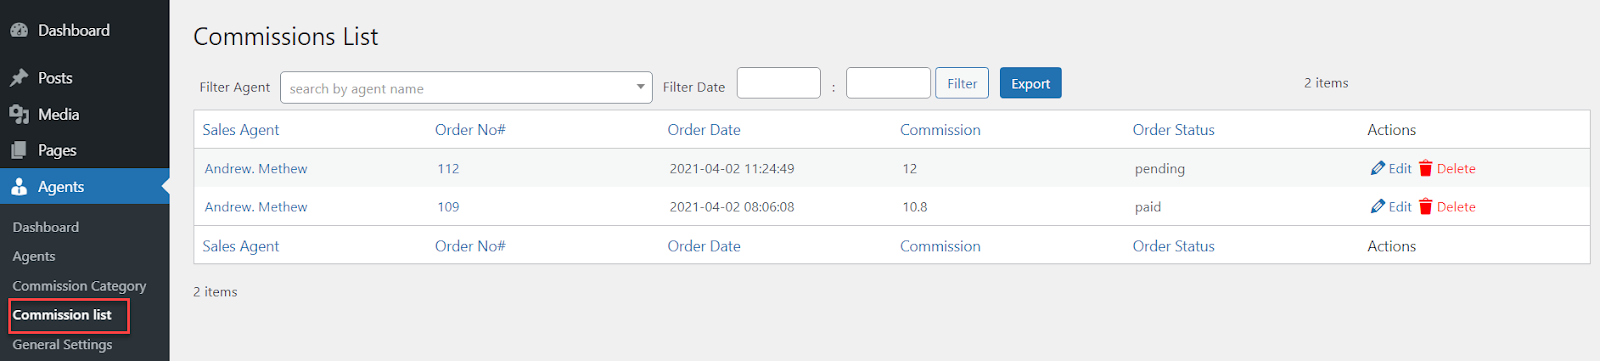
- Click on Export button (search applied) → Export CSV
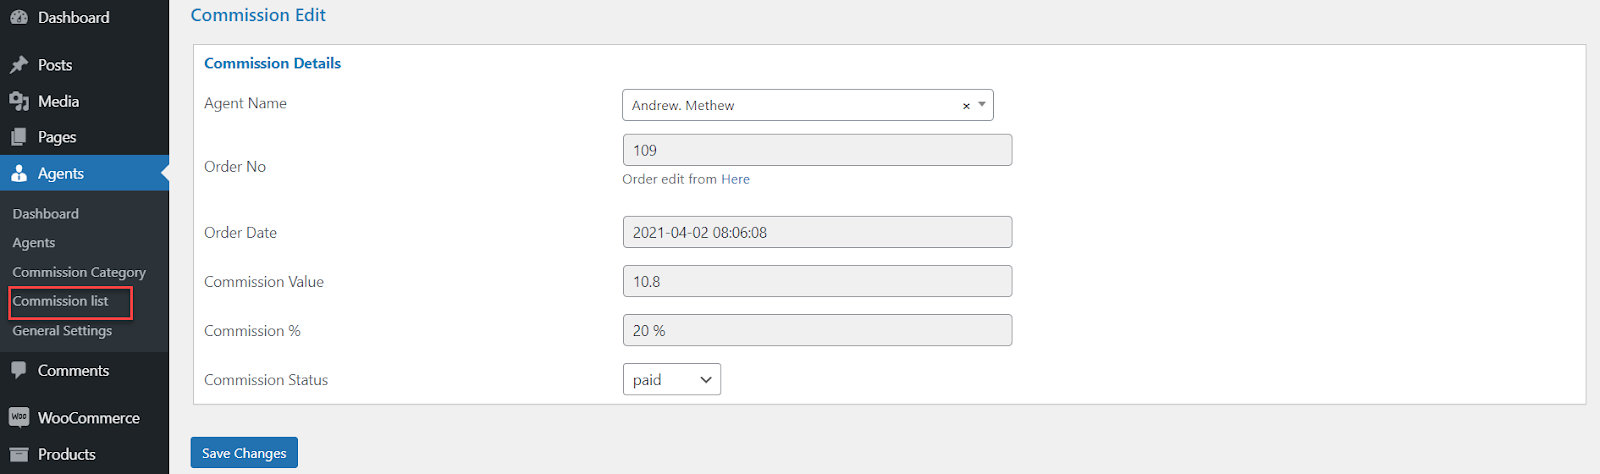
How to change commission status?
↑ Back to topOn viewing commission details, the admin can change the status of any commission (Paid/Pending/Cancelled) using a drop-down menu. They can also view details including:
- Order number
- Order date
- Commission status: admin can change commission status for [pending, paid, canceled]
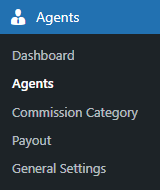
Sales Agents – Administrator View
↑ Back to topCreate a new sales agent
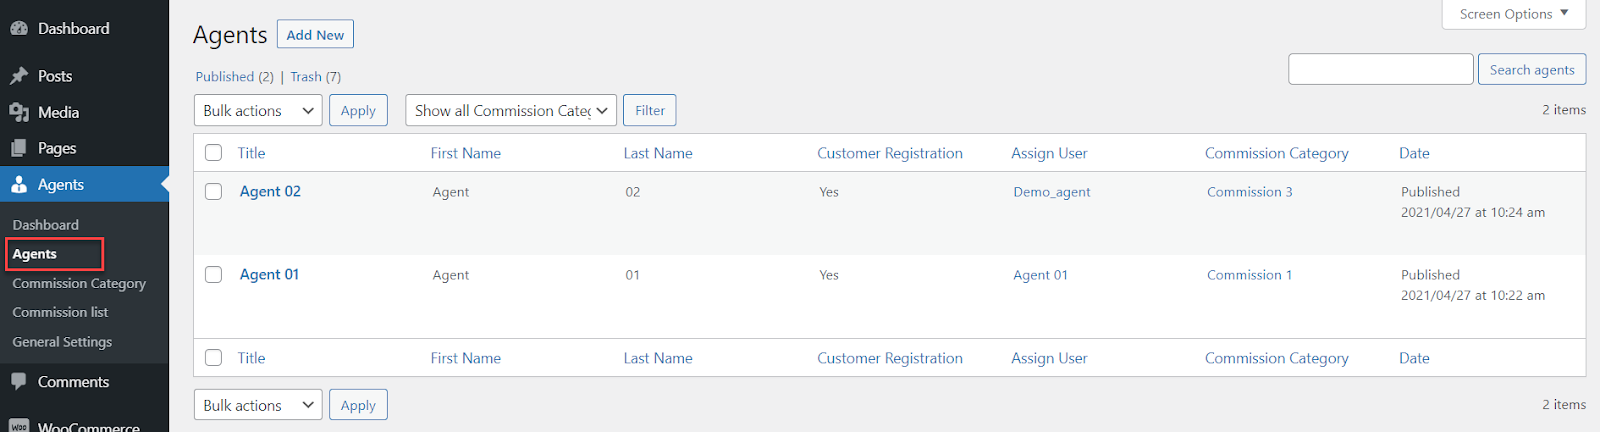
↑ Back to top- Navigate to Admin Dashboard → Agents → Agents.
- All the sales agents are mentioned on the Agents page.
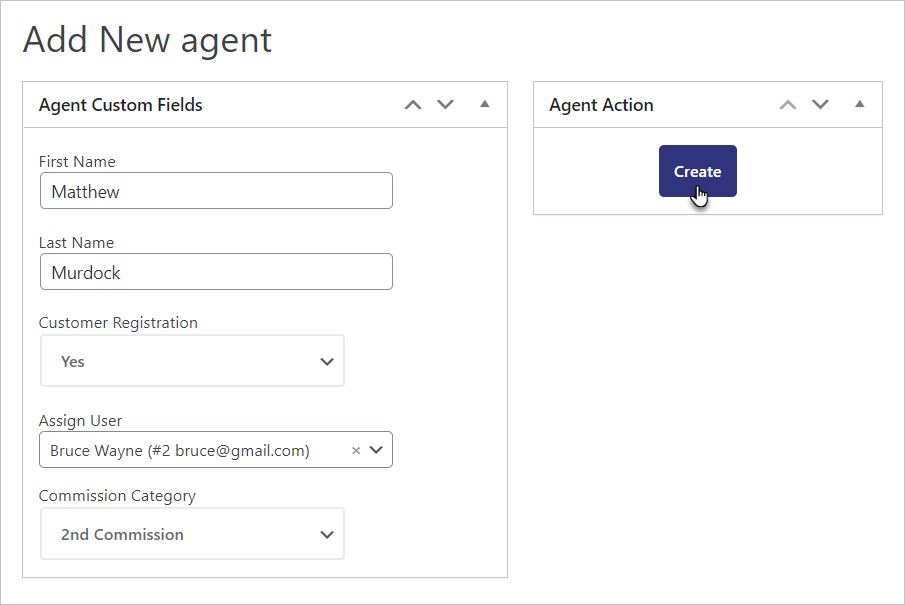
- You can add new sales agents by clicking on the Add New button.
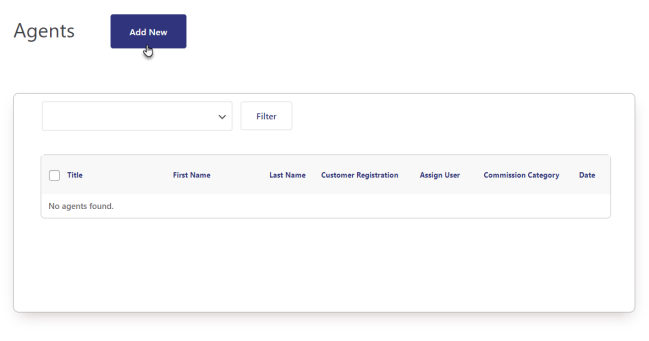
- Set the First Name of the sales agent.
- Set the Last Name of the sales agent.
- Select the Yes or No in the dropdown menu of the Customer Registration option. If Yes is selected, the sales agent would be able to create a customer from the My Account page.
- Assign any user to the sales agent in the Assign User option.
- Assign a commission category to your sales agent from the dropdown menu in the Commission Category option.
- Click on the Create button.
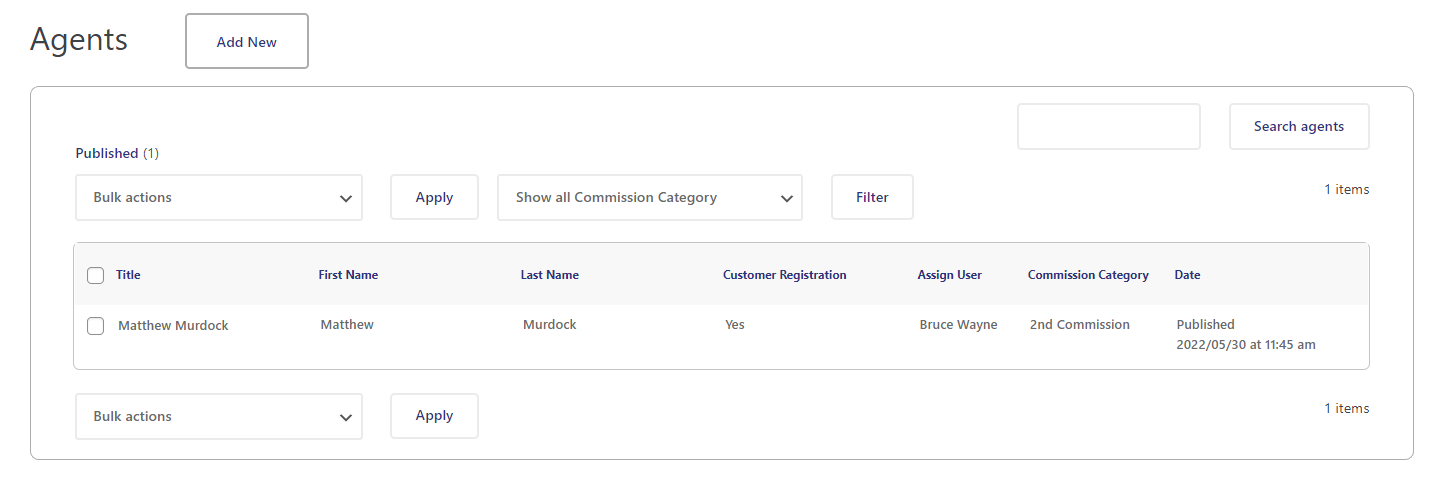
- Now navigate back to Admin Dashboard → Agents → Agents.
- You can view the new sales agent created.
- Similarly, you can create multiple sales agents according to your requirements.
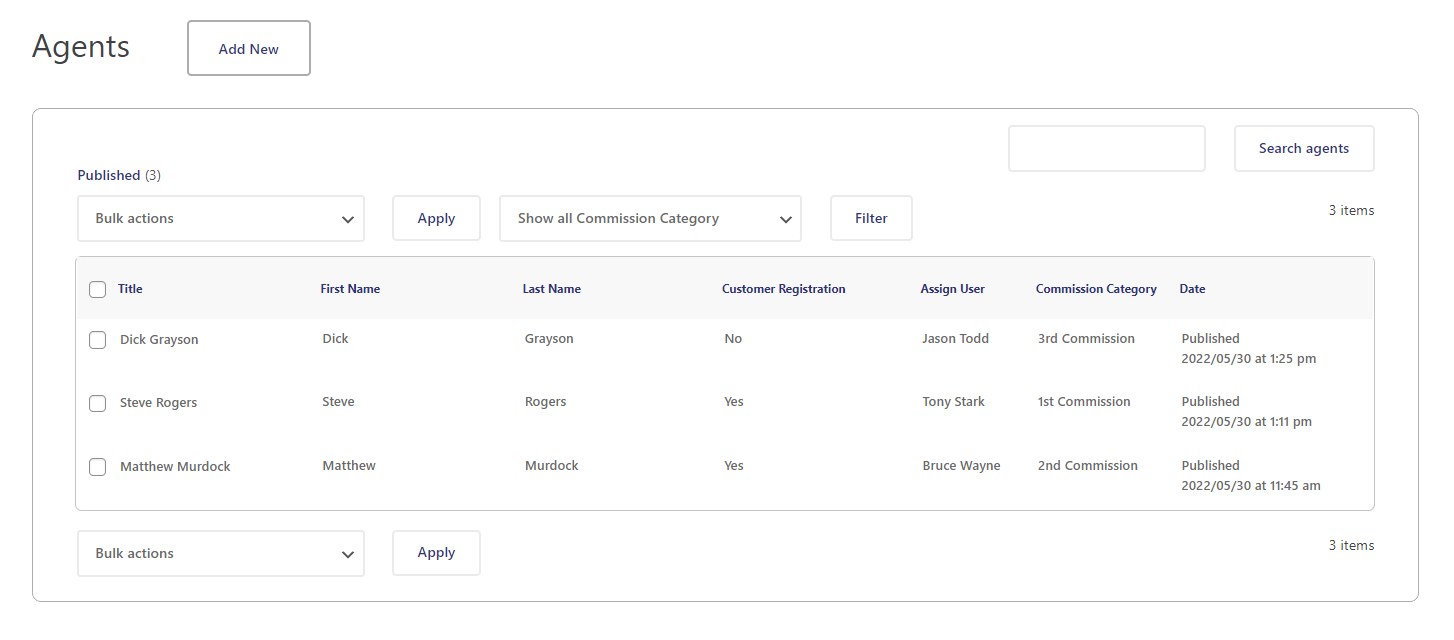
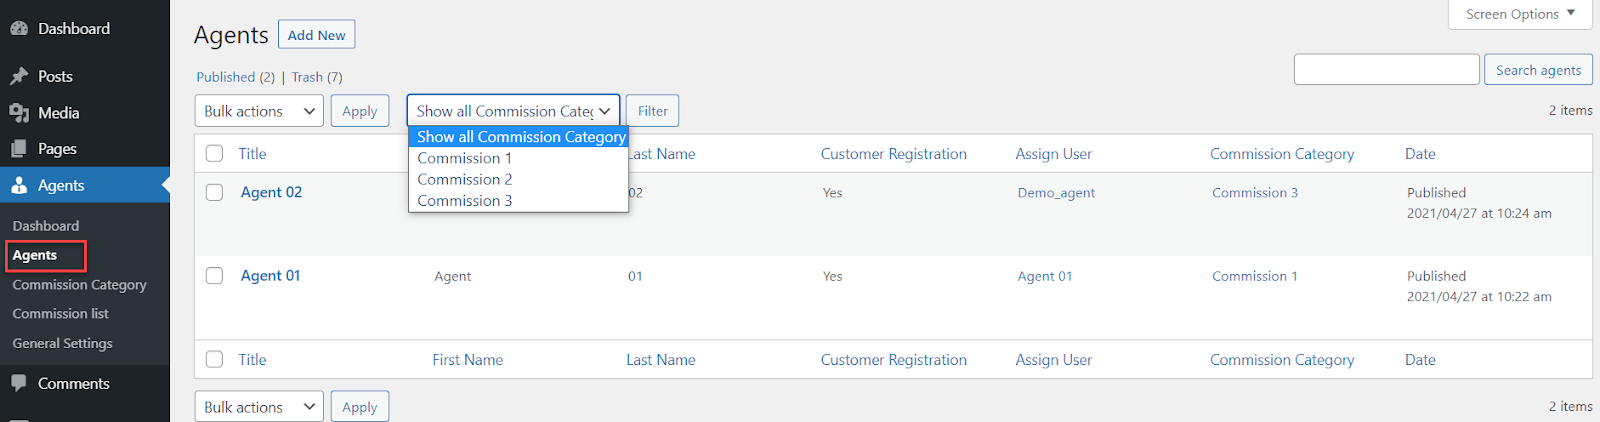
- You can also filter the sales agents according to the Commission Category.
- Select the Commission Category.
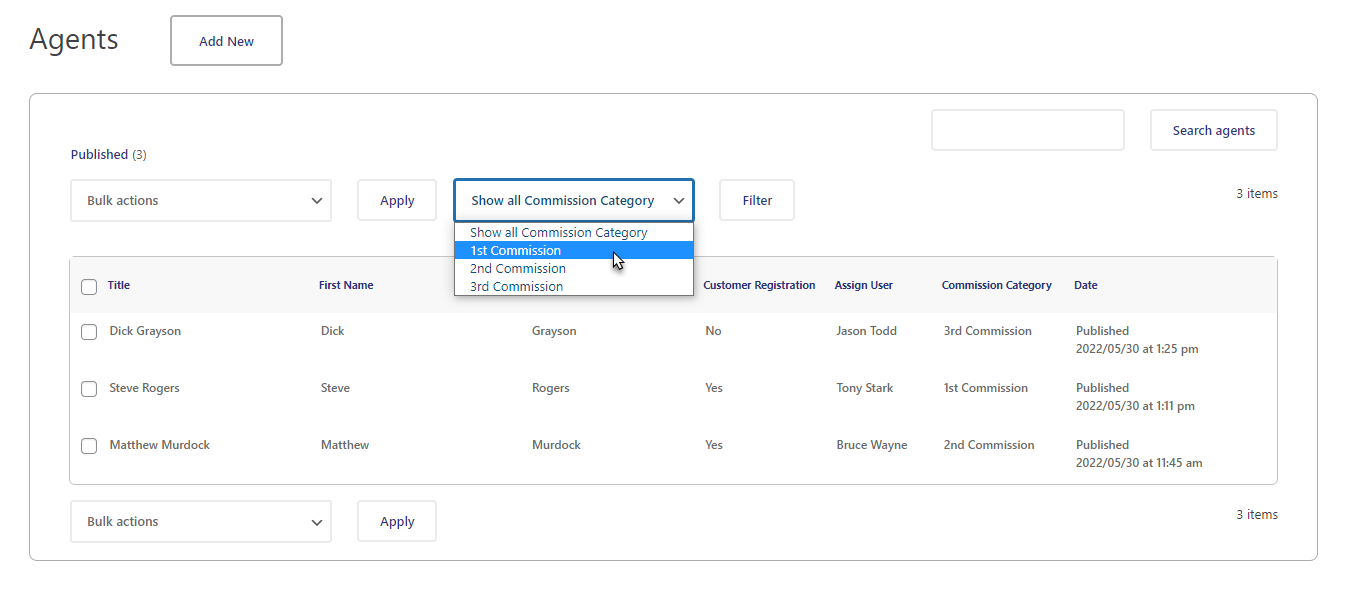
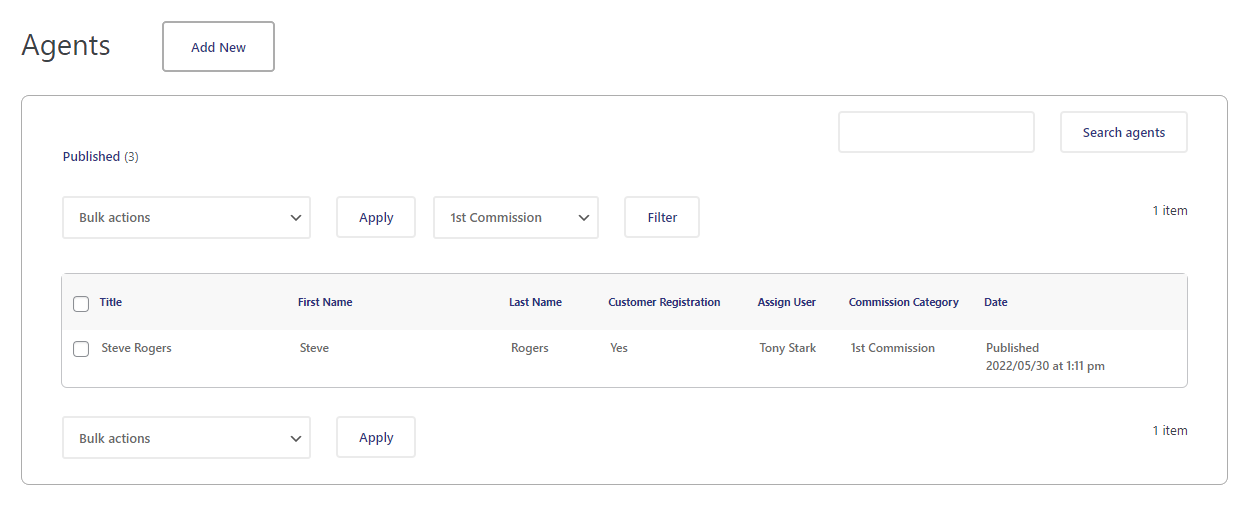
- Once done, click on the Filter button.
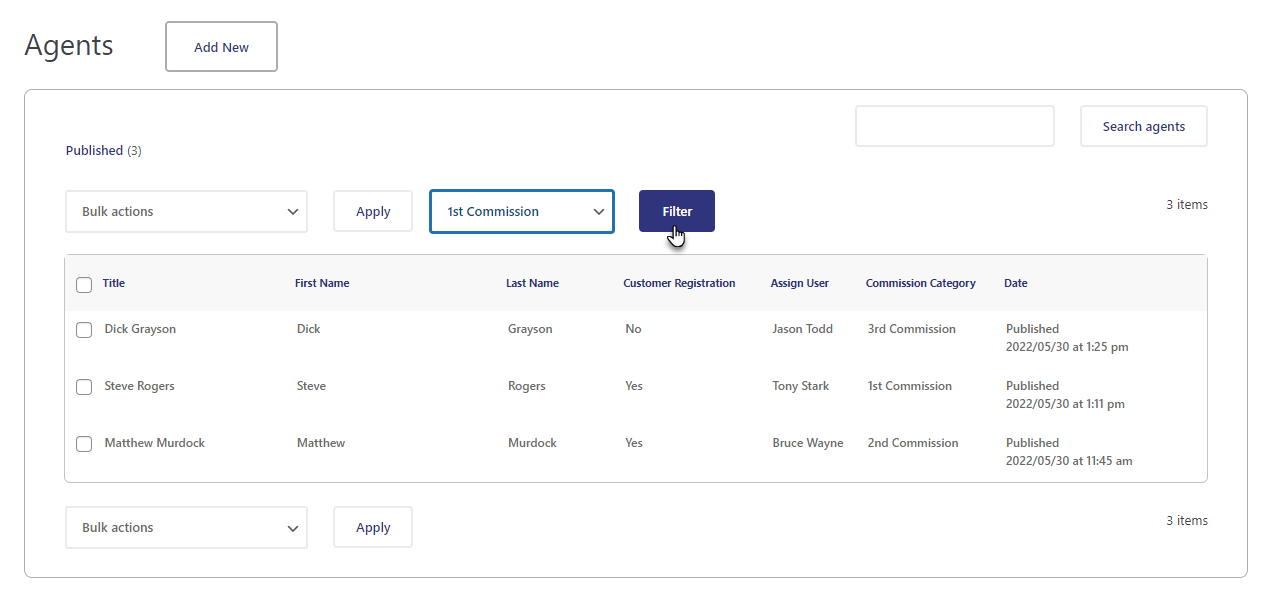
- Sales Agents having the selected commission category will be filtered.
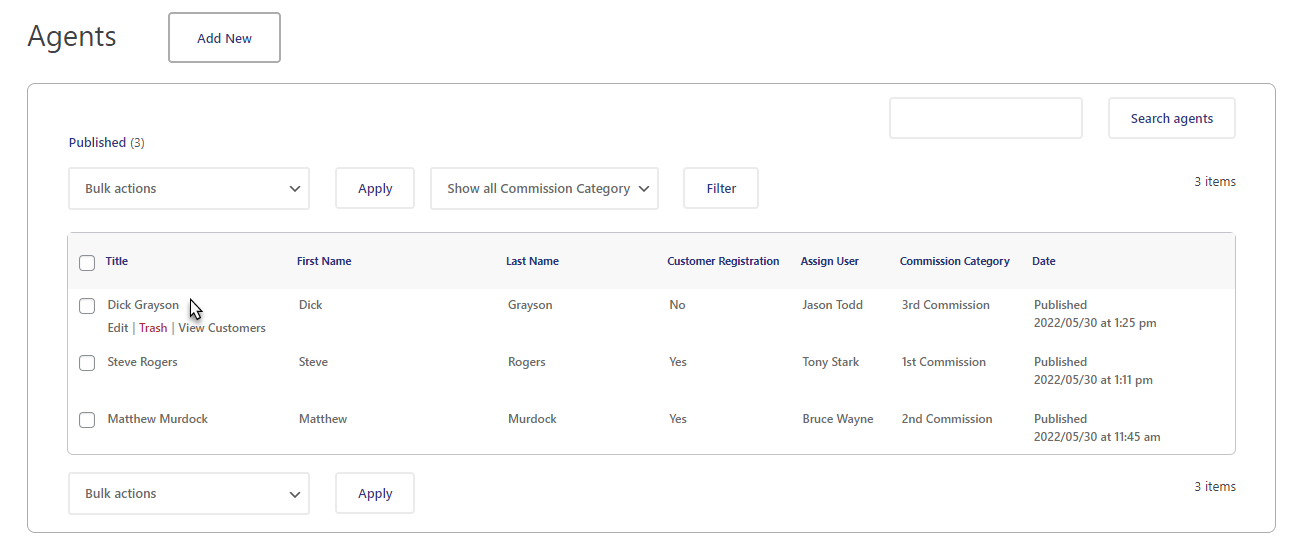
- Hover over any sales agent to view further options.
- Once done, you can also Edit, Trash, and View Customers of any particular sales agent.
List view of all agents
↑ Back to topAdmin can view a list of all agents including details like:
- Agent username.
- Agent First/Last name
- Customers related to this user
- Commission category that is assigned to this agent.
Admin will be asked for confirmation if they want to delete a sales agent.
Admin can filter by commission category.
View customers related to sales agents
↑ Back to topAdmin can view a list of all customers related to sales agents (created by an agent or assigned to them).
How to view a sales agent’s customers?
- Go to agents → View Customers
- View all customers list by all details.
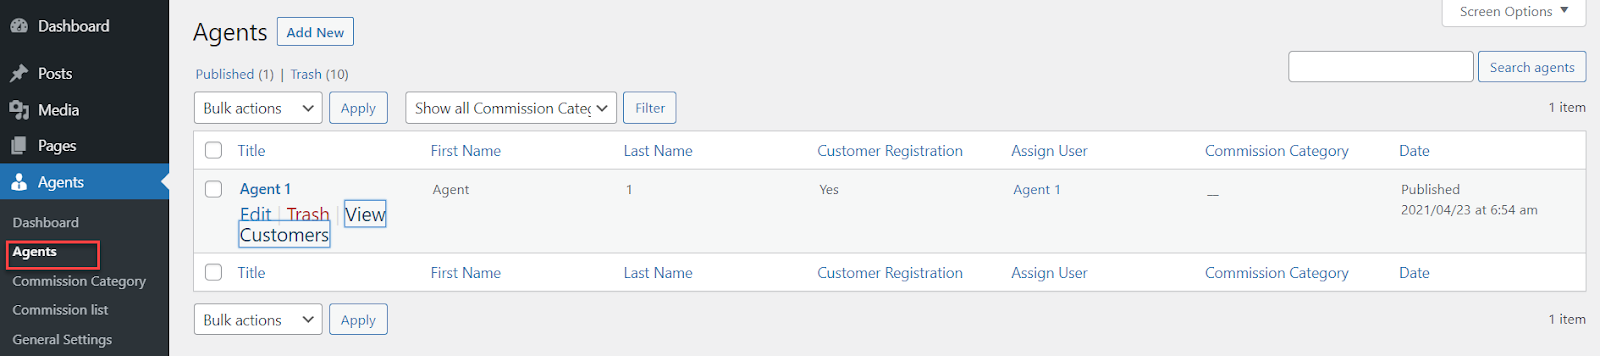
- Click on View customers.
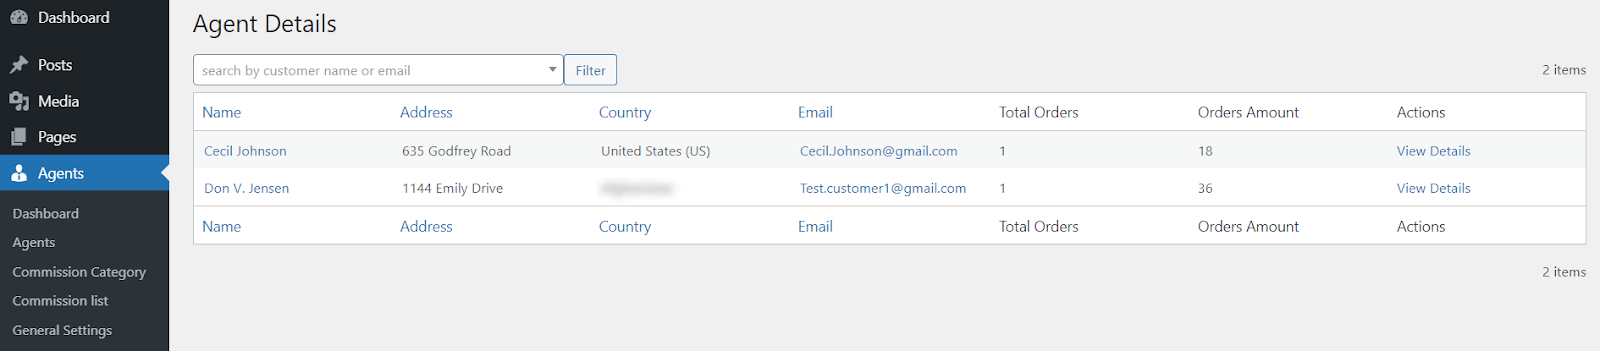
View customer details
↑ Back to topHow to view customer details?
Admin can view all customer details including:
- Go to customer list → View details.
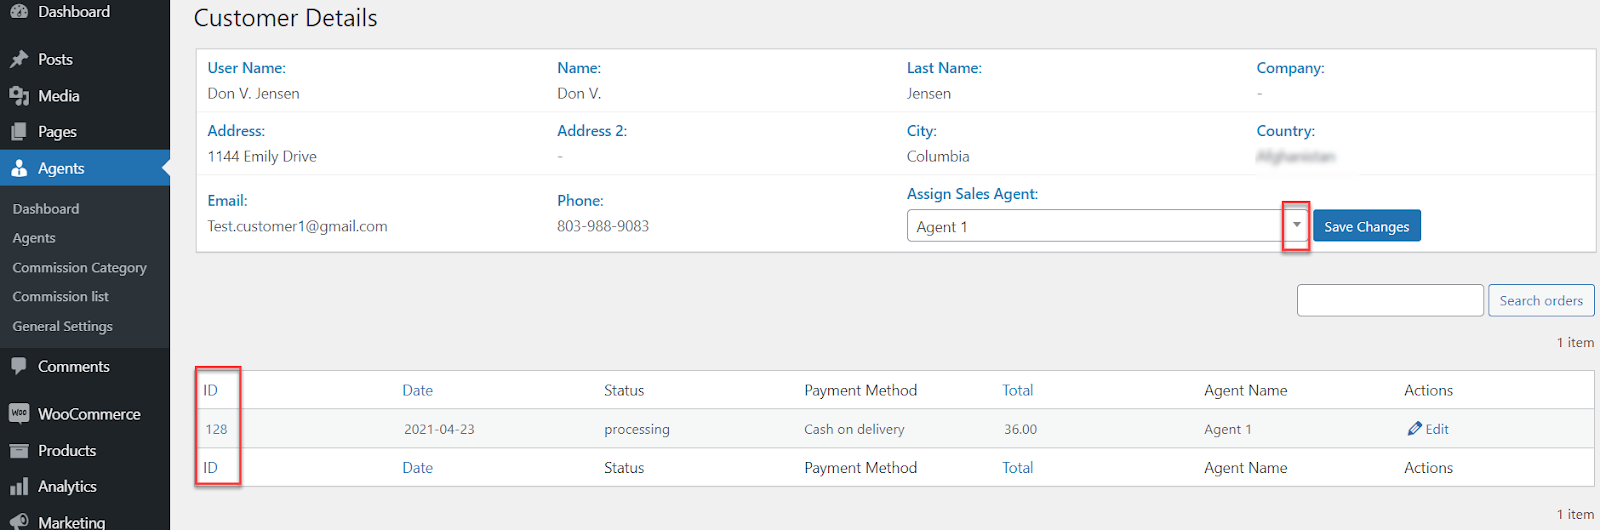
- Admin can view all customer details.
- Admin can change sales agents.
- Admin can view all orders related to their customers with all details.
- Admin can search for a specific order.
- Click on edit admin to view order details.
Sales Agents – Agent View
↑ Back to topWhat can sales agents do?
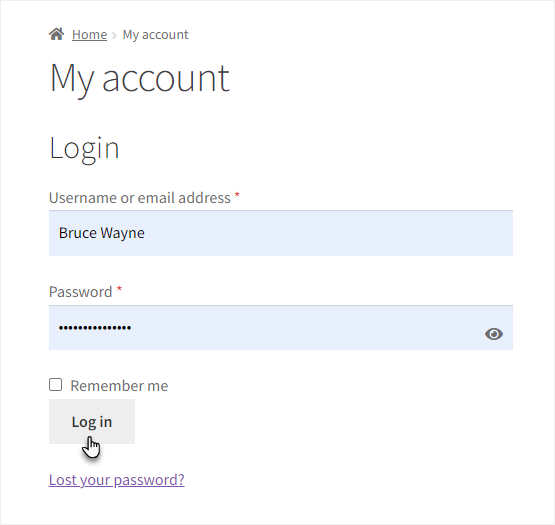
↑ Back to top- Once the Sales Agent is configured, log in to the website.
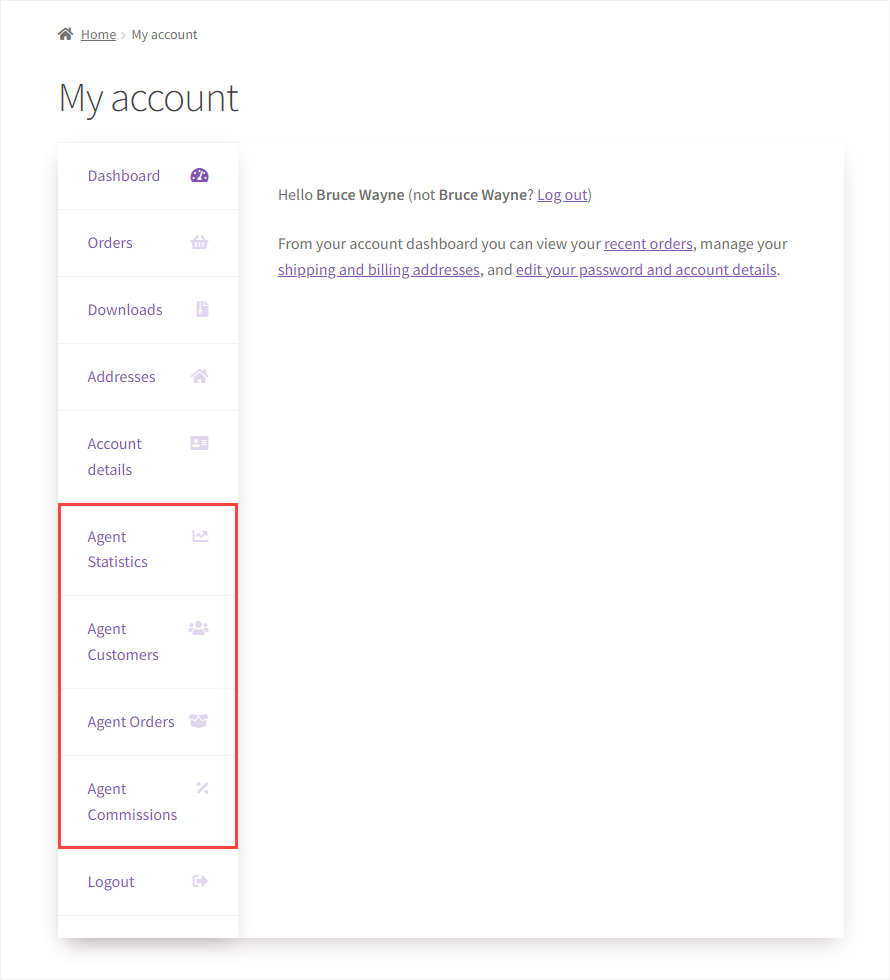
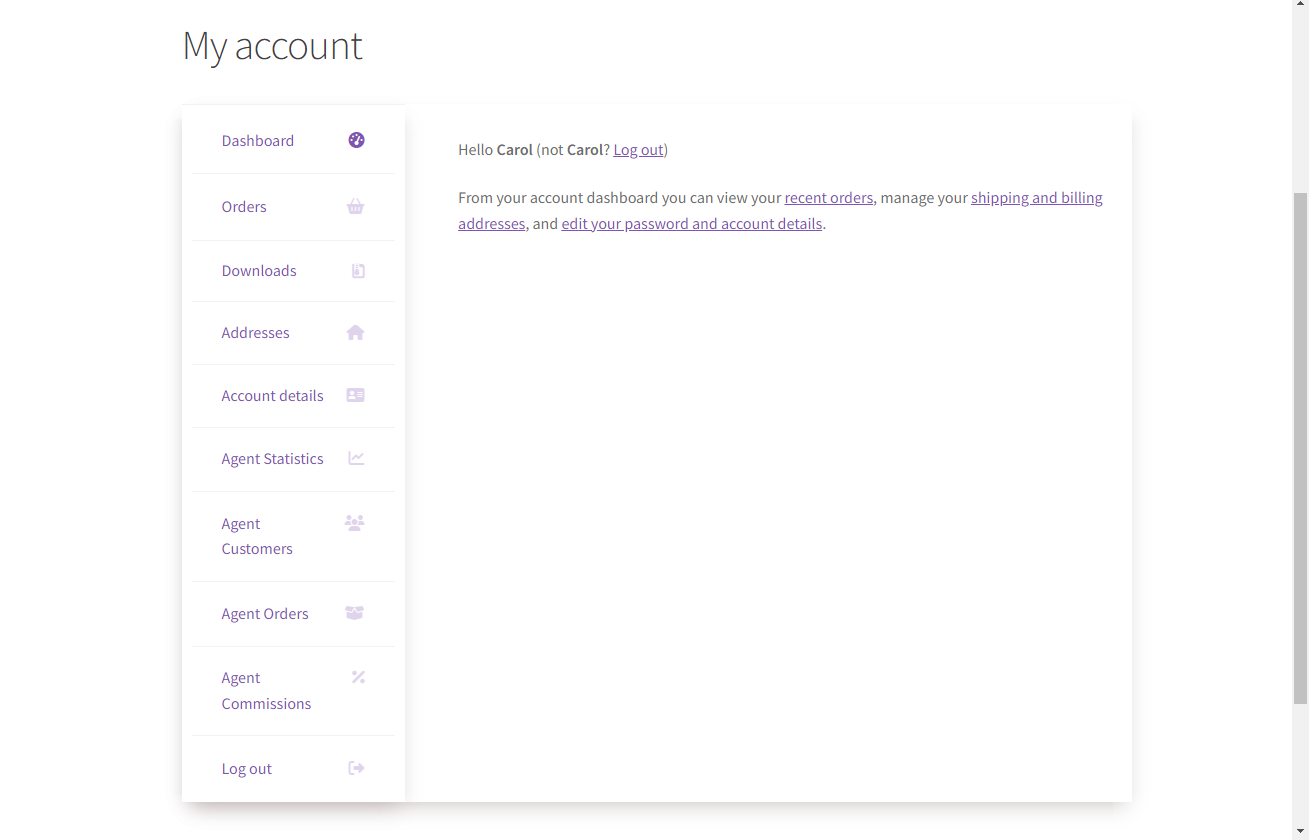
- On the My Account page, we can see four tabs for the Sales Agent.
- Agent Statistics
- Agent Customers
- Agent Orders
- Agent Commissions
How can sales agents create customer profiles?
↑ Back to top- Once the Sales Agent is logged in, navigate to the My Account page.
- On the Dashboard, navigate to the Agent Customers tab.
- All the customers of that Agent will appear.
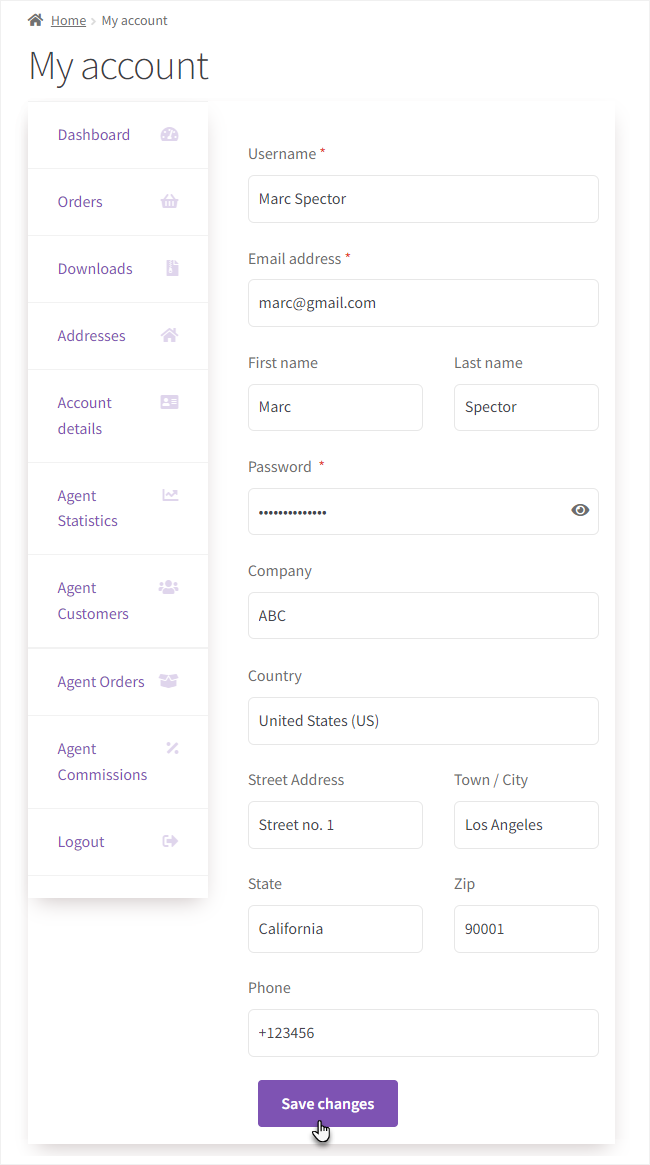
- Now click on the Create Customer button to add new customers.
- Fill in the required fields and click on the Save Changes button.
- Once the customer is created successfully, a notification will appear at the top of the page “Customer details added successfully.”
- Now navigate to the Agent Customers tab on the Dashboard. We can see the customer mentioned, which was recently created.
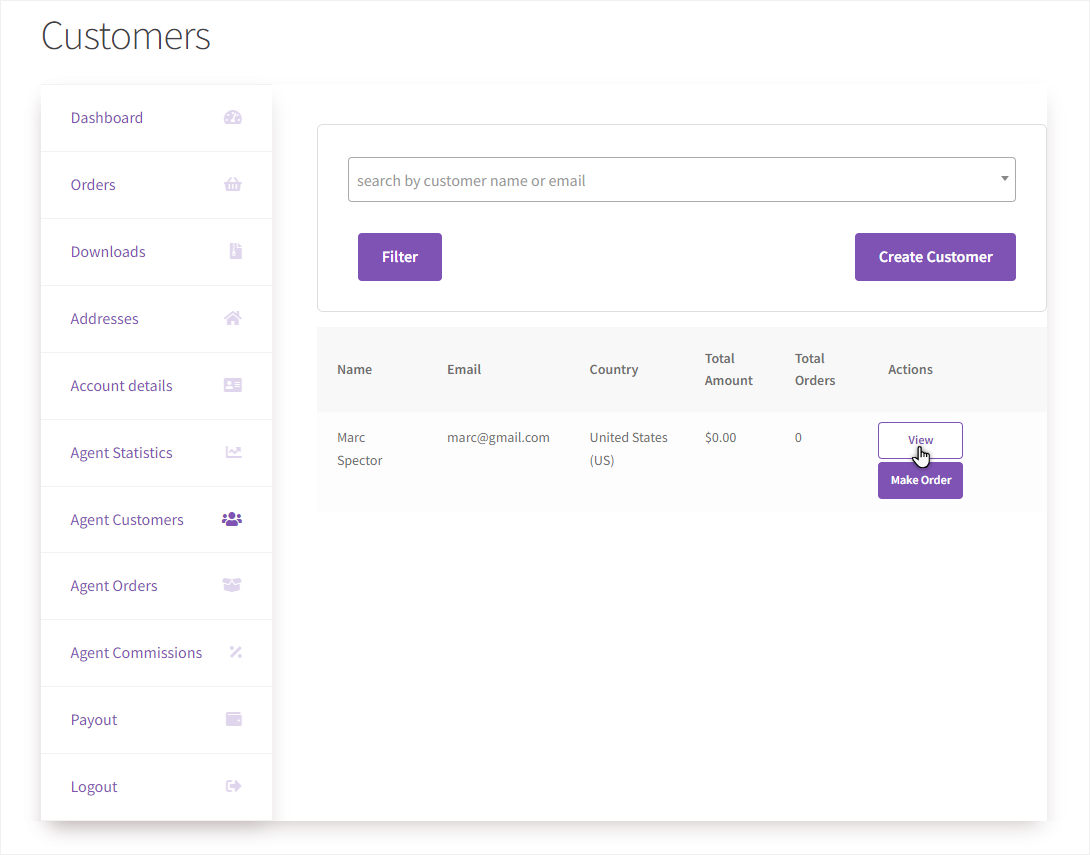
- The Agent can view all their customers in the Agent Customers tab.
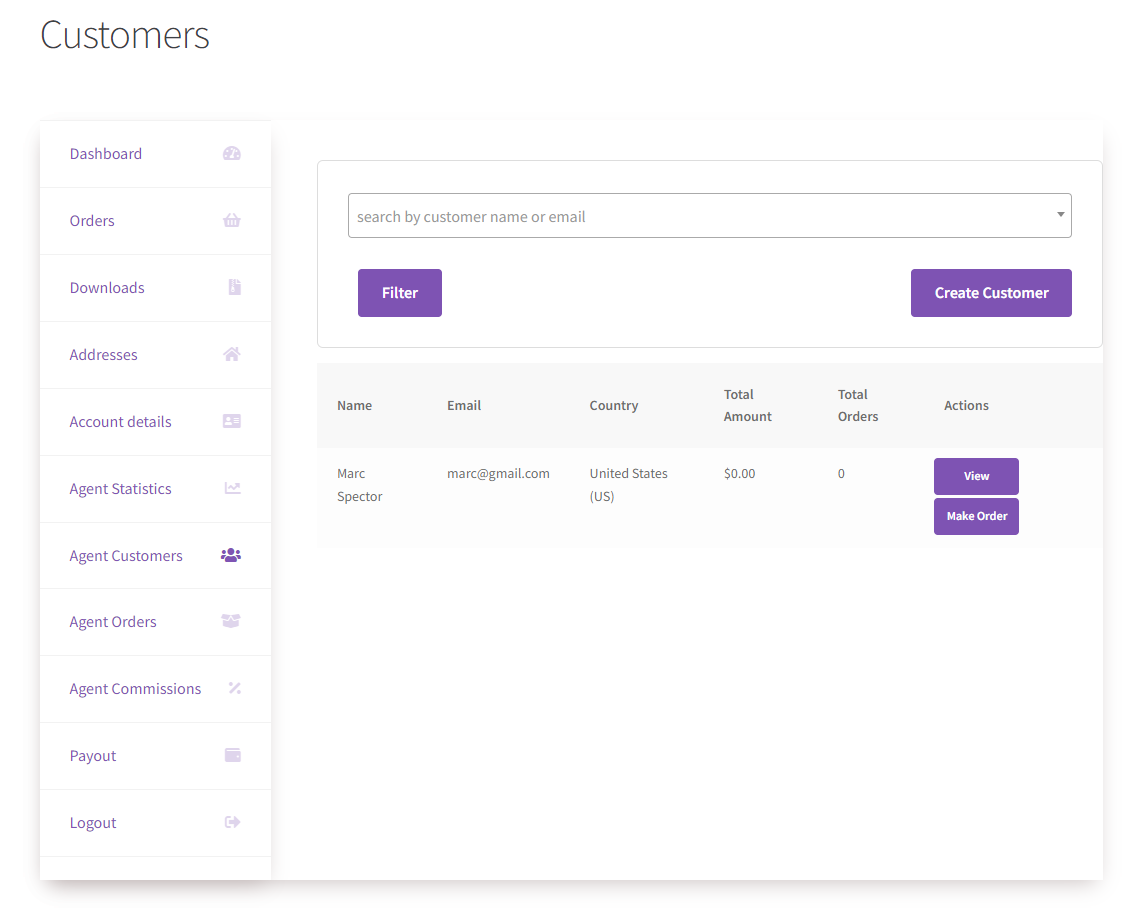
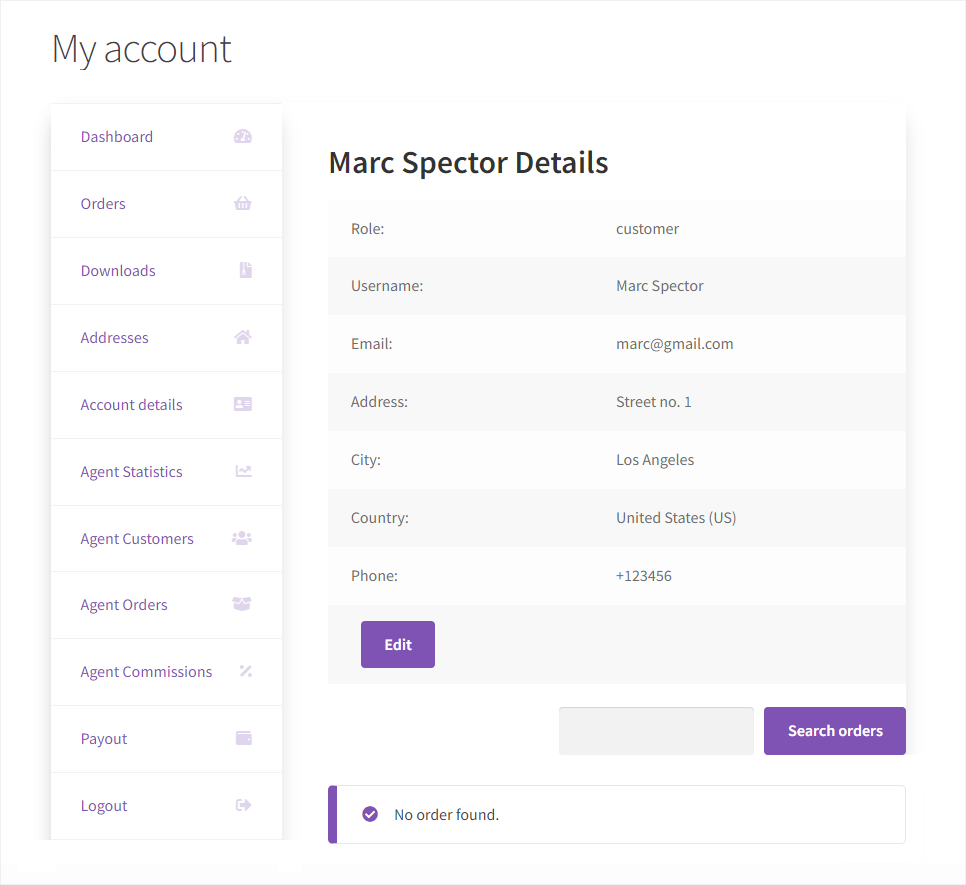
- Click on the View button in the Actions column to view all their customers in the Agent Customers tab.
- All the details of the customer will appear.
- You can also update the details by clicking on the Edit button.
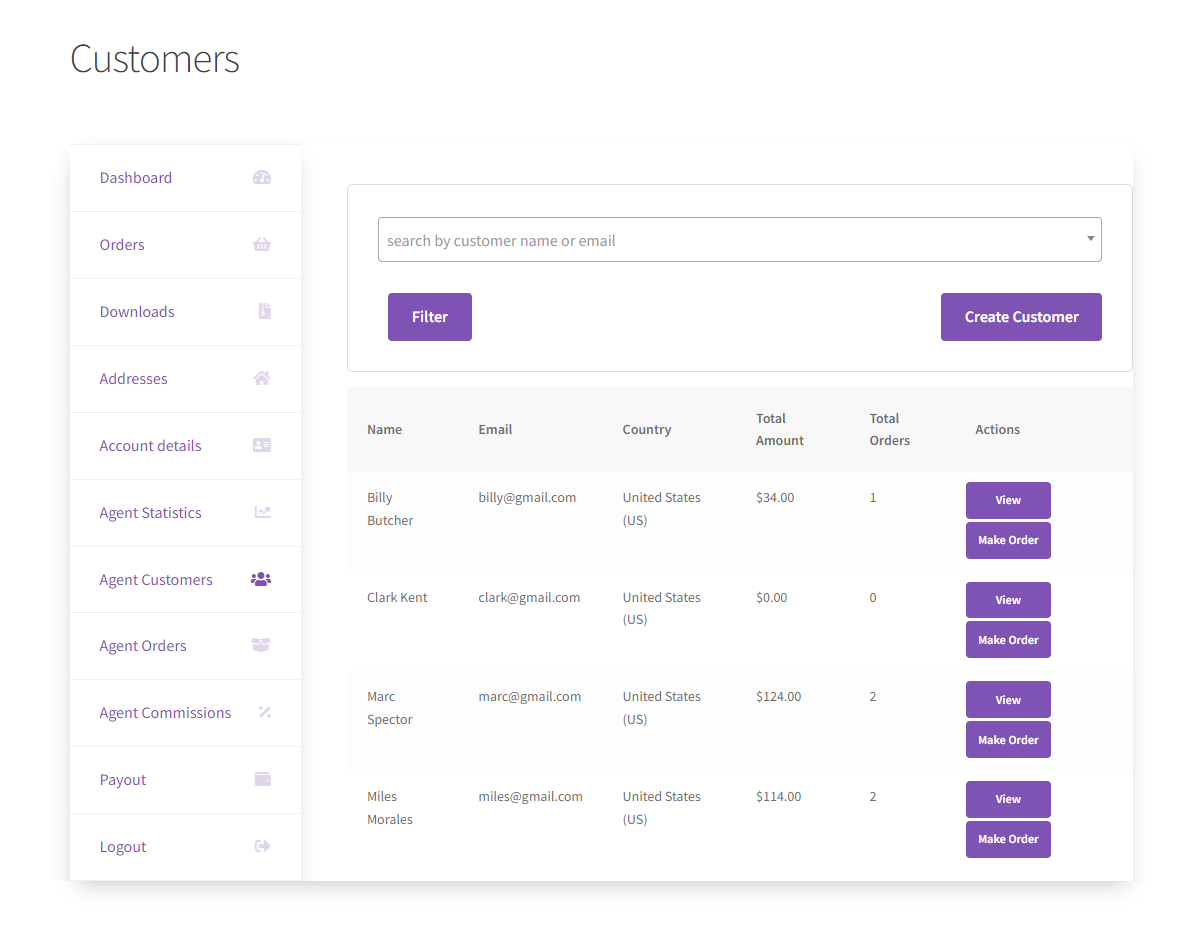
How can sales agents view their customer list?
↑ Back to top- Go to the wp-admin menu → Agent Customers
- The agent can view a list of all customers.
- The agent can use filters to view specific customers (if a search is applied).
- The agent can view customer details.
- Agents can make orders on behalf of their customers (When clicked, it will switch agents to a customer account. Sales agents will be able to access the Shop, Cart, and Checkout page)
How can sales agents view customer information & orders?
↑ Back to top- Agents can view all customer info.
- Agents can edit all customer info.
- Agents can view all orders created by customers.
- Agents can view customer WooCommerce order details.

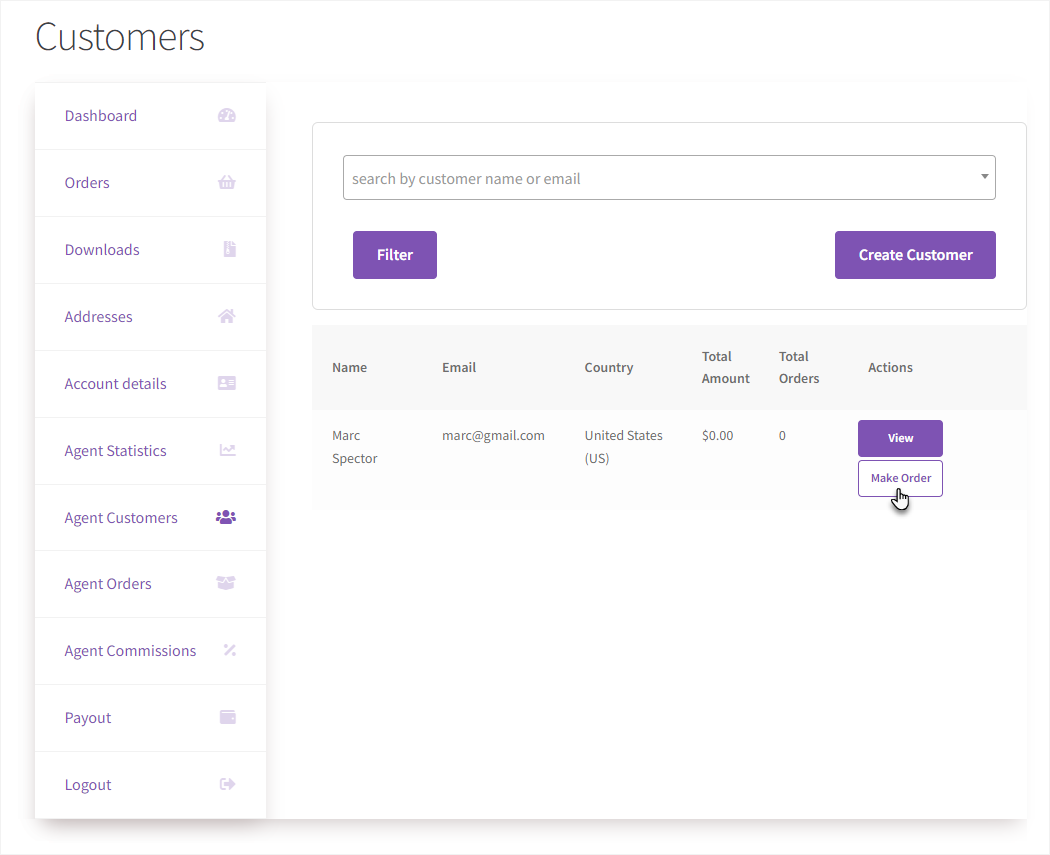
How can sales agents create an order for customers?
↑ Back to top- Now, navigate to the Agent Customers tab on the Dashboard.
- All the customers will appear.
- Click on the Make Order button in the Actions column of that respective customer.
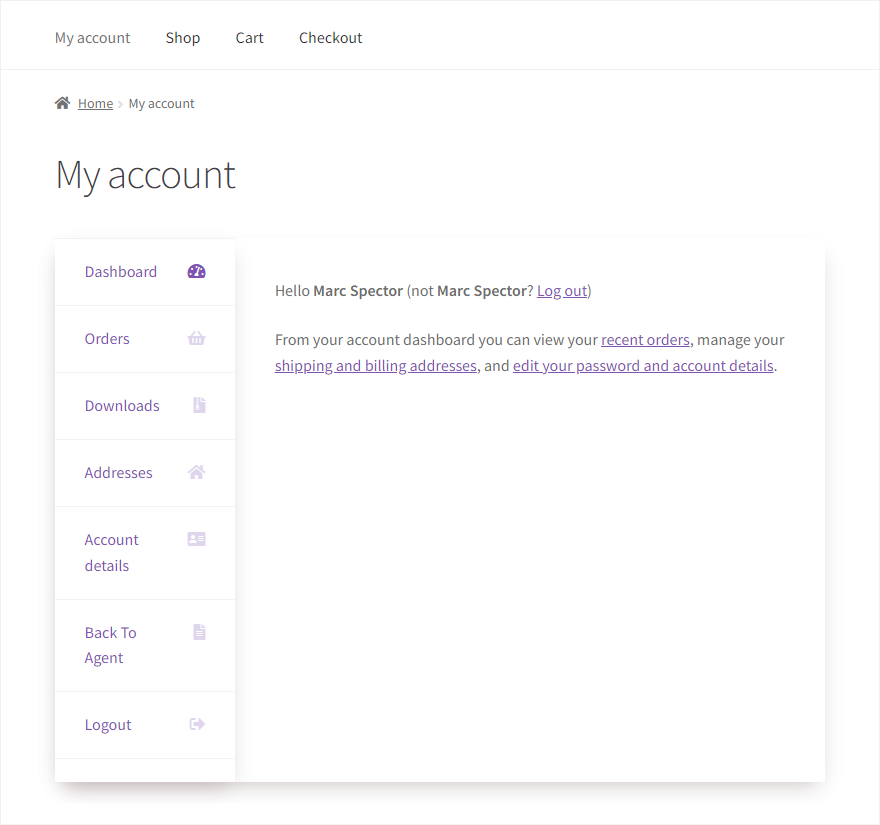
- Once done, the agent will log in to the customer’s account.
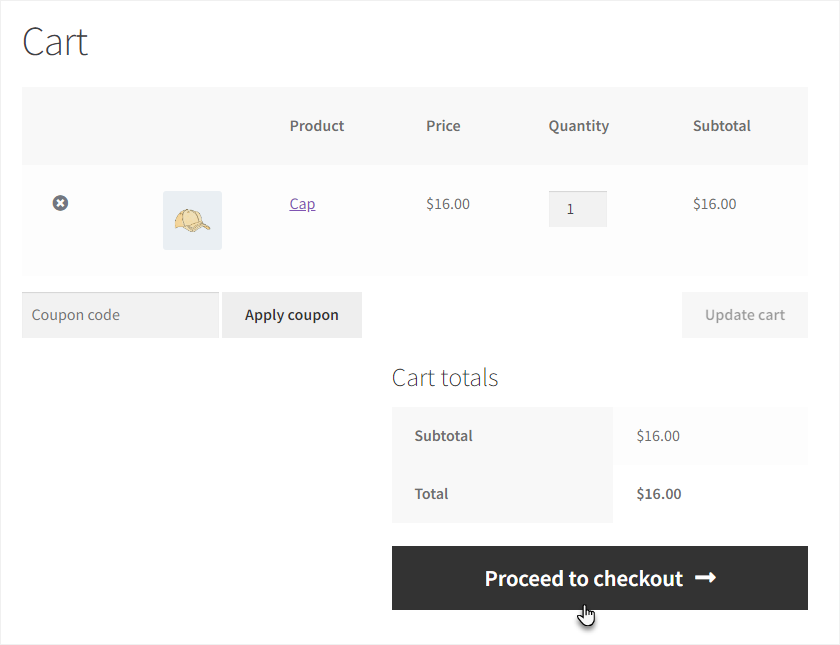
- Now Navigate to the Shop page.
- Click on the Add to Cart button against any item.

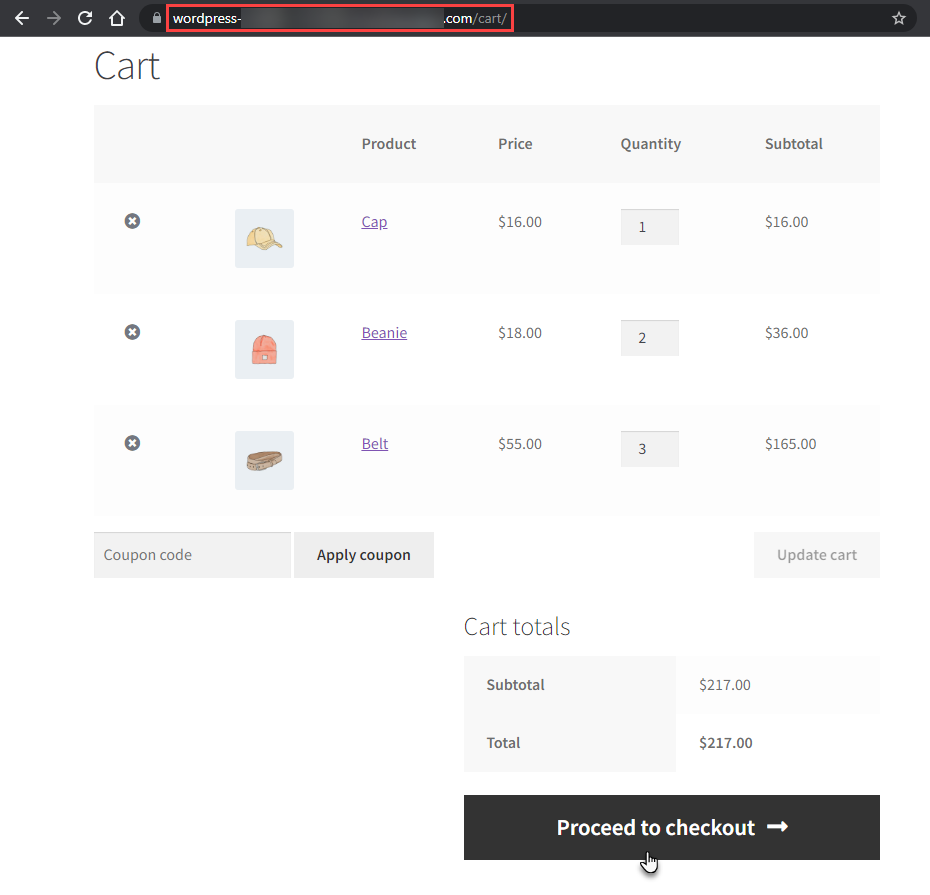
- Now Navigate to the Cart page.
- Click on the Proceed to checkout button.
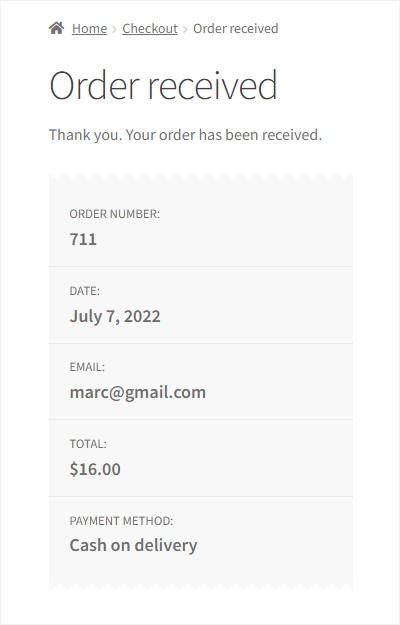
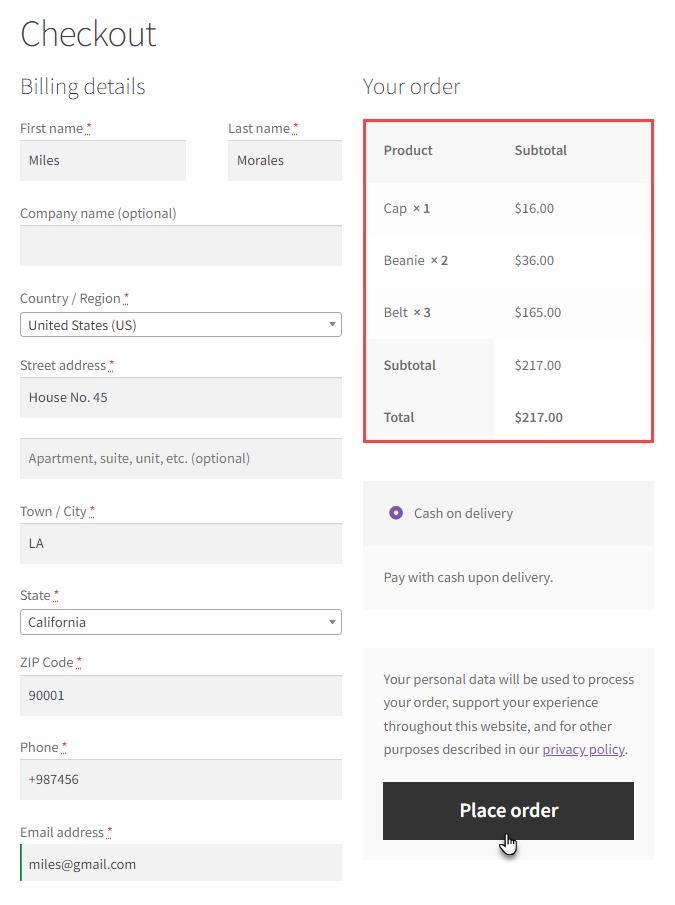
- Now you’ll be on the Checkout page.
- Click on the Place Order button.
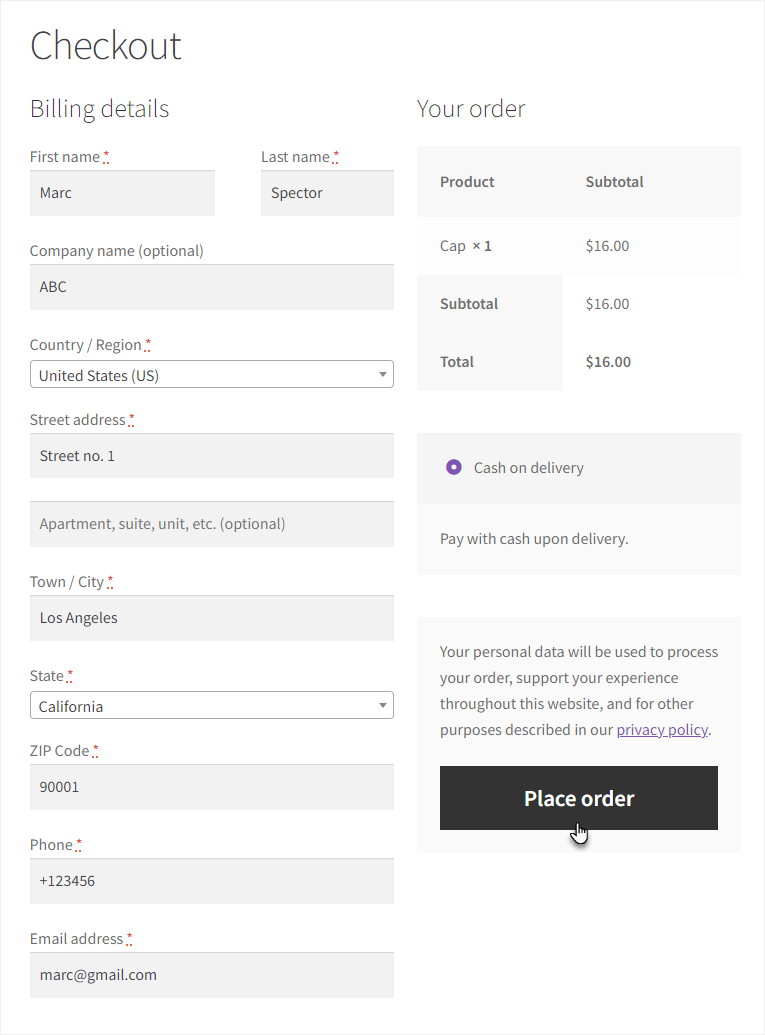
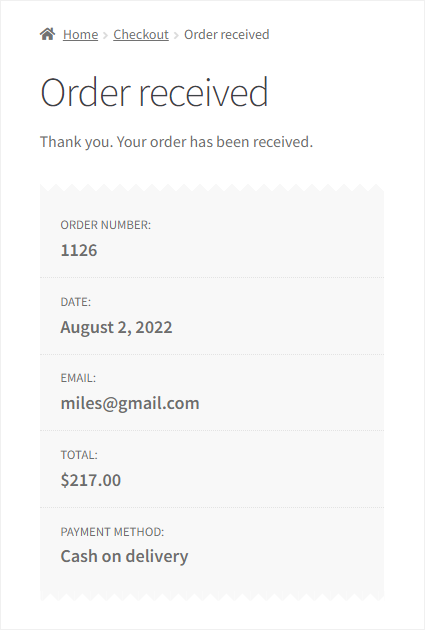
- The order is successful.
How to view customer orders?
↑ Back to top- If the Sales Agent is logged in with the customer’s account, navigate to the My Account page and click on the Back to Agent tab on the Dashboard.
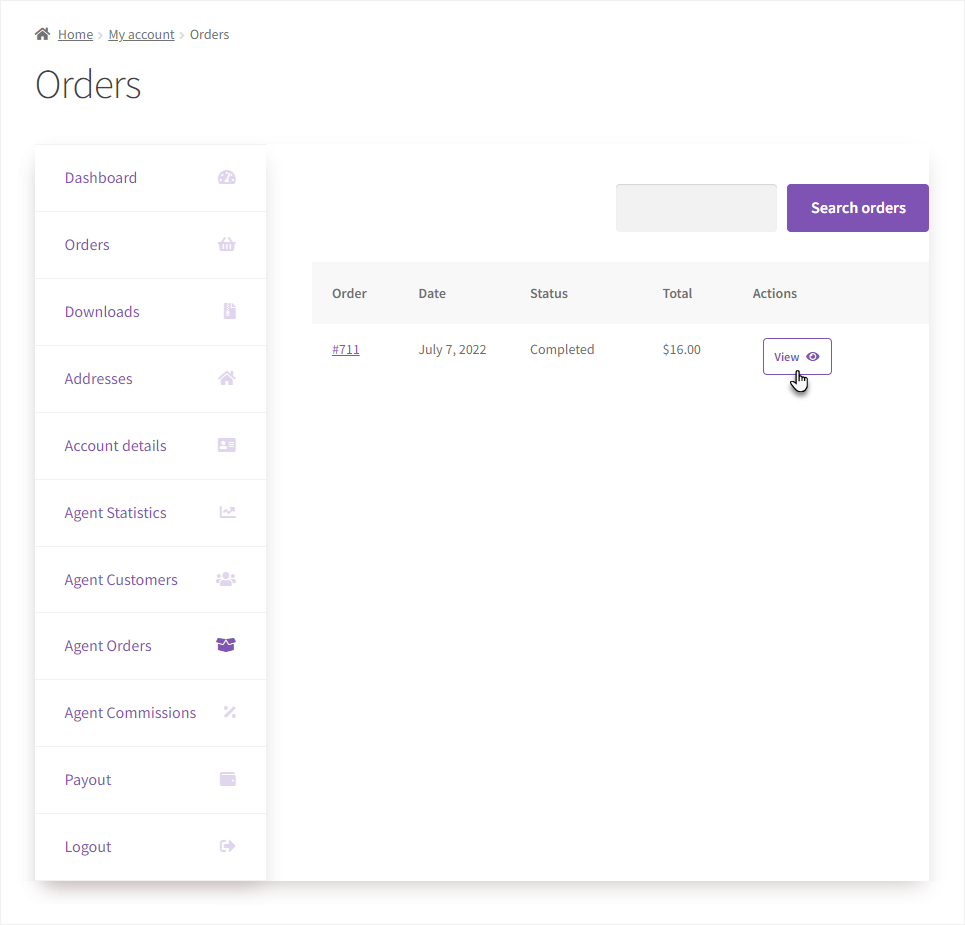
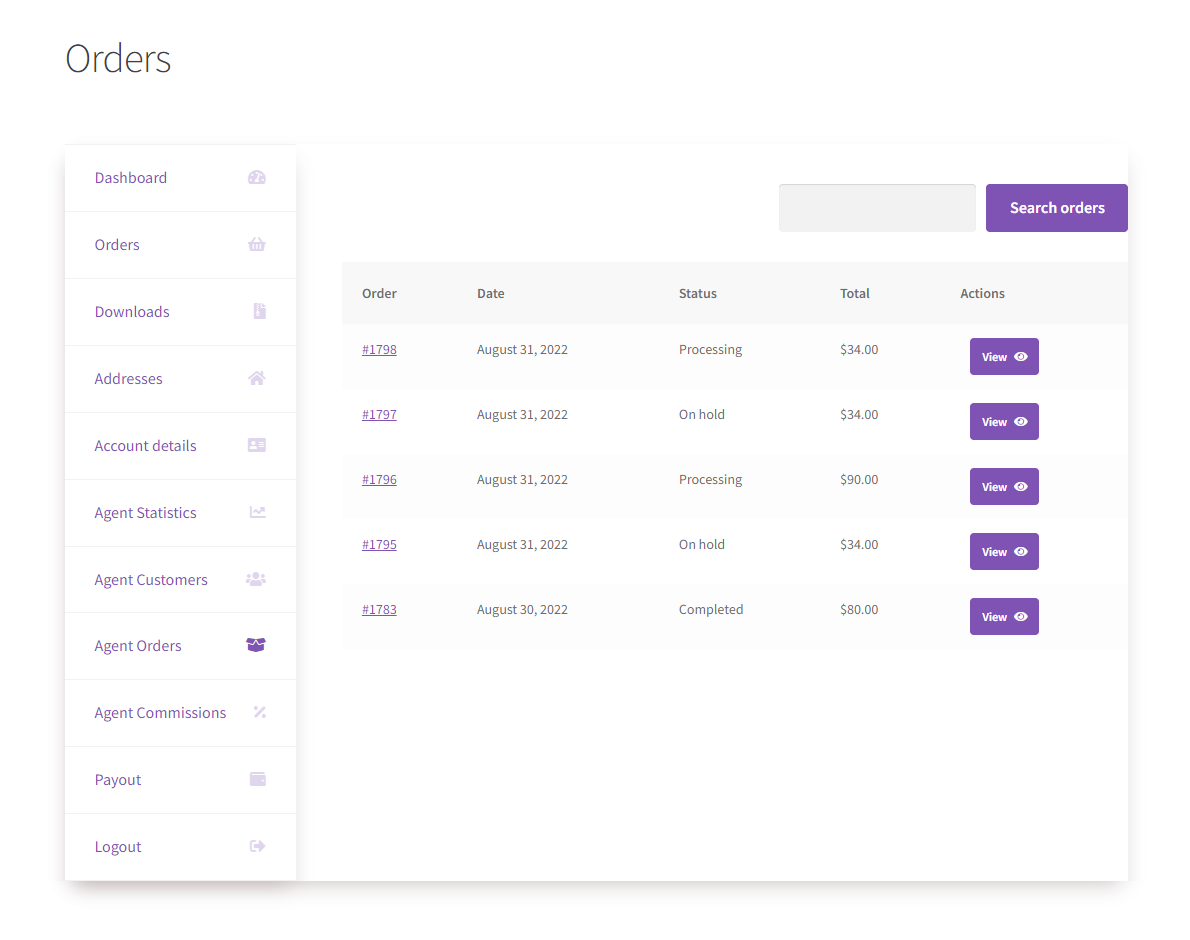
- Once the Sales Agent is navigated to his My Account page, click on the Agent Orders tab on the Dashboard.
- All the Orders will appear in this tab, and details like Date, Status, and Total.
- Click on the View button in the Actions column of that respective order.
- Once done, all the Customer details and Order details related to that order will be displayed.
- If the order status is Completed, an Order again button will display if you want to order the same item with the same quantity.

- The Sales Agent can also search any specific order using the search functionality present on the top right in the Agent Orders tab.
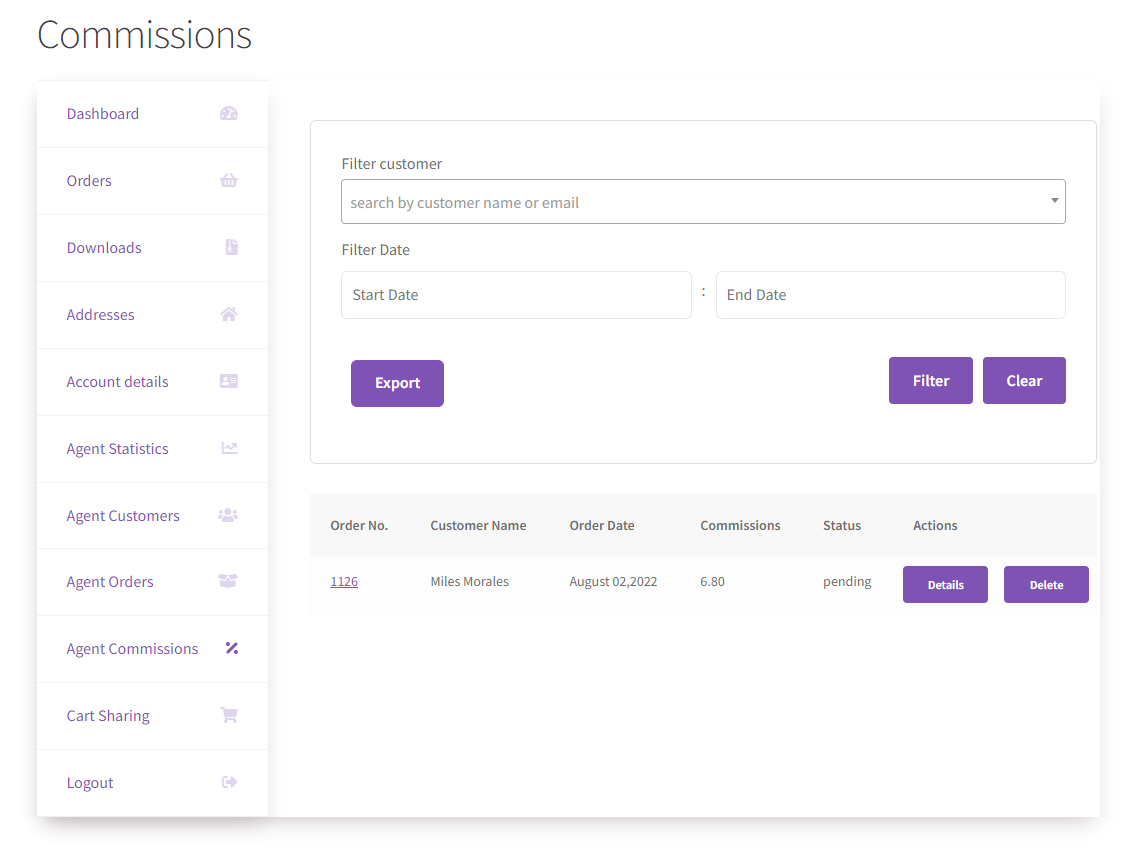
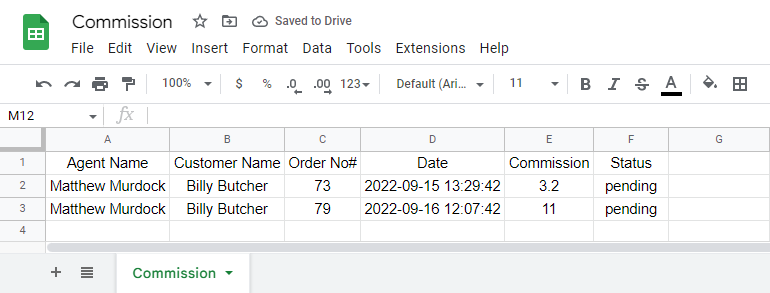
How to view agent commissions?
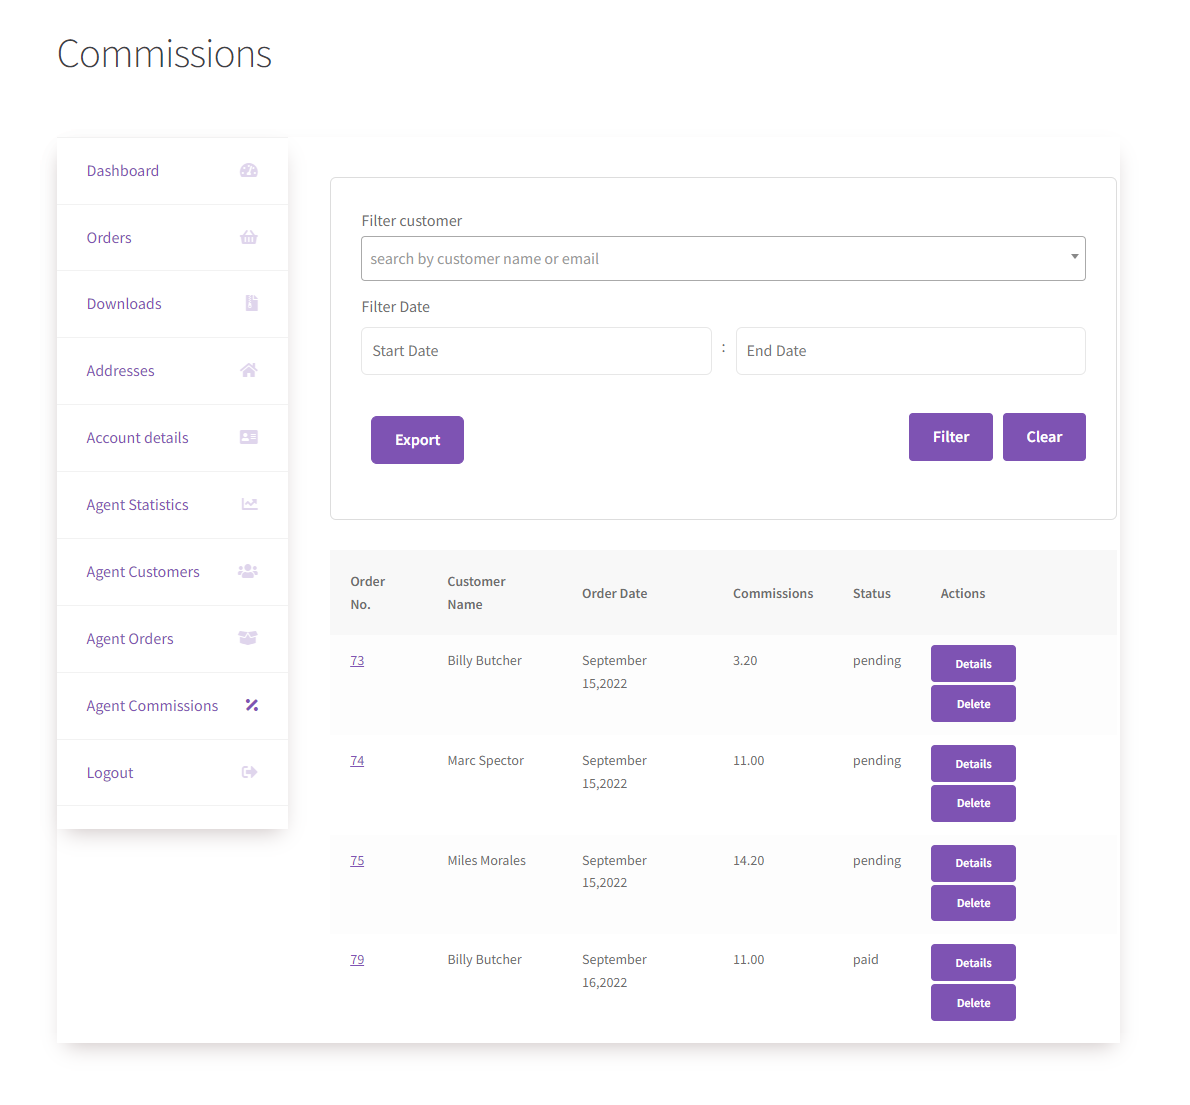
↑ Back to top- Click on the Agent Commissions tab on the Dashboard.
- All the Orders will appear in this tab, and details like Order Number, Order Date, Commissions, and Status.
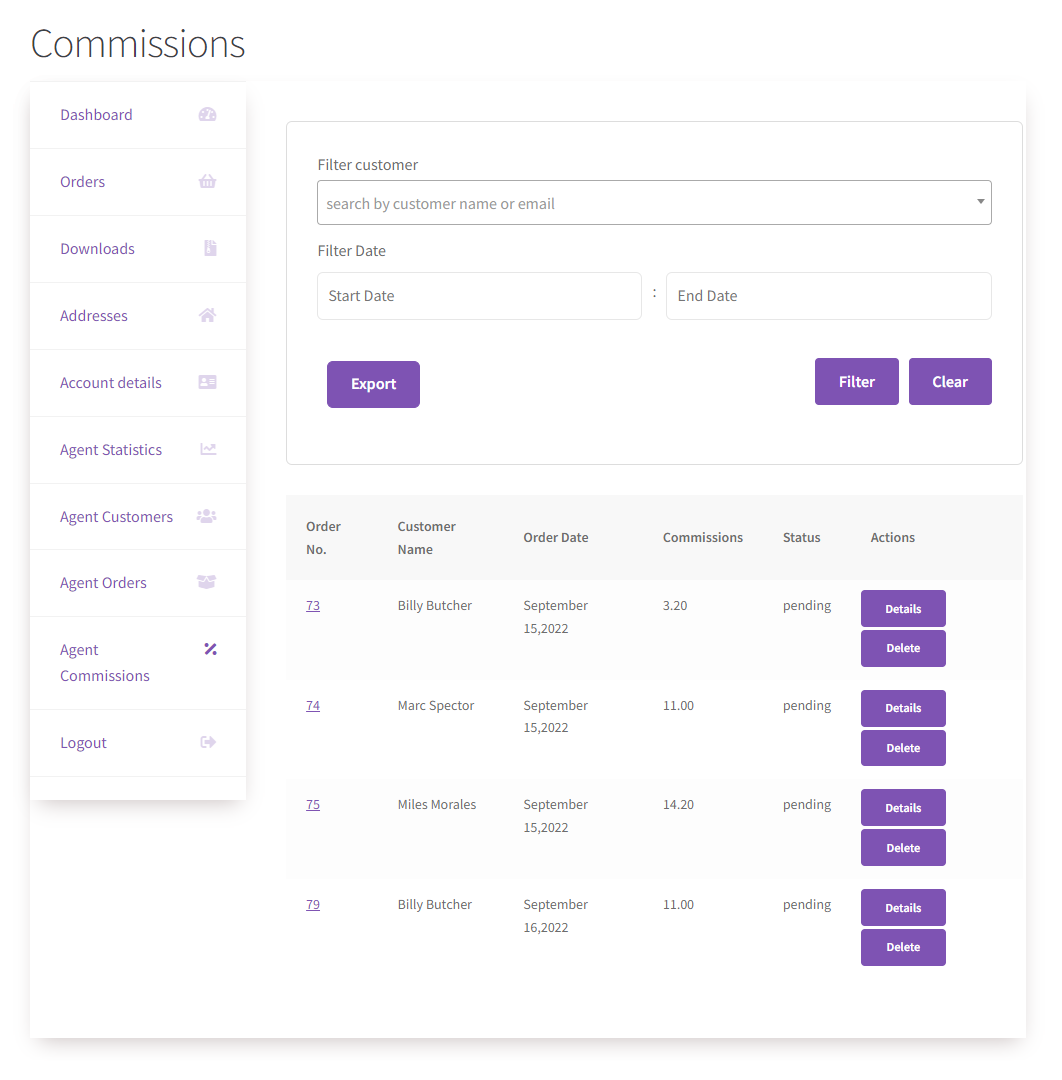
- A filter will appear at the top of this tab. We can search for the customer in the Filter Customer field. Enter the name of the customer and select it from the dropdown menu. Once done, click on the Filter button.
- All the orders of that customer will be displayed.
- Another filter will appear below the Filter Customer option. Set the Start Date and the End Date in the filter. Once done, click on the Filter button.
- All the orders that took place between the filtered dates will be displayed.

- Click on the Details button in the Actions column of that order, and the Customer details and Order details related to that order will be displayed.
- Click on the Delete button in the Actions column of that individual order to remove that order.
- You may also export order data in the Commissions tab by applying filters.
- Once the filter is applied, click on the Export button.
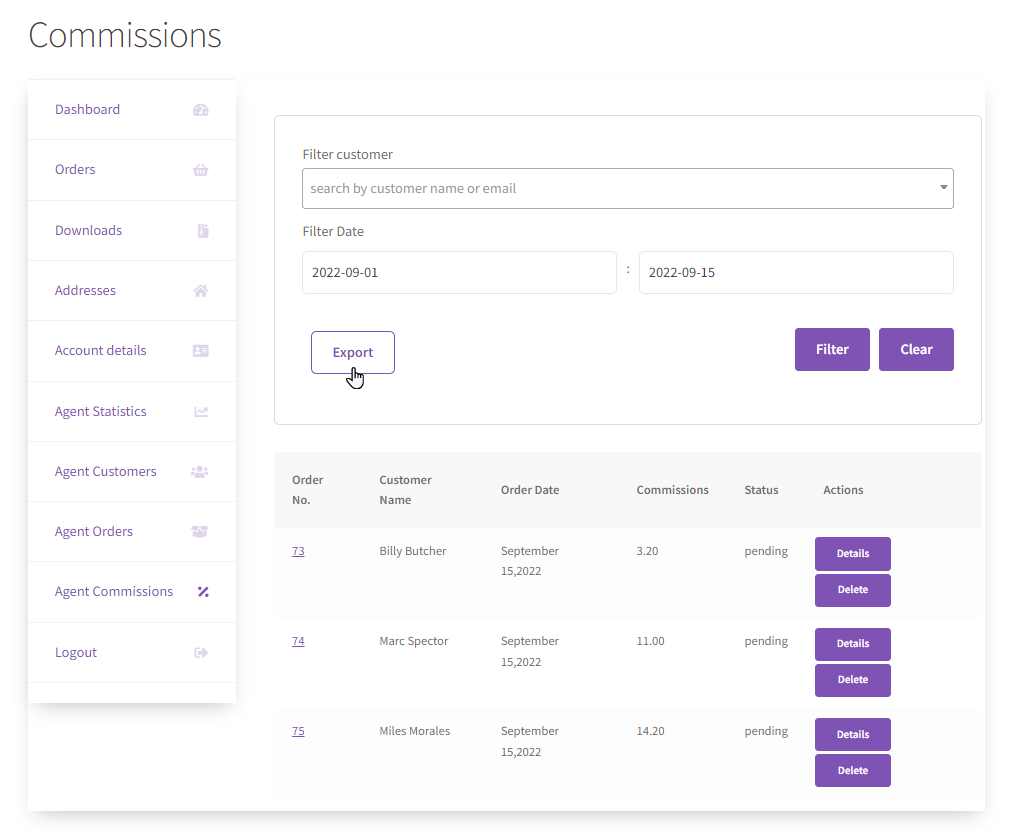
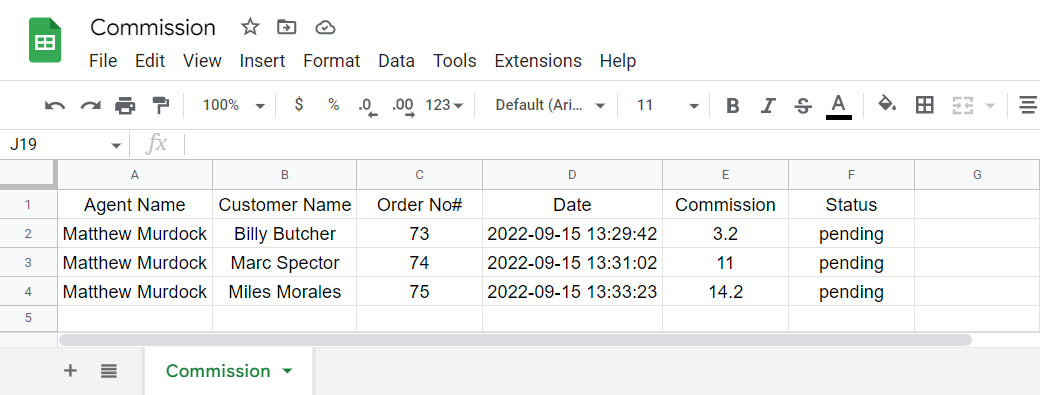
- Once done, a CSV file will be downloaded.
- Open the CSV file. It will contain all the details of the filtered orders.
- Click on the Clear button to remove all the filters.
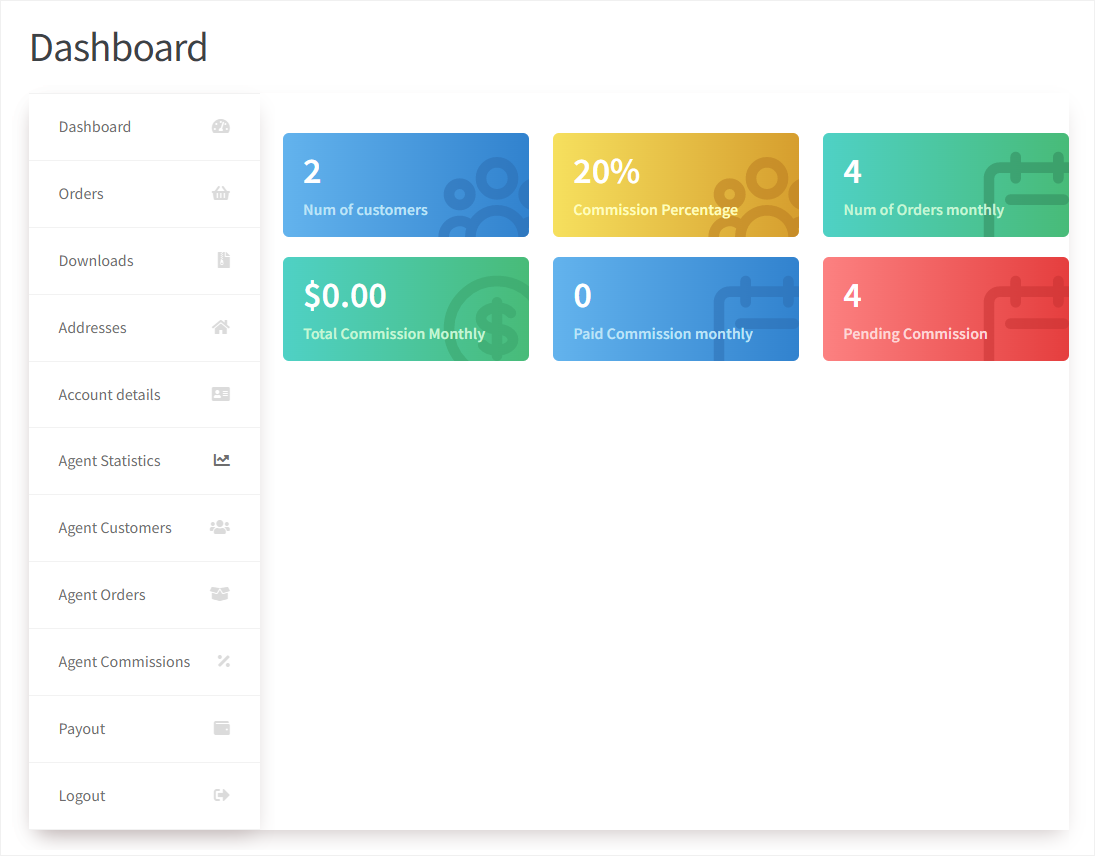
How to view agent statistics?
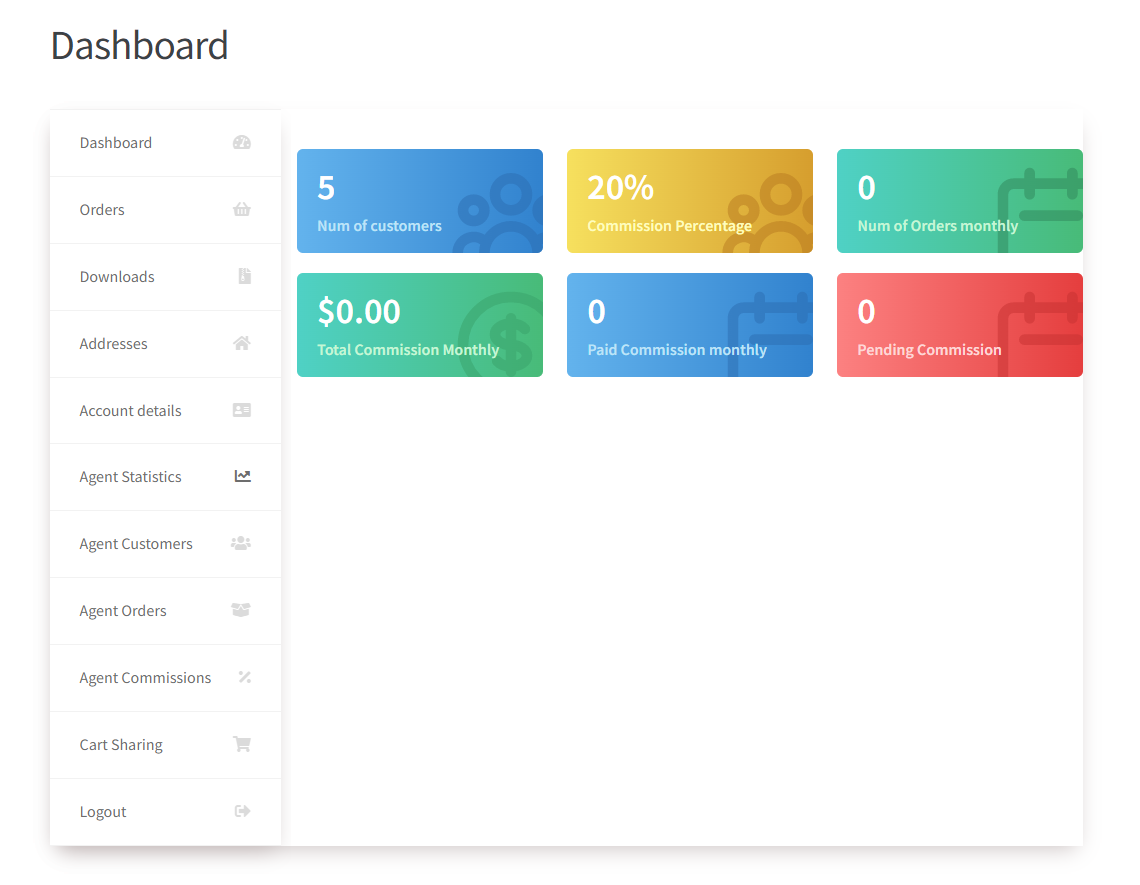
↑ Back to top- Click on the Agent Statistics tab on the Dashboard.
- The statistics will appear in this tab, including the Number of Customers, Commission Percentage, Number of Orders monthly, Total Commission Monthly, Paid Commission monthly, and Pending Commission.
Sales Dashboard
↑ Back to topSales dashboard options and filters
↑ Back to top- Go to → wp-admin menu → Agents →Dashboard
- Admin can find a monthly report of :
- Number of created customers by agent current month
- Number of created sales agents a current month
- Number of orders of current month
- Total of commissions monthly
- Number of paid commissions current month
- Number of pending commissions current month

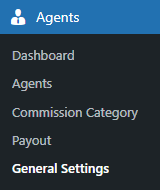
General Settings
↑ Back to topHow to change general settings?
↑ Back to top- Navigate to Admin Dashboard → Agents → General Settings.
Once you’re on the General Settings page, all the options will appear.
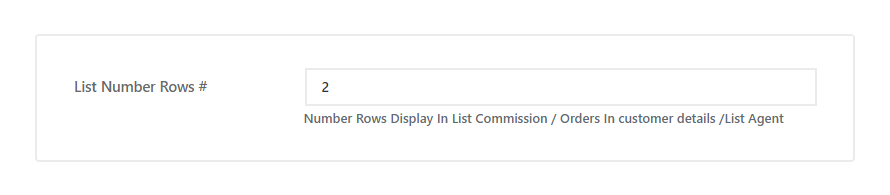
Setting the number of rows for general pages
- In the List Number Rows option, the Administrator can set the number of rows displayed on the Agent Customer, Agent Customer – Customer Details, Agent Orders, Agent Commissions, and Commission List page.
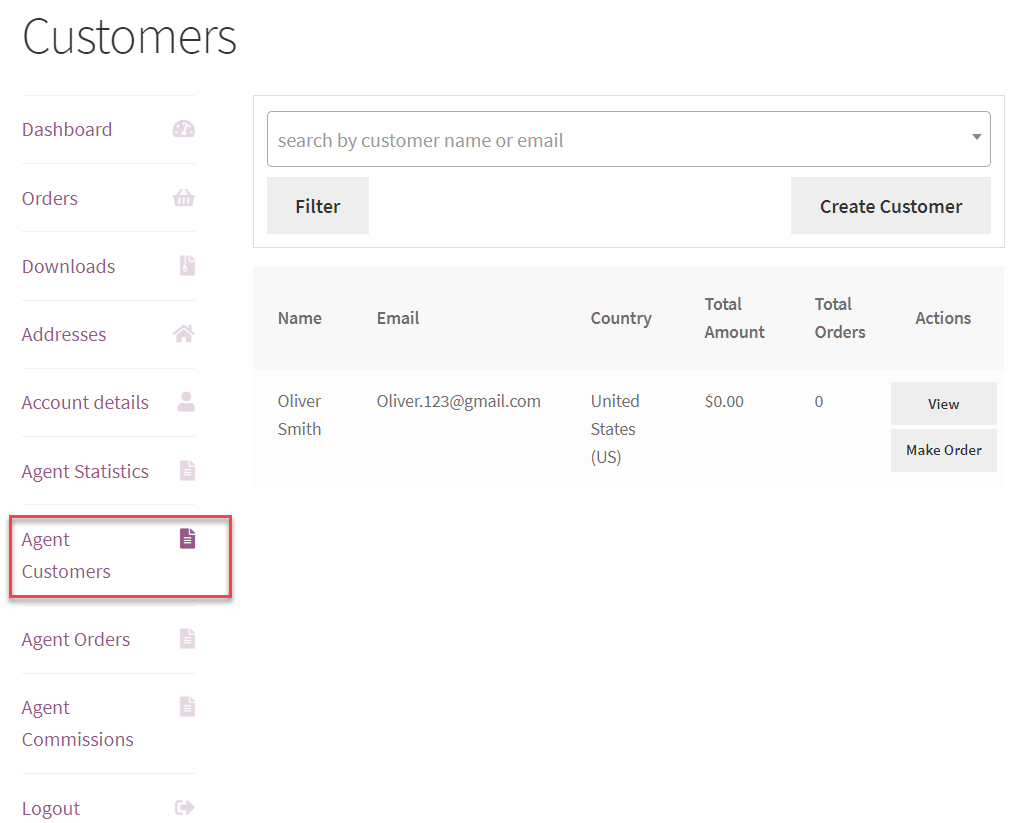
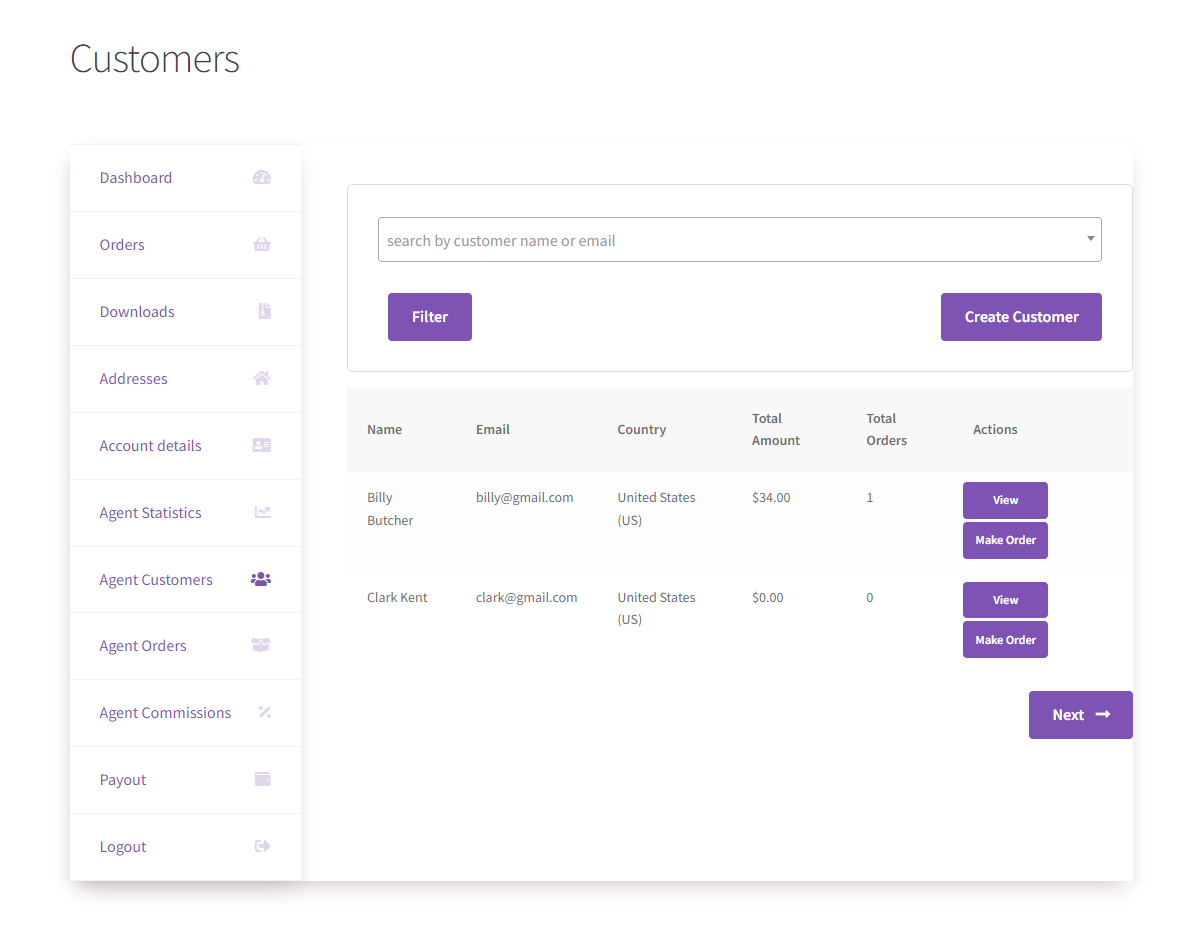
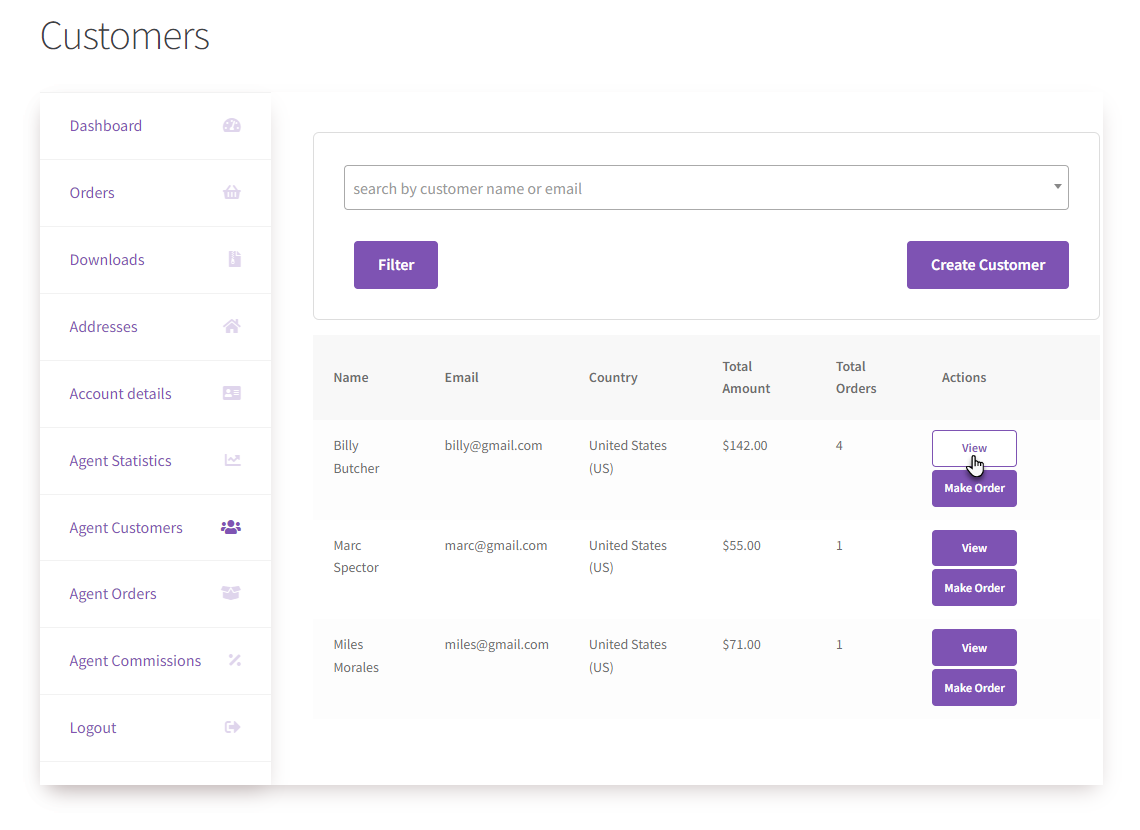
Agent Customer Page
- Navigate to the My Account page on the website.
- On the Dashboard, navigate to the Agent Customers tab.
Before
After
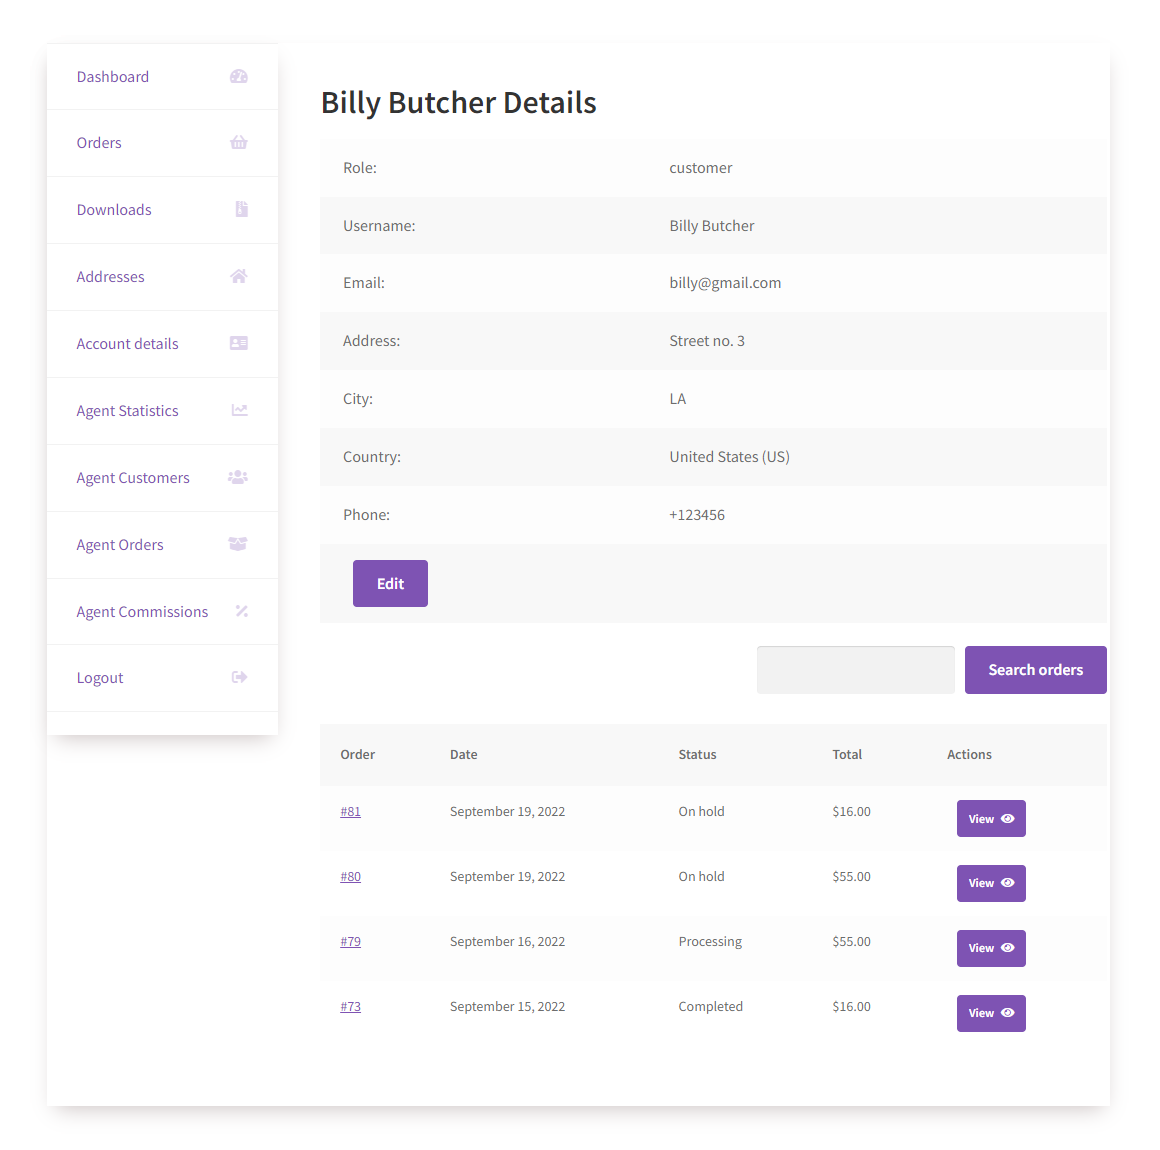
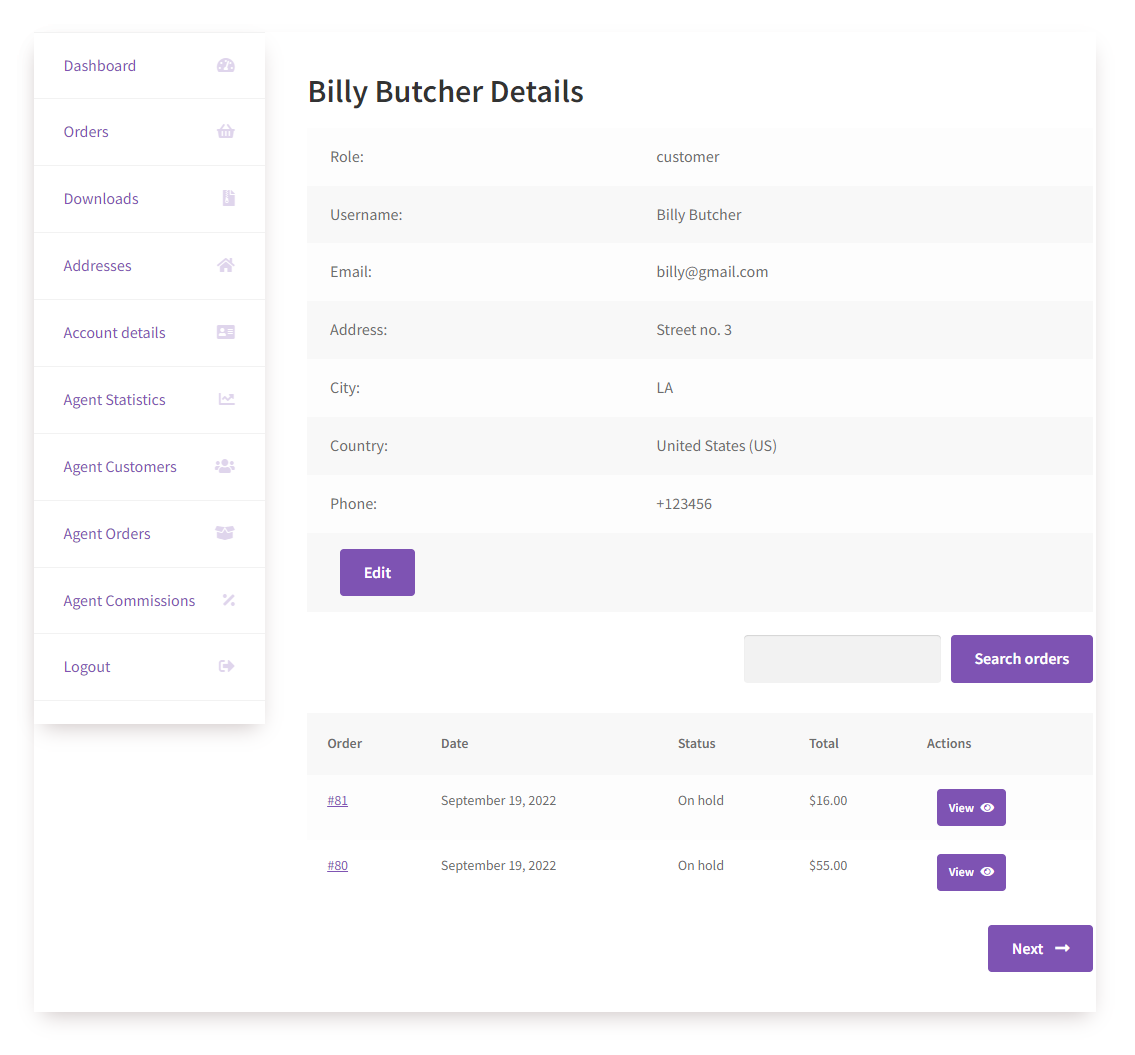
Agent Customer – Customer Details Page
- Navigate to the My Account page on the website.
- On the Dashboard, navigate to the Agent Customers tab.
- Click on the details button against the customer.
Before
After
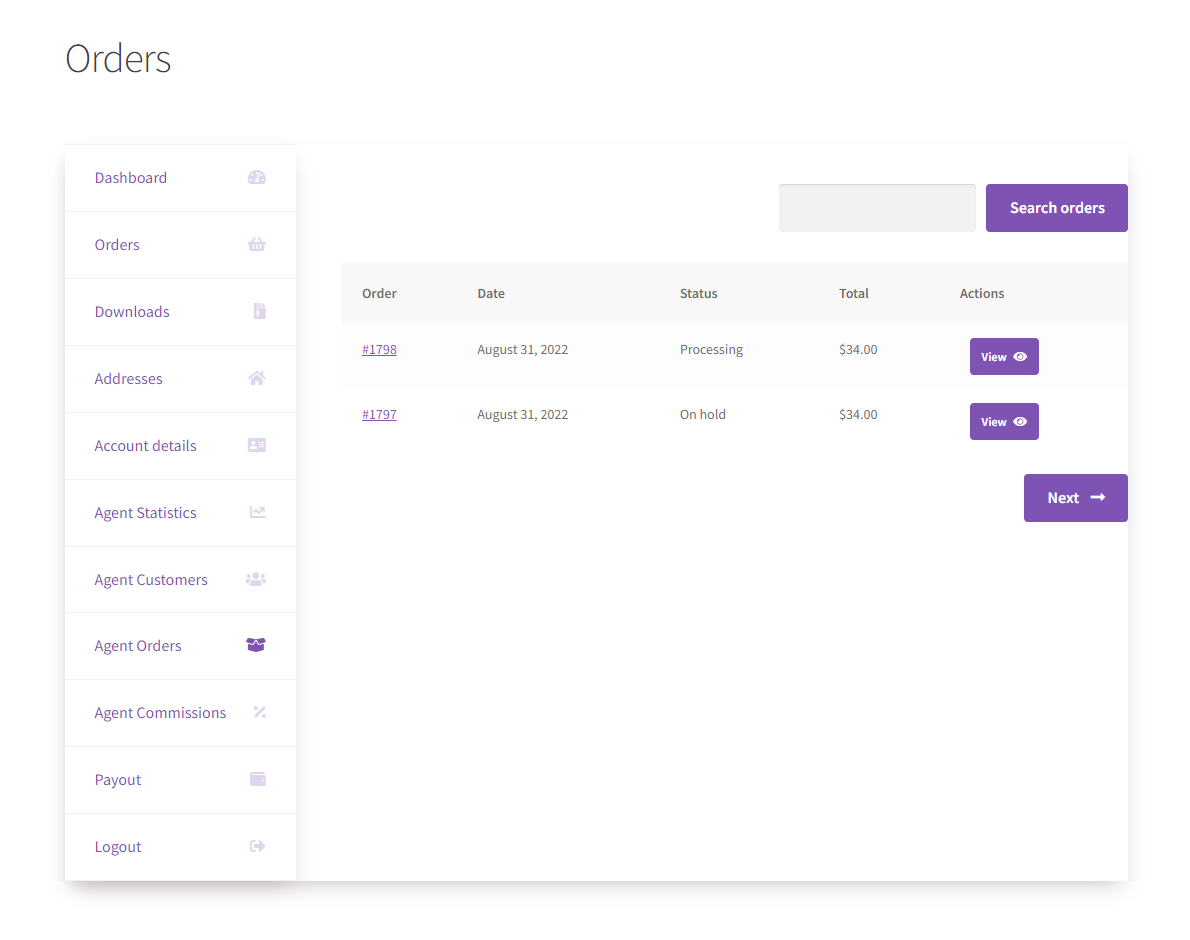
Agent Order Page
- Navigate to the My Account page on the website.
- On the Dashboard, navigate to the Agent Orders tab.
Before
After
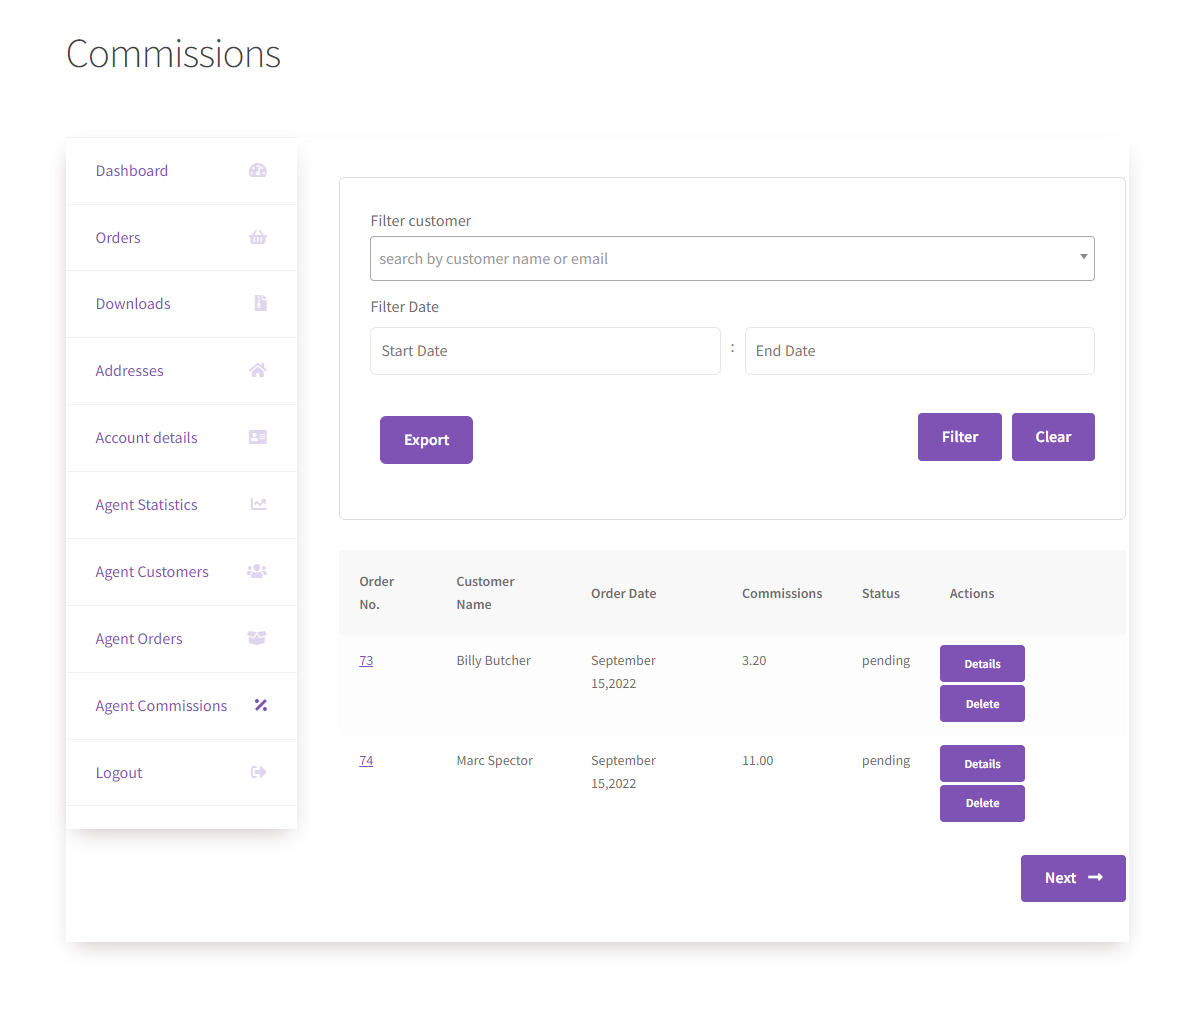
Agent Commissions Page
- Navigate to the My Account page on the website.
- On the Dashboard, navigate to the Agent Commissions tab.
Before
After
Commission List Page
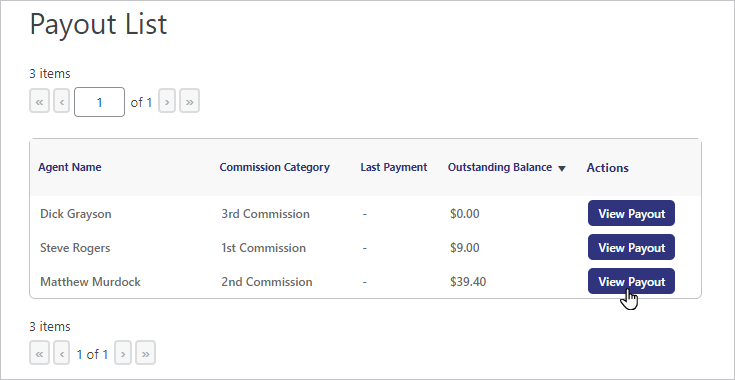
- Navigate to the Admin Dashboard → Agents → Payout.

- All the Payouts are mentioned on this page.
- Click the View Payout button against any agent to view his commission list.
Before
After

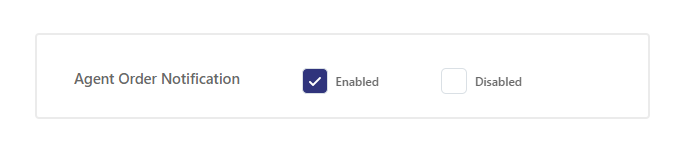
Agent Order Notification
- In the Agent Order Notification option, If the Administrator clicks on the Enabled checkbox, then when a customer orders anything from the shop page, the Agent assigned to that customer will also receive an email of the order.
Agent Registration
↑ Back to top- To register an Agent, navigate to WordPress Admin Dashboard > Sales Agent > Registration.
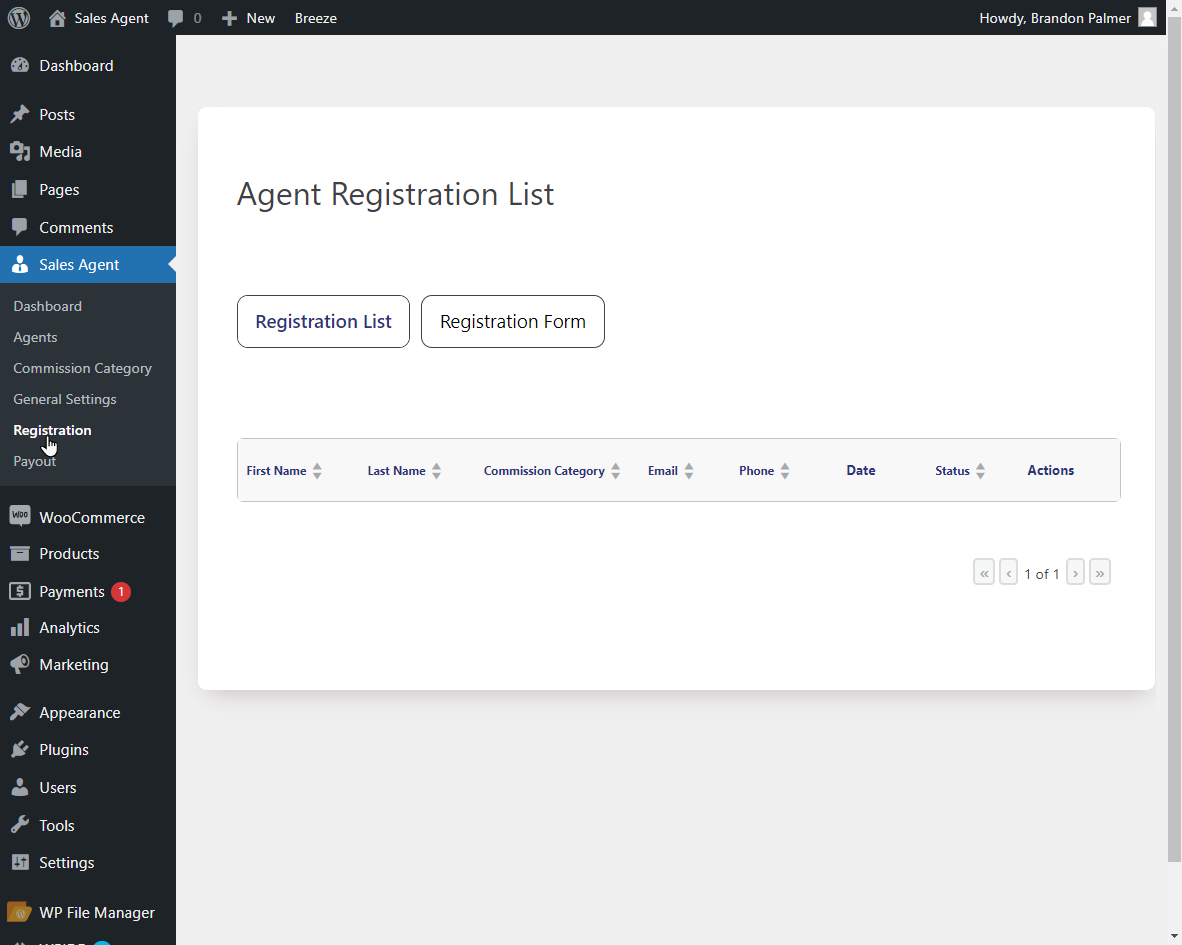
- You will have two options on the Registration page: Registration List and Registration Form.
Registration Form
↑ Back to top- Admin can create an Agent Registration form. To create a form, click the Registration Form button.

- An Agent Registration Form Page will appear.

- On this Page, by default, First Name, Last Name, Email, Password, and Commission Category form fields will be available.
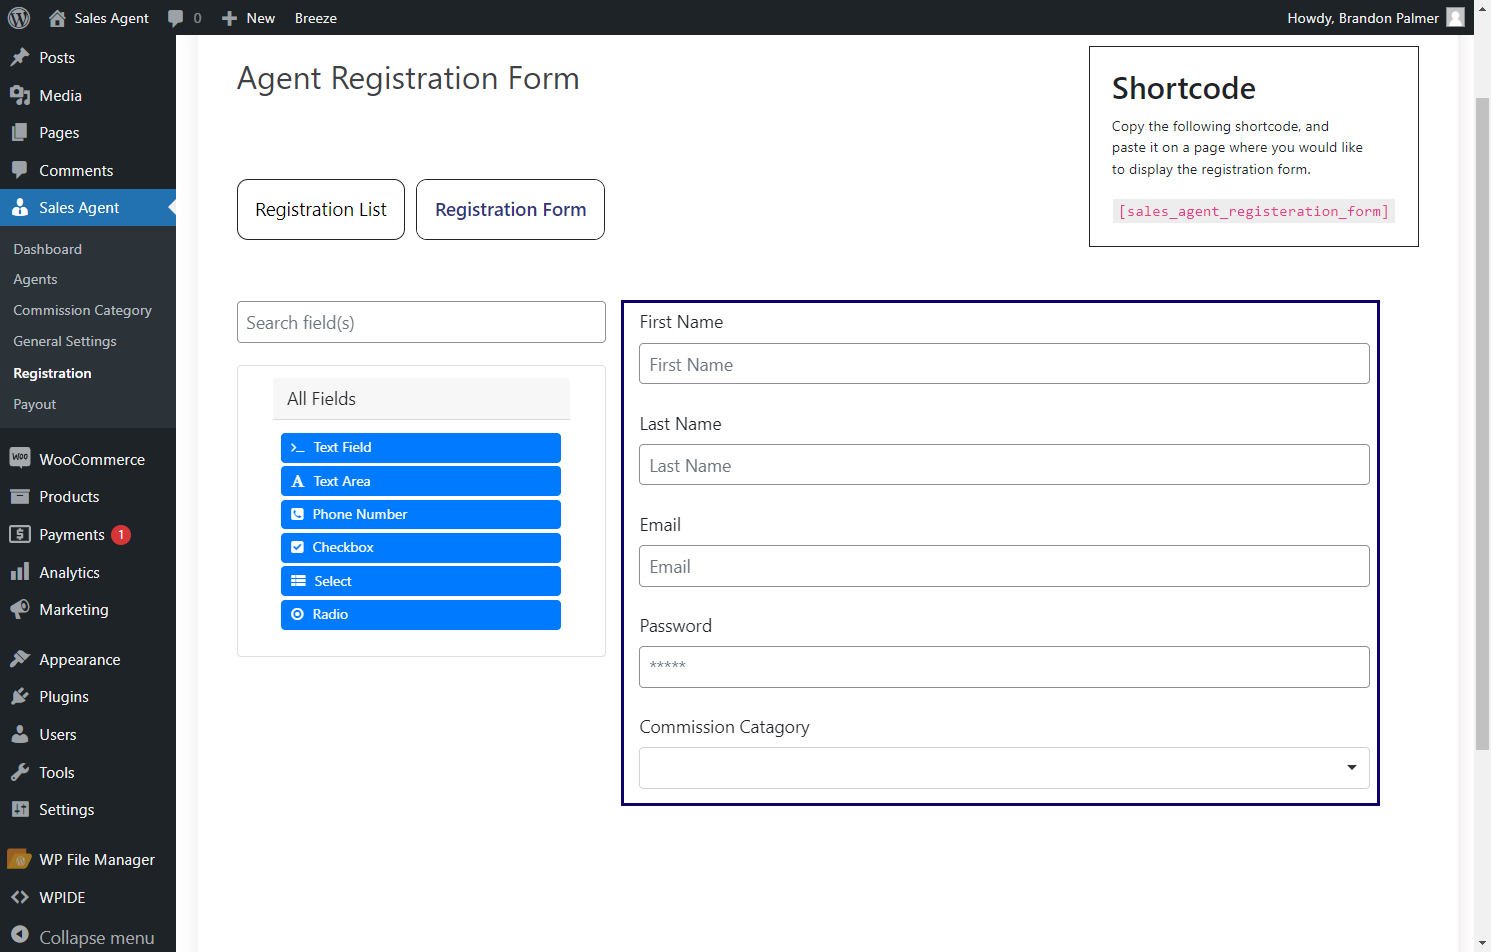
- The admin can reflect additional fields in the form by dragging and dropping them.
- Once the admin adds the field, Field Components will appear.
- Here, the admin can customize it accordingly.
- Under the Display Tab, the admin can edit the Label and Placeholder.
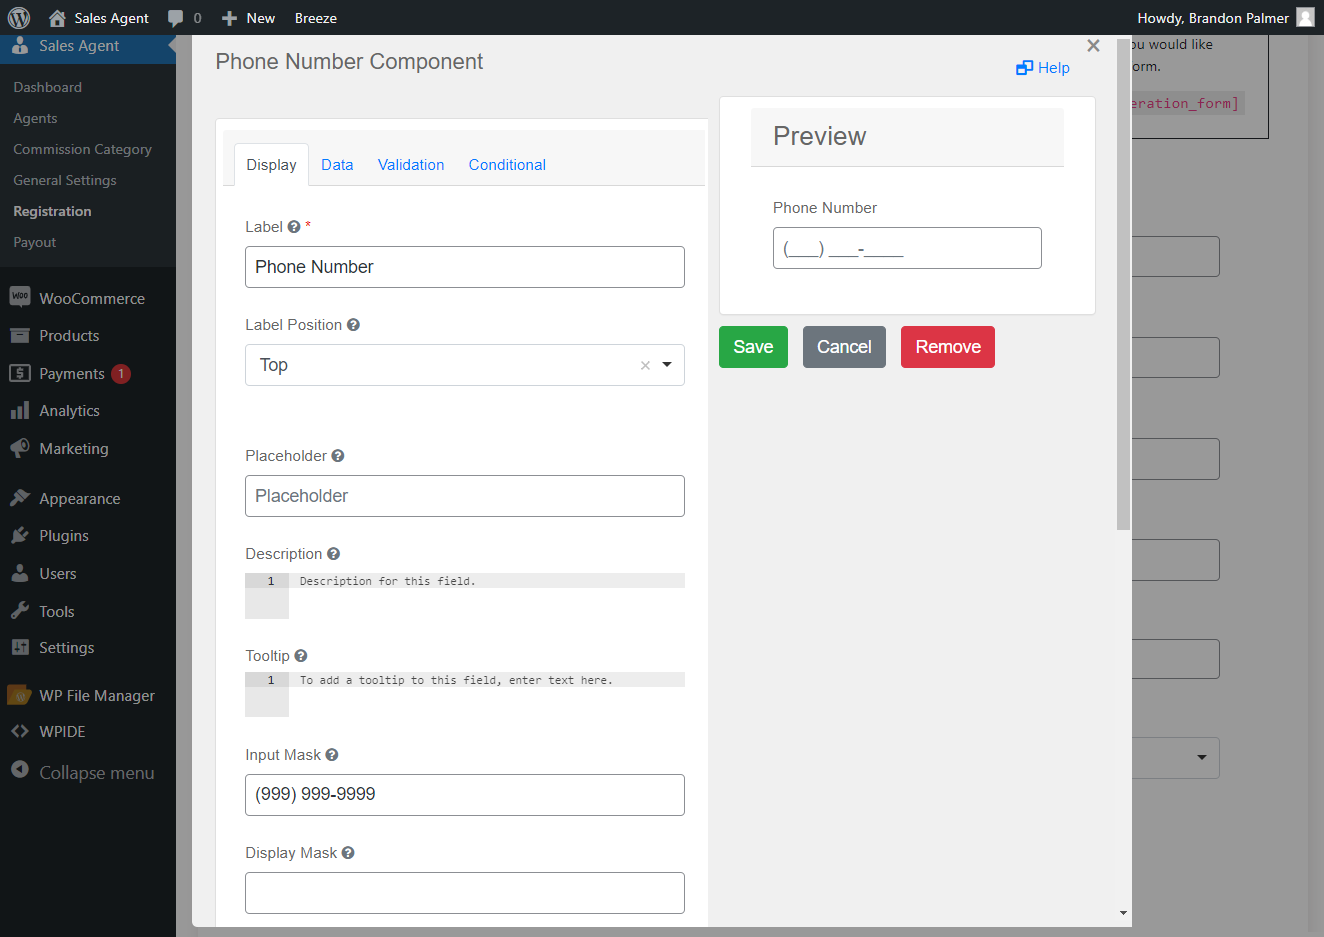
- Admin can also set the Placeholder.
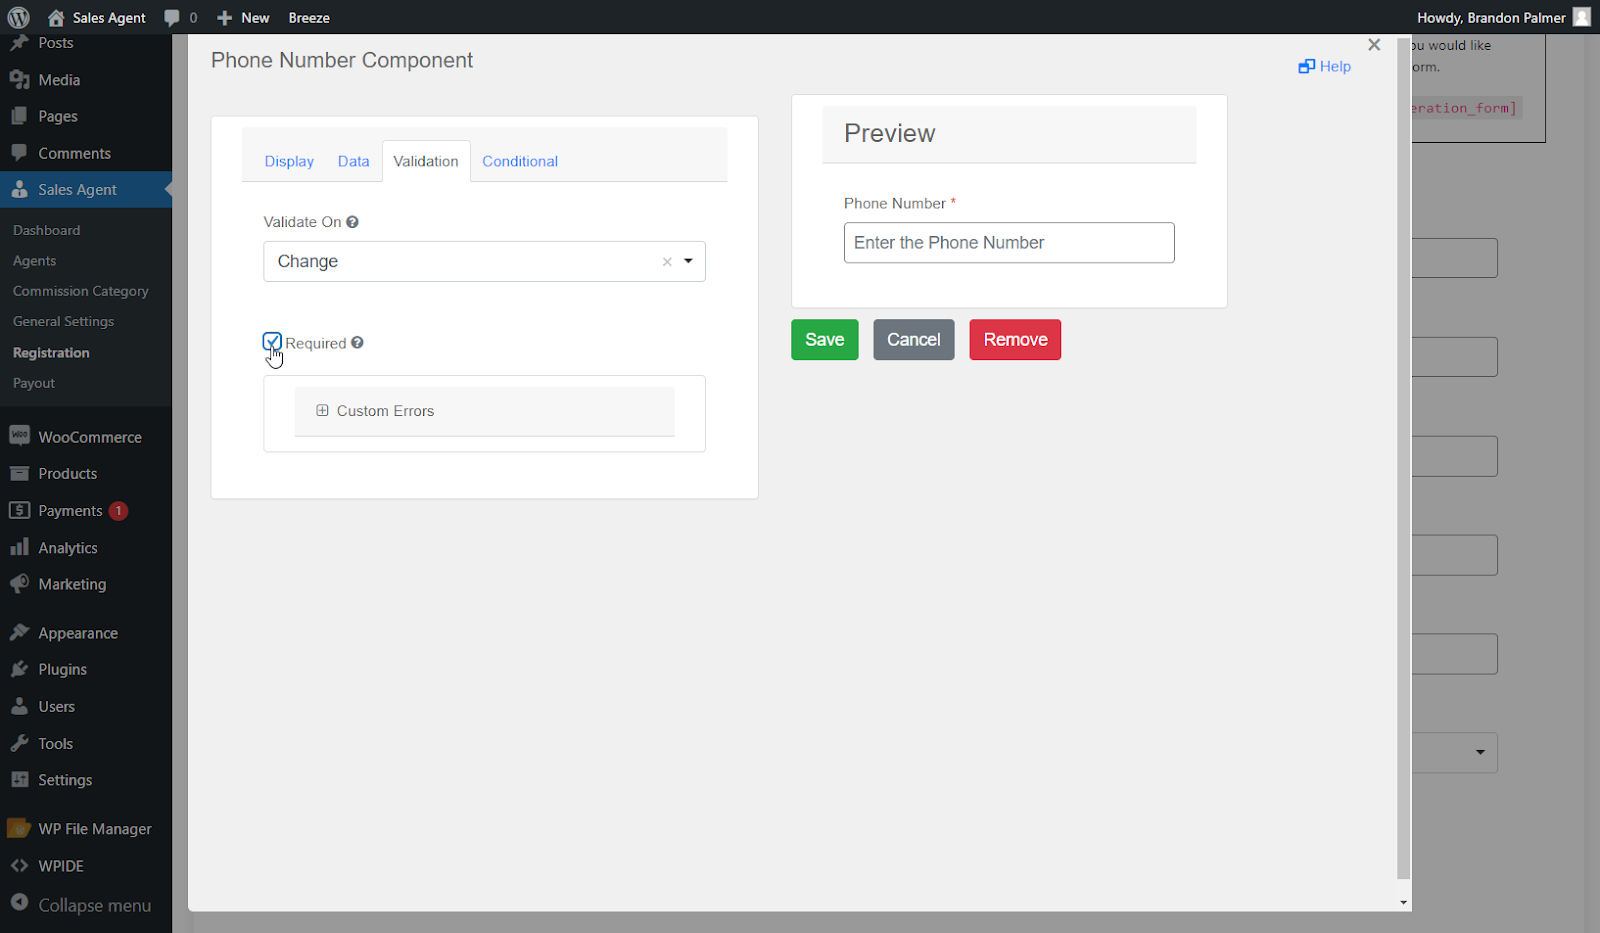
- Under the Validation tab, the admin can make the field required by clicking the Required Checkbox.
- Admin can set the Conditions for the specific field under the header Conditional.
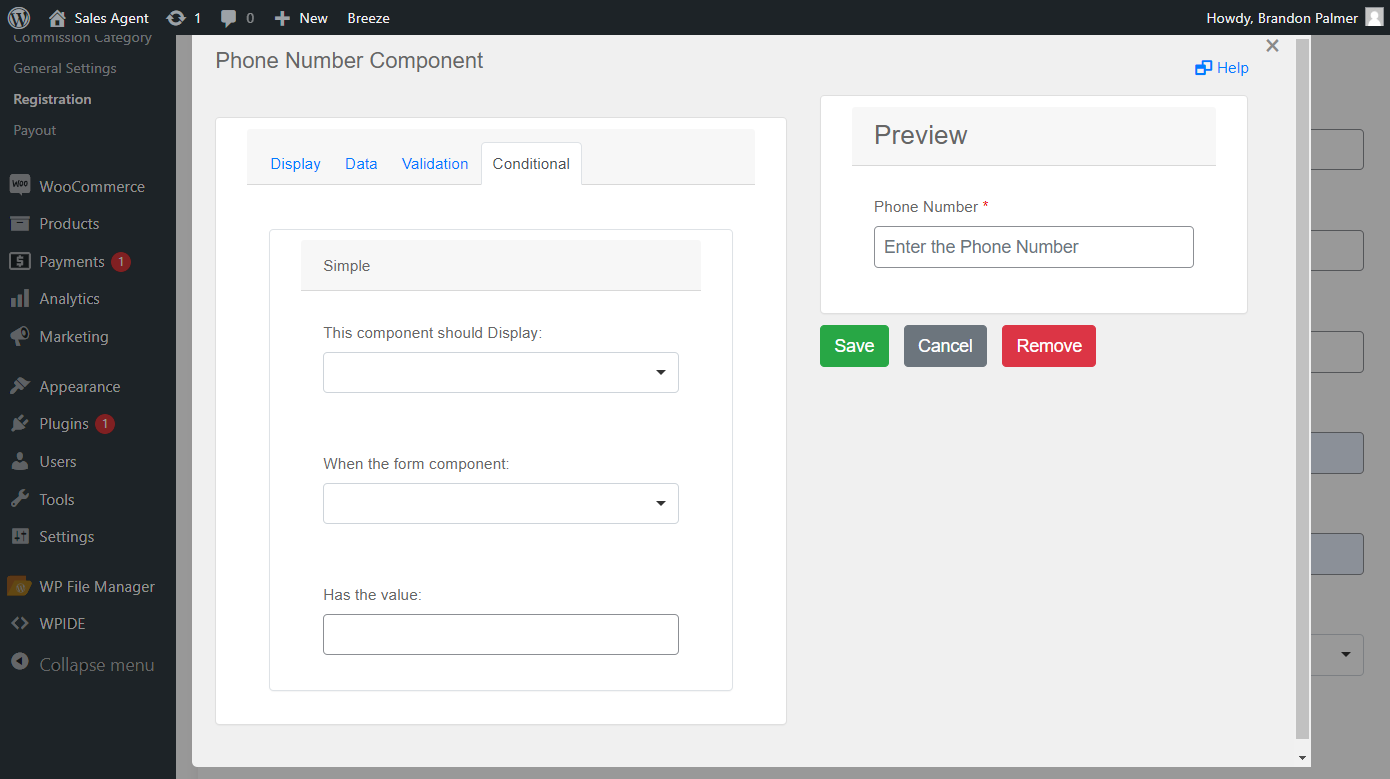
- Under the Conditional tab select This component should Display option from the dropdown.

- Under the ‘when the form component’ dropdown, select the field and specify the ‘Has the Value option’.
- In our case, there’s no need for a value, so it is empty; provide the required data in the Has the Value section.
- Click the Save button.
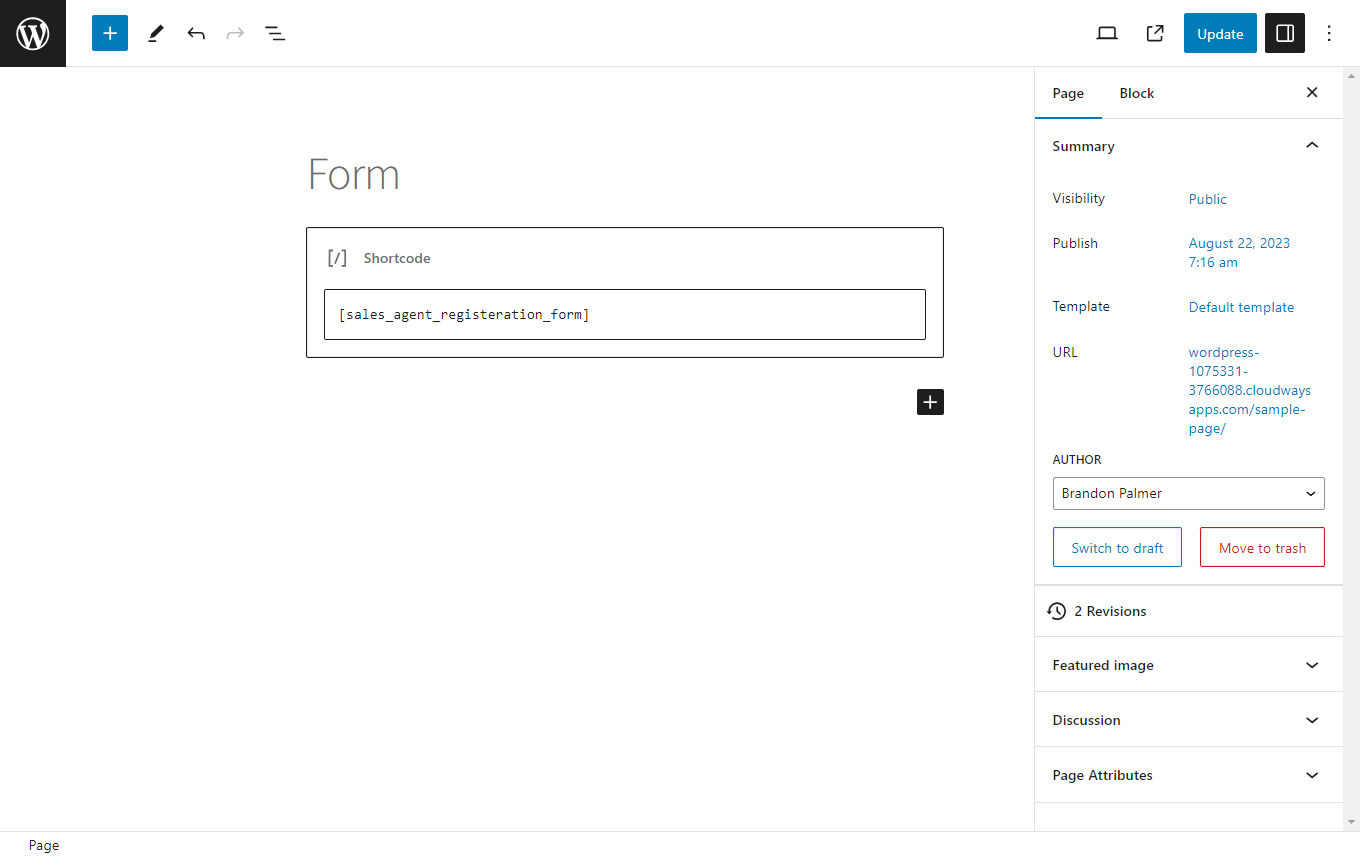
- Once saved, copy the shortcode.
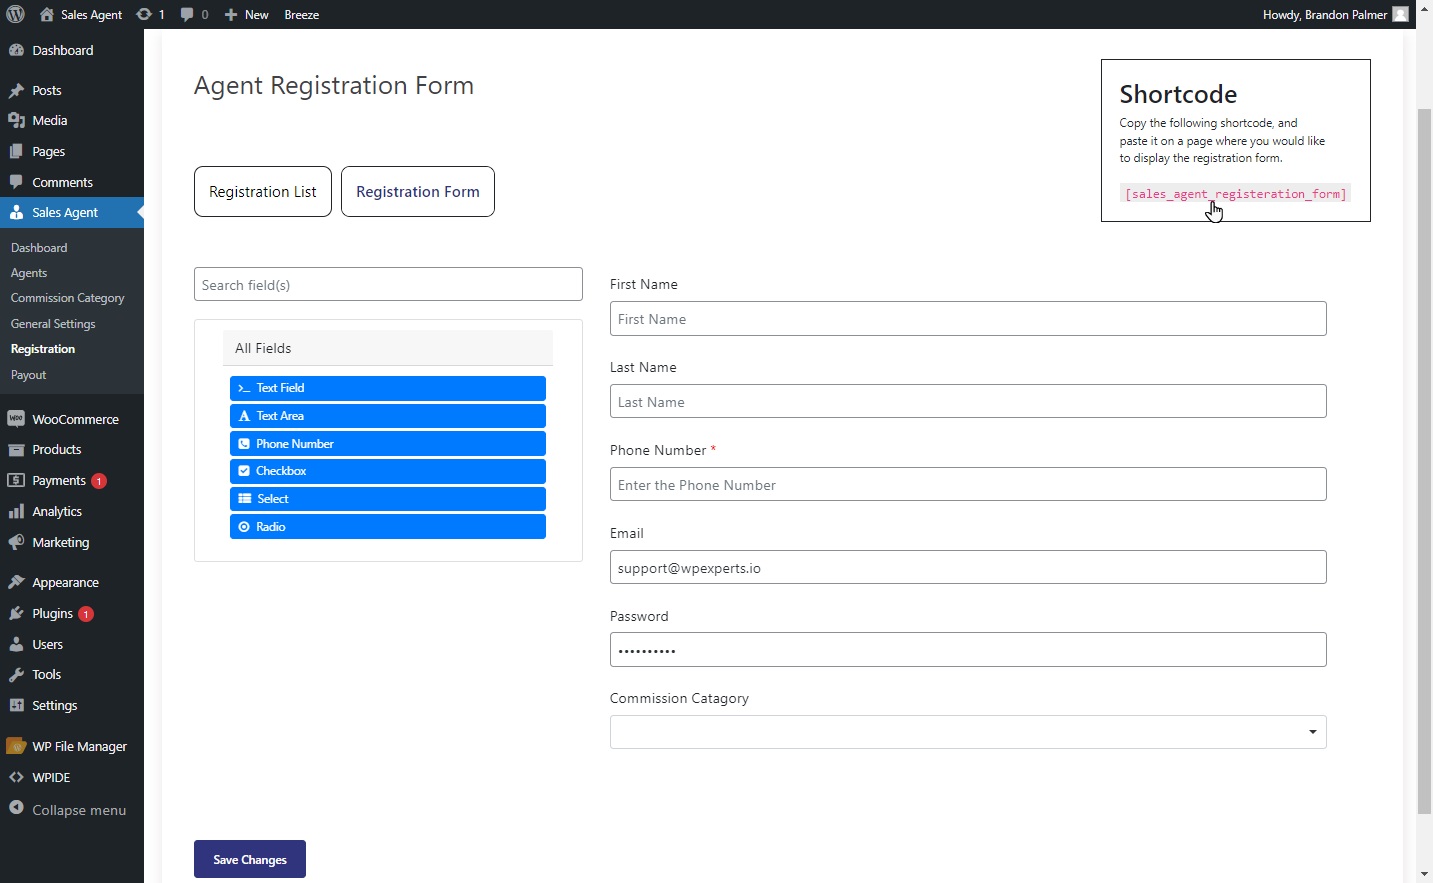
- Paste the shortcode on the desired page.
Frontend Impact
- Fill out the form and click register.
- The phone number field will appear when there is a value in the Last Name field.
Registration List
↑ Back to top- Once registered, the admin can view the Registration list by navigating to WordPress Admin Dashboard > WooCommerce > Registration.
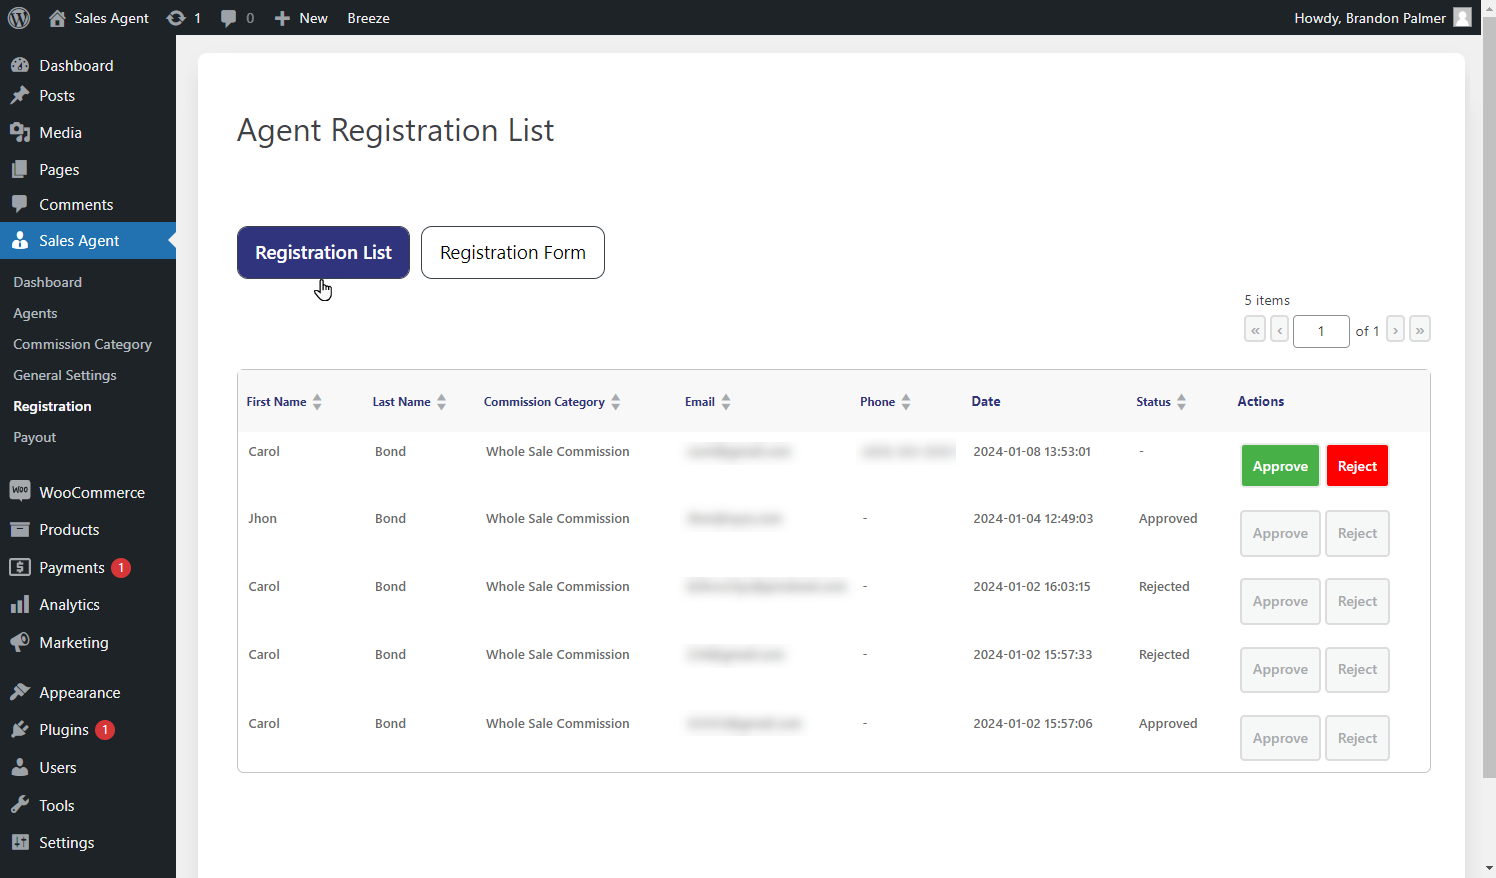
- Admin can view all the Registered Users with their status and details.
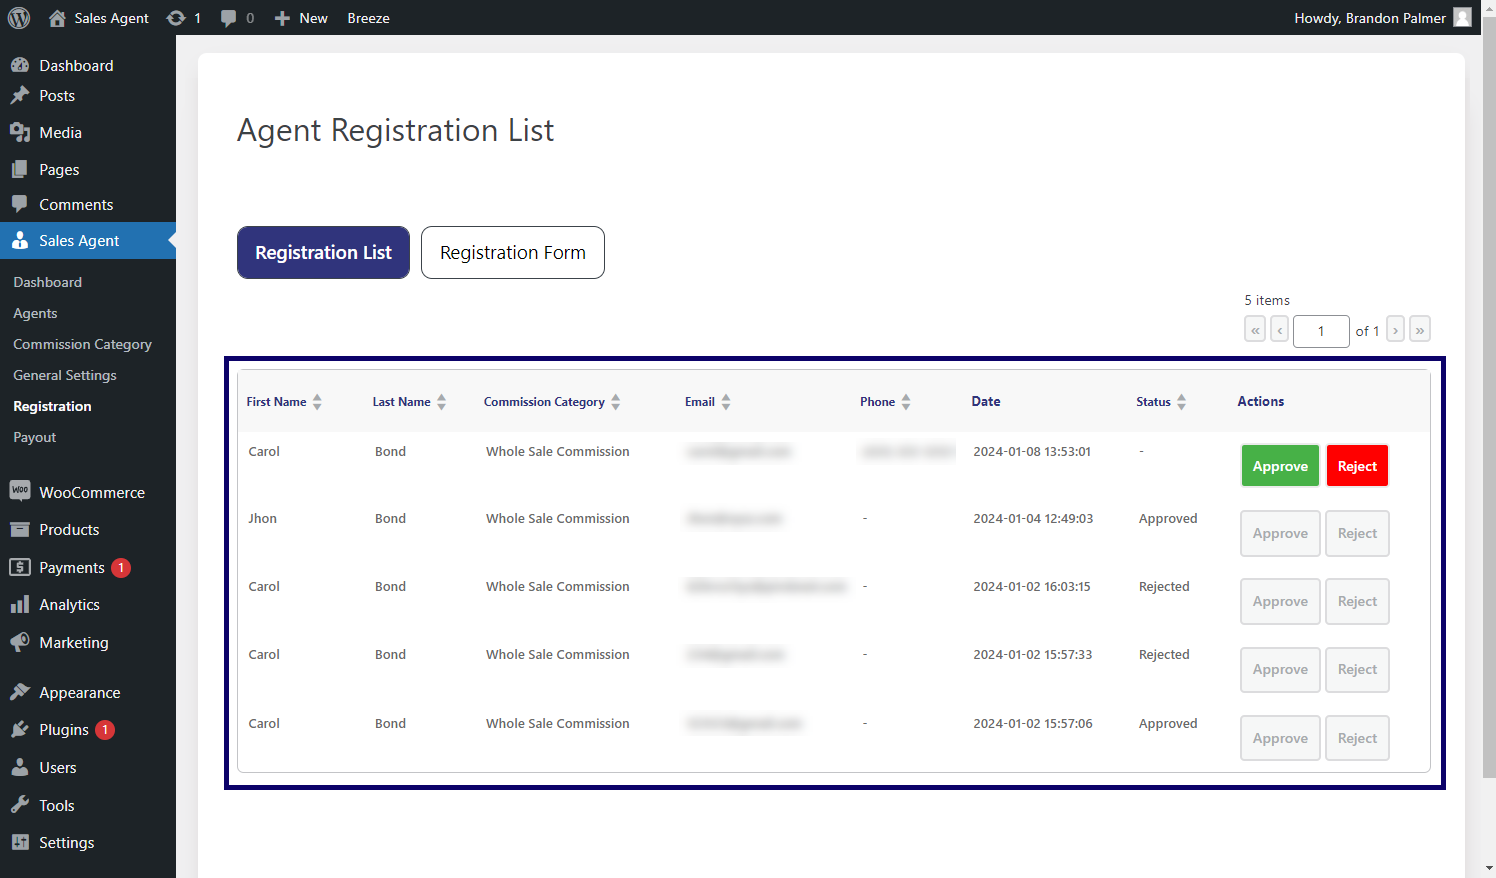
- Admin can Approve or Reject the registered user.

- Once the Admin Approves or Rejects the registered user, the status will be updated.

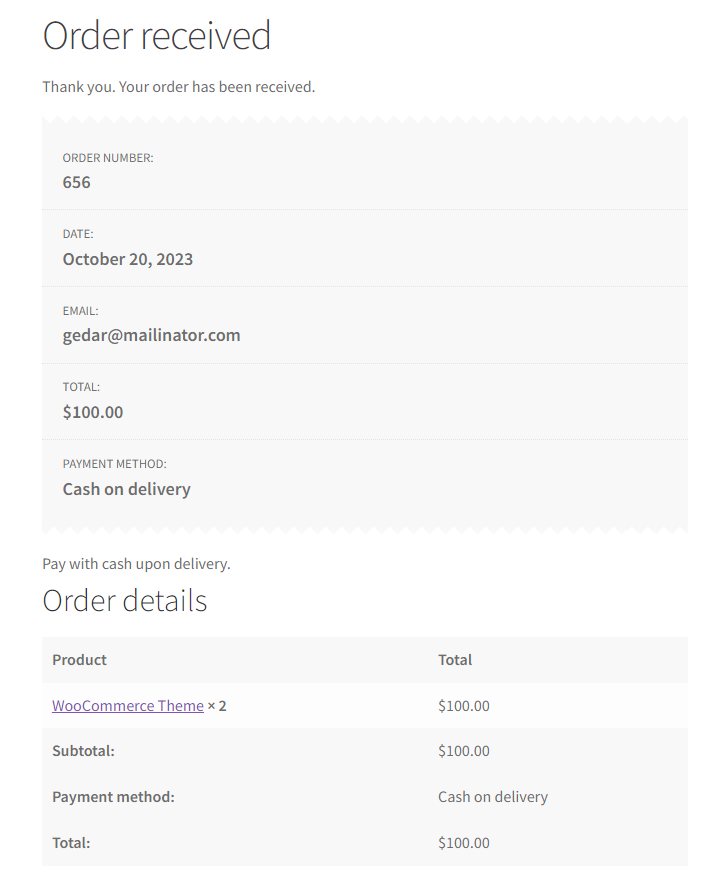
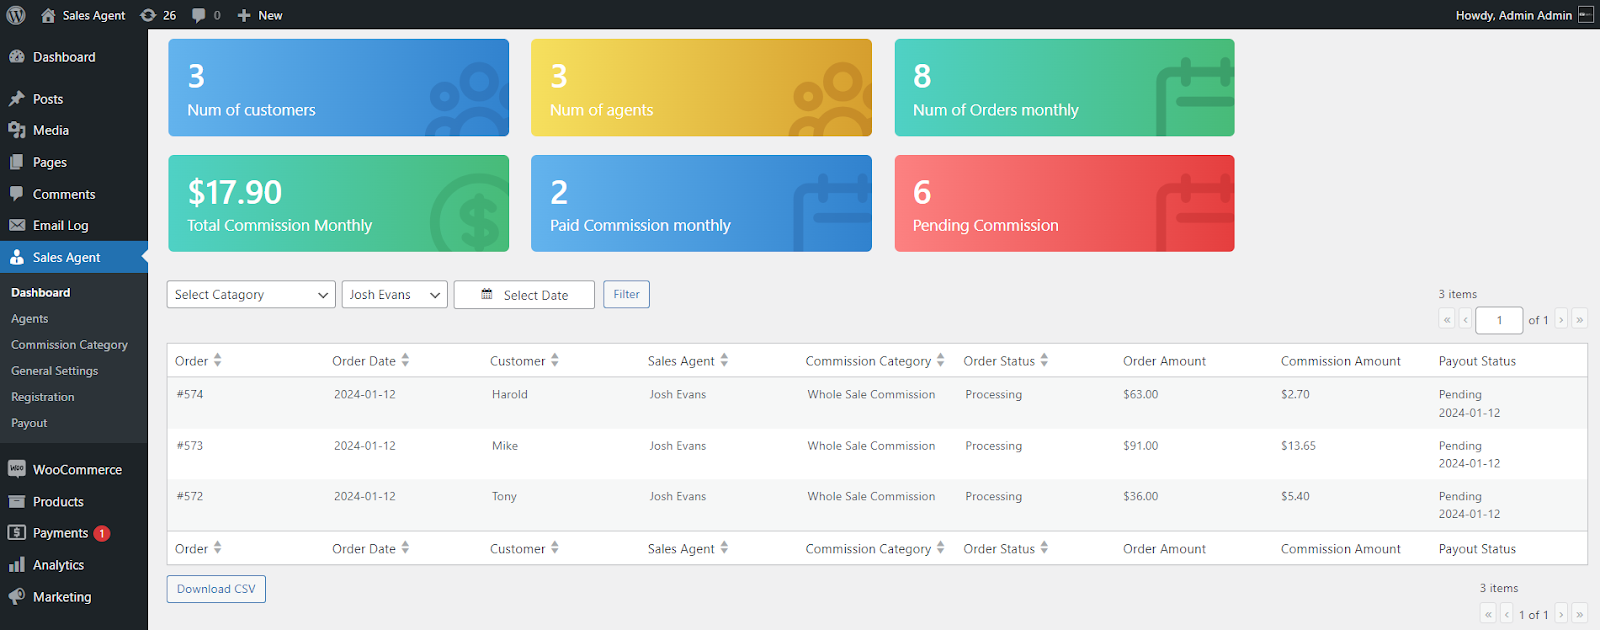
Sales Agent Dashboard
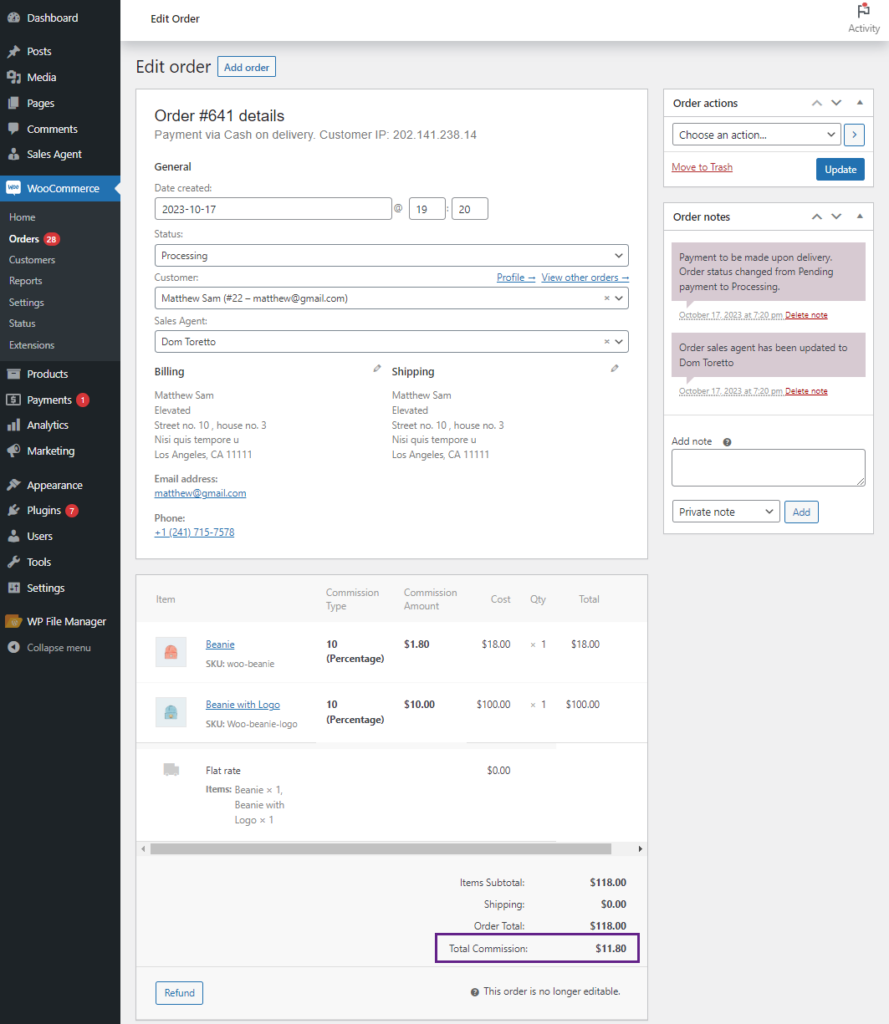
↑ Back to top- Once the Agent orders for his Customer, the Order Amount and Commission Amount will be shown on the Sales Agent Dashboard.
- The Order Amount indicates the customer’s payment. The Commission Amount reflects the earnings of the Sales Agent on that order displayed on the dashboard.
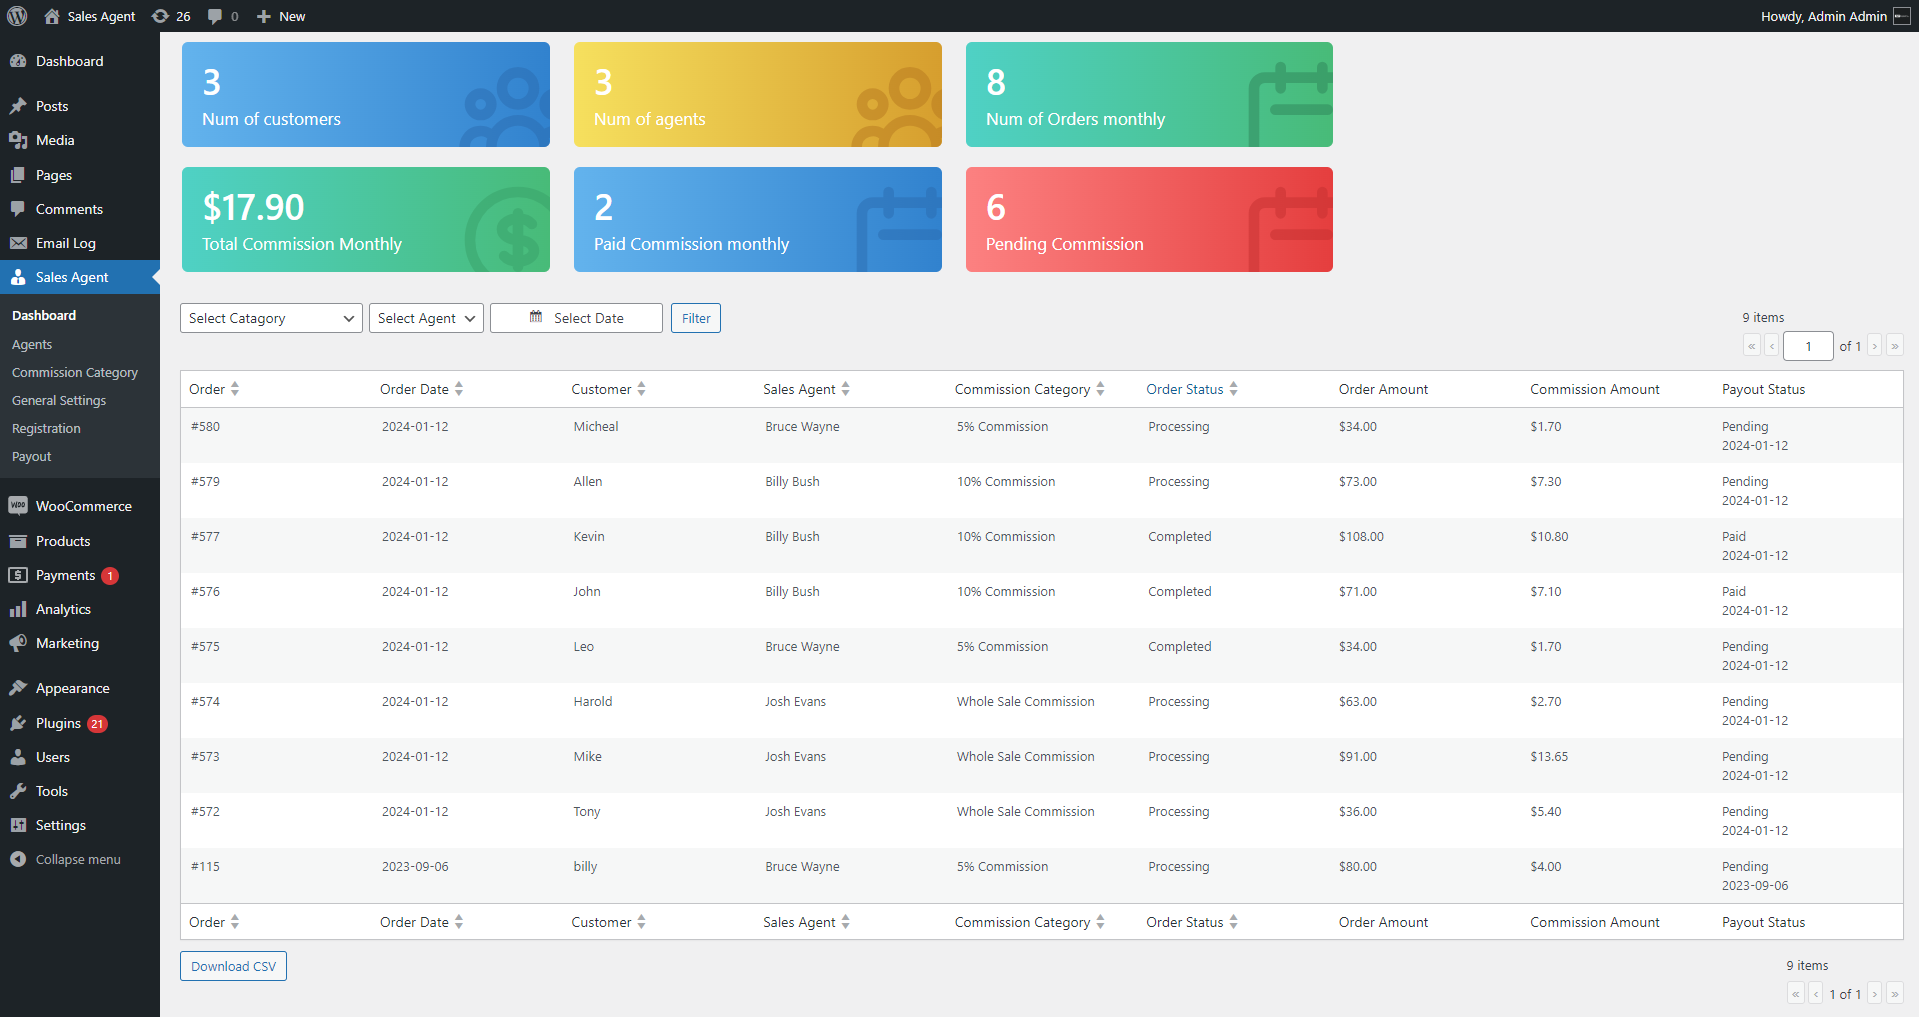
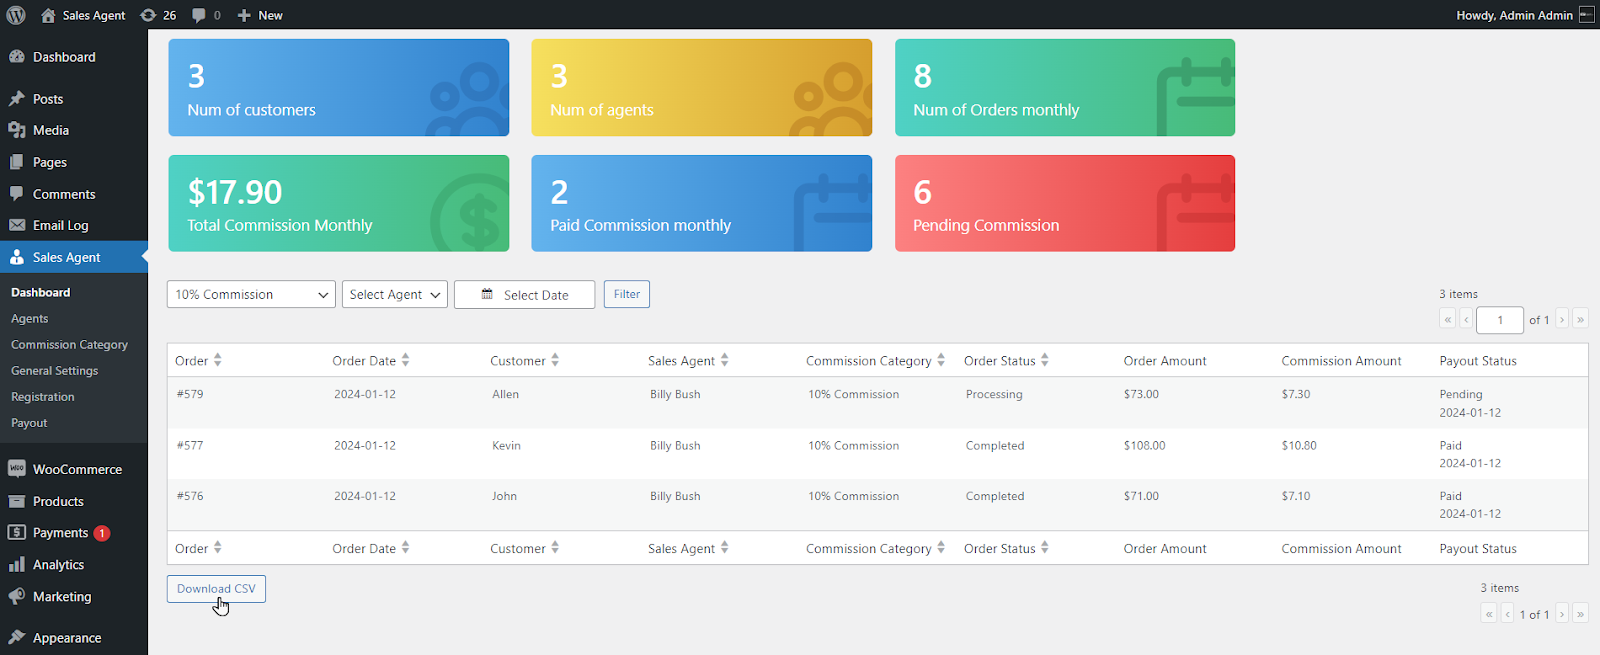
Filter by Commission Category
↑ Back to top- Further, the Admin has the capability to sort the list using options such as Select Category, Select Agent, and Select Date from the available filtering options.
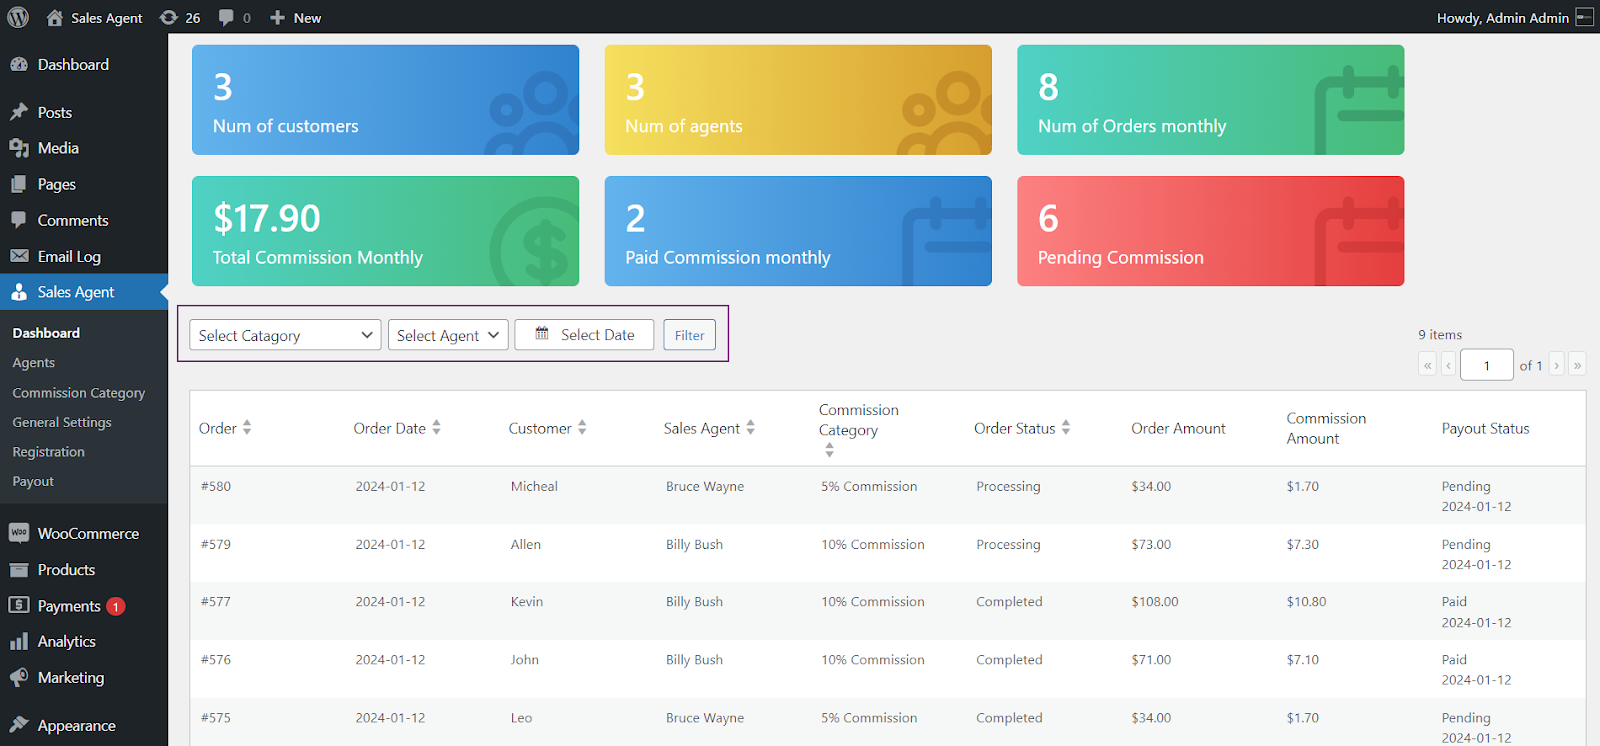
- Navigate to the Select Category filter.
- Select a Commission Category.
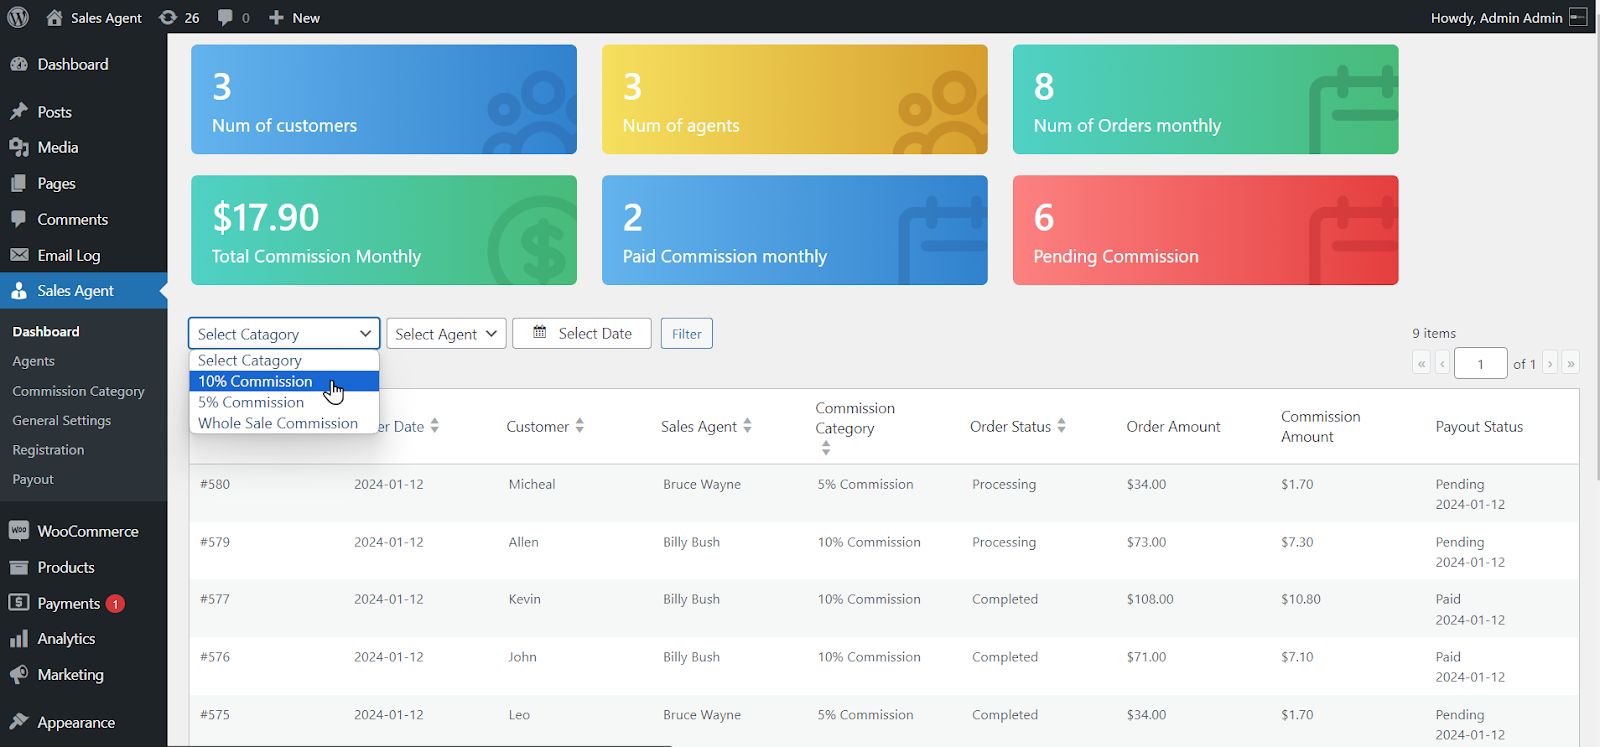
- Click on the Filter button.
- The filtered data will be displayed.

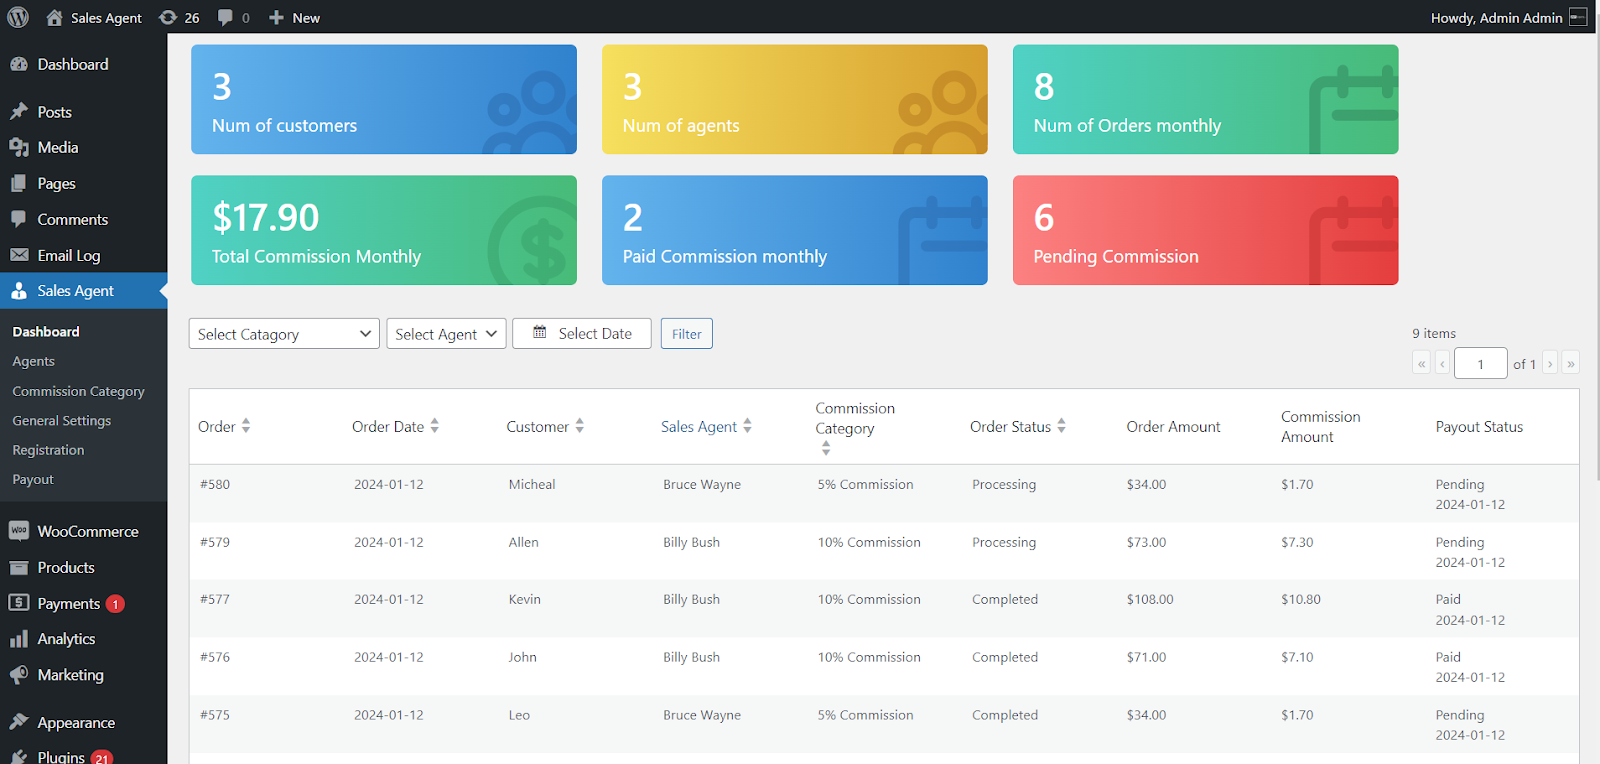
Filter by Sales Agent
↑ Back to top- Navigate to the Select Agent filter.
- Select a Sales Agent.
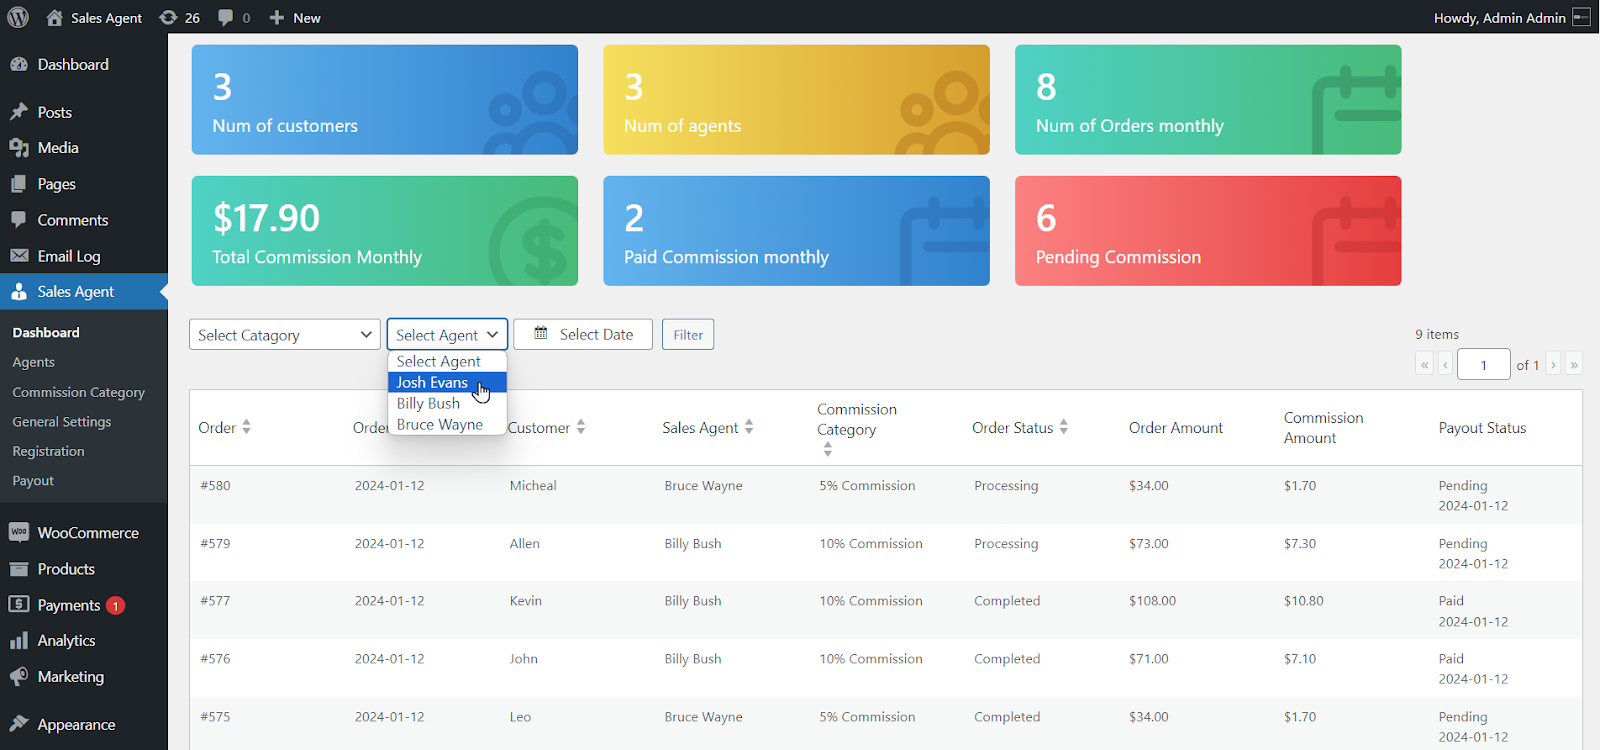
- Click on the Filter button.
- The filtered data will be displayed.
Filter by Date
↑ Back to top- Navigate to the Date filter.
- Select a date.
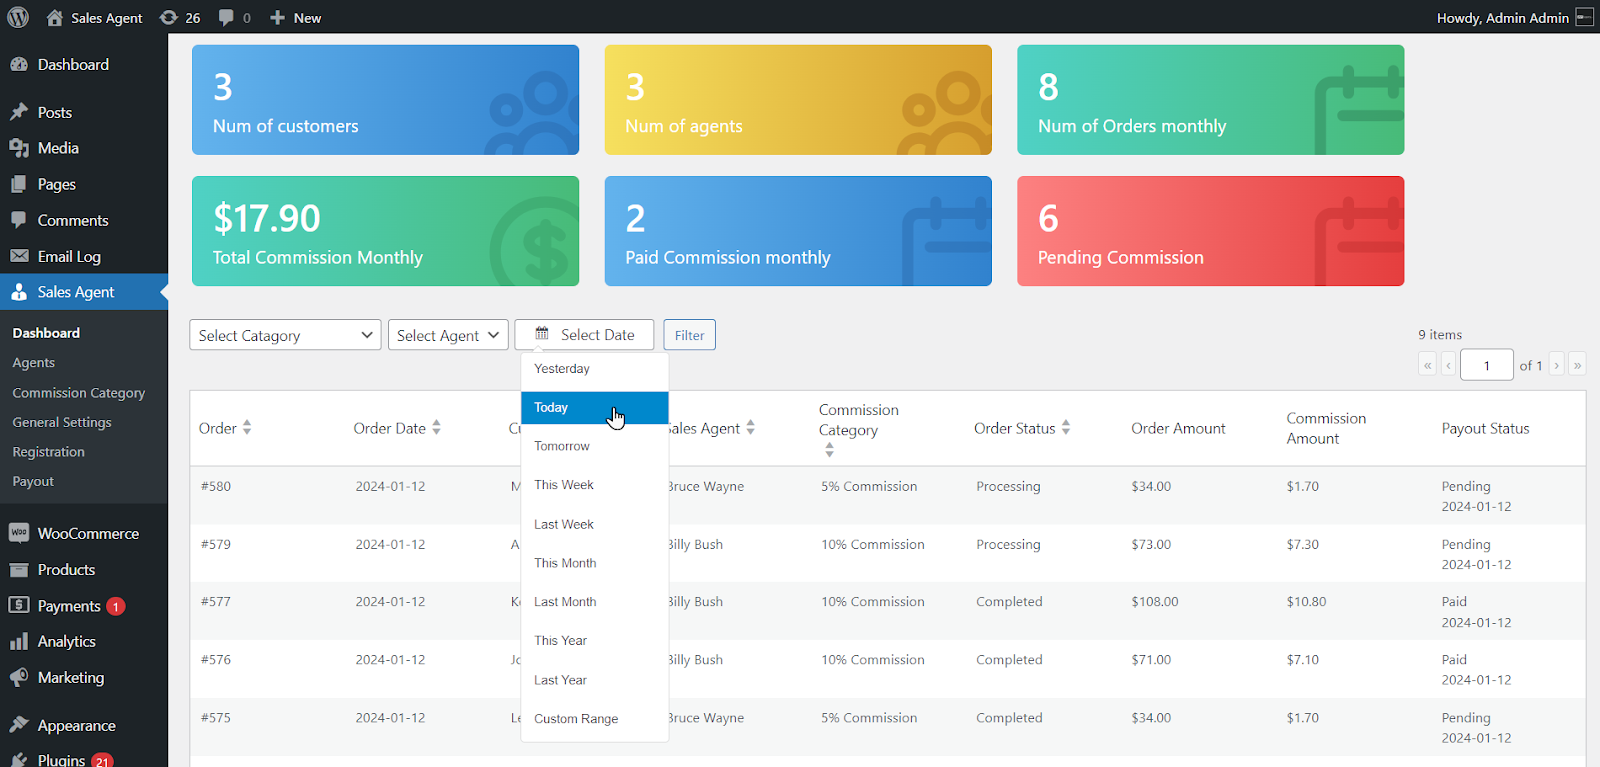
- Click on the Filter button.
- The filtered data will be displayed.
Download CSV
↑ Back to top- The Admin can also Download the Listing as a CSV by clicking the Download CSV button.
- After downloading, the admin can view the downloaded CSV.
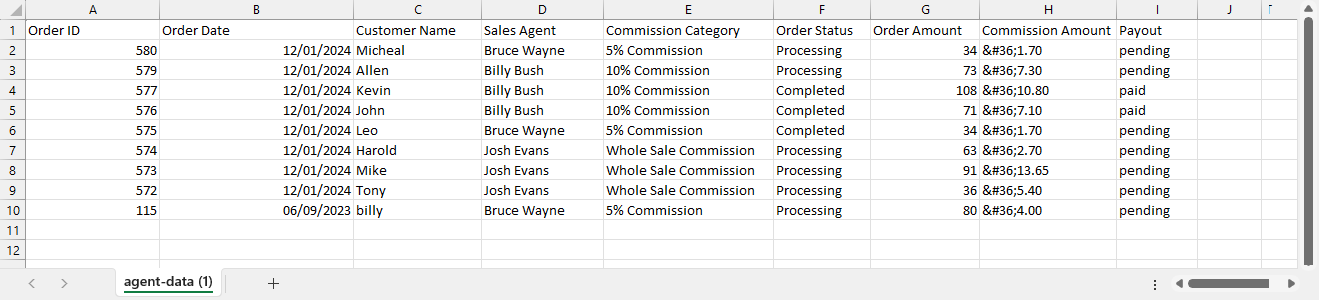
Note: The “$” represents the Unicode for the currency, and the value signifies the commission amount.
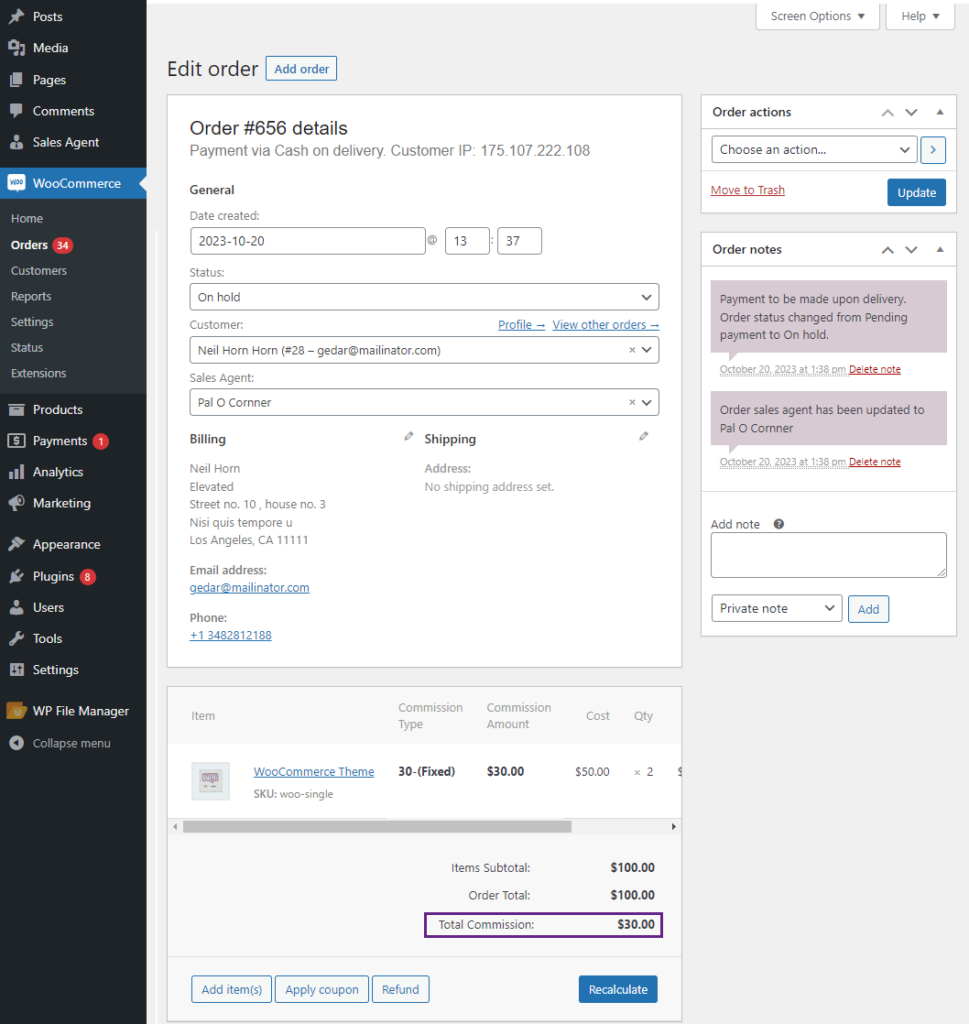
Sales Agent Information in orders
↑ Back to top- The Admin can view the Sales Agent information on the Order listing page.
- To view the information, navigate to WooCommerce > Orders.
- Here, the Admin can view the order details with the Sales Agent’s name and Commission Amount.

Latest Orders in Sales Agents Dashboard
↑ Back to top- The Agent can view the Latest Orders in the Sales Agent Dashboard. To do so, log in as an Agent and navigate to My Account.
- Under the My Account header, click Agent Statistics.
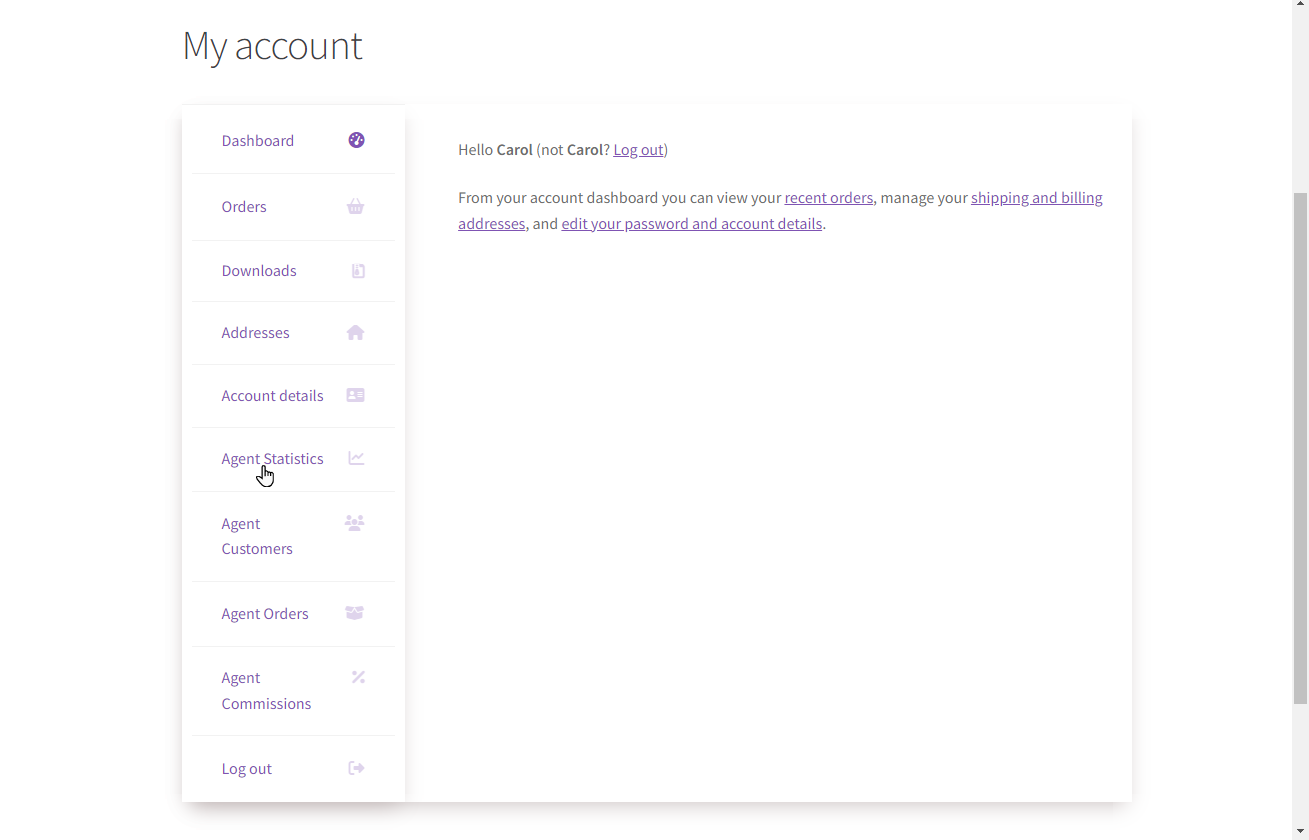
- Once clicked, the Agent can view the Last Order list.
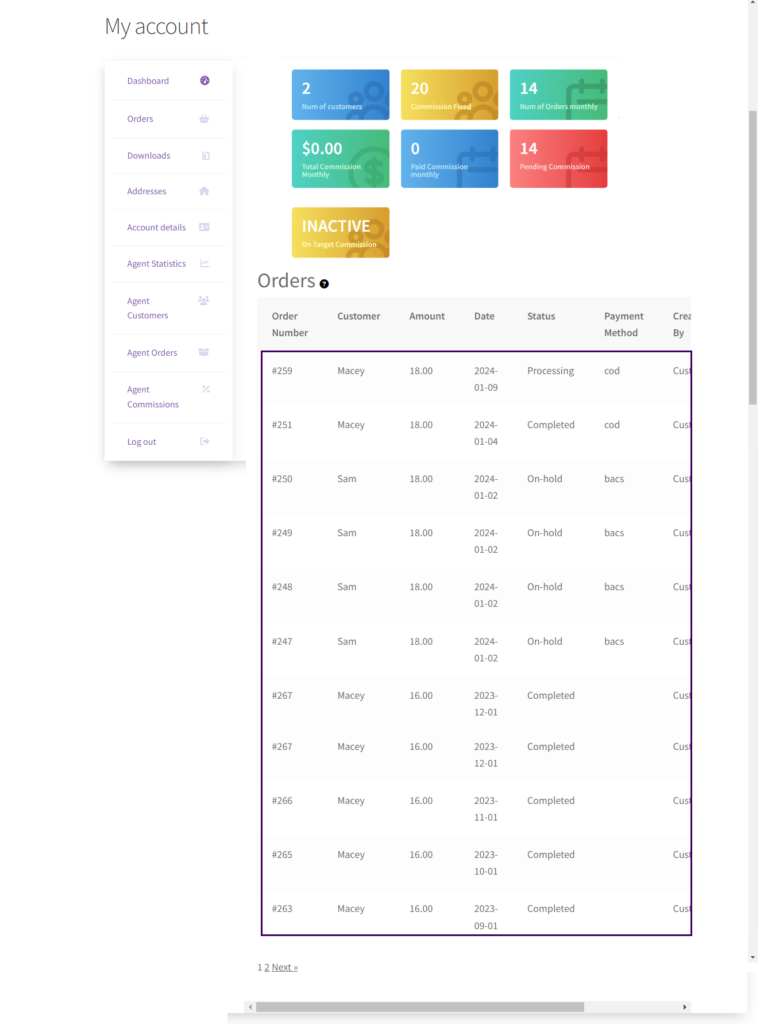
Note: Agents can view orders from the past six months, including the current month, specifically highlighting those with statuses as Completed or Processing and On-hold
Enable Messages
↑ Back to top- In the Enable Messages option, If the Administrator clicks on the Enabled checkbox, it will allow the administrator and agents to communicate among themselves through the messages. The agent and administrator can compose new messages.
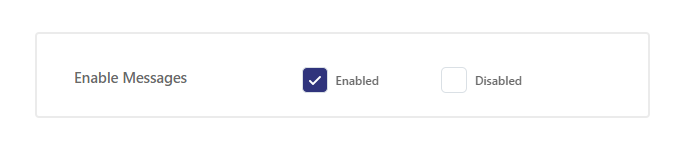
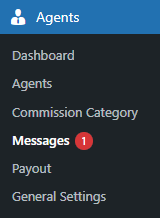
- Once the Administrator clicks on the Enabled checkbox, a Messages option will appear in the WP Admin Dashboard.
- Navigate to Admin Dashboard → Agents → Messages.
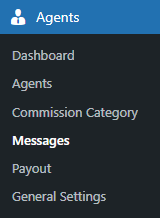
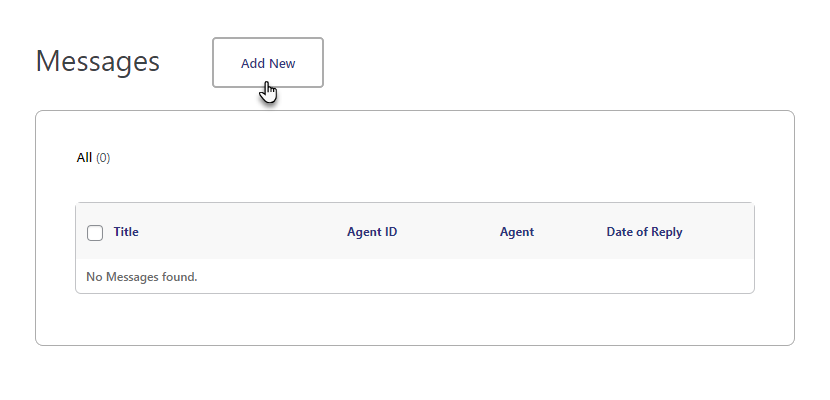
- All the messages are mentioned on the Messages page.
- You can compose a message by clicking on the Add New button.
- Set the Title of the message.
- Select the sales agent from the dropdown menu from the Select Agent option.
- Type your message in the given Textbox.
- Click on the Send button.
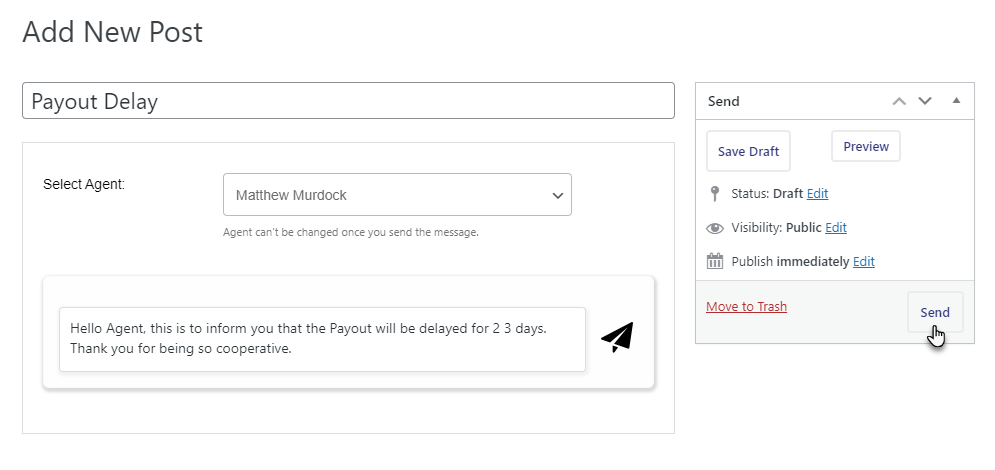
- Once done, a notification will appear.
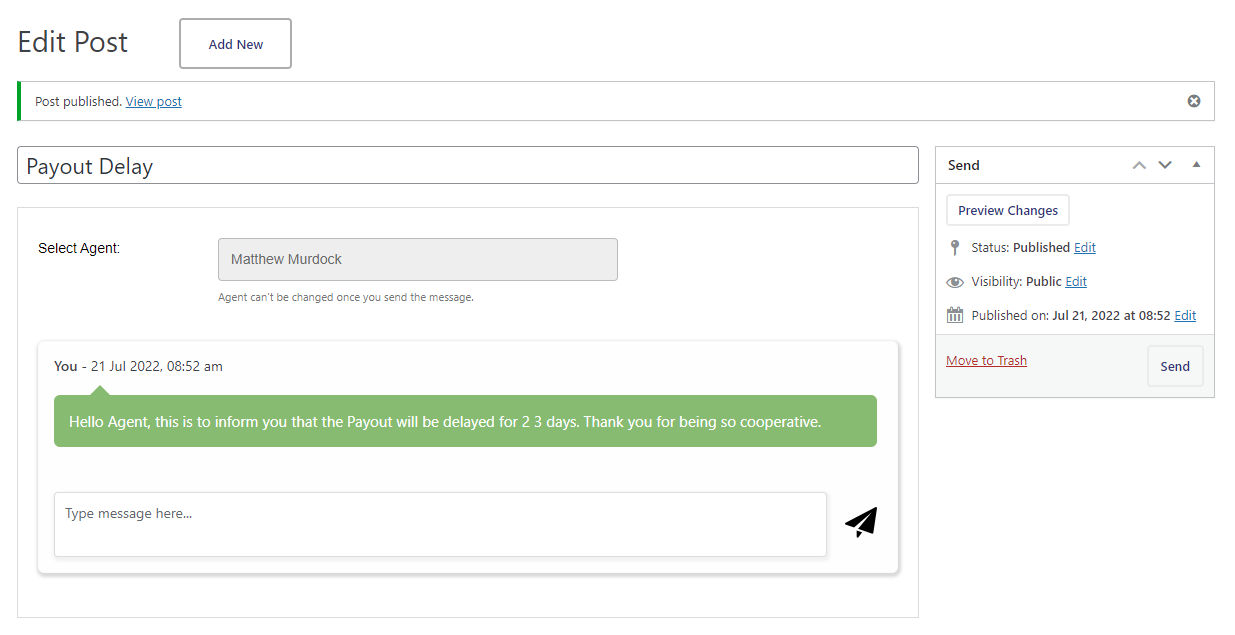
- As we know, the sales agent Matthew Murdock has the user assigned Burce Wayne.

Front-End Impact
- Go to the website.
- Log in with the Burce Wayne credentials.
- On the My Account page, navigate to the Messages tab.
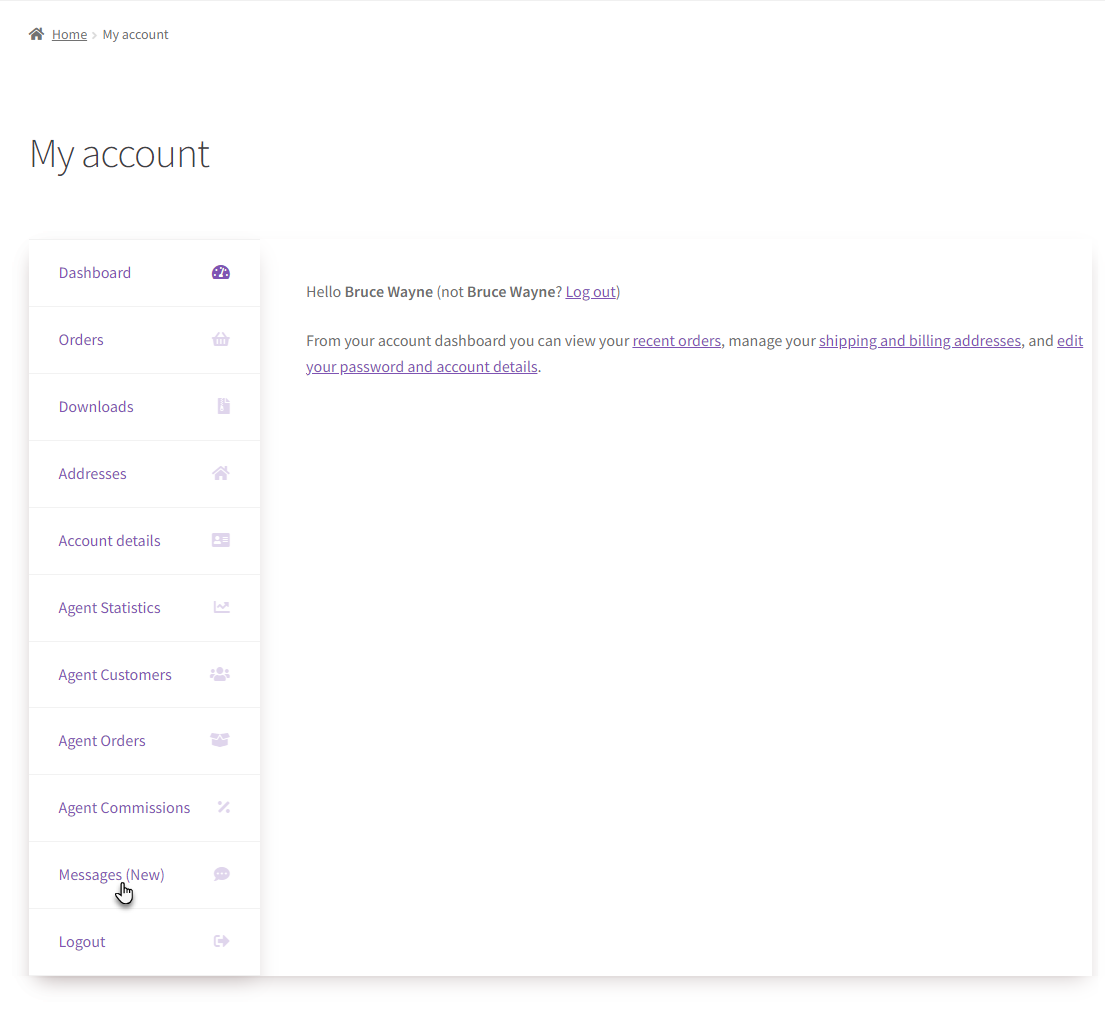
NOTE: Whenever the Agents receive a new message, the Messages tab will appear as Messages (New) on the dashboard.
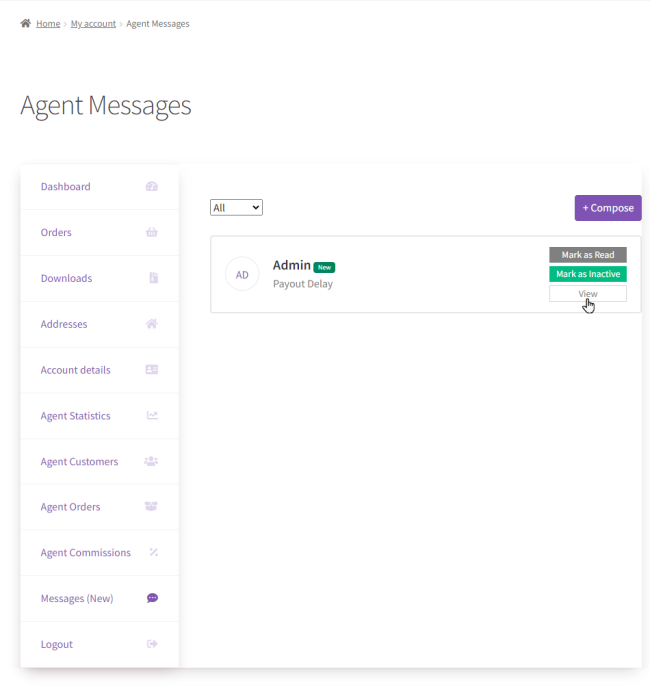
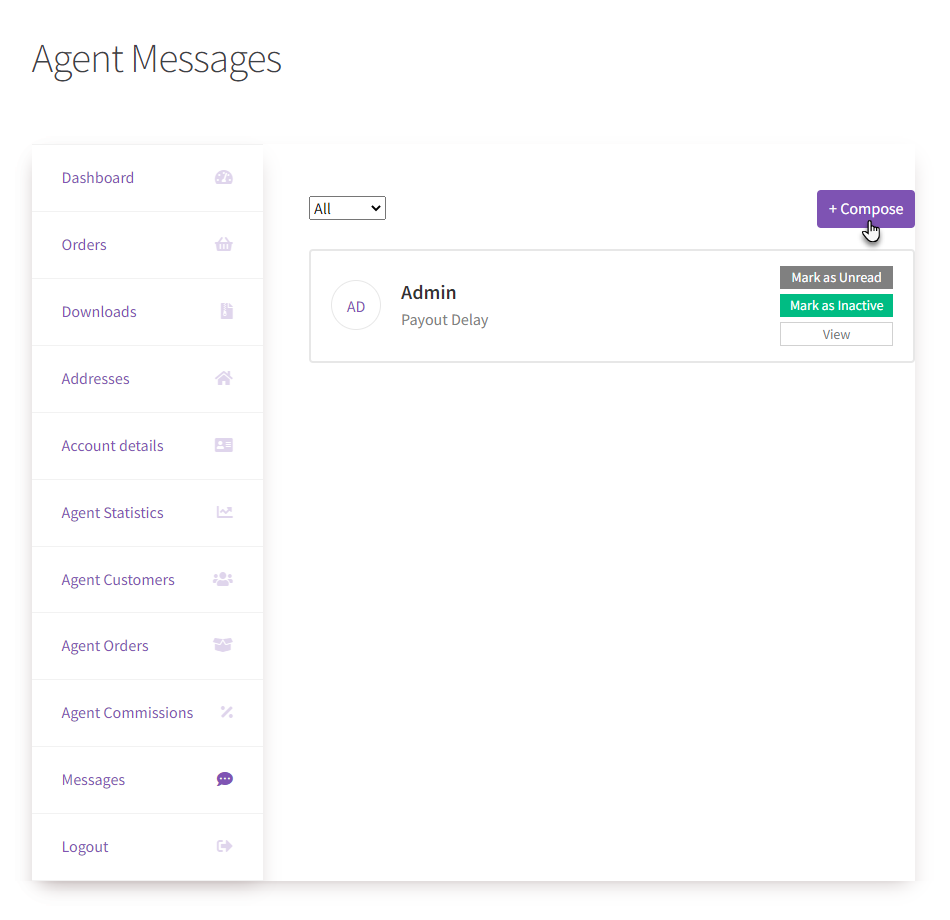
- All the messages will appear in the Messages tab.
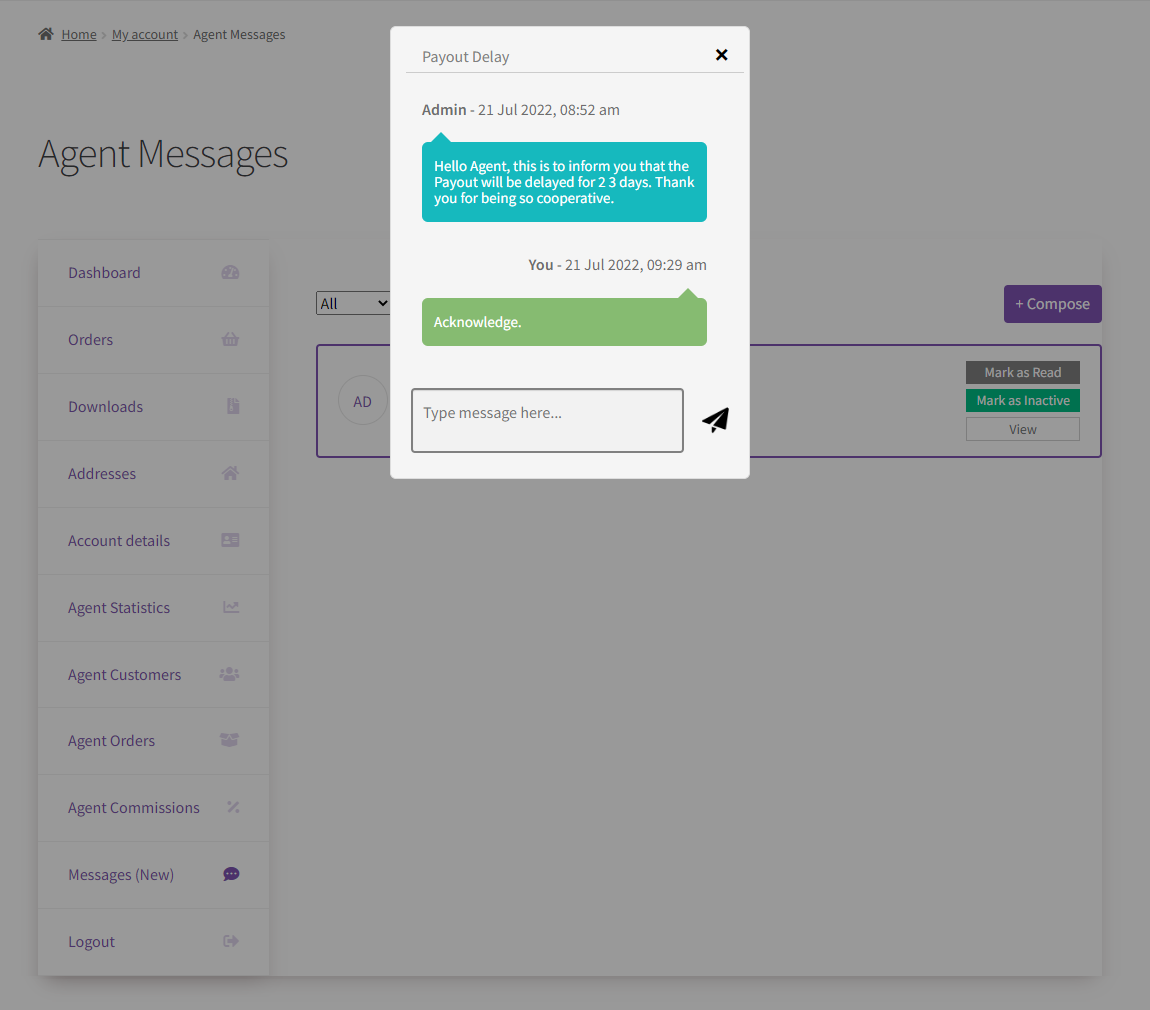
- Click on the View button on the message.
- A popup will appear will all the details, and the message will be displayed.

- The sales agent can type their message in the textbox and click on the Send button.
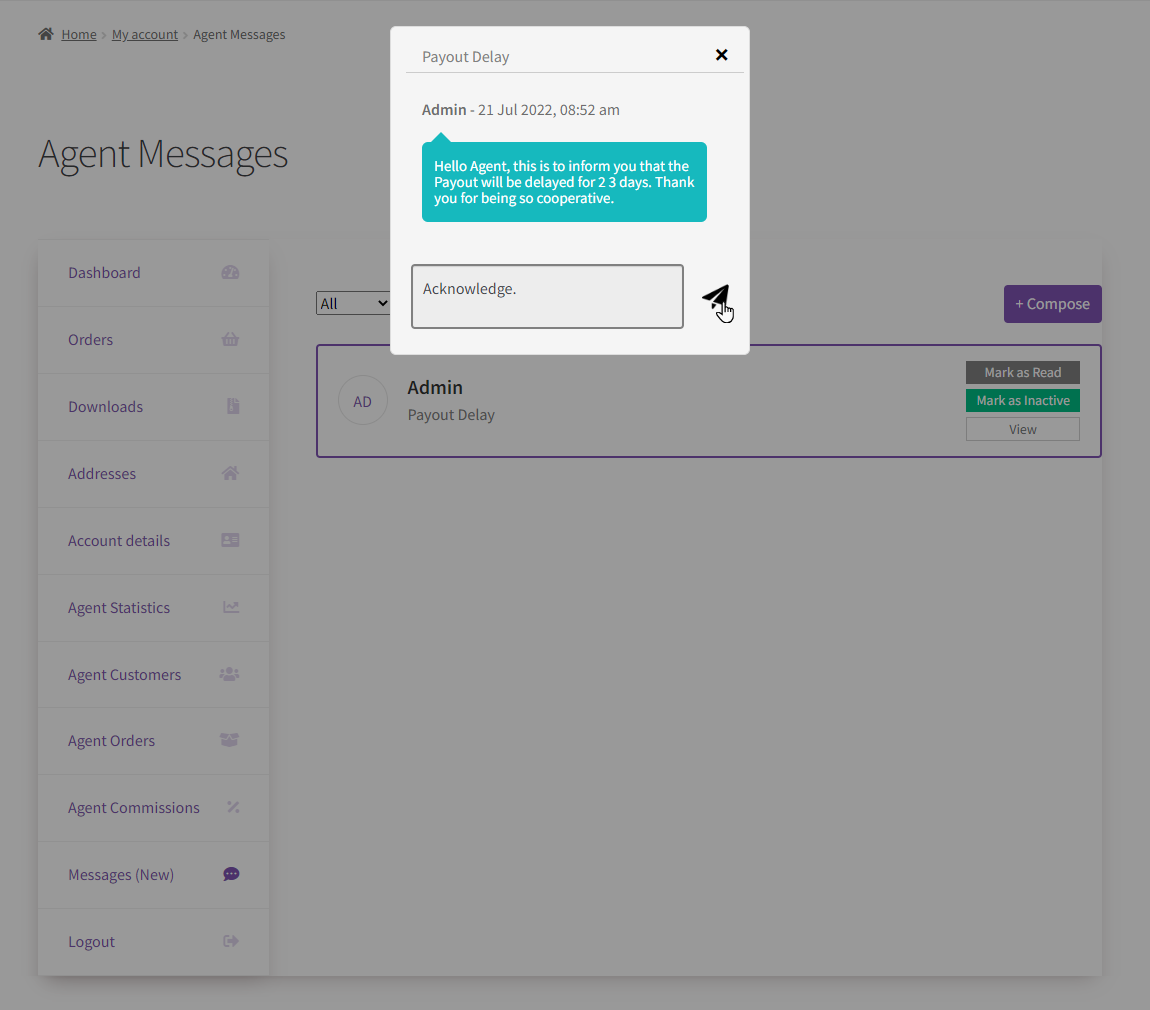
- Once done, a notification will appear indicating the message has been sent, and the message will appear with all the details.
- The sales agent can also compose a new message to the Administrator.
- Click on the Compose button.
- A popup will appear to compose your message.
- Enter the Subject.
- Enter the Message.
- Once done, click on the Submit button.
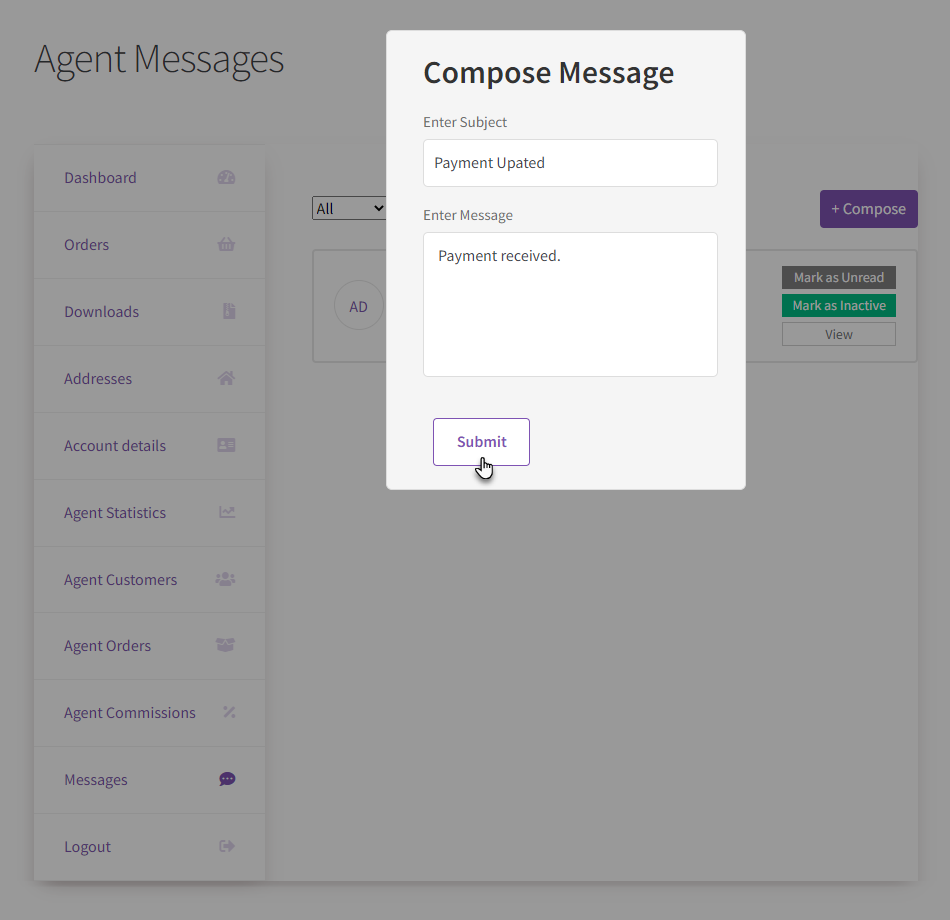
- A notification will appear, and the message will appear in the Messages tab.

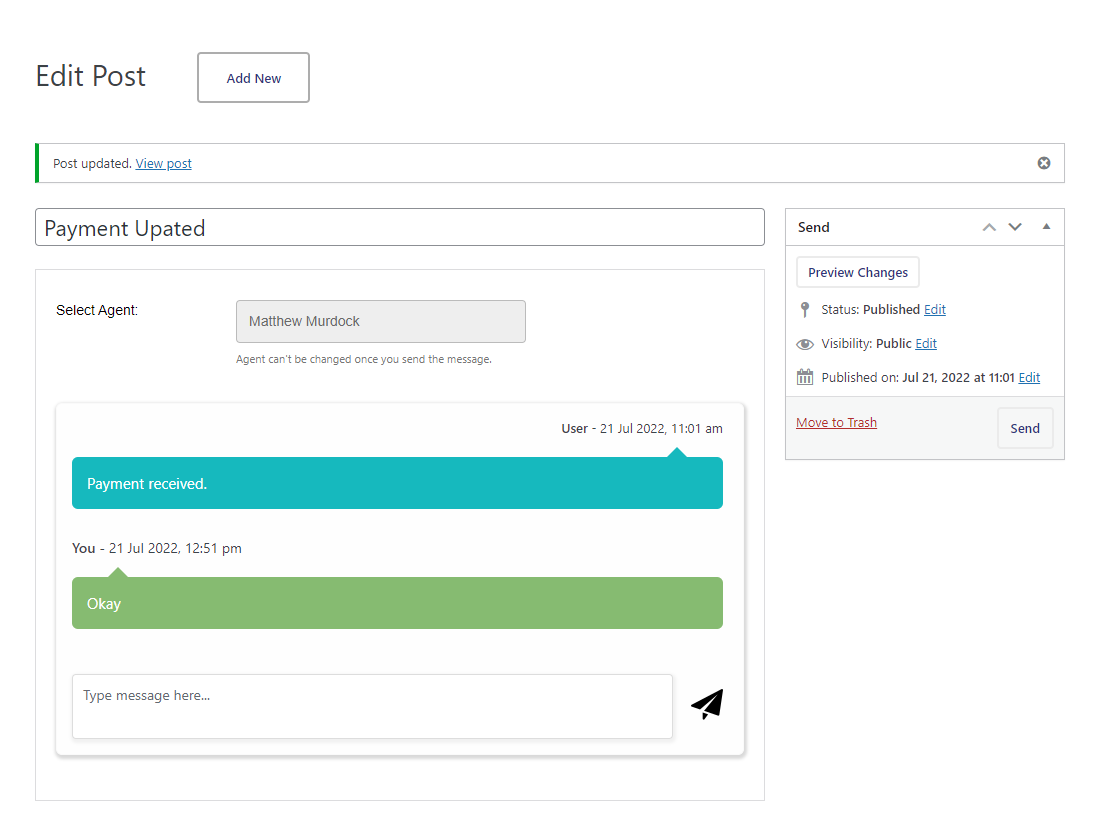
- Now the Administrator will navigate to Admin Dashboard → Agents → Messages.
- Now you’re on the Messages page.
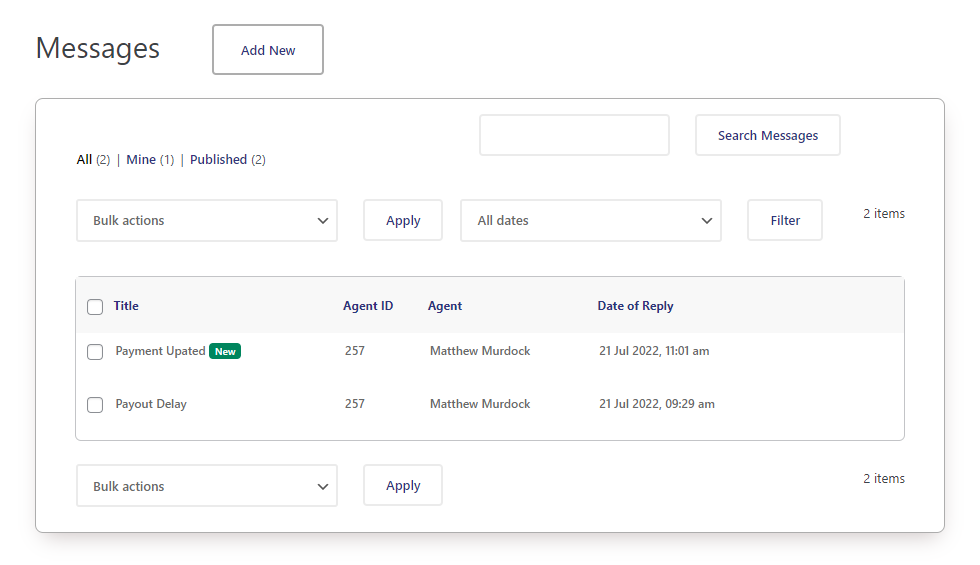
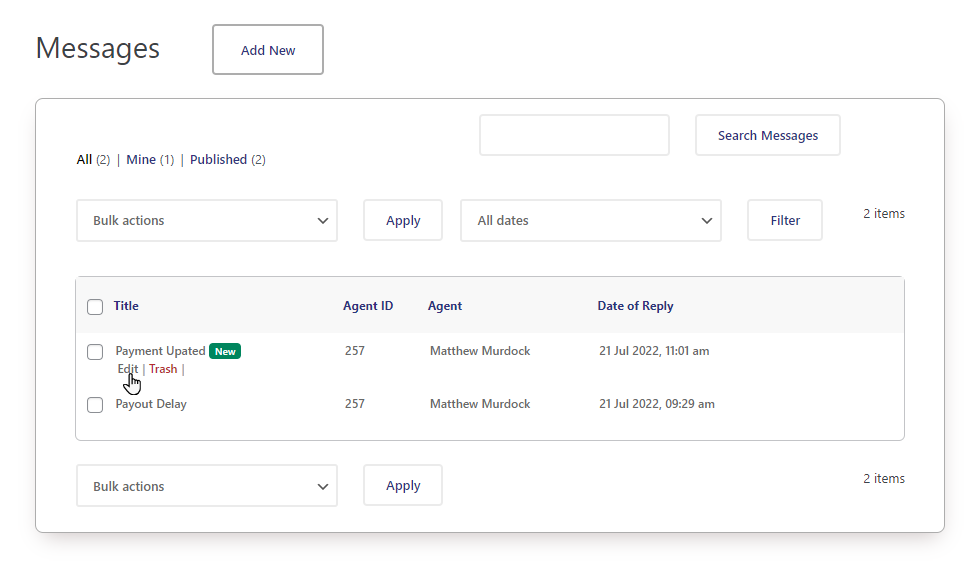
- Hover over the new message to view further options.
- Click on the Edit suboption.
- You’re on the Edit Post page now.
- The message from the Sales agent will appear.
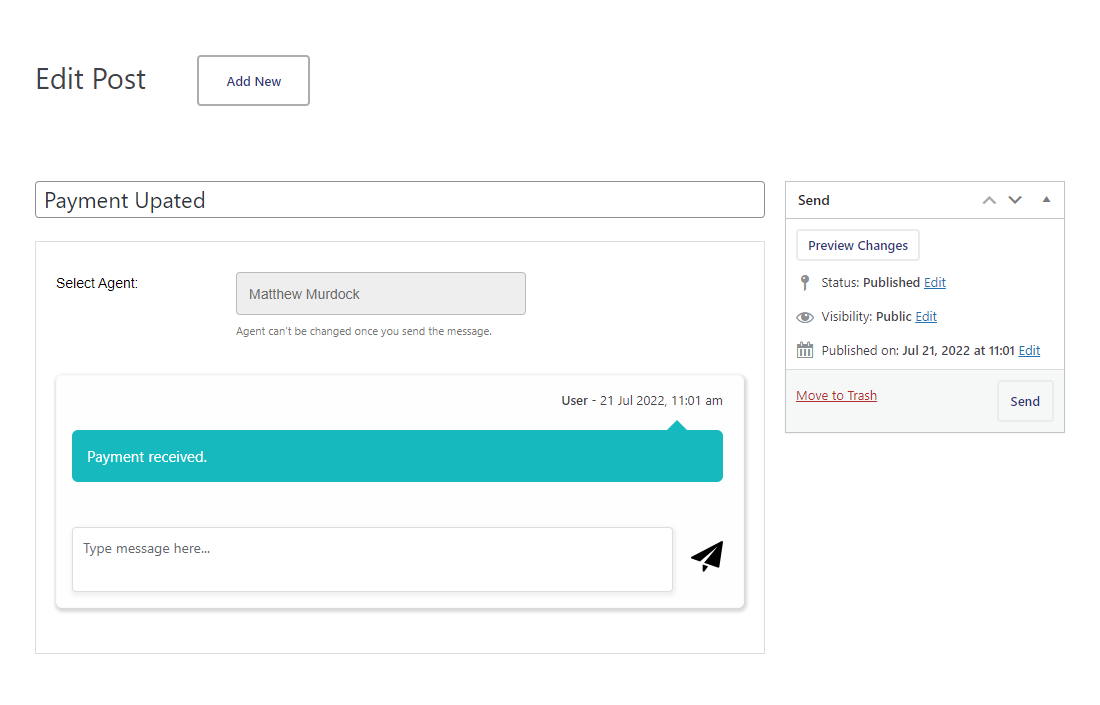
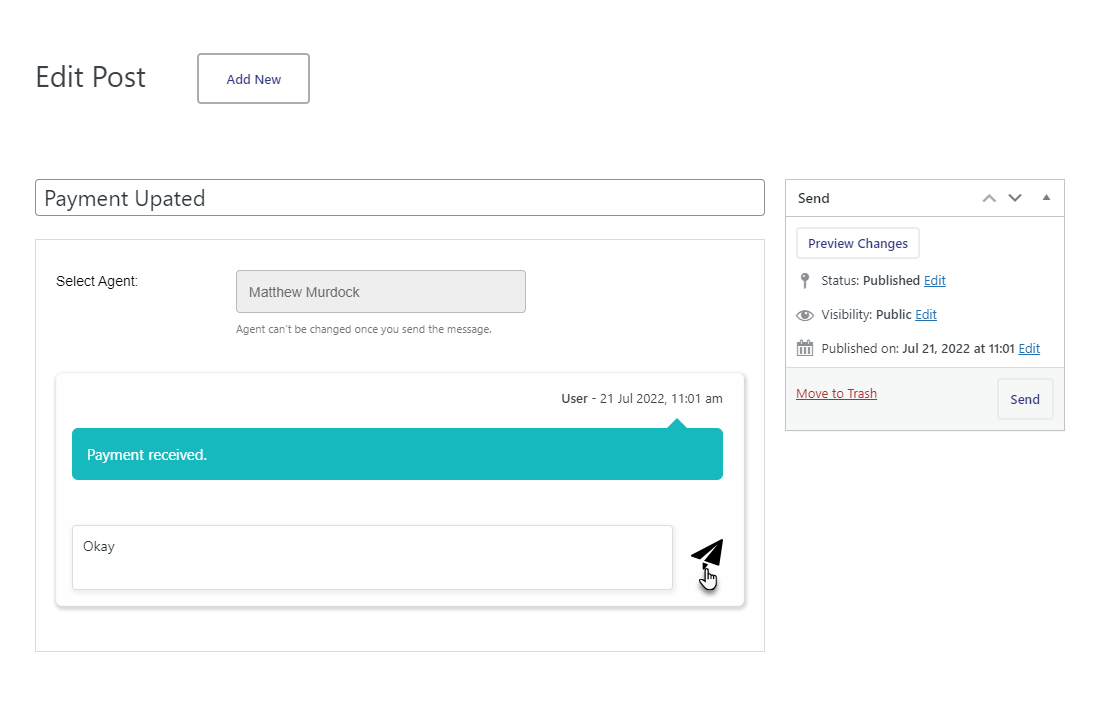
- The Administrator can also compose a message in the textbox responding to the Sales Agent’s message.
- Once done, click on the Send button.
- Once done, a notification will appear.
- Go to the Messages tab.
- On the Agent Messages page, the sales agent can click on the Mark as Read button on the New message to make it read.
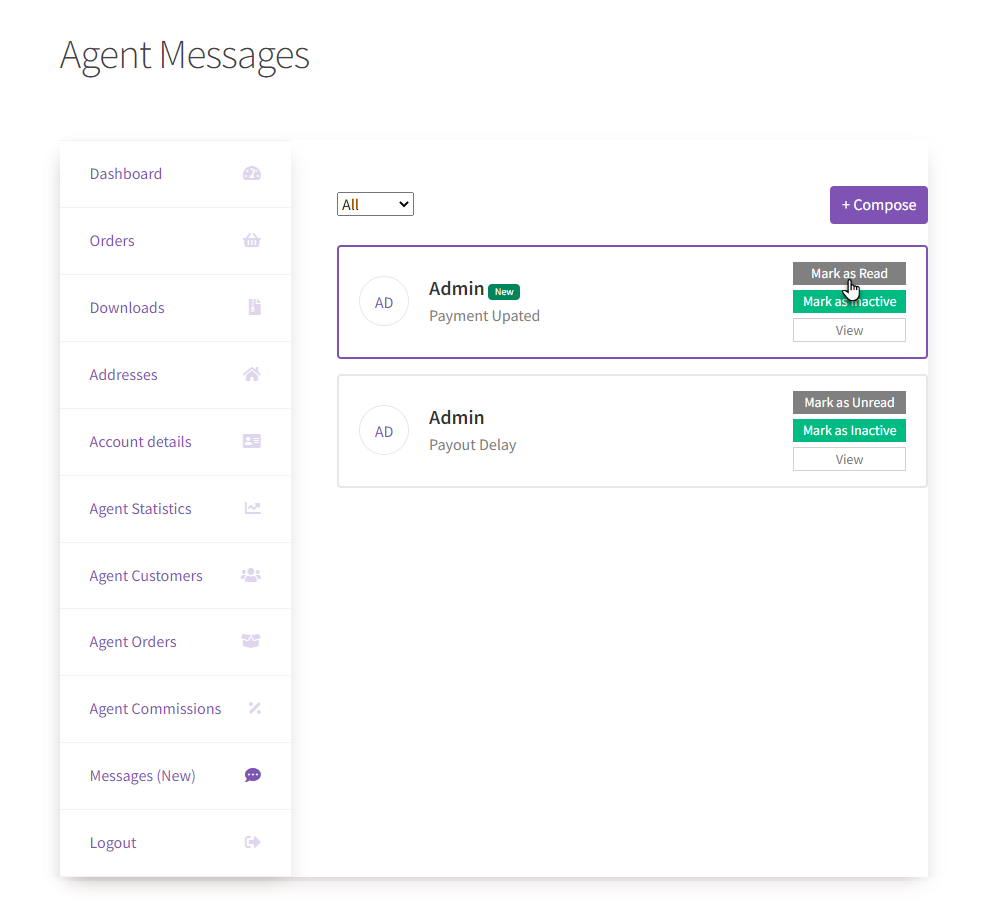
- Once done, the New tag will disappear from the messages.
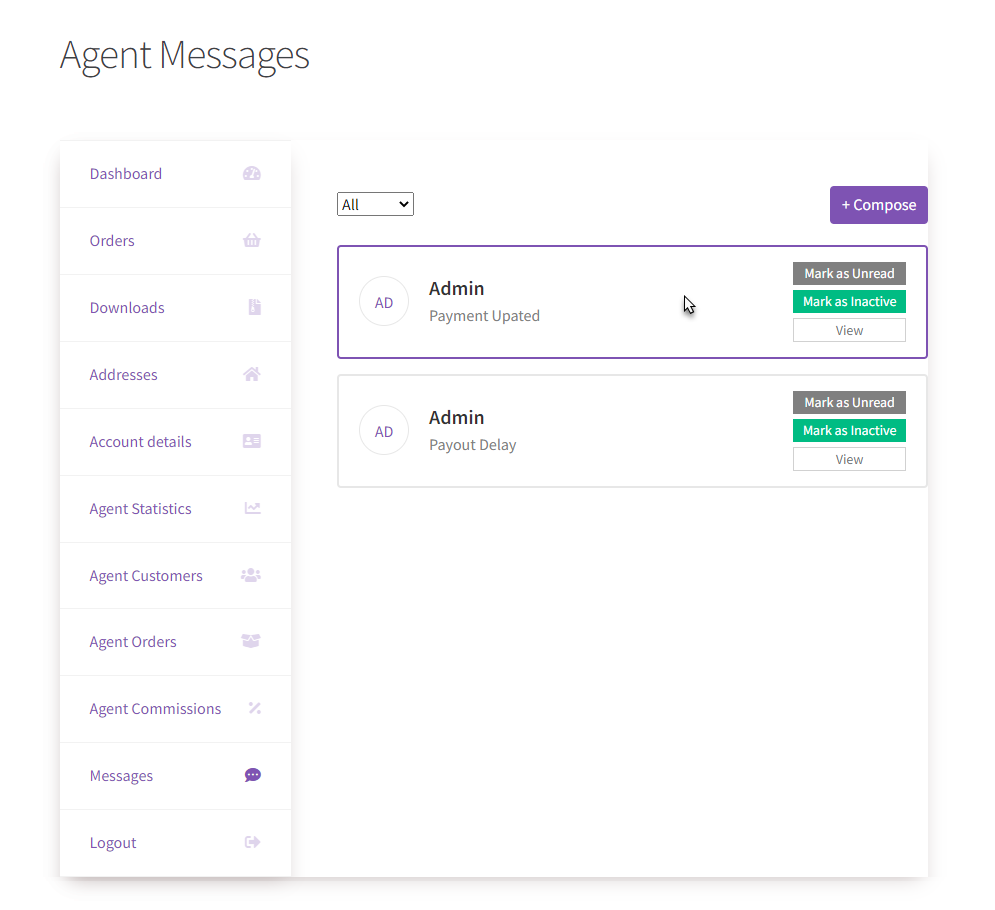
- The sales agent can click on the Mark as Unread button on any read message, due to which the message will be unread again.
- Click on the Mark as Inactive button on the message to make it inactive.
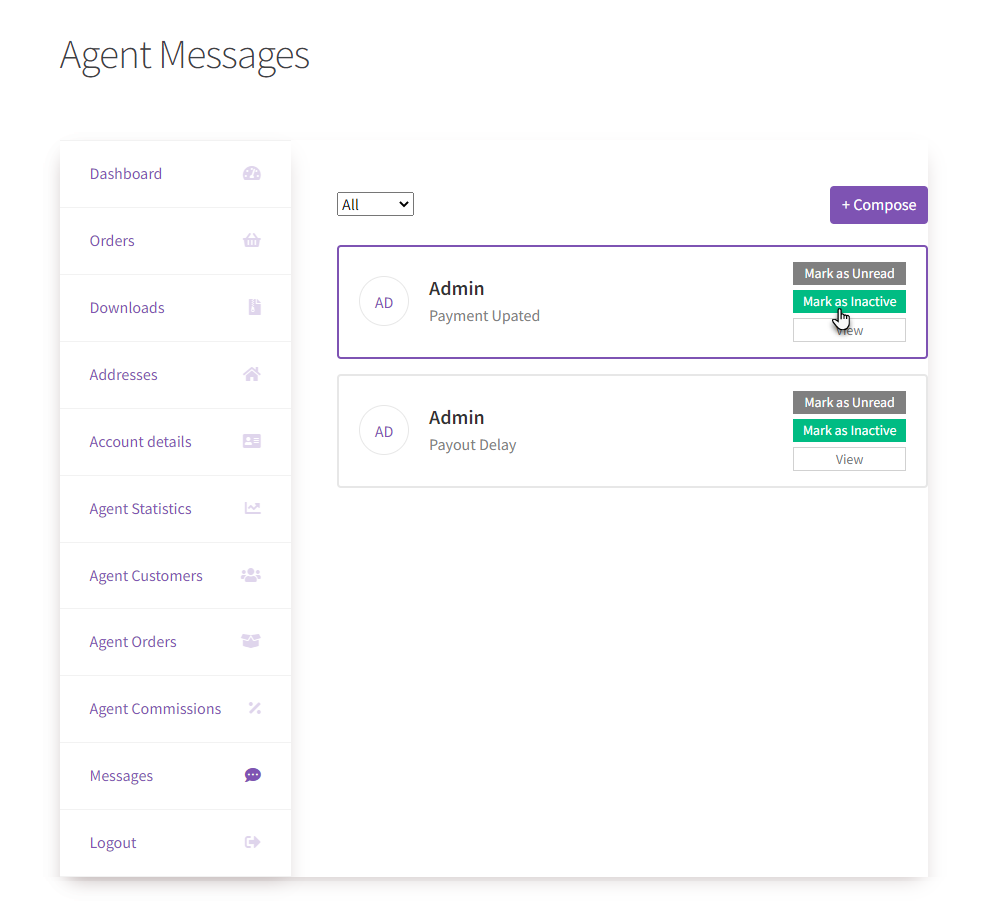
- A Closed tag will appear in the message.
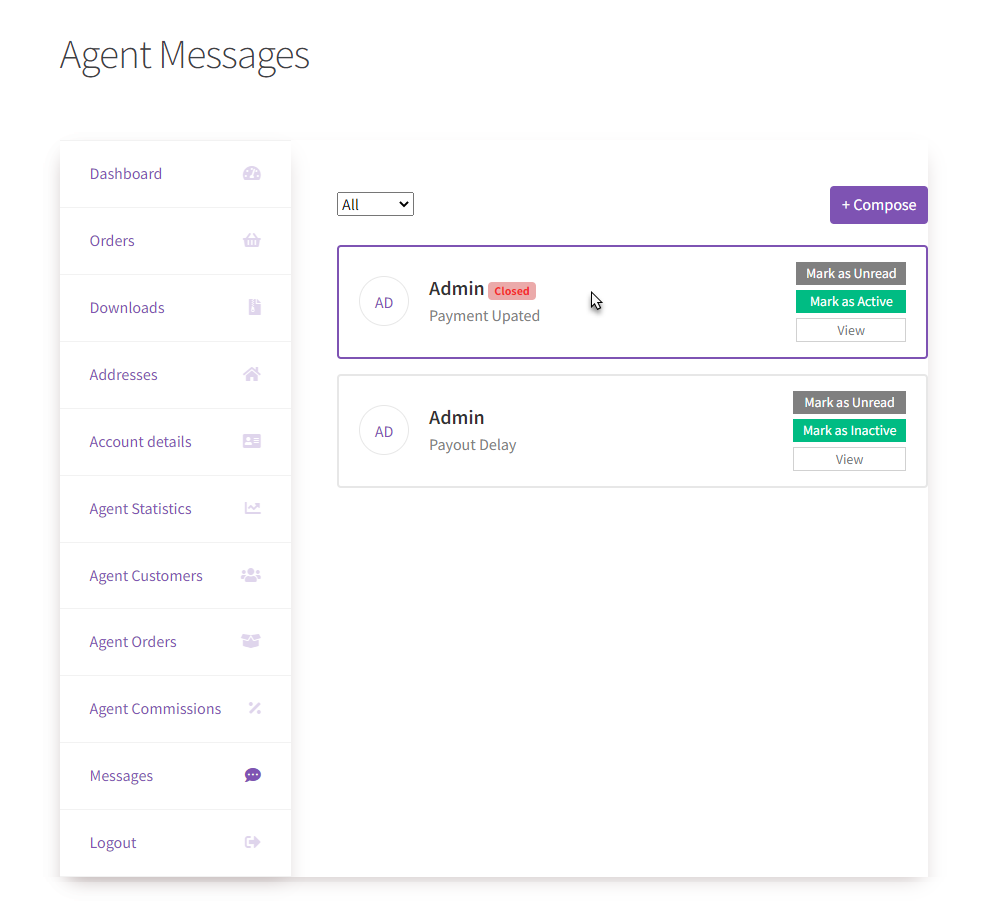
- The sales agent can click on the Mark as Active button on any Inactive message, due to which the message will be active again.
- There’s a filter on the Agent Messages page.
- The sales agent can filter the message using All, Active, and Inactive tags.
Enable Affiliate Links
↑ Back to top- The Administrator will checkmark the Enable checkbox in the Enable Affiliate Links option.
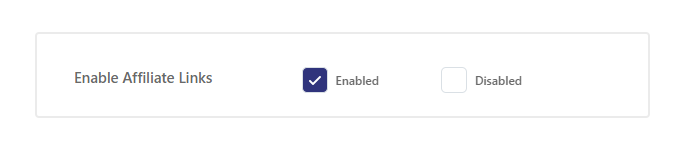
- Once the Enable Affiliate Links option is enabled, two suboptions will appear.
Add Create Account Link
↑ Back to top- Add an account creation/registration link here for affiliate links.
- Leave it empty if you want the WooCommerce default account link.

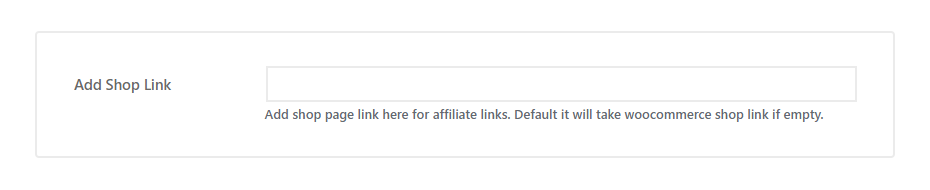
Add Shop Link
↑ Back to top- Add a store/shopping link here for affiliate links.
- Leave it empty if you want the WooCommerce default store/shop link.
Front-End Impact
- The Sales Agent will go to the website and log in.
- Once done, the Sales Agent will navigate to the My Account page.
- On the Dashboard, a new tab will appear titled Affiliate Links.
- Click on the Affiliate Links tab.
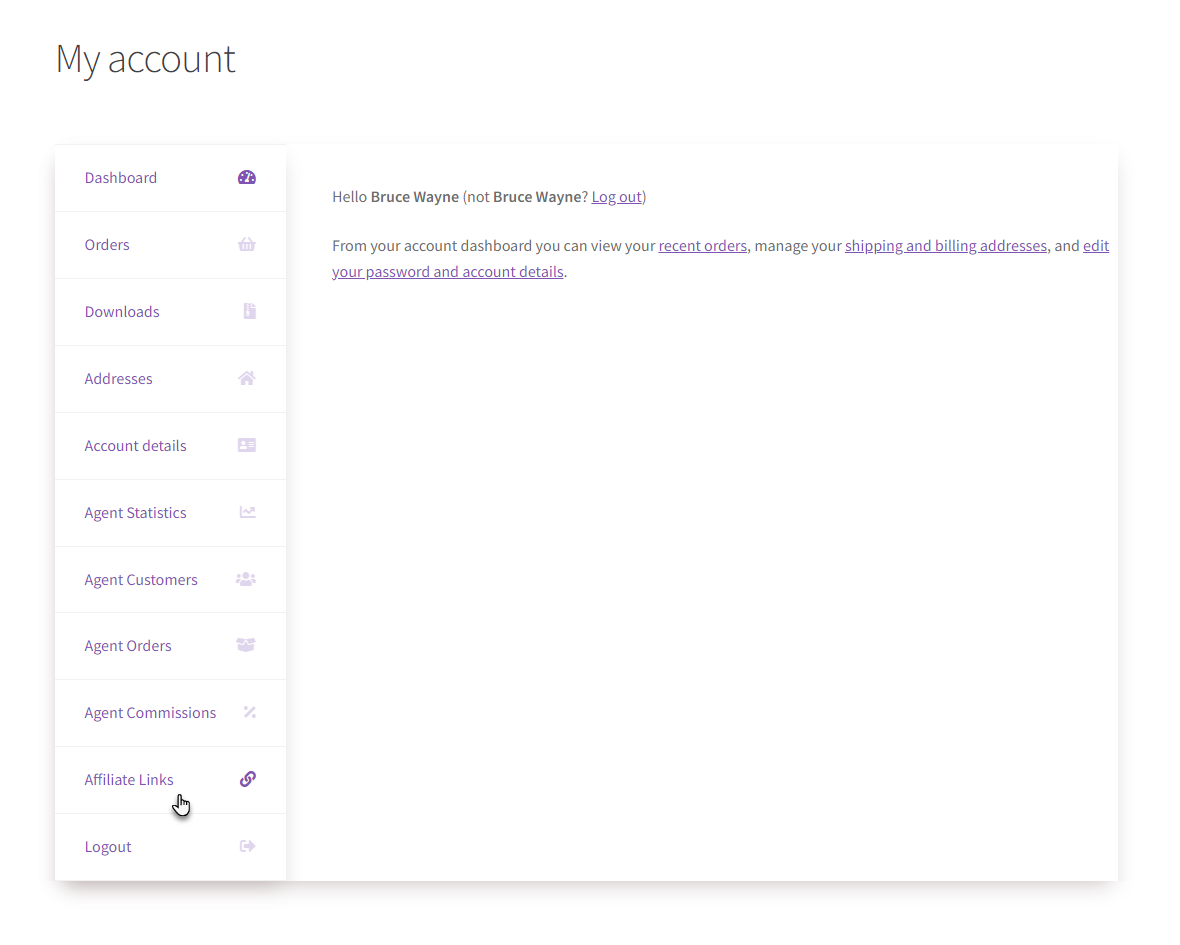
- Now you’re Affiliate links page.
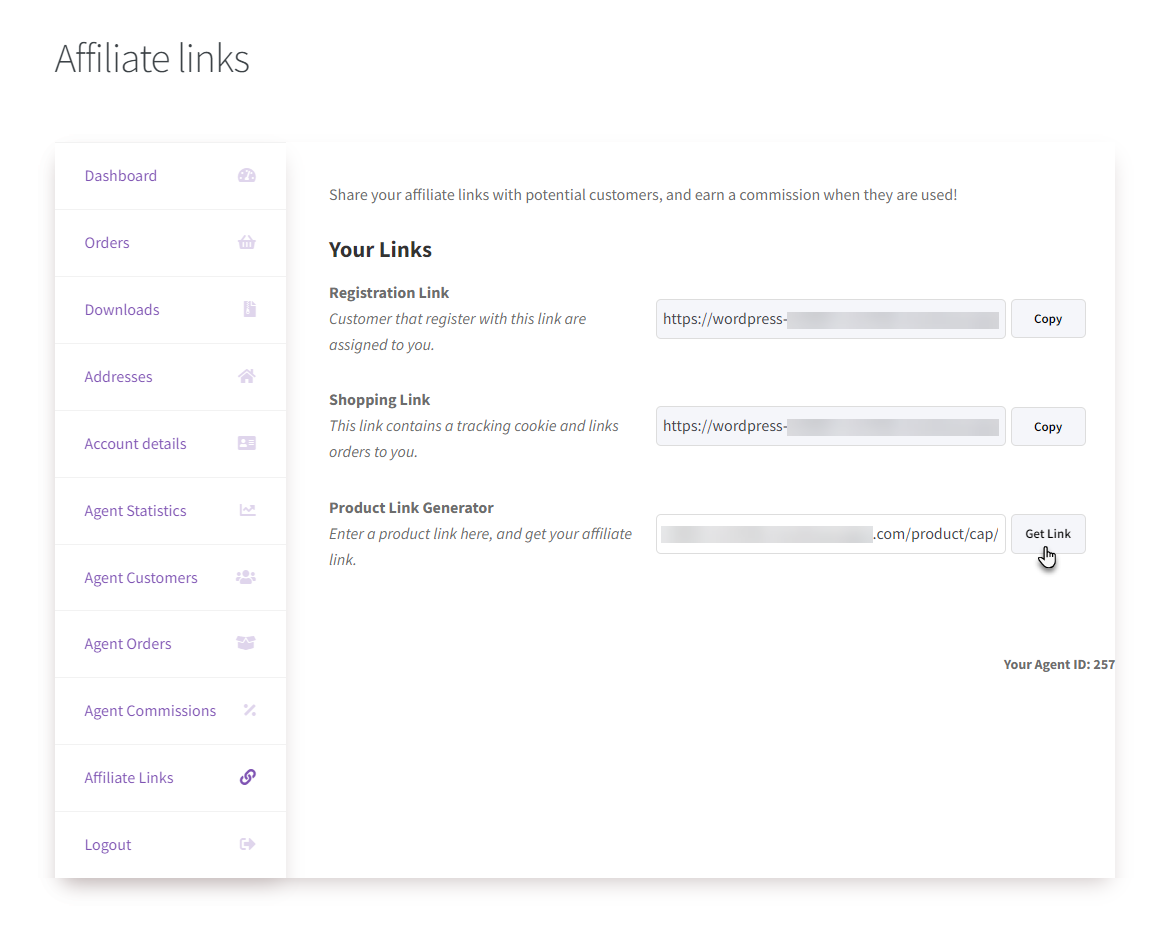
- There are three types of affiliate links available on this page.
Registration Link
- It will be a pre-defined registration link with the agent’s reference ID. The agent can copy the link and share it with their customers. Customers registered via the link provided by the agent will be automatically assigned to the respective agent.
Shopping Link
↑ Back to top- It will be a pre-defined store/shopping link with the agent’s reference ID. The agent can copy the link and share it with their customers. The customers visit the shop and order products via the link provided by the agent.
- The orders will be linked to the respective agent, and the agent will get the commission on the category assigned.
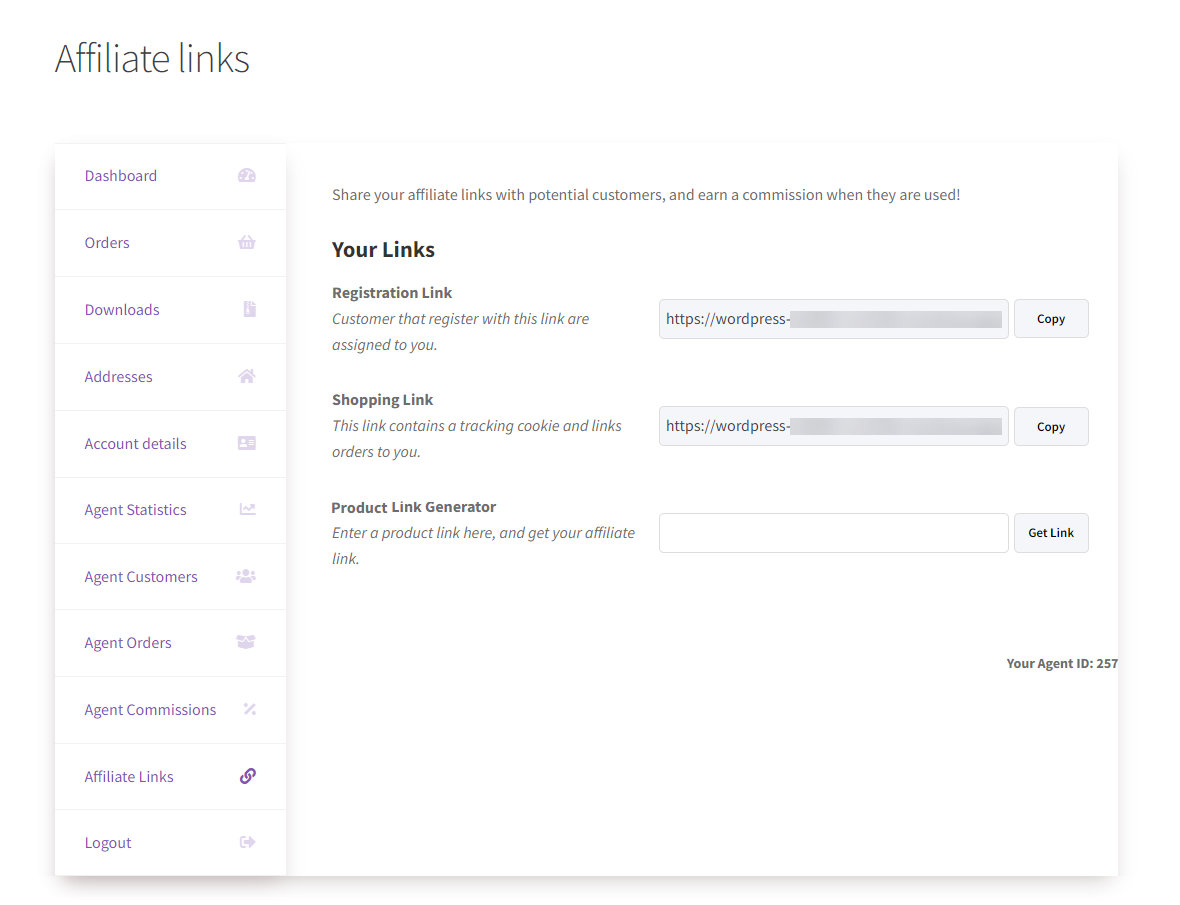
Product Link Generator
- It will be a pre-defined product link with the agent’s reference ID.
- The agent will select any product and then navigate to the single product page of that product.
- Copy the URL of that single product page.
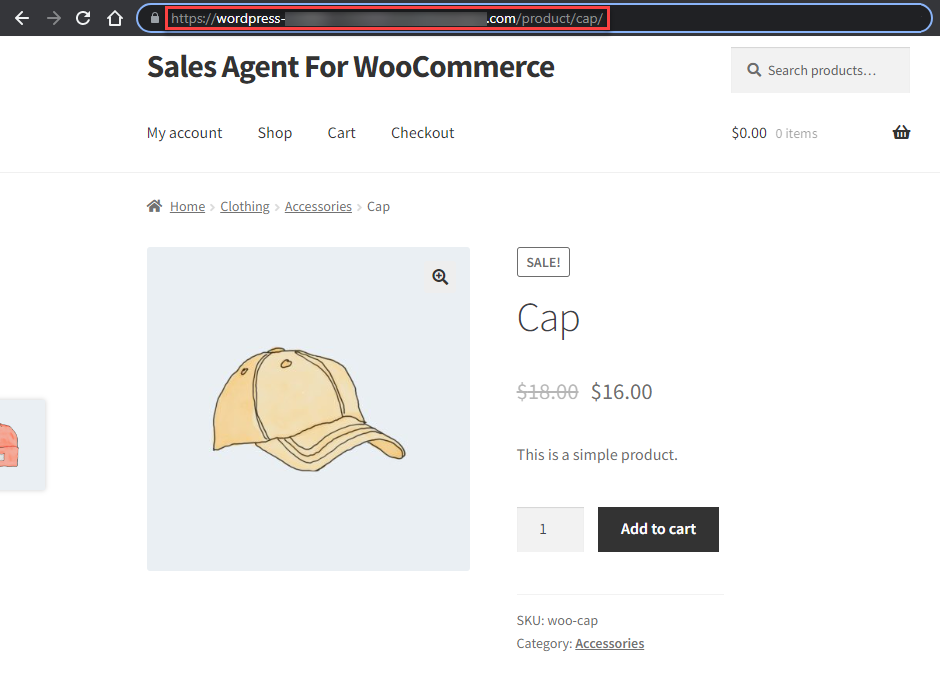
- Navigate back to the Affiliate links page.
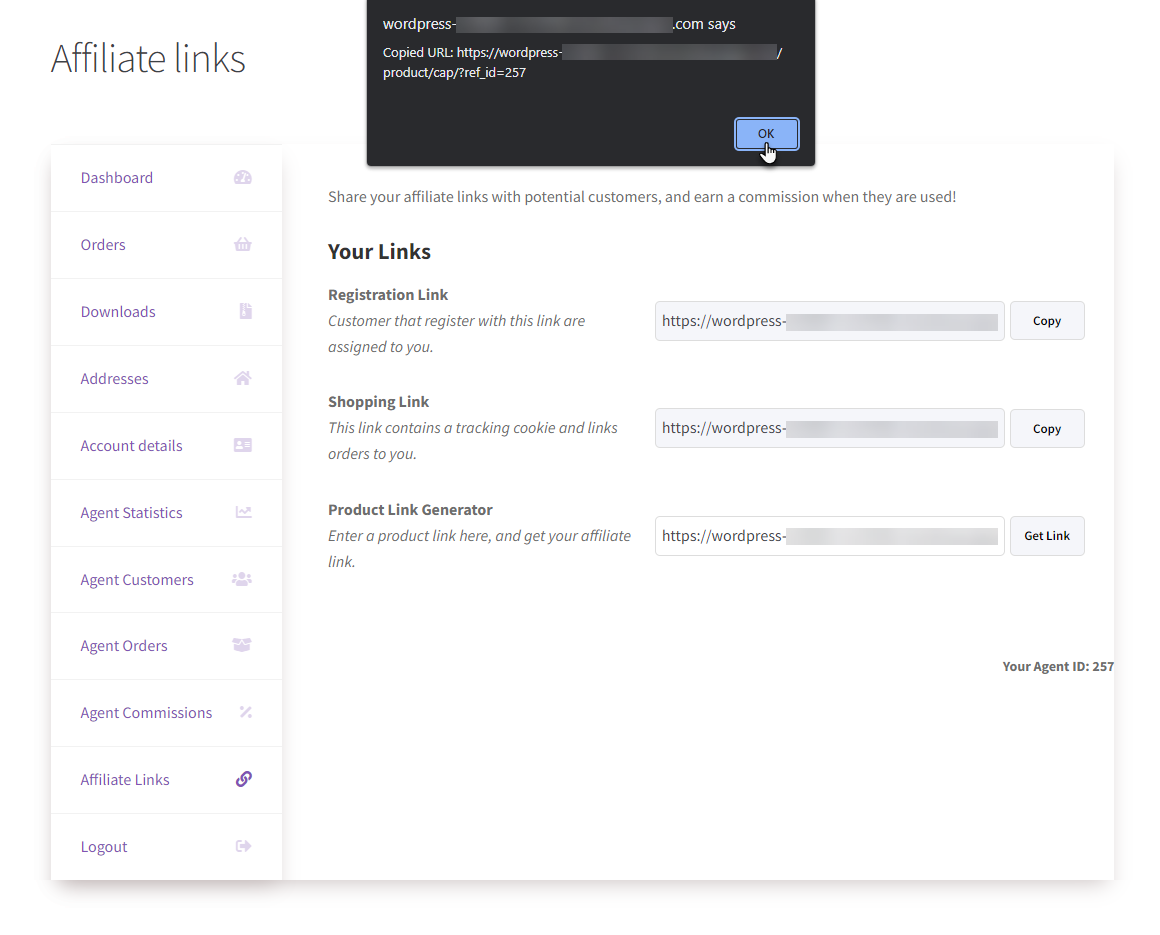
- Paste the single product page URL in the Product Link Generator option and click on the Get Link button.
- A popup will appear at the top of the page.
- Your link product link will be generated.
- The agent can copy the link and share it with their customers. The customers visit the store/shop and order products via the link provided by the agent.
- The orders will be linked to the respective agent, and the agent will get the commission on the category assigned.
Enable Cart Sharing
↑ Back to top- In the Enable Cart Sharing option, checkmark the Enabled checkbox. Click on the Save Changes button to apply your settings.

Front-End Impact
- The Sales Agent will go to the website and log in.
- Once done, the Sales Agent will navigate to the My Account page.
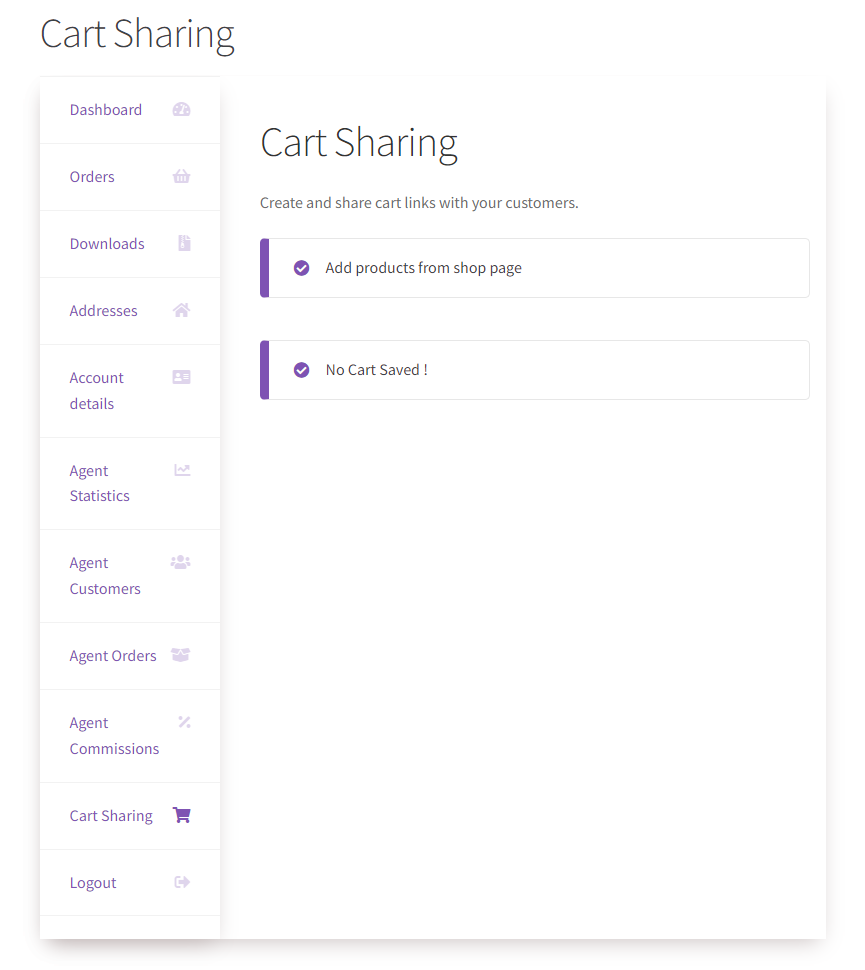
- On the Dashboard, a new tab will appear titled Chart Sharing.
- Click on the Chart Sharing tab.
- We can see that at the moment, there is no cart saved.
Cart Sharing Workflow Overview
↑ Back to top- Once the Cart Sharing option is enabled, the Sales Agent will log in.
- On the Dashboard, go to the Cart Sharing tab.
- We can see that at the moment, there is no cart saved.
- The Sales Agent will now navigate toward the Shop page and add one or multiple items to the cart.
- Now navigate to the Cart page.
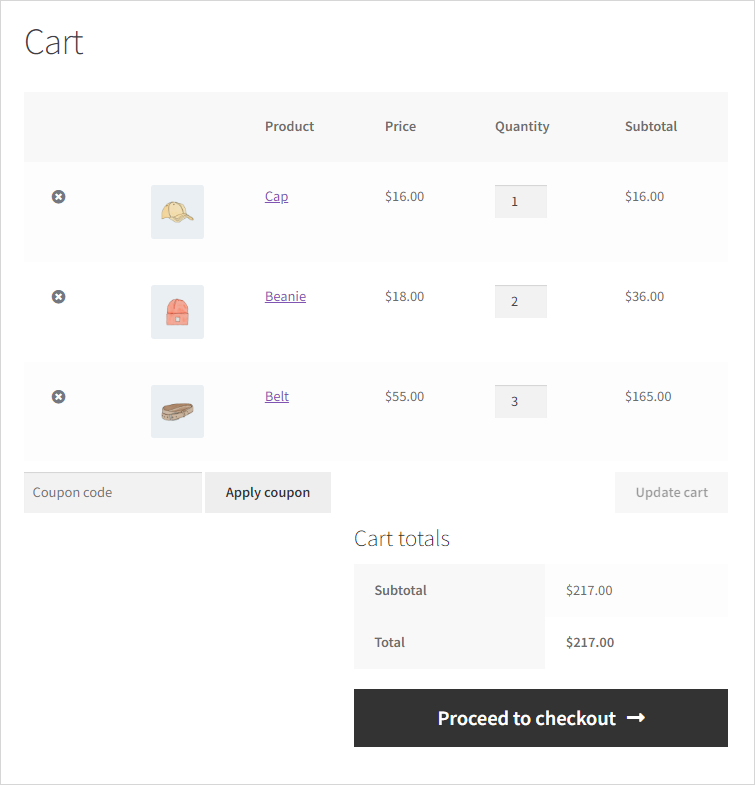
- Once done, navigate to the Cart Sharing tab on the My Account page.
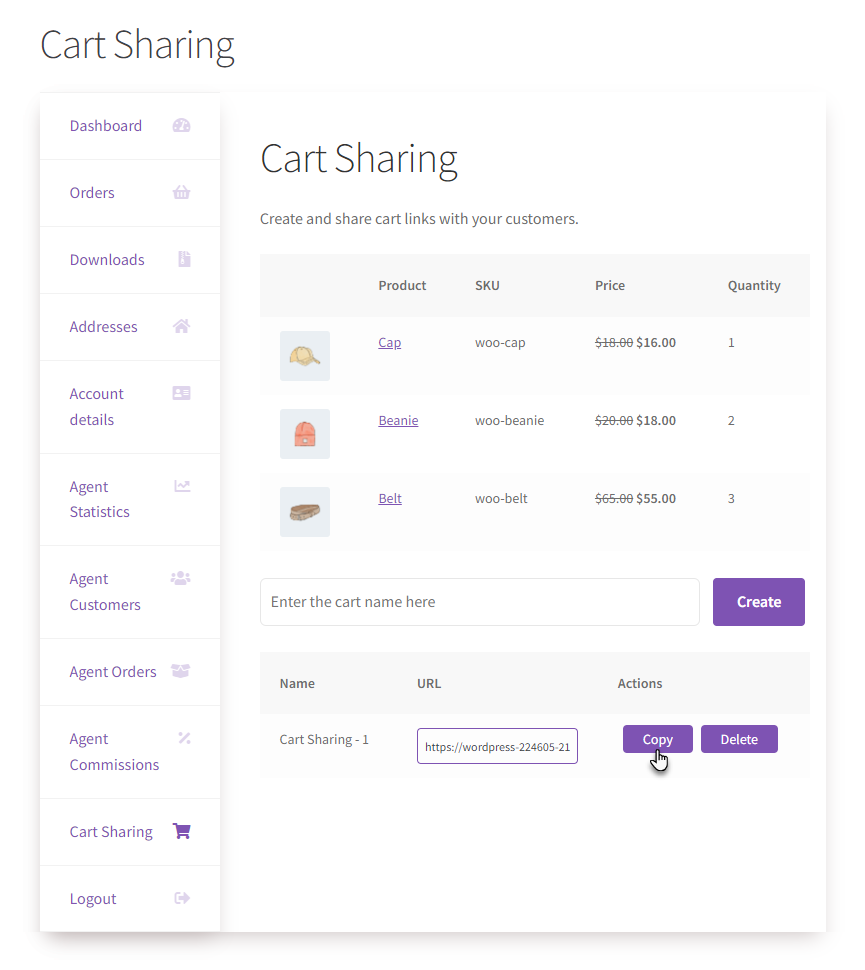
- We can see that the items added to your cart would appear.
- You can enter the name of this cart sharing and click on the Create button.
- Once done, a cart will be created, which is mentioned below.
- Once done, a cart will be created, which will be mentioned below.
- Click on the Actions column’s Copy button to copy the cart-sharing URL.
- Now go to the website and log in with a user who is a customer of that specific sales agent.
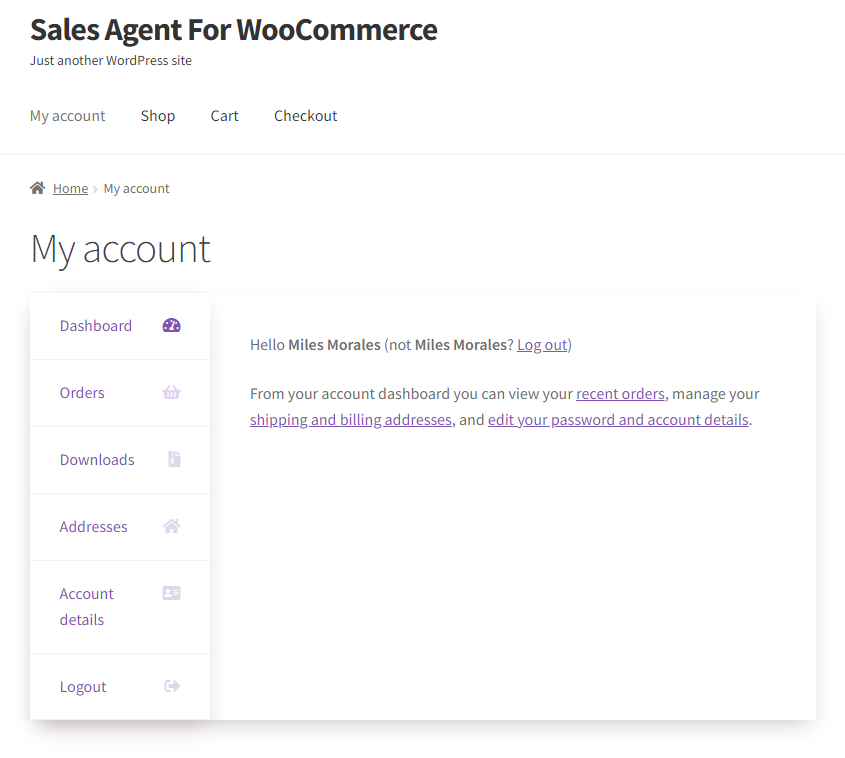
- Now paste the URL that you copied from the Cart Sharing tab.
- Once done, all the items added in the Cart Sharing will be added to the user’s cart.
- Click on the Proceed to checkout button.
- Now on the Checkout page, we can see all the items added in the Your order section.
- Now click on the Place order button.
- The order is placed successfully.
- Once the order has been placed successfully, the impact would appear on the agent’s statistics.
- Navigate to the Agent Statistics tab.
Agent Statistics before the order was placed

Agent Statistics after the order was placed
- Navigate to the Agent Commissions tab.
- We can see that the commission for that order is $6.80.
- Click on the Details button against that order.
- We can see all the details of the order.
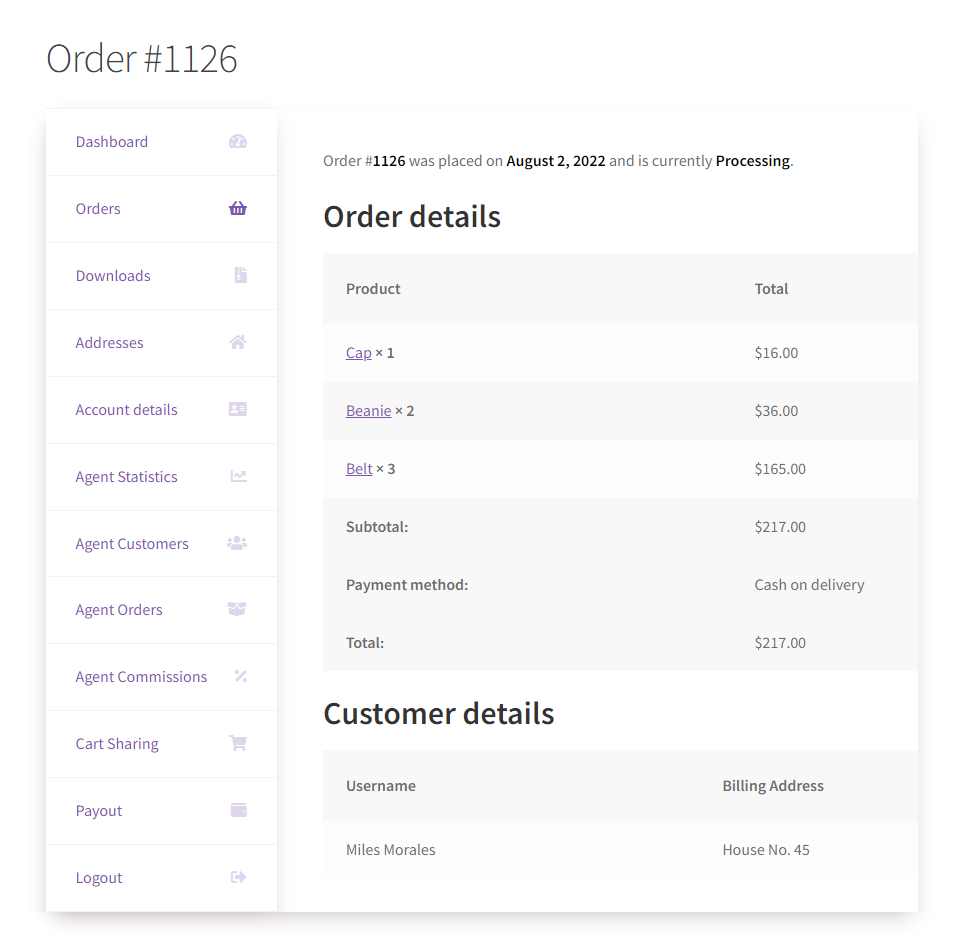
Commission Calculation
- As we know, the commission for that order placed using the Cart Sharing link is $6.80.
- The Commission Category assigned to the agent has a 20% Commission Value on Cap and Beanie.
- 1 Beanie is for $18.00, and 1 Cap is for $16.00.
$16.00 + $18.00 = $34.00
20 percent of 34.00 = $6.80
Enable Announcements
↑ Back to top- In the Enable Announcements option, If the Administrator clicks on the Enabled checkbox, it will allow the administrator to post announcements to all the sales agents.
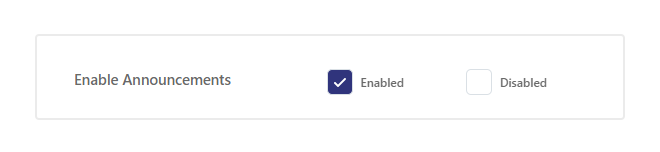
- Once the Administrator clicks on the Enabled checkbox, and Announcements option will appear in the WP Admin Dashboard.
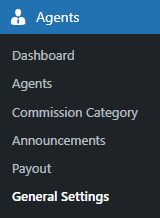
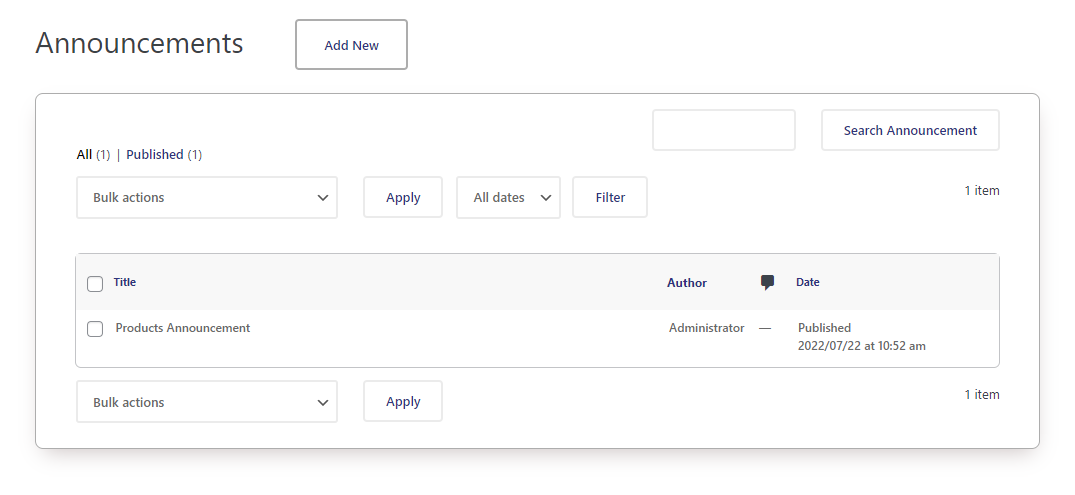
- Navigate to Admin Dashboard → Agents → Announcements.
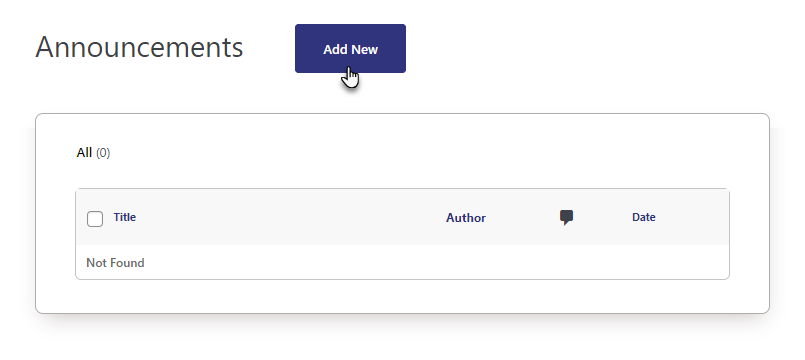
- All the messages are mentioned on the Announcements page.
- You can create an announcement by clicking on the Add New button.
- Now you’re on the Edit Announcement page.
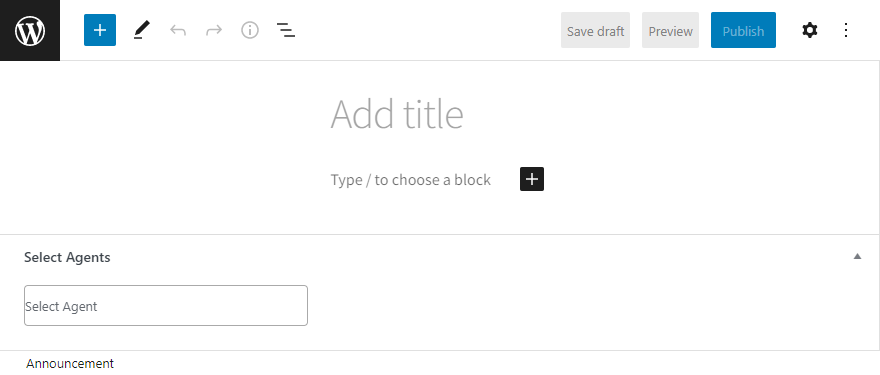
- Set the Title of the announcement.
- Set the paragraph/ text of the announcement.
- Click on the Publish button.

Front-End Impact
- Go to the website.
- Log in with the Burce Wayne credentials.
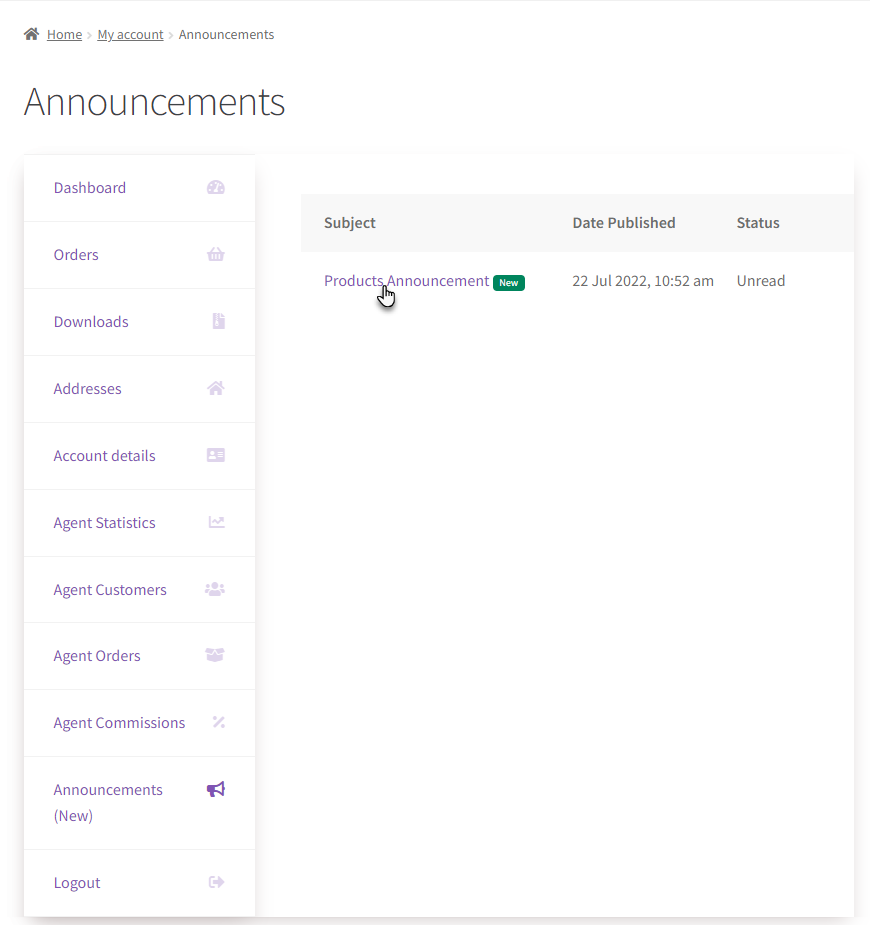
- On the My Account page, navigate to the Announcement tab.
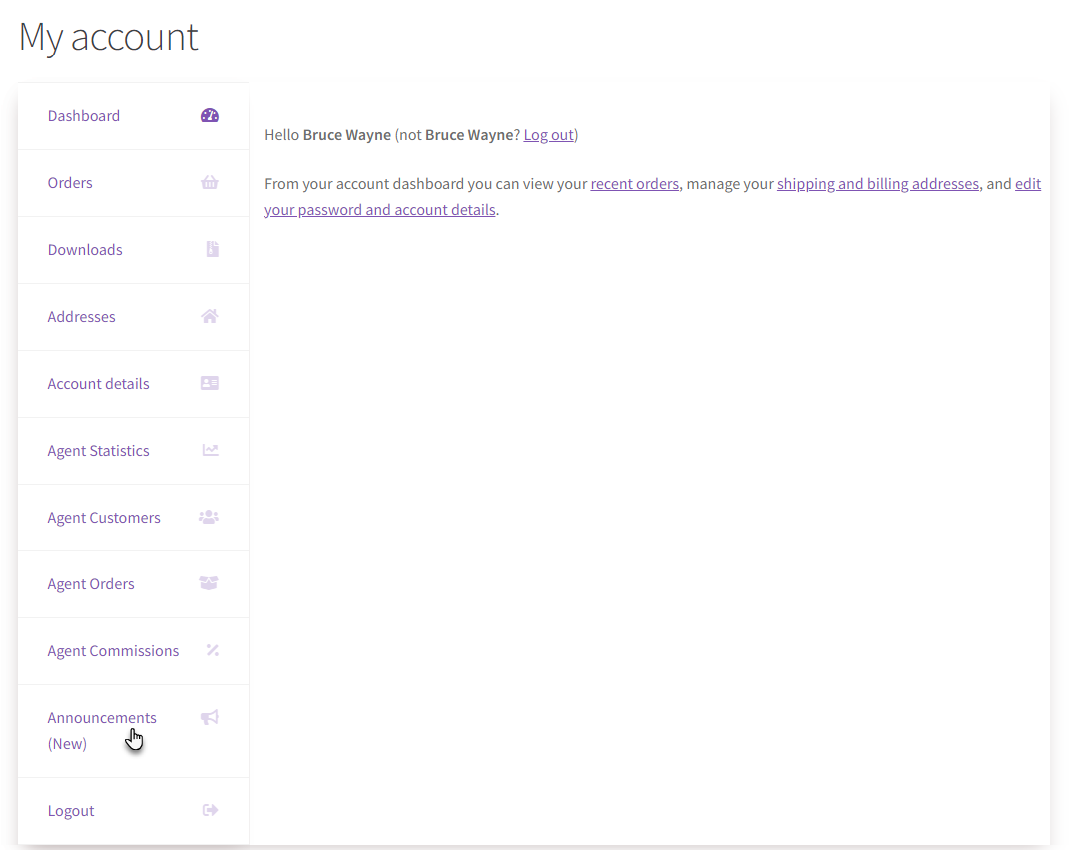
NOTE: Whenever there’s a new announcement, the Announcements tab will appear as Announcements (New) on the dashboard.
- All the announcements will appear in the Announcements tab.
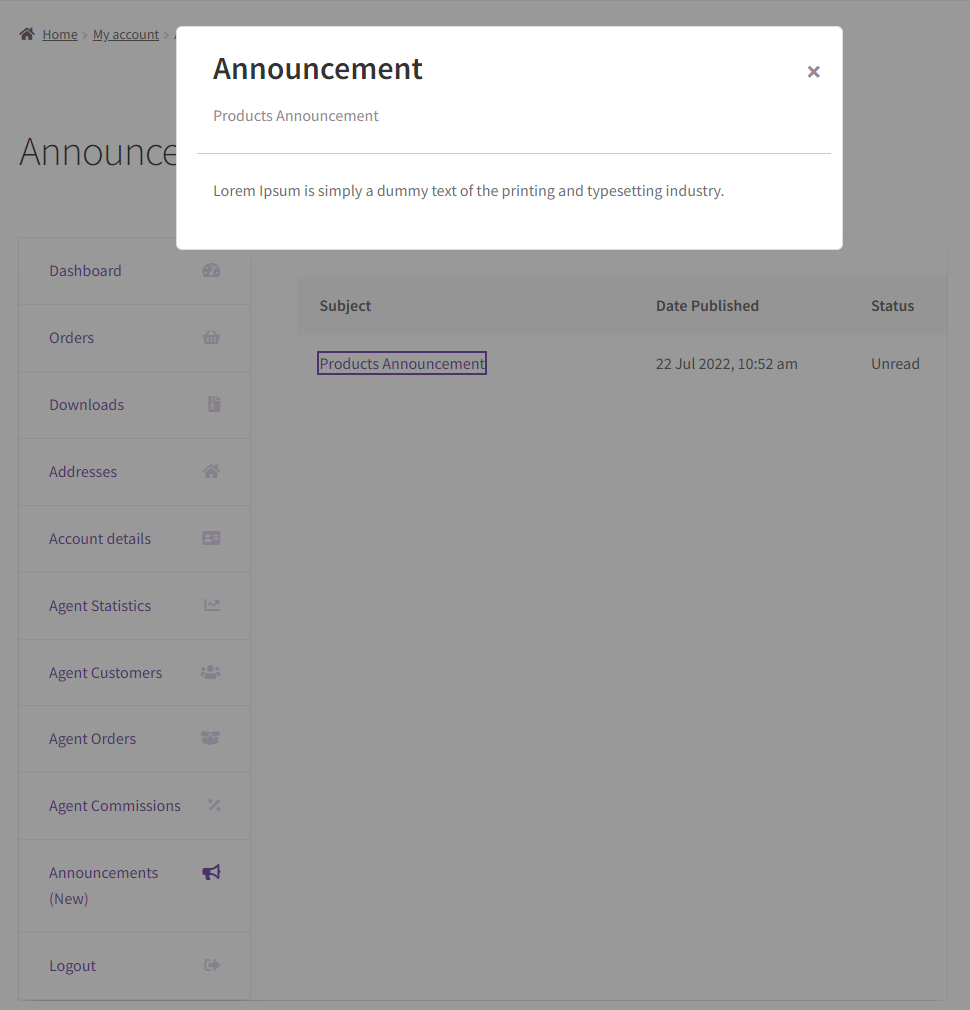
- Click on the announcement to view it.
- A popup will appear, and all the announcements will be displayed.
- The Administrator will navigate to Admin Dashboard → Agents → Announcements.

- Now you’re on the Announcements page.
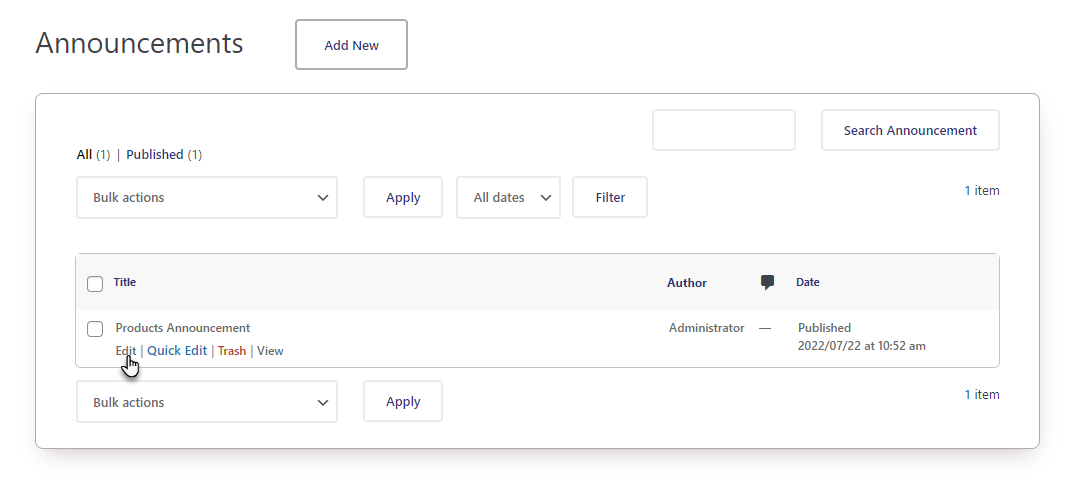
- Hover over the announcements to view further options.
- Click on the Edit suboption.
- You’re on the Edit Announcement page now.
- At the bottom of the page, there’s a Select Agent tab.
- Click on the Select Agent tab.
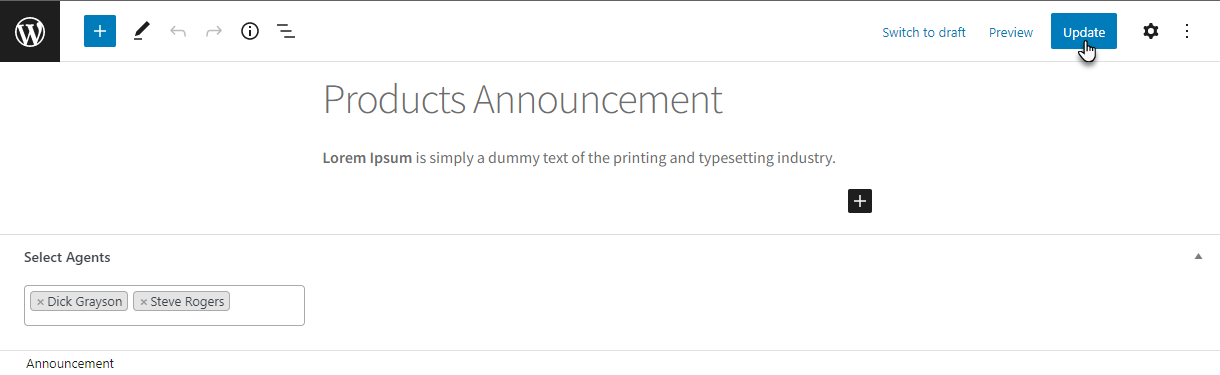
- Select the sales agent from the dropdown menu in this tab.
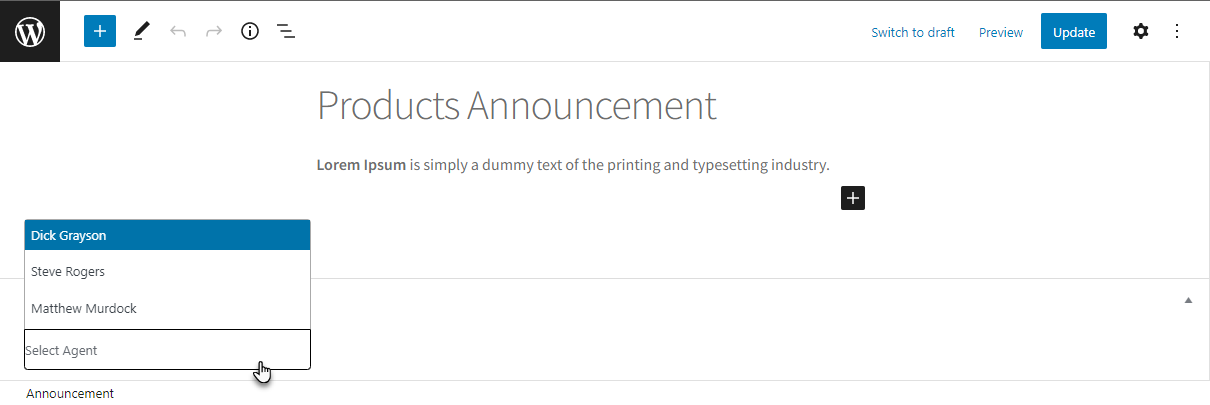
- The announcement will only appear to the selected sales agent in this tab.
- Once done, click on the Update button.
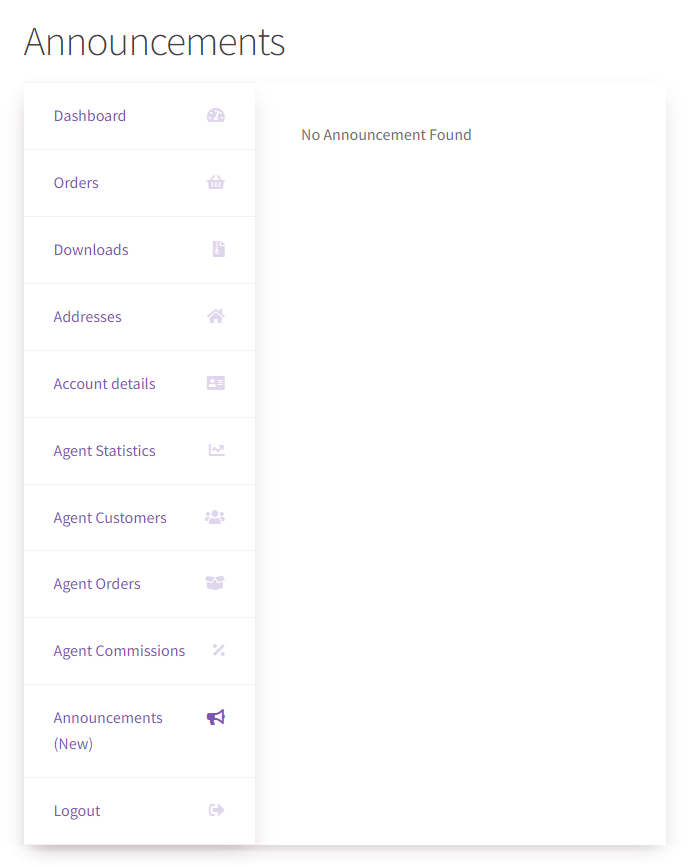
- Since we can see that the sales agent Matthew Murdock is not included, we will log in with the assigned user of this sales agent and navigate to the Announcements tab.
- We can see that there’s no announcement in the Announcements tab.
Payouts
↑ Back to topHow to apply filters in Payout?
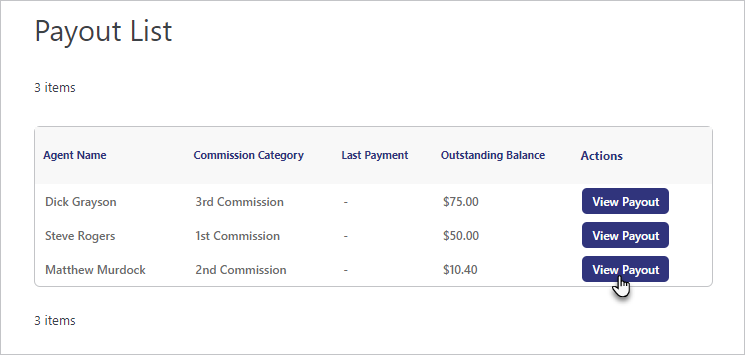
↑ Back to top- Navigate to the Admin Dashboard → Agents → Payout.

- All the Payouts are mentioned on this page.
- Click the View Payout button against any agent to view his commission list.

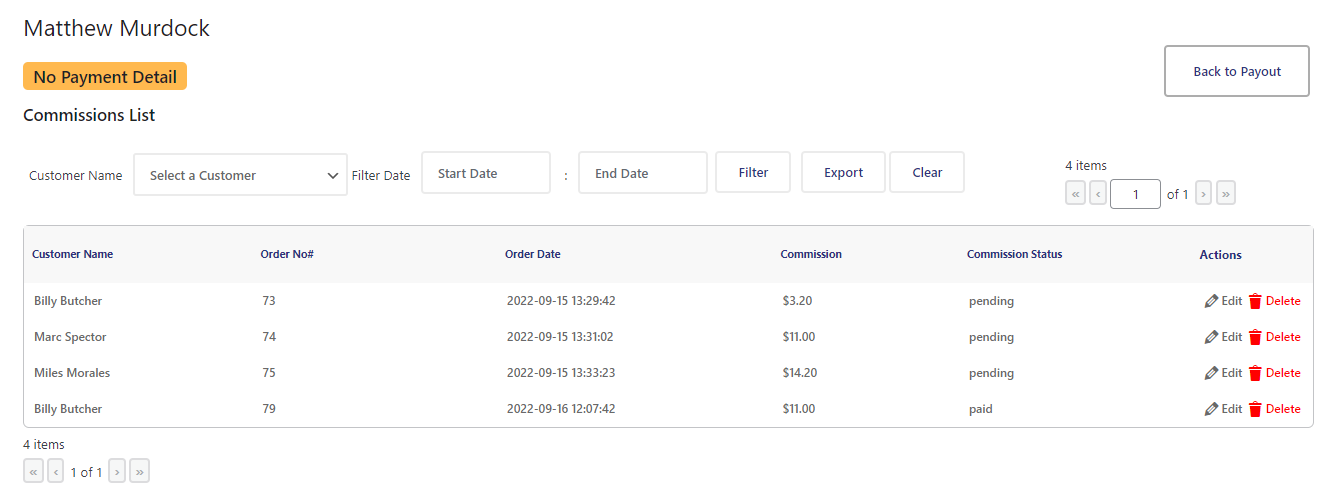
Filter – Customer Name
- On the Commission List page, a Customer Name filter section is present.
- The Administrator can filter out the commission list of any particular customer by selecting it from the dropdown menu in the Customer Name filter.
- Once done, click on the Filter button.
Filter – Start Date and End Date
- A Start Date and End Date filter section on the Commission List page is present.
- The Administrator can filter out the commission list by setting the Start Date and the End Date in the filter. Once done.
- Once done, click on the Filter button.
- All the commissions that took place between the filtered dates will be displayed.
How to Export the Commission List?
↑ Back to top- Apply the filters according to your requirement.
- Once the filter is applied, click on the Export button.

- Once done, a CSV file will be downloaded.
- Open the CSV file. It will contain all the details of the filtered commission list.
Enable Paypal for Payouts
↑ Back to top- In the Enable Paypal for Payouts option, If the Administrator clicks on the Enabled checkbox, it will allow the sales agent to payout through Paypal.

Front-End Impact
- Go to the website.
- Log in with the sales agent credentials.
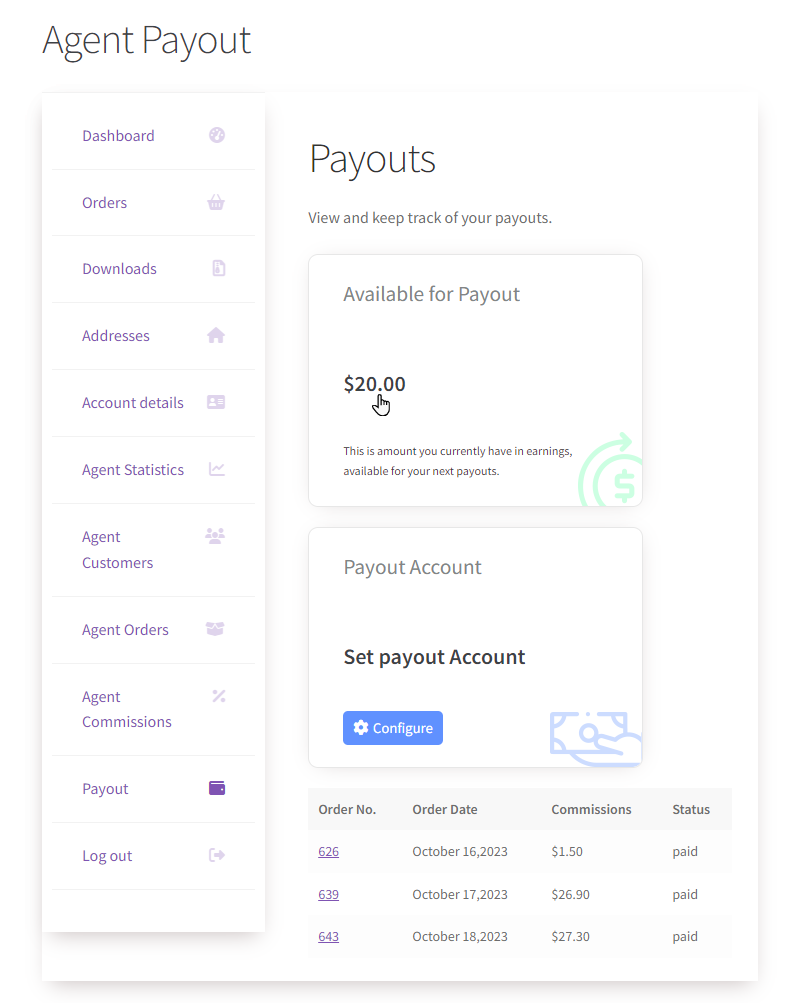
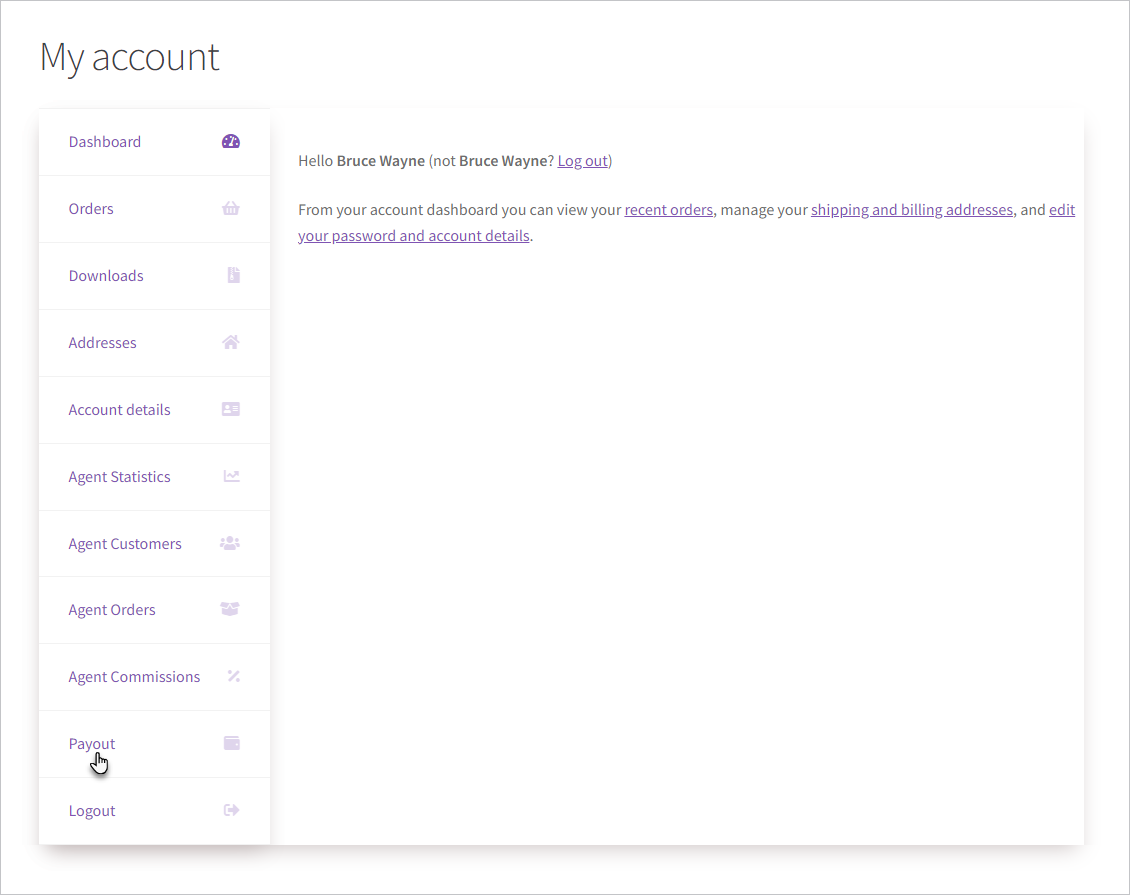
- On the My Account page, navigate to the Payout tab.

- Once the agent is on the Payout page, click the Configure button.
- A popup will appear, select the Paypal radio button and then enter the email of the Paypal account of the sales agent.
- Once the payment method is successfully added, a notification will appear as Thank you! Your Payment Detail has been Saved.
- Navigate to the Admin Dashboard → Agents → Payout.

- All the Payouts are mentioned on this page.
- Click the View Payout button against any agent to view his commission list.
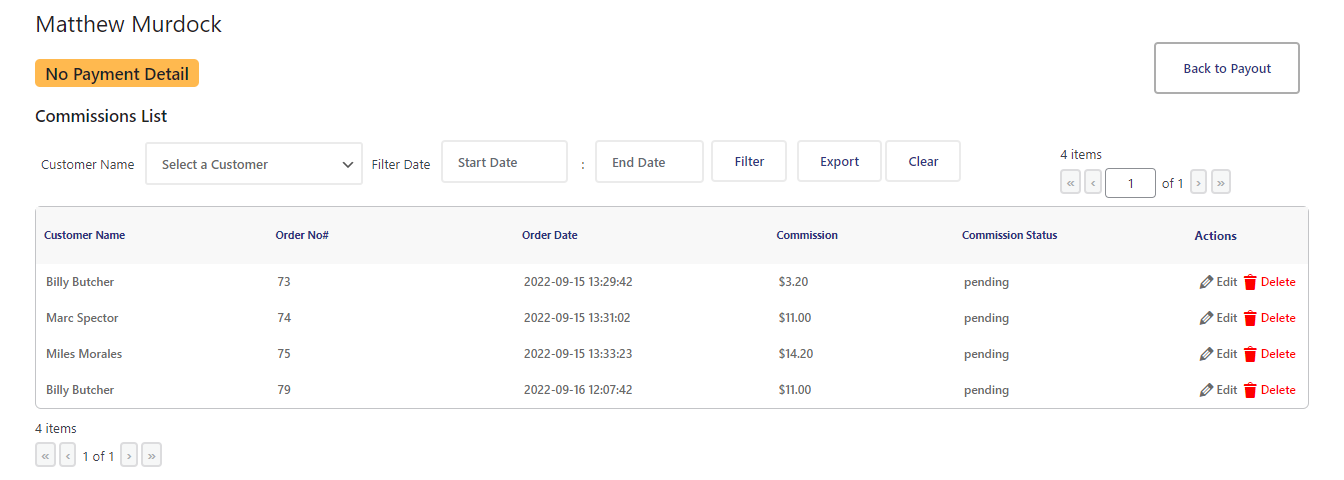
Before Paypal Account details were added
↑ Back to top- We can see that no payment details were added.
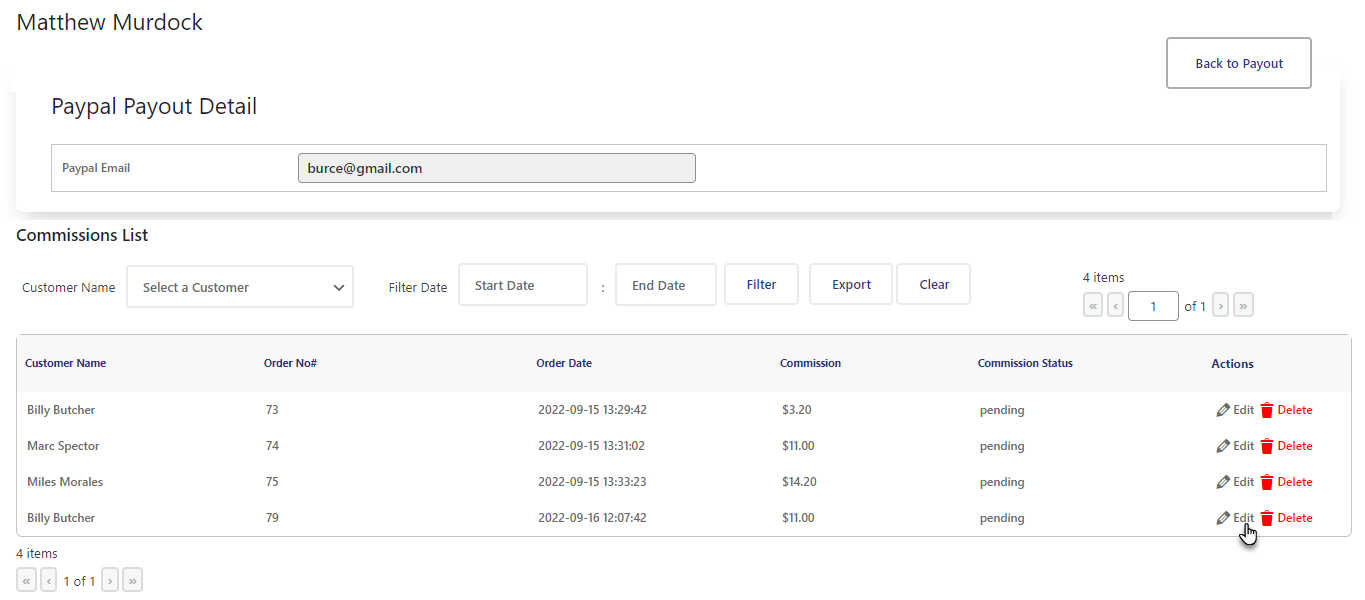
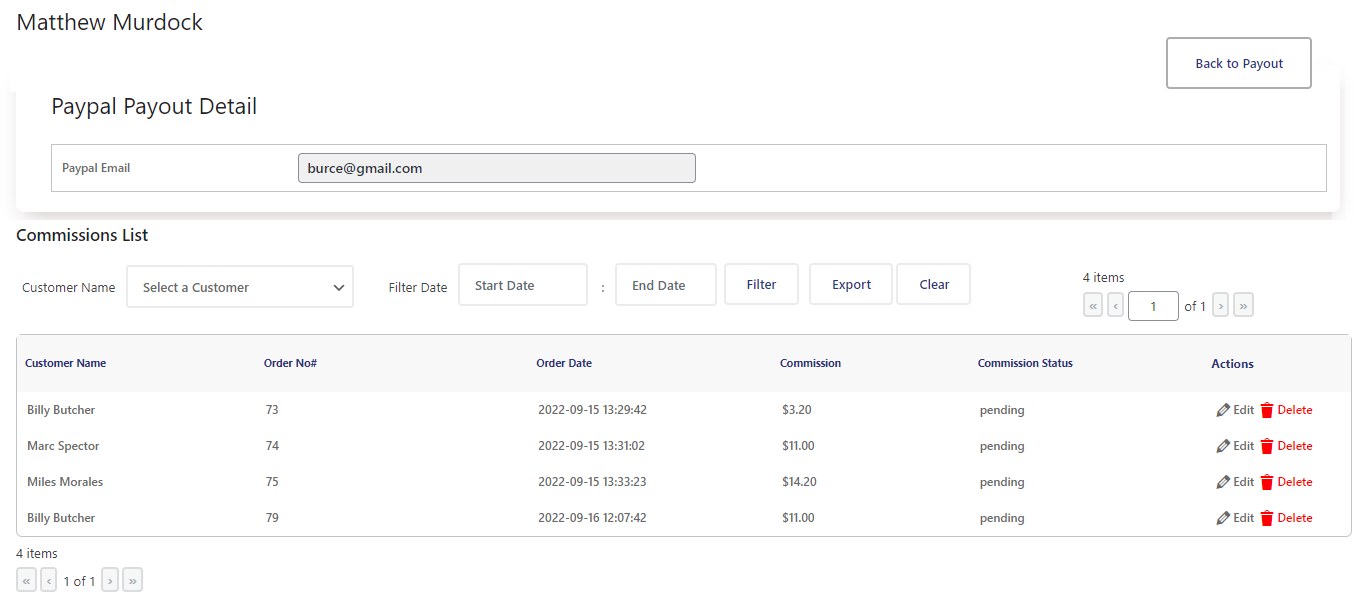
After Paypal Account details were added
↑ Back to top- We can see that the Paypal Payout Details appear at the top of the page.

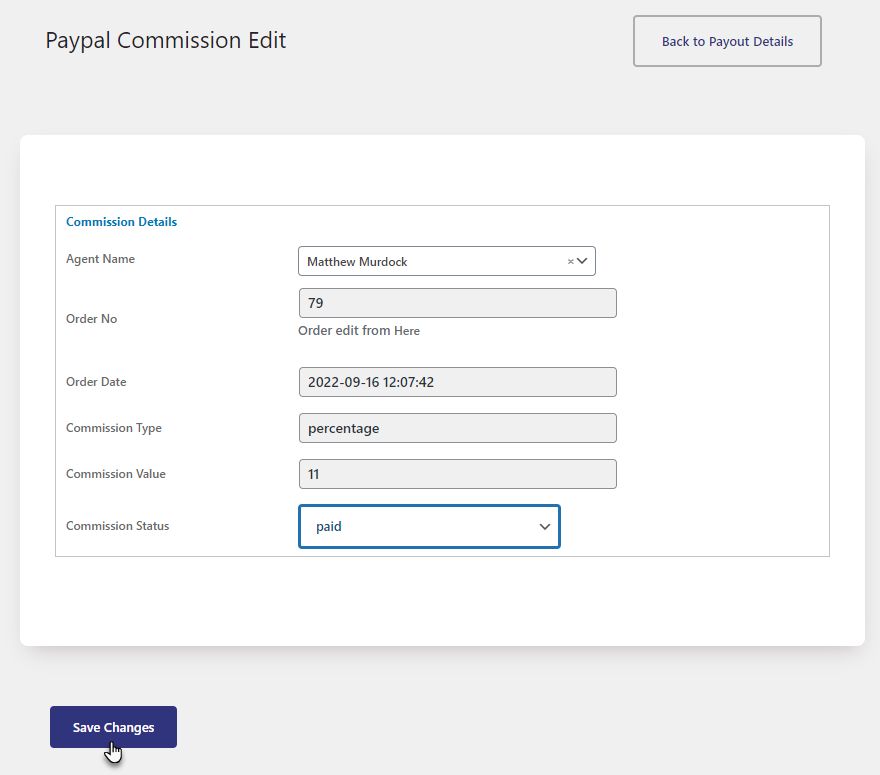
- The Administrator can change the sales agent and status of the commission status.
- Click on the Edit button against any commission in the Actions column.
- The Administrator can change the sales agent in the Agent Name option and then enter the name of another sales agent.
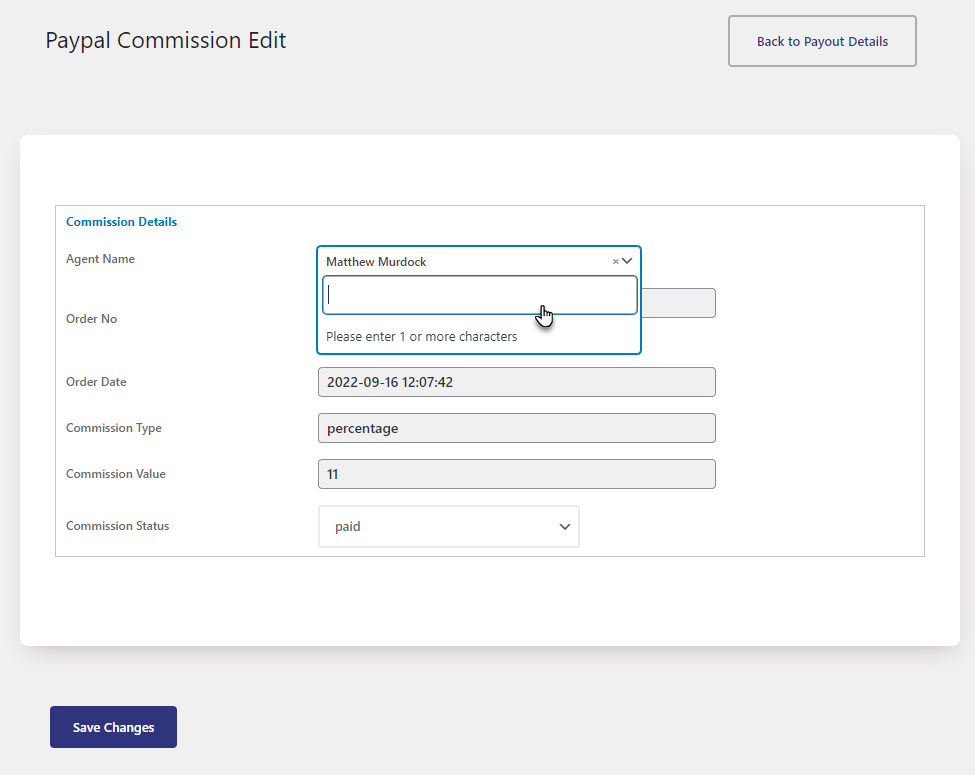
- The Administrator can change the status of the commission in the Commission Status option by selecting the options from the dropdown menu.
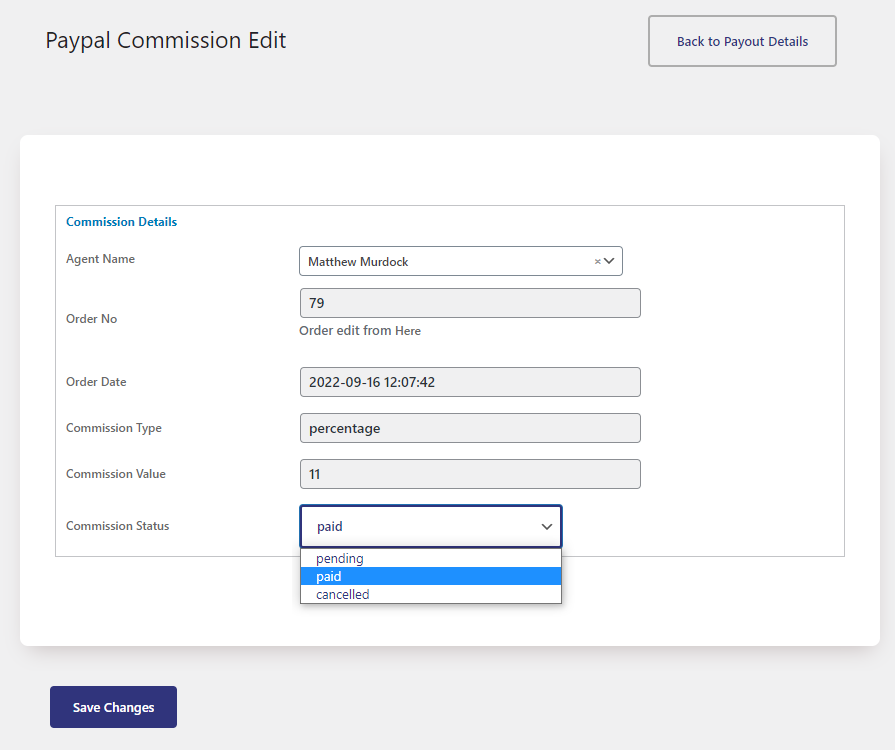
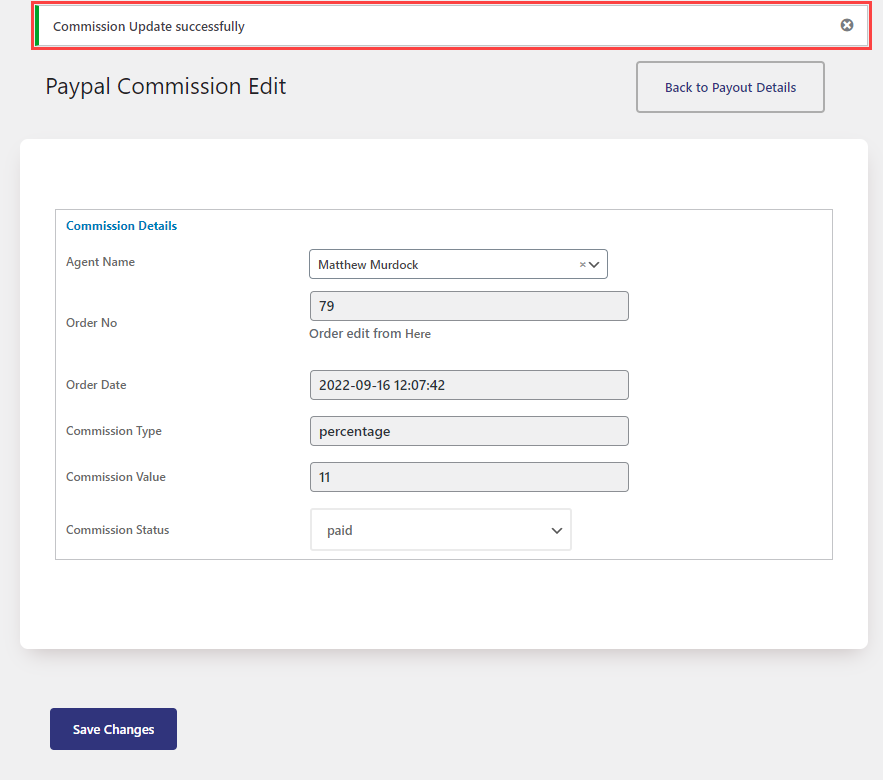
- Once done, click on the Save Changes button.
- Once the operation is successful, a notification will appear at the top of the page Commission Update successfully.
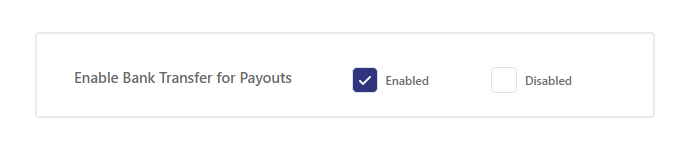
Enable Bank Transfer for Payouts
↑ Back to top- In the Enable Bank Transfer for Payouts option, If the Administrator clicks on the Enabled checkbox, it will allow the sales agent to payout through Bank Transfer.
Front-End Impact
- Go to the website.
- Log in with any sales agent credentials.
- On the My Account page, navigate to the Payout tab.
- Once the agent is on the Payout page, click the Configure button.
- A popup will appear, select the Bank Transfer radio button and then enter the required information of the sales agent.
- Once the payment method is successfully added, a notification will appear as Thank you! Your Payment Detail has been Saved.
- Navigate to the Admin Dashboard → Agents → Payout.
- All the Payouts are mentioned on this page.
- Click the View Payout button against any agent to view his commission list.

Before Bank Transfer details were added
- We can see that the Paypal Payout Details appear at the top of the page.
After Bank Transfer details were added
- We can see that the Bank Transfer details appear at the top of the page.

Default Sales Agent
↑ Back to top- In the Default Sales Agent option, the Administrator can select any sales agent and make them a Default Sales Agent, so whenever a new customer register’s through the website registration page, the sales agent assigned to that customer will be the default sales agent.

Front-End Impact
- Go to the website.
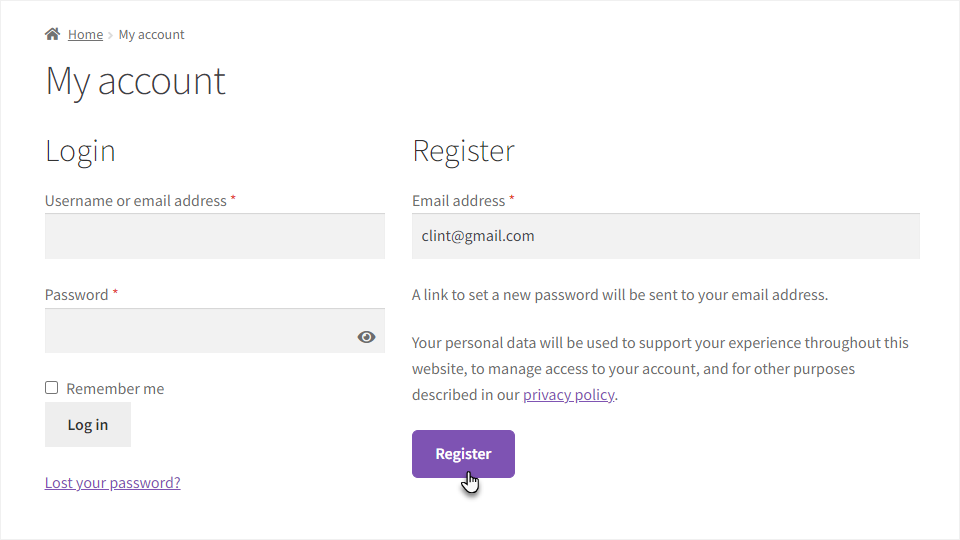
- Navigate to the My Account page.

- Enter your email for registration and click on the Register button.
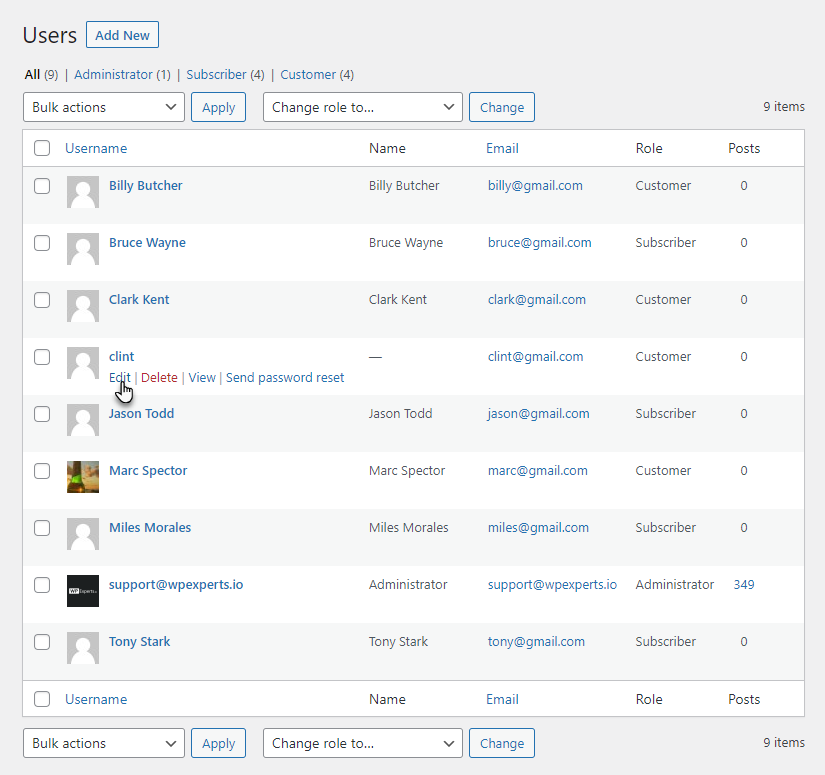
- Once the registration is successful, navigate to the WP Admin Panel → Users → All Users.
- All the users are present on this page.
- Hover over the Clint user to view further options.
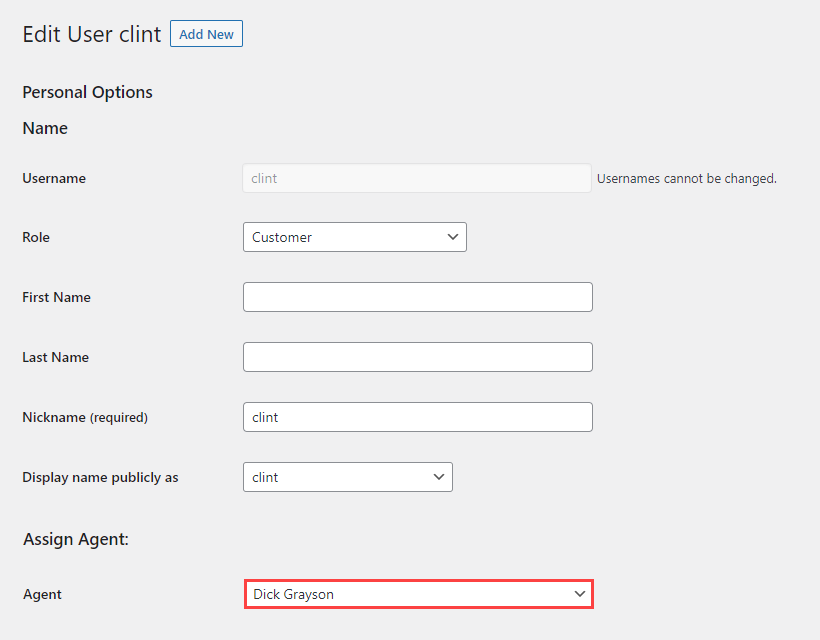
- Click on the Edit suboption.
- On the Edit User – Clint page, we can see that the agent assigned to this user is Dick Grayson, who was set as the default sales agent.
NOTE: The Default Sales Agent functionality also applies to the customers who will create an account during Checkout.