
The Sale Flash Pro extension for WooCommerce by Kestrel gives you control over how you showcase discounts on your online store.
Requirements
↑ Back to top- WooCommerce 3.5+
- PHP 5.4+
Installation
↑ Back to top- Download the .zip file from your WooCommerce account.
- Go to: WordPress Admin > Plugins > Add New and Upload Plugin with the file you downloaded with Choose File.
- Install Now and Activate the extension.
Setup and configuration
↑ Back to topOn the General tab of the WooCommerce settings screen you will find the following options:
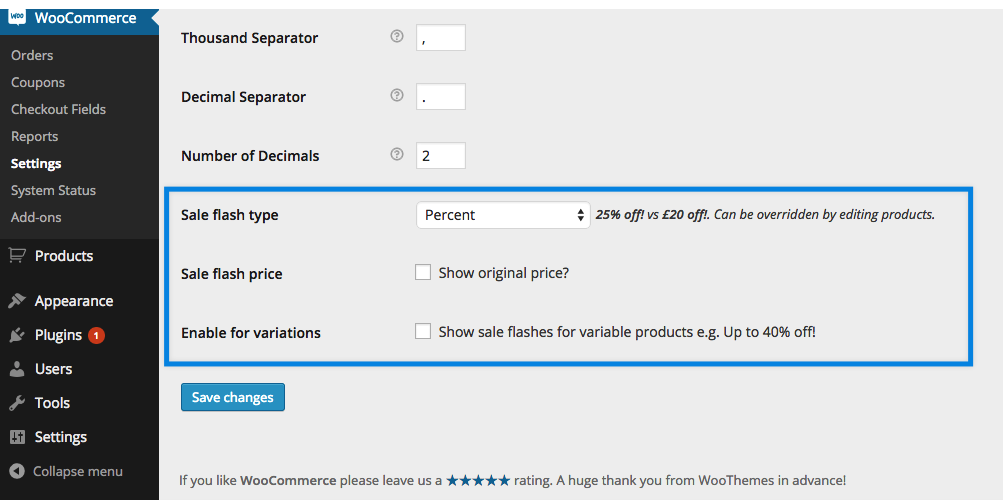
Sale Flash Type
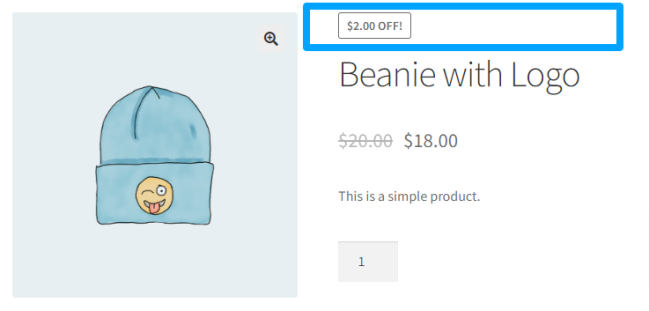
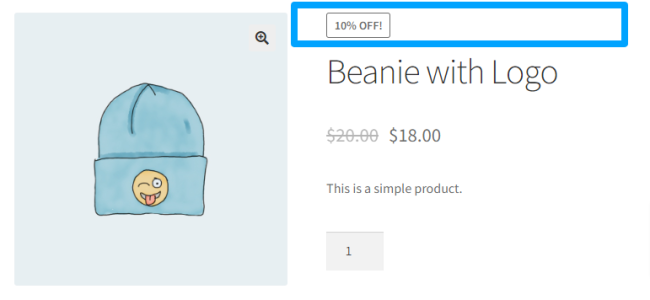
↑ Back to topThis option allows you to choose whether to display the discount as a percentage (eg. “25% off”) or a total (eg. £2.50 off).
Sale Flash Price
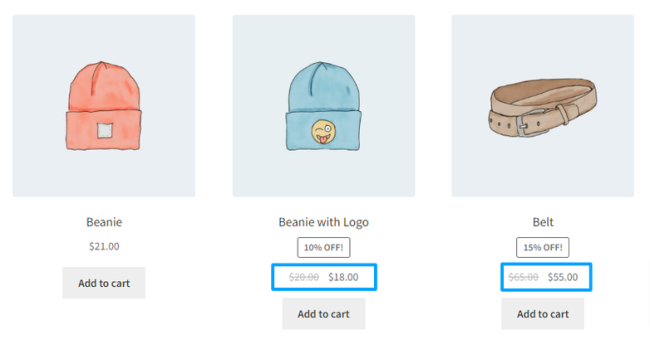
↑ Back to topThis option allows you to display the regular price (or not).
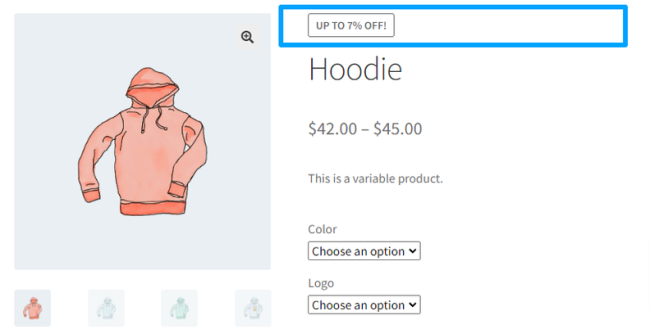
Enable for variations
↑ Back to topThis option allows you to display the sale flash on variable products. It will display the most attractive discount. So if one of your variations is reduced by 25% whilst the other is only reduced by 20% it would display “up to 25% off”.
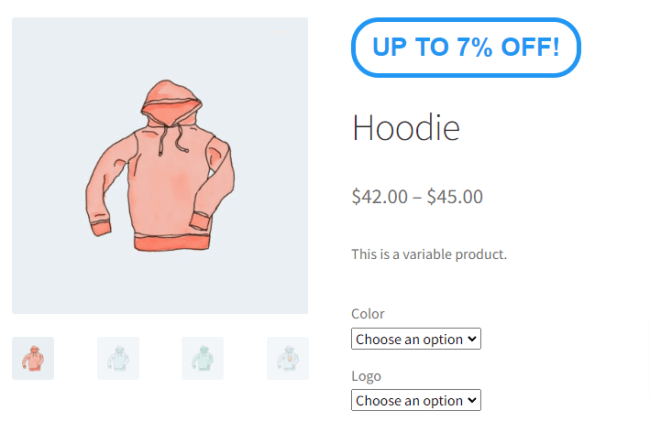
Customize the design
↑ Back to topSales Flash Pro has been designed to provide flexibility in styling through CSS. The plugin will adopt the styles of your active theme by default, but you can customize it to achieve the desired design by applying custom styles using Cascading Style Sheets (CSS).
1. Identify the HTML elements
Using your browser’s developer tools, inspect the elements you want to modify. Identify the HTML structure, classes, or IDs associated with the elements you wish to customize. You can find a detailed instruction depending on what browser you are using on this link
2. Add custom CSS
Now that you’ve identified the elements, it’s time to add custom CSS rules to your WordPress theme. Here’s an example of how you can do this:
.onsale {
  font-size: 15px;
  color: #2196F3;
  border-radius: 30px;
  border: solid 3px;
}
3. Apply the CSS
Add the custom CSS to your WordPress theme through the theme customizer:
- Log in to your WordPress admin dashboard.
- Navigate to “Appearance” and select “Customize.“
- Locate the “Additional CSS” Section.
- Paste the CSS here and save the changes (Publish button).
FAQ
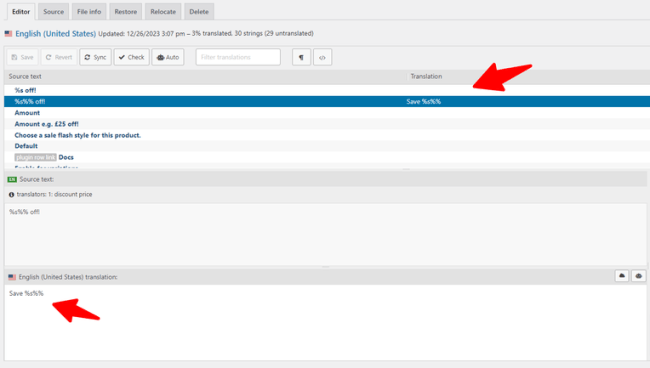
↑ Back to topHow can I change the Sale ribbon? It says 25% off!
↑ Back to topYou can use the Loco Translate plugin to modify this text and others. Just create a translation of the Sale Flash Pro for your current language.
Can I change the sale flash for grouped and variation products?
↑ Back to topNo, these kinds of products are children of a parent product. Thus, the sale flashes are handled by their parents.