Theme installation
↑ Back to topInstalling the theme is a very simple process. Go to your WordPress dashboard -> Appearance -> Themes ->Add new and upload the zip file.
Once uploaded just click on the Activate button. That’s it! You can now start creating pages.
In order to install the theme manually, or in case you have trouble installing it through the admin panel, you have to unzip the WordPress theme’s zip file on your computer, and upload via FTP the resulting theme folder inside the archive file, into your WordPress installation themes folder (wp-content/themes). Then, from the WordPress admin go to Appearance -> Themes. The theme should be available in your themes list. Click activate.
Required Plugins
↑ Back to topAfter the theme activation you will need to install the plugins required by the theme.
- WooCommerce — (required) WooCommerce is the world’s most popular open-source eCommerce solution. You must have this plugin installed. Check how to setup it here.
- MaxSlider – (required only if you need to add a slider like the one we have on our demo site) MaxSlider is probably the easiest way to add a custom responsive slider to any page of your website.
- GutenBee: A free set of awesome Gutenberg blocks and advanced capabilities.
- One Click Demo Import — (recommended) Help you import dummy content and replicate the live demo. The plugin can be deactivated and deleted after the demo content is imported.
- Jetpack – (recommended) Security, performance, and site management: the best way to WordPress is with Jetpack. You will use this plugin to add Contact Form, Widget visibility and several other enchantments that might appear in the theme demo
How to import the sample content
↑ Back to topIf you like what you see in our demo website, you can simply import the sample content. This means that an exact replica of our demo website will be imported in your WordPress installation. Now all you have to do is simply replace the content of these pages with your content.
Here’s how to do it:
↑ Back to top- In your WordPress dashboard visit Plugins ->Add New.
- Search for One Click Demo Import and Install the plugin.
- Activate it.

Please note: Due to the nature of the import mechanism some links may link back to our demo website. If you are not sure how to update / change these links simply get in touch and we’ll help you out.
First you will need to download the Sample Content archive file for Rhodes by clicking here. Extract the file like described here for MacOS and here of Windows PC. We are going to import these files using the One Click Import free plugin.
After activating the plugin navigate to Appearance->Import Demo Data. In this section add:

- Add your content.xml from your sample content archive.
- Add your widgets.wie from your sample content archive.
- Add the customizer.dat from your sample content archive.
- Import the content
This might take a few minutes depending on your server configuration. If you encounter any errors while installing sample content please have a look here.
Image sizes
↑ Back to topWeb page loading times are greatly affected by the size of your images. For best results make sure to use images with the recommended minimum dimensions as described below:
Main thumbnail: 998x560px
Rhodes item: 615x 740px
Rhodes item tall: 615px
Rhodes item large: 1340x 755px
Rhodes article media: 510x510px
Product images
Thumbnail image width: 750px and unlimited in height
Single image width: 560px and unlimited in height
Gallery thumbnail image width: 150px and unlimited in height
Please note: If for any reason you want to change the dimensions of any of the predefined image sizes you have to use a plugin. This guide describes this process.
Setting up your website
↑ Back to topHeader Section
↑ Back to topYou can customize the looks of your header section from Appearance->Customize->Header. The theme offers two header styles. A transparent header, which is used in the demo’s homepage, and an opaque one which you can check out in the demo’s inner pages such as posts, products etc. The header style of each post or page can be set through its page layout section.
You can control the header colors from Appearance->Customize->Header->Colors for the opaque, and under Appearance->Customize->Header->Transparent Header Colors for the transparent header
The header has a two separate placeholders for the mini cart and your search tool. You can enable or disable each one from Appearance->Customize->Header->Content.
You can control if you want the header section to be sticky in mobile or desktop under Customize->Header->Layout. In the same section you select whether you want an alternative logo to appear (with a different color) when the menu becomes fixed.
Logo
Another part of the header is the Logo area which can be controlled from Customize->Site Identity. Here, you can select your main logo, as well an alternative one that will apply optionally if the header is transparent or when its fixed on scroll. Rhodes allows you to display the site title and tagline below the logo image if you wish to do so. Additionally you can limit the logo size for retina displays, for this feature to work you will need to upload a logo with double the dimensions of the original one.

You can set your Site Icon also under Customize->Site Identity, which will appear in the browser tab, while visiting your site.
Top Bar
The last major part of the theme’s header is the top bar. Under Customize->Top Bar -> Content you will get three content fields, Left, Middle and Right where you can set custom HTML code and complementary information for your visitors. If you want any section not to display, just leave it blank.

Some useful HTML snippets you can use here are:
Call example
<a href="tel:+3312345670">Call us for further information</a>
Email example
<a href="mailto:info@example.com">Send us an email example</a>
New page example
<a target="_blank" rel="nofollow noopener" href="https://www.example.com/">Visit and external link</a>
You can customize Top Bar Colors under Customize->Top Bar->Colors
Fonts and Colors
↑ Back to topYou can change all theme colors under the Customize->Global->Colors section. This includes button and form colors, as well as the main site background. Same applies for the typography section under Customize->Global->Typography. Here you can pick from a variety of Google Fonts for your menu, headings and content for desktop, tablet and mobile.

You can also disable Google Fonts and use only System fonts.
Main Menu
↑ Back to topIn your WordPress dashboard click on Appearance → Menus. In the Menu structure section enter a Menu name (it can be anything you like) and click on the Create Menu button. From the Add menu items section on the left select the pages that you want to add in your menu and click on the Add to Menu button. Now all you have to do is assign this menu to a Display location. In the Menu Settings section click on the Main Menu checkbox. Your navigation menu should be now visible on your website.
You can create a special button-like menu item by setting a certain class for to it. The class name is nav-button and you can set it under Appearance->Menus for the item you want. First enable this section from Screen Options (More info here ).
Footer
↑ Back to topThe footer area is a standard 4-column widgetized area that can be populated with widgets through Appearance → Widgets, from Footer 1st column to 4th column. Leaving a footer widget area blank will automatically remove it from the footer. You can also remove the credits at the very bottom of this area by visiting the Appearance → Customize → Footer → Content section.
Front page
↑ Back to top
Creating a frontpage
Create a new page from Pages -> Add New, then select from the right side under Page Attributes the Full width contained template. Then from Layout Options section check the
Transparent header (optional) to create a nice overlay effect with your main slider.

Save the page and you are ready to add your blocks and content.
Adding a Slider
Our main demo page has a Slider which was created using the MaxSlider plugin. Create a new slider as described here. Then copy the slider shortcode and head over to your frontpage. Add a shortcode block and paste your MaxSlider shortcode inside.
Setting the content demo
The pages in the theme demo are available as reusable blocks. To replicate the demo exactly start by adding a column block with two columns active. In the first column you will need to add a Heading block and after it a paragraph block.
For the heading block you will find under Block settings an additional style option.

Next, add a Best Selling Products block with four columns and two rows under its Layout Options.
Continue adding a Column block with two columns and a Featured Category block inside each one. Make sure the categories you select there have description and a thumbnail under Product->Categories.

Again we create a two column block. The first column has a heading block and a paragraph one, while the second has a button block with the outline style selected. After that, add a Newest Products block with three columns and two rows, which will display your latest products.
Create a Cover block with a minimum height of 600px. Add a background image and two Headings with one button block.
Finally we have a two column block with Heading and paragraph block in the first column and nothing in the second one, following a Latest Posts block with your latest blog posts.
Shop page
↑ Back to topAssign a Shop page
Before any other step you will need to create a new page from Pages->Add new and then select it as your Shop page.

Customize the Shop page
You can control the Shop listing page and product categories from Customize->Woocommerce->Product Catalog. Here you can select whether you want to show categories as items in your shop and product category pages as well as the column and row number for each page.

You can also set a second image to appear when hovering over your product. The first – default one will be the featured image, while the second will be the first image item from your product gallery.
Here you can also modify the shop layout to have a sidebar, and the position of that sidebar in relation to the content.
Contact page
↑ Back to topCreate a new page from Pages->Add New and set the page template under Page Attributes to Full width contained. Then under Layout Options check the Hide title when viewing this Page option.
Add a column block with two columns. In the first column add a Jetpack Contact Info Block (you will need to have Jetpack active) and set your contact information. In the other one you can add a heading and paragraph block and after that a Jetpack Contact Form block.
Journal page
↑ Back to topThis is you main blog page. You can Create a new page and set it as your blog page under Settings->Reading
Single product
↑ Back to topYou can hide or show the related product section under Customize->Woocommerce->Single Product. There you can also control the number or upsells and related products you want to display.

Widget areas
↑ Back to topThe theme provides special widget areas for your Blog posts and archives, pages and shop. You can use a plugin/module like Jetpack’s widget visibility to hide or show widgets for certain pages or posts or products.
Child Theme
↑ Back to topFor any CSS changes you could use the Additional CSS feature available through the customizer. If you prefer to use a child theme instead, you can download it from this link.
Updating Rhodes
↑ Back to topBEFORE PROCEEDING – We recommend backing up your theme, files and database before starting to update. If you have made changes in the theme’s files and you don’t have a child theme, your changes will be lost!
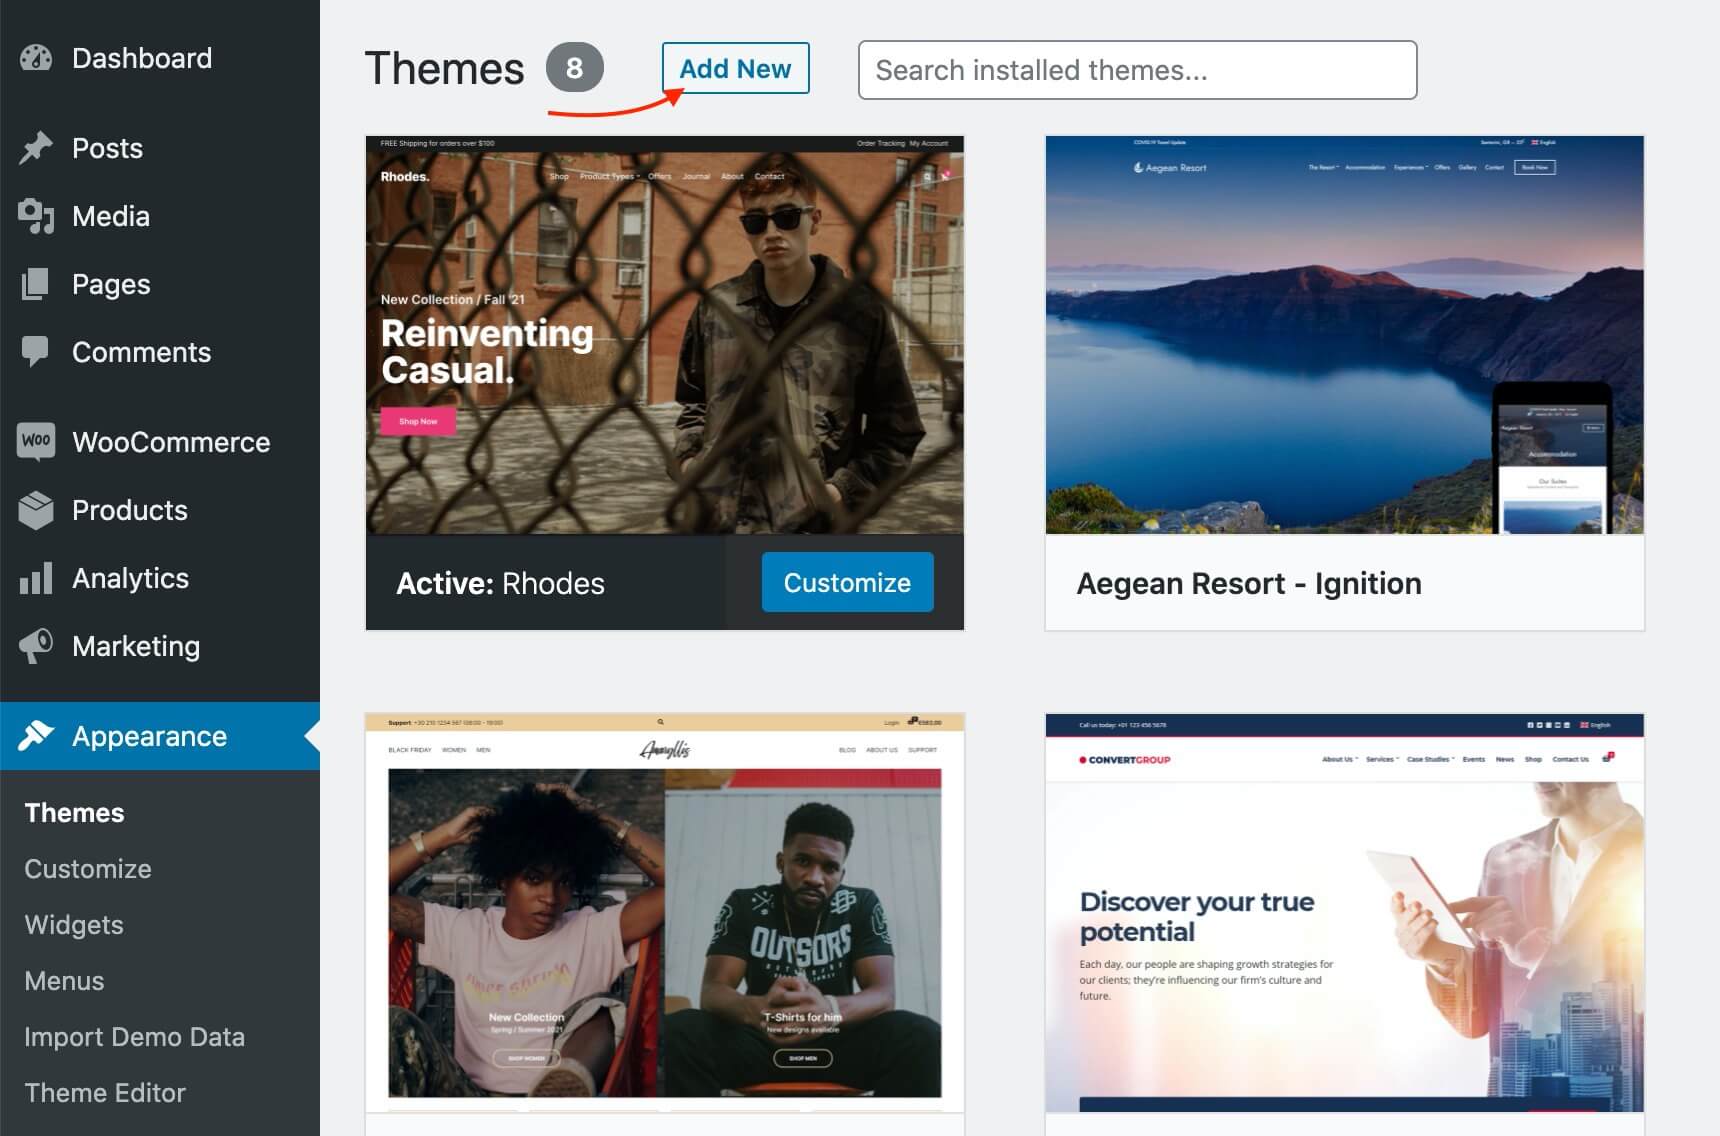
Download the latest version of the theme and navigate to the theme selection page under Appearance->Themes in your WordPress dashboard. Click on the Add New button to begin the process.
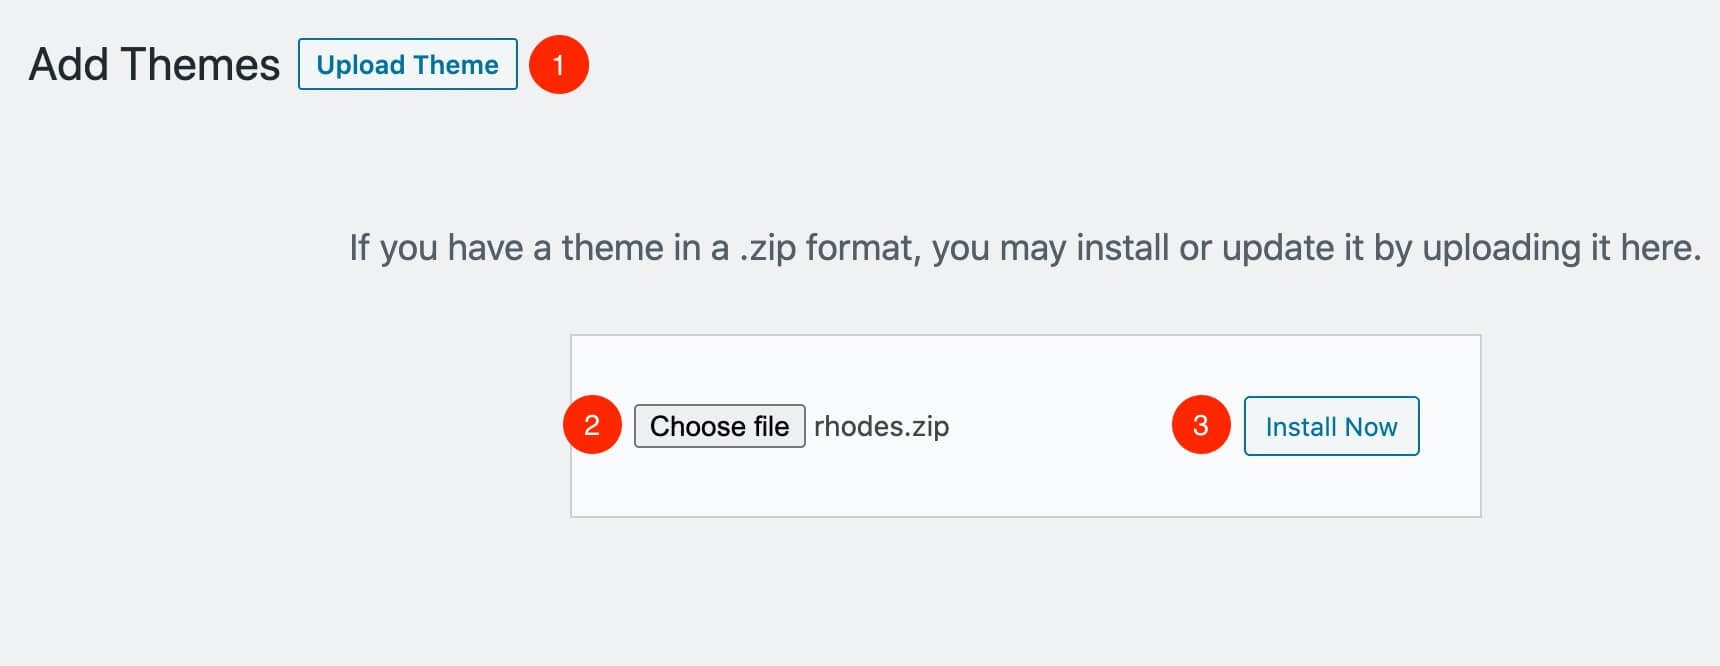
In the next screen click on the Upload Theme (1) button and select your new theme archive (zip) file (2). Next click on the Install Now (3) button.
Wait until the theme is uploaded and when prompted select to replace the current version of the theme with the uploaded one.
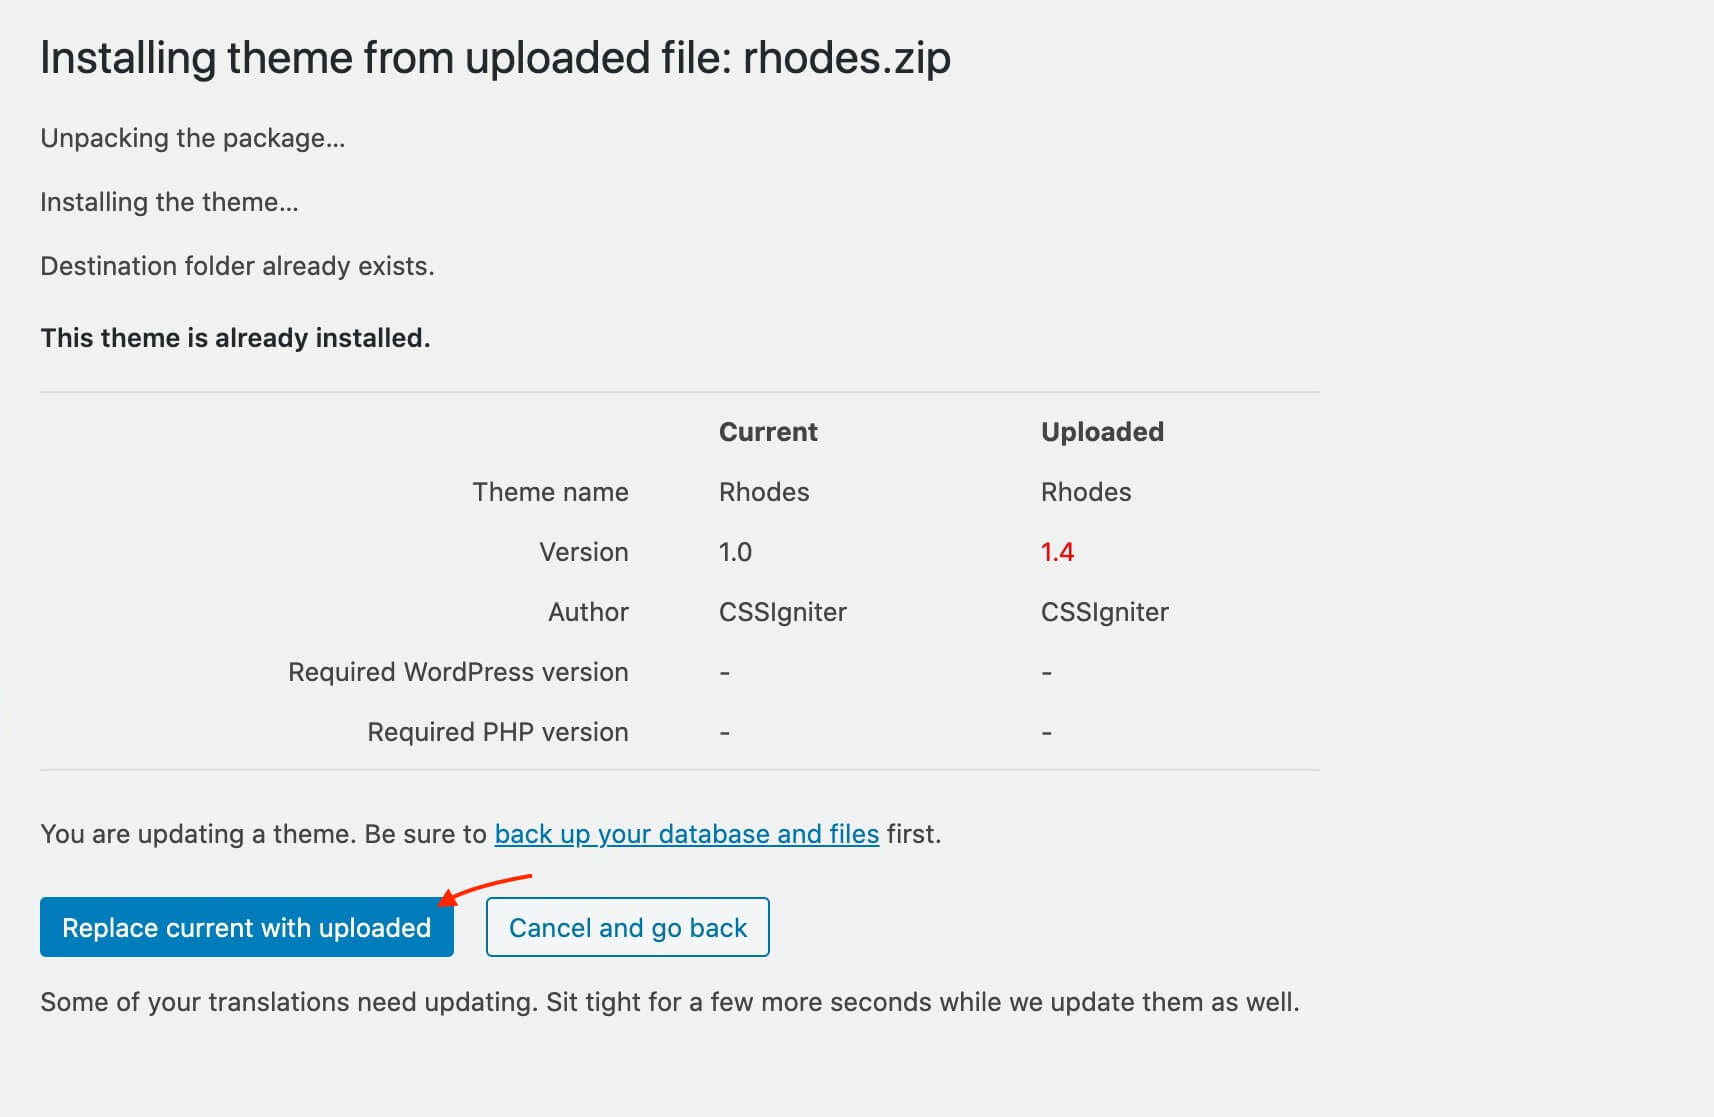
That’s it! This will update Rhodes to the latest version.