WooCommerce has a built-in product CSV Importer and Exporter which can accessed from the All Products > Products page. You can import, export, or update hundreds or thousands of products in your WooCommerce store with a single CSV. This tool supports most product types, including variations.
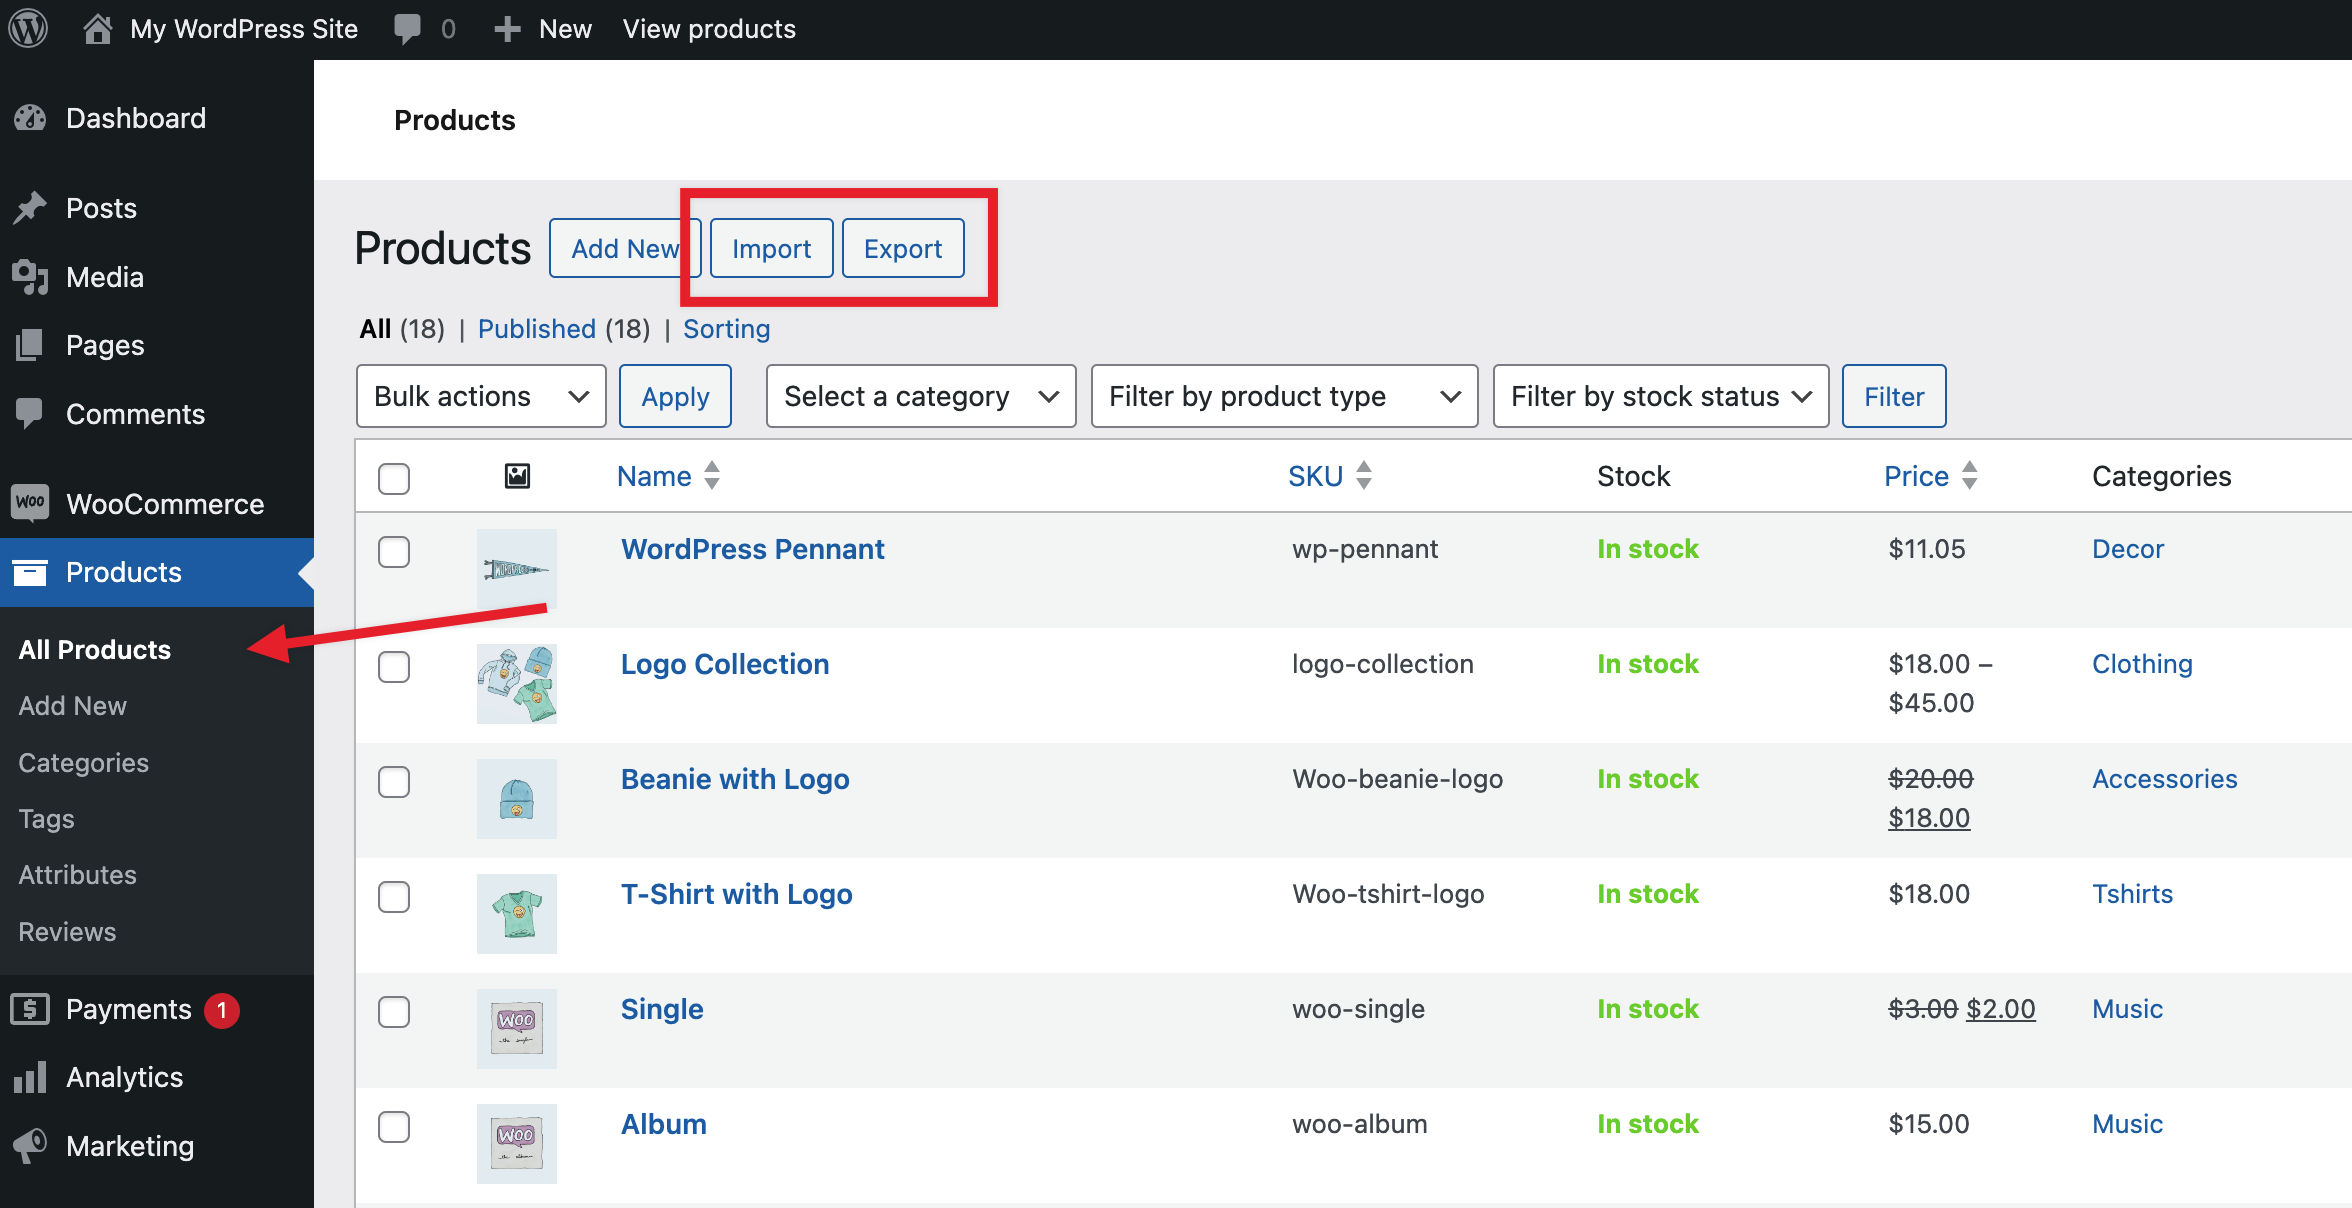
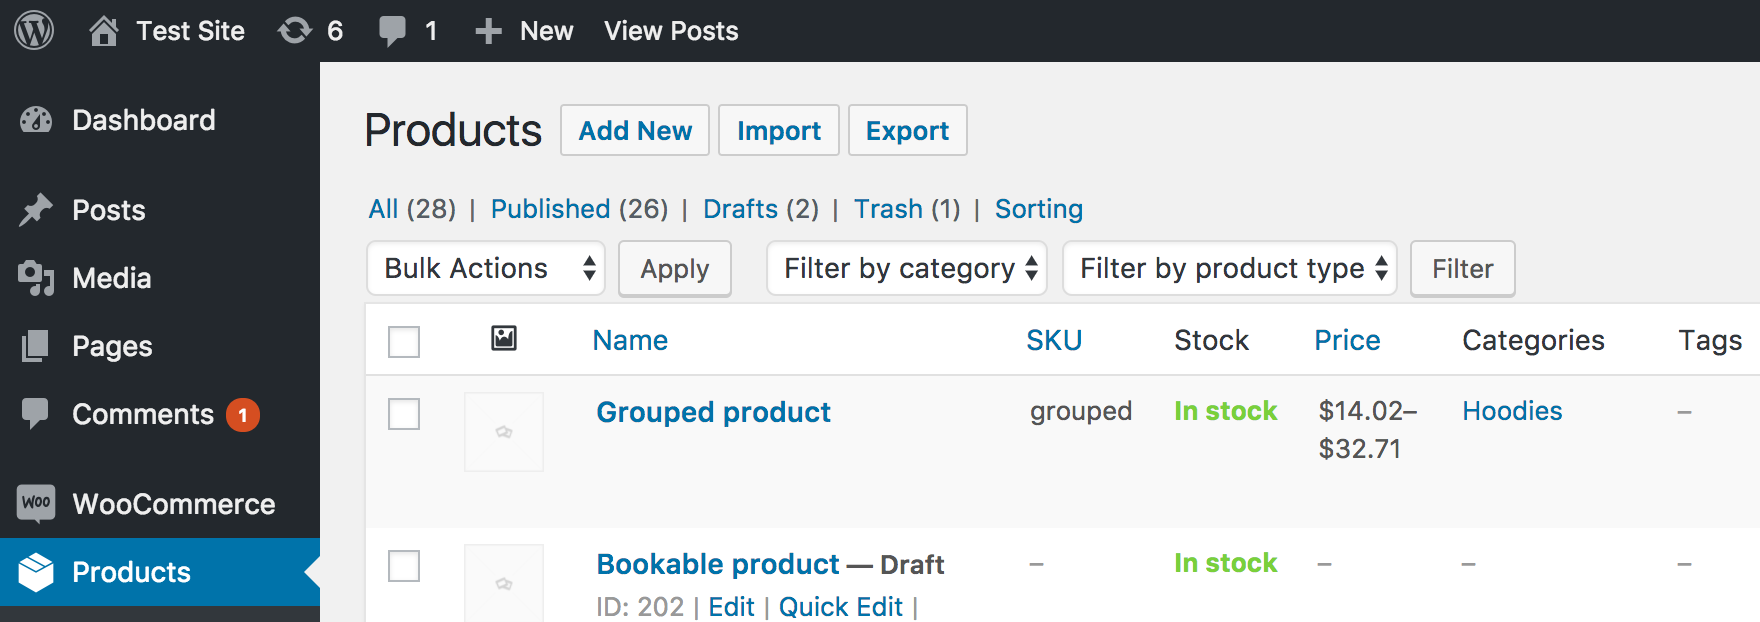
Locate the Import / Export Tool
↑ Back to topThe “Import” and “Export” options are placed right next to the “Add New” Product button.
- First-time store owners get started more quickly by exporting and importing products during setup.
- Existing store owners can update tens or hundreds of products with new info or place them on sale, or sync multiple storefronts.
Create your CSV
↑ Back to topWhat CSV editors do you recommend?
↑ Back to topWe recommend using:
- Online spreadsheet editor Google Drive / Docs
- Free spreadsheet app in OpenOffice
- Free Calc app in LibreOffice
- Numbers for macOS
If possible, avoid Microsoft Excel due to formatting and character encoding issues.
How to create the CSV?
↑ Back to topTo import new products or update existing products, you need a CSV containing your product information. You can:
- Export a CSV of products from an existing store.
- Download a CSV file with sample data from GitHub and replace the sample data with information for your own products.
- Create or bring your own CSV. Any information you wish to import must follow the formatting and columns of the Product CSV Import Schema.
If using the blank and formatted CSV file, it also follows the schema; just be sure to enter the info as instructed at Product CSV Import Schema.
General guidelines
↑ Back to top- CSVs should be in UTF-8 format.
- Dates should be defined for the store’s local timezone.
- Use 1 or 0 in your CSV, if importing a Boolean value (true or false)
- Multiple values in a field get separated with commas.
- Wrapping values in quotes allows you to insert a comma.
- Prefix the id with
id:if referencing an existing product ID. No prefix is needed if referencing a SKU. For example:id:100,SKU101 - Taxonomy term hierarchy is denoted with
>, terms are separated with commas. - Draft products are not exported, only published and privately published products.
- It is not possible to assign a specific post ID to product on import. Products will always use the next available ID, regardless of the ID included in the imported CSV.
Images
↑ Back to top- Images need to be pre-uploaded or available online to import to your store.
- External URLs are supported and imported into the Media Library if used, provided the images are directly accessible and not behind a redirect script (as happens on some cloud storage services).
- You can define the filename if the image already exists in the Media Library.
- The core CSV importer does not currently have the ability to add, edit or update alt text for product images.
Import
↑ Back to topAdding New Products
↑ Back to topFirst-time and existing store owners using WooCommerce can use the CSV to add new products with one upload.
- Go to All Products > Products.
- Select Import at the top. The Upload CSV File screen displays.

- Select Choose File and the CSV you wish you use.
- CSV delimiter (Advanced option): Generally CSV elements are separated by a comma. If you are using a different delimiter in your file, you can set it here.
- Click on the Continue button
- The Column Mapping screen displays, WooCommerce automatically attempts to match or “map” the Column Name from your CSV to Fields.
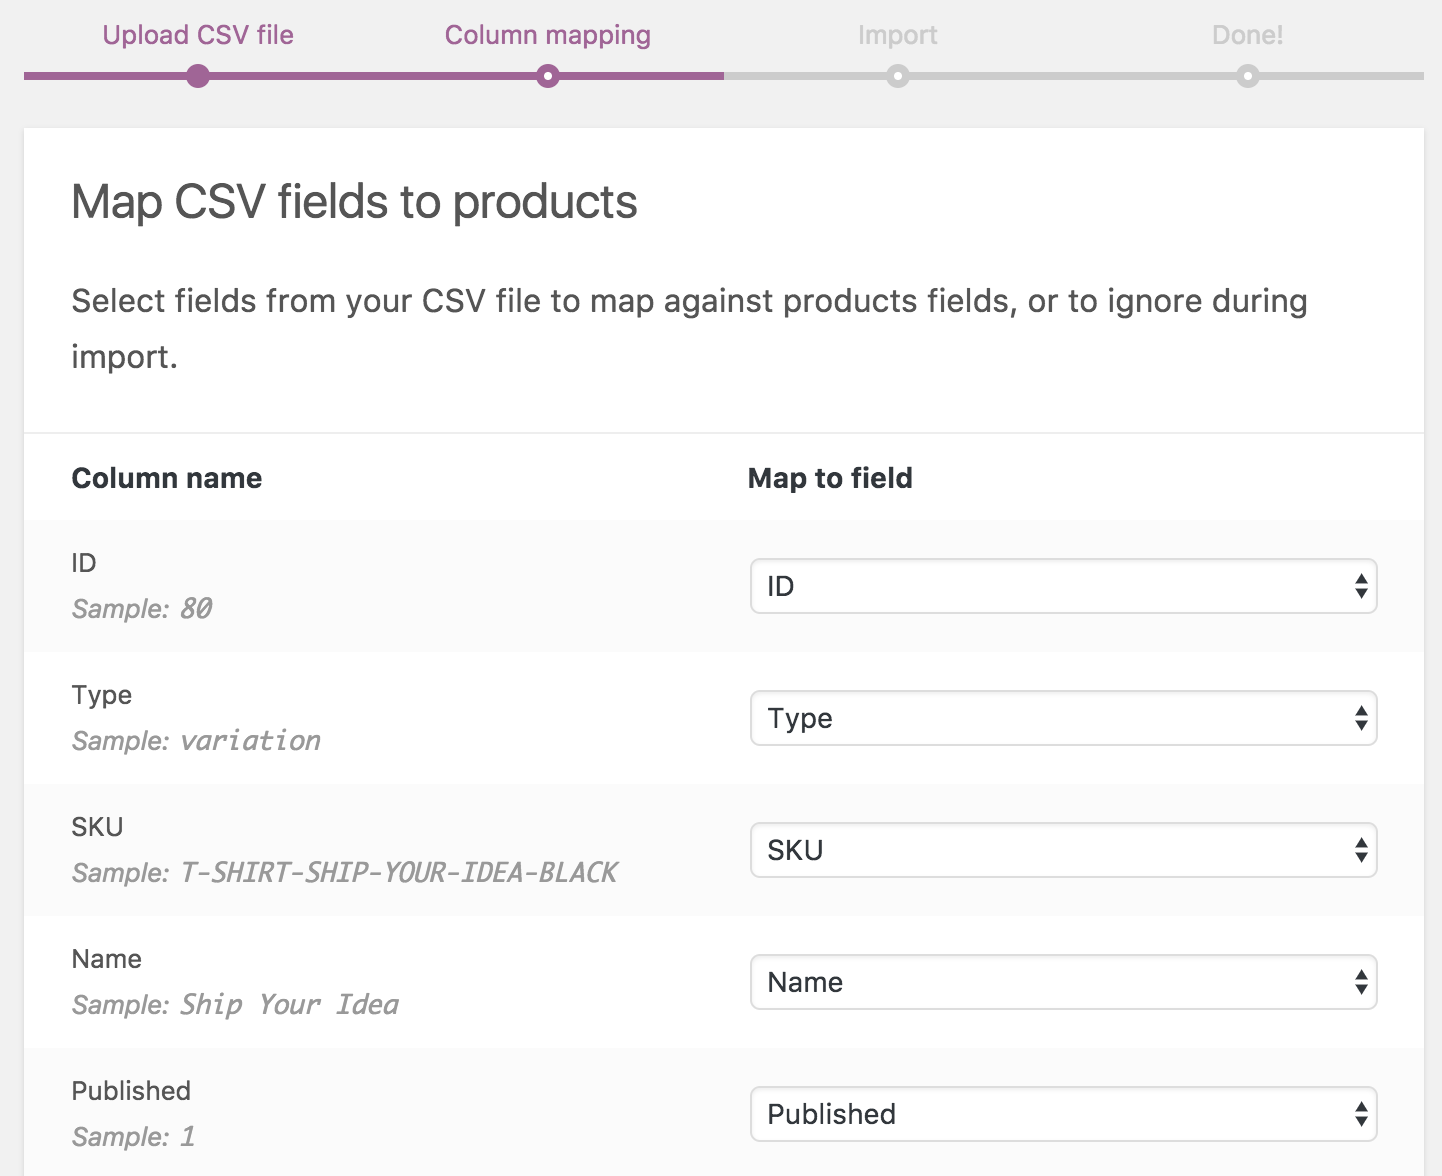
- Use dropdown menus on the right side to adjust fields or indicate ‘Do not import.’
- Any unrecognized columns will not be imported by default.
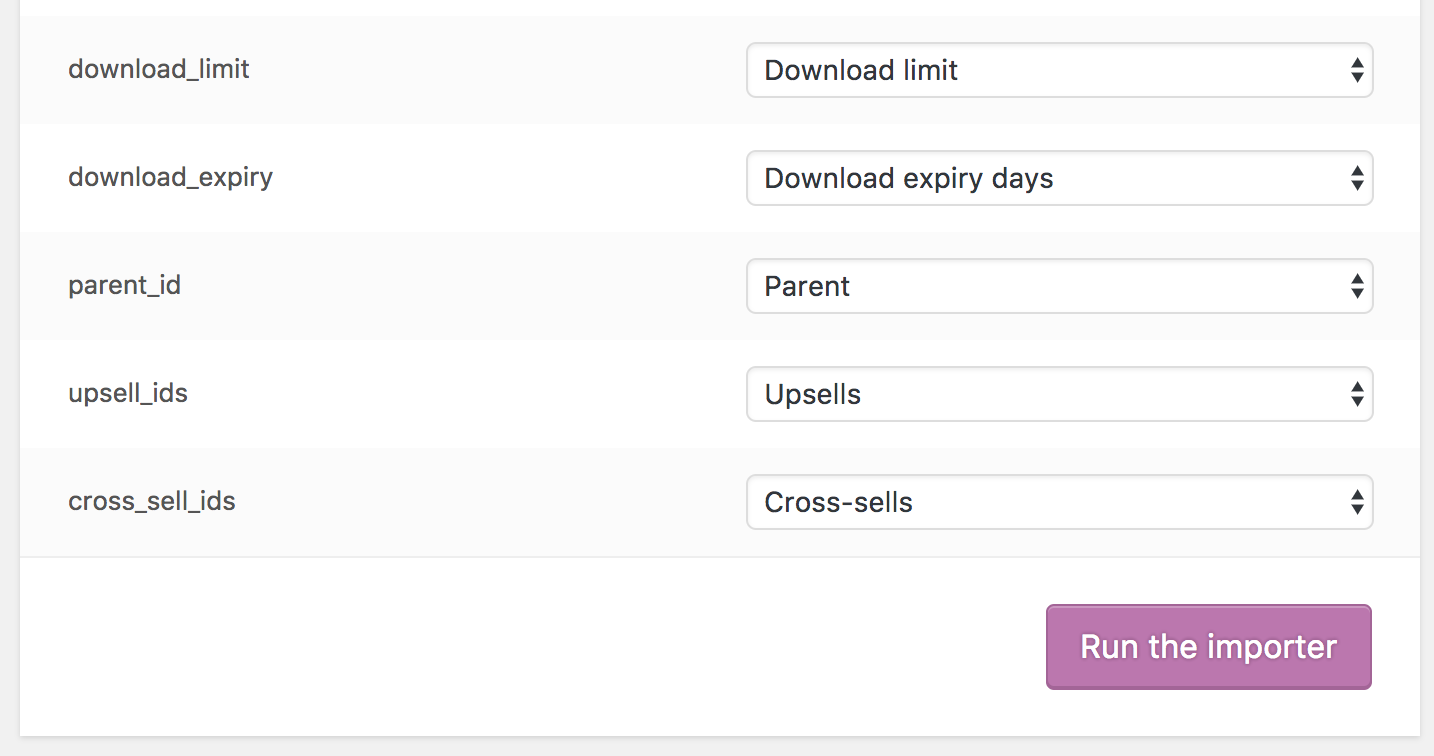
- Once you are ready, click on the ‘Run the Importer‘ button.
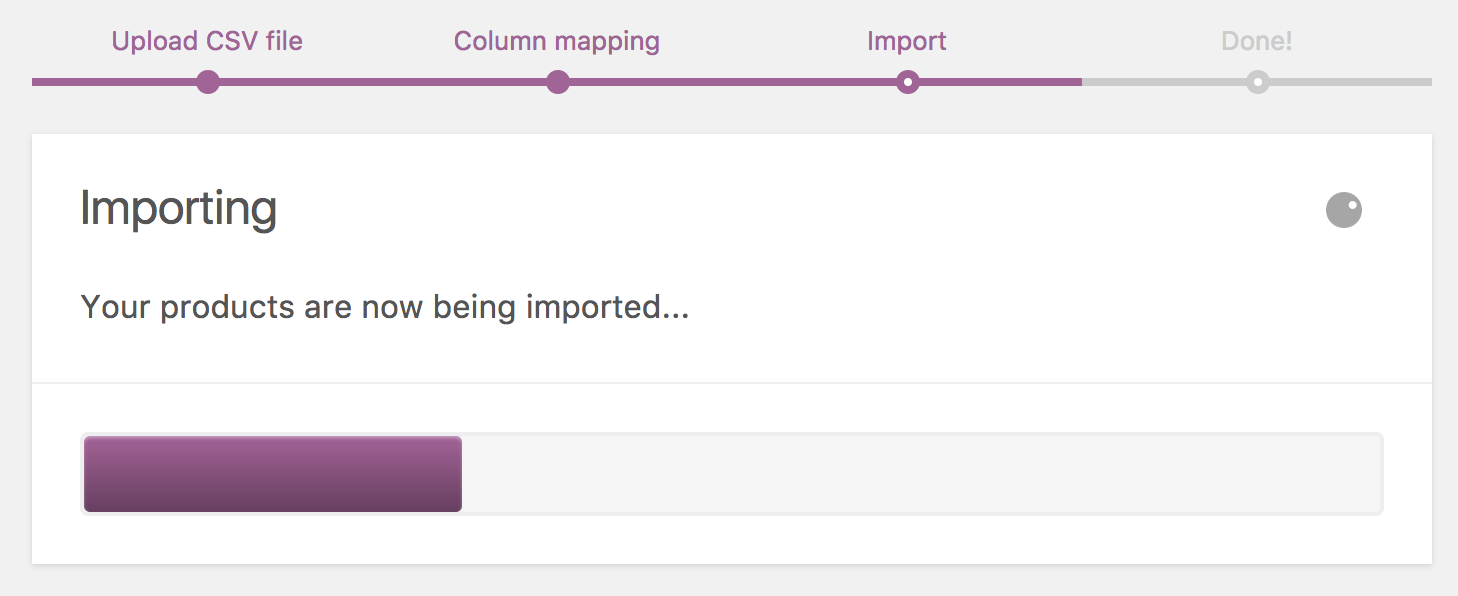
- Wait until the Importer is finished. Do not refresh or navigate away from this page while the import is in progress.
Update Existing Products
↑ Back to topStore owners can use the CSV Importer tool to update existing products with new info, e.g., Adding a brand, changing a tax class, bulk-update for a special sale or event, etc.
- Make a CSV file as indicated in the Create Your CSV section, using the IDs and/or SKUs of products you wish to update. The importer uses the ID and/or SKU from the CSV to match and update products in your shop.
- Navigate to All Products > Products.
- Click on the Import button at the top. The Upload CSV File screen displays.
- Select Choose File and the CSV you wish you use.
- Tick the checkbox to Update Existing Products.

- Click on the Continue button.
- The Column Mapping screen displays and WooCommerce automatically attempts to match or “map” the Column Name from your CSV to Fields.
- Use dropdown menus on the right side to adjust fields or indicate ‘Do not import.‘
- Any unrecognized columns will not be imported by default.
- Click on the Run the Importer button.
- Wait until the Importer is finished. Do not refresh or navigate away from this page while the import is in progress.
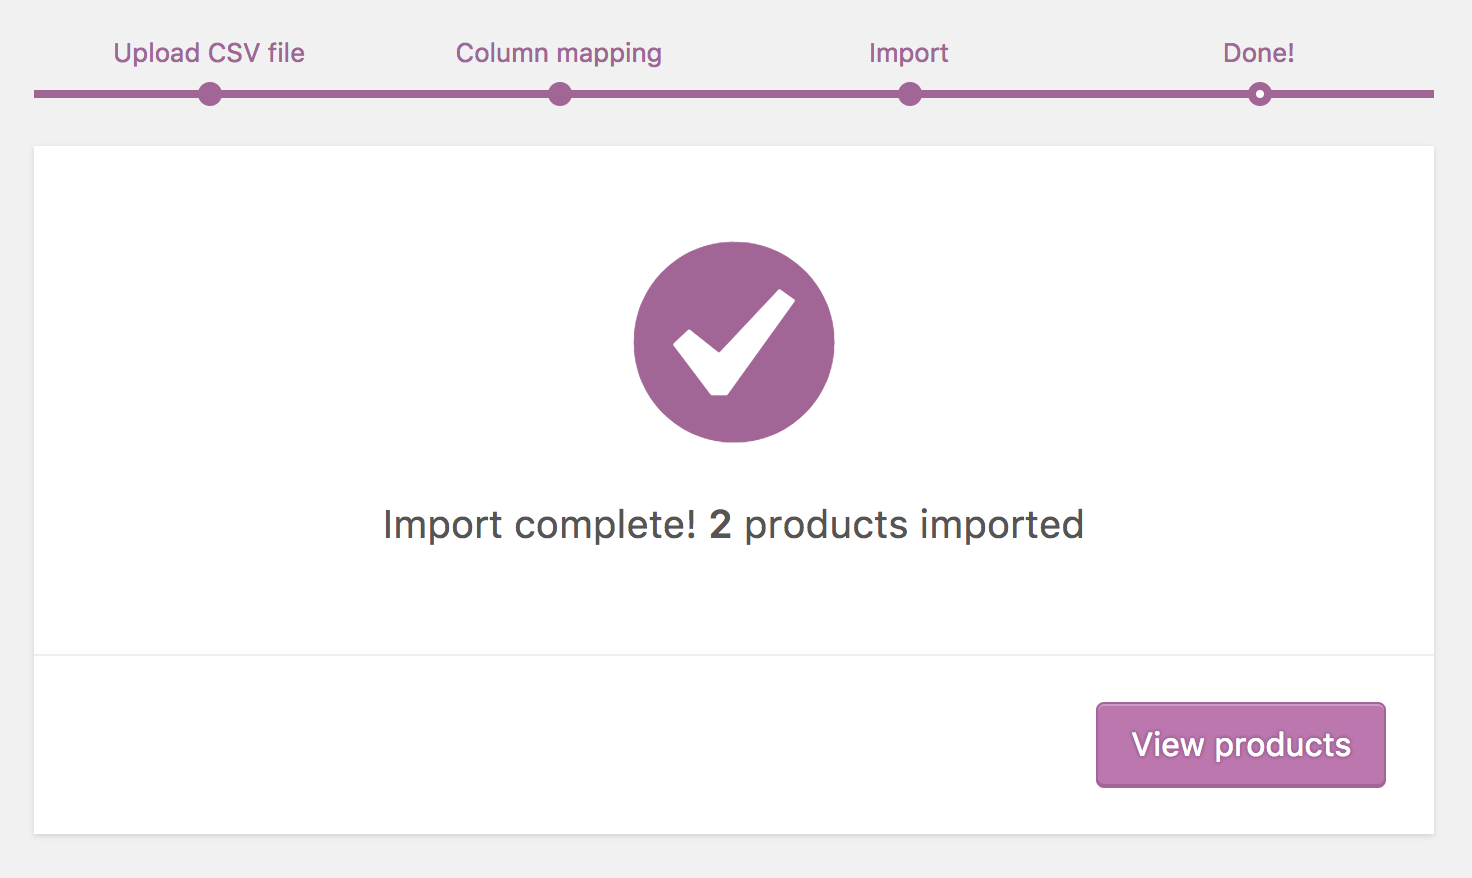
Your product import is complete!
Converting existing Simple Product to Variable Product
↑ Back to topStore owners can use the CSV Importer tool to convert an existing simple product to a variable product. To do so, follow the below steps:
- Create a simple product that has a price and SKU.
- Export product via built-in CSV Exporter on the
All Productspage. - Open the CSV file and convert the simple product to a variable by following the below steps:
In this example, we will convert a simple product into a variable product with 1 attribute (size) and 2 variations:
- Add 2 new rows, one for each product variation. Leave the initial product’s row in place.
- Add 4 new columns after the last column. Give the columns the following headings :
Attribute 1 nameAttribute 1 value(s)Attribute 1 visibleAttribute 1 global
- Add
Sizefor the three rows in theAttribute 1 namecolumn. - Add the attribute values in the
Attribute 1 value(s)column- In the row for the simple product, add all available attribute values. In this example we’ve added
S, Mas attribute values for the product. - In the first new variation’s row, add
Sas the attribute value. - In the second new variation’s row, add
Mas the attribute value.
- In the row for the simple product, add all available attribute values. In this example we’ve added
- Enter
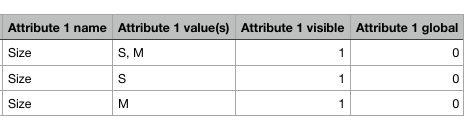
1for each row in theAttribute 1 visiblecolumn. This is marking the attribute as visible. - Enter
0for each row in theAttribute 1 globalcolumn. This is marking theIs attribute global?fieldfalseand means the attribute will only be added to this variable product, and won’t be created globally for reuse on other products.
So far our new 4 columns look as follows:
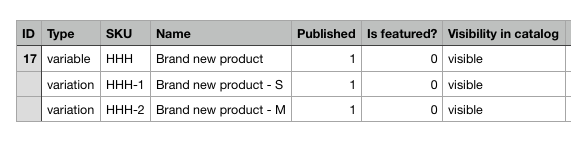
- In the
Typecolumn, change the type of the product fromsimpletovariableand add typevariationto variation rows (2 new rows that you created). - Add a SKU to variation rows.
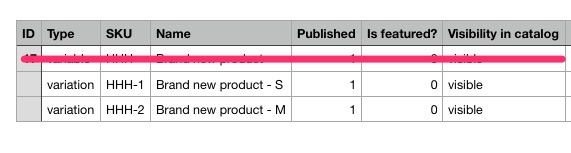
- Give the new variations a name as well. It looks like this in our example:
- Update the other columns as well (and any other columns if needed):

- Important: Add a SKU to all variation rows in the
Parentcolumn – this is to map the parent product with its variations:

- Save a new CSV file.
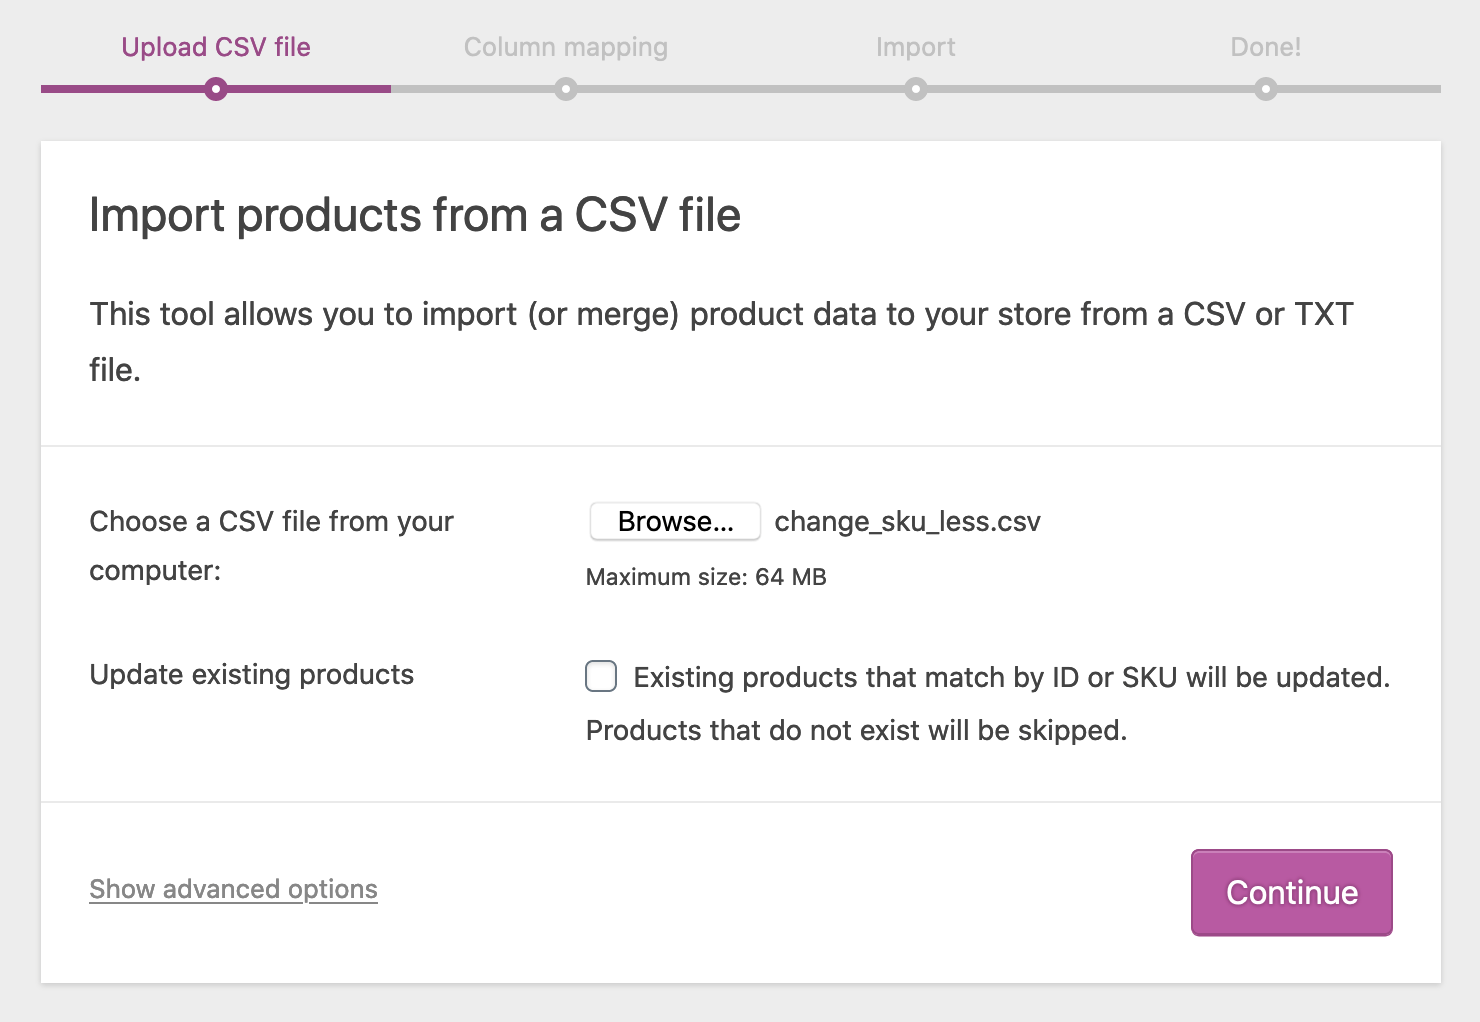
- Import the updated CSV file back to the site using the built-in CSV Importer
- Select to update existing products option before running the import since we want to update the existing product on the site:
- Click on the “Continue” button to proceed with import (nothing to be mapped).
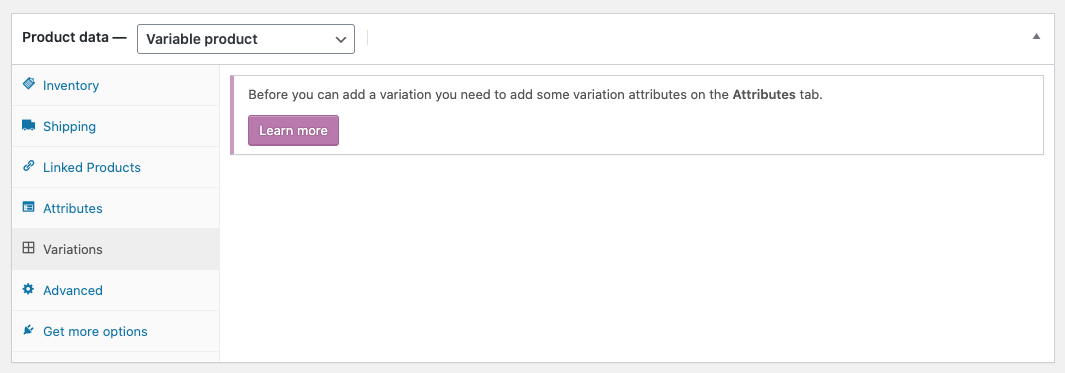
- You will see the following which is expected:
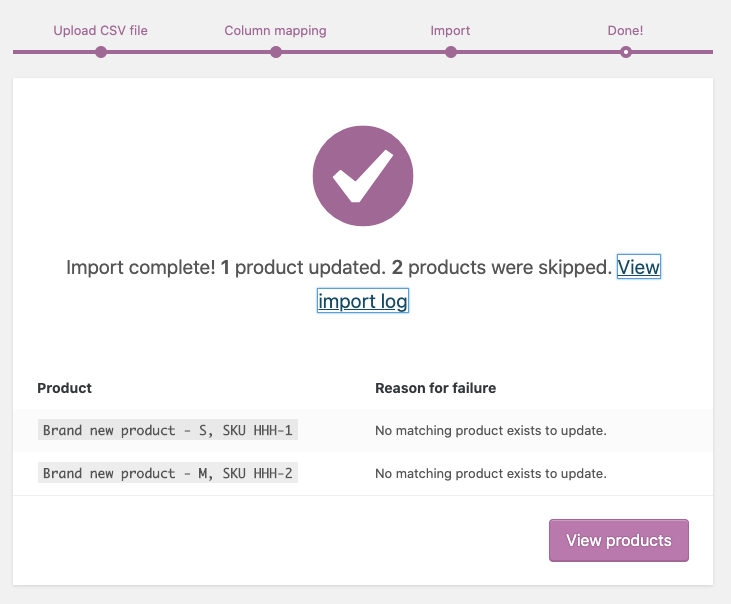
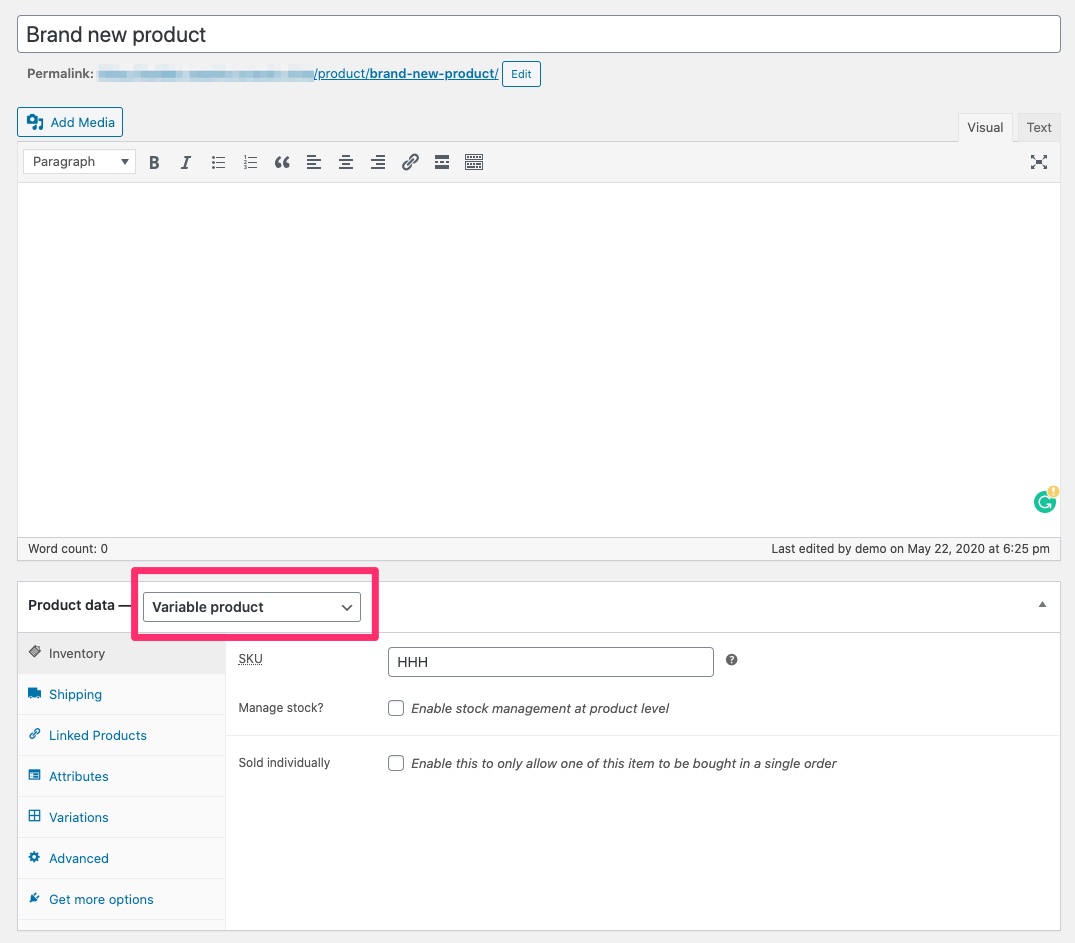
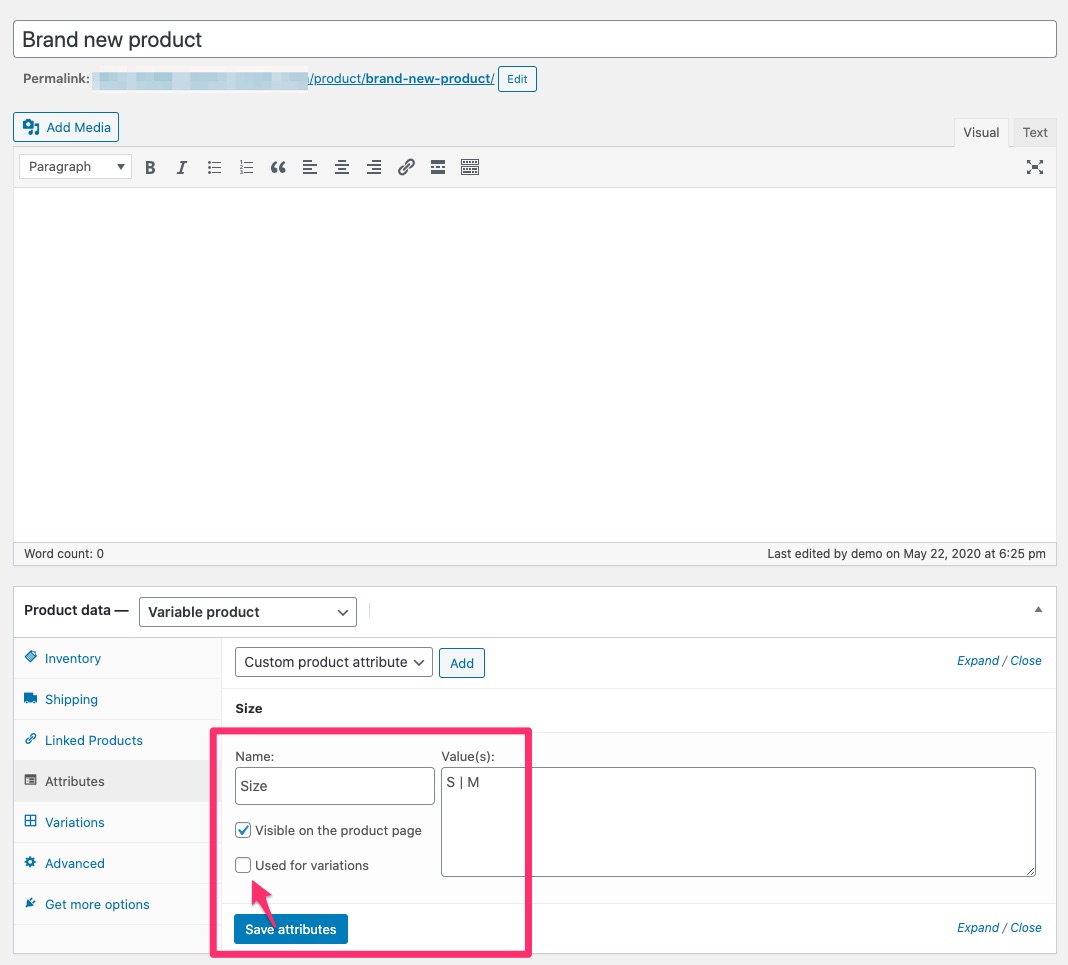
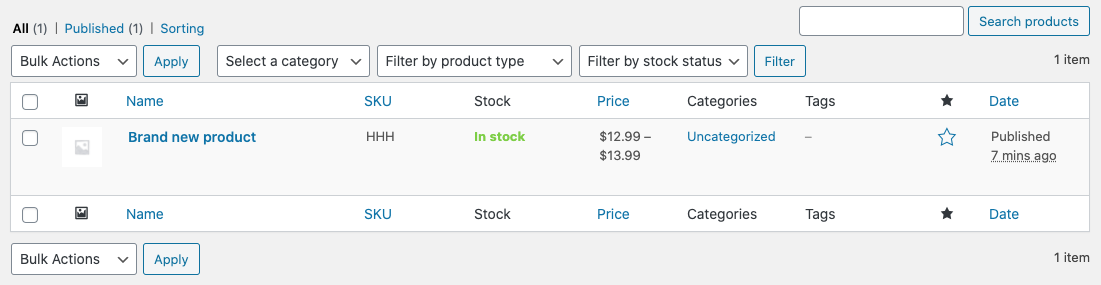
- Navigate to the product. You will see that it is now variable and has 1 attribute added but no variations were created. Note that
Used for variationscheckbox is not selected. This is also expected:
- Open the CSV file again (the one where you already created rows for variations) and delete the parent product row. Leave variations rows without changes:

- Save the updated CSV file.
- Next, import the updated CSV file to the site but this time don’t select the box next to
Update existing products:
- Proceed with import (no fields need to be mapped). You should see that variations have been imported:

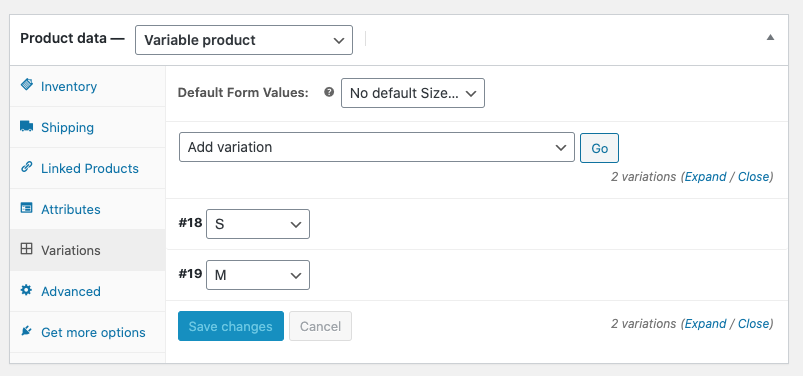
- After the import is completed, navigate to the product. It will now be a variable product with variations:
Export
↑ Back to topStore owners wishing to export their current catalog of products for any reason can generate a CSV export using the built in Product Importer/Exporter tool.
- Navigate to All Products > Products.
- Click on the Export button at the top. The Export Products screen will be displayed.
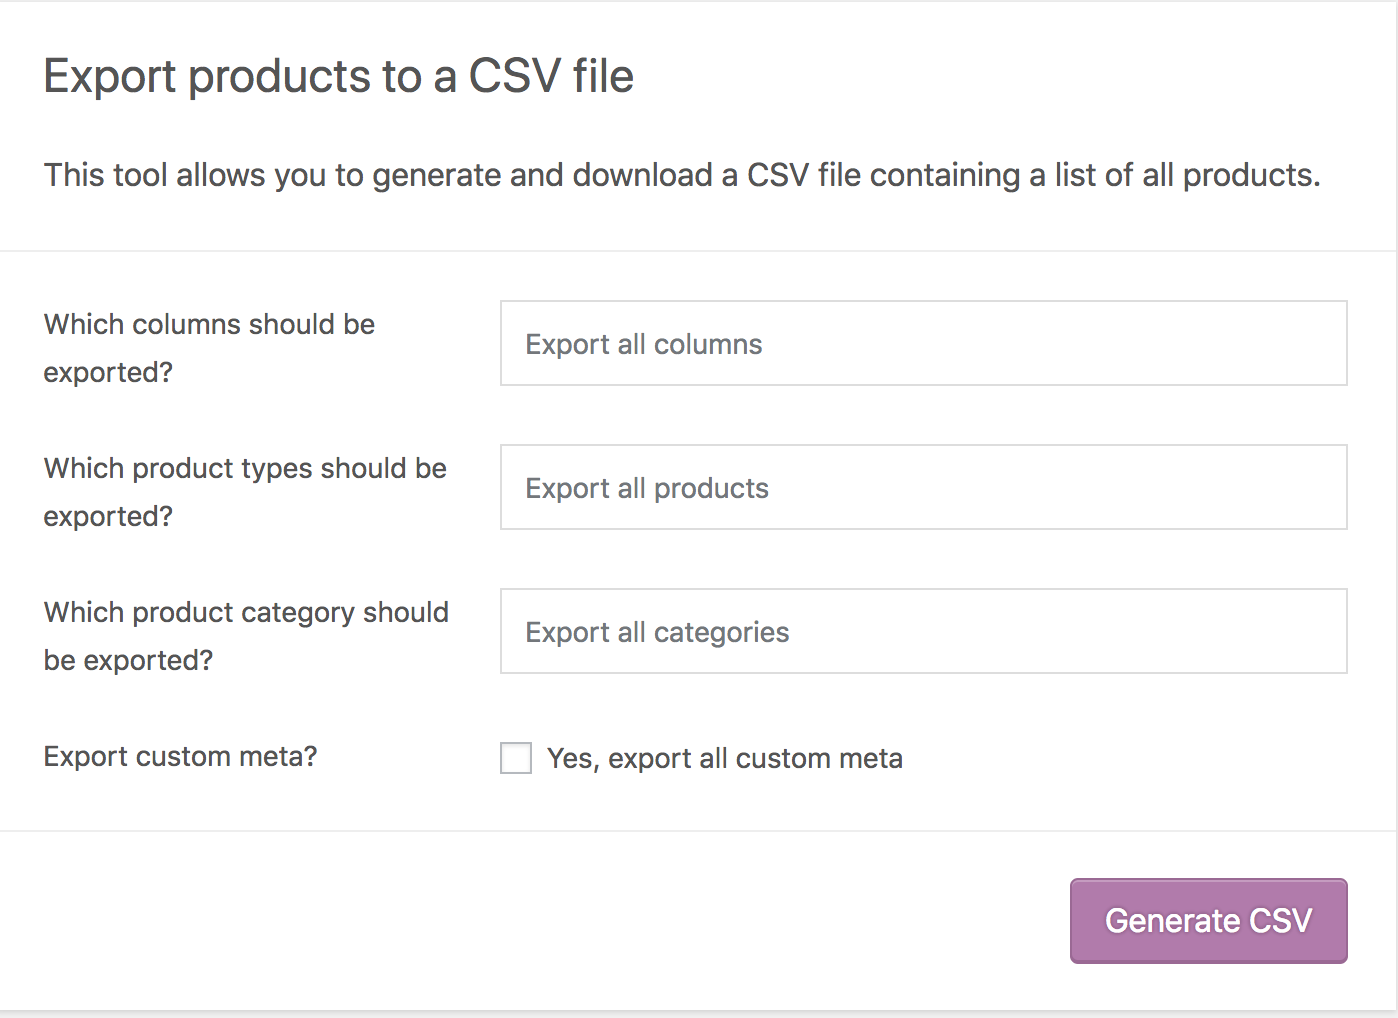
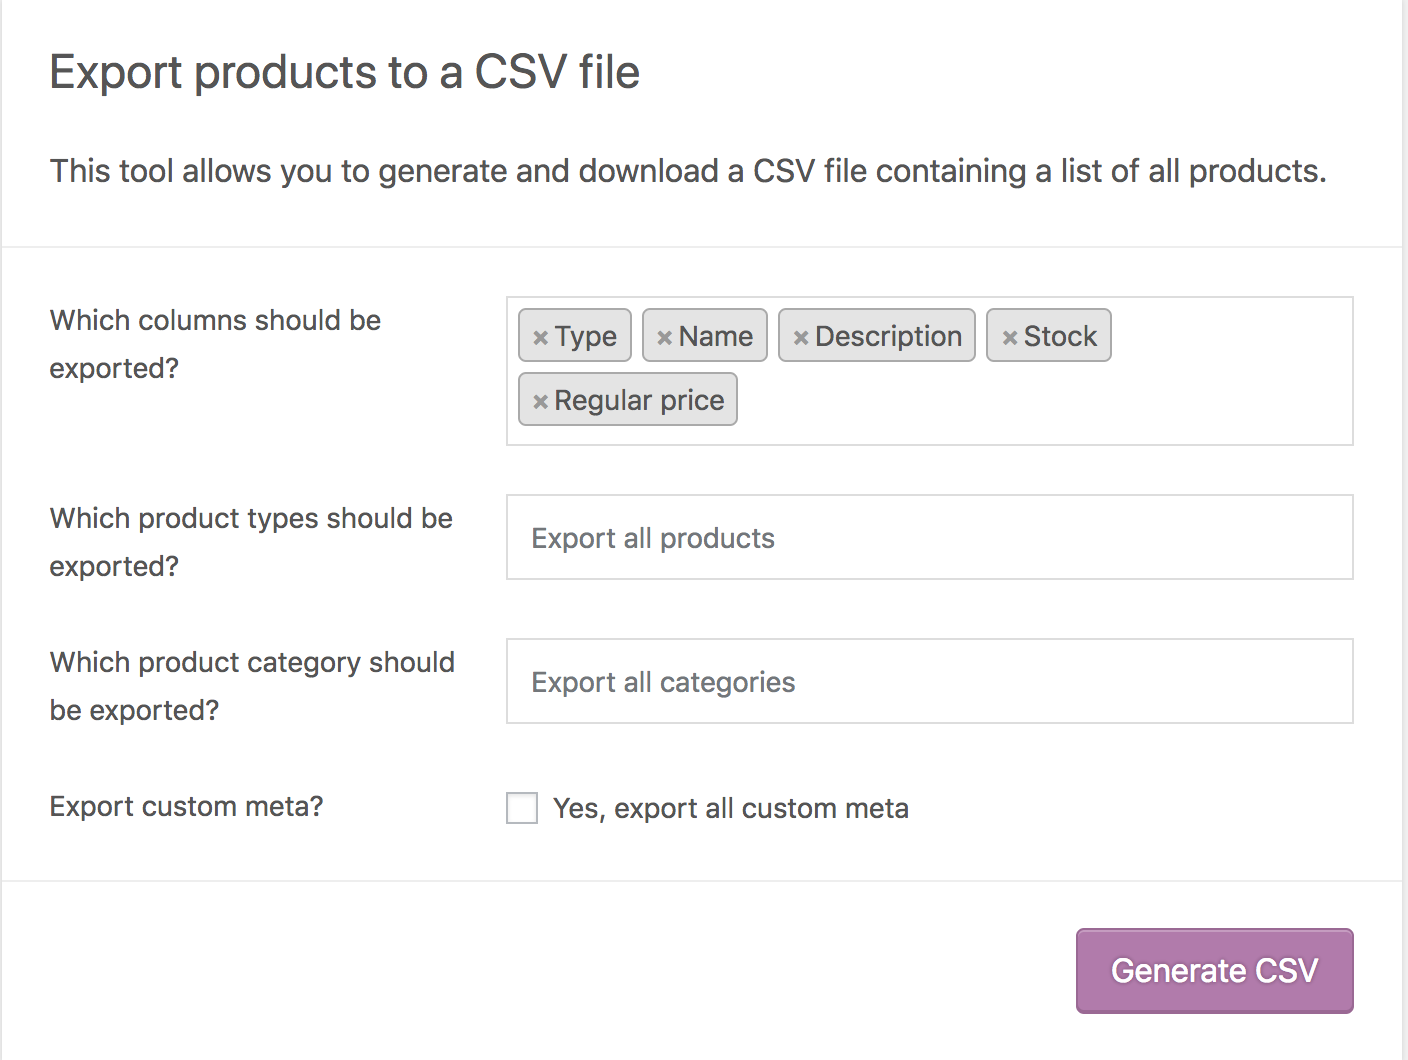
- Select to Export All Columns. Or select which columns to export by using the dropdown menu.
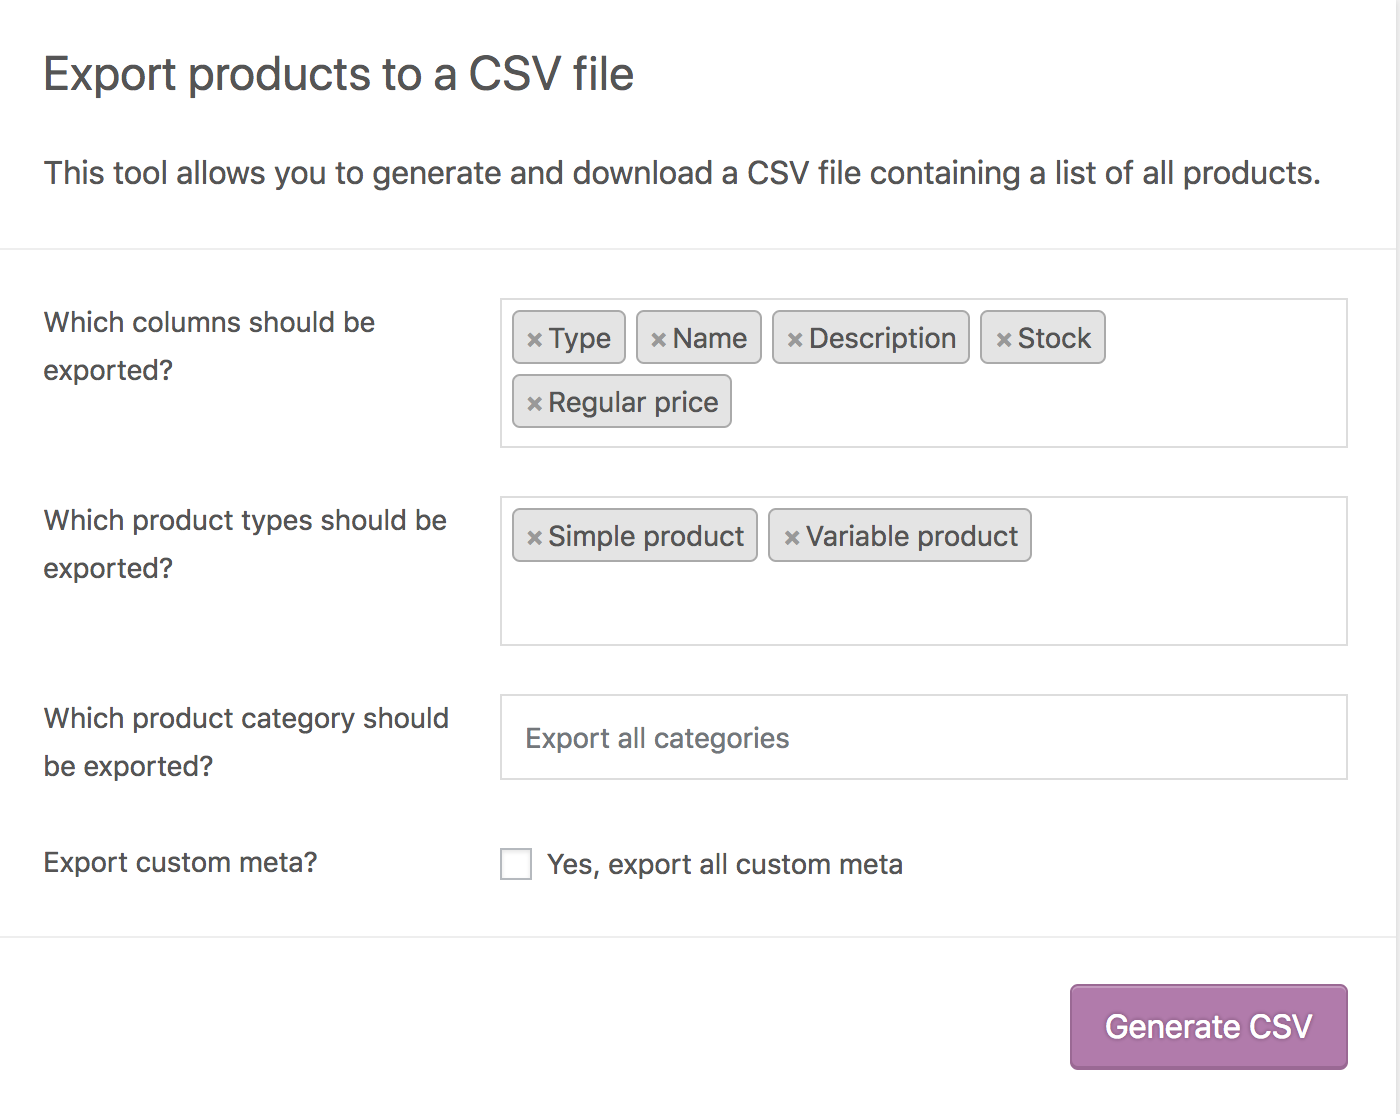
- Select to Export All Products. Or select which product types to export by using the dropdown menu.
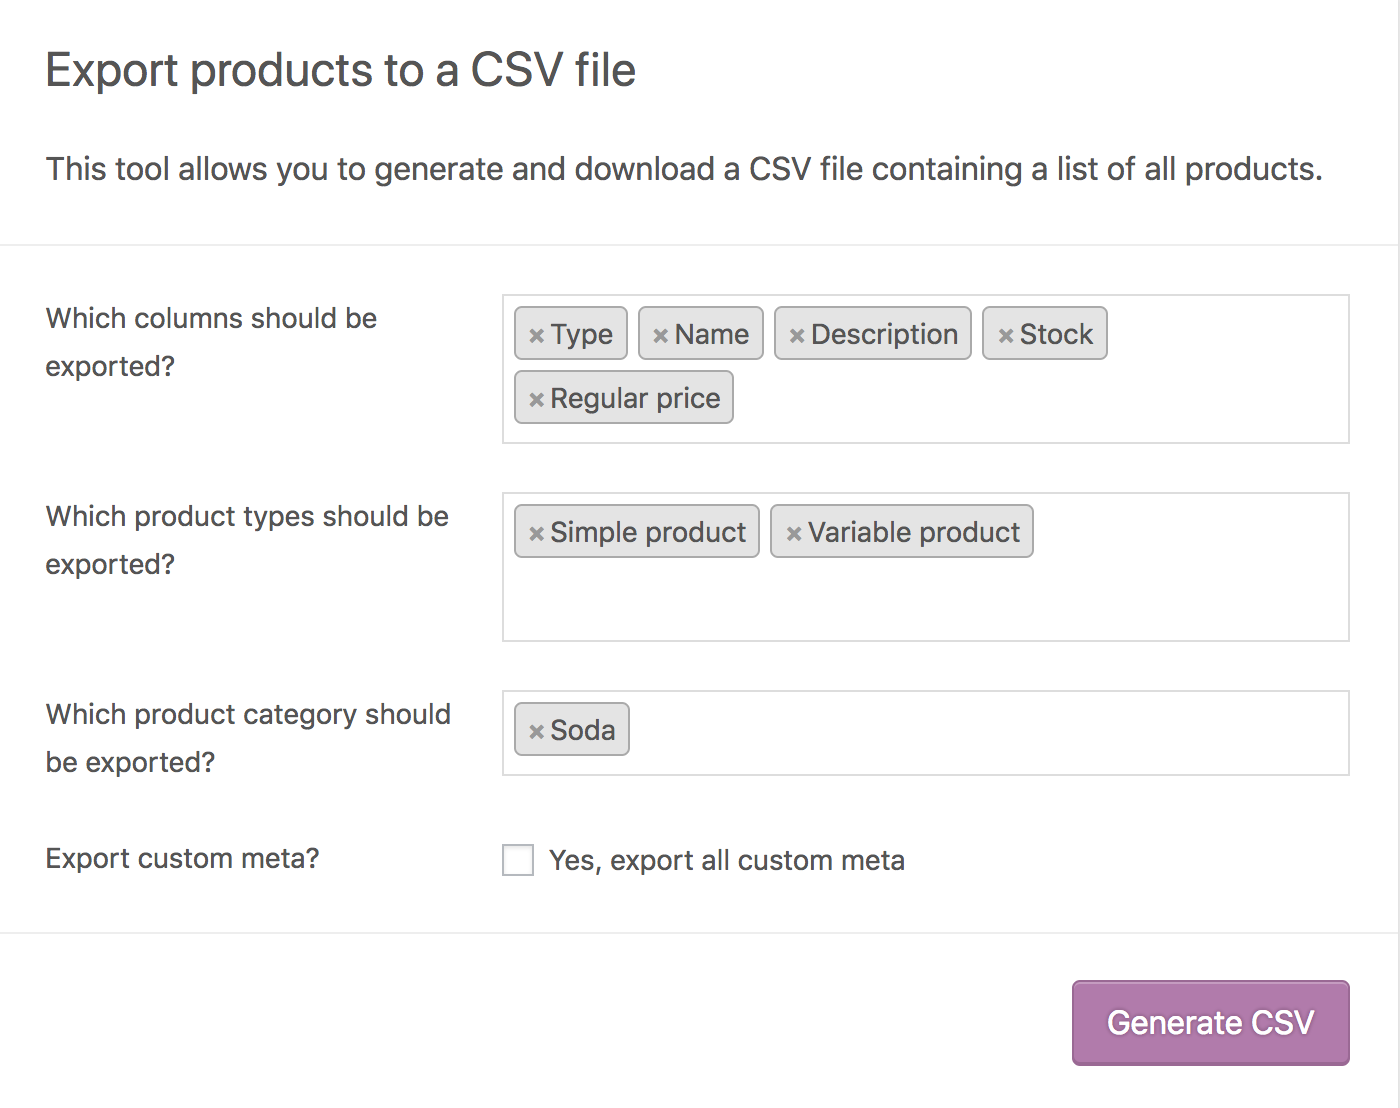
- Select to Export All Categories. Or select which categories to export by using the dropdown menu.
- Tick the box to Export Custom Meta, if you need this info. Metadata on your products is typically from other plugins. Metadata columns are exported with
meta:-prefixed to the metadata. For example, if you have metadata under the “product_depth” key, a column namedmeta:product_depthwill be exported with those values. By default, no additional metadata is exported. - Click on the Generate CSV button and wait for the export to finish.

Your products are exported and the CSV will be downloaded by your browser
Product CSV Import Schema
↑ Back to topThis is the schema used for the built-in CSV importer and exporter in WooCommerce. You can review the schema in full-page on our GitHub repository.
| CSV Column Name | Maps to product property | Example | Notes |
|---|---|---|---|
ID | id | 100 | Defining this will overwrite data for that ID on import. |
Type | type | simple, variation, virtual | Product Type. Valid values: simple, variable, grouped, external, variation, virtual, downloadable. Multiple types can be used CSV separated. |
SKU | sku | my-sku | Required. Auto-generated if missing. |
Name | name | My Product Name | Required. |
Published | status | 1 | 1 for published, 0 for private, -1 for draft. |
Is featured? | featured | 1 | 1 or 0 (1 for true, 0 for false) |
Visibility in catalog | catalog_visibility | visible | Supported values: visible, catalog, search, hidden |
Short description | short_description | This is a product. | |
Description | description | This is more information about a product. | |
Date sale price starts | date_on_sale_from | 2013-06-07 | Date (start of day) or leave blank. |
Date sale price ends | date_on_sale_to | 2013-06-07 | Date (end of day) or leave blank. |
Tax status | tax_status | taxable | Supported values: taxable, shipping, none |
Tax class | tax_class | standard | Can use any existing tax class. |
In stock? | stock_status | 1 | 1 or 0 (1 for true, 0 for false) |
Stock | manage_stock / stock_quantity | 20 | Numeric stock level enables stock management. parent can be used for variations. Blank = no stock management. |
Low stock amount | low_stock_amount | 3 | Empty or a number |
Backorders allowed? | backorders | 1 | 1, 0, or notify (1 for true, 0 for false) |
Sold individually? | sold_individually | 1 | 1 or 0 (1 for true, 0 for false) |
Weight (unit) | weight | 100 | Parse only numbers. |
Length (unit) | length | 20 | Parse only numbers. |
Width (unit) | width | 20 | Parse only numbers. |
Height (unit) | height | 20 | Parse only numbers. |
Allow customer reviews? | reviews_allowed | 1 | 1 or 0 (1 for true, 0 for false) |
Purchase Note | purchase_note | Thanks for buying it buddy. | |
Sale price | sale_price | 20.99 | Sale price. |
Regular price | regular_price | 24.99 | Regular price. |
Categories | category_ids | Category 1, Category 1 > Category 2 | CSV list of categories. > used for hierarchy. |
Tags | tag_ids | Tag 1, Tag 2 | CSV list of tags. |
Shipping class | shipping_class_id | Name | Name of shipping class |
Images | image_id / gallery_image_ids | http://somewhere.com/image.jpg, http://somewhere.com/image2.jpg | First is the featured image. |
Download limit | download_limit | 1 | n/a or a limit. |
Download expiry days | download_expiry | 1 | n/a or a day limit. |
Parent | parent_id | id:100, SKU-1 | Set parent ID. Used for variations. Can be just a numeric ID e.g. id:100 or a SKU. Export will use SKU when possible. |
Grouped products | children | id:100, id:101, SKU-1, SKU-2 | List of IDs. Can be just a numeric ID e.g. id:100 or a SKU. Export will use SKU when possible. |
Upsells | upsell_ids | id:100, id:101, SKU-1, SKU-2 | List of IDs. Can be just a numeric ID e.g. id:100 or a SKU. Export will use SKU when possible. |
Cross-sells | cross_sell_ids | id:100, id:101, SKU-1, SKU-2 | List of IDs. Can be just a numeric ID e.g. id:100 or a SKU. Export will use SKU when possible. |
External URL | product_url | https://mercantile.wordpress.org/product/wordpress-pennant/ | Product external URL. |
Button text | button_text | Buy on the WordPress swag store! | Custom product “buy” button. |
Position | menu_order | 1 | Menu order, used for sorting. |
Attribute 1 name | attributes | Color | Looks for global attribute or uses text if not found. Include as many as needed. “Used for variations” is set automatically. |
Attribute 1 value(s) | attributes | Blue, Red, Green | List of values. Variations only need 1 value. First is used if multiple get provided. |
Attribute 1 default | default_attributes | Blue | Default value for variable products. |
Attribute 1 visible | attributes | 1 | 1 or 0. (1 for true, 0 for false) Mapping screen labels this as “Attribute Visibility” |
Attribute 1 global | attributes | 1 | 1 or 0. (1 for true, 0 for false) Mapping screen labels this as “Is a global attribute?” |
Download 1 name | downloads | Download 1 | |
Download 1 URL | downloads | url.zip |
FAQ
↑ Back to topIs it possible to add custom import columns?
↑ Back to topYes. Feel free to visit the WooCommerce repo at GitHub to see the custom code at Adding Custom Import Columns. Be aware that is Developer level info for which we provide no assistance under our Support Policy.
Is it possible to add custom export columns?
↑ Back to topYes. Feel free to visit the WooCommerce repo at GitHub to see the custom code at Adding Custom Export Columns. Be aware that this is Developer level info for which we provide no assistance under our Support Policy.
Why aren’t all my products exported?
↑ Back to topPrevious to WooCommerce 3.6.5, only products with a status of ‘publish’ or ‘private’ were exported, not those in ‘draft.’ If you want to change that, there’s a filter you can use, but this would require custom coding, which we can’t provide assistance with.
If you’re using the current version of WooCommerce and all your products aren’t exporting, check your WooCommerce logs for error messages. It may be that a plugin conflict is causing an error.
Why aren’t all of my products imported?
↑ Back to topPrevious to WooCommerce 3.6.5, only products with a status of ‘publish’ or ‘private’ were imported, not those in ‘draft.’ As of WooCommerce 3.7, CSV product import now allows true/false values for the published field, as well as the original 0 (private), -1 (draft), 1 (publish) values.
If you’re using the current version of WooCommerce and all your products aren’t importing, check the import log for error messages. It may be that a product already exists with the SKU you’re trying to use, a plugin conflict could be causing an error, or you may need to split your csv into smaller files for your server to handle the import successfully.
Permission error when importing?
↑ Back to topAre you seeing the following permission error when importing your CSV file?Sorry, this file type is not permitted for security reasons.
When an import file contains HTML the file type can be mis-detected by WordPress on some servers. One workaround is to add the following line to your wp-config.php file:define( 'ALLOW_UNFILTERED_UPLOADS', true );
For security reasons, you should only enable this temporarily for the duration of the import, and then remove it again from the configuration file.
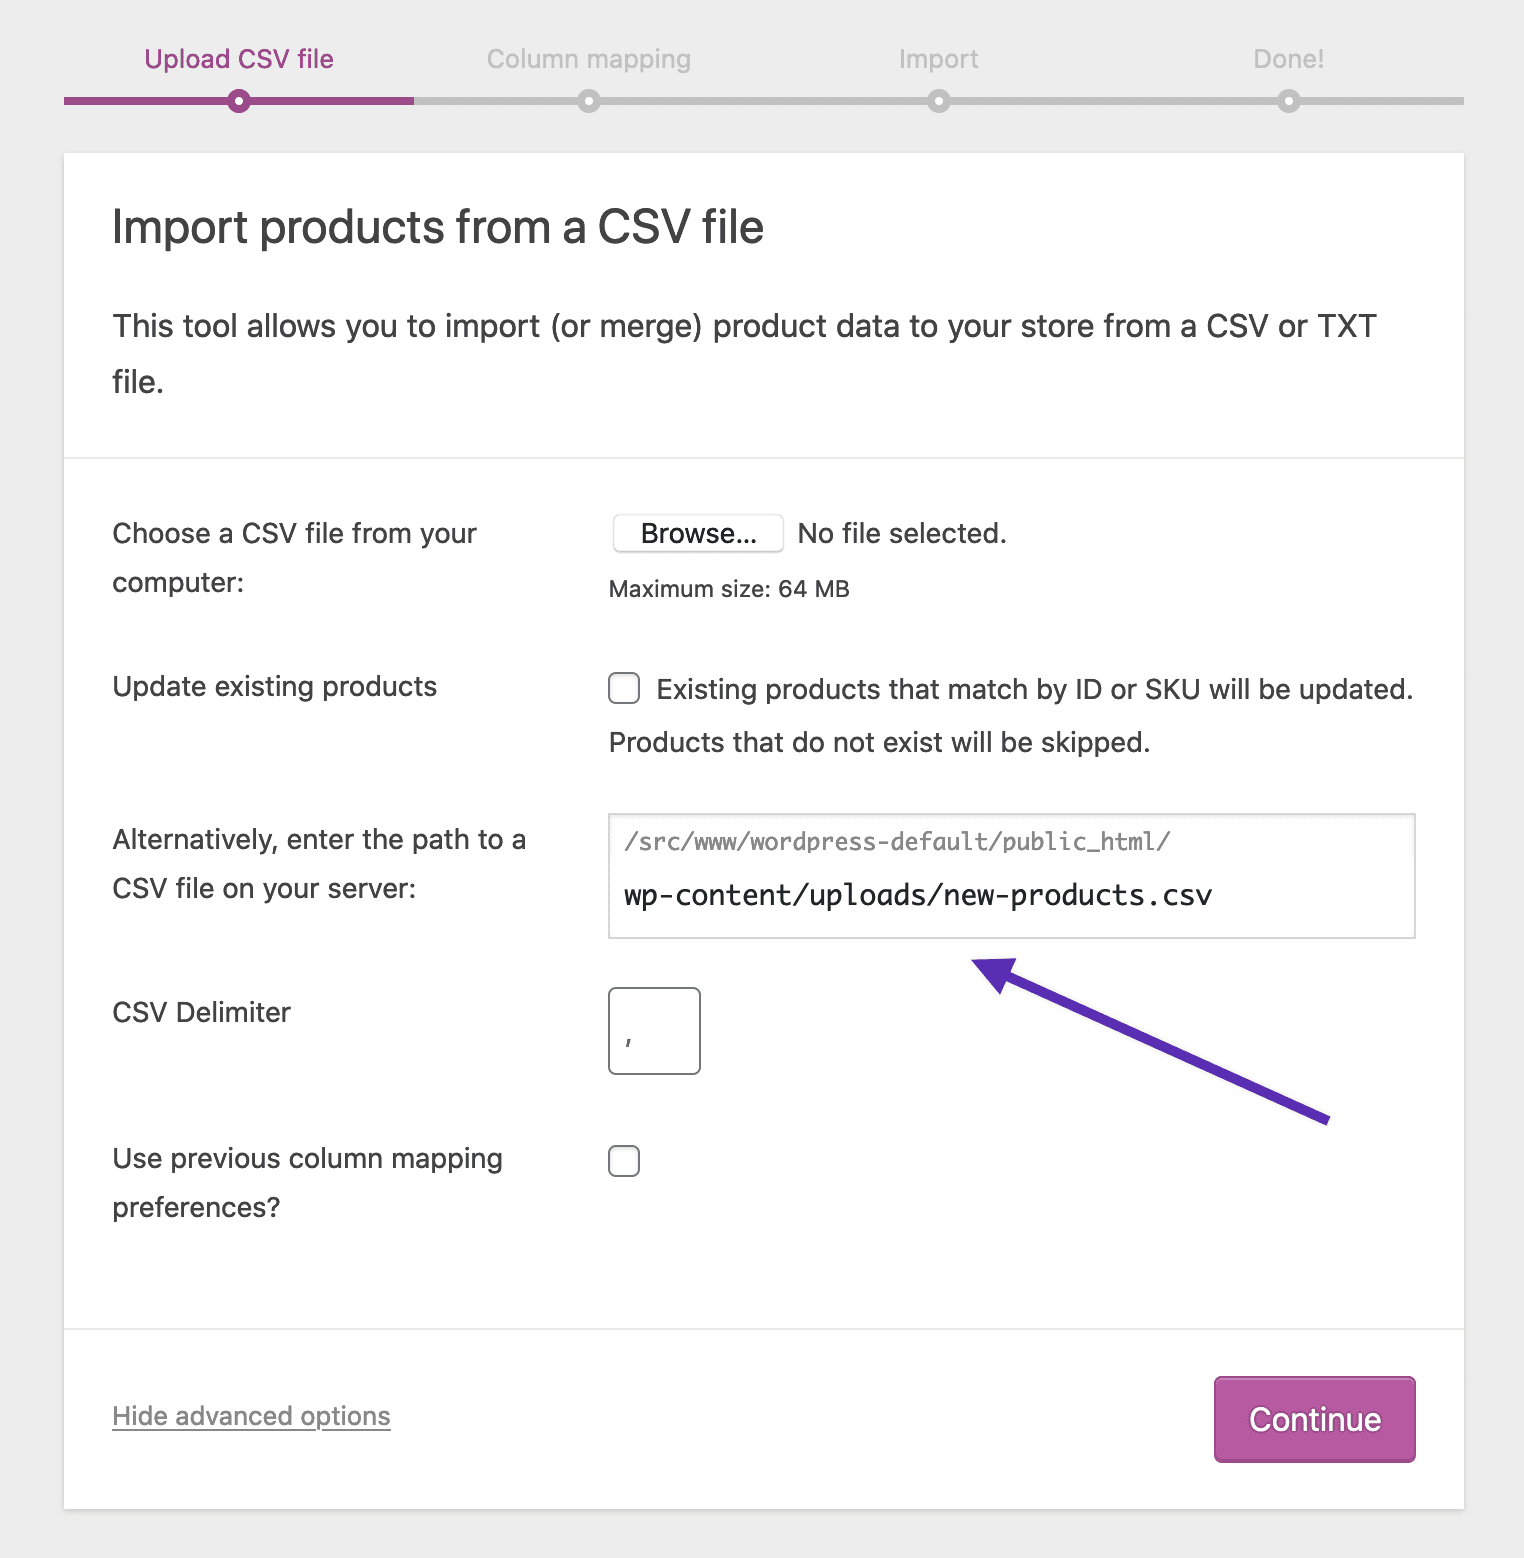
Alternatively, instead of Choose a CSV file from your computer, you can first upload the CSV file to your website’s upload directory via FTP or your host’s admin panel file manager. Then, via Advanced Options, specify the location of that file for upload:
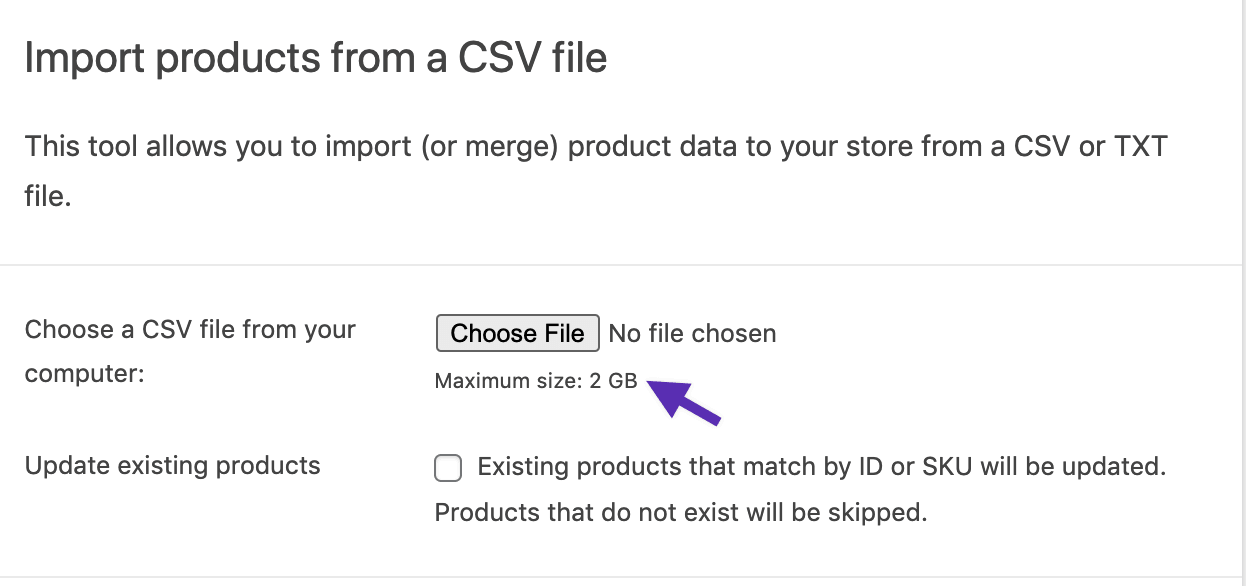
How to increase the CSV import maximum size?
↑ Back to topThe Maximum size value is set at the server level. To increase the maximum file size, please contact your hosting company. As a workaround, you can split the CSV into multiple parts to upload separately.
How to import a large product database?
↑ Back to topWhen stores need to import a large number of products, the performance of your server becomes crucial. To ensure a smooth import process when using a CSV file, consider breaking it into smaller batches. This reduces the chances of errors and allows for easier troubleshooting if issues occur.
For handling extensive imports, we recommend using the Product CSV Import Suite. This extension supports the import of thousands of products, including complex ones and custom data from extensions like Product Vendors, Brands, Google Product Feed, and more.
Questions and Support
↑ Back to topDo you still have questions and need assistance?
This documentation is about the free, core WooCommerce plugin for which support is provided in our community forums on WordPress.org. Searching there you’ll often find that your question has been asked and answered before.
If you haven’t created a WordPress.org account to use the forums, here’s how.
- If you’re looking to extend the core functionality shown here, we recommend reviewing available extensions in the Woo Marketplace.
- Need ongoing advanced support, or a customization built for WooCommerce? Hire a WooExpert agency.
- Are you a developer building your own WooCommerce integration or extension? Check our Developer Resources.
If you weren’t able to find the information you need, please use the feedback thumbs below to let us know! 🙏