Before you get started, please make sure to set up a business account with Pinterest:
https://business.pinterest.com/en/creating-your-account
Getting started
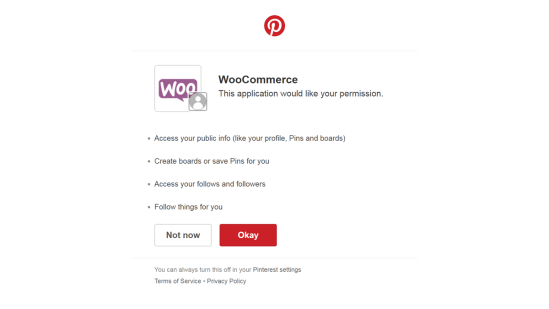
↑ Back to top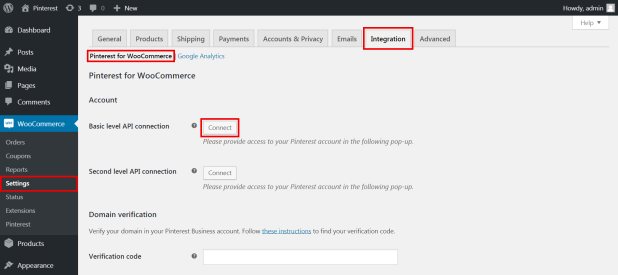 You’ll be redirected to WooCommerce application permission pop-up. Click ‘Okay’.
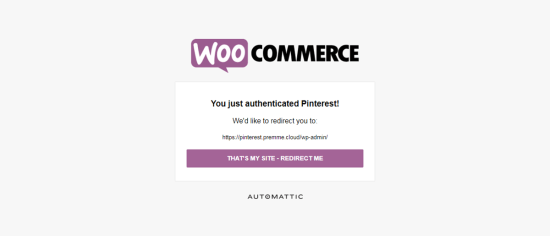
 When you see a message from WooCommerce about authentication of Pinterest, click the button ‘THAT’S MY SITE – REDIRECT ME’:
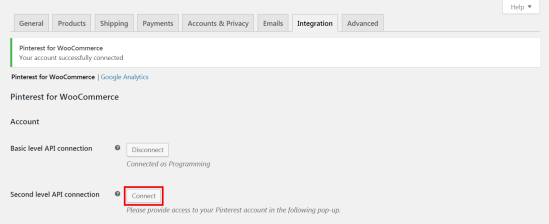
 To access the domain verification and analytics, you will need to connect to the Second Level API Connection for Pinterest:
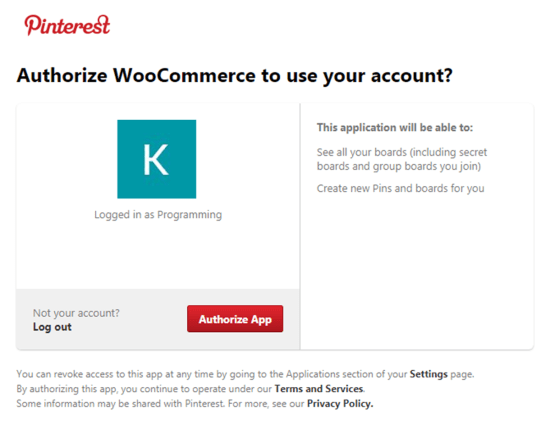
 When Pinterest will ask you for authorization, click ‘Authorize App’:
 In the redirection window, click ‘THAT’S MY SITE – REDIRECT ME’:
Domain verification
↑ Back to top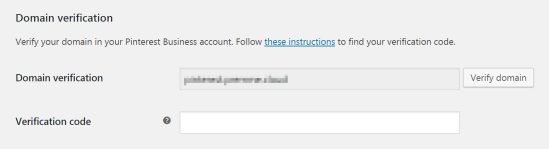 If automatic verification doesn’t work, please follow manual step by step setup to claim your website:
- Log in to Pinterest from a web browser.
- Go to ‘Settings’.

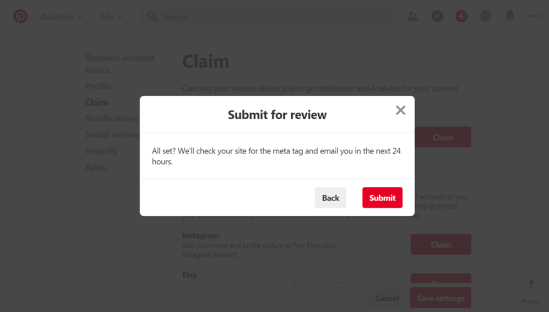
- In the ‘Claim’ section, enter your website URL and then click ‘Claim’:
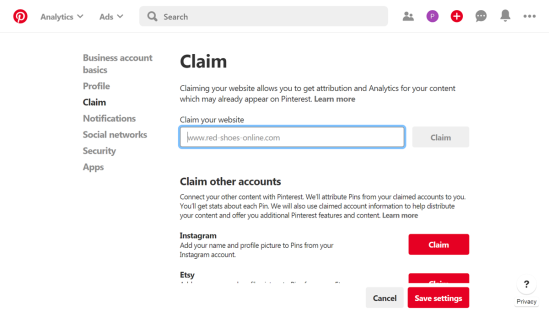
- Select ‘Add HTML tag’.

- Copy the code between the brackets and click ‘Next’.
- Go to your website dashboard > WooCommerce > Pinterest > Account.
- Paste the copied code to the ‘Verification code’ field and click ‘Save’.
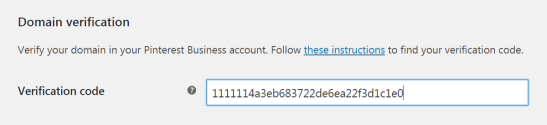
- Go back to Pinterest and click ‘Submit’.
Schedule Your Pins – Pinning Settings
↑ Back to top- Right away – your Pins are published as queued in real time.

- Schedule – Your Pins will be published according to the settings. You can set the time, date, pinning intervals and the number of images for pinning.

Pinterest has query limits, it should not exceed 100 queries per day. Take it into consideration when scheduling your Pins.
General settings
↑ Back to top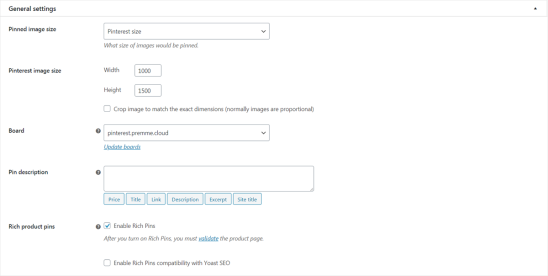 Before pinning products on Pinterest, we recommend you to make the following settings:
- Choose the size of the image for Pinning. You’ll have two options available:
- Original image size.
- Pinterest size. You can set the image size that will be pinned on Pinterest. This size will be applicable only for uploaded images after you save the settings “Pinterest size”
- Choose the board for pins from the ‘Board’ drop-down list.
- Pin descriptions – this description will be added to all Pins. You can use variable products and website information with the help of shortcodes.
- Run the Rich Pins validation:
- Activate the ‘Enable Rich Pins’ checkbox and click ‘Save’.
After ‘Rich product Pins’ has been activated, the main product details (price, currency, name, stock availability) will be added to the product page markup in the Open Graph format. Therefore, make sure the product page doesn’t have an Open Graph markup of other SEO plugins to avoid your store SEO ranking deterioration.
- Copy the URL of the product which has all main details filled in (name, image, price, description).
- Click ‘Validate’ to go to the ‘Rich Pins Validator’ page.
- Paste the product URL ( see b.) and click ‘Validate’.
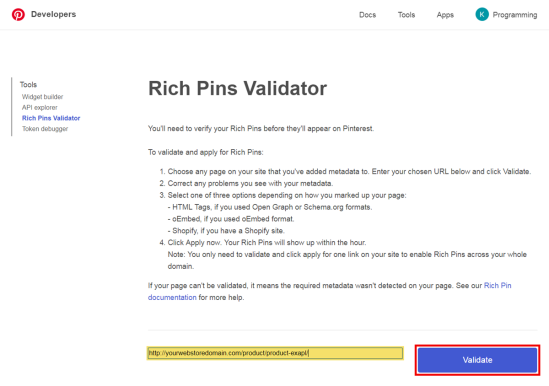
- Within an hour, a letter confirming the creation of the detailed pins will be sent to your email.
- Pinterest will add price, title, and description during 24 hours.
- Activate the ‘Enable Rich Pins’ checkbox and click ‘Save’.
Pinterest boards settings
↑ Back to top
Pinterest Сatalog Settings
↑ Back to topCategories without chosen Google categories will be skipped. It means that if your product has missing info, such as name, description, image, price, it will be skipped.
 To set automatic update of your catalog, please activate the checkbox “Regenerate catalog automatically”. The time should be set according to server time.
WooCommerce doesn’t have the field “condition”, so all products are assigned with the tag “new”
Save button settings
↑ Back to top
Pinterest hashtags section
↑ Back to top
Track Conversion settings
↑ Back to top
- Activate the ‘Enable Track Conversion’ checkbox to add the main code to the website.
- Enter the Tag ID. You can find it here.
- Activate the events you wish to track.
- Save your changes.
Pinterest data
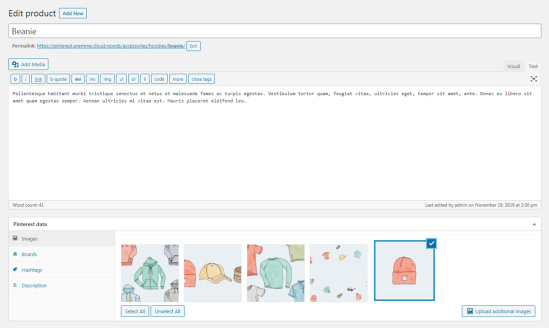
↑ Back to top The Pinterest data meta box is where you manage and set images for pinning.
- Images section. Choose the image for pinning in the attached photos or upload a new image. It will not be visible elsewhere on your website.
- Boards section. Choose which boards the product image will be pinned to. In this section, you’ll see boards that you chose in the plugin settings.
- Hashtags section. Add hashtags that will be added in the Pin description.
- Description section. Add custom description that will be added to the Pins of this product.
Pinning products
↑ Back to top- Activate the ‘Pin product image’ checkbox.
- Mark images to be pinned.
- Update the product.
When you pin images of variable product variations, only the highest price will be displayed in Rich Pins. But a variation price, name and description will be added to the pin description.
- The chosen images will be added to the queue to be pinned on Pinterest.
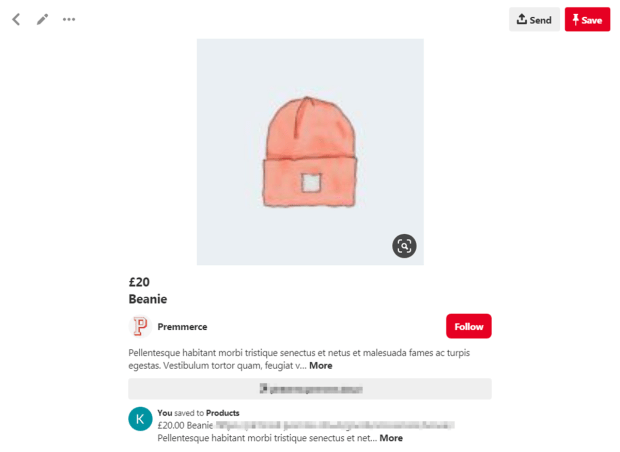
- The result:
If you deactivate the ‘Pin product image’ checkbox on the Edit product page and click ‘Update’, tasks for all Pins (which have been pinned from this product) deletion from Pinterest.com will be added to the queue. If you deactivate only one image and update a product, only this image Pin will be deleted from Pinterest.Pin from out of stock product:

At present Pinterest doesn’t have the option to display price range and sale price on a product Rich pin.
Bulk pinning
↑ Back to top- On the ‘Products’ page mark the products you want to pin.
Be patient: here is a limit of 1000 pins on hour.
- Choose ‘Pin’ from the ‘Bulk Actions’ drop-down list.
- Click ‘Apply’.
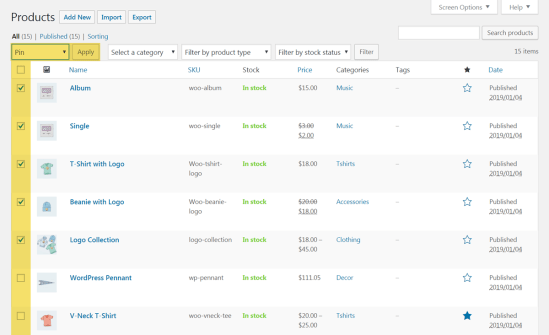
When you use bulk pinning, only the main product image will be pinned.
- Main product images will be added to the queue to be pinned on Pinterest if they haven’t been published yet.
Pins
↑ Back to top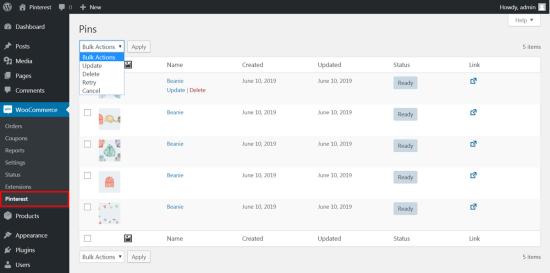
Pinterest hashtags
↑ Back to top