Note: This product is no longer sold on WooCommerce.com. This document was left available to you for help with configuration and troubleshooting, but is no longer updated.
PayPal Payments Advanced is a gateway that allows you to seamlessly integrate credit card processing into your checkout. This product combines a Merchant Account and Payment Gateway into one cost-effective solution for the United States and Canada.
- Low cost and seamless integration
- Easier PCI compliance
- Combines Merchant Account and Payment Gateway
To learn more, see: PayPal Payments Advanced.
Installation
↑ Back to top- Download the .zip file from your WooCommerce.com account.
- Go to: WordPress Admin > Plugins > Add New to upload the file you downloaded with Choose File.
- Activate the extension.
More information at: Installing and Managing Plugins.
Sign up for PayPal Payments Advanced
↑ Back to topMerchant Account
↑ Back to topTo use the PayPal Payments Advanced extension, you need a Merchant account. Go to PayPal Advanced and submit an application.
If you wish to use an existing account different from what’s stated, you must inquire with PayPal directly about whether this is allowed and possible. PayPal has a wide variety of products, and each has its own policies and rules.
Test Account
↑ Back to topIf you do not have a live PayPal Payments Advanced account, you can use the Test account by following instructions at: Testing with the Payflow gateway.
Setup and Configuration
To set up PayPal Payments Advanced for your WooCommerce store:
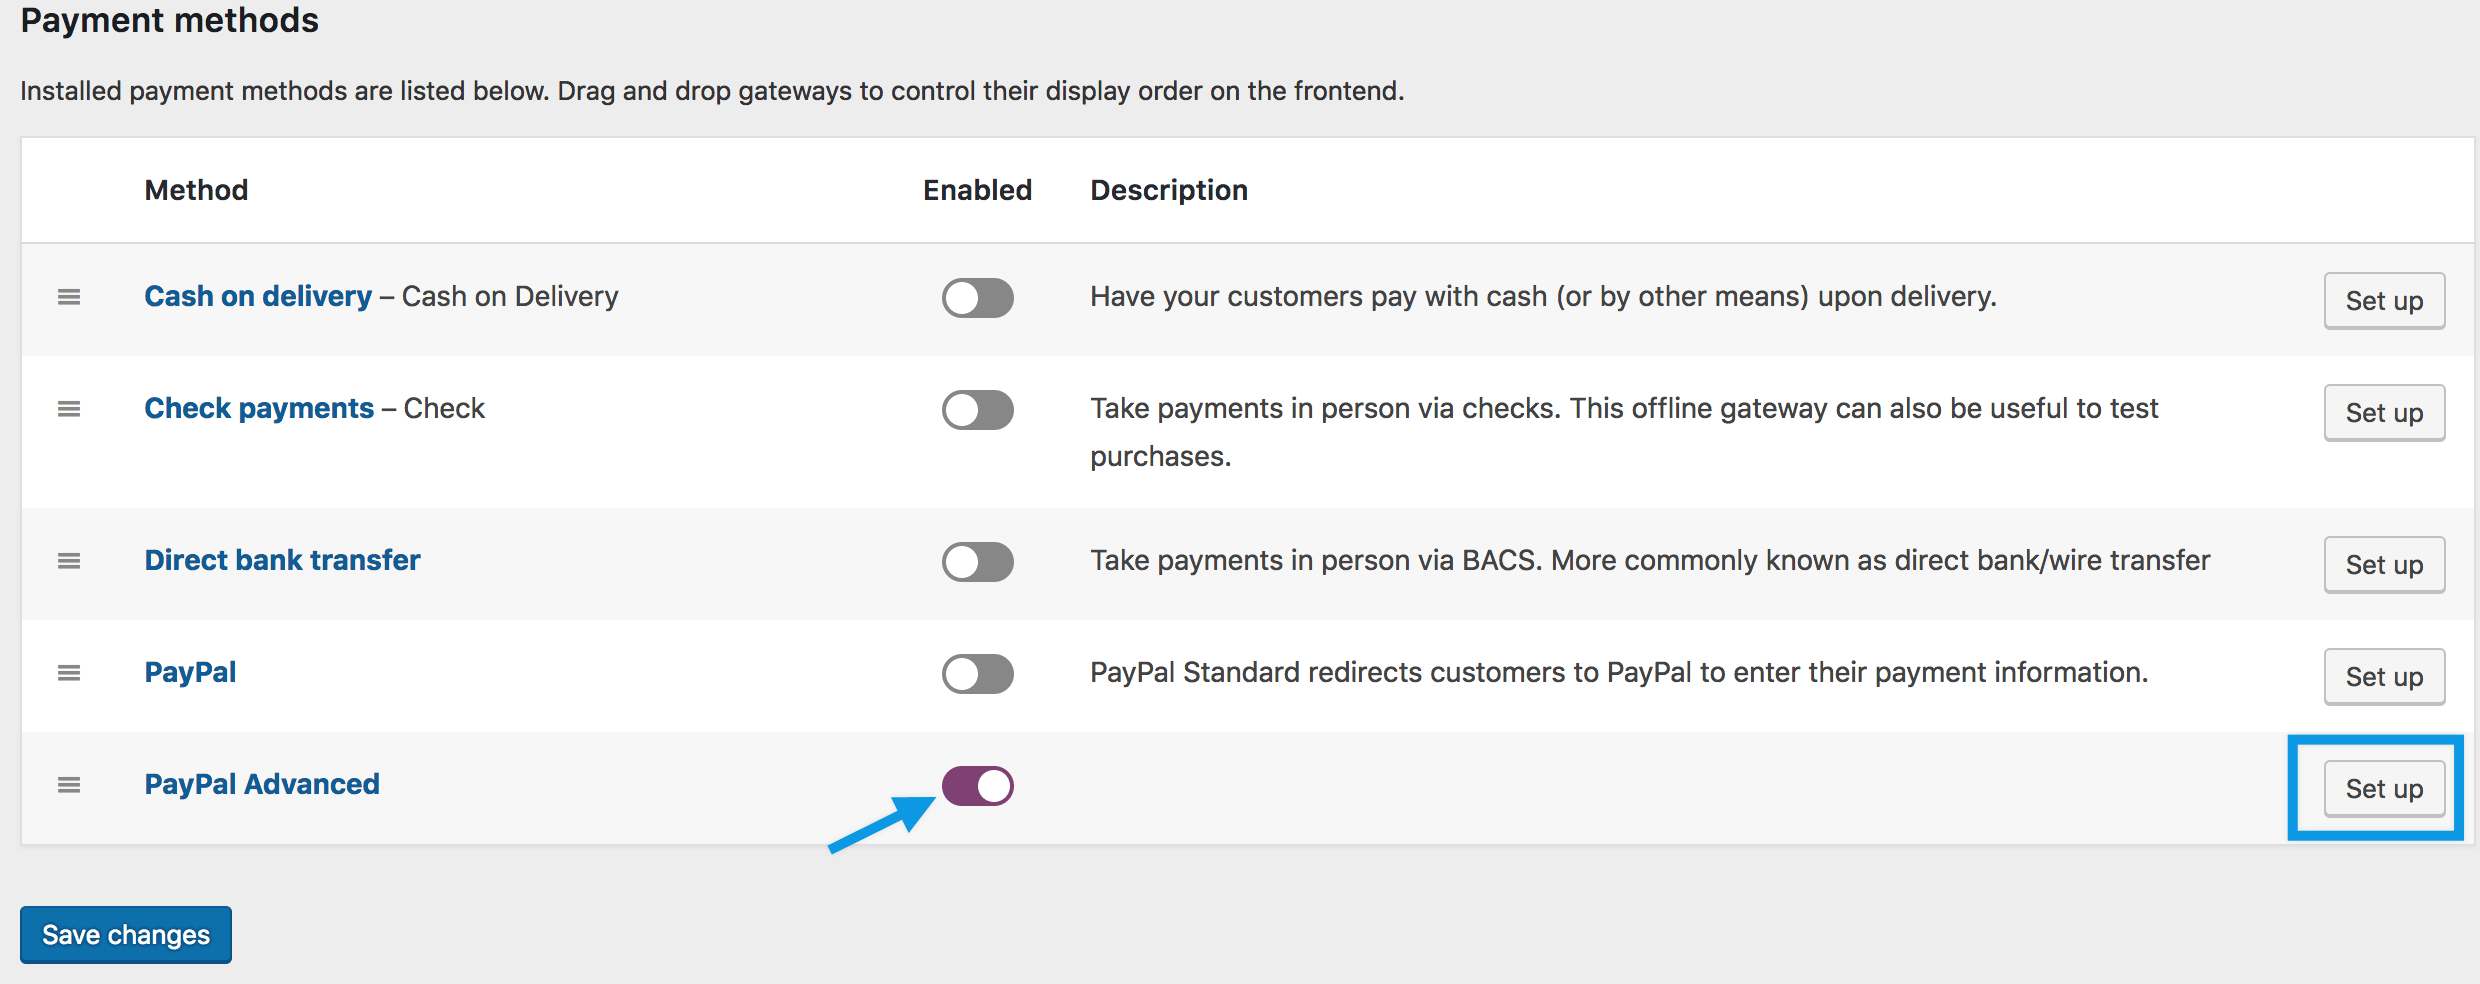
- Go to: WooCommerce > Settings > Payments.
Note: ‘Payments’ formerly called ‘Checkout’ prior to WooCommerce 3.4. - Use the toggle under Enabled to select PayPal Advanced.
- Select Set Up. You are taken to the PayPal Advanced settings.
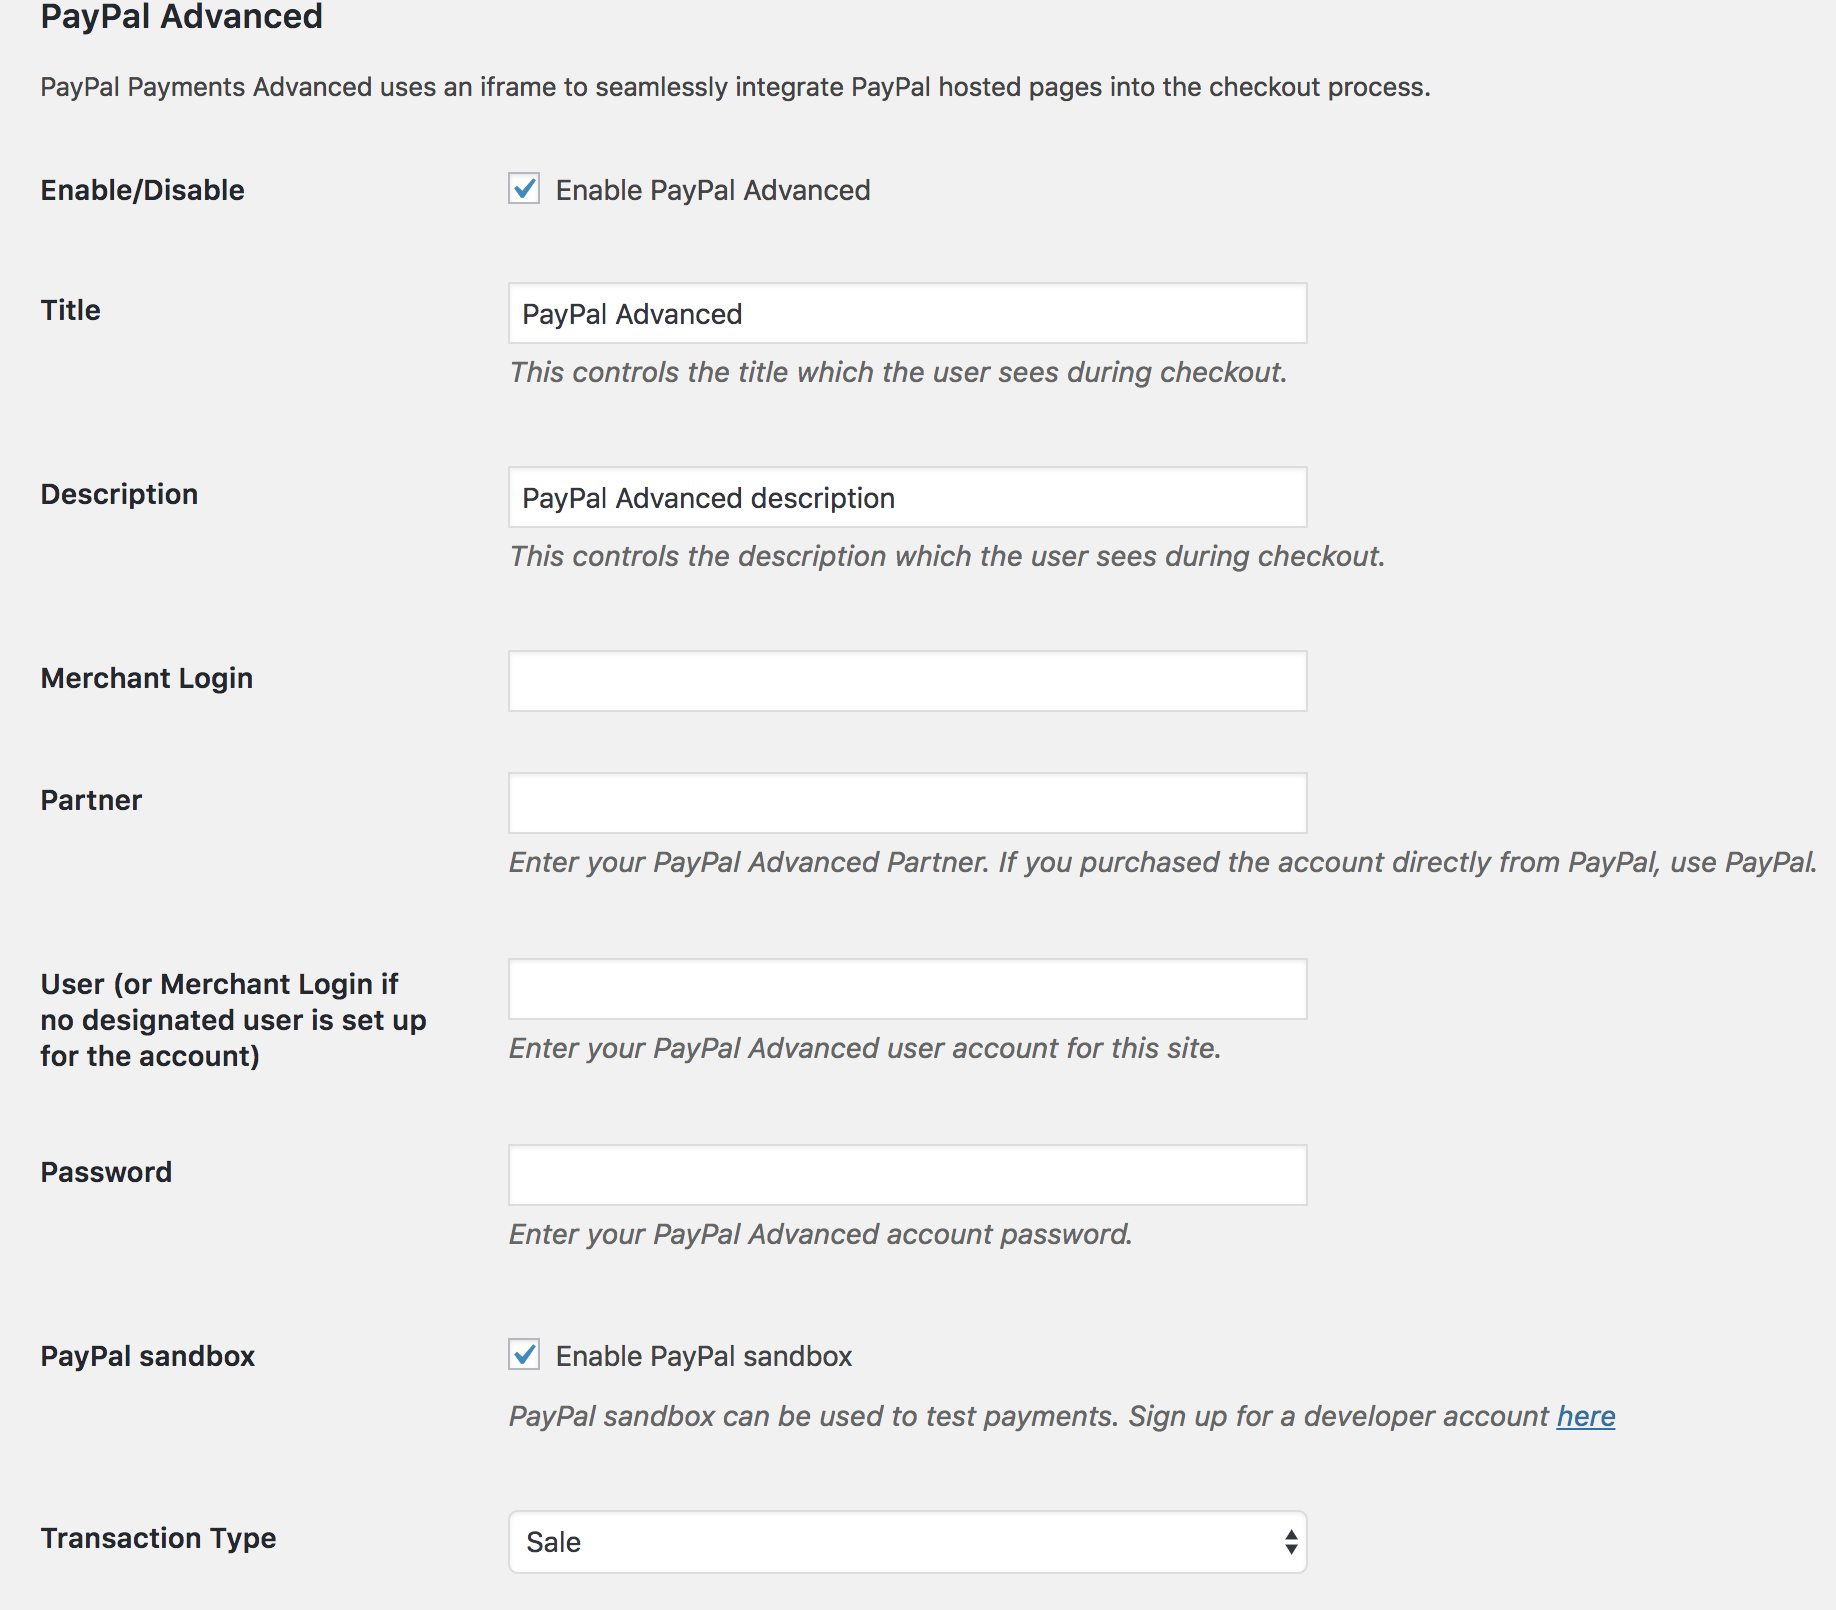
- Configure your settings:
- Enable/Disable – Enable to use. Disable to turn off.
- Title – Choose the title shown to customers during checkout
- Description – Add info shown to customers if they use PayPal Advanced.
- Merchant Login, Partner, User and Password — Enter info from your PayPal Advanced account.
- PayPal Sandbox — Tick the checkbox if you wish to use test (not live) mode.
- Select Transaction Type:
- Authorization, payment is authorized but not completed. You need to manually Capture.
- Sale, automatically captures payment. This is recommended.
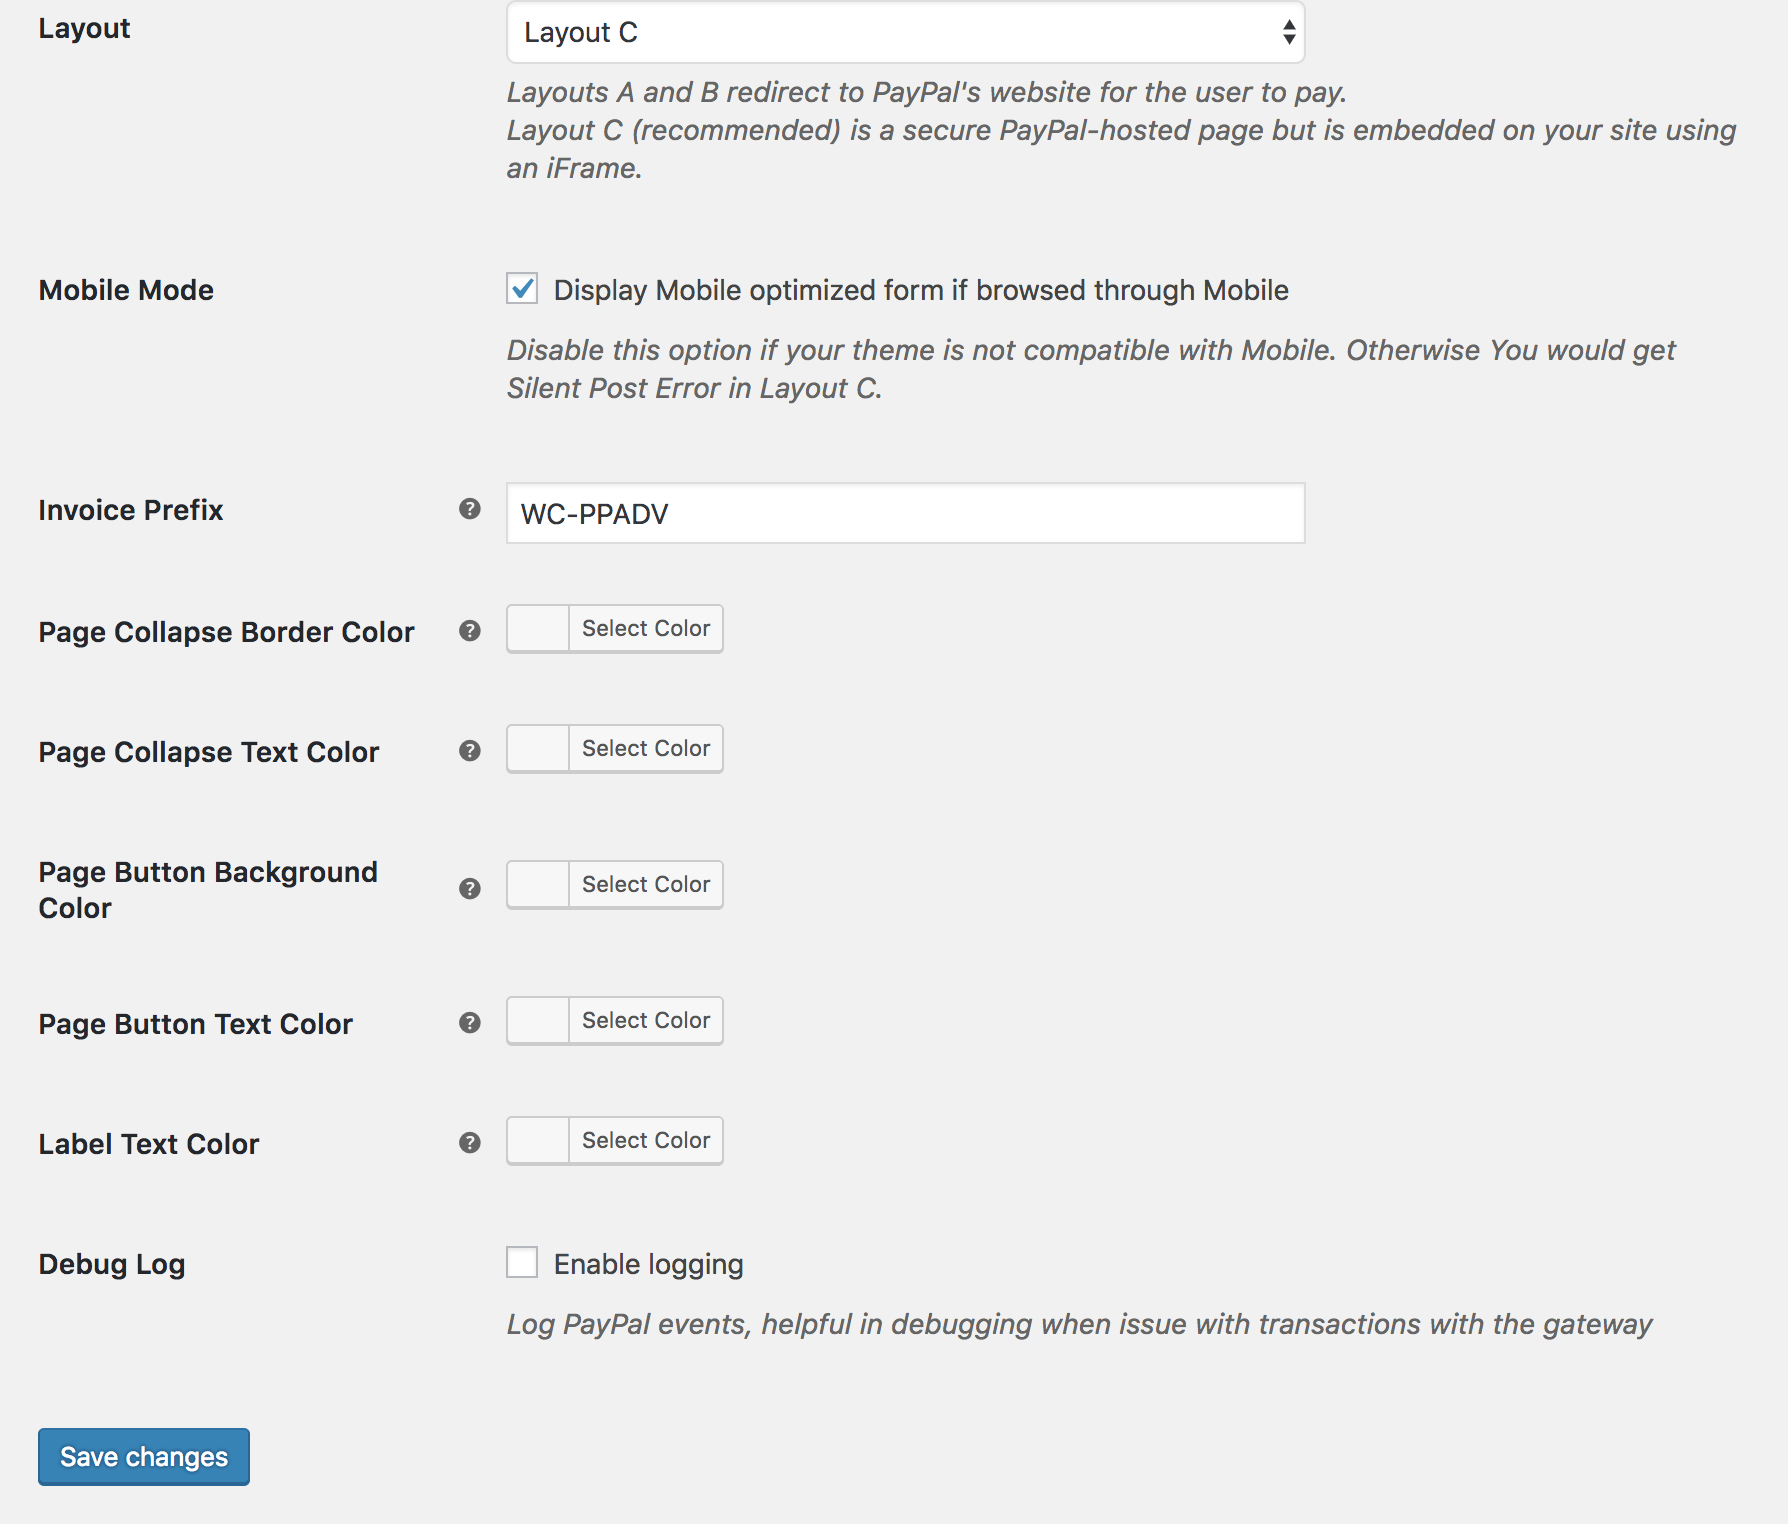
- Select Layout A, B or C.
- Tick the Mobile Mode checkbox to activate responsive layout.
- Enter an Invoice Prefix (optional). Helpful if using the same PayPal account for more than one website/store.
- Select (optional) custom colors for
- Page Collapse Border
- Page Collapse Text
- Page Button Background
- Page Button
- Label Text
- Tick the Enable Logging checkbox to help troubleshoot issues. Otherwise leave unticked (recommended).
- Save changes.
Set up PayPal Manager
↑ Back to topSetting up a different PayPal Manager user for your store account is recommended, as you may be prompted monthly to change the root user account and then change it in your PayPal Payments Advanced extension settings.
To get started, log in at: PayPal Manager.

Service settings
↑ Back to topYour account will remain in Test mode until activated with a purchase.
- Go to: Service Settings > Set Up
- Enter text for Cancel URL (optional), e.g., Cancel and return to the site.
- Set Cancel URL and Error URL to your site URL, e.g., http://www.yoursite.com. This satisfies PayPal requirements, so URLs are dynamically created and sent to PayPal with the transaction request.
- Select Payment Confirmation > On My Website
- Select Yes for Silent Post for Data Transfer >Use Silent Post.
- Tick the checkbox for Void transaction when my server fails to receive data sent by the silent post.
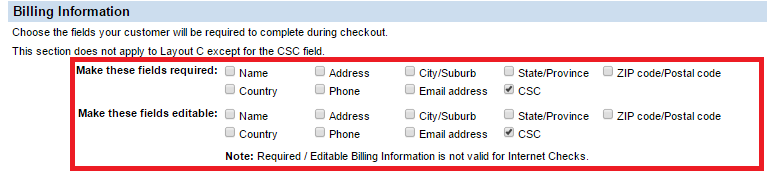
- Select: Billing Information > CSC to show CSC/CVV field on the payment page.
No need to enter URLs for Enter Silent Post URL and Return URL when Silent Post Fails, as they’re prepared dynamically and sent with the transaction request.
There are three ways PayPal Advanced can appear on the Checkout Page: Two layouts are onsite in iFrames; one is offsite. It also depends on what the user chooses during payment. See the FAQs below.
Transaction settings
↑ Back to top- Go to: Account Administration > Manage Security > Transaction Settings
- Select Yes for Allow reference transactions. This enables refunds.
FAQs
↑ Back to topDo I need a Payflow account?
↑ Back to topNo. The necessary account is included at no additional charge. When you sign up for a PayPal Payments Advanced account, it also walks you through creating the appropriate Payflow account credentials you need.
Do I need an SSL Certificate?
↑ Back to topAn SSL certificate is not required for this extension. However, it is recommended that you use an SSL certificate for an added layer of security and/or if you or visitors receive mixed content warnings.
PayPal has given us and our customers conflicting information. To repeat, it’s NOT required. But having one will ensure that everything works.
More info about SSL certificates and HTTPS at: SSL and HTTPS guide.
Why does selecting PayPal or Bill Me Later direct offsite?
↑ Back to topThis is normal. When a user selects either “Bill Me later” and “PayPal” to pay, they are taken offsite to complete payment. After payment is completed, the user is redirected to the site.
Is PayPal currently a US-only service?
↑ Back to topNo. People worldwide can make purchases using PayPal Payments Advanced. The exception is the Bill Me Later payment method, which is only supported for US buyers.
Why am I getting ‘User Authentication Denied’ errors during checkout?
↑ Back to topYour account may have been set up incorrectly. You need to contact PayPal tech support.
I am getting User Authentication Failed Error, what went wrong?
In the PayPal Manager interface, you should set the transaction mode to live. Go to SetUp Page > Transaction Process Mode to verify your settings. Also, check that your username and password are correct and current on the WooCommerce settings page.
I am getting Errors related to Silent Post or Mobile CheckOut or User Authentication Failed 0r 160 code error, what went wrong?
This kind of errors would occur if you have not made your Merchant Login whitelisted. You may do so by contacting the Paypal Technical Support team through https://www.paypal-techsupport.com/app/ask or call their direct contact number.
Why is the CSC/CVV field not showing on the payment page?
You need to enable/set in SetUp Page > Billing Information.
What kind of refunds does PayPal Advanced support?
↑ Back to topPayPal Advanced currently only supports full refunds. Partial refunds are not possible at this time.
What do these PayPal error codes mean?
↑ Back to topIf there are errors on checkout pages or in your admin, see: API Error and Warning Codes. In most cases, contacting PayPal with your error code is the required course of action.
Questions and Feedback
↑ Back to topHave a question before you buy? Please fill out this pre-sales form.
Already purchased and need some assistance? Get in touch with a Happiness Engineer via the Help Desk.