PayPal Checkout is no longer available for download via the WooCommerce Marketplace and support ended on 1 March, 2022. You’re encouraged to download PayPal Payments, PayPal’s latest, most complete payment processing solution.
If you are already using PayPal Checkout, we strongly recommend upgrading to PayPal Payments for the best experience and future feature upgrades.
Support for PayPal Checkout is limited. If troubleshooting cannot address any issues, you might be asked to upgrade to PayPal Payments.
WooCommerce PayPal Checkout allows your store to accept payments via PayPal and uses customizable Smart Payment Buttons™. When your customers use PayPal Checkout, they can pay with PayPal or any major credit or debit card without ever leaving your site. Shoppers can purchase right from your product pages, and pay in 26 currencies. In the U.S., customers have the added benefit of Smart Payment Buttons™. This feature automatically presents relevant payment options, including PayPal, and both Pay in 4 and PayPal Credit*—which allow your customers to buy now and pay later while you get paid up front.
Installation
↑ Back to top- Go to: Plugins > Add New on your WordPress site.
- Enter WooCommerce PayPal Checkout in the Search Plugins bar. The author is WooCommerce.
- Install Now and Activate.
More information at: Install and Activate Plugins/Extensions.
Requirements
↑ Back to top- A PayPal Business account – go to PayPal.com to sign up or log in to your existing account
- PayPal Reference Transactions via Express Checkout for Subscriptions – apply for and enable Reference Transactions if you intend to use and sell WooCommerce Subscriptions
What’s new in v2.1.0
↑ Back to top- Pay in 4 from PayPal has been added as a payment option.
- PayPal Credit messaging has been updated to display new Pay in 4 and PayPal Credit messaging
Setup and Configuration
↑ Back to top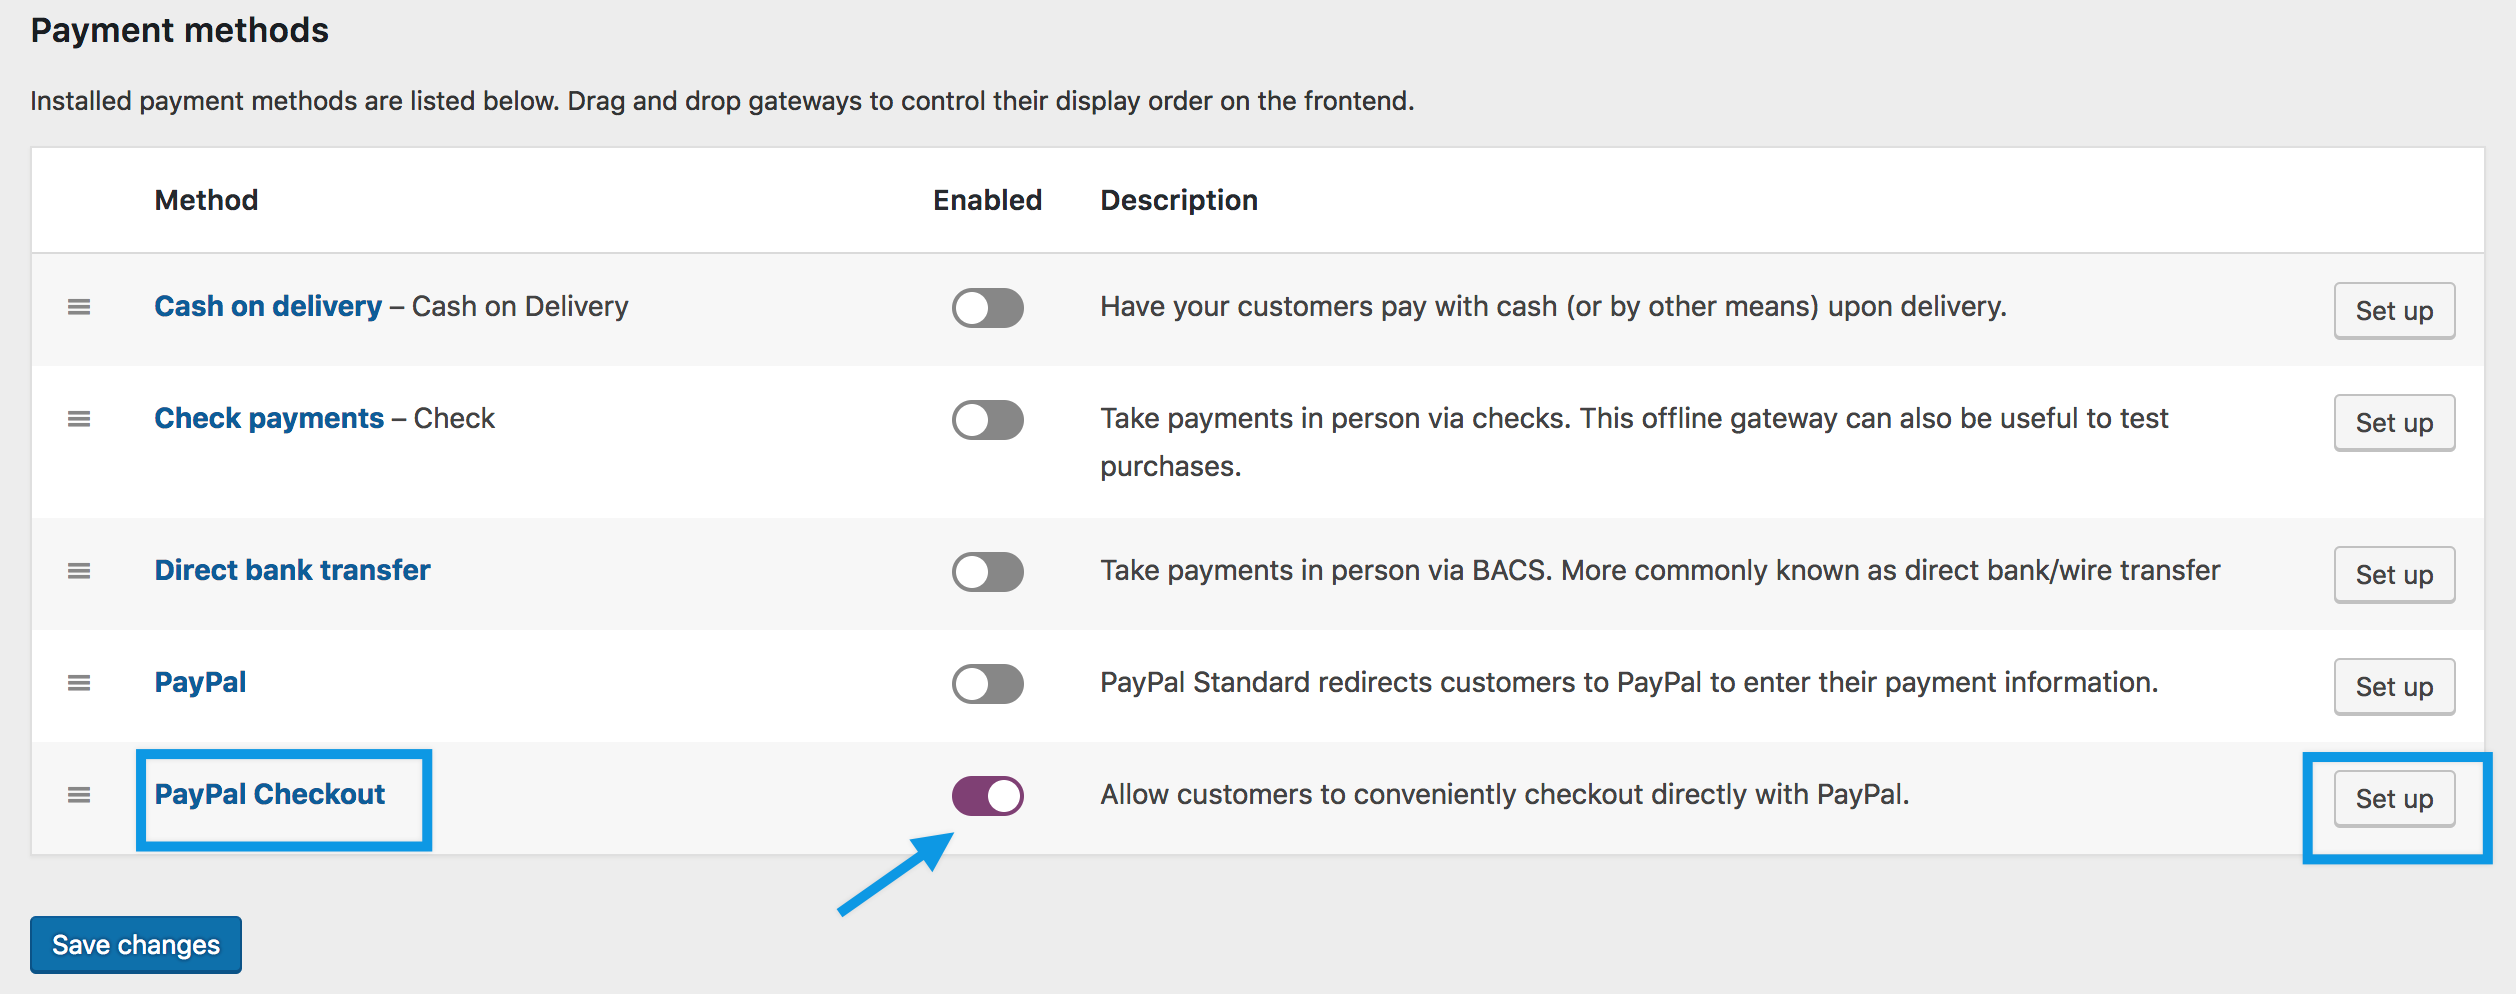
To set up PayPal Checkout:
- Go to WooCommerce > Settings > Payments.
- Use the toggle next to PayPal Checkout to Enable it.
- Click Set up or Manage to configure your PayPal Checkout settings.
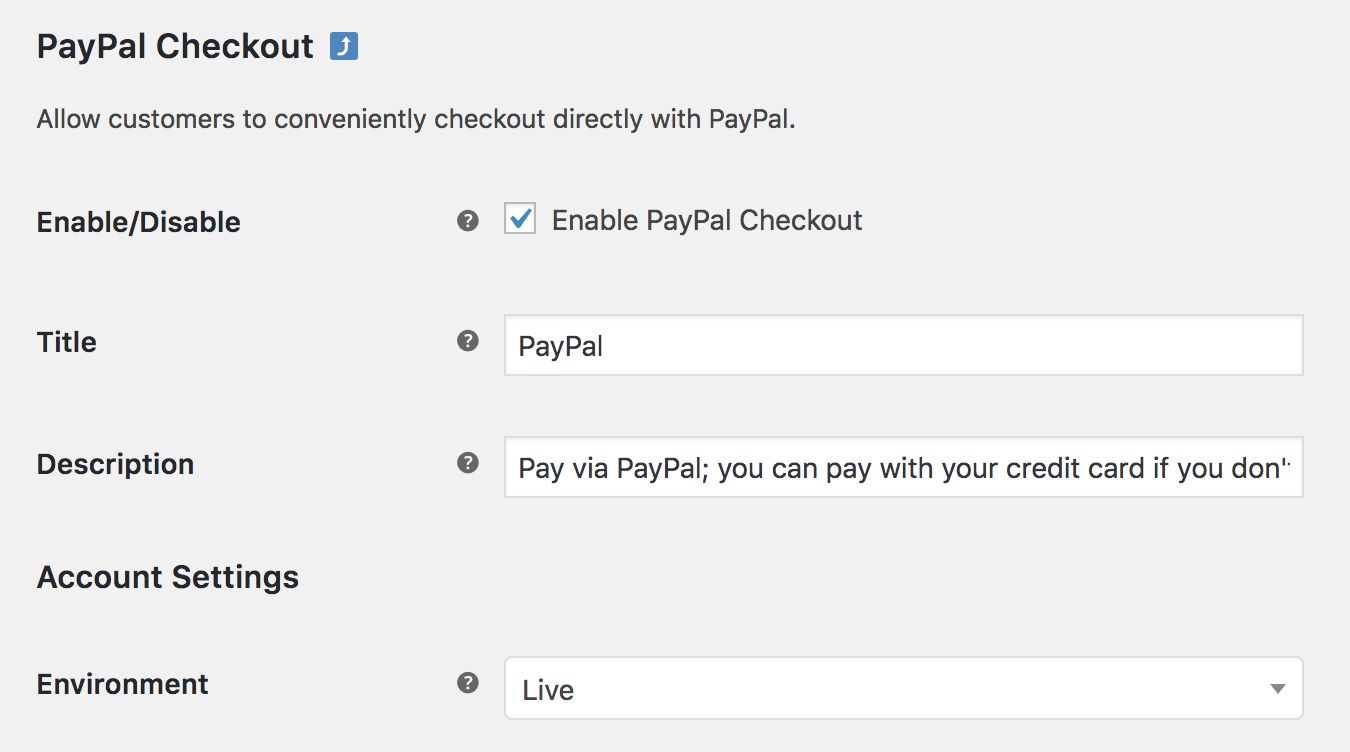
- Configure your settings:
- Title – Choose the title shown to customers during checkout
- Description – Add a description shown to customers if they use PayPal Checkout
- Account Settings – Environment – Select Live to accept payments and Sandbox to test payments.
API Settings
↑ Back to topConnect a new or existing PayPal account.
- Click the Setup or link an existing PayPal Account button to add your API Credentials automatically by logging into your PayPal account.

- When prompted log into your PayPal account.
- Click Activity near the top of the page and select API Access
- Scroll to NVP/SOAP API Integration (Classic) and click Manage API Credentials.
- Copy and paste the credentials into the corresponding fields on your WooCommerce site:
- Live API Username
- Live API Password
- API Certificate and Signature, and Live API Subject are optional.
PayPal-hosted Checkout Settings
↑ Back to top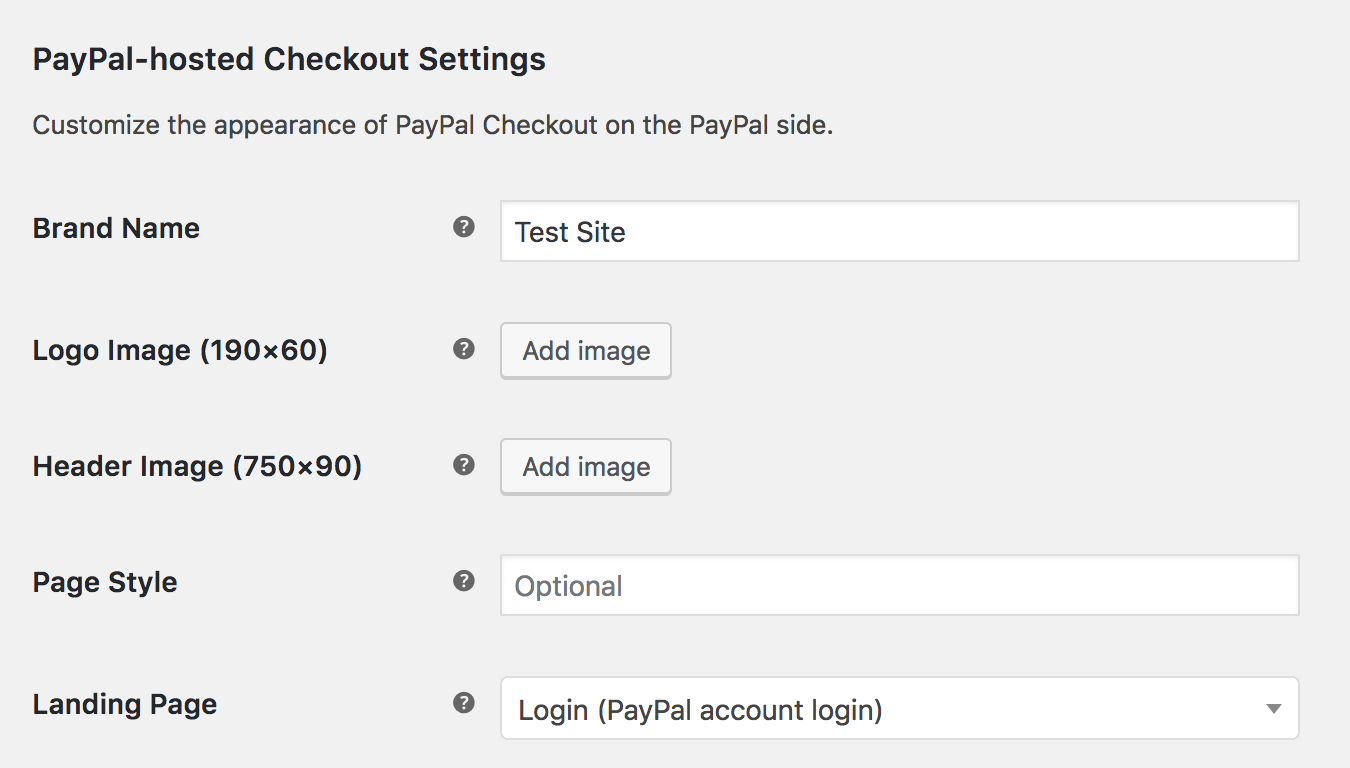
- Enter a Brand Name that displays during checkout on the PayPal site, e.g., the name of your business/store/site.
- Enter the URL of an image you want to display as the Logo Image and Header Image during checkout (optional).
- Add a logo/icon or photo at: Add Image > Upload Files.
- Or use an existing one at: Add Image > Media Library.
- Select a Page Style (optional). Page styles are shown on your PayPal account.
- Select a Landing Page, which all customers initially see on checkout.
Advanced Settings
↑ Back to top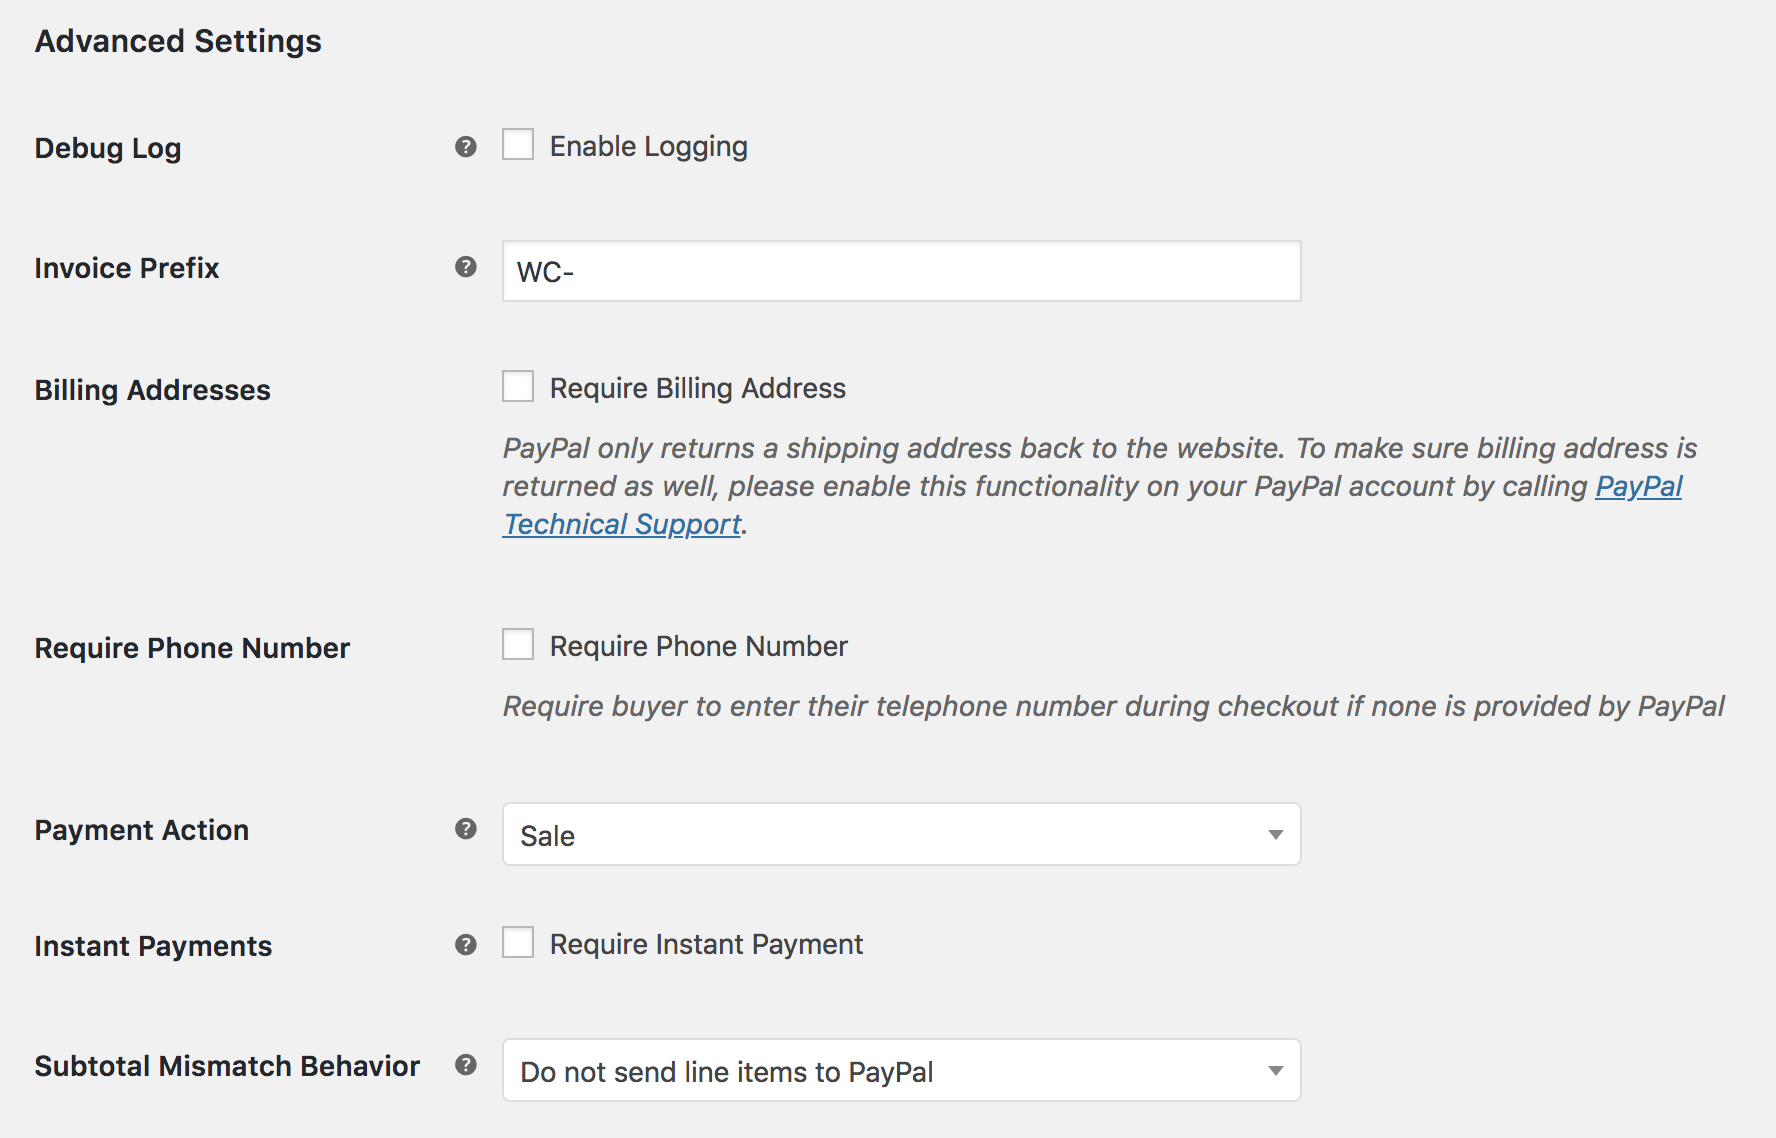
- Check the Enable Logging when troubleshooting issues with your site. Otherwise, leave unchecked/disabled.
- Enter an Invoice Prefix to identify transaction from this site. WC (WooCommerce) is entered by default.
- Tick the box to Require Billing Address during checkout. *Note: This feature is no longer supported by PayPal. If you need to collect billing address, you could turn off the payment buttons on the product and cart pages, and collect that information using the normal WooCommerce checkout fields.
- Tick the box to Require Phone Number if you require customers to enter their phone number on checkout.
- Select a Payment Action from the drop-down. ‘Sale’ captures funds immediately. ‘Authorize’ only verifies the availability of funds; you must then capture the payment.
- Tick the box if you Require Instant Payment. Customer must use a payment method allowing immediate capture (e.g., No checks).
- Select a Subtotal Mismatch Behavior preference for occurrences when totals for PayPal and WooCommerce are different.
PayPal Credit (Pay Later) Messages Settings
↑ Back to top- Ensure that Enable PayPal Credit messages is checked in order to present PayPal Credit messaging on the Shopping Cart page.
- Set the preferred styling for the PayPal Credit Messaging layout, logo, logo position, and text color from the dropdowns.
- Configure individual settings for each Single Product Page and Regular Checkout Messages you have enabled in order to present PayPal Credit messaging on the Product and Checkout pages.

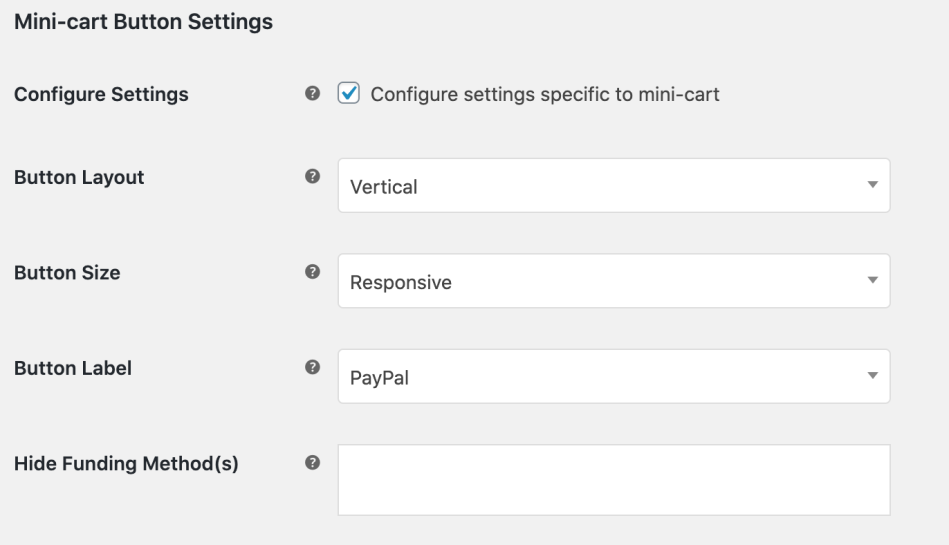
Button Settings
↑ Back to top
- Select a Button Color, Shape, Label, Layout, and Size from the dropdown.
- Select Hide Funding Method(s) if you don’t want to display certain funding methods.
- Tick the box for Checkout on cart page, if you wish to display PayPal checkout buttons on the cart page.
- Configure individual settings for each Single Product Page, Mini-Cart, and Regular Checkout Buttons you have enabled.
- Save changes.

PayPal Checkout Buttons


How to obtain PayPal credentials
↑ Back to topThis applies if you choose to manually enter your PayPal credentials.
1. Log into your PayPal Business account at: https://www.paypal.com/us/signin
2. From the navigation menu click Activity > API Access.

3. Scroll to NVP/SOAP API Integration (Classic) and click Manage API credentials.
4. Ensure Request an API Signature is checked and click Agree and Submit

5. Click Show to reveal your credentials and copy the API Username, Password and Signature into your WooCommerce PayPal Checkout settings.

Processing Orders
↑ Back to topUsage with PayPal accounts and credit/debit cards
This extension skips most of the WooCommerce checkout process, and customers leave your site from the Cart page to complete checkout through PayPal.
PayPal Checkout buttons on product and cart pages is meant to reduce the amount of data entry required by the customer. To achieve this, PayPal sends the customer’s billing information after they log into PayPal and authorize the transaction.
Typical scenario:
- Customer shops on your site
- Customer adds products to Cart
- Customer reviews Cart page
- From the Cart page customer selects “Checkout with PayPal” button
- The customer is redirected to PayPal, and WooCommerce sends the order subtotal, customer information, and shipping address to PayPal (Customers can enter a new shipping address).
- Customer logs in to PayPal and authorizes the transaction*
- PayPal redirects the customer back to WooCommerce and sends authorization token and customer’s billing information
- On the WooCommerce Review Order page, the customer reviews any taxes and chooses a shipping option
- The customer finalizes the order, and the transaction is completed with PayPal
*Order authorization is obtained for an amount that is 150% of the subtotal to anticipate taxes and shipping costs. If there are no taxes or shipping costs, then the original amount is used. If there are shipping/taxes, the updated total is used.
Usage with PayPal in 4
Customers will see the option to use PayPal Credit or Pay In 4 on checkout, if the checkbox for Enable PayPal Credit to eligible customers is ticked in the PayPal Checkout Display Settings and if the customer is in an eligible location.
The store/site owner is paid in full upfront. Customers enjoy financing and are given time to pay.
Admin Usage
↑ Back to topCapture Charges from WooCommerce Order Admin
This extension allows you to authorize charges during checkout, then manually capture funds later. You can do this via your PayPal business account, or from the WooCommerce Edit Order page. Not sure what this means? Check out this tutorial on Authorizing vs. Authorizing and Capturing.
When a payment is authorized for an order, the order status is set to “on hold”. You can edit the order by going to WooCommerce > Orders, then clicking the order number to edit the order. From the Order Actions dropdown select the “Capture Charge” action to the capture the payment.
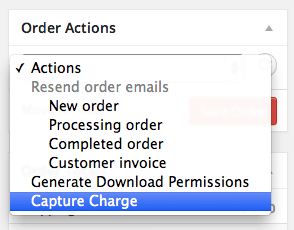
Once you select Capture Charge and save the order, payments are captured via PayPal, the order status updates to Processing, and the Order notes update to reflect these changes.
Customization
↑ Back to topMake Billing Address not Required
↑ Back to topThe billing address fields can be optional only in a certain scenario. The filter below is for the scenario when a customer checks out from the PayPal button on a cart or product page. After they return from PayPal to the site, they land on the Confirm you Order page. It is the billing address fields on that page that this filter affects.
To make billing fields not required you can use the code below:
add_filter(‘woocommerce_paypal_express_checkout_address_not_required’, ‘__return_true’ );
The “Require Billing Address” setting must also be disabled.
Remove the “Proceed to Checkout” link on the cart page
↑ Back to topTroubleshooting
↑ Back to topYou can turn on logging for this plugin via the plugin settings:

Logs will be available via WooCommerce > System Status > Logs.
Frequently Asked Questions
↑ Back to topDoes PayPal Checkout include support for Subscriptions?
↑ Back to topYes, PayPal Checkout supports recurring payments when used with WooCommerce Subscriptions (separate purchase).
You must apply for and enable Reference Transactions via Express Checkout with PayPal for this plugin to work with subscriptions. More information at: PayPal Reference Transactions for Subscriptions.
Why has the Debit/Credit Card button has disappeared?
↑ Back to topThe debit/credit option is only shown if no Subscription products are in the cart. This button is hidden with Subscription products by default. Due to the recurring nature of a subscription, Subscription product types require the customer to use a PayPal account in order to establish the Billing Agreement. Therefore, the guest checkout “Debit or Credit Card” button is removed by default. To offer customers Debit or Credit card fro Subscription products, another payment gateway should be used.
Why do I get errors when I test PayPal Checkout in Sandbox Mode?
↑ Back to topYou cannot have the “PayPal Sandbox” option turned on and use production API credentials. Go to https://developer.paypal.com/ and create a Buyer and a Seller profile to create a sandbox account.
You can request sandbox credentials in the same way you request live credentials once your account is set up. Put the seller’s API credentials into the WooCommerce admin for PayPal Checkout and use the buyer’s credentials to test purchases with.
When you want to return to production mode, change back to production/live API credentials.
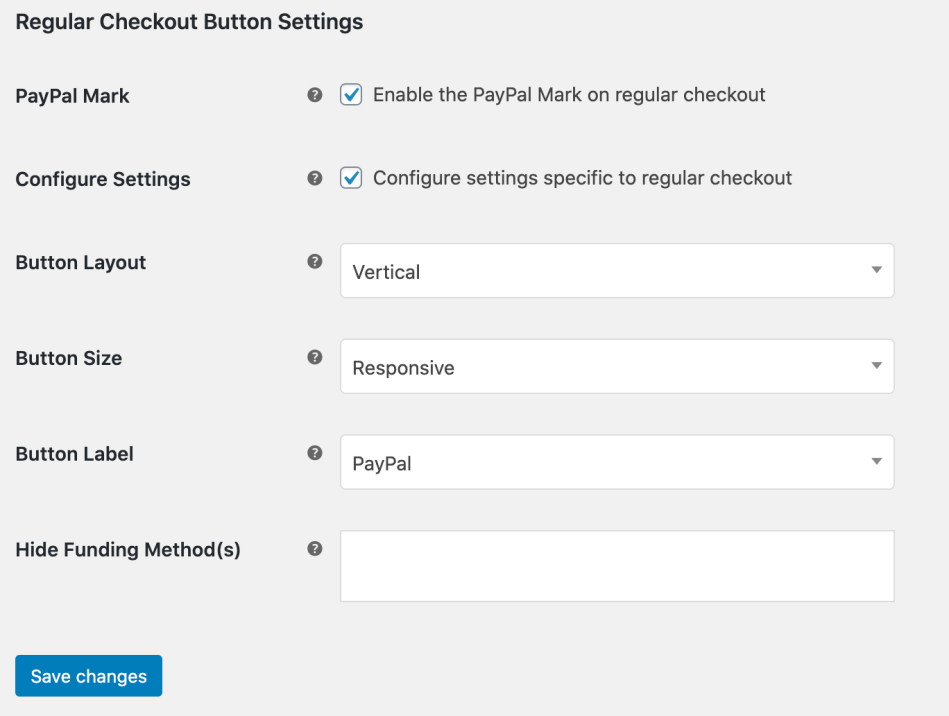
PayPal Checkout doesn’t show up on my Checkout page
↑ Back to topMake sure the checkbox for PayPal Mark is checked under the Regular Checkout Button Settings.
What are the Regular Checkout Button Settings?
↑ Back to topThese settings apply to the default WooCommerce Checkout page and the payment options displayed on this page.
Is there an extra fee to offer PayPal Credit or Pay In 4 to customers?
↑ Back to topThere’s no extra charge for this service to the store/site owner.
If you are a PayPal accepting merchant, PayPal Credit and Pay in 4 is already included at checkout at no additional cost to your business. You just pay your current PayPal transaction fees.
Is PayPal Credit and Pay In 4 available in all countries?
↑ Back to topIt is available without limitation in the United States (US).
PayPal Credit is available by invite only in the United Kingdom (UK), and qualifying merchants will be contacted by PayPal directly for the technical setup required to enable it on the site.
Do I need to accept PayPal to offer PayPal Credit or Pay In 4?
↑ Back to topYes. You must have an eligible PayPal payment solution integrated with your website to offer PayPal Credit and Pay In 4 (either through the PayPal checkout or as a PayPal Credit or Pay Later checkout button) and to advertise financing on your website.
When do I get paid if my customers pay using PayPal Credit or Pay In 4?
↑ Back to topYou get paid upfront, even though your customers have more time to pay. Payments usually show in your PayPal account within minutes, similar to any other PayPal transaction.
Can I use the legacy PayPal Checkout?
↑ Back to topSince PayPal Checkout 2.0, Smart Buttons are enabled by default via the integration with the new PayPal JavaScript SDK. If you would like to use the legacy javascript, you can use this filter:
add_filter( 'woocommerce_paypal_express_checkout_use_legacy_checkout_js', '__return_true' );If you would like to not use Smart Payment Buttons, you can use this filter:
add_filter( 'woocommerce_paypal_express_checkout_disable_smart_payment_buttons', '__return_true' );Questions
↑ Back to topHave a question or need some assistance? Get in touch with a Happiness Engineer via the Help Desk.
*PayPal Pay in 4 and PayPal Credit subject to consumer credit approval.