When you sign up for WooPayments, you must verify your personal and business information with Stripe. This creates a Stripe Express account, which WooPayments uses in the background for managing your business account information and activity.
As a result, this Stripe Express account has various bits of information in it, such as details about your business as well as about the individual person who created the account. This information can be updated at a later time, if need be.
NOTE: Changing the email or phone number that Stripe has on file is different from changing your customer support email or phone number as shown in the Settings Guide. For example, if you would like to route customer support requests to another team or person, then these two bits of information may differ.
Updating your personal information
↑ Back to topFirst, access your Stripe Express account, then update the information as shown below.
- Click the name of your store in the Platform Settings section.
- You may see multiple stores listed here if you have more than one site using WooPayments.
- In the Personal Details section, click the pencil icon.
- Update your personal details as needed.
- Click Submit.
- Click Done at the bottom.
- Click the Sign Out button to sign out of the Stripe Express dashboard.
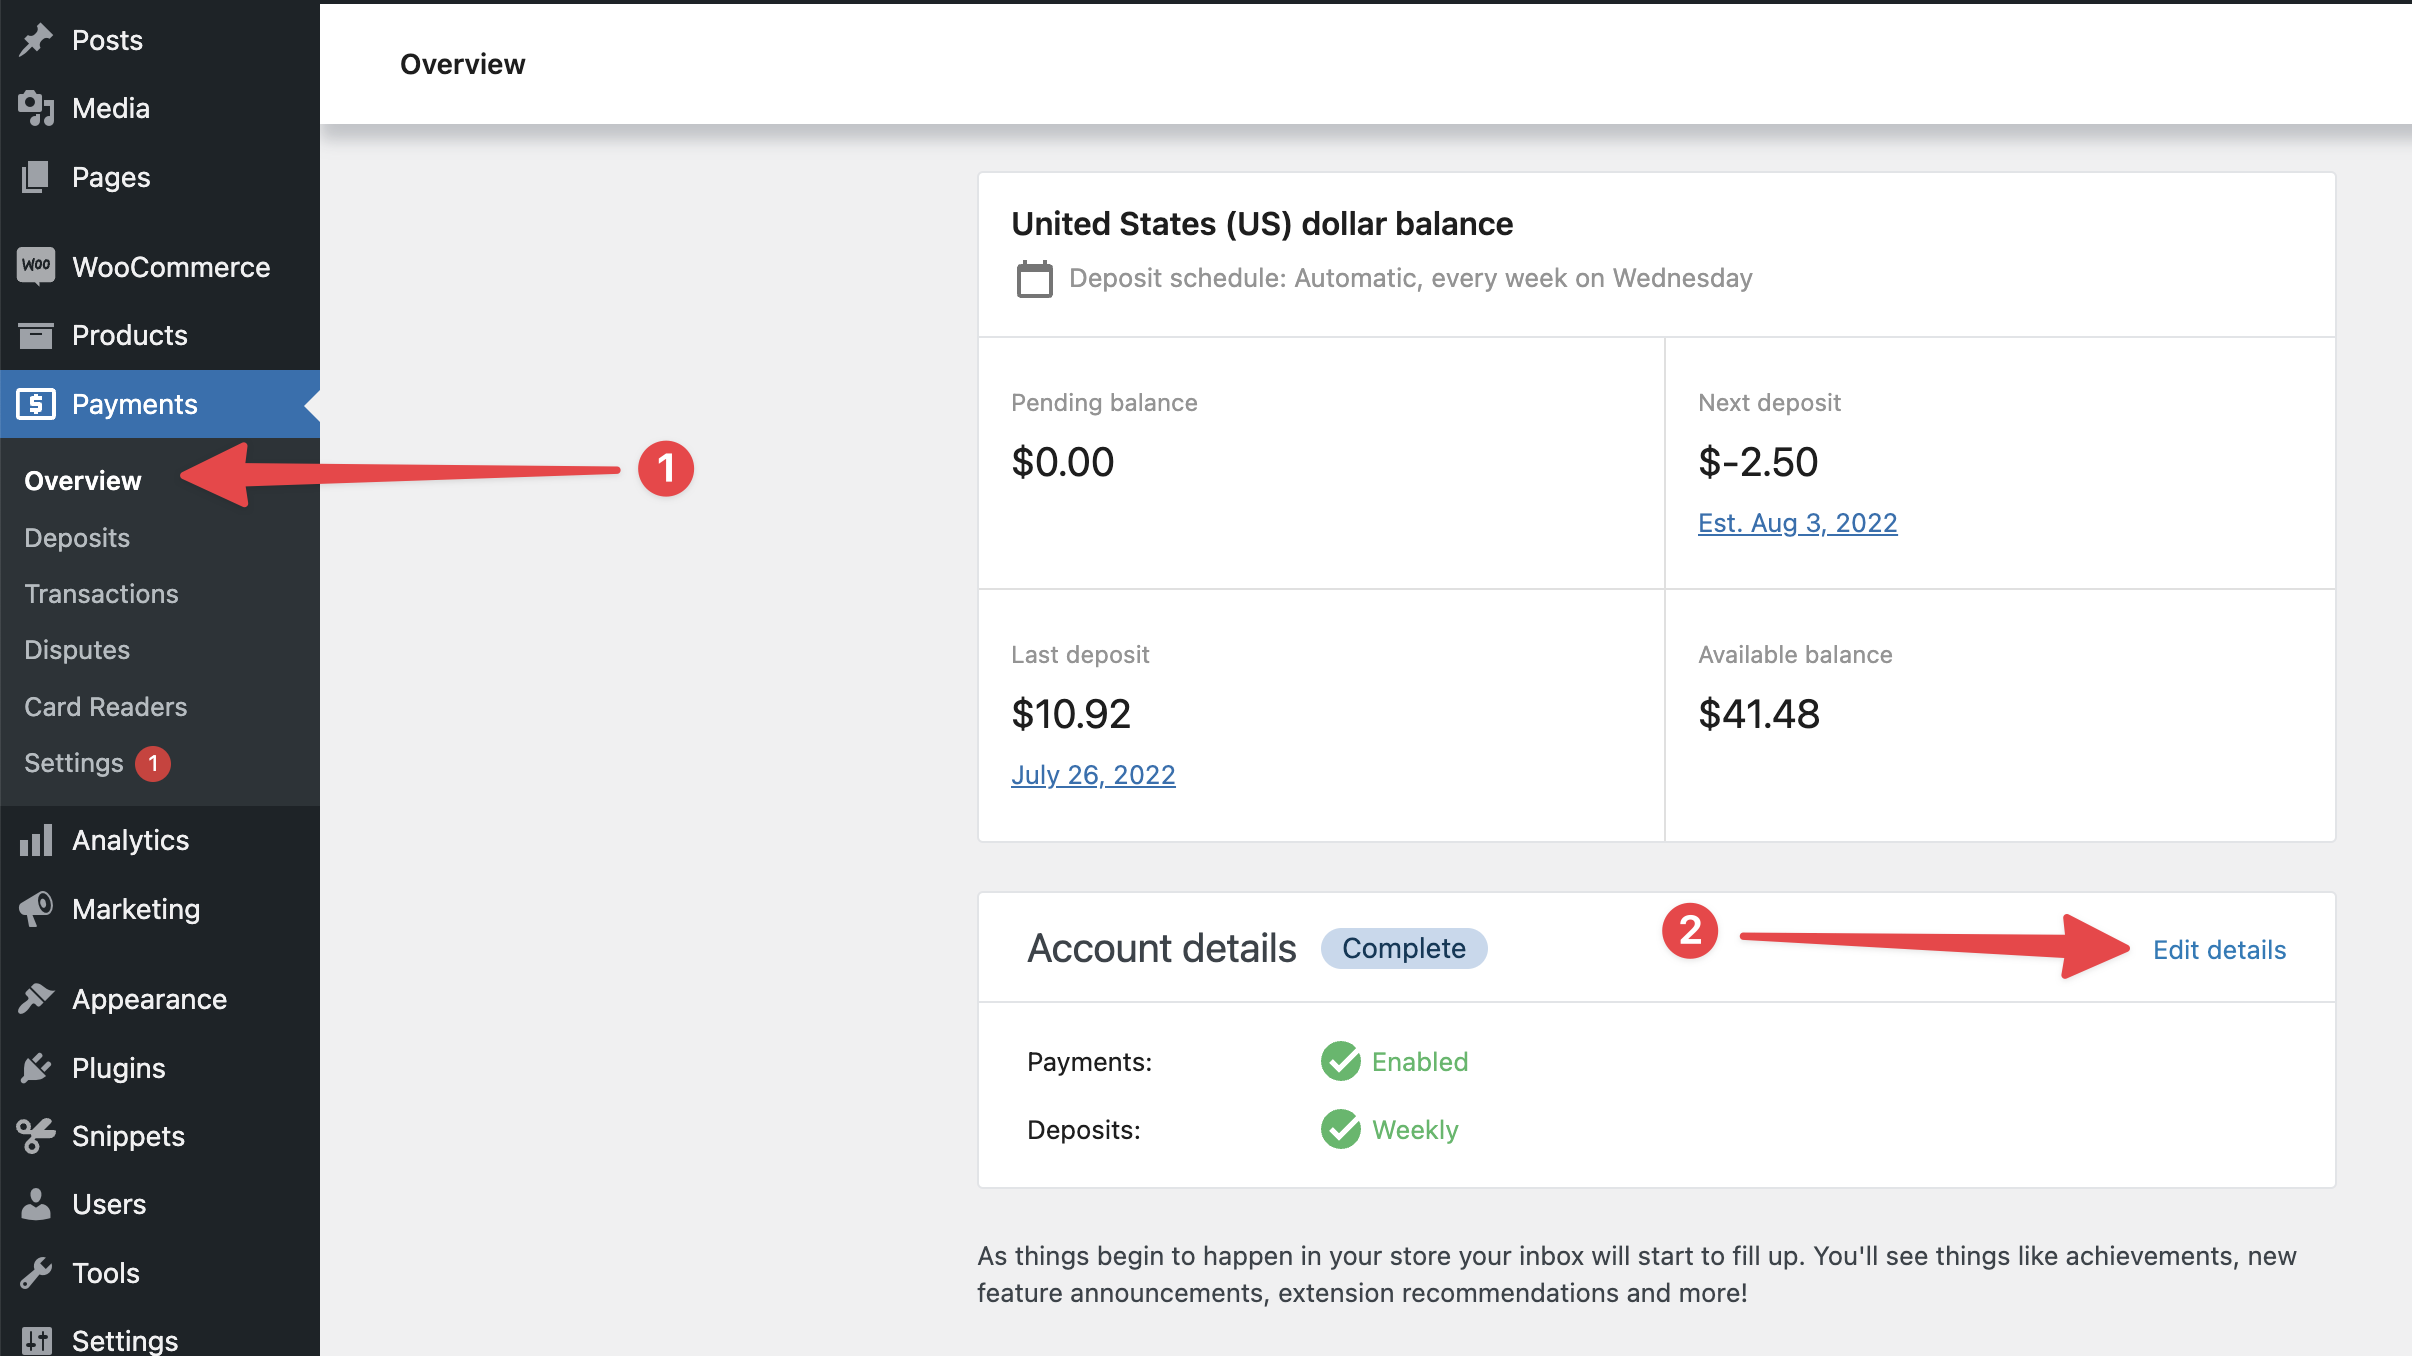
Under Payments > Overview, click the Edit Details link 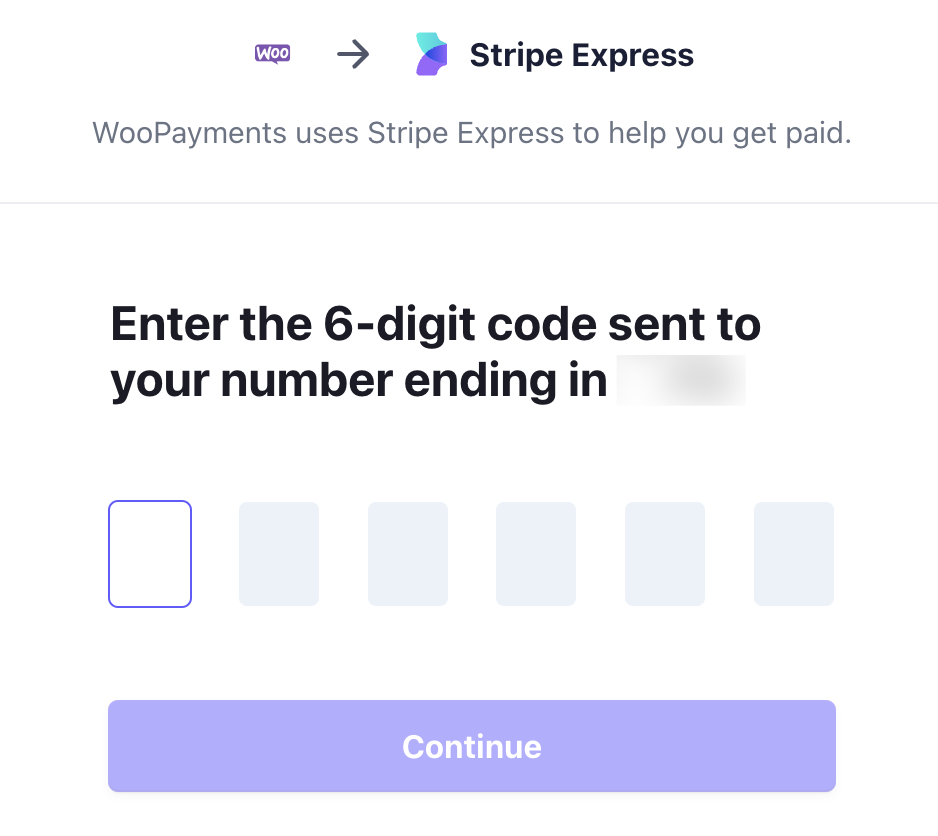
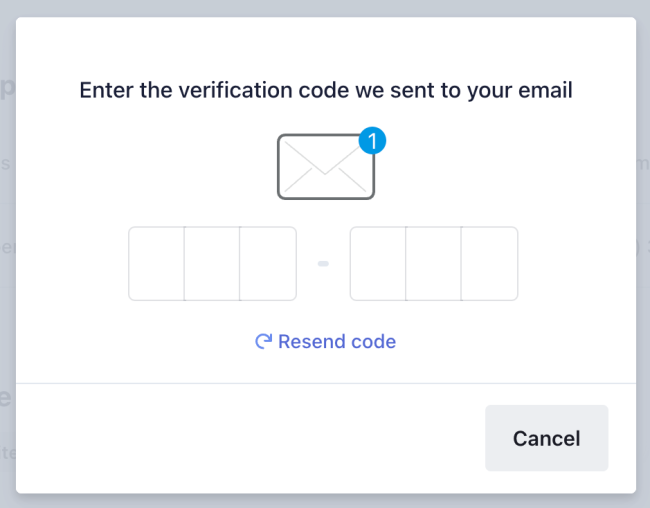
Enter the 6-digit verification code sent to your phone 
Click the person icon in the upper-right 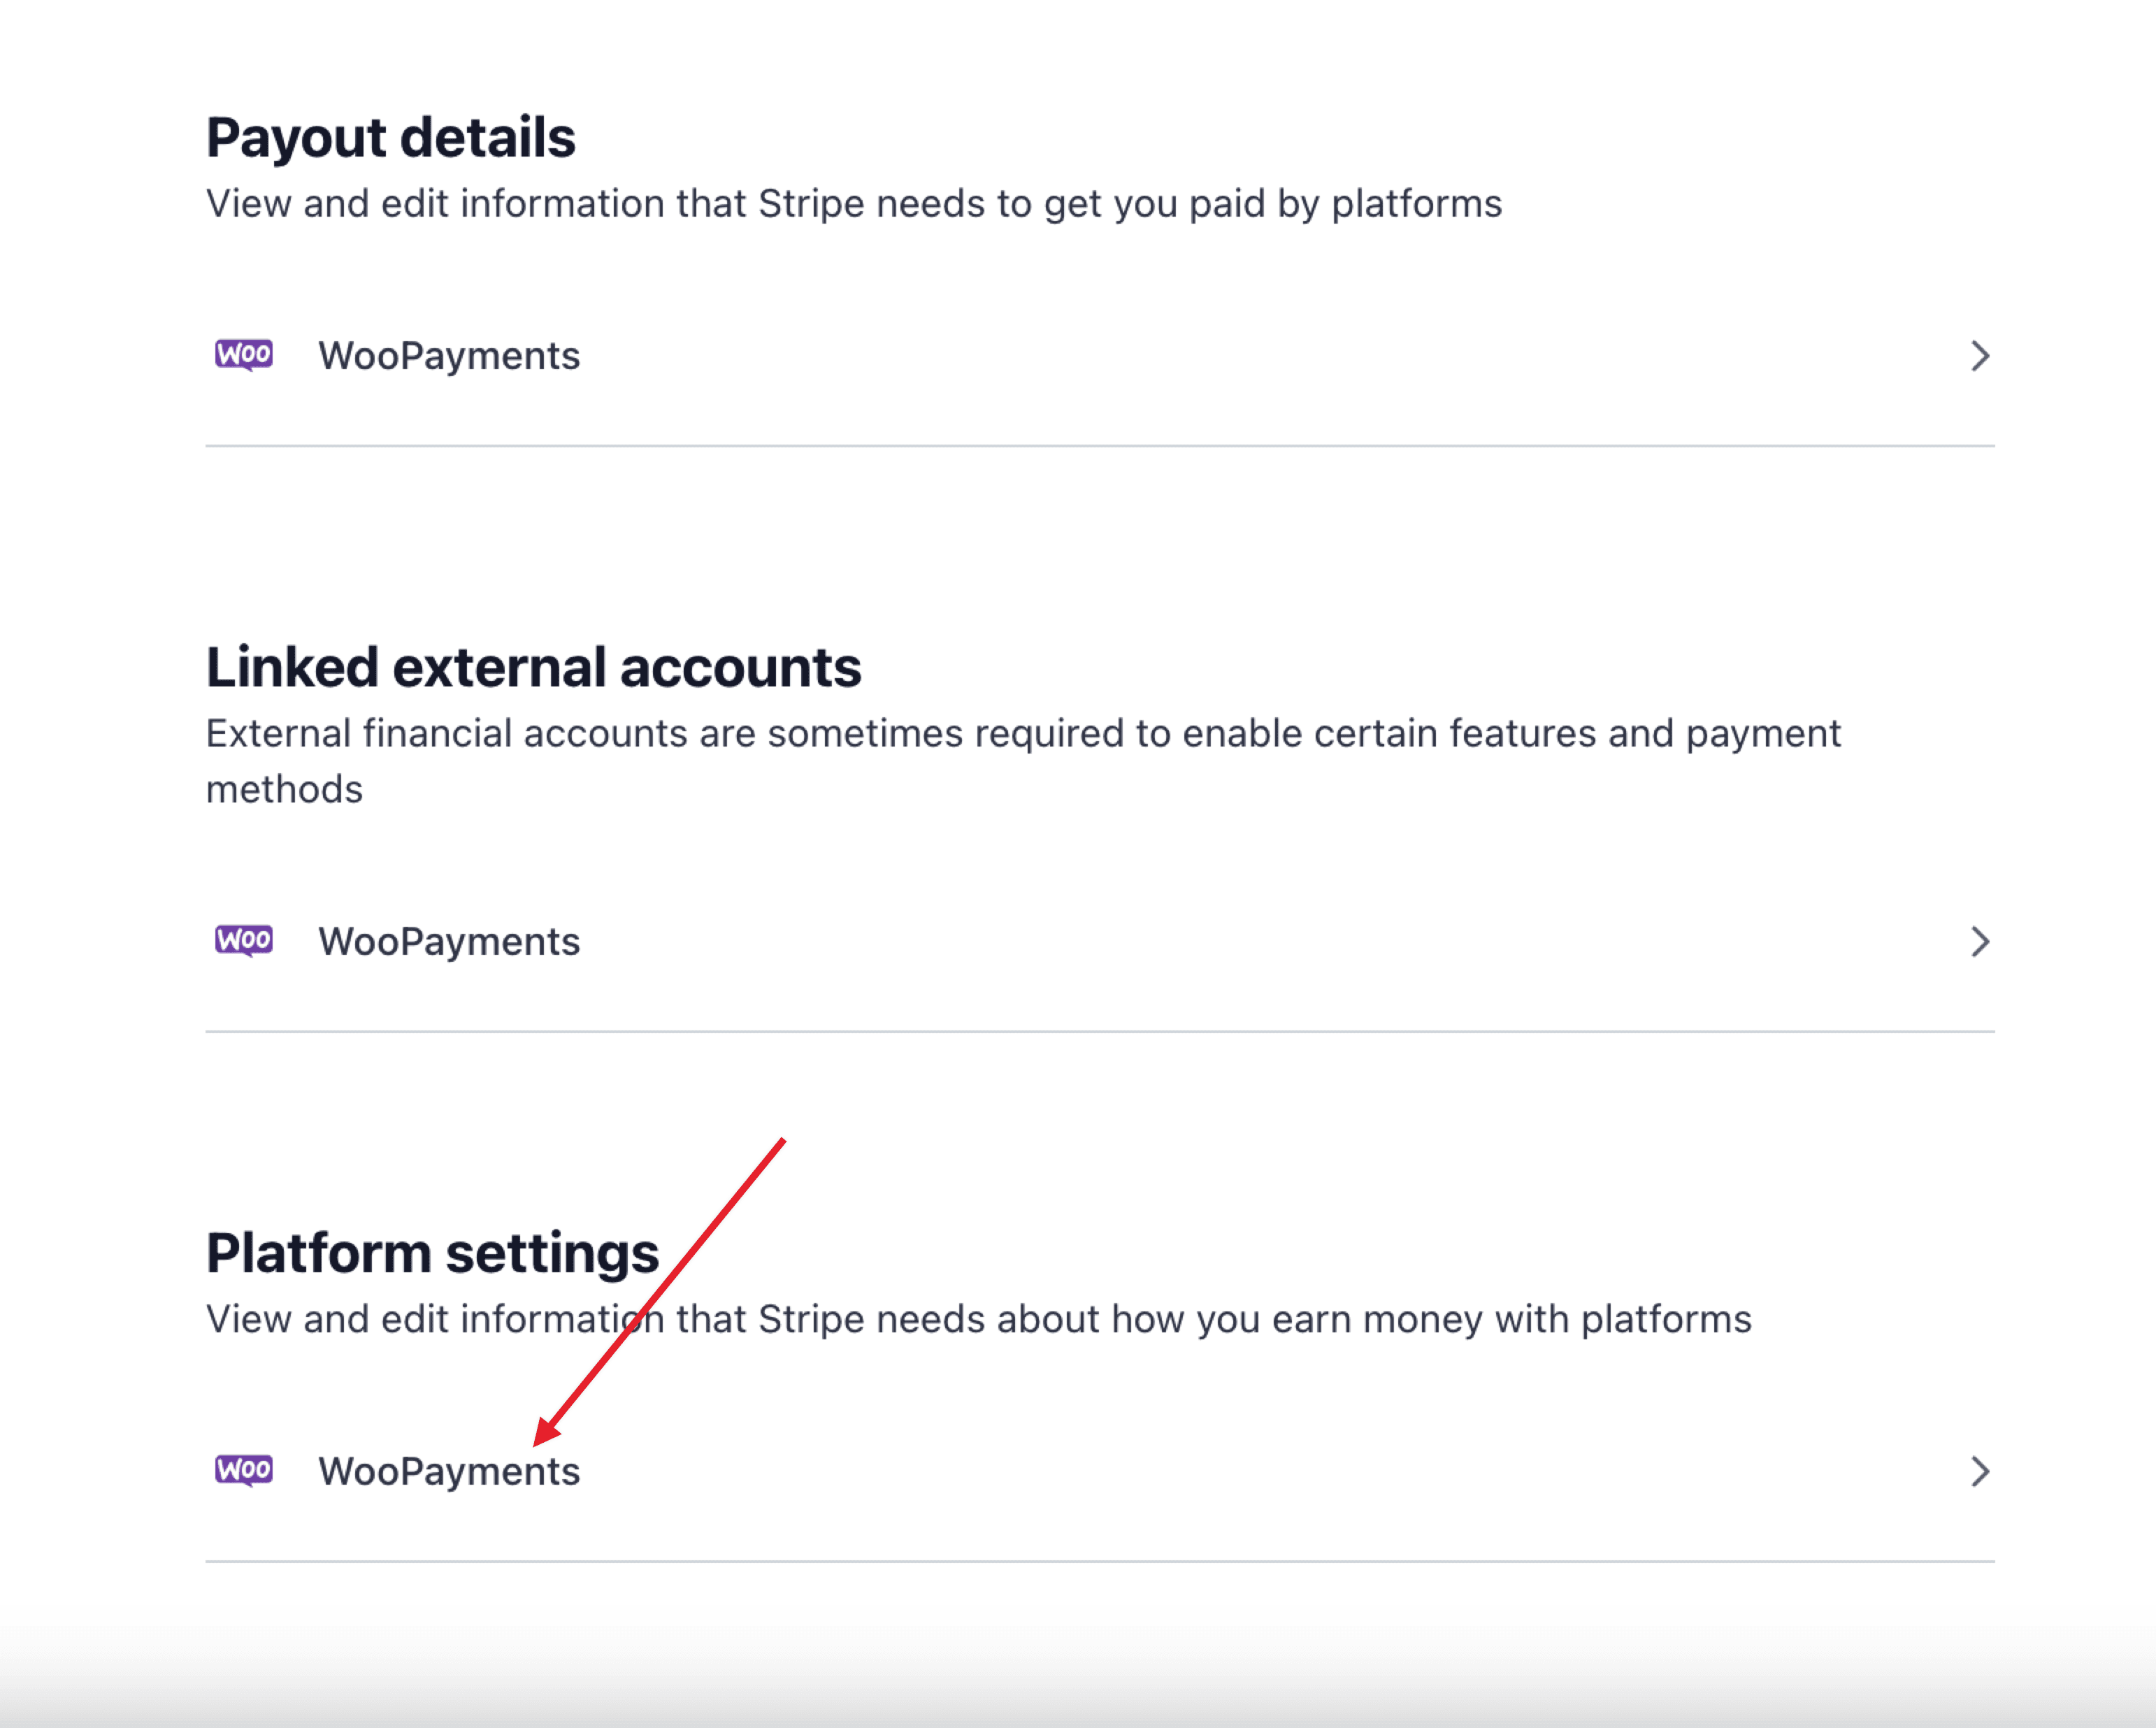
Click your site name in the Platform Settings section 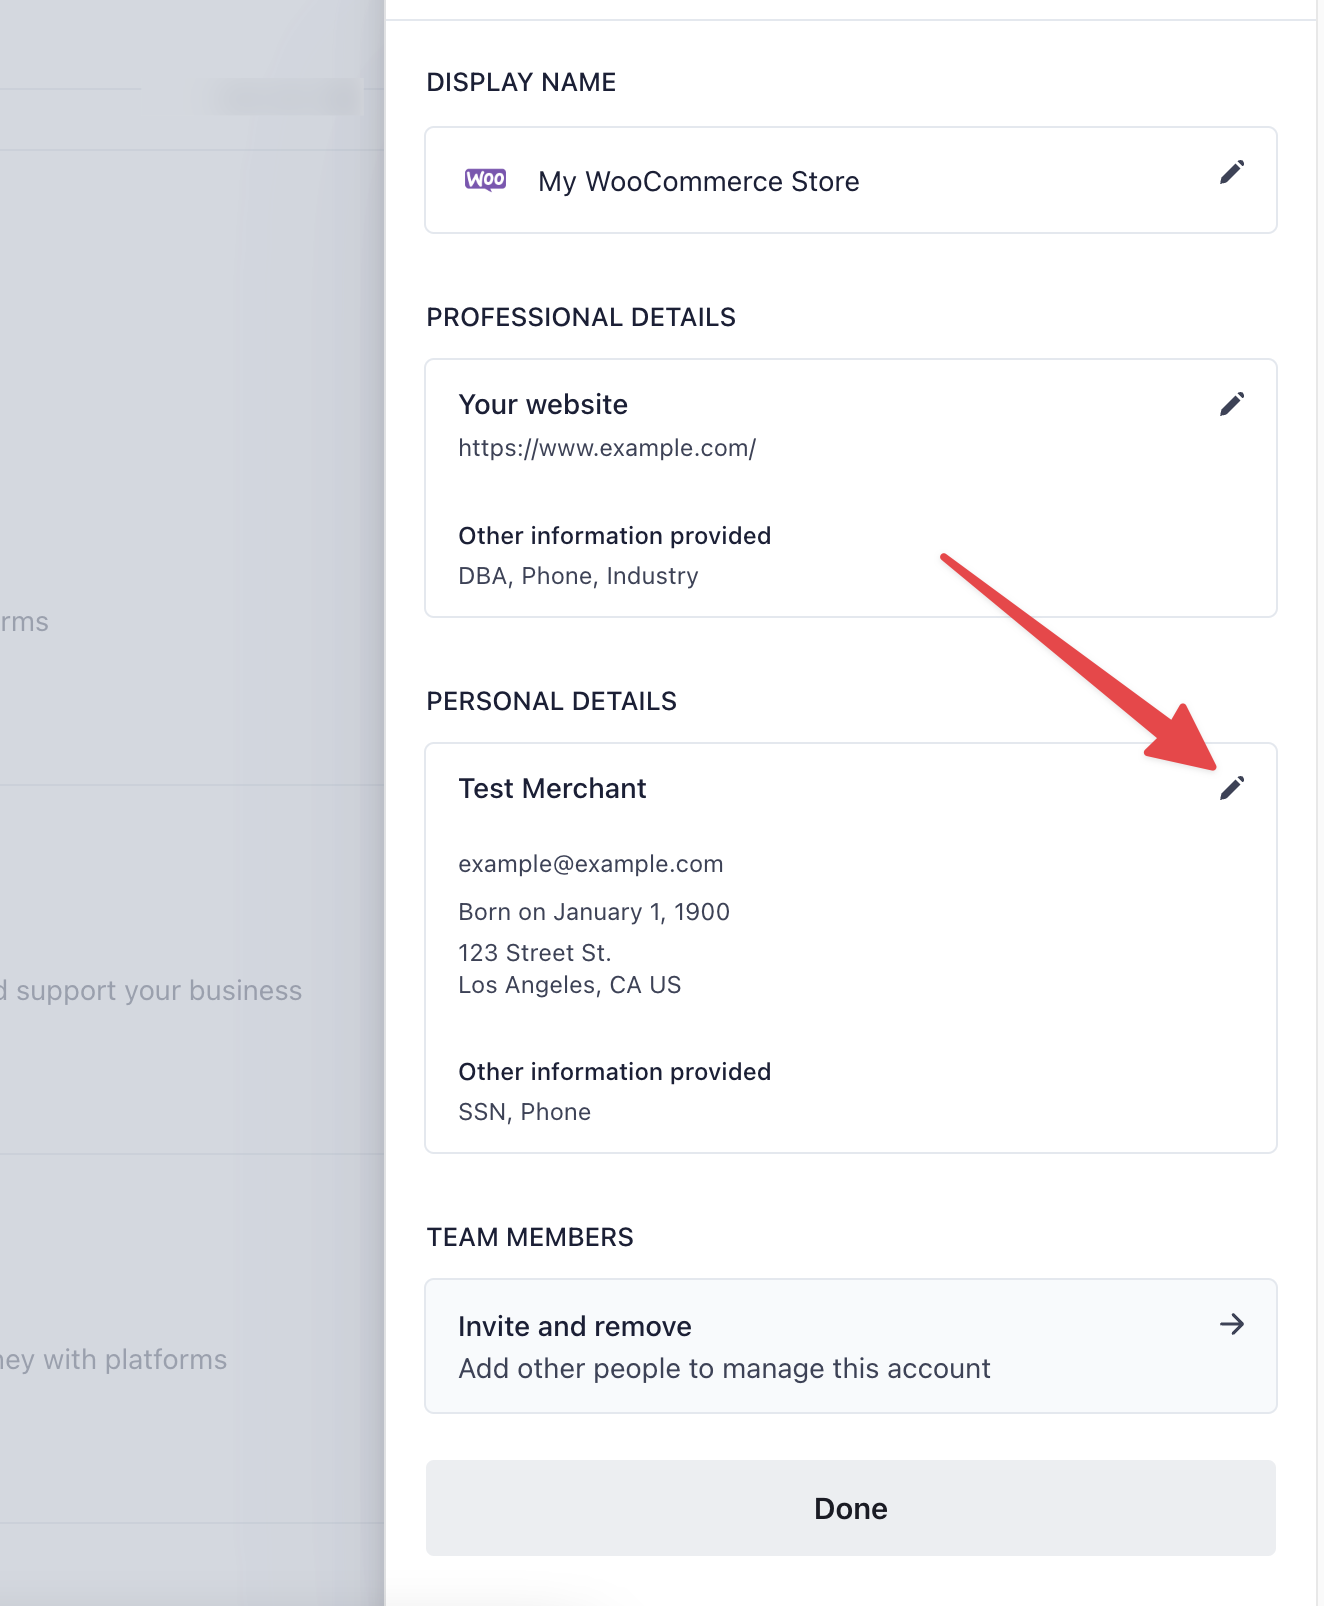
Click the pencil icon in Personal Details section 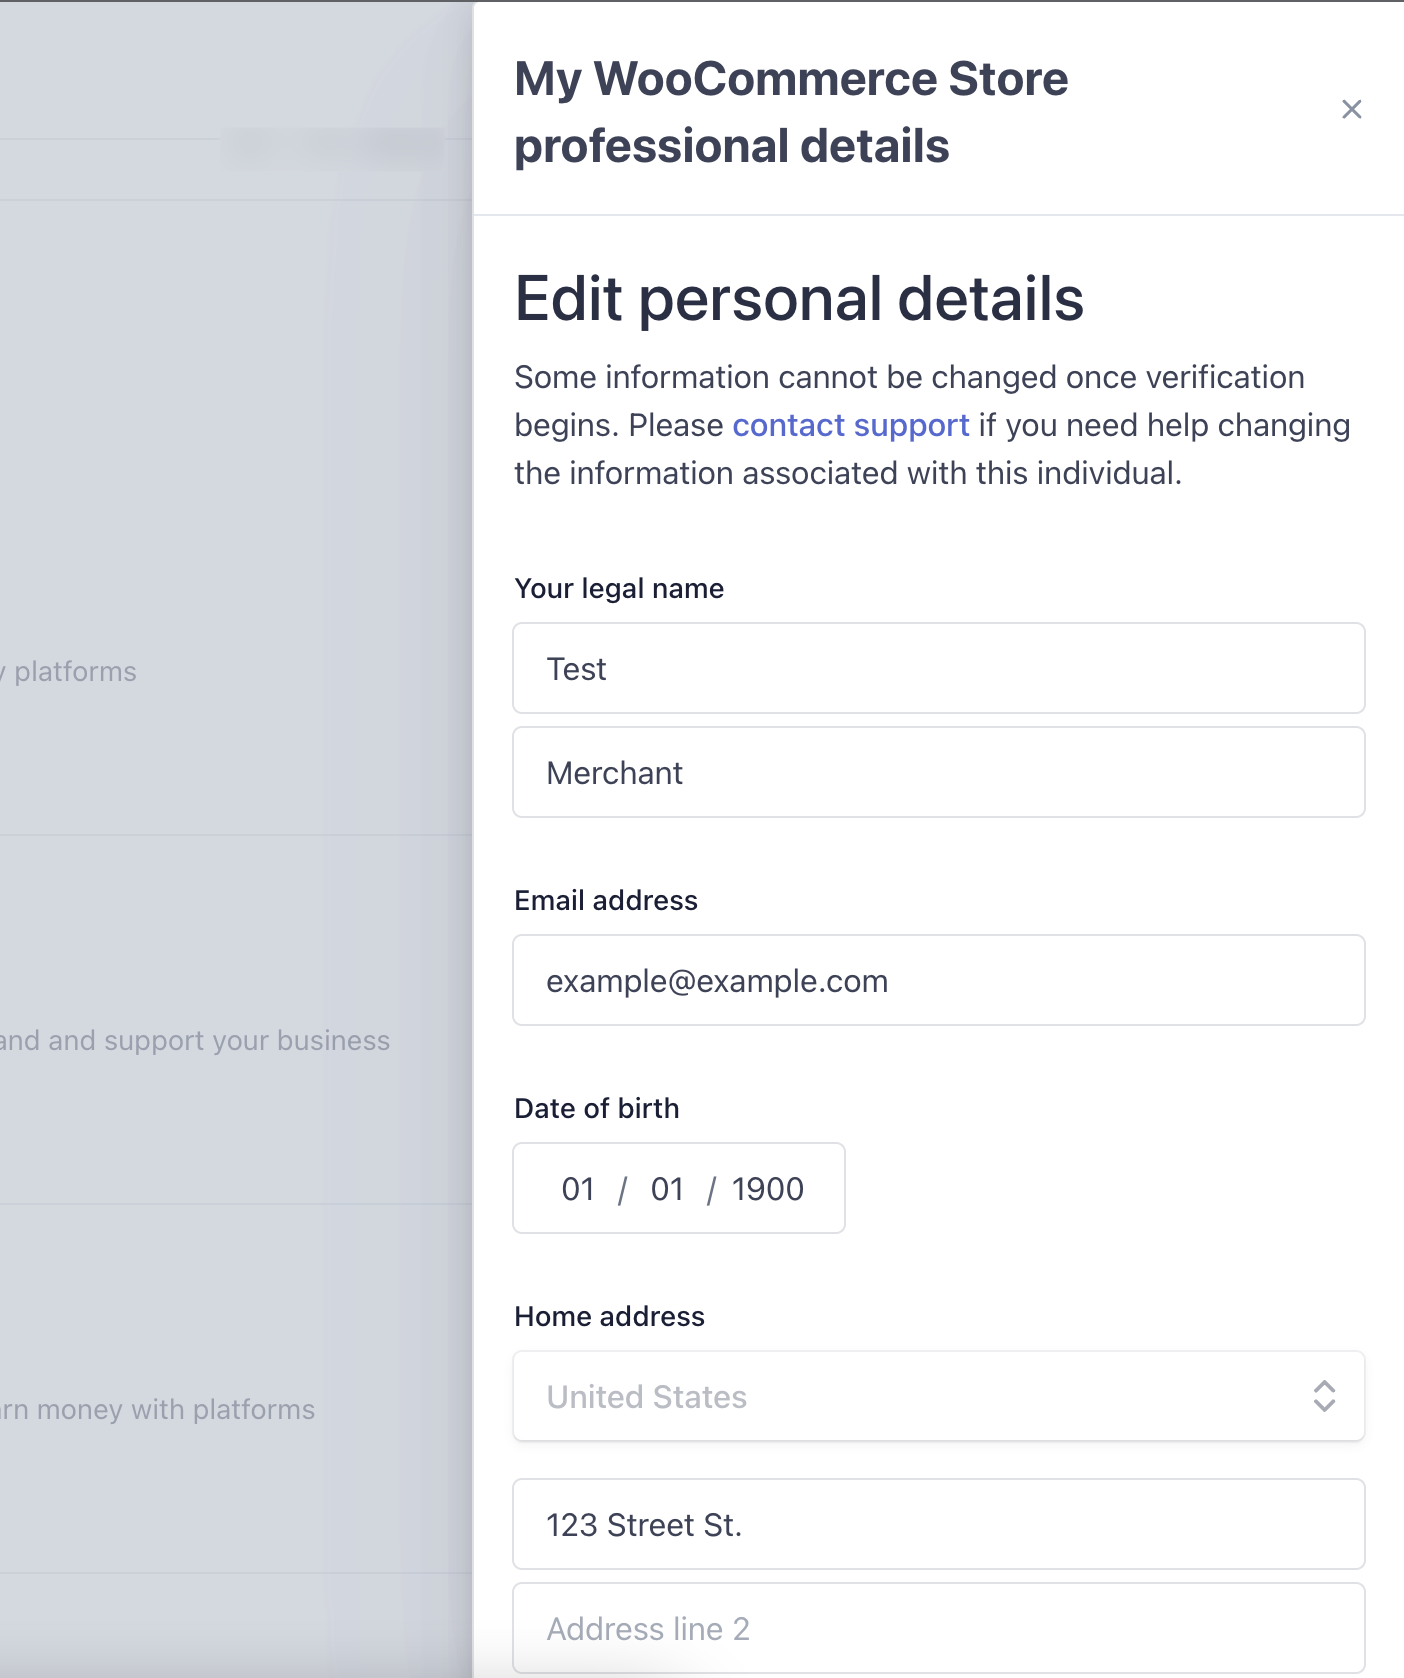
Edit details and click Submit at bottom 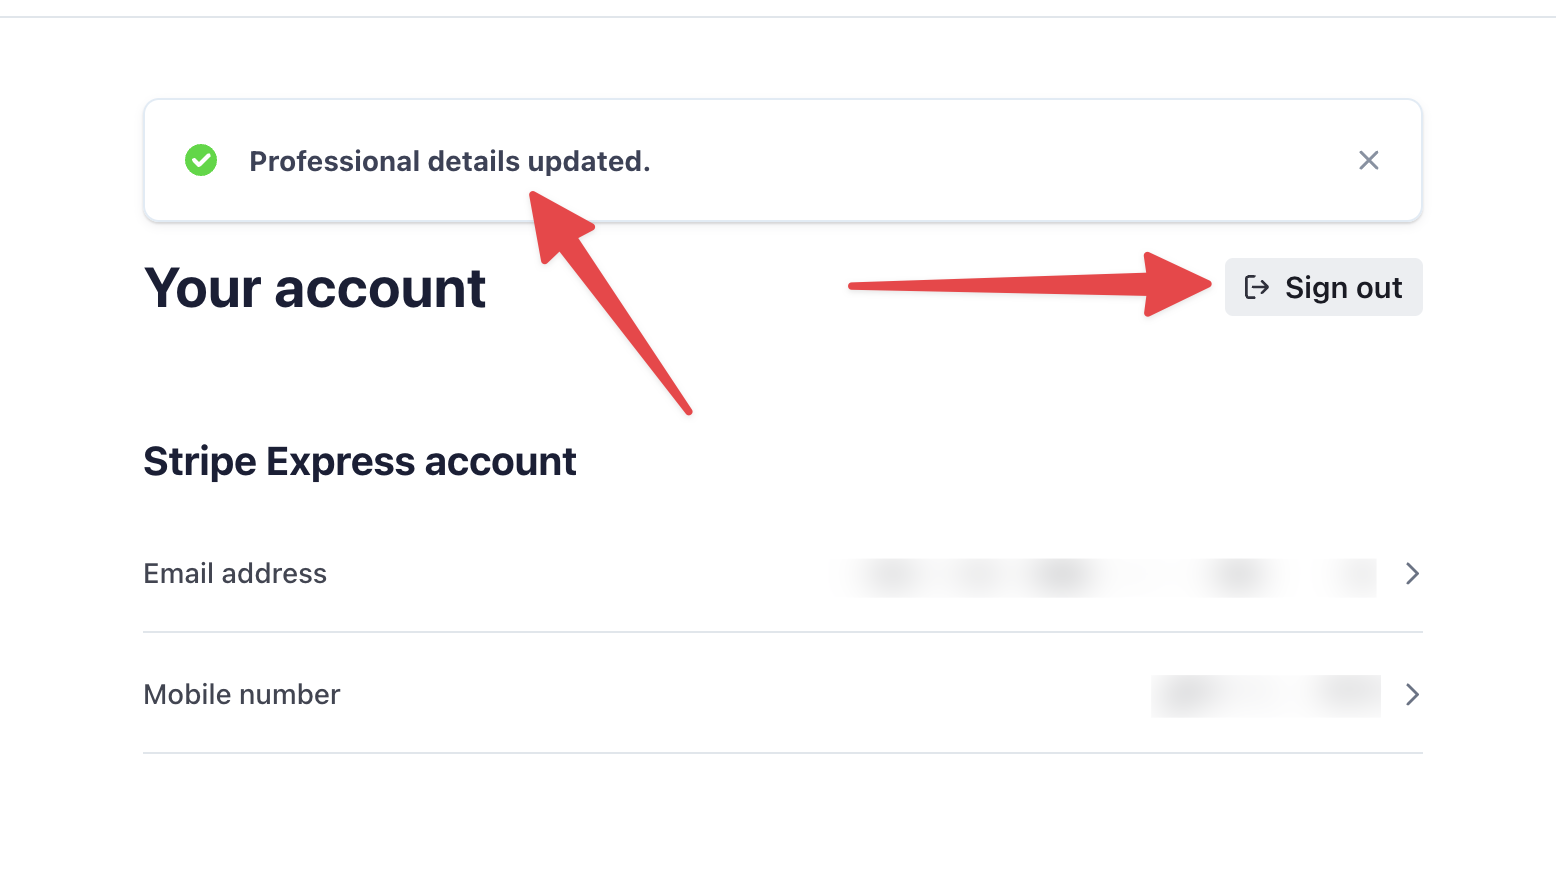
Confirm that your information was updated and sign out
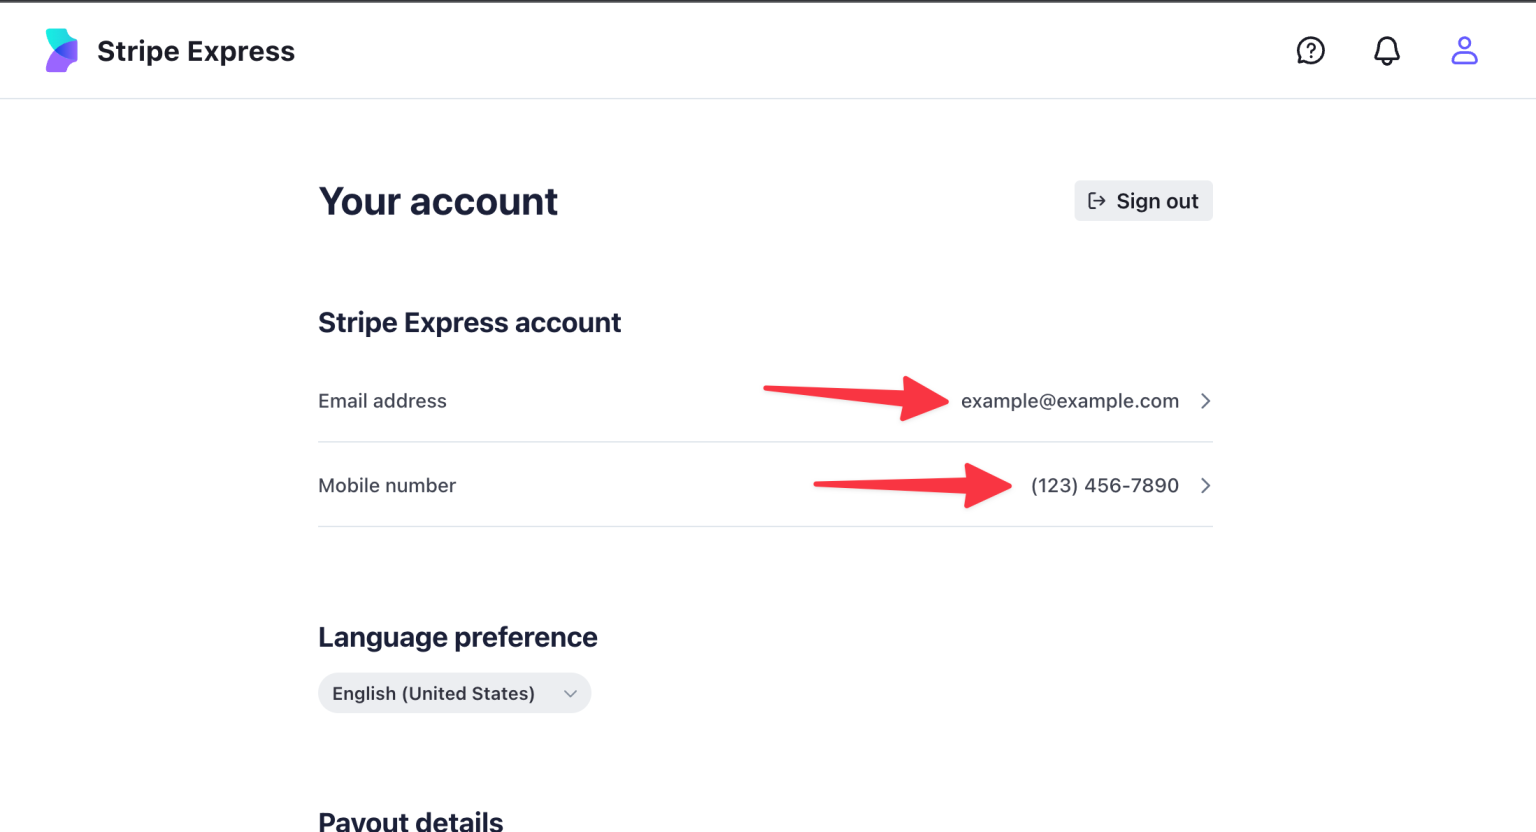
Updating your account information
↑ Back to topFirst, access your Stripe Express account, then update the information as shown below.
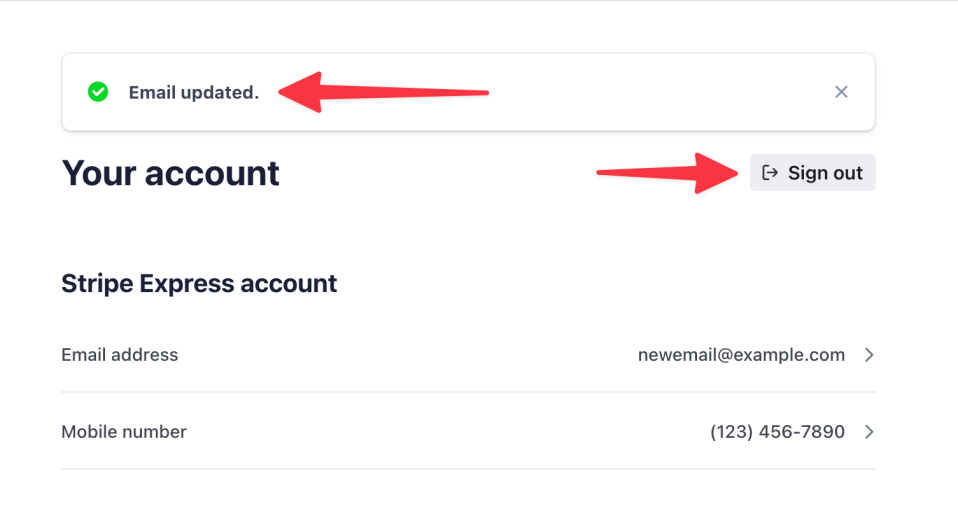
- The account dashboard will show your current account email and phone number.
- Click either piece of information to update it.
- You will be asked to verify yourself with a code that Stripe will send to you.
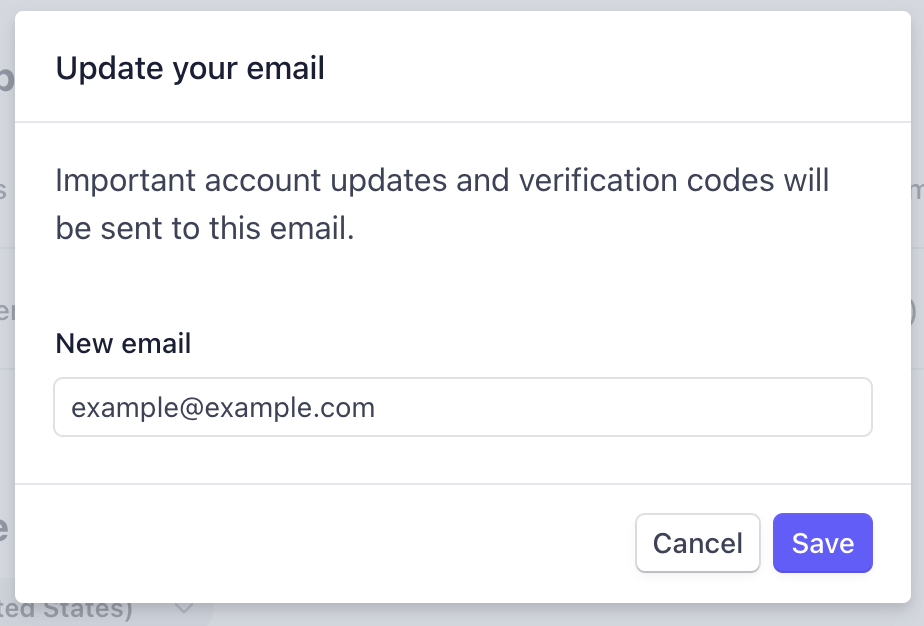
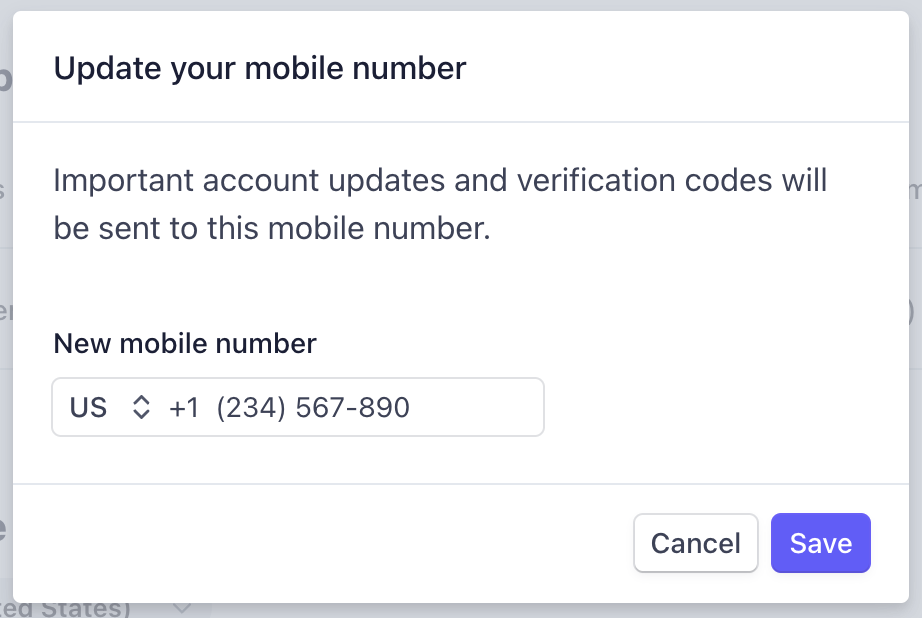
- Enter your new email address or phone number and click Save.
- You will see a message confirming that your info was updated.
- Click Sign Out.