Our Payfast Payment Gateway extension for WooCommerce allows you to process payments via the South African payment processor, Payfast. Payment from any country may be accepted, but it is required to use ZAR as the store currency.
Installation
↑ Back to top- Download the .zip file from your WooCommerce account.
- Go to: WordPress Admin > Plugins > Add New and Upload Plugin with the file you downloaded with Choose File.
- Install Now and Activate the extension.
More information at: Install and Activate Plugins/Extensions.
Requirements
↑ Back to top- A Payfast account to obtain a Merchant ID and Merchant Key. Note that Merchant IDs for developers and live sites are different, so you may need to update those in your live site.
- Instant Transaction Notification (ITN) should be enabled. Replace the following with your domain for the Notify URL. https://domain.com/?wc-api=WC_Gateway_Payfast
- WooCommerce version 7.2 or higher
- WordPress version 6.1 or higher
- PHP version 7.2 or higher
Sign up for Payfast
↑ Back to topTo register for a Payfast account.
- Go to: Payfast
- Register
- Verify your account.
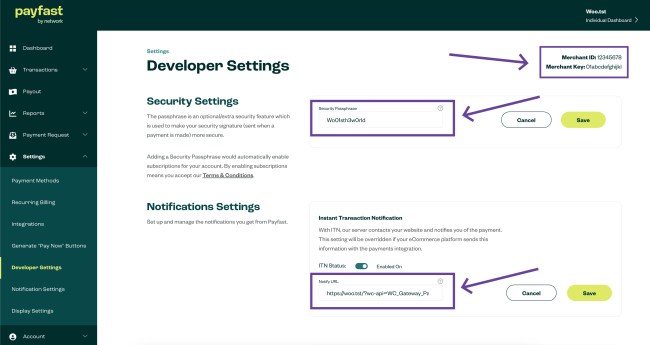
- Go to: Payfast > Settings > Developer Settings
- Copy your Merchant ID and Merchant Key (top right) to use during the setup of your WooCommerce store. Or leave this window open after signup.
- Add and copy the Security Passphrase
- Be sure to enter your Notify URL on this page as well.
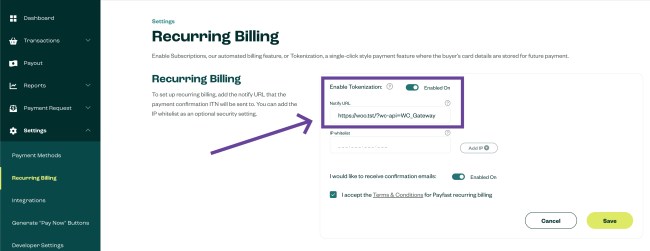
If you’re using Subscriptions and/or Pre-orders, verify that Ad hoc Payments are enabled under the Recurring Billing section.
Setup and Configuration
↑ Back to top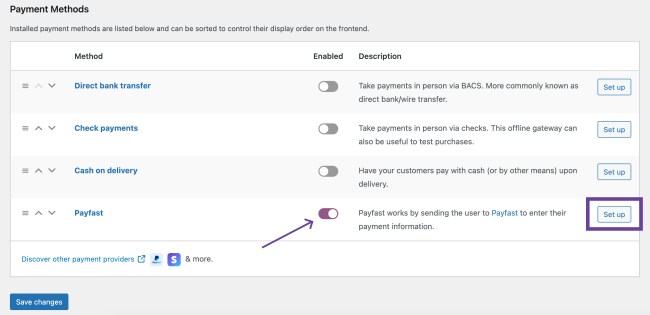
To connect your store with Payfast:
- Go to: WooCommerce > Settings > Payments > Payfast.
- Use the toggle under Enabled to select Payfast.
- Select Set Up. You are taken to the Payfast settings:
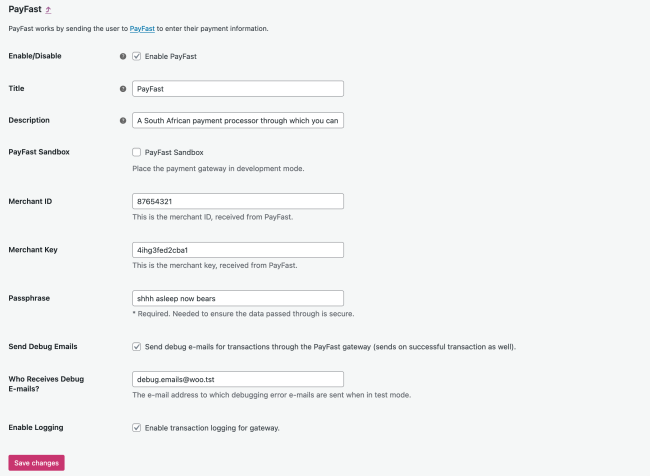
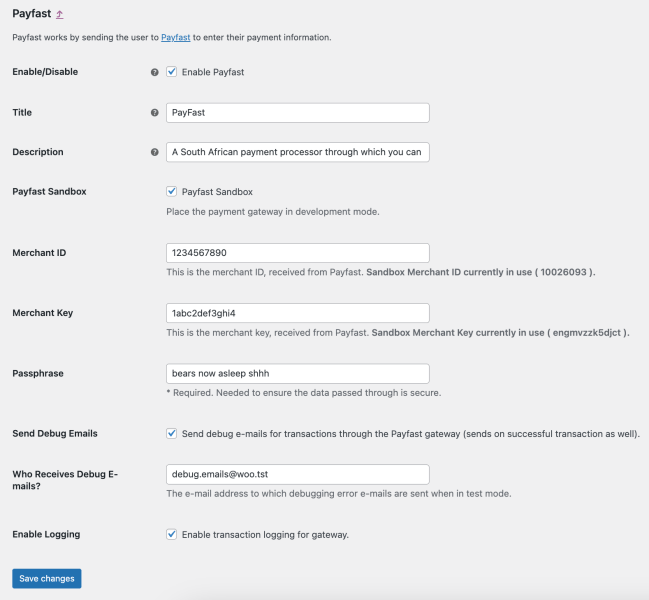
- Enable/Disable – check the box to enable Payfast as an option on the checkout page.
- Title, Description – shown to customers at checkout (optional).
- Payfast Sandbox – check the box if you are developing your website and not ready to accept payments and/or wish to test.
- Merchant ID, Merchant Key, Passphrase – obtained from your Payfast account as outlined above.
- Send Debug Emails, Who Receives Debug E-mails? – check the box and enter an address to receive emails for each transaction (optional)
- Enable Logging – when checked, creates a log under WooCommerce > Status > Logs to record transaction event information, which is useful for troubleshooting.
- Save changes.
The Payfast extension uses the Merchant ID and Merchant Key fields to send cart information to your Payfast account.
Compatibility with other extensions
↑ Back to topPayfast works well with several extensions. One thing to bear in mind is the initial charge may not be less than R5.00.
WooCommerce Subscriptions
↑ Back to topPayfast works with WooCommerce Subscriptions (separate purchase). Configure a simple or variable subscription product as described in the extension’s documentation.
Using Payfast with Subscriptions:
- Basic features available: Subscription suspension and subscription cancellation
- Advanced features available: Recurring total modification, payment date modification, customer payment method changes
While one user can own multiple subscriptions at the same time, Payfast is unable to process the purchase of multiple subscriptions in the same transaction. Two subscriptions cannot be added to the cart at the same time.
Cancellation works from both the WooCommerce store and the Payfast side. If you cancel at the store, the token is cancelled at Payfast. If you cancel at Payfast, the order is cancelled locally.
WooCommerce Pre-Orders
↑ Back to topPayfast works with WooCommerce Pre-Orders. Configure the products as described in the extension’s documentation.
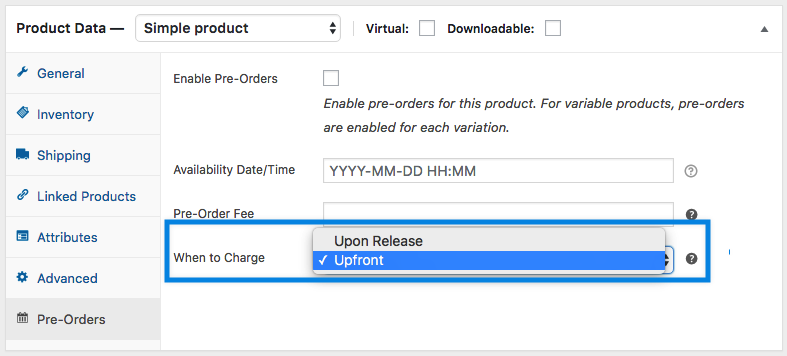
Pre-Orders will not work if there is no initial fee charged. To address this, there are two options:
- If you want to charge Upon Release, you need to set a Pre-Order Fee.
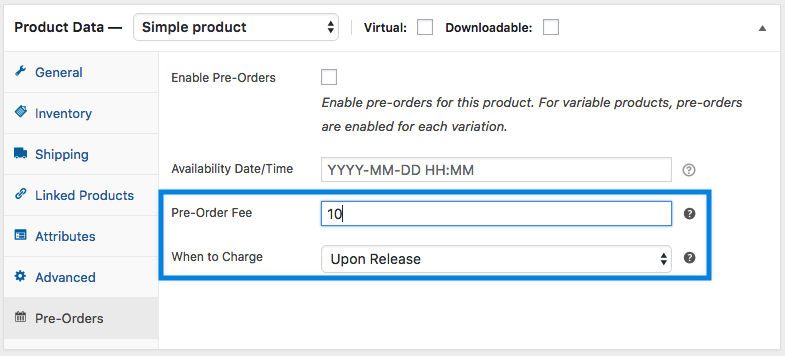
- If you charge the full amount Upfront, setting a Pre-Order Fee is optional.
Test Payfast
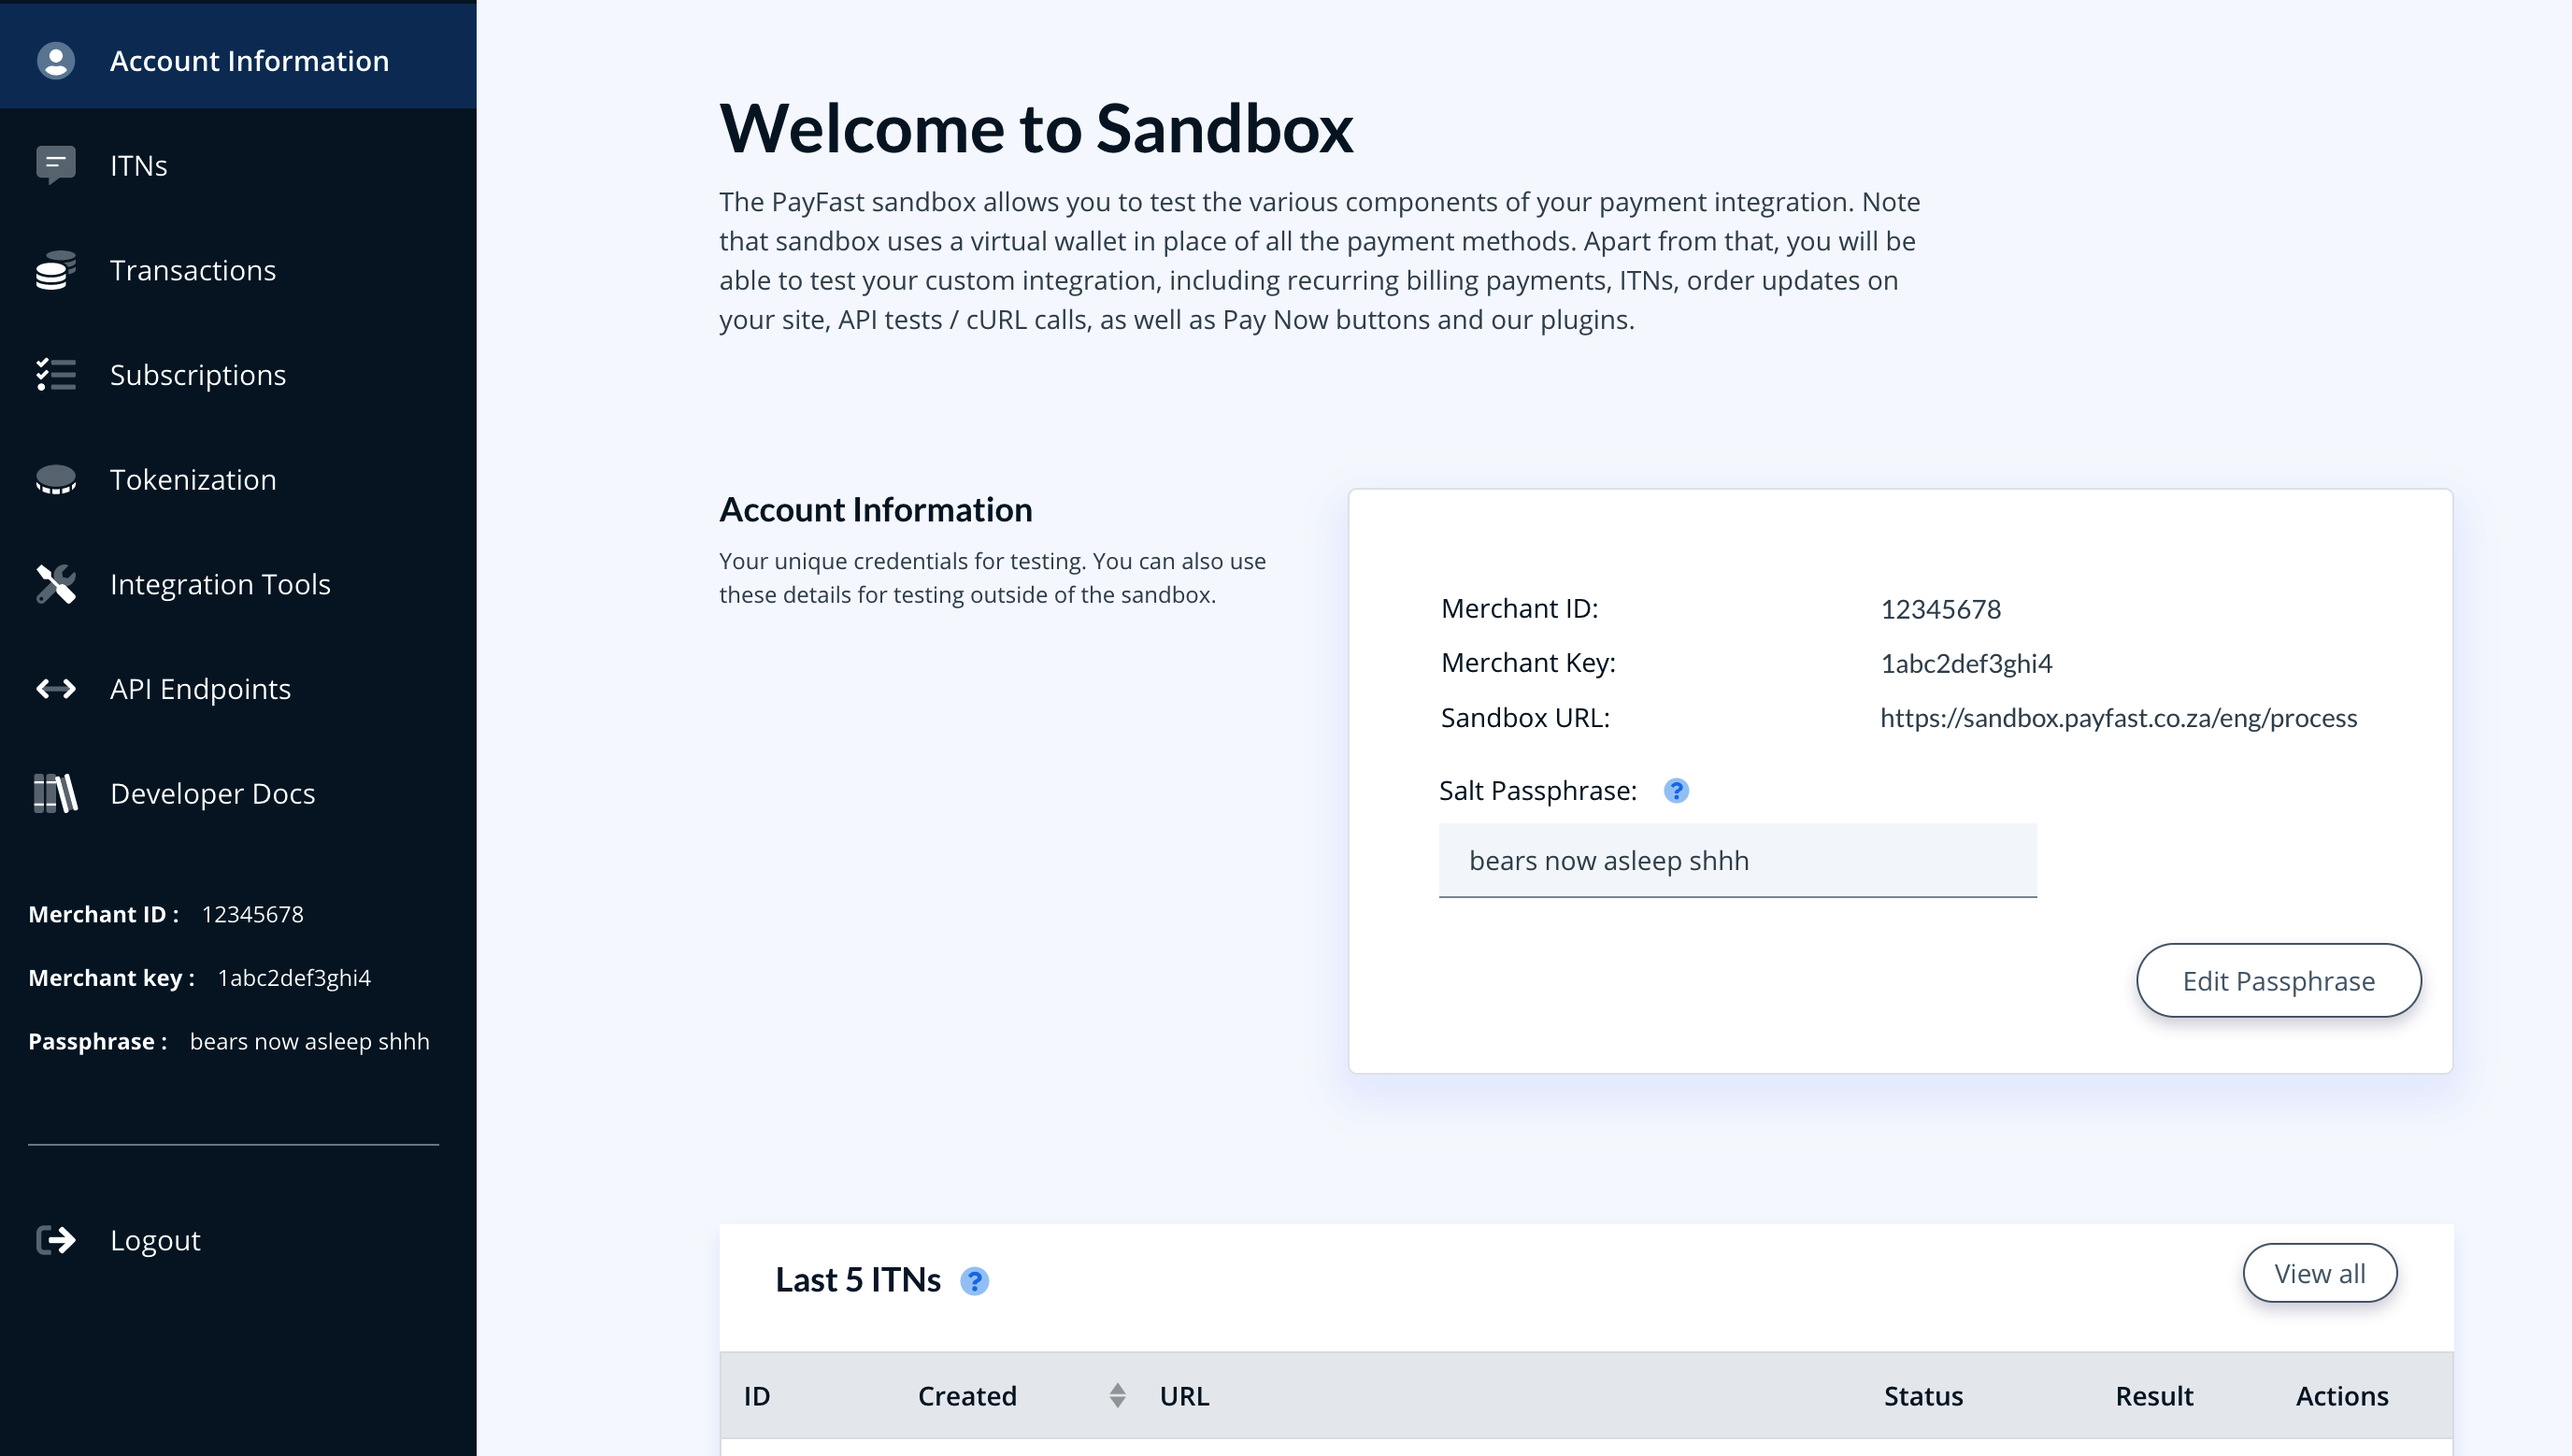
↑ Back to topIt’s possible to test the Payfast payment gateway before going live by using Payfast Sandbox credentials.
To do this:
- Go to: WooCommerce > Settings > Payments > Payfast.
- Tick the Payfast Sandbox checkbox to put the gateway in test mode.
- Replace your Merchant ID, Merchant Key, and Passphrase with the equivalent from your Payfast Sandbox.
- Save changes.
Note: When ready to go live, be sure to untick the Payfast Sandbox checkbox and check your live credentials again. Your Merchant ID and Merchant Key must be entered correctly and in the appropriate fields, even when using Sandbox mode. Otherwise, there will be an error in checkout. Also note that Merchant IDs for developers and live sites are different, so you may need to update those in your live site after testing.
Questions and Feedback
↑ Back to topHave a question before you buy? Please fill out this pre-sales form.
Already purchased and need some assistance? Get in touch with a Happiness Engineer via the Help Desk.