WooCommerce allows shop owners to automatically geolocate customers and display tax rates and shipping methods specific to a customer’s location. In order to determine the correct location for a customer, as of version 3.9+, WooCommerce uses an integration with MaxMind Geolocation.
This document covers:
- Enabling the geolocation in the settings
- Creating a MaxMind account
- Generating a MaxMind license key
- Adding the MaxMind license key to your site’s settings.
- How your WooCommerce site updates the MaxMind database used for geolocation
Enabling Geolocation
↑ Back to topTo enable the MaxMind Geolocation Integration:
- Go to: WooCommerce > Settings > General
- Head to the General options section.
- In the “Default customer address” dropdown, choose “Geolocate” or “Geolocate (with page caching support)”

After geolocation is enabled, you need to create a MaxMind account and finish configuring the MaxMind Geolocation in the integrations tab in the WooCommerce settings.
Create an account on MaxMind
↑ Back to top- Visit the GeoLite2 Sign Up page
- On the registration page, complete the form with your information. If you’re not sure what to choose as “Industry” and “Intended use” fields you can fill as “eCommerce” and “Content customization” respectively.
- After submitting you’ll get an email with a link to set your password shortly. Click on that link and choose a password.


Create a MaxMind License Key
↑ Back to topNow that you have an account on the MaxMind website you will be able to create a license key.
- Go to: https://www.maxmind.com/en/account
- Select the “Manage License Keys” tab in your user account dashboard.
- Select “Generate new license key”.

- Next, fill in the form to generate a license key.
- Add a description (just as the name of your store)
- Choose “No” next to “Will this key be used for GeoIP Update?”
- Select “Confirm”.

- You will be presented with a new key. Copy this key straight away as it will be shown only once.

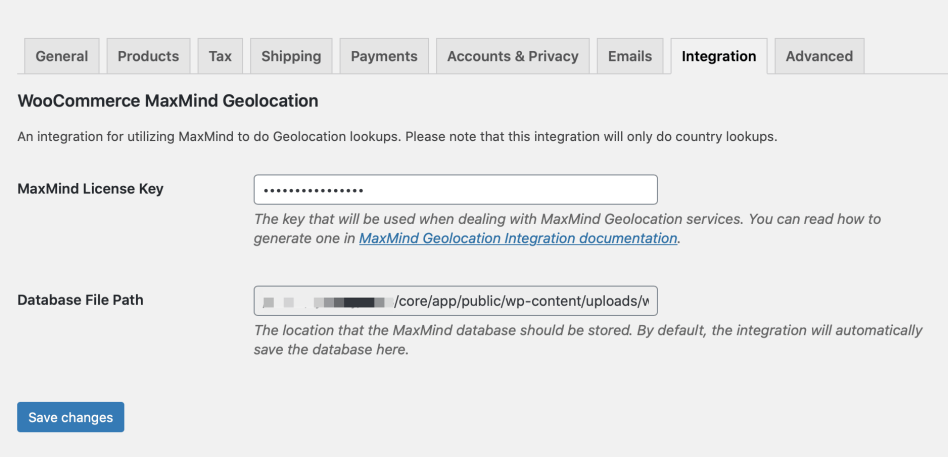
Add MaxMind Geolocation License Key to WooCommerce settings
↑ Back to topFinally, you need to add this key to your WooCommerce settings.
- Go to: WooCommerce > Settings > Integration > MaxMind Geolocation
- Paste the license key
- Click the“Save changes” button
Now your WooCommerce store is ready to geolocate customers with the MaxMind Geolocation Integration.
Updating the MaxMind database
↑ Back to top- The system automatically updates every 15 days, using the built-in WordPress function WP Cron to trigger
woocommerce_geoip_updater. - If the mmdb file on your server doesn’t seem to be updated correctly after this time, you can install the WP Crontrol plugin to troubleshoot scheduled cron events in WordPress.
- Once the plugin is installed and active, you can go to Tools > Cron Events, check the next scheduled time for this event, and optionally run it manually.
Why am I seeing ?v=$hash query strings added to my site’s URLs? (e.g. https://my.example.shop/?v=bc74b2d76824)
When you select the option to “Geolocate (with page caching support)” WooCommerce appends a user specific hash of the user’s IP address to the URL, so that the page can be cached for their re-use. This enables location specific data like tax rates and shipping information to be cached for your customers as they navigate your shop.
If you’d like to prevent these query strings from being added. Select the Geolocate option instead.