Welcome to Matthew WordPress theme documentation! This documentation will show you step by step how to accomplish the basic configuration of Matthew.
Installation
↑ Back to topTo install the Matthew theme you must first have a working WordPress(.org) installation. For more information on installing WordPress, please see Installing WordPress, from official WordPress site. Once WordPress has been set up, you can start installing your theme.
There are two main ways in which you can install Matthew in your WordPress site: using WordPress dashboard or uploading the theme files through FTP (file transfer protocol). The fastest way to install the Matthew theme is through the WordPress dashboard.
Using WordPress dashboard
↑ Back to top- Head over to Appearance → Themes in your WordPress dashboard.
- Click Add New at the top of the themes screen followed by the Upload Theme button.
- Upload the matthew.zip file you have downloaded from WooCommerce.com.
- Activate as you would any other WordPress theme.
Using FTP client
↑ Back to top- Download the latest version of Matthew from WooCommerce.com
- Upload the extracted folder of the theme to the /wp-content/themes/ directory on your server using FTP.
- Activate Matthew from the Appearance → Themes screen in your dashboard.
Configuration
↑ Back to topNow we need to configure our WordPress site to display proper pages and elements.
Installing and activating WooCommerce
↑ Back to topThe theme requires WooCommerce for selling products online. To learn how to transform your WordPress site into a thoroughbred eCommerce store, please see WooCommerce documentation.
Adding a demo content
↑ Back to topThis step is totally optional. Please ignore it if you want to create a fresh WordPress installation without any content.
It is possible to install a demo content into your WordPress site by importing XML files with a sample content. We’ve created this sample content specially for you! The sample content and instructions can be found here.
Please note, uploading XML files to your WordPress site usually just results in some sample content, which is helpful in case your website doesn’t have content yet. XML files usually won’t take care of the full site configuration for you.
Also, note that the demo content does not necessarily reflect the layout of the theme. With the introduction of the Patterns function in WordPress, the theme now provides pre-made layouts that replicate the designs shown on the demo website.
If you’ve decided to skip a step regarding a demo content, please see steps below on how to create a layout similar to a demo site.
Setting up a static front page
↑ Back to topA static front page is the main page of your site. By default, your homepage is your blog, but you can change this to any page you’ve created.
- Create two new pages: one for your homepage and another for your blog page. You can leave them empty (with no content in it) for now.
- Open the Customizer and navigate to Homepage Settings.
- Select the A static page option.
- Choose your new page for a front page from the Homepage drop down.
- Choose your new page for a blog page from the Posts page drop down.
- Click on the Publish button to save your settings.

Creating a content for a static front page
↑ Back to topNow we are ready to create a content for our front page which we have recently created. First, click the X in the top left corner to exit the Customizer. Then, go back to the front page to start adding content.
The theme comes with pre-made layouts for Home page. They can be found in the Block editor: Patterns
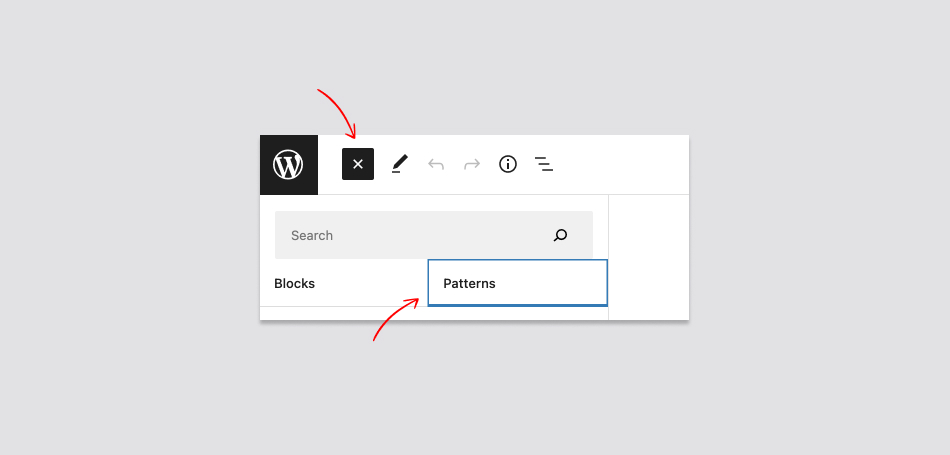
These layouts are created using a combination of WordPress and WooCommerce blocks which come by default with WordPress and WooCommerce.
Setting up a blog page
↑ Back to topThe blog page has been already created and set in the “Setting up a static front page” step above. Note, there is no need to add any content to your blog page. WordPress will automatically generate a blog page content for you.
Customization
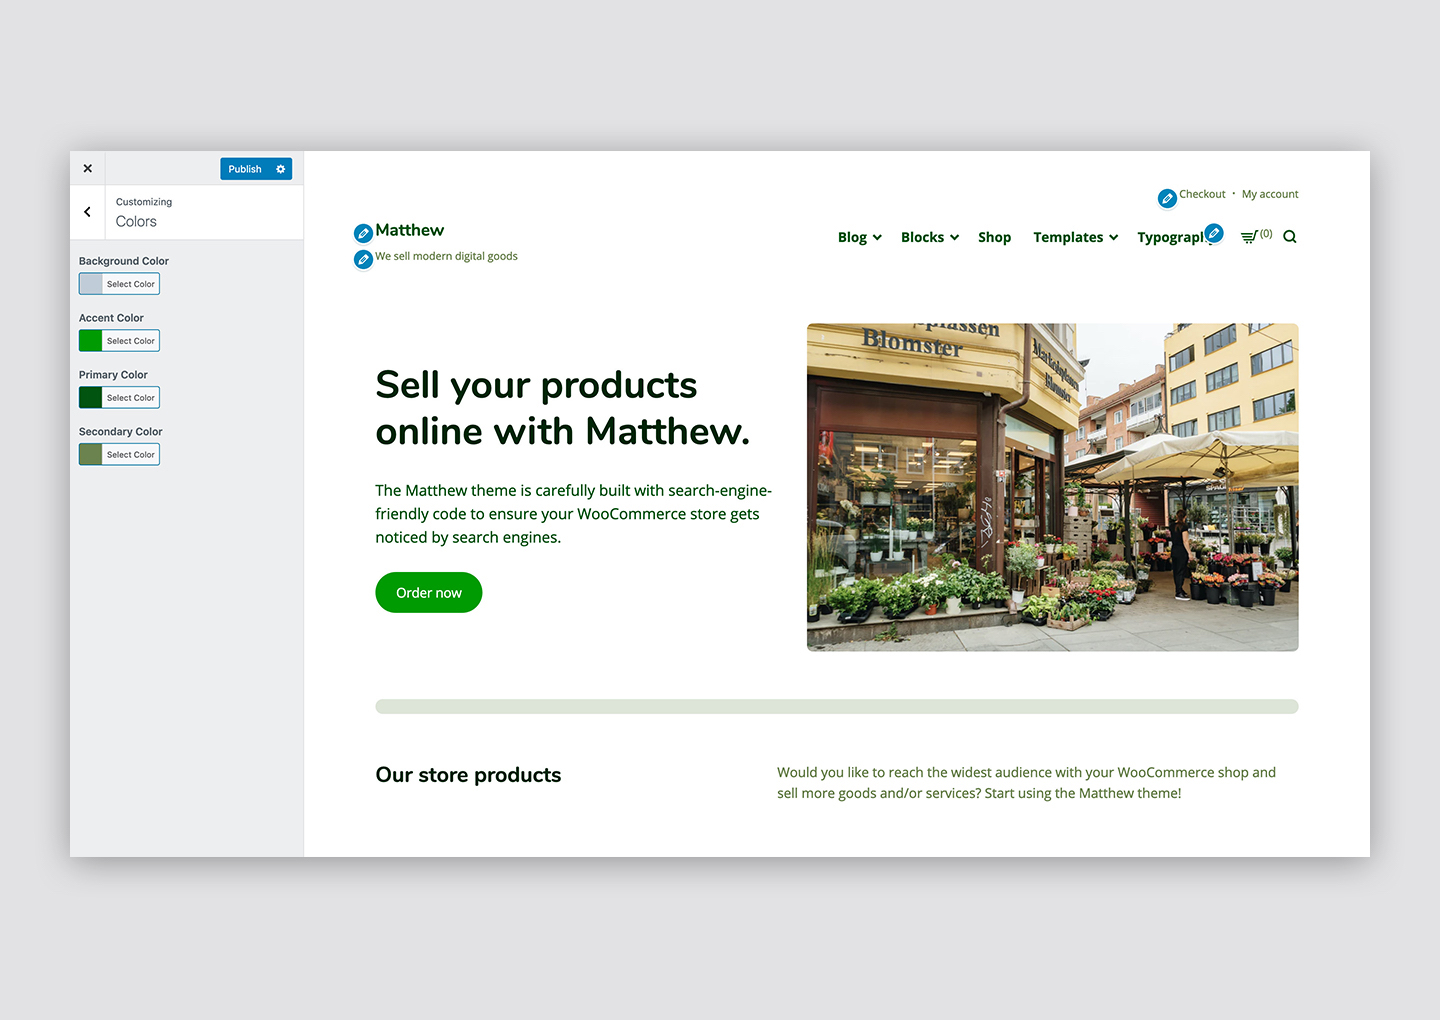
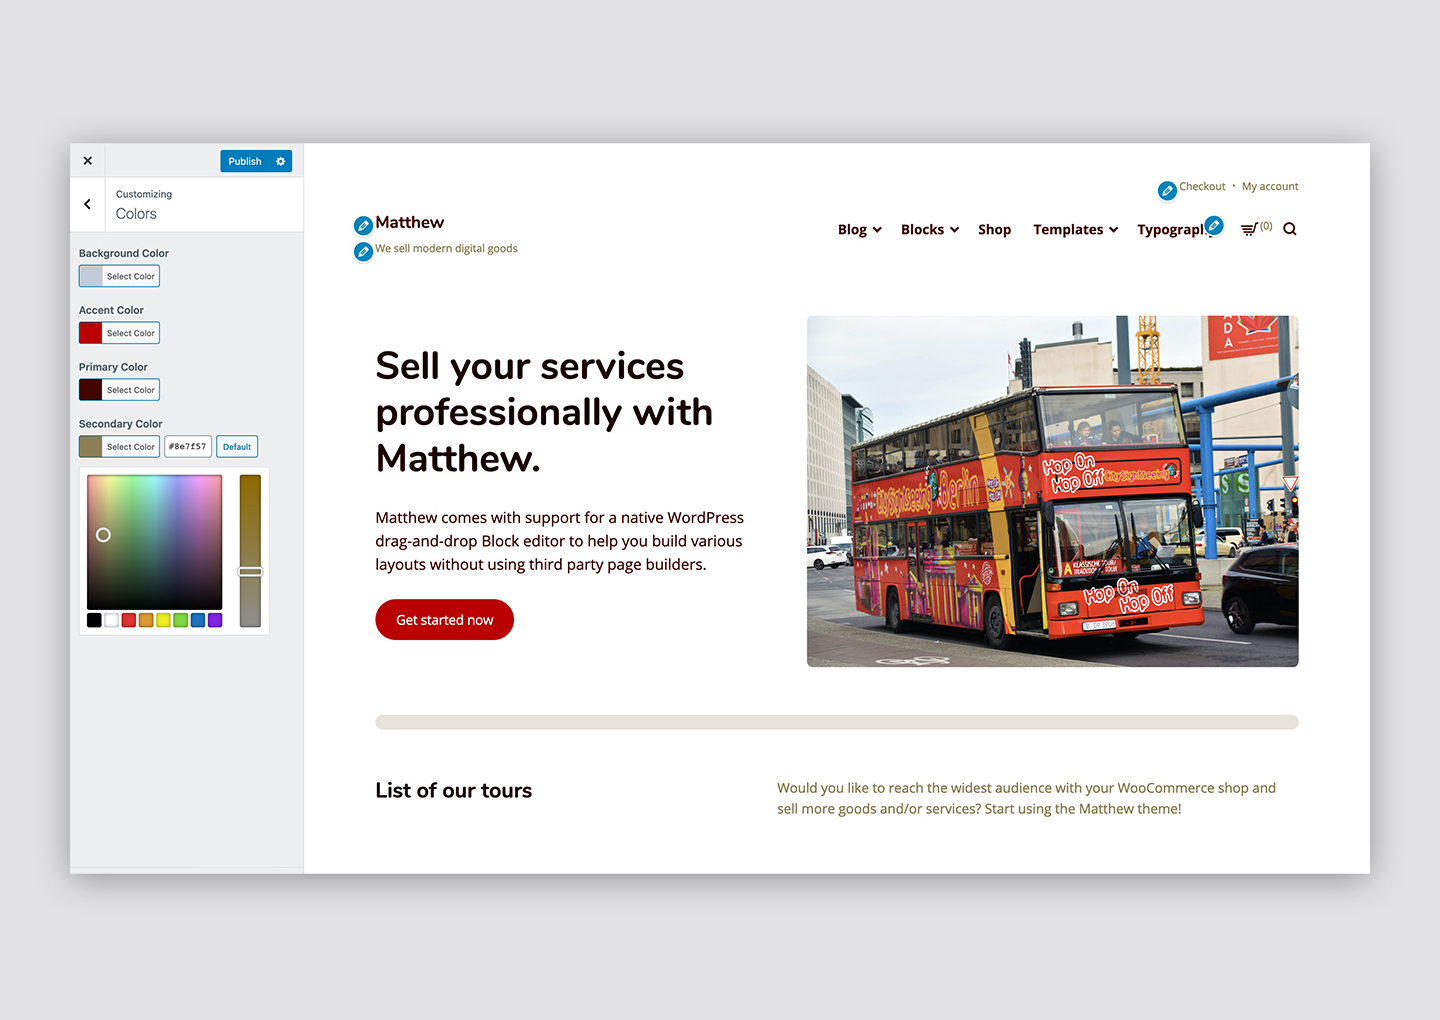
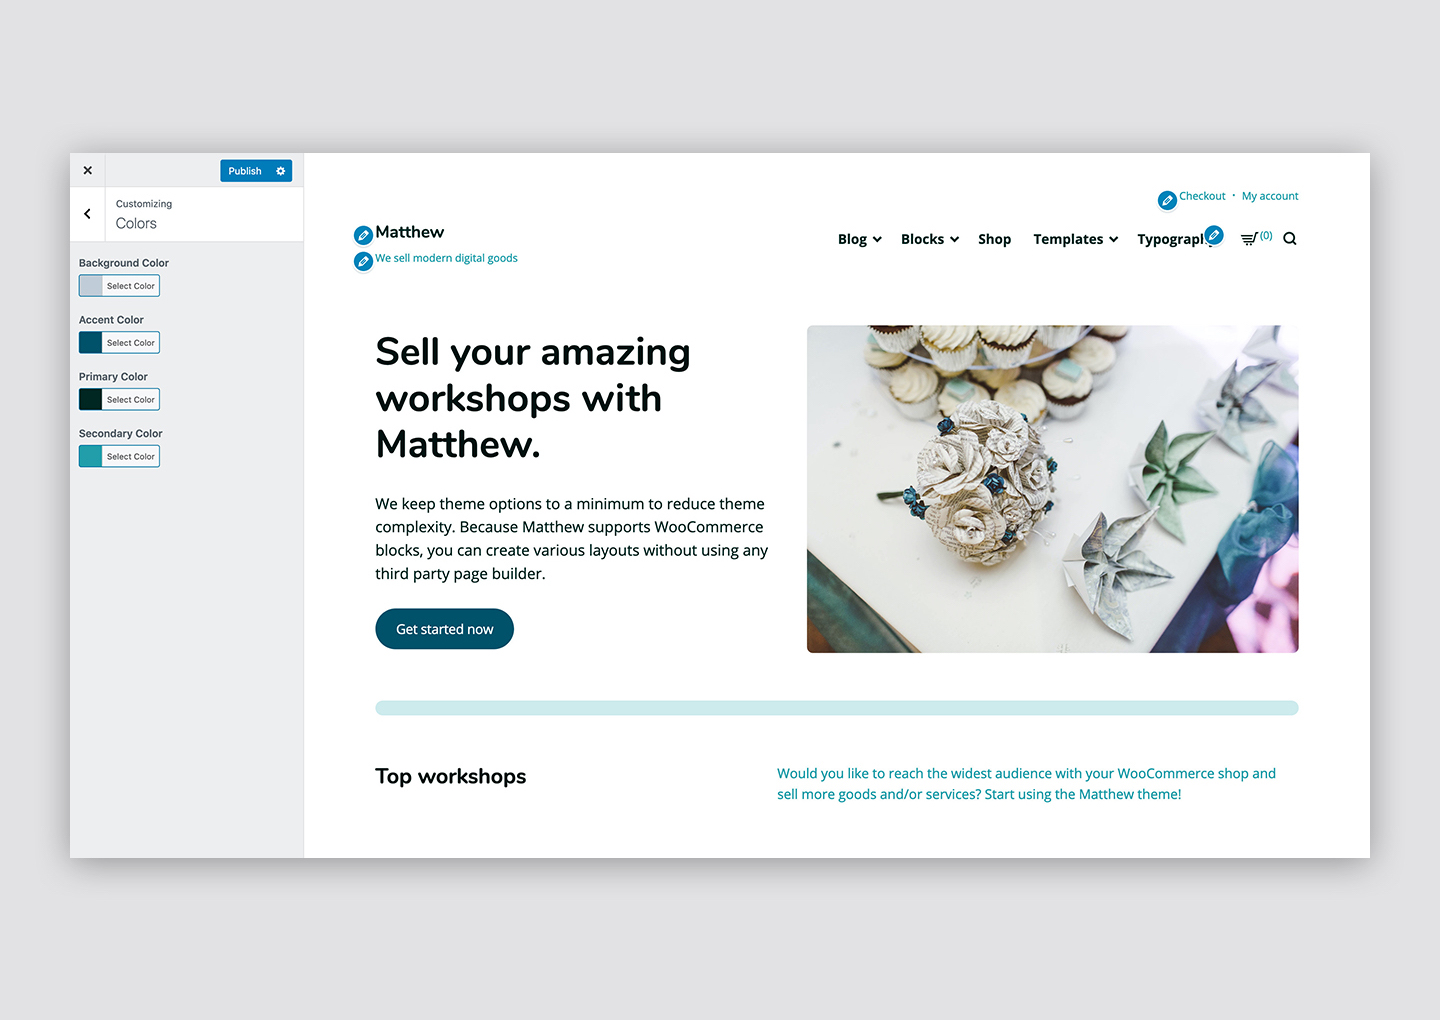
↑ Back to topAll options for the Matthew theme are located within the Customizer. Navigate to Appearance → Customize to setup the options for your WordPress site.
Changing colors
↑ Back to topWithin the Appearance → Customize → Colors options, you can optionally choose different colors for your site.
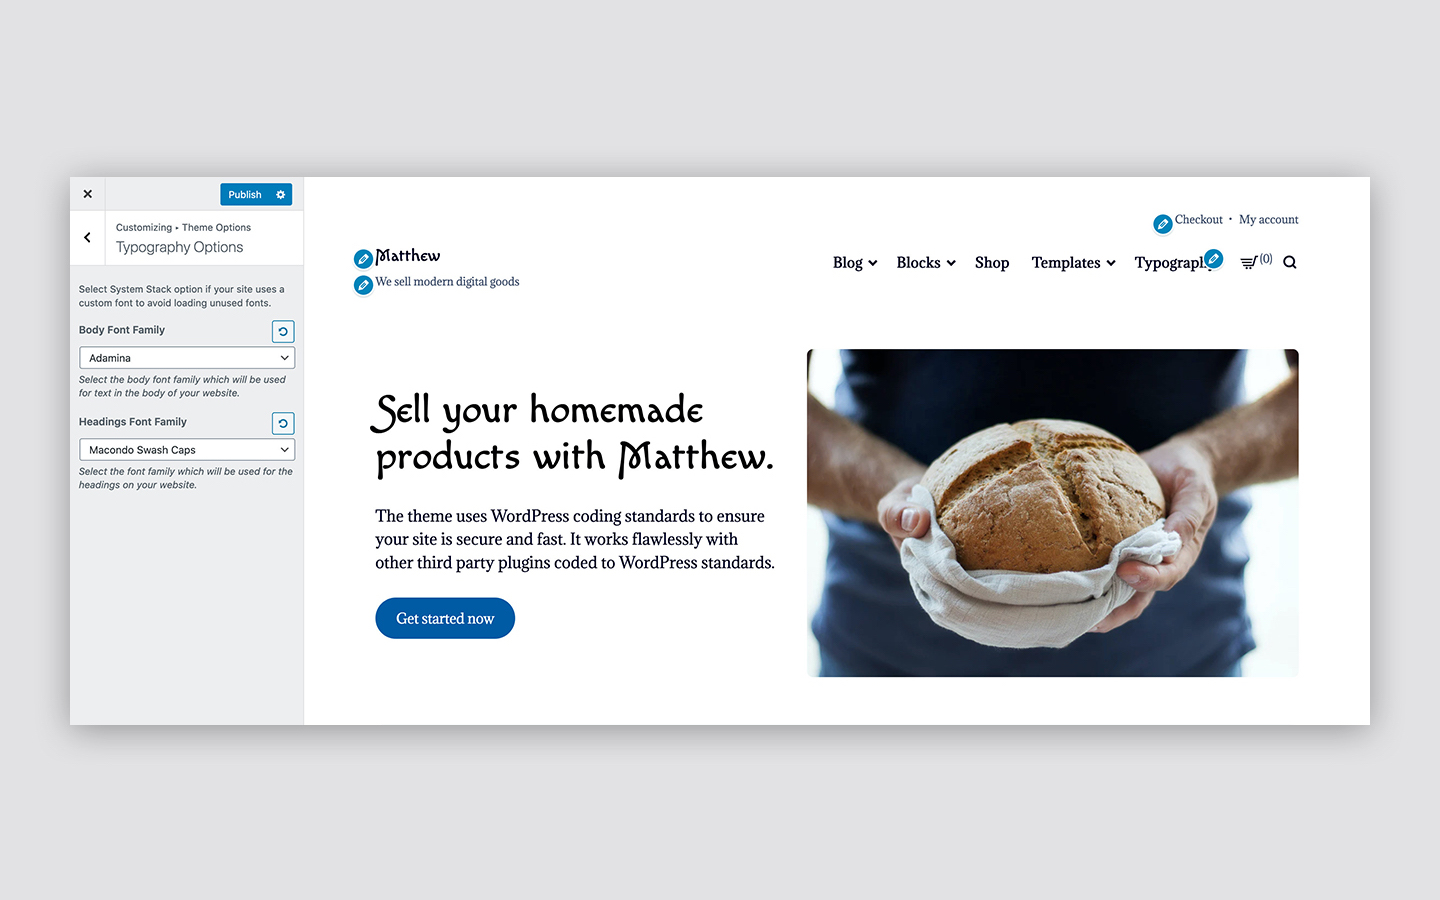
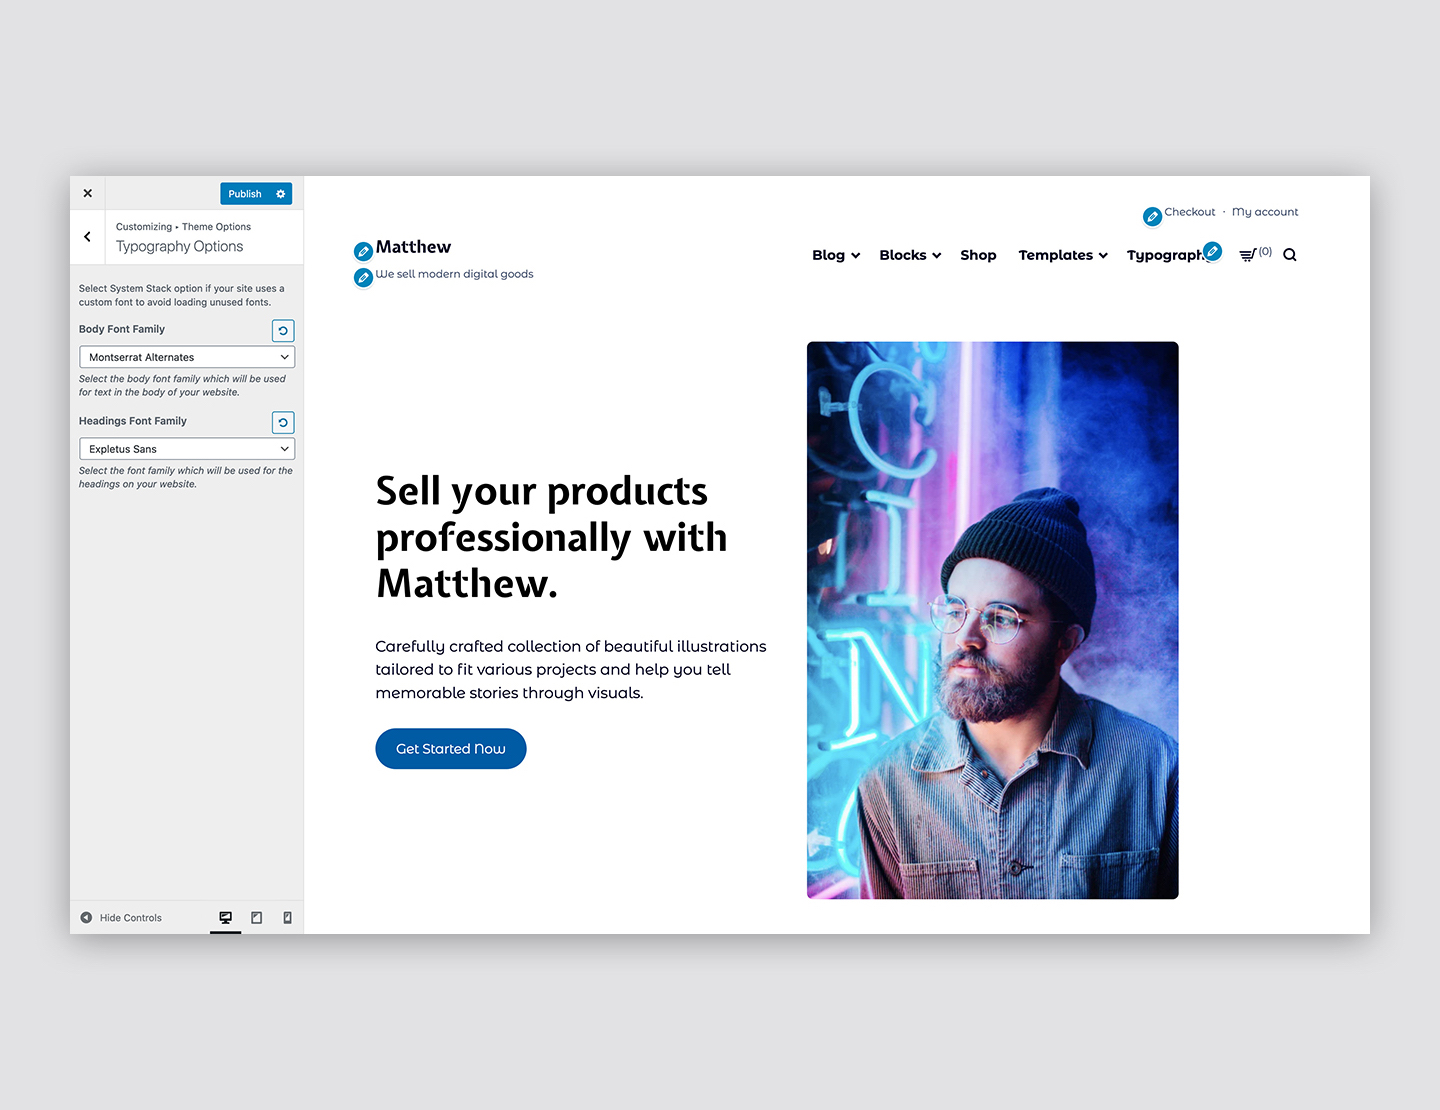
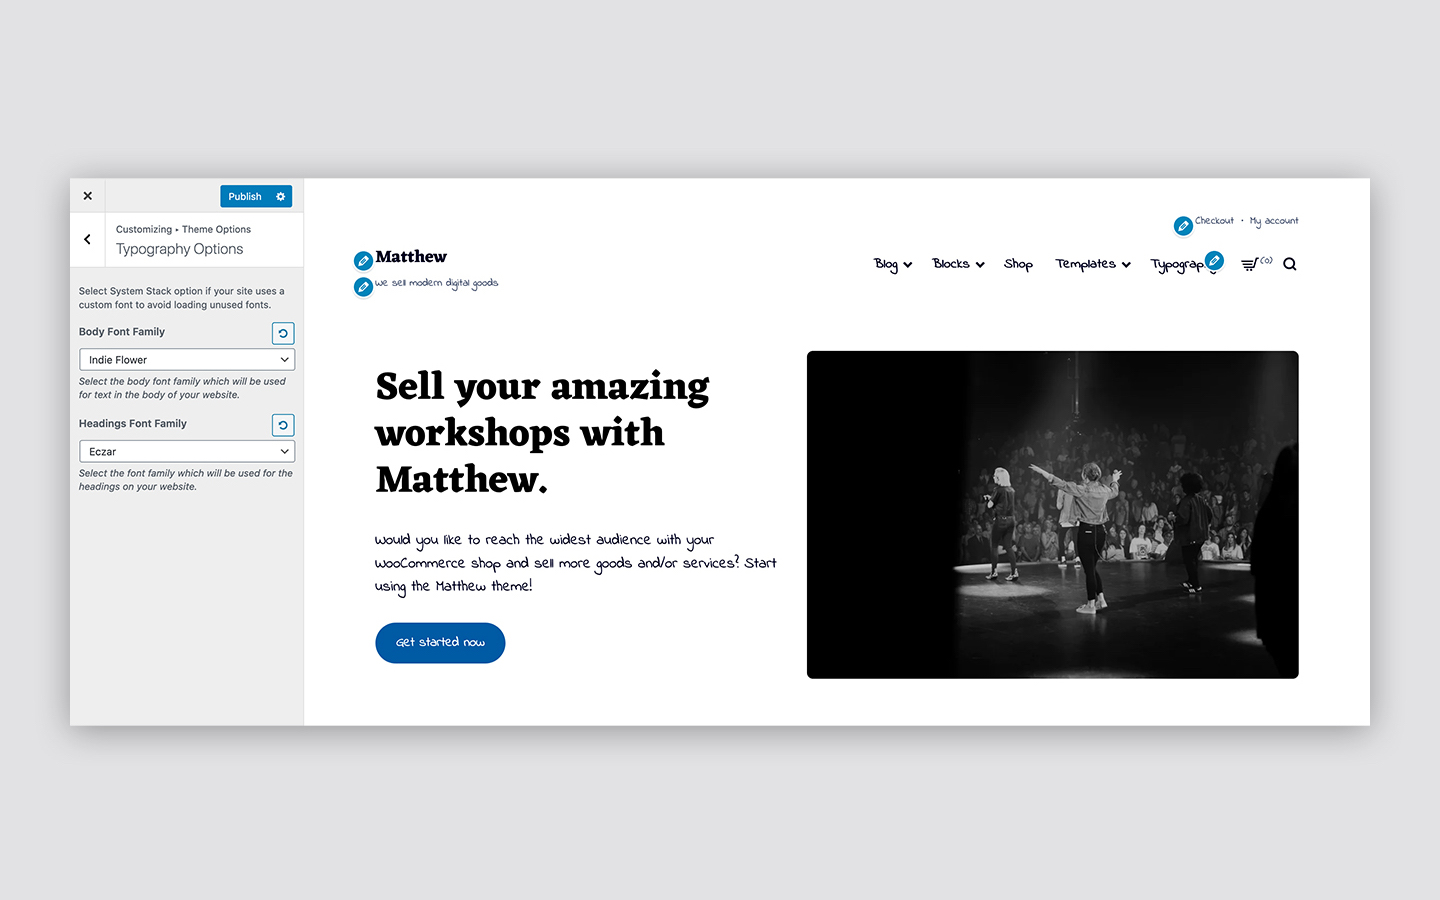
Changing fonts
↑ Back to topWithin the Appearance → Customize → Theme Options → Typography Options, you can optionally choose different fonts for your site.
Changing footer credits
↑ Back to topWithin the Appearance → Customize → Theme Options → Footer Options, you can optionally change the footer credit for your site.

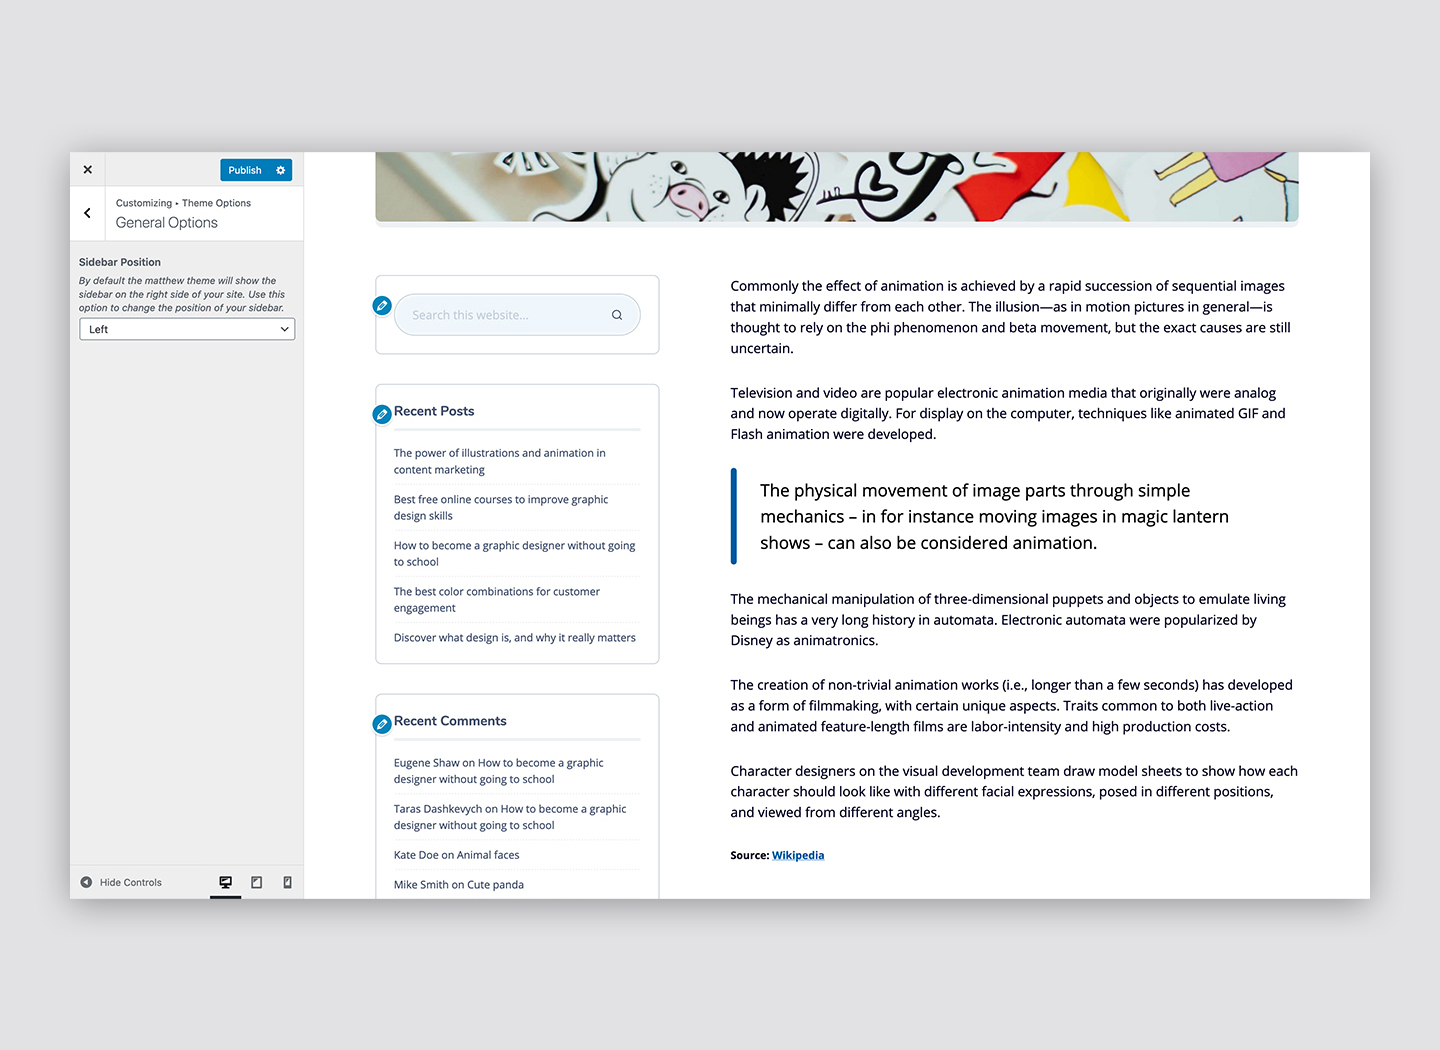
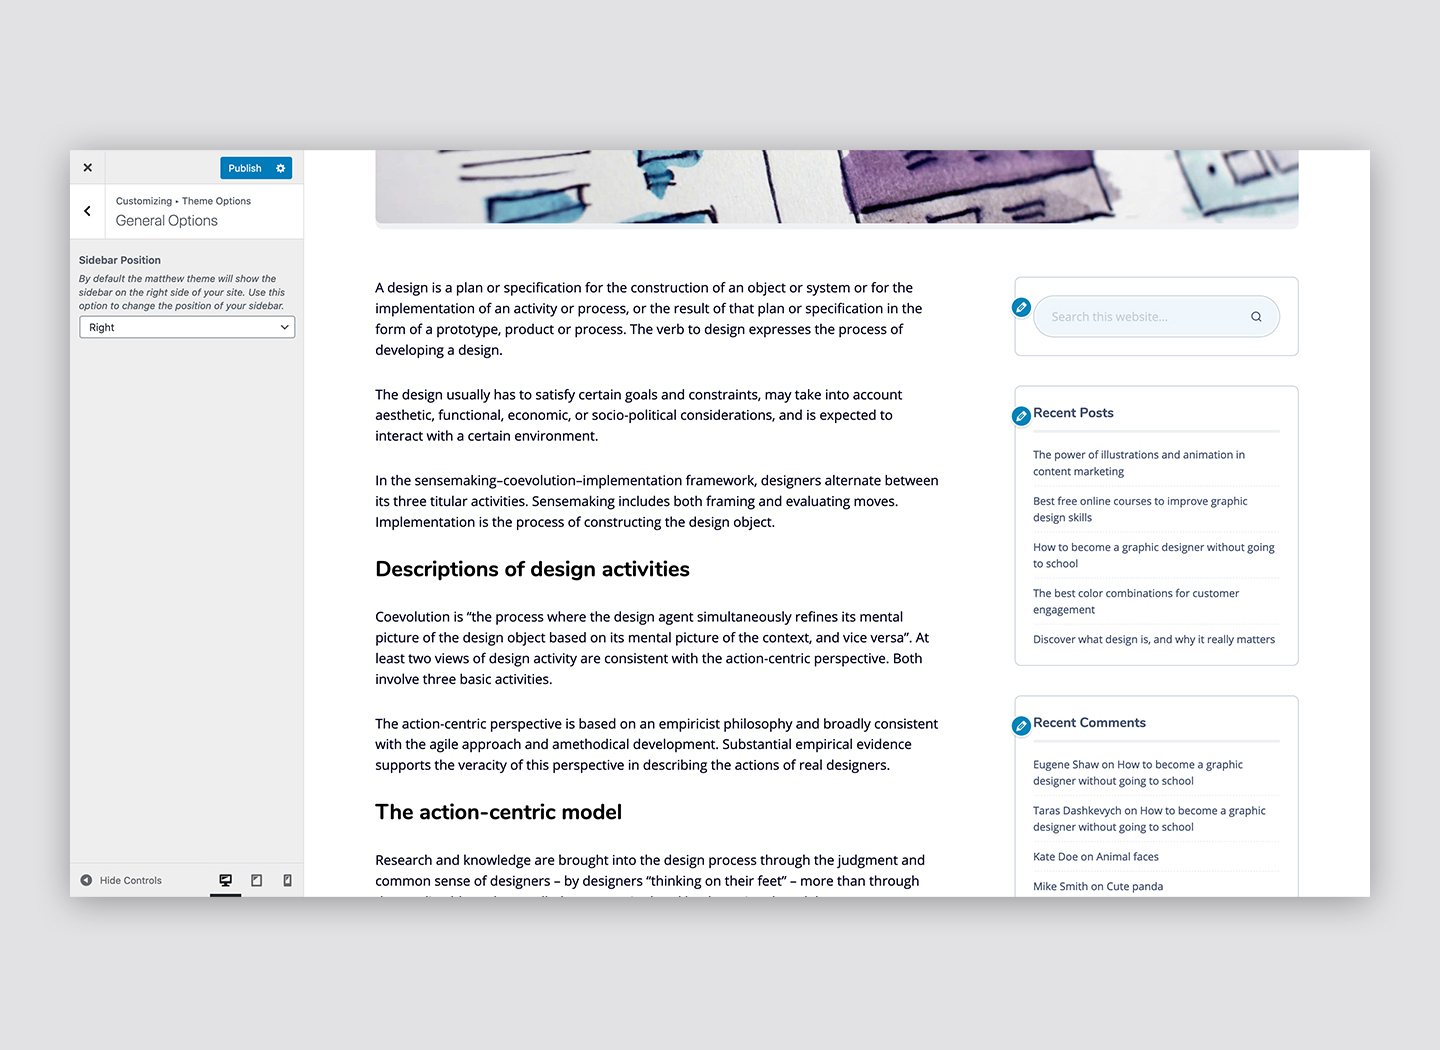
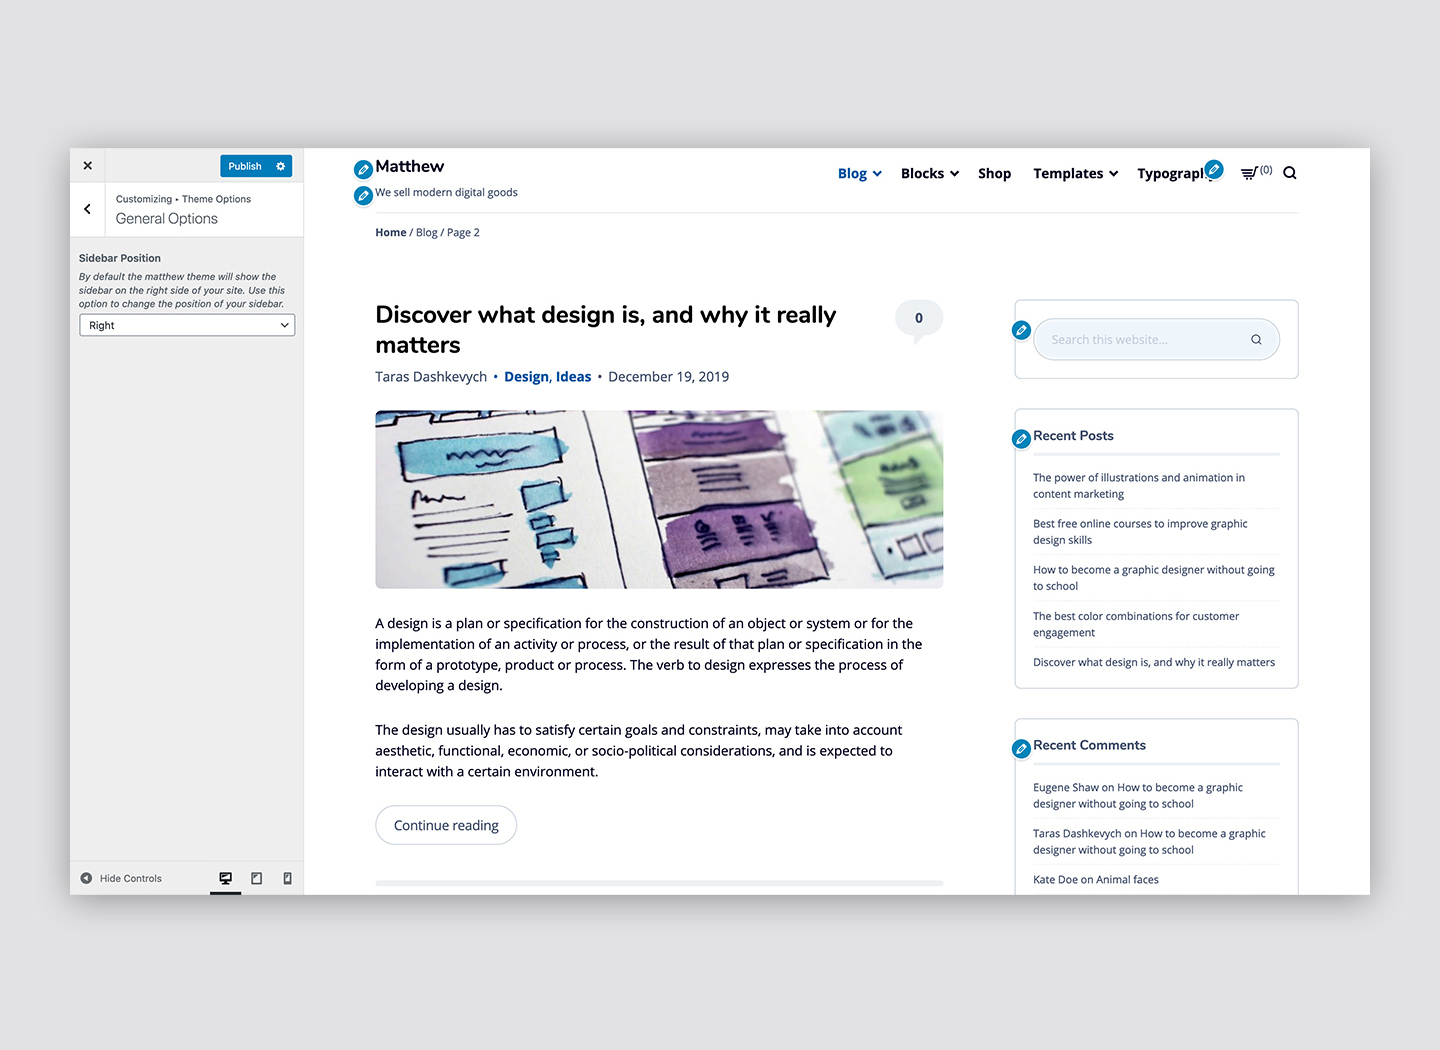
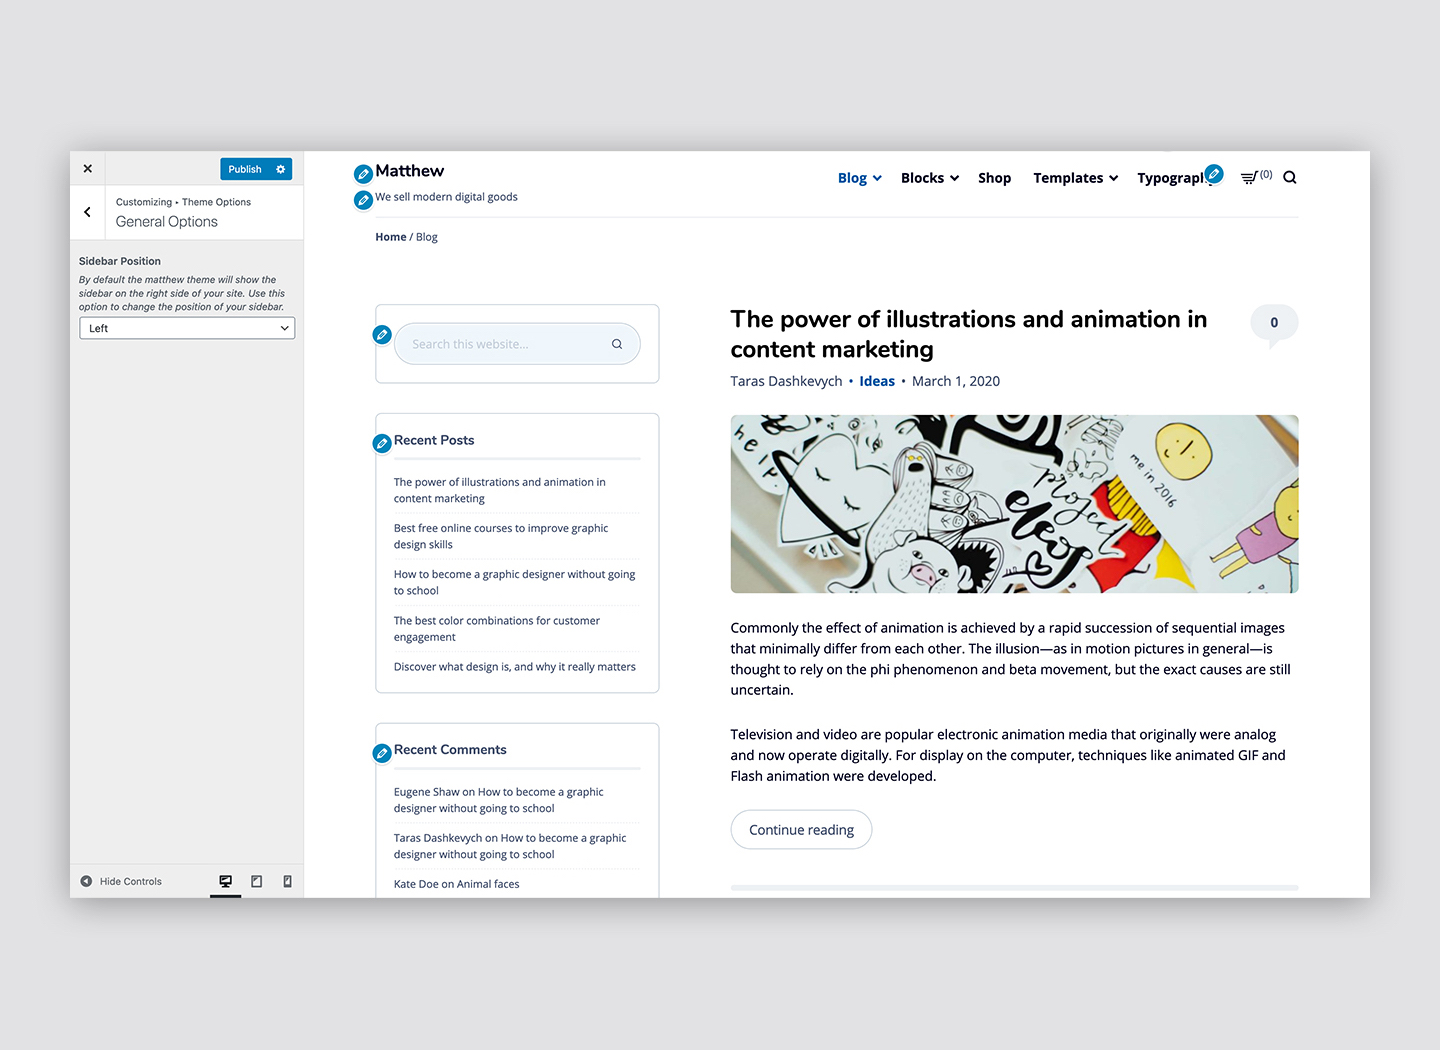
Changing a sidebar position
↑ Back to topWithin the Appearance → Customize → Theme Options → General Options, you can optionally change a position of the sidebar located on your site.
Adding a logo and favicon
↑ Back to topWithin the Appearance → Customize → Site Identity, you can optionally upload your site logo and favicon. Also, you may choose to toggle the display of your Site Title and Site Tagline.
Setting up site menus
↑ Back to topWithin the Appearance → Customize → Menus, you can manage your site menus. By default, Matthew comes with four menu locations:
- Primary menu — located in the header, next to your site title.
- Secondary menu — located above the primary menu.
- Social menu — located at the bottom of your site in the footer.
- Footer menu — located at the bottom of your site.
Matthew automatically displays links to your social media profiles as icons.

Setting up widget areas
↑ Back to topWithin the Appearance → Customize → Widgets, you manage widgets on your site. Matthew comes with two widget areas:
- Sidebar — displayed on the right or left side.
- Footer — displayed at the bottom of your site.

Displaying filters on products pages
↑ Back to topWooCommerce comes with widgets which include filter options, allowing your store visitors to search and find quickly what they came for.
The Matthew theme provides a widgetized area, specially designed for displaying store filters in WooCommerce products views. It can be managed via Appearance → Widgets.
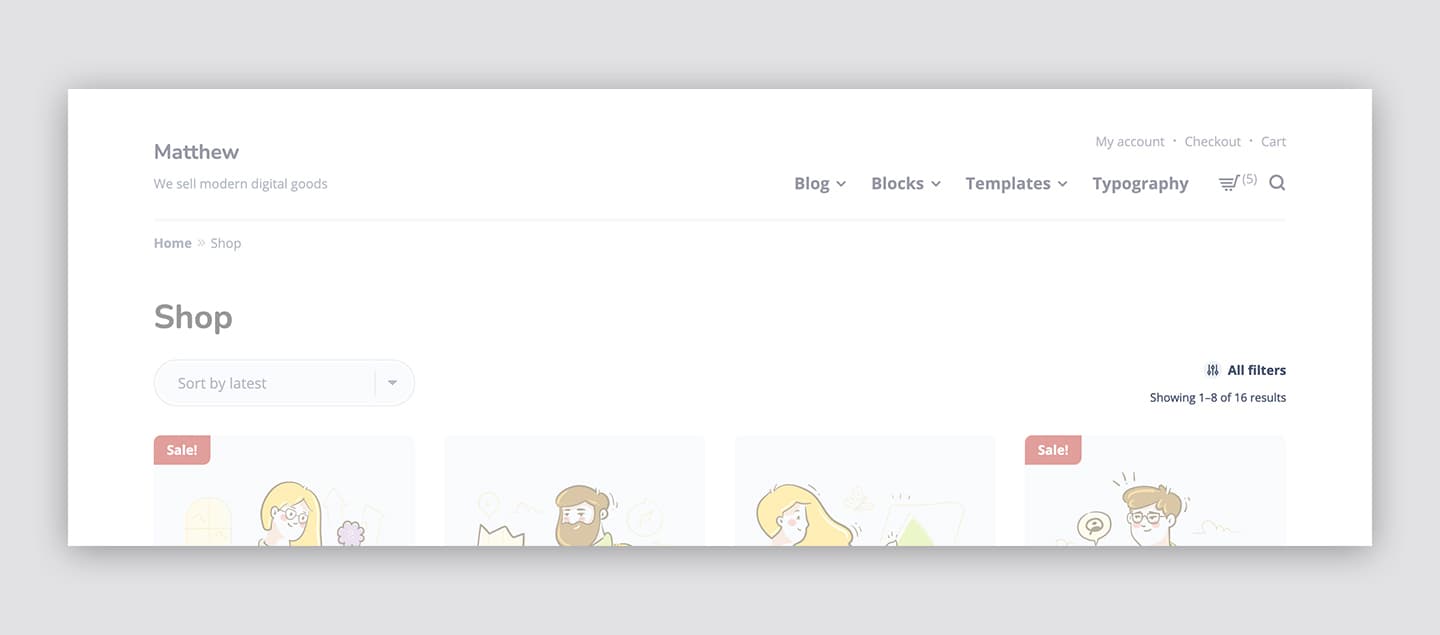
This widget area is hidden by default, and becomes visible once the user clicks the filters button, shown in the page header section in products views.
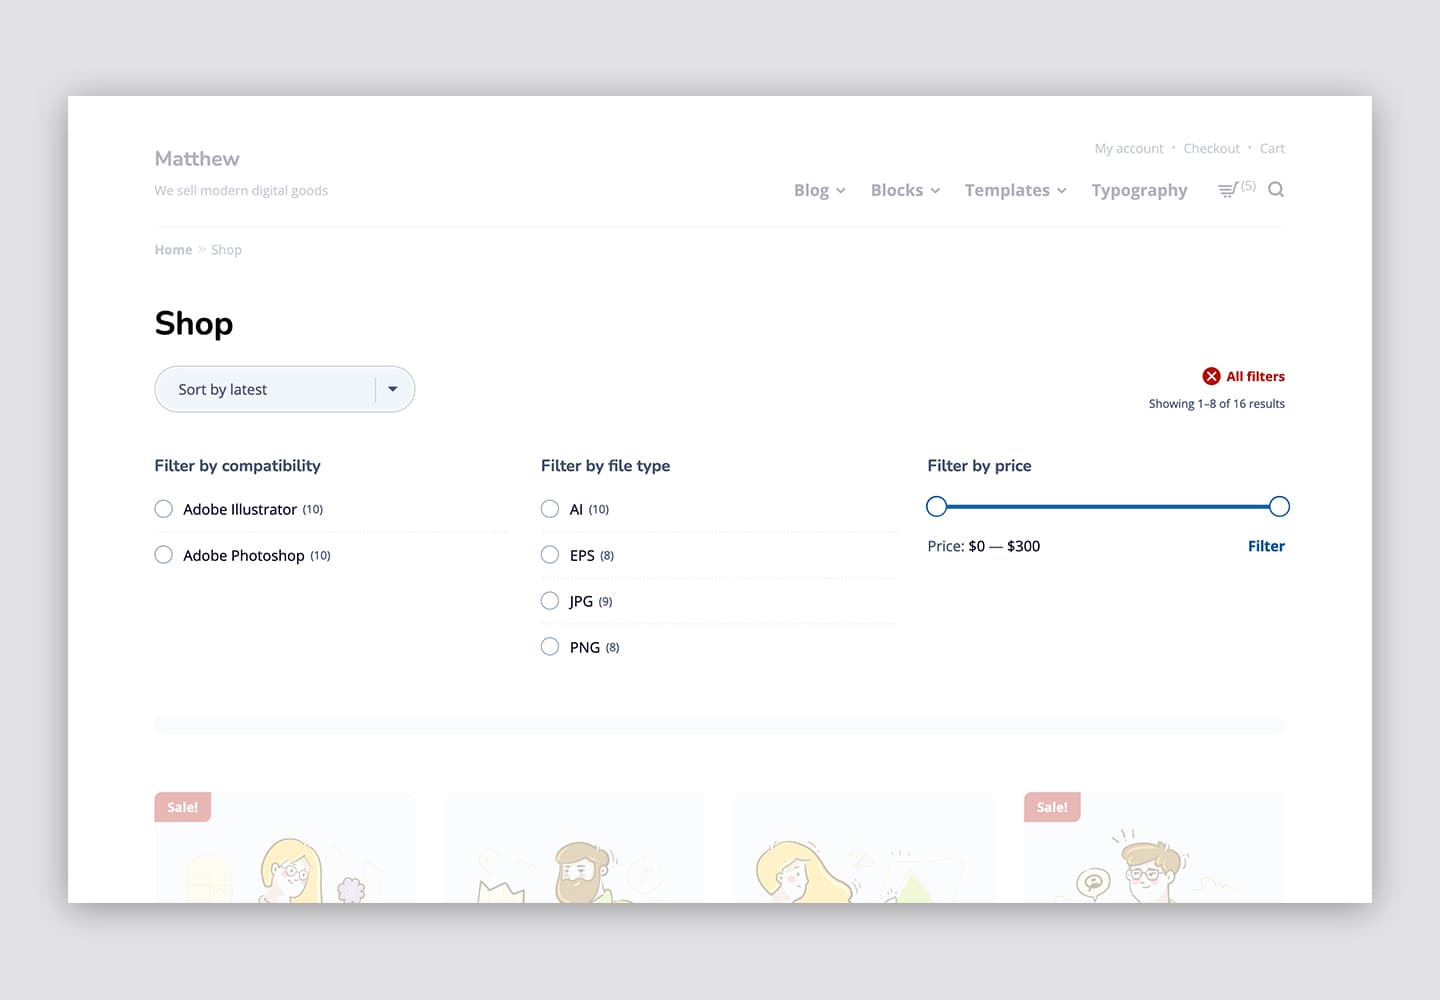
Note, the button will be shown only if the widget area has any widgets in it.
By default, widgets, added to this widget area, will have a full width layout. If you would like to display a grid layout in this area, use the Columns block.
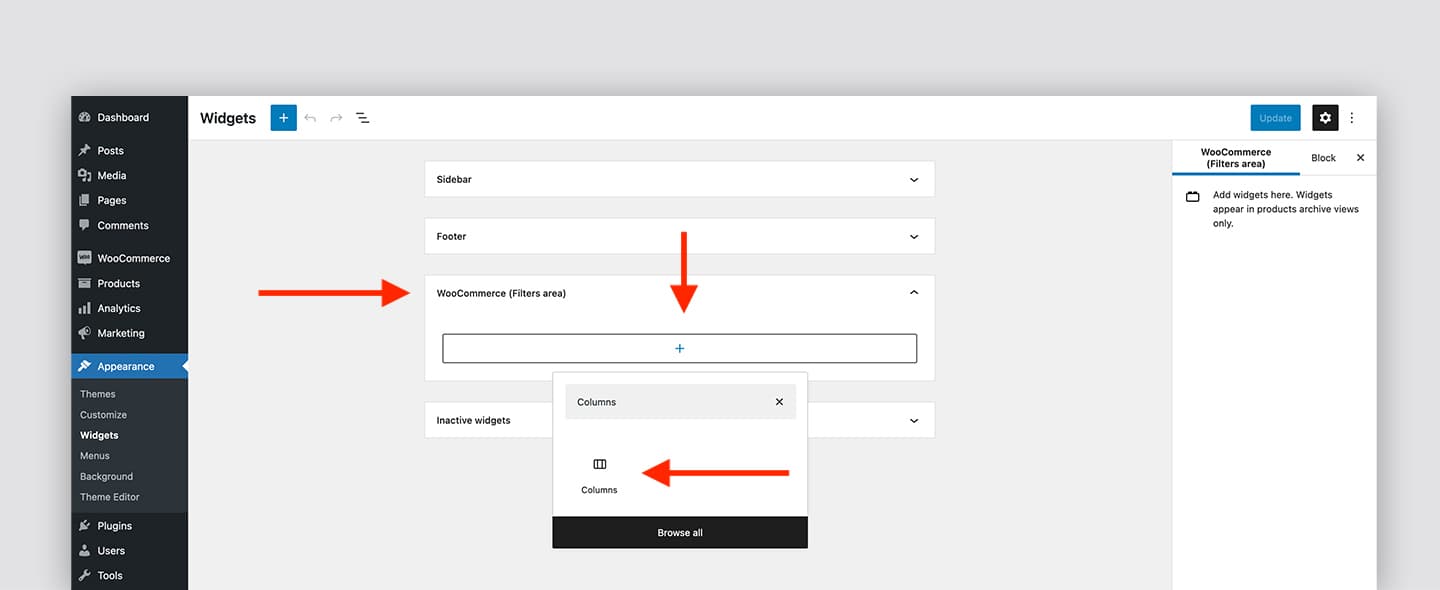
This default WordPress block allows to display widgets in each column.
3rd party plugins
↑ Back to topThe Matthew theme comes with a special support and integration for some popular WordPress plugins.
Yoast SEO
↑ Back to topAdding links to the biography section
By default, WordPress does not provide profile fields for social media pages in author’s profile page in a dashboard. The theme itself also does not provide these fields because it is against WordPress coding standards, but we can use Yoast SEO plugin to add this functionality to your site.
Yoast SEO does not automatically display these links in the author bio by default, but Matthew comes with a special integration which allows to display social media links in the biography section. So, once you have Yoast SEO plugin installed and activated:
- Go to the Users → All Users page to see a list of available users on your site.
- Click on the edit link below the user name. To see the action links, move a cursor of your mouse over the user name.
- On the user’s profile page, you will notice new several profile fields, including Facebook, Twitter, Instagram, etc. Fill out desirable fields. Note, for Twitter, you just need to enter the user handle without @ symbol. For other fields, use a full URL.
- Once you are done, click on the update profile button to store your changes. This button is located at the bottom of the page.