Note: This product is no longer sold on WooCommerce.com. This document was left available to you for help with configuration and troubleshooting, but is no longer updated.
Krokedil Wishlist enables your customers to bookmark their favorite products for later purchases or sharing lists with colleagues and friends.
Installation
↑ Back to top- Download the .zip file from your WooCommerce account.
- Go to: WordPress Admin > Plugins > Add New and Upload Plugin the file you have downloaded.
- Install Now and Activate.
More information at Install and Activate Plugins/Extensions.
Setup and Configuration
↑ Back to topOnce the plugin has been activated, the setup tools will be accessible via WooCommerce > Settings > Wishlist.
All available wishlists for each user can be viewed and accessed by logged in users through My Account > Wishlists.
Wishlist options
↑ Back to topHere you can choose and customize the displayed properties of the users’ wishlists.
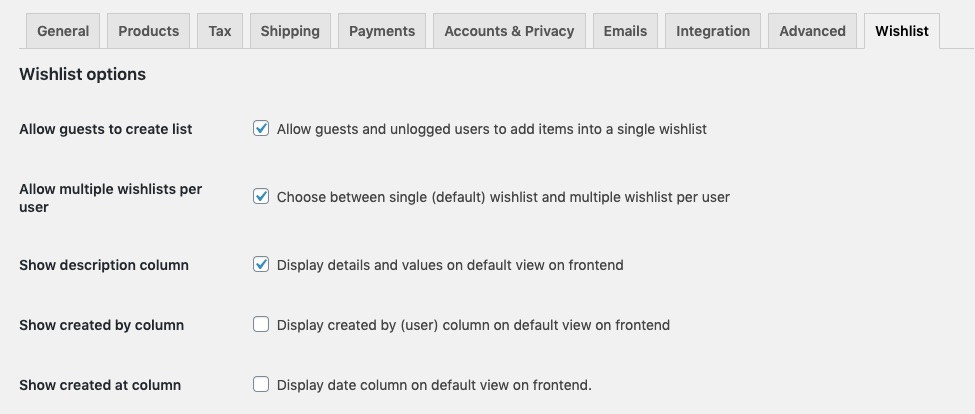
Allow guests to create lists
Allow guests and not logged in users to add items into a single wishlist.
Allow multiple wishlists per user
Allow for adding products into multiple separate wishlists.
- In the Single wishlist mode (unchecked box), the users will automatically add the selected product to their Default wishlist.
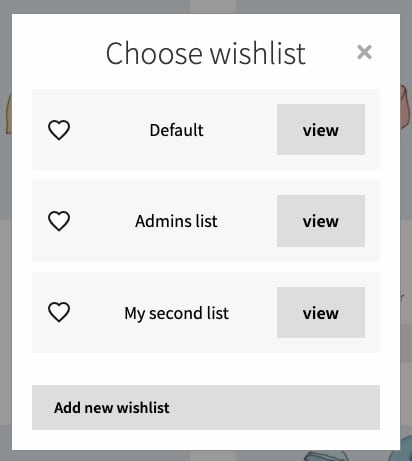
- In the Multiple wishlist mode (checked box), a pop-up window will appear upon activating the favorite products icon. In this window, the users can choose the wishlists which are to contain the selected product, or create a new wishlist for the product in question.Check this option to expand additional options:
- Show description column – Display details and values per wishlist
- Show “Created by” column – Display creator user for the wishlist
- Show “Created at” column – Display creation date for the wishlist
Note: if the user chooses the Single wishlist mode, the wishlist displayed under My Account > Wishlists will be the user’s Default wishlist.
Display options
↑ Back to topHere you can edit the properties of the icon used for marking the products which you wish to add to a wishlist.
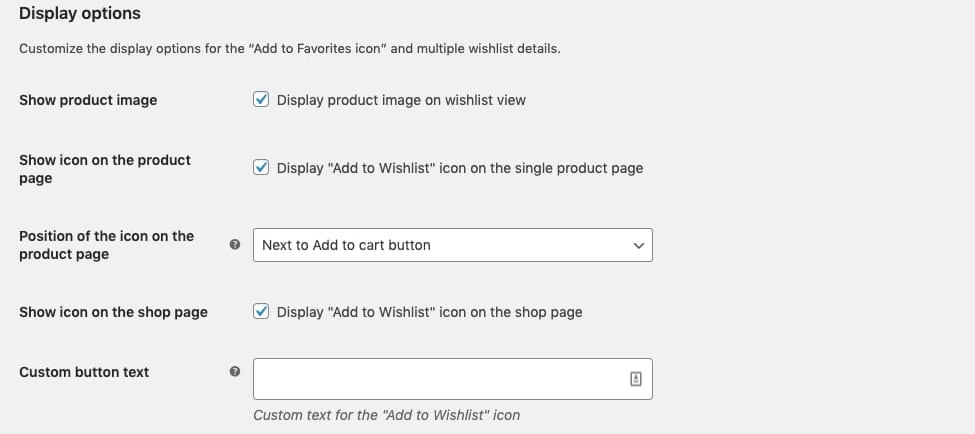
Show product image
Check this option to display the product thumbnail next to the product details when viewing a wishlist.
Show icon on the product page
Check this option to display the icon along with the Add to cart options when viewing a single selected product.
Position the icon on the product page – Choose whether to display the icon above, inline with or under the Add to cart options when viewing a single product.
Show icon on the shop page
Check this option to display the icon on the Shop page.
The icon will appear on the center of the product image upon a cursor hover. Move your cursor over the icon and click on it to add the product to your wishlist (if in Single wishlist mode) or to open the multiple wishlists menu (if in Multiple wishlist mode).
Custom button text
Customize the text that will appear alongside the wishlist icon on the single product page.
Style options
↑ Back to top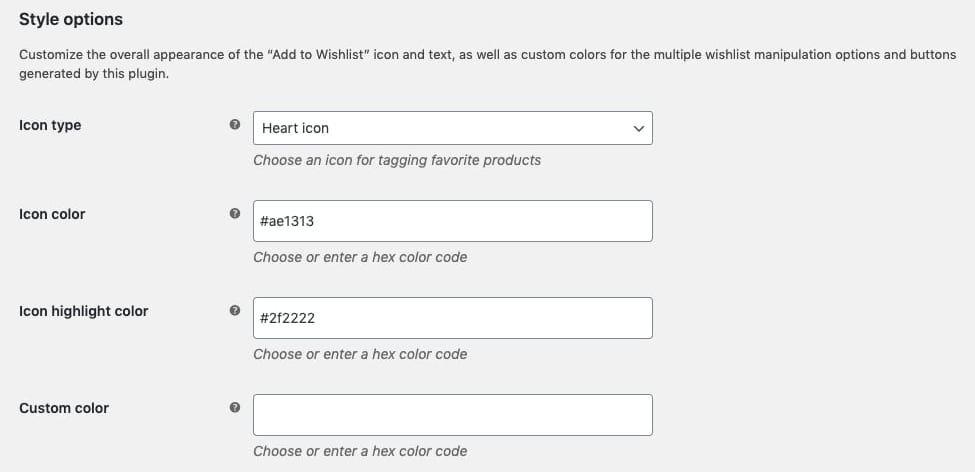
Icon type
There are two icon types two choose from: a heart shape and a star shape.
Icon color
Choose the color to fill the icon shape upon selection. Upon a direct cursor hover over an unselected product, the icon color will be semi-transparent.
Icon highlight color
On desktop view, the icon will be surrounded by a transparent circle of color upon hover actions over the product and the icon itself.
Custom color
Krokedil’s custom color feature enables you to keep your theme layout or preferred color consistent throughout the additional tabs generated by this plugin: simply pick a color you wish to apply to Save buttons in this plugin’s pop-up windows and wishlist interaction menus.
Note: If this field is left empty, the default color scheme will be grey.
Page options
↑ Back to top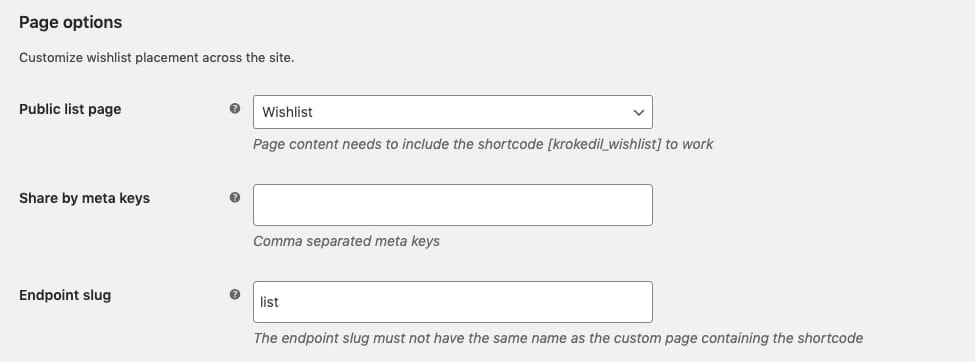
Public list page
Choose a page in which the users will view their public lists. This page needs to include the shortcode [krokedil_wishlist] to work.
Share by meta keys
With the Share by meta keys feature in the plugin, logged in users that have the same value in the user meta key specified in this setting will be able to see and edit each other’s lists.
Endpoint slug
Customize the wishlist’s endpoint slugs.
Note: By the default, the endpoint slug will be “wishlist”. The endpoint slug must not have the same name as the permalink to the page containing the shortcode (or any other permalink on the website).
Usage
↑ Back to topThe Krokedil Wishlist plugin is designed to allow users of your web store to add products to their wishlist. This is done by clicking on the wishlist symbol next to the product on the shop page or the single product page.
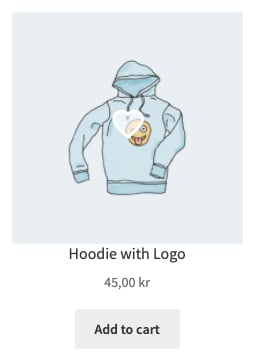
Shop page example

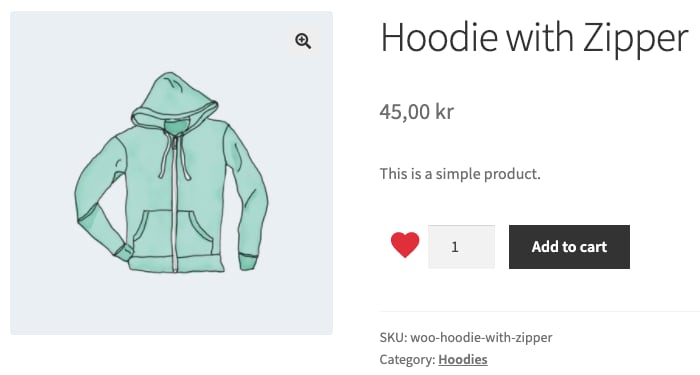
Product page example

Guest users
↑ Back to topIf the option to allow guests to create wishlists is checked, an unlogged in user visiting the shop will be able to add products to their wishlist.
If the visitor is not logged in and add a product to the wishlist, this data is stored in a cookie in the users browser. The wishlist products will be added to the user’s Default wishlist (stored in the database) once they logs into their account.
Products added to the wishlist can be displayed on the Wishlist page, specified in the plugin settings (the page containing the wishlist shortcode).
- A guest user can only add products to one single wishlist, even if Multi wishlist mode is enabled in settings.
- A guest user can not use the sharing feature, since the wishlist data is stored in the users browser.
Logged in users
↑ Back to topSingle wishlist mode
If a logged in user adds a product to the wishlist, this product will be added to the user’s Default wishlist (stored in the database).
Products added to the wishlist can be displayed on the Wishlist page, specified in the plugin settings (the page containing the wishlist shortcode) or from the Wishlists tab under My account.
Multi wishlist mode
When adding a product to a wishlist by clicking on the wishlist icon, a popup window will open. In this window you select which list you want to add the product to. You also have the possibility to create a new wishlist from this view.
Edit and share wishlists
↑ Back to topWhen Multi wishlist mode is enabled you have the possibility to edit the wishlist Name, Description and Type.
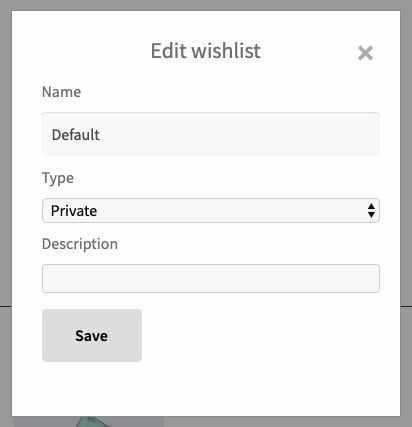
When a wishlist Type is set as a Public, the user will have the option to share its URL via the wishlist options menu.
- To edit the wishlists, go to My Account > Wishlists and select a wishlist (this also provides the user with the wishlist sharing option).
FAQs
↑ Back to topHow does the private/public system work?
↑ Back to top- A public wishlist can shared with other users and displayed on the wishlist page specified in the settings.
- A private wishlist cannot be accessed by other users.
How do I share a public wishlist?
↑ Back to topUpon viewing the contents of a wishlist, the options to delete or edit the wishlist will be available below the wishlists title. If the wishlist is public, the option to share the wishlist will appear next to the latter.
When clicking the share icon, the wishlists URL will appear. Click on the Copy link button to add the link into your clipboard (the full text of the link will also be displayed in an alert window notification).
How do I add product variants in the single product view?
↑ Back to topWhen the wishlist icon is empty, it means that the product in question or any of its variants have not been added to a wishlist. By selecting a product variant and then clicking on an unfilled icon will add that specific variant to a wishlist.
Should the user wish to add some other variant instead, all they has to do is click the icon again, thereby both leaving the icon unfilled and removing the product and any of its variants from a wishlist, and then select which variation they would like to add.
Questions & support
↑ Back to top- Please get in touch with us if you have any questions before you buy the plugin.
- Have you already purchased the plugin and need some assistance – create a ticket an we will help you.