Note: This product is no longer sold on WooCommerce.com. This document was left available to you for help with configuration and troubleshooting, but is no longer updated.
Overview
↑ Back to topThe Infinite Ajax Scroll for WooCommerce plugin lets you implement infinite scrolling on your WooCommerce shop page. Thus, letting you enhance the browsing experience for your customers both on desktop and mobile.
Installation
↑ Back to top- Download the .zip file from your WooCommerce account.
- Log into your WordPress Dashboard and navigate to Plugins > Add New.
- Click on the Upload Plugin button on top and upload the zip file of the plugin.
- Install the plugin and click Activate to get started.
General Settings
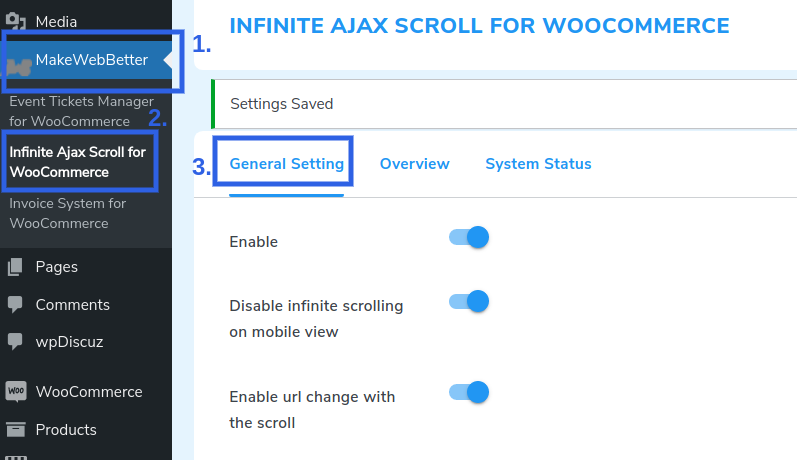
↑ Back to topTo configure the plugin’s general settings from your WordPress dashboard visit the MakeWebBetter → Infinite Ajax Scroll For WooCommerce page. On this page, you’ll find some configuration settings that define the overall functionality of this plugin.
This page has the following options:
- Option to enable the plugin for your WooCommerce store.
- Option to enable/disable infinite scrolling for the mobile users.
- Option to enable/disable change in URL when new content loads upon scrolling.
- You can select the scroll type for loading the page content.
- Configuration to edit the text when the content is over.
- You can also select a loader image.
- The admin can also choose from the various options of transition effects and loaders.
Let’s see all these configurations in detail.
Enabling The Plugin
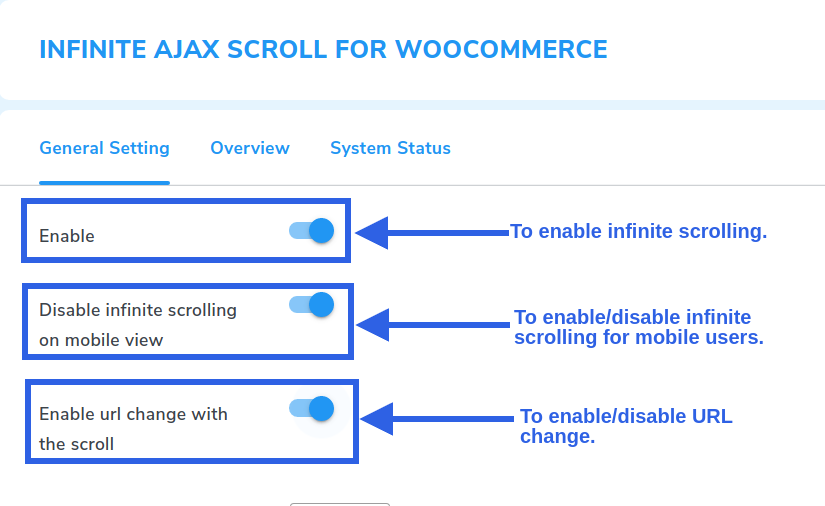
↑ Back to top1. To enable the plugin for your WooCommerce store turn on the slider switch beside the “Enable” option on the General tab of the plugin.
2. By default, infinite scrolling is enabled for the mobile version of your site too. You can disable it by pressing the slider switch beside “Disable infinite scrolling on mobile view” on the General tab of the plugin
3. If you want the URL to change whenever new content is loaded upon scrolling you can enable the slider switch beside the “Enable url change with the scroll” option.
Selector
↑ Back to topThe selectors allow the admin to select the section of your WooCommerce store for which you want to implement the infinite scrolling effect. In order to control the overall functionality of these selectors, you need their classes or ids.
You can find the following selectors on the General tab of the plugin:
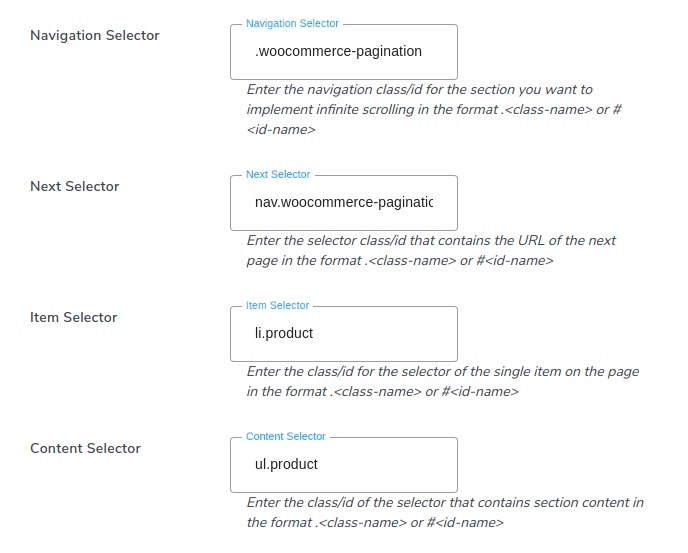
Navigation Selector
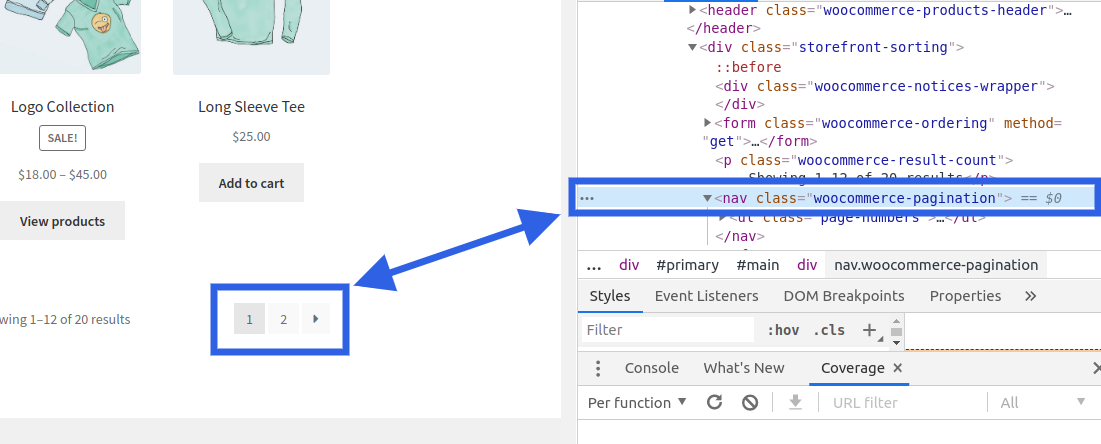
↑ Back to topEnter the class/id that contains the navigation of the page. Open the inspection tool and hover your mouse on the div that contains the pagination of a page.
Once you’ve discovered the class/id, you can enter it in the text field beside the Navigation Selector field in the format .<class-name> or #<id-name>. For example: .woocommerce-pagination
Next Selector
In this field, you’ve to enter the class/id of the selector that contains the URL of the next page. You can find this by opening the inspection tool and hovering the mouse over the next page button.
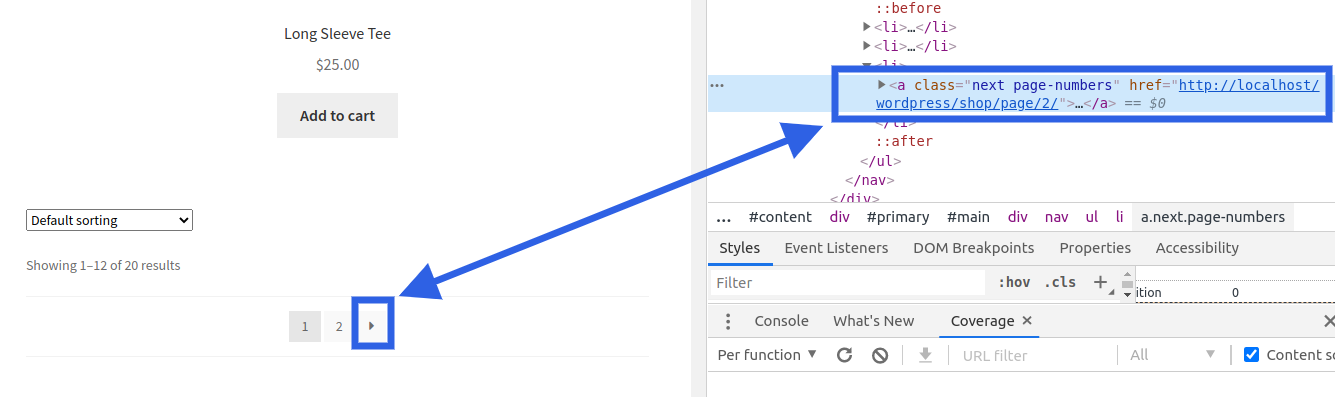
You have to enter the class/id in the text field beside the Next Selector in the format .<class-name> or #<id-name> . For example: .pagination .page-numbers a.next.
Item Selector
↑ Back to topEnter the class/id of the div that contains your products. To find the class/id of the item selector open the inspection tool and hover your mouse over the div containing a product.
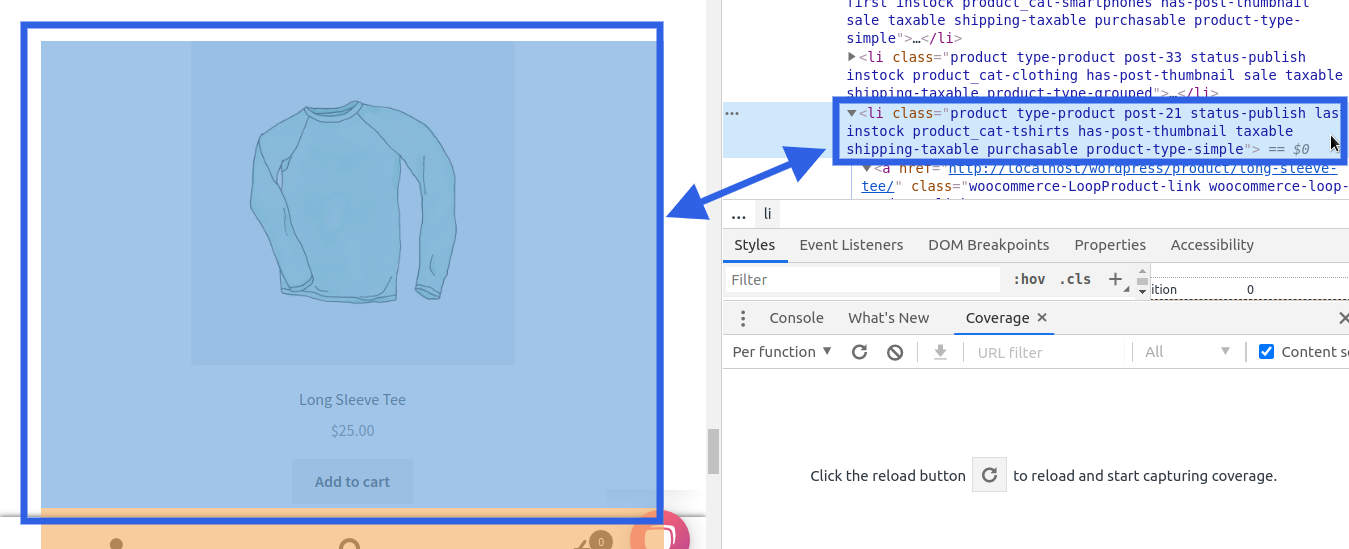
You have to enter the class/id in the text field beside the Item Selector in the format .<class-name> or #<id-name>. For example: .product.
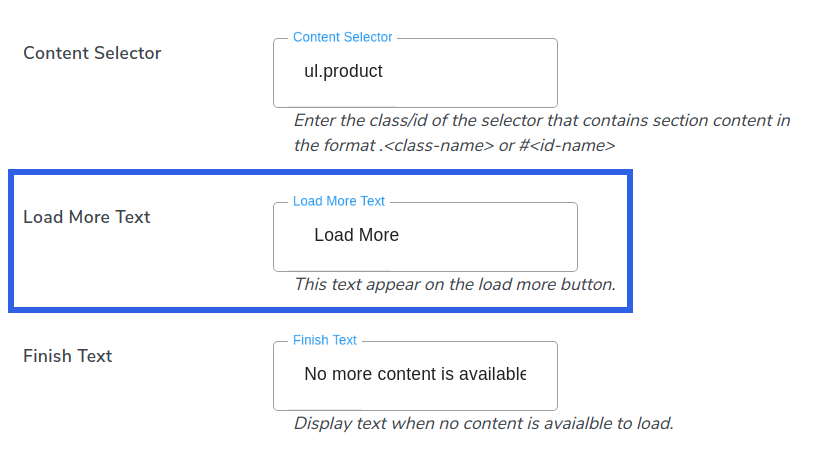
Content Selector
↑ Back to topEnter the class/id of the div that contains the entire page content. You can find this too with the help of the inspection tool too.
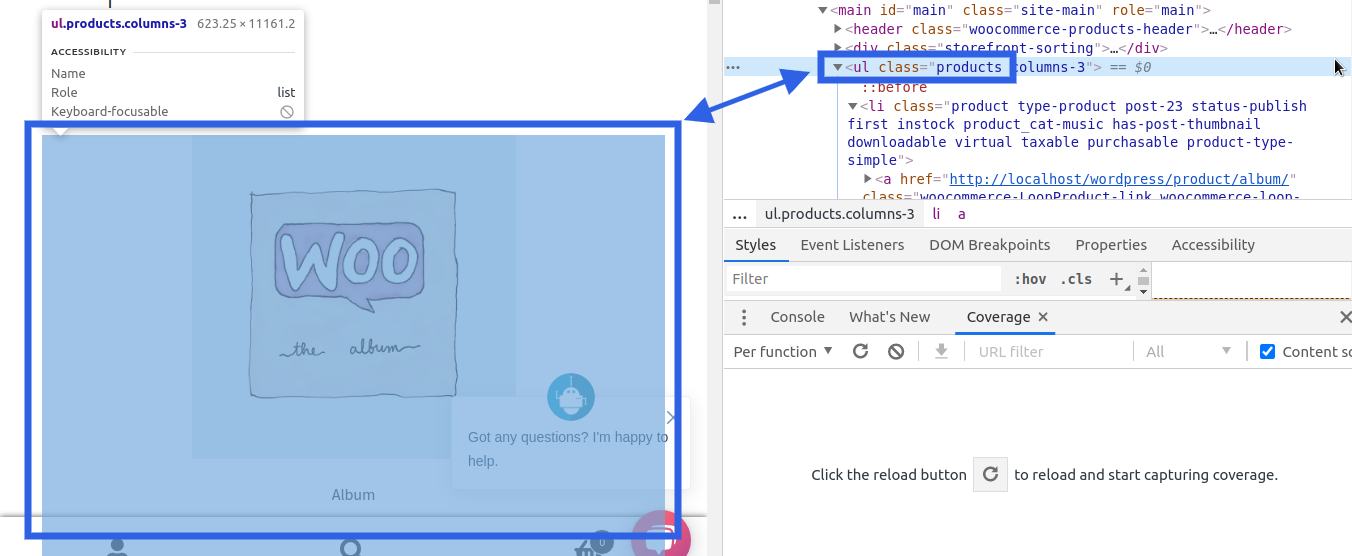
You have to enter the class/id in the text field beside the Content Selector in the format .<class-name> or #<id-name>. For example: .products.
Note: It might happen that the data for all these parameters are already filled when you install the plugin. In such a case, you don’t have to fill them again.
Loader Content
↑ Back to topNext in the plugin, we have settings that offer customizations for the loading of page content. In the General Settings, you’ll find the following options:
Scroll Type
↑ Back to topThe plugin allows the WooCommerce store owners to select a Scroll type i.e. you can select the pagination type for your page content.
For scroll type, choose an option from the dropdown menu beside the “Select scroll type”.
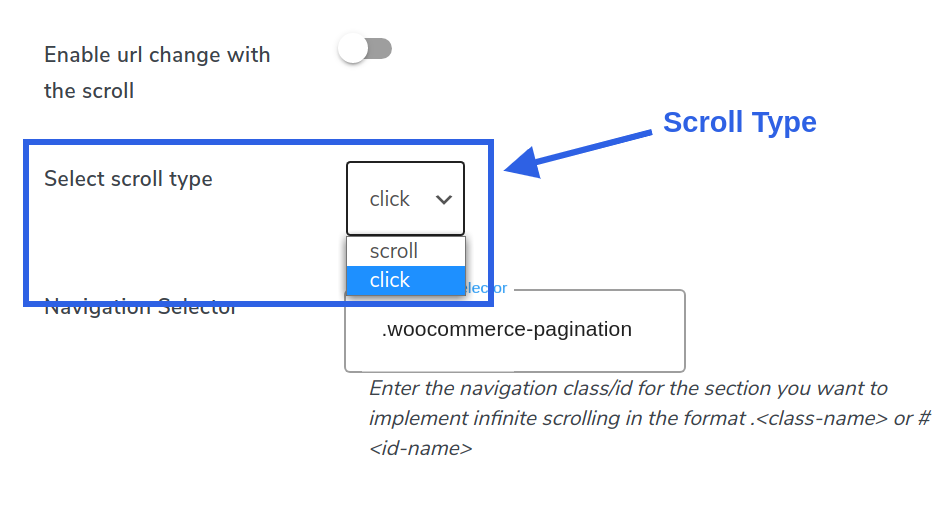
There are two options available that are click and scroll, you can choose any one option.
Load More Text
↑ Back to topYou can enter a text that’ll be displayed on the button which appears when the customer reaches the end of the page. Clicking this button the plugin will load the content of the next page.
Just scroll down on the General Settings tab and enter the message in the text field beside the Load More Text option.
Note: This option will only appear if you’ve selected the “click” option in the Scroll Type setting.
Finish Text
↑ Back to topThe admin can display a text to the user when the customer reaches the end of the page. This text appears when all the content is loaded and you have no content to show.
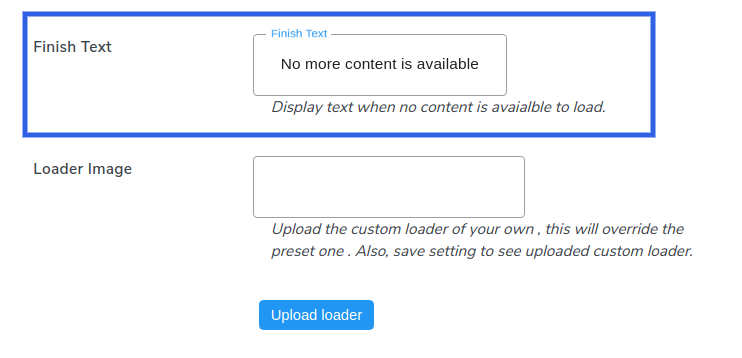
Enter the text to be displayed in the text field beside the Finish Text option.
Note: You can leave it empty if you don’t want any text to be displayed.
Loader Image
↑ Back to topThe Loader Image option allows you to choose an image as a loader image that will appear to your customers as they scroll and wait for the page content to load.
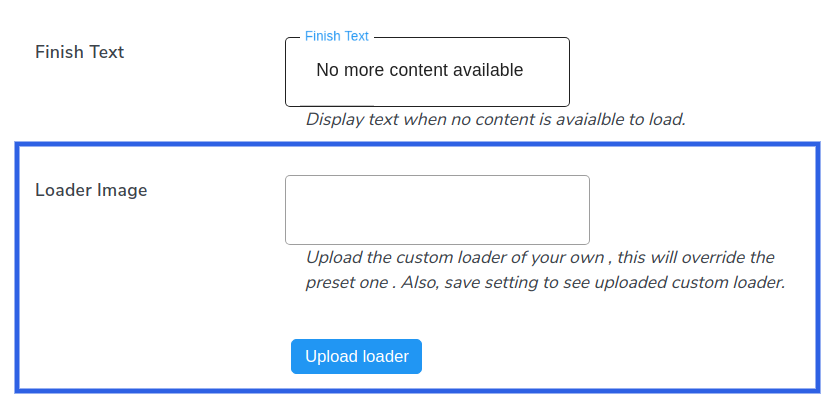
This can be done in two ways:
- In the first method, you can choose an image from the WordPress media library.
- In the second approach, you can place the public URL of an image in the text field beside the Loader Image option.
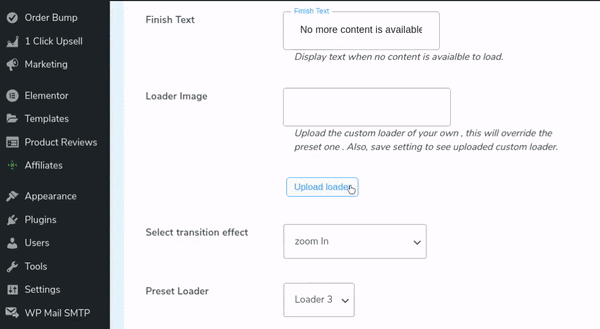
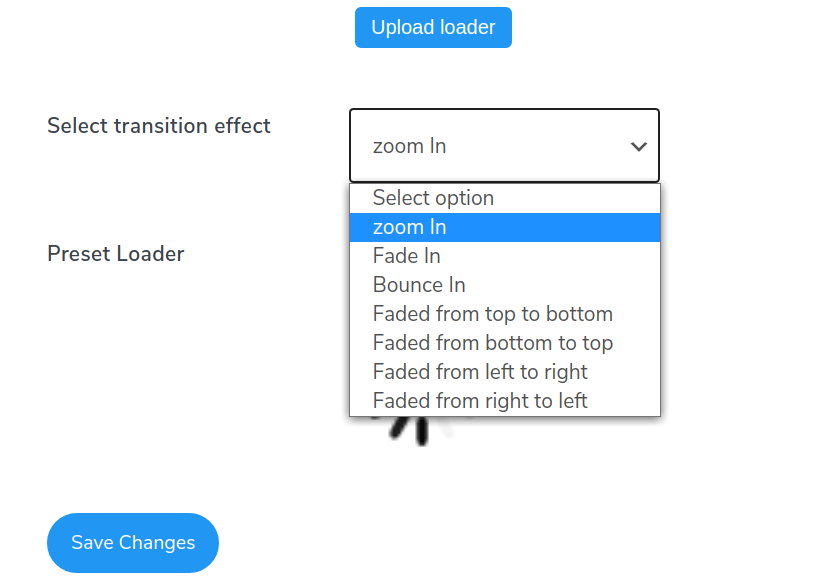
Transition Effect
↑ Back to topFrom the Transition Effect option, you can choose a loading effect for your content. Just click on the dropdown menu beside Transition Effect and choose your favorite option.
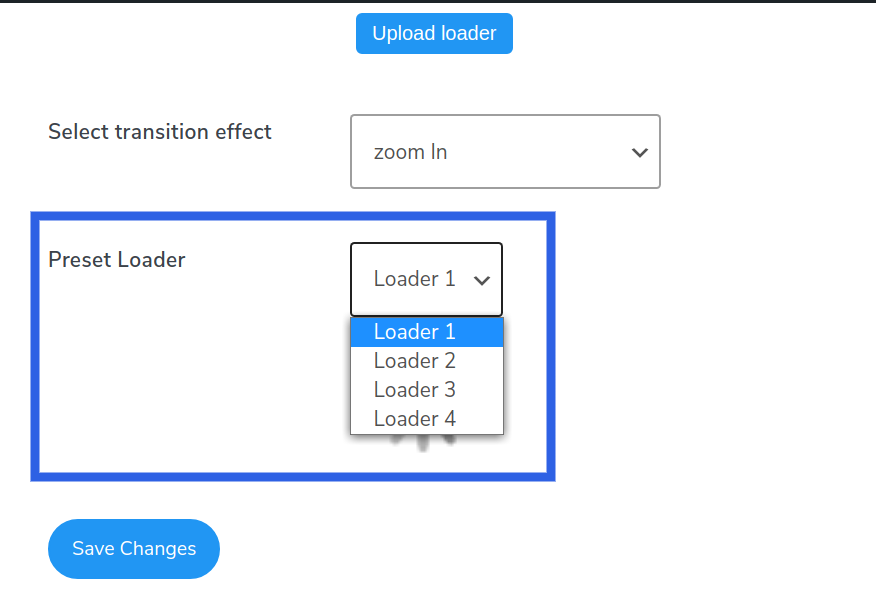
Loader
↑ Back to topIf you aren’t uploading any image for the loader, you can choose across from the default loader options.
Beside the Preset Loader, you’ll find a dropdown menu from which you can choose a graphical representation that will appear when the user waits for the page content to load.
Once you’re done with configuring all the settings you have can press the Save Changes button.
FAQs
↑ Back to topQ1. I don’t know any coding. Will I be able to use the Infinite AJAX Scroll for WooCommerce?
Infinite AJAX Scroll for WooCommerce is very easy to use and does not require any coding knowledge.
Q2. Does the Infinite AJAX Scroll for WooCommerce plugin work with any WordPress theme?
Yes, Infinite AJAX Scroll for WooCommerce will work with WooCommerce’s standard themes.
Q3. I want my customers to use an infinite scroll in the mobile version of my shop. Is this possible? Are there any possibilities to turn it off if I want?
Yes, with our plugin it is possible to implement infinite scrolling for mobile users too. We have provided the option to enable/disable. You can disable it from the general setting anytime.
Q4. I want the URL to change when a new content loads upon scrolling. Is it possible with this plugin?
Yes, We have an option for that, you can find this feature under the General Setting tab.