Overview
↑ Back to topUsing Featured Listing For Product Vendors, a vendor of the multivendor marketplace can list his/her products before the products of other vendors using the paid listing option. In concise, the store owners can provide their vendors with an opportunity to highlight their products as featured products and increase their product sales.
Vendors can request to feature their products by paying the amount specified by the store owners. After the approval of the request, the product of the vendor is featured for the time being fixed by the owner.
Features
↑ Back to top- Admin can offer paid listing to all the vendors of the eCommerce marketplace.
- Admin can specify the time and amount for listing the products of vendors’ on the top of the shop page.
- Vendors can use the one-click option to request for paid listing.
- Admin can restrict the total number of products that can appear in the feature listing section.
Installation
↑ Back to top- Purchase the product from WooCommerce.com
- Download the ZIP file from your WooCommerce.com dashboard
- Go to Plugins > Add New > Upload and select the ZIP file you just downloaded
- Click Install Now and then Activate.
- Read on to learn how to set up and configure the product.
More information at: Install and Activate Plugins/Extensions.
Setup And Configuration
↑ Back to top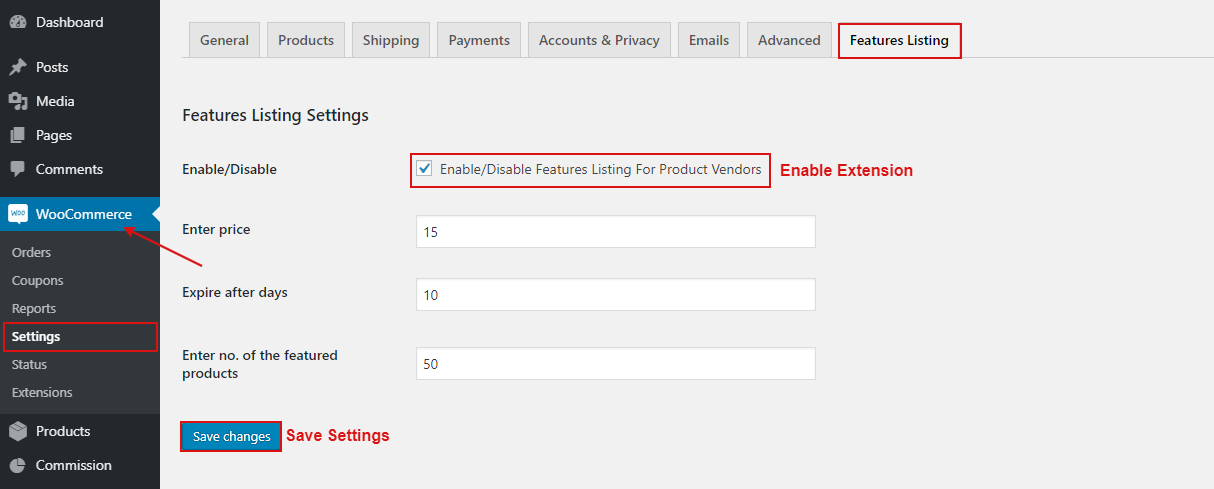
After installing your plugin successfully, follow the steps to activate the functionality of Featured Listing For Product Vendors.
- Go to the Admin Panel
- Click on WooCommerce > Settings > Features Listing
- Enable the checkbox to activate the functionalities of the plugin
- Set the global price for listing the products of vendors
- Enter the days up to which the product can be listed as the featured product
- Enter the total number of products you want to display in the feature listing section
- Save Changes
How to Use
↑ Back to topThe vendors’ can take benefit of this add-on using the listed steps.
- Go to the Admin Panel
- Click on WooCommerce > Settings > Features Listing
- Enable the checkbox to activate the functionalities of the plugin
- Set the global price for listing the products of vendors
- Enter the days up to which the product can be listed as the featured product
- Enter the total number of products you want to display in the feature listing section
- Save Changes
Note
- After clicking on the Pay Now button, you’ll be redirected to the checkout page to complete your paid listing request. You can complete your order using any payment method.
- As soon as the admin marks your order status as completed, your products will start showing at the top of the shop page.
- Your products will be displayed for the time specified by the admin.
- You can request as many products as you want to display at the top of the shop page.
- To leverage the functionalities of Feature Listing For Product Vendor, store owners are first required to purchase Product Vendor from the WooCommerce marketplace.
When the admin confirms your request your product will appear on the top of the shop page as shown below.
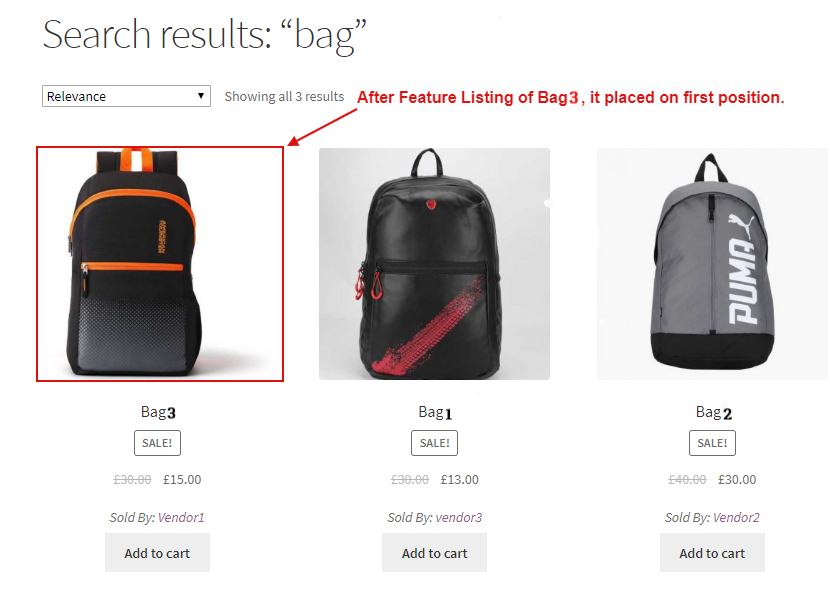
Now, whenever a customer searches for a product that is related to the product for which you’ve paid, your featured product will appear on the top of the page. Thus, you can boost your product visibility and sales.
FAQs
↑ Back to topIs there any dependency or requirement of any other plugin for the activation of the featured listing plugin?
Yes, for activation of the feature listing plugin we required two plugins, i.e.
- WooCommerce
- WooCommerce Product Vendors
What is the required setting to enable the plugin?
Go to the Admin Dashboard > WooCommerce > Setting > Feature Listing Tab > Enable/Disable Setting > Click on the save setting.
Is there any setting through which we charge the product which is requested as a featured product?
Go to the Admin Dashboard > WooCommerce > Setting > Feature Listing Tab > Enable/Disable Setting > Enter Price > Save Setting.
There is any setting through which we set the number of days after that feature product is expired?
Go to the Admin Dashboard > WooCommerce > Setting > Feature Listing Tab > Enable/Disable Setting > Expiry After Day > Save Setting.
How many feature products are shown at a time if anyone searches?
Go to the Admin Dashboard > WooCommerce > Setting > Feature Listing Tab > Enable/Disable setting > Enter No. of Feature Product.
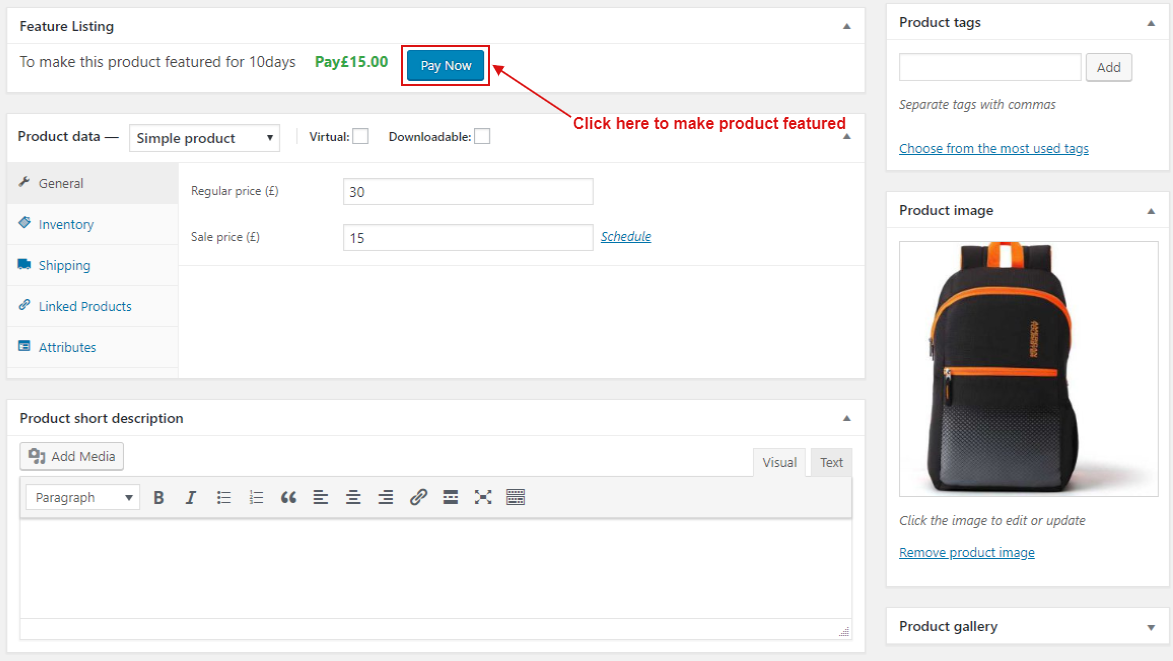
How do vendors request a product as a featured product?
For this vendor directly go to the selected product page and on that product page there is a pay now button, when the vendor clicks on that pay now button then it redirects to the checkout page and then the vendor select the payment method through which they want to pay and a new order is created and a request is sent to the admin.
How admin approve the feature listing request?
For Approving the feature product request the order status of the featured product should be completed.
How does the vendor know that its selected product is set as a featured product?
The selected product is listed first on that category product.