This documentation describes how you can go about the following with Convertiply.
- Installing Convertiply on your WordPress Website
- Creating your First Widget
- Customizing the appearance of your Widget
- Configuring your widget behaviour
- Setup triggers- when should the popup show up
- Segment audience to whom the popup should be shown
- Integrating your Email Marketing service
- Lead Routing
For any queries or more information, have a look at our website Convertiply.com
↑ Back to topInstallation
↑ Back to top-
- Download the convertiply.zip file from your WooCommerce account.
- Go to WordPress Admin > Plugins > Add New and “Upload Plugin” with the file you downloaded with “Choose File”.

Creating your first Widget
↑ Back to top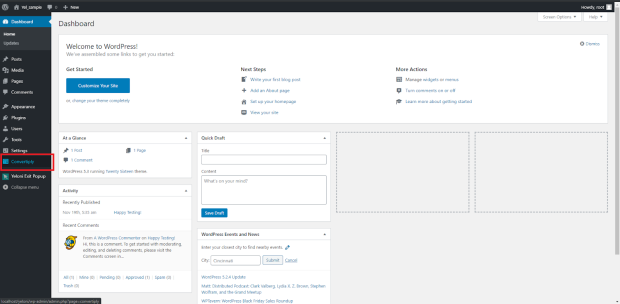 Go to the dashboard. The first time after installing, you will see all available Design layouts.
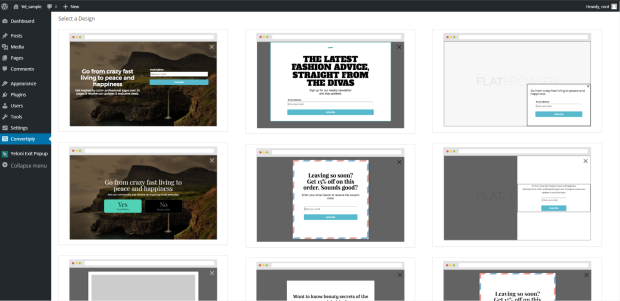 To get started, click on a Design Thumbnail of your choice and start customizing it according to your needs.
Else, you’ll see the Convertiply dashboard with all of the popups that you’ve created and the contacts that you’ve received.
To get started, click on a Design Thumbnail of your choice and start customizing it according to your needs.
Else, you’ll see the Convertiply dashboard with all of the popups that you’ve created and the contacts that you’ve received.
Customizing the Appearance of Your Widget
↑ Back to top Now select how the popup should enter your website from the drop-down menu.
 In the Widget Editor Page, you have the options to customise the widget as per your needs.
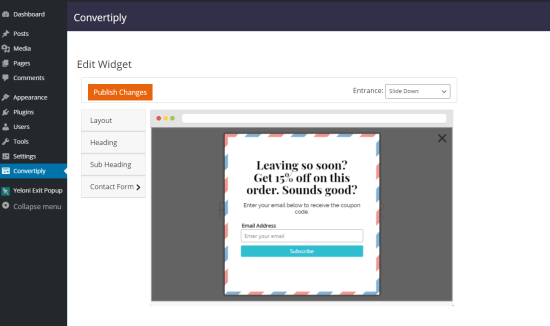 Here you can edit your widget’s Visual & Call to Action settings. The sections you can edit in this page are,
- Layout
- Heading
- Sub Heading
- Positive Action
- Negative Action
- Button Action
- Image
- Contact form
Configuring Your Widget Behaviour
↑ Back to top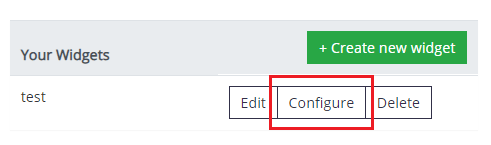 Here, You have the options to configure
- When should the Widget appear
- How often should the Widget appear
- Where should the Widget appear
- Who should see the Widget

 Click here to see the detailed instructions on configuring your widget
Integrating Your Email Marketing Service
↑ Back to top When you are setting up Integrations for the first time on Convertiply, you will be asked to “Add an email marketing service”.
 Click on that drop-down menu and you will see the available email marketing services Mailchimp and Sendinblue.
Select your preferred service from the list.
If you chose Mailchimp, A Connect to Mailchimp button will appear. Click on that button and complete the setup.
Click here to find out how to set up your Mailchimp account with Convertiply.
If you chose Sendinblue, A text box will appear. There, enter your Sendinblue API key and click Connect.
Click on that drop-down menu and you will see the available email marketing services Mailchimp and Sendinblue.
Select your preferred service from the list.
If you chose Mailchimp, A Connect to Mailchimp button will appear. Click on that button and complete the setup.
Click here to find out how to set up your Mailchimp account with Convertiply.
If you chose Sendinblue, A text box will appear. There, enter your Sendinblue API key and click Connect.
 Click here to find out how to find out your Sendinblue API key.
Lead Routing
↑ Back to top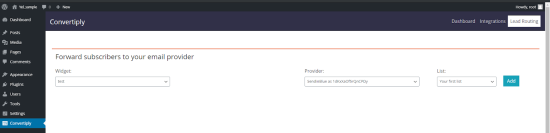 Now you can see the respective widgets assigned to different lists on your email marketing service.
Continue to see the detailed instructions on setting up and using the Convertiply Plugin.
Now you can see the respective widgets assigned to different lists on your email marketing service.
Continue to see the detailed instructions on setting up and using the Convertiply Plugin.
Customizing a widget
↑ Back to topLayout
↑ Back to top- Background
- Close Button
- Border
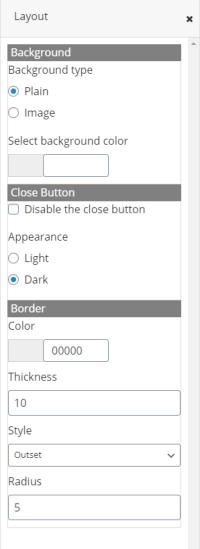
Background type:
Customize the background of your widget in this option. The different options for the background are,- Plain
- Choose an image

Appearance:
There are two themes available for the widget.- Light theme
- Dark theme
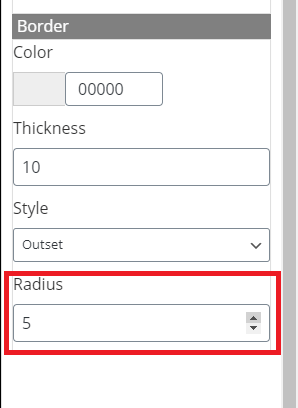
Border:
The border can be customized for the following options.- Border colour
- Thickness
- Style
- Radius
 Thickness option allows you to choose the preferred thickness for the border of your widget
Style:
Convertiply has several styles for the border of your widget. choose between- Dotted
- Dashed
- Solid
- Double
- Groove
- Ridge
- Inset
- Outset
Radius: This option lets you have rounded edges for your border. Just decide how rounded your edges should be!
 After making changes in the dedicated section, click “Save” on the top right corner of the section.
Image
You can change the settings associated with the image inside your widget with this option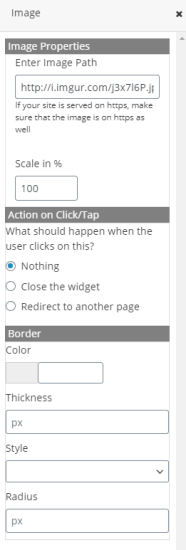 Enter the URL of the image you want to display in your widget.
Select the Scale in % for your image.
Choose what should the widget do when a visitor clicks on the image.
You can choose to
Enter the URL of the image you want to display in your widget.
Select the Scale in % for your image.
Choose what should the widget do when a visitor clicks on the image.
You can choose to
- Do Nothing
- Close the Widget
- Redirect to another page in the same tab or a new tab.
- Border colour
- Thickness
- Style
- Radius
Heading
↑ Back to top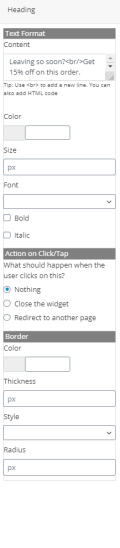 Type in your text for the popup heading.
Customize the text using different options such as
Type in your text for the popup heading.
Customize the text using different options such as
-
- text colour
- size
- font
- Action on click/tap
- border colour
- thickness
- radius
 Choose what should the widget do when a visitor clicks on the Heading.
You can choose to
Choose what should the widget do when a visitor clicks on the Heading.
You can choose to
- Do Nothing
- Close the Widget
- Redirect to another page in the same tab or a new tab.
Sub Heading
↑ Back to top-
- Text colour
- Size
- Font
- Action on click/tap
- Border colour
- Thickness
- Radius
- Do Nothing
- Close the Widget
- Redirect to another page in the same tab or a new tab.
Contact form
↑ Back to top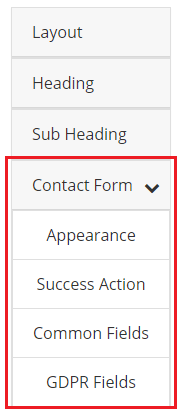
Appearance
The form’s- Label colour
- Button text
- Colour can be customised here.

Success action: Once the user has successfully submitted their data, the popup shows a success message.

The default message can be tweaked according to your wish. And you can also choose what to do after a successful subscription.
You can either choose to close the popup or to redirect the user to a page of your choice after a successful subscription.
Also, You can choose the time delay between the closing of popup in this menu.
Positive/Negative actions for Choice popups.
You can customise the behaviour of the popups which carries Yes/No buttons. You have all of the usual customisation options and along with that, you have the option to choose what to do when the user makes a choice in the widget. You can either choose to- Do Nothing
- Close the widget
- Redirect to a page
when the user makes a choice.


GDPR Fields
Make your popup GDPR compliant using this tool. Collect the customer’s consent regarding data collection and protection using these fields.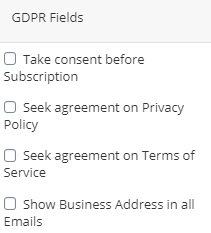
Common fields
Choose the text that goes in the data collection fields of your widget.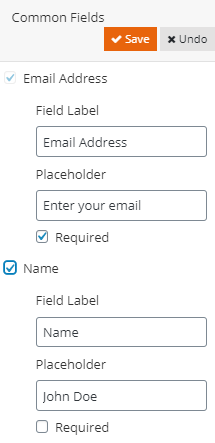 After customizing the widget, click on “Publish Changes” to make your changes live.
Configuring a Widget
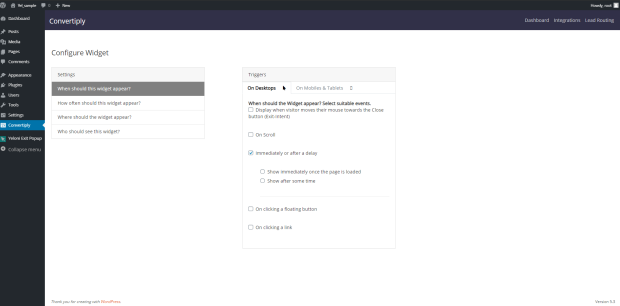
↑ Back to topWhen should this widget appear?
↑ Back to top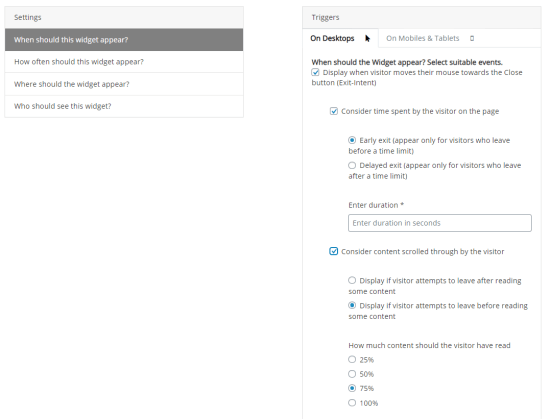 Under this setting, you can choose to show the widget when the visitor moves their mouse towards the close button.
You can also consider whether to show the widget or not according to the time spent by the visitor on the page.
Under this setting, you can choose to show the widget when the visitor moves their mouse towards the close button.
You can also consider whether to show the widget or not according to the time spent by the visitor on the page.
-
- Show the widget to people who leave before a time limit
- Show the widget to people who leave after a time limit.
-
- Display if the user leaves after reading certain content
- Display if the user leaves before reading certain content
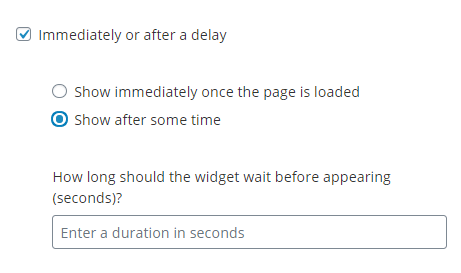
 After a Delay
Choose to show the widget according to the time the user has spent on the page.
After a Delay
Choose to show the widget according to the time the user has spent on the page.
-
- Show the widget immediately after the page loads
- Show the widget after a certain time.
If you choose this option, You have to input the time in seconds after which the widget should appear.
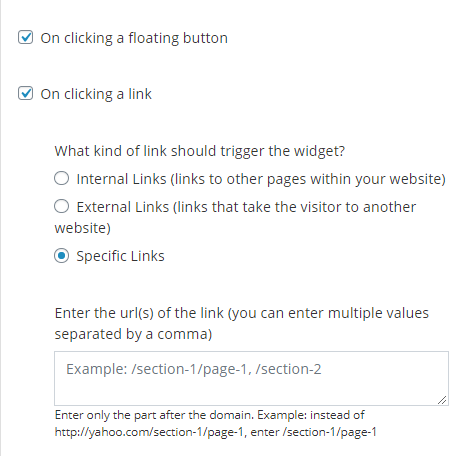
- On clicking a floating button
- On clicking a specific link
- Internal links (The links to other pages within your website)
- External links (The links to other websites)
- Specific links (The links that you decide)
 On mobile devices such as Mobiles and Tablets, The exit intent trigger has similar customisation options, but it is triggered when the user taps the back button.
To configure this, click the tab “On mobiles and tablets”
On mobile devices such as Mobiles and Tablets, The exit intent trigger has similar customisation options, but it is triggered when the user taps the back button.
To configure this, click the tab “On mobiles and tablets”
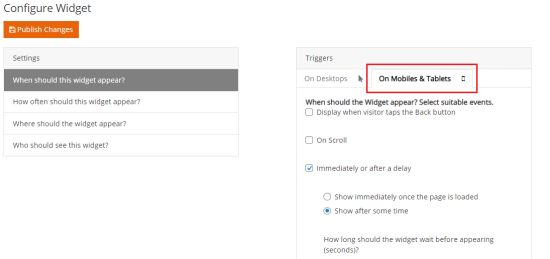 This setting has similar configuration options as in the desktop platform. Just the method of the trigger is different.
How often should the widget appear?
↑ Back to top- Show whenever triggered Under this, you have the option to disable the widget for the particular user who has already completed the expected action.
- Show only once in a session The session ends once the user closes the browser.
- Show only once for a visitor

Where should the Widget appear
↑ Back to top- Choose to enable/disable the widget where the URL matches some text
- Choose to enable/disable the widget where the URL contains some text
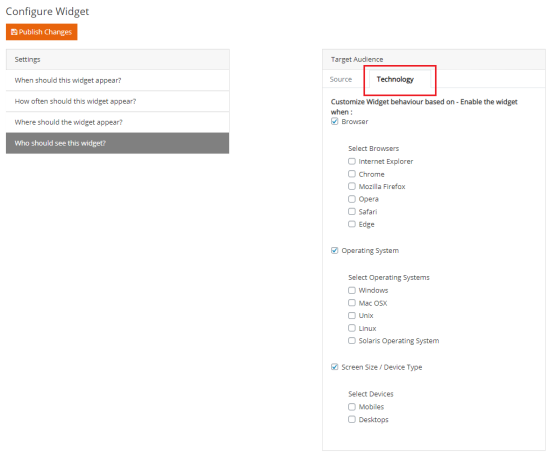
Who should see the widget?
↑ Back to top- Search traffic
- Social traffic
- Visitors from specific websites.
- Campaign traffic based on UTM codes

-
Technology
 To save the Design after customising it according to your needs, click on “Publish changes” button on the top left side of the dashboard, and see your widget live in action on your page!
Integrations
↑ Back to topYou can integrate Convertiply with popular email marketing platforms Mailchimp and SendInBlue. Minimise the hassle of feeding contacts manually into them by having the contacts acquired through the widget sent automatically to your respective email marketing account.
For Mailchimp;
↑ Back to topFor Sendinblue
↑ Back to top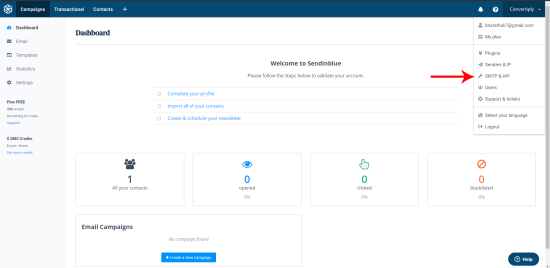 In that page, your API key will be displayed. Copy-paste it to the Convertiply page and click “Connect to SendinBlue”
And you have successfully integrated Sendinblue with Convertiply!
In that page, your API key will be displayed. Copy-paste it to the Convertiply page and click “Connect to SendinBlue”
And you have successfully integrated Sendinblue with Convertiply!