Scenario
↑ Back to topMatty has a restaurant, but he can’t afford the costs of a website so he decides to register at a website where he can sell products and give a small percentage to the site owner.
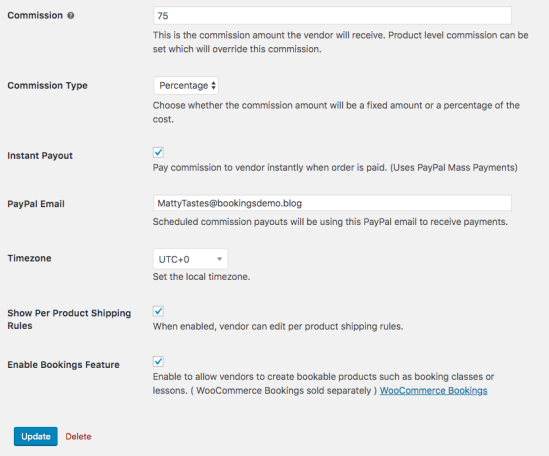
- Matty has 75% revenue on each booking
- His place is open every day, except Christmas, from 7:00 PM to 11:00 PM
- It’s a small restaurant with only 18 seats
- The price increases on New Year’s Eve
- Each booking is for at least 2 hours

Required extensions
↑ Back to topRecommended theme
↑ Back to topSetup and Configuration
↑ Back to topAdd New User
↑ Back to top- Login with your Administrator account and go to Users > Add New.
- On the Add New User page, fill out the fields as desired. This will be your Product Vendor’s account. It’s important that you select the new user’s Role from the drop down and set that to
Vendor Admin. This will give your Product Vendor the ability to administrate their products.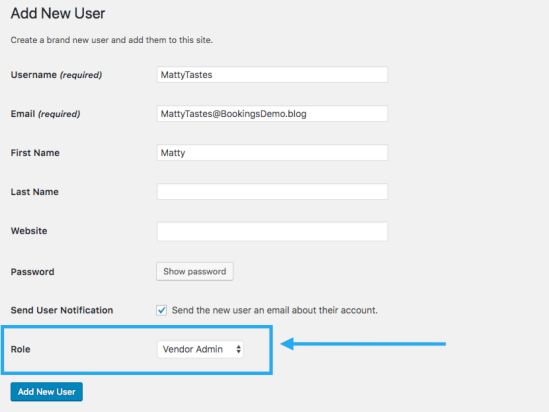
- Be sure to send the newly created Product Vendor their credentials.

Create Product Vendor
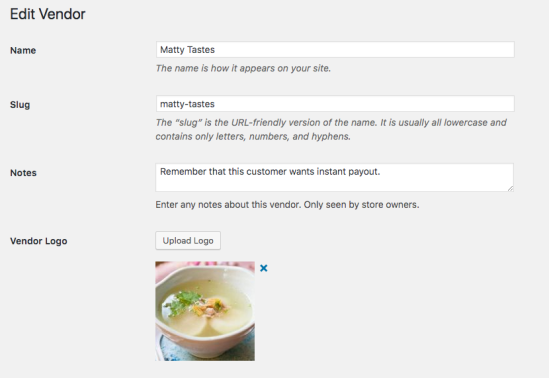
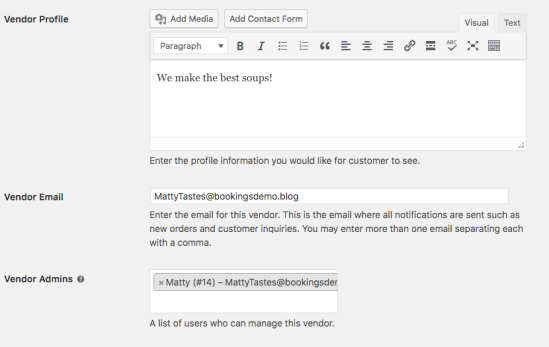
↑ Back to top- Go to Products > Vendors and create a new vendor as shown in the screenshots below. Make sure that you select the Product Vendor’s email address in the Vendor Admins field. When you click in this field you will be able to search for users. Adding the Product Vendor to the Vendor Admins field will allow the user to administrate their products. The only fields that are required are Name, Enable Bookings Features, and Vendor Admins. If you do not enable Bookings feature, then your Vendors will not be able to create Bookable Products. The rest of the fields are either used for display on the Vendor’s Profile page, or pertain to commission. You can set the commission here or on the product as the Vendor Admin.
- The new Product Vendor will be able to login and add products. You can login as the Product Vendor to follow the next set of steps.
Create Product
↑ Back to topWe’ll need to first create a Bookable Product.
- In the sidebar of your WordPress Admin, click on Products.
- Click on the Add New button on the top.
- Under Product data select
Bookable product. - To the side of the Product data box you will then tick the checkboxes for Virtual and Has Persons.
- In our example we have enabled Pass shipping/tax. You do not need to do this step unless you wish to pass these costs off to the Product Vendor.
General Tab
↑ Back to top- Product is
Virtual(no need to ship anything). - Product
Has Persons. - product has Bookings duration set to Fixed blocks of
1hour.

Availability Tab
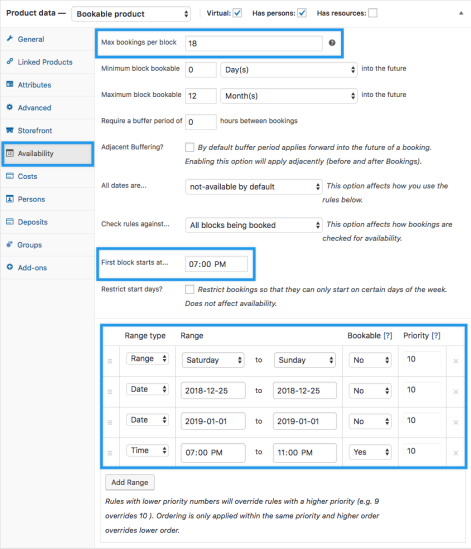
↑ Back to topFor this case, we’ll set All dates are… to not-available by default and add rules for what is available. The buffer period we set here allows our trainers time to travel between appointments.
- Product has Max bookings per block set to
18. - Product has Require a buffer period of
1hours between bookings. - Product has All dates are…
not-available by default. - Product has First block starts at …
7:00 PM - The rules for this Bookable Products are set as follows.
This rule states that Saturday and Sundays (weekends) are not bookable.
Range Type: Range

Range: Saturday to Sunday

Bookable: No

Priority: 10
This rule states that December 25th 2018 is not bookable.Range Type: Date
Range: 2018-12-25 to 2018-12-25
Bookable: No
Priority: 10
This rule states that January 1st 2019 is not bookable.Range Type: Date
Range: 2019-01-201 to 2019-01-01
Bookable: No
Priority: 10
This rules states that the hours that can be booked fall between 7:00 PM and 11:00 PMRange Type: Time
Range: 07:00 PM to 11:00 PM
Bookable: Yes
Priority: 10
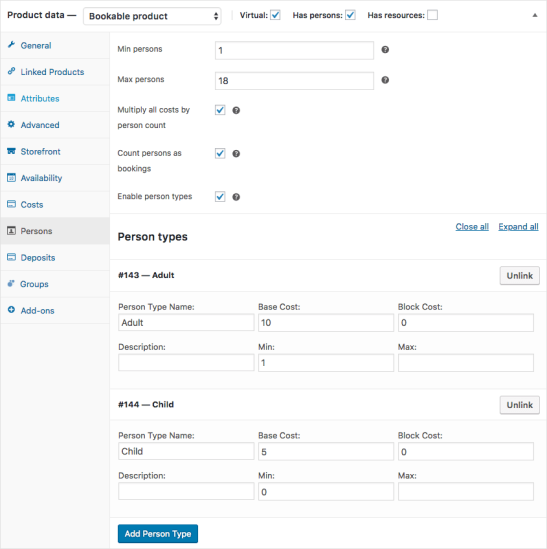
Persons Tab
↑ Back to topWe would like to charge different rates for children and adults. We want to require that at least one person books and that a maximum amount of 18 persons can book. We are going to multiply all the costs of this booking by the amount of persons, as well as count bookings as person. What this does is allow us to tie a person to a booking. Remember that we set the Max bookings per block to 18. Since each person counts as a booking, that means that each person selected will take away one spot from the booking. Lastly we set the name of the person type, how much that person type costs as well as require that at least 1 Adult books. We don’t want just children booking.
- Product has Min persons set to
1. - Product has Max persons set to
18. - Product has Multiply all costs by person count enabled.
- Product has Count persons as bookings enabled.
- Product has Enable persons type enabled.
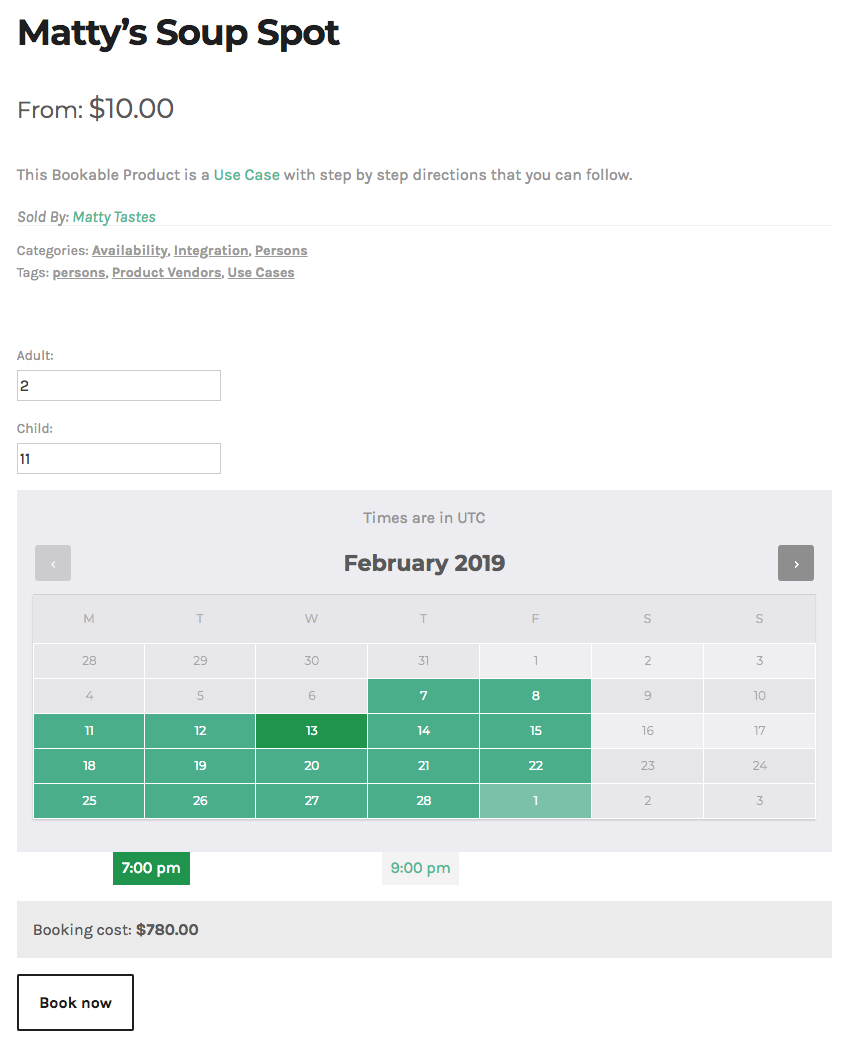
Usage
↑ Back to topThis is what you see in the frontend:
Questions and Feedback
↑ Back to topHave a question before you buy? Please fill out this pre-sales form.
Already purchased and need some assistance? Get in touch with a Happiness Engineer via the Help Desk.