Why use Single Emails?
↑ Back to top- Standardize the wording and structure of all your email communications – not just your automated emails.
- Use your WordPress and WooCommerce database to select a customer or grouping of customers to send emails to, at any time, without any pre-planning or set up.
- Include WordPress and WooCommerce data in your email “auto-magically” – this includes coupons
- Track the efficacy and performance of your emails – something that Gmail, for example, cannot track
- Quickly send an email without ever leaving your store management panel
Creating and Sending Single Emails
↑ Back to top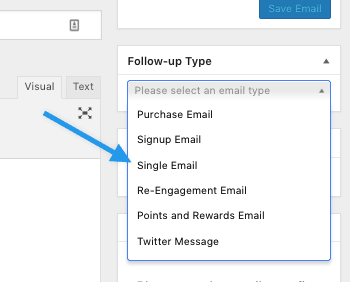 With the non-automated Manual Emails, you can create and save unique emails as a template for yourself or your employees, that you can use as often as you wish when you need to send an email to someone. Creating an email is the same process as with any other email. When creating the email template, simply select “Single Email” from the Follow-up Type as seen to the left.
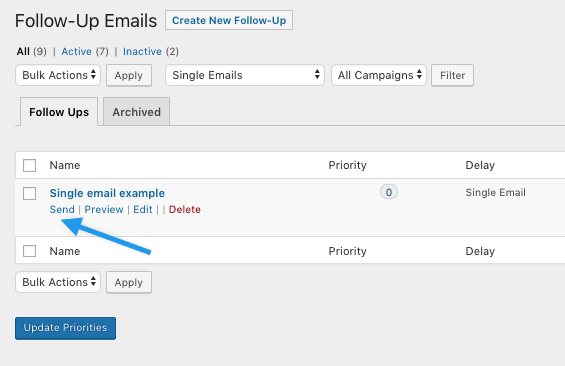
Once your email template is created and saved, you can quickly pull it up on the summary page by hovering the cursor over the email name, and clicking “Send”.
With the non-automated Manual Emails, you can create and save unique emails as a template for yourself or your employees, that you can use as often as you wish when you need to send an email to someone. Creating an email is the same process as with any other email. When creating the email template, simply select “Single Email” from the Follow-up Type as seen to the left.
Once your email template is created and saved, you can quickly pull it up on the summary page by hovering the cursor over the email name, and clicking “Send”.
 This opens up an editing screen as shown below, where you can enter in the sending criteria, and make a few quick edits if needed.
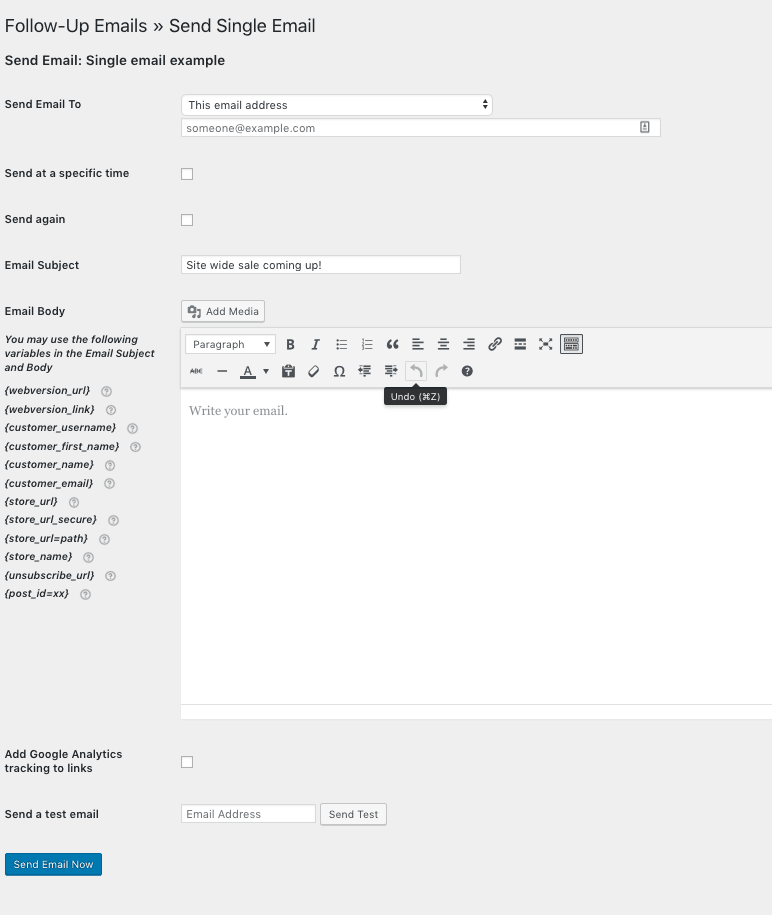 The options available in the drop-down menu for “Send Email To:” are:
- This email address: A specific email address you enter (comma-separated list accepted)
- All users: All registered WordPress users
- All customers: All customers – includes registered users and guest customers
- Subscribers: Choose from All Subscribers or a specific list
- This customer: Search for one or many specific customers
- Customers who bought these products
- Customer who bought from these categories
- Customers who bought between these dates
- Customers with an active subscription
- Customers who booked this event
Review all the available variables and merge tags for manual emails here. Out-of-the-box variables are documented here.
If the selected option needs additional information, such as a date range, text-boxes are provided for entering it in. Most options give you the ability to search the database for the required information, such as the email address of a certain customer for “This customer”. Just enter all or part of the customer’s name, and it will automatically appear. Follow-Up Emails wills gather all the email addresses (or email address) that fit into the range of the set criteria, and will automatically send an email to these addresses (or address) when you’re ready to send.
Scheduling or Automating Single Emails
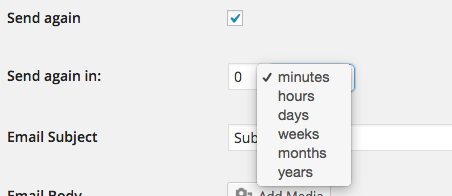
↑ Back to top A checkbox is provided for those who wish to automatically resend the same email after some chosen time interval – maybe you want to send it now, and then send it again in seven days… you can do that. The Send Again feature also takes a scheduled email into account by offsetting the resend schedule based on the initial email’s sending schedule. So you could send an email this coming Friday, and schedule it for 2 days later to resend on Sunday as well.
 Other options provided here include adding Variables, sending a test email, and adding Google Analytics tracking.
 Coupons can be added by going back to the main editing screen. This screen is opened by hovering the cursor over the email name on the summary page, and clicking “Edit” instead of “Send”.
 You will find more information on creating and adding coupons to your emails on this page.
The main editor also allows you to enter in a BCC email address (where you want a copy of each email sent to), and the reply email address, that a recipient can click to send a reply. All of these options are explained on the “Creating a New Email” page found here.
When you think you are ready, just click “Send Email Now.” The email (or emails) will arrive at their destination inboxes immediately.
You will find more information on creating and adding coupons to your emails on this page.
The main editor also allows you to enter in a BCC email address (where you want a copy of each email sent to), and the reply email address, that a recipient can click to send a reply. All of these options are explained on the “Creating a New Email” page found here.
When you think you are ready, just click “Send Email Now.” The email (or emails) will arrive at their destination inboxes immediately.