WooCommerce Follow-ups is a premium extension.
Following up automatically with customers that have a failed subscription payment is an important key to securing and increasing revenue. Subscription customers:
- Often assume that everything is worked as planned
- That their subscription will be shipped/delivered in short order
- That their payment worked flawlessly and their subscription is a-ok
But, for anyone that has ever run an eCommerce storefront, you know all too well that this is frequently not the case. Mistakes, failed payments, and miscommunication happen all too often. With Follow Ups, you can address these scenarios head-on.
Click either the “Create New Follow-Up” button new the top of the page or the “New Email” link in the Follow-up Emails navigation menu.

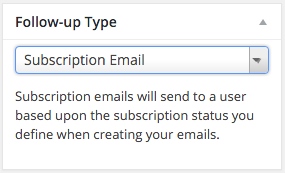
Next, you will want to make sure that you’ve set the correct Follow-up Type. For this tutorial, we will use the “
Subscriptions Email” type.
Now enter a name for your email. The
Follow-up name is used by you internal for reporting and tracking the email in the future. The
subject line is the subject line that will be sent when this email is triggered and sent to your customer. Your email must have a subject line to be sent.

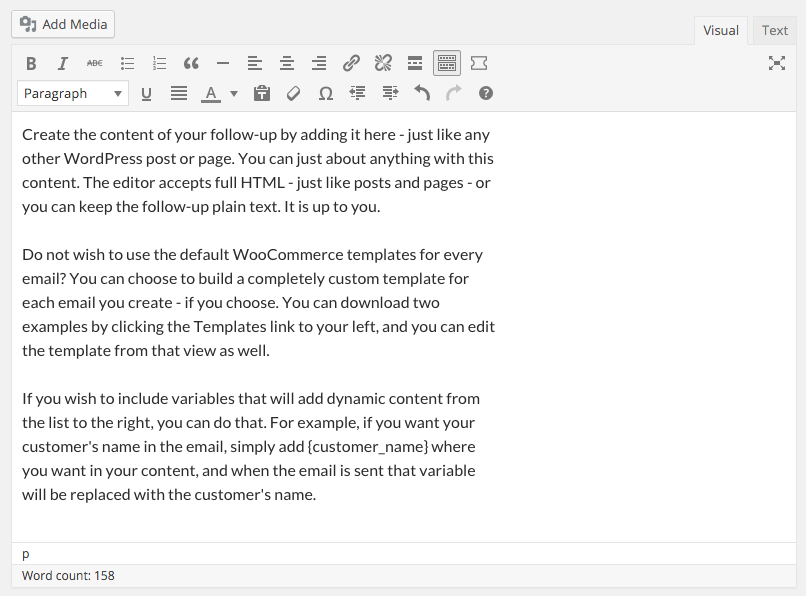
Create the content of your follow-up by adding it here – just like any other WordPress post or page. You can just about anything with this content. The editor accepts full HTML – just like posts and pages – or you can keep the follow-up plain text. It is up to you.
If you wish to include variables that will add dynamic content from the list to the right, you can do that. For example, if you want your customer’s name in the email, simply add {customer_name} where you want in your content, and when the email is sent that variable will be replaced with the customer’s name.
See all the variables here.
For the sake of this tutorial, we will keep the trigger simple, but you can certainly add more complexity if necessary. I am going to define this email to be triggered:
15 minutes after subscription is suspended
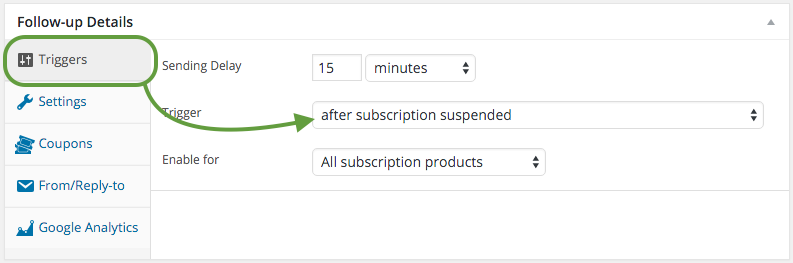
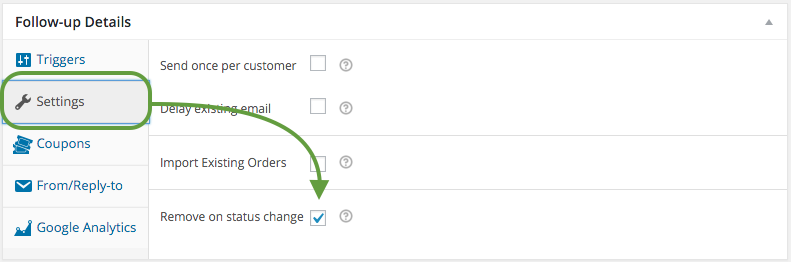
Now, every time a subscription is suspended, this email will be trigger to send 15 minutes after that occurs. Do not worry, if the subscription status changes, this email will not be sent. To ensure this is the case, next we will want to click the “
Settings” tab in the “
Follow-up Details” section, and check the box next to “
Remove on status change“.
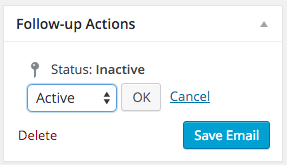
Now you just need to set your email as active and save it, and you’ll be all set for emails to send when your customer’s subscription is suspended.