- One-time payments processing
- Recurring payments for WooCommerce Subscriptions (separate purchase)
- Strong Customer Authentication (SCA) required for transactions within the European Economic Area (EEA),in compliance with the Payments Systems Directive 2 (PSD2)
- Multi-currency transactions (see dedicated paragraph)
- Delivery notifications alerts for customers via Amazon Alexa devices
Requirements
↑ Back to top- Your store must be based in: Austria, Belgium, Cyprus, Denmark, France, Germany, Hungary, Ireland, Italy, Japan, Luxembourg, the Netherlands, Portugal, Spain, Sweden, the UK, or the US.
- An SSL certificate. More info on how to get a free or low-cost SSL at: SSL and HTTPS.
- An Amazon Payments Merchant account. Use an existing account or sign up for a new one with our extension. Note: This is not the same as a regular Amazon or Selling on Amazon account.
Installation
↑ Back to topFor a quick start video on getting setup with Amazon Pay for WooCommerce, please refer to the Amazon Pay University tutorial.
- Download the .zip file from your WooCommerce.com account.
- Go to: WordPress Admin > Plugins > Add New to upload the file you downloaded with Choose File.
- Activate the extension.
- (Optional) If you are an Existing Amazon Pay merchant, replace the current version with the new one, and proceed.
Amazon Pay Account Setup
↑ Back to top- Go to: WooCommerce > Settings > Payments.
- Select Amazon Pay. You are taken to the configuration screen.
- Select store location from the Payment Region dropdown. This should also match the location of your Amazon Payment Merchant account.
- Enable/Disable – Enabled by default. Disable to turn off Amazon Pay or when testing.
- Select “Connect to Amazon Pay”. This opens a new window and displays the Amazon Pay Merchant Registration screen.
- Select your country of establishment and click on “Create an Amazon Payments merchant account”, you will be redirected to a login page.
- Create your Amazon account: If you need to sign up for a new account.
- Sign In: If you have an existing Amazon Pay Merchant account.
At the end of the Amazon Pay merchant onboarding process, click the Transfer Access Keys button to import your Amazon Pay credentials into WooCommerce.

Configuration
↑ Back to topBelow are the different options you can customize for the Amazon Pay plugin:
Amazon Pay Merchant Account Details
↑ Back to top
Subscriptions support
↑ Back to topUse Sandbox
↑ Back to topAdvanced Configurations
↑ Back to topIPN URL
↑ Back to topPayment Settings
↑ Back to top-
- Payment Capture – Allows to define how to process the payment for your order, choosing between 3 options:
- Authorize and capture – Completes authorization and capture for the order, when the order is placed.
- Authorize – Only completes the payment authorization on order placement. Capture will need to be triggered manually at a later point in time.
- Don’t authorize – This option will not trigger any payment operation on order placement, the order will only be confirmed. Use this option only in case you need to manage long term pre-orders.
- Authorization processing mode – Defines the way the Amazon Pay API is going to return a response to your shop in terms of authorization results.
- Synchronous – Default processing mode, recommended one. The result of the payment will be immediately available.
- Asynchronous – In this case, the Amazon Pay API can return a Pending response in some cases. Use this processing mode only in case you are selling very high value items. Please note that the asynchronous mode cannot be set if thePayment Capture option is set to “Authorize and Capture”.
- Payment Capture – Allows to define how to process the payment for your order, choosing between 3 options:
 Display options
- Button language: Select the preferred language for the Amazon Pay checkout. This configuration will change the language of the label shown below the Amazon Pay button, but also the language of the whole Amazon Pay experience, including buyer facing emails sent from Amazon Pay side.
- Button color: 3 options are available, Gold, Light Gray and Dark Gray. Gold is the preferred option, as buyers associate this color with the Amazon brand.
- Standard checkout button: Check the box to hide standard checkout button on the cart page. Amazon Pay will be the only checkout option in this case.
- Classic Gateway: Check the box to include Amazon Pay as payment option on the payment selection page at the end of the checkout.
- Amazon Pay on mini cart: Check the box to include the Amazon Pay button on your mini cart.
- Amazon Pay on product pages: Check the box to include the Amazon Pay button on product pages.
- Support Alexa Delivery Notifications: Check the box to allow customers to receive delivery updates for Amazon Pay orders via their Alexa devices. Not available for Royal Mail in the UK.
Miscellaneous
↑ Back to top- Debug: Use the Debug option in this section to enabled logging of API events in your WooCommerce system.
- Enable Hide button mode: The “Enable hide button mode” option, allows to keep the module active, without showing the button to your customers. Use it only in case you are testing the solution before releasing it.
Multi-Currency support
↑ Back to top- Multi-currency support for WooCommerce – https://wpml.org/documentation/related-projects/woocommerce-multilingual/multi-currency-support-woocommerce/
- WooCommerce Currency Switcher – https://wordpress.org/plugins/woocommerce-currency-switcher/
- Currency Converter Widget – https://woocommerce.com/products/currency-converter-widget/
- Price Based on Country for WooCommerce – https://wordpress.org/plugins/woocommerce-product-price-based-on-countries/
 Note:
Note:
- Not all multi-currency plugins show a list of supported currencies like the one above. Should a list appear, select all currencies configured in your store that you would like to offer for Amazon Pay as a checkout option.
- Not all WooCommerce multi-currency plugins provide a currency conversion on an API level. Some, such as Currency Converter Widget display a “visual currency conversion only” without passing the value to Amazon Pay for order processing. In such cases, the price shown to the buyer will be in their currency, but the order is processed in your store’s currency.
- Some multi-currency plugins, such as WooCommerce Currency Switcher, provide both options (display and conversion). In this case, it’s possible to select a “visual currency conversion” only or activate the currency conversion. The latter will activate the Amazon Pay multi-currency feature.
Customer Checkout Flow
↑ Back to top Checkout Page

Sign in and details selection
When the buyer clicks on the Amazon Pay button, a redirect to the Amazon Pay hosted page happens, where the buyer can sign in with the Amazon account, and select address and payment details for the purchase.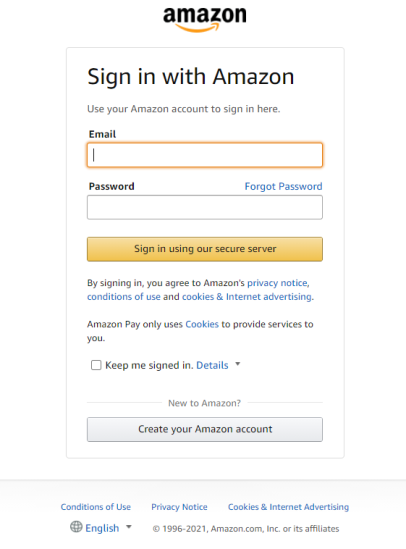
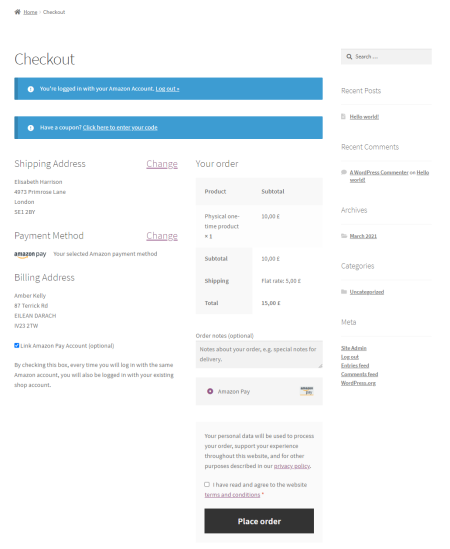
 Order Review Page
Clicking on “Continue to Checkout” the buyer will be redirected to the checkout page, where all the details coming from the Amazon Account are prompted for review. The buyer can simply review the details and complete the purchase.
Order Review Page
Clicking on “Continue to Checkout” the buyer will be redirected to the checkout page, where all the details coming from the Amazon Account are prompted for review. The buyer can simply review the details and complete the purchase.
 Processing and Thank You Page

 Amazon Pay as a classic payment gateway
In addition to the express button placements, Amazon Pay can also be displayed as a classic payment gateway within your payment selection page at the end of the checkout.
Amazon Pay as a classic payment gateway
In addition to the express button placements, Amazon Pay can also be displayed as a classic payment gateway within your payment selection page at the end of the checkout.
 When the buyer selects Amazon Pay, they are redirected to the Amazon Pay page to confirm the delivery address (the one entered by the buyer during the checkout) and the payment instrument before the transaction is completed.
Admin Order Fulfillment Flow
↑ Back to topWhen you open an Amazon Pay order within your WooCommerce admin, you will see an order fulfillment flow widget that allows you to make different actions based on the order status.

Order fulfillment widget for an order that has not been authorized.

Order fulfillment widget for an order that has been captured.
This widget allows you to perform the following actions:
- Authorize – Authorize a payment but do not capture. Amazon recommends capturing payment once you have verified the order and begun processing it.
- Authorize and Capture – Capture funds for the full order total amount.
- Capture – Capture an authorized payment. Amazon recommends capturing payment once you have fulfilled the order.
- Close authorization – Close an authorization and release funds without capturing.
- Refund – If you captured a payment that is still open, you can refund X amount.
After each action, an order note is created, noting the status.
Frequently Asked Questions
↑ Back to topHow do I activate Affirm for Amazon Pay?
↑ Back to top- Make sure you navigate to Amazon Pay (Production View)
- Go to the Gear Wheel in the upper right and select Account Info
- Under the Customer Payment Methods section, select Manage additional payment methods
- Find Affirm and select Get started
- Ensure you meet all eligibility requirements and fill out the necessary fields.
- Select Continue to pricing
- On the following page, you will be offered to see how the customer will see Affirm during checkout and the price per transaction. If you agree, select Confirm.
- Confirm your business details are correct and review Amazon Pay with Affirm’s Merchant Terms of Service and Privacy Policy. Select Submit when ready.
Will this gateway work with X extension that modifies the WooCommerce checkout page?
↑ Back to top- WooCommerce Drip (separate purchase)
- WooCommerce Dynamic Pricing (separate purchase)
- WooCommerce German Market (not a Woo product)
Can I use Amazon Pay/Pay with Amazon/Amazon Payments Advanced with WooCommerce Subscriptions?
↑ Back to topWhere should I go to view my Amazon account balance?
↑ Back to top- US: https://sellercentral.amazon.com
- UK: https://sellercentral.amazon.co.uk/
- Germany: https://sellercentral.amazon.de/
- JP: https://sellercentral-japan.amazon.com/
- EU: https://sellercentral-europe.amazon.com/
Where can I find Amazon Pay Merchant credentials?
↑ Back to topIs Amazon Pay available in other languages?
↑ Back to topMy Amazon Pay button is greyed out. Why?
↑ Back to top- Make sure you navigate to Amazon Pay (Production View)
- Go to the Gear Wheel in the upper right and select Account Info
- Under the Customer Payment Methods section, select Manage additional payment methods
- Find Affirm and select Get started
- Ensure you meet all eligibility requirements and fill out the necessary fields.
- Select Continue to pricing
- On the following page, you will be offered to see how the customer will see Affirm during checkout and the price per transaction. If you agree, select Confirm.
- Confirm your business details are correct and review Amazon Pay with Affirm’s Merchant Terms of Service and Privacy Policy. Select Submit when ready.
Troubleshooting
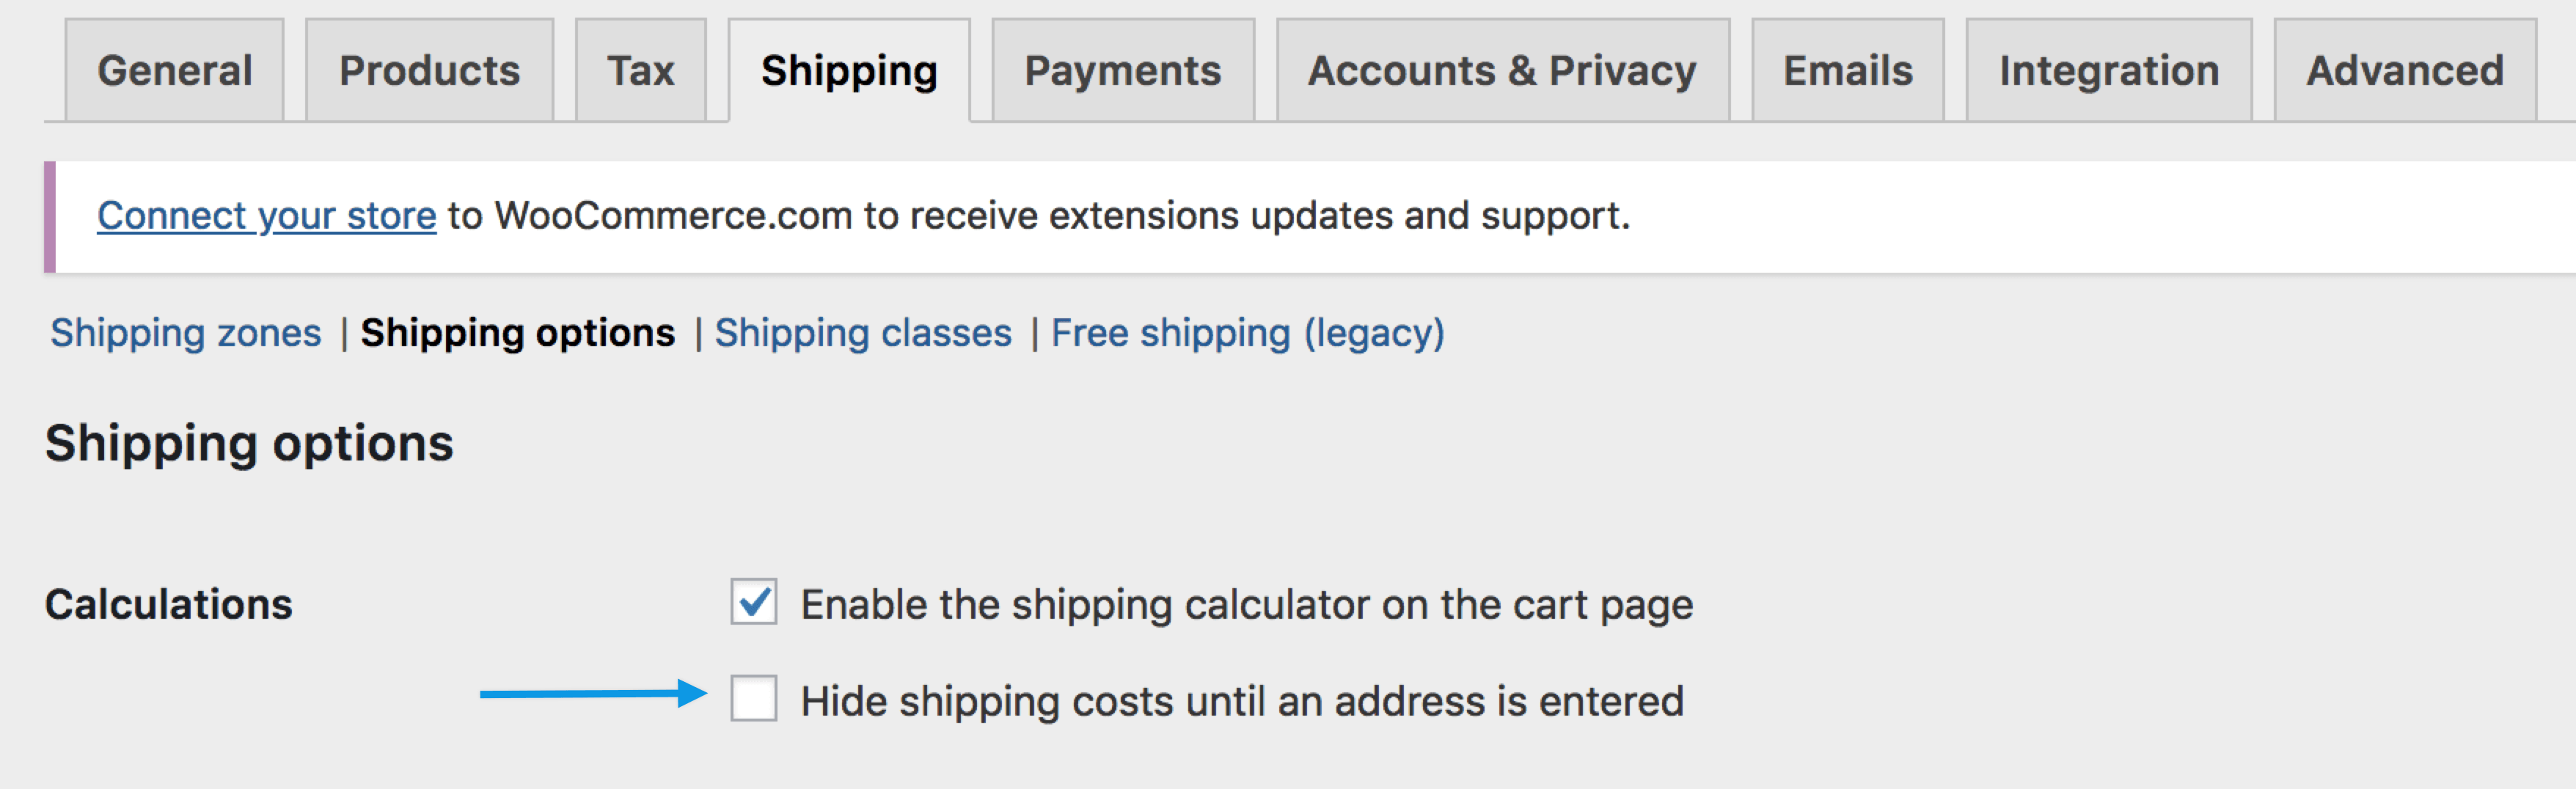
↑ Back to topShipping costs are missing
↑ Back to top