Amazon Fulfillment (MCF) for WooCommerce integrates your WooCommerce store with Fulfillment by Amazon (FBA) to enable automated order fulfillment and delivery.
Important Update
↑ Back to top
- North America Region: Brazil, Canada, Mexico, US
- Europe Region: United Arab Emirates (U.A.E.), Germany, Egypt, Spain, France, UK, India, Italy, Netherlands, Poland, Saudi Arabia, Sweden, Turkey
- Far East Region: Singapore, Australia, Japan
- China
How It Works
↑ Back to top- Sign up for an Amazon Pro Seller account
- Enable Fulfillment by Amazon on your account (if applicable)
- Take or Ship your products to an Amazon facility
- Install and set up this plugin
- Sell products via your WooCommerce store
- Amazon handles your orders by picking, packing, sending the shipment, plus provides tracking info and customer service
Installation
↑ Back to top- Download the .zip file from your WooCommerce account.
- Go to: WordPress Admin > Plugins > Add New and Upload Plugin with the file you downloaded with Choose File.
- Install Now and Activate the extension.
Sign up for an Amazon Pro Seller account
↑ Back to top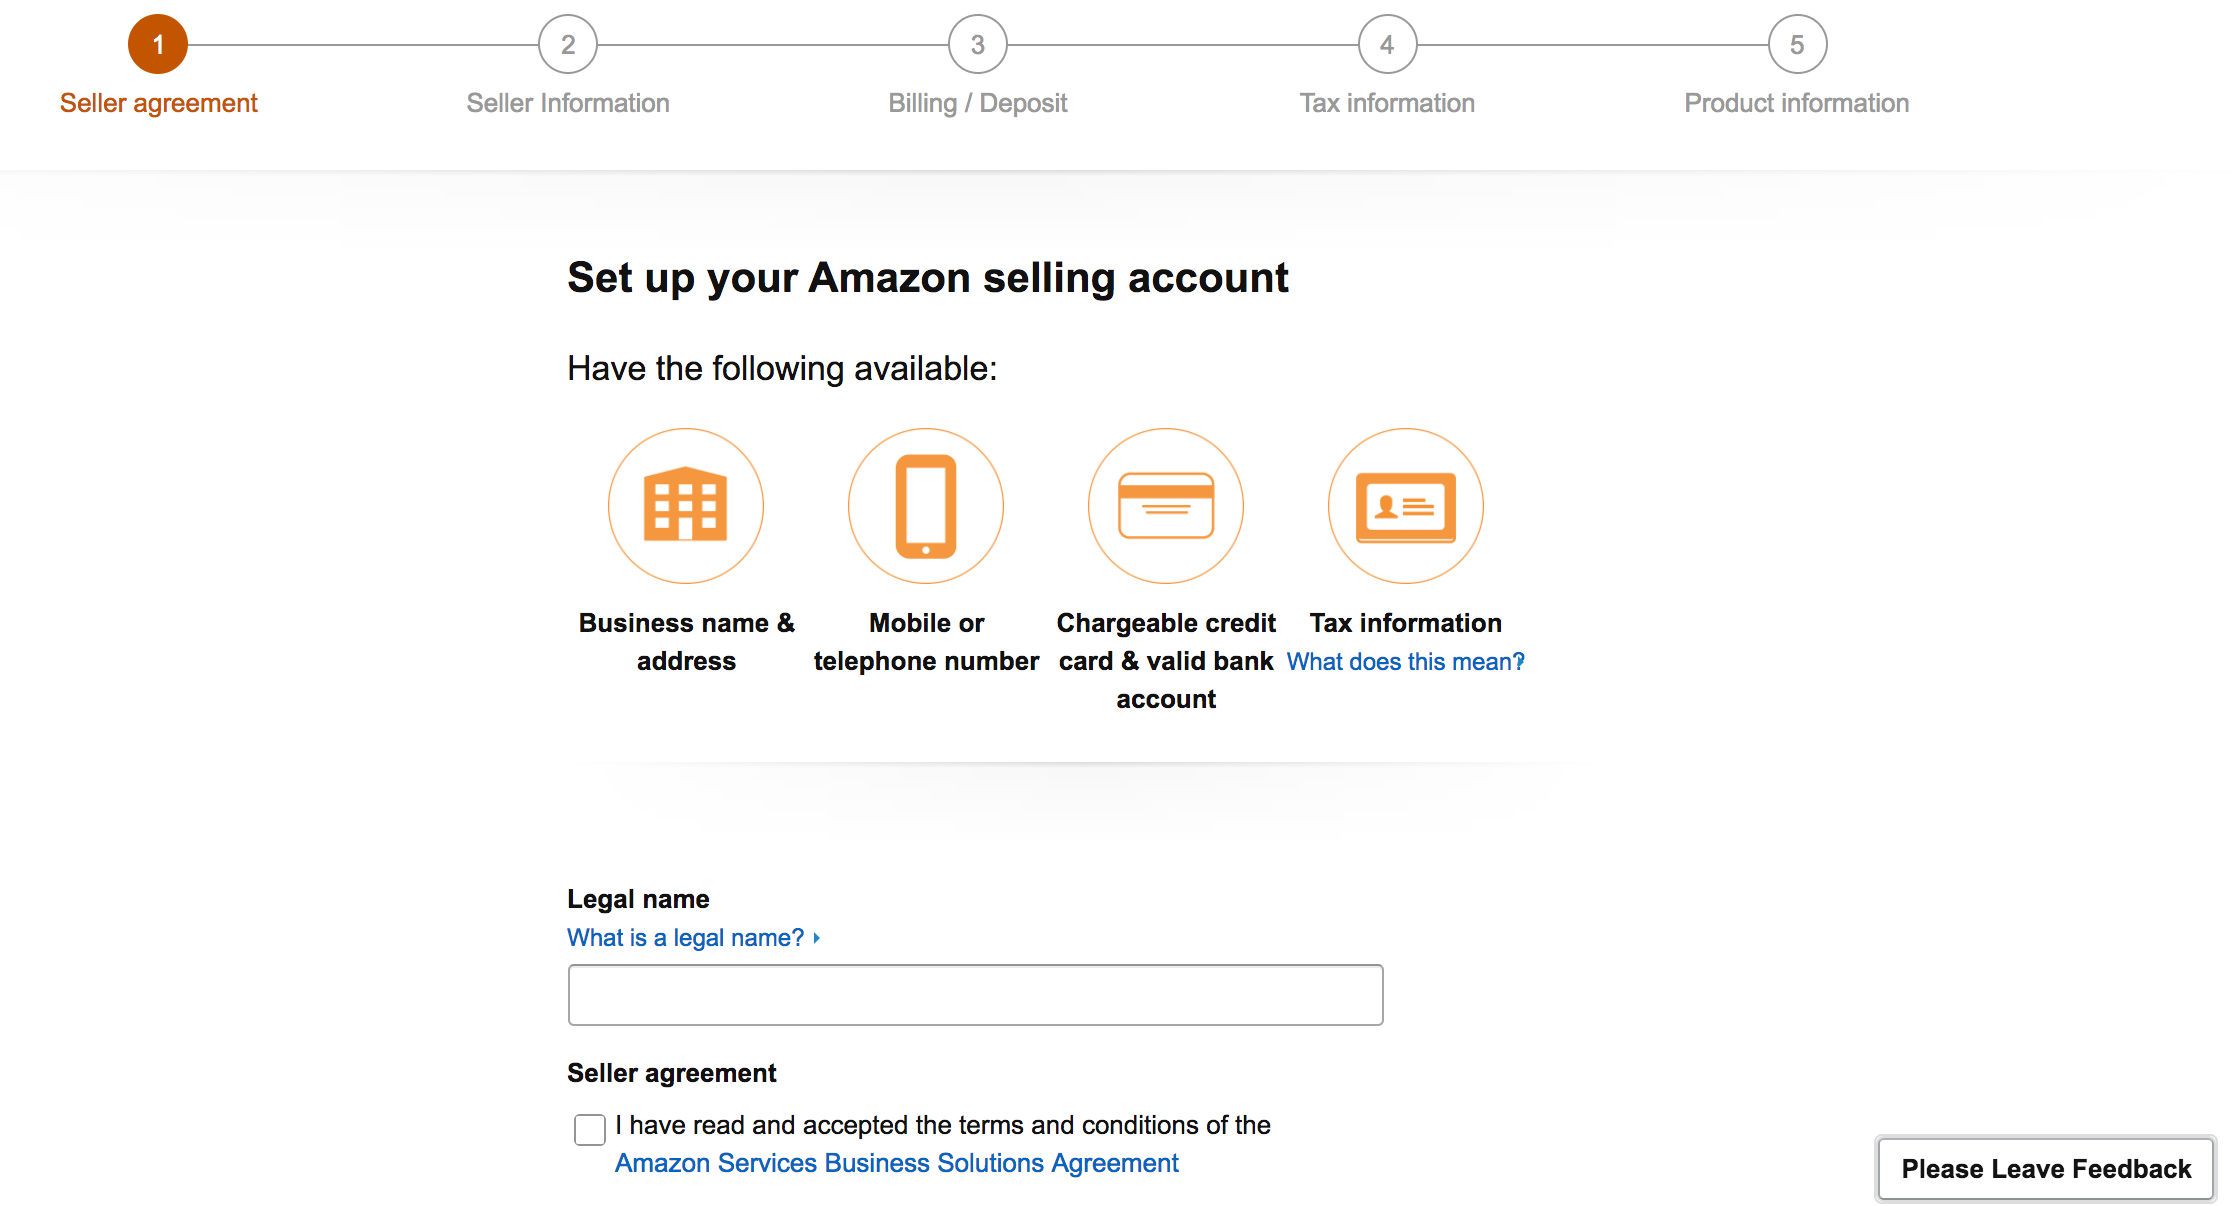
- Go to Amazon Services at Amazon Seller Central and sign up for a Professional Seller account. If you already have an Amazon account, sign into your account on the same screen and check that it is a Professional account. If not, you need to sign up for a Professional Selling Plan.
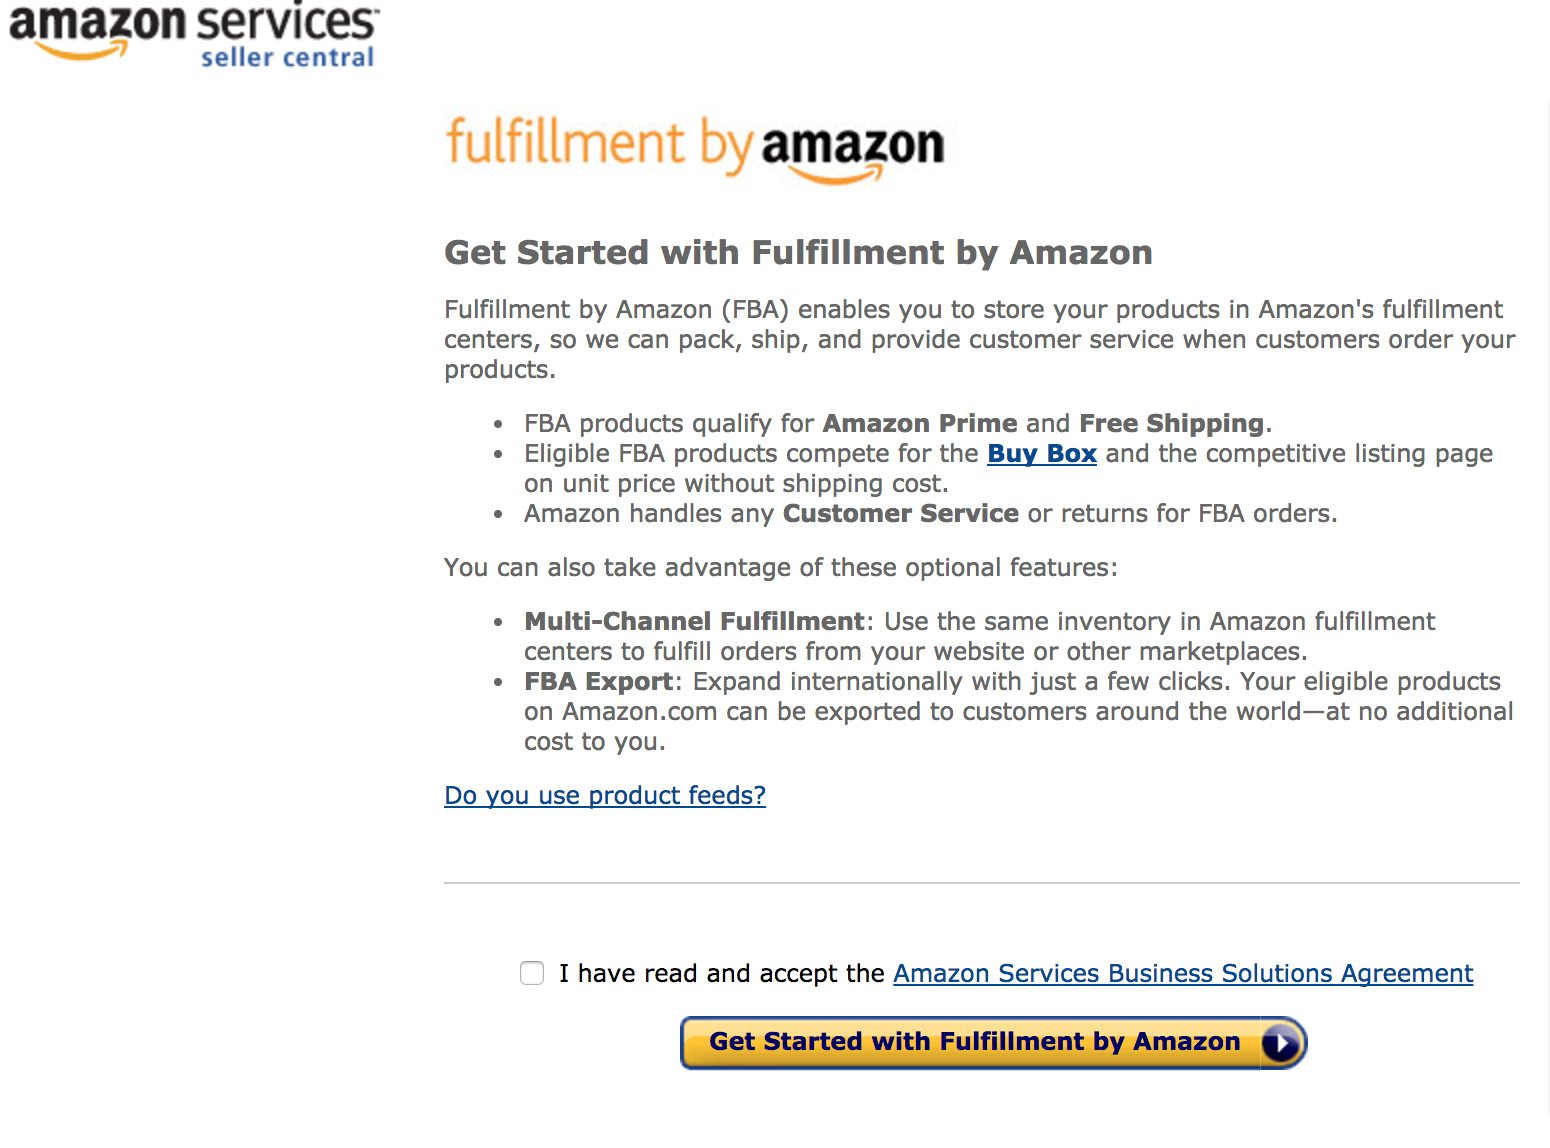
- Go to Amazon Benefits and enable Fulfillment by Amazon on your Amazon Professional Seller account (for some new accounts FBA might already be active by default).
 We also highly recommend:
- Having at least one product set up in your FBA inventory
- Confirming that Seller SKUs in your FBA inventory match the product SKUs in WooCommerce for each product you want to enable for Fulfillment by Amazon
- Providing your physical inventory to Amazon before configuring and testing this plugin
Setup and Configuration
↑ Back to top- The plugin
- Shipping
- Products
Plugin settings
↑ Back to top
- Go to: WooCommerce > Settings > Integration > Fulfillment by Amazon.
- Select the Home Region/Country that applies to your main Amazon Seller Central Account.
- The Plugin will provide instructions and links for you to Authorize this plugin’s Developer ID based on the Home Region that you select. Note that each region will have a unique Developer ID that you need to use during the process.
- Log into your Seller Central account at the Amazon website (you can use the link the plugin provides in the instructions).
- From your Seller Central Dashboard, click Settings (top right) > User Permissions
- Under “Third party developer and apps” click the Visit Manage Your Apps button.
- Under “Manage your apps” near the top of the screen click the Authorize new developer button.

- Copy and paste the values for Developer’s Name and Developer ID from the plugin instructions area into the correct fields.
- Click Next to review and confirm that you understand the implications of granting access to WooCommerce Amazon Fulfillment to integrate your store with Fulfillment by Amazon.
- Check the box and click Next again to access your Seller ID, Marketplace ID, and MWS Authorization Token, which you will need to paste back into the plugin settings.

- Copy and paste the applicable values into the related plugin settings:
- Seller ID > Amazon Seller ID
- Amazon Marketplace ID > Amazon Marketplace ID (use the one that makes the most sense for your store’s country)
- MWS Auth Token > MWS Authorization Token
Important: If you have updated from an older version of WCAF and were previously using the Access ID and Secret Key settings, those can now be ignored. When you save your MWS Authorization Token in the settings, WCAF will automatically use the latest method of authentication with FBA. If you delete your Secret Key from the settings, then WCAF will hide both the Access ID field and the Secret Key field. The 3 fields above (Seller ID, Marketplace ID, and MWS Auth Token) are the only ones you need now.
- Click the Test MWS Connection button. If you entered all credentials correctly, a success message appears at the top and additional plugin settings become available underneath.
- For all other plugin settings, be patient and work your way through each one. Hovering over the (?) for explanations and assistance. You need only do this once or when you wish to make changes to how the plugin is handling your fulfillment.
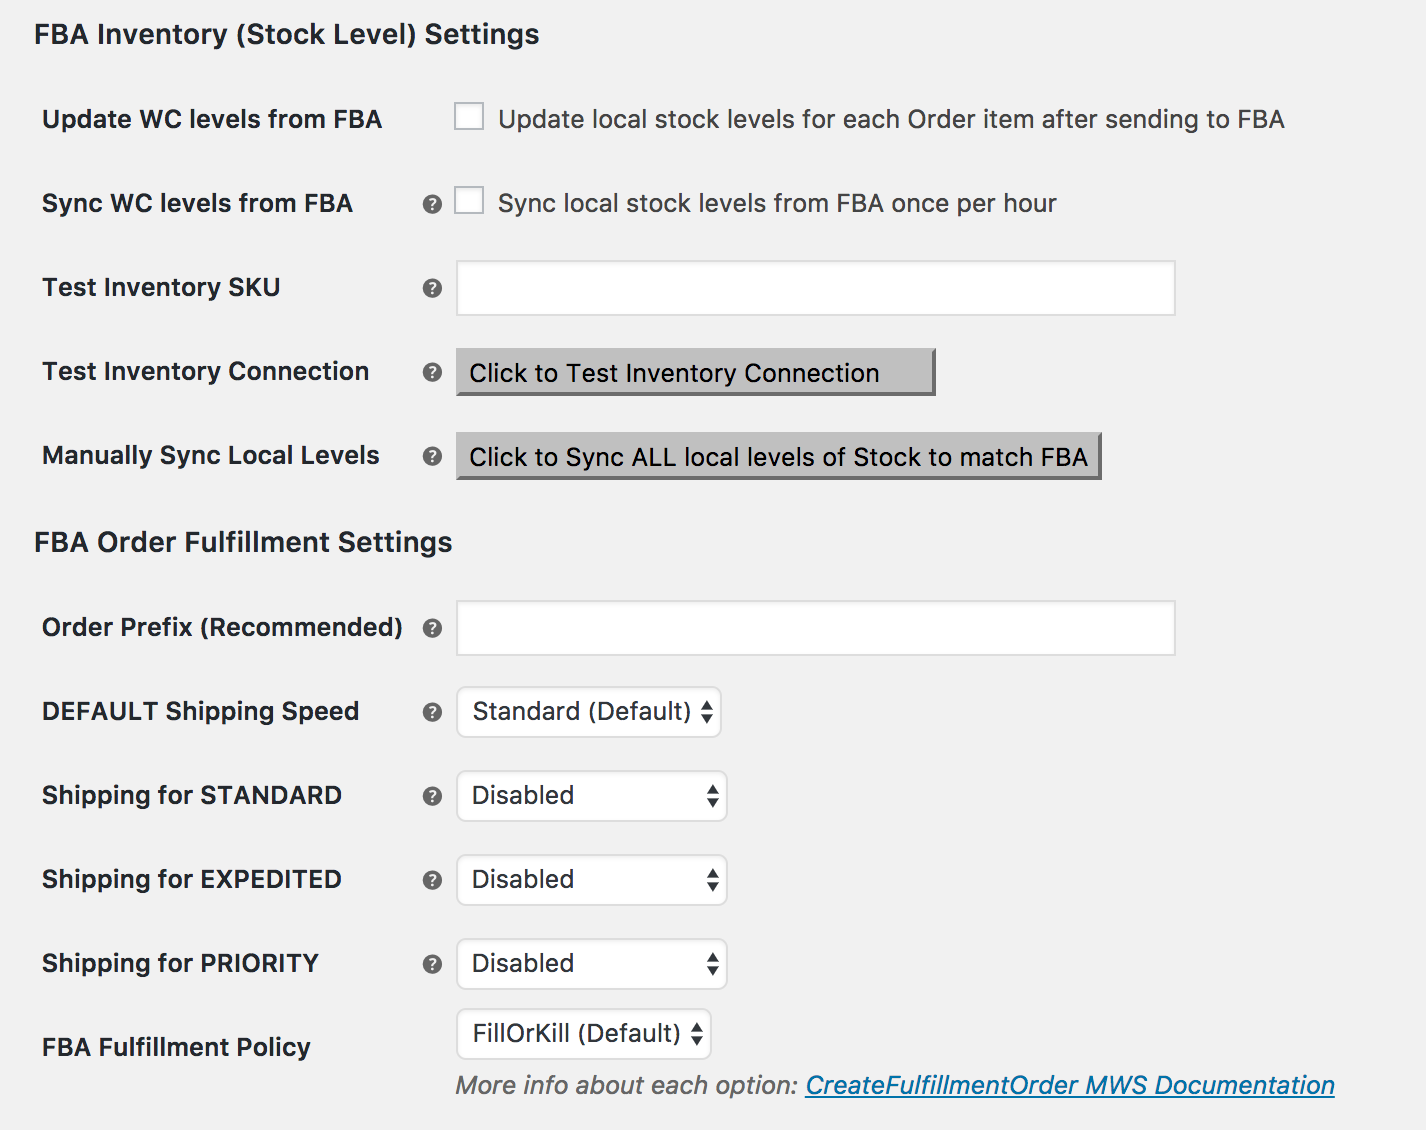
- Enter your selection for each of the FBA Inventory Settings: Most stores will likely want to tick both stock level sync checkboxes to have them turned ON.
- Update WC (WooCommerce) levels from FBA
- Sync WC (WooCommerce) levels from FBA
- Test Inventory SKU (your store should have at least one item set up on FBA and your store with the same SKU as advised above)
- Configure the FBA Order Fulfillment Settings:
- Order Prefix: Use an prefix that helps you identify fulfillment orders in FBA reports and tools on Amazon, e.g., fba or ama or anything that works for accounting.
- Enter your selection for each option under General Plugin Settings.
- If you want to receive shipping and error notifications at an email address different than the WordPress admin email address setting, then provide an address in the “Notification Email” setting.
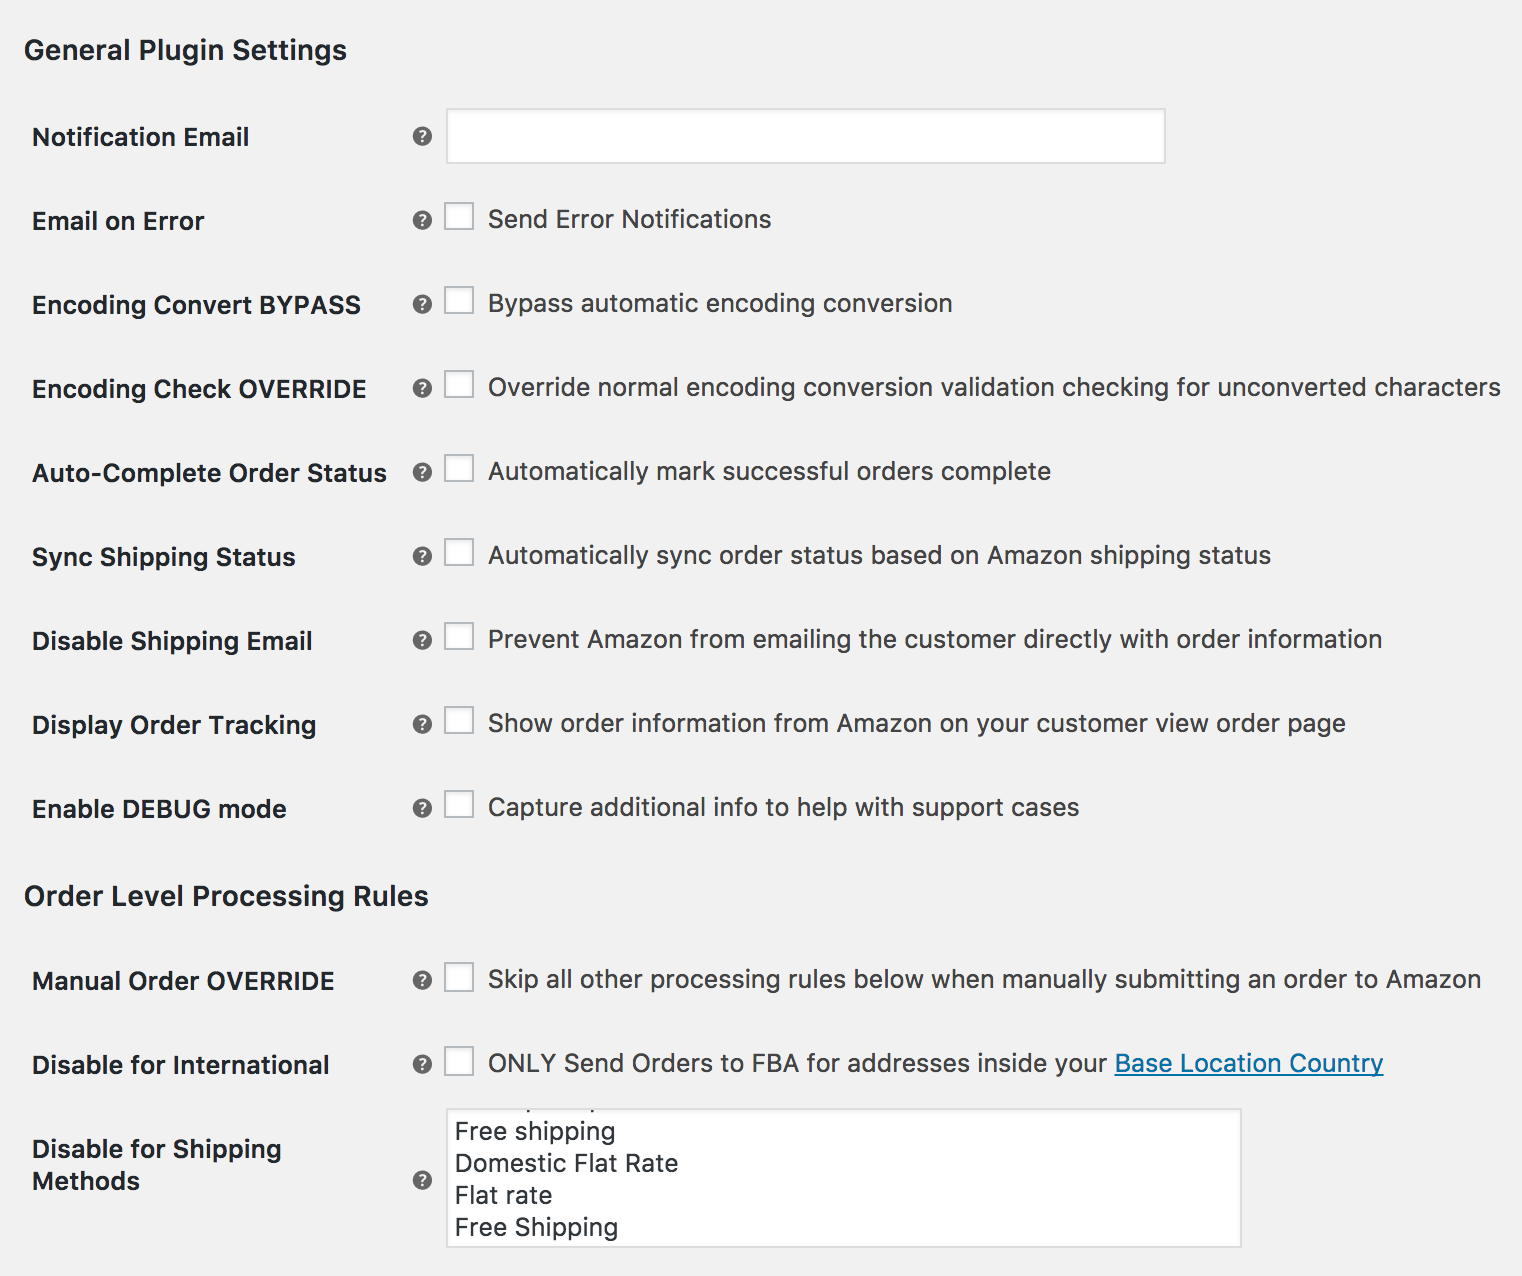
- Enter your selection for each option under Order Item (Product) Level Processing Rules.
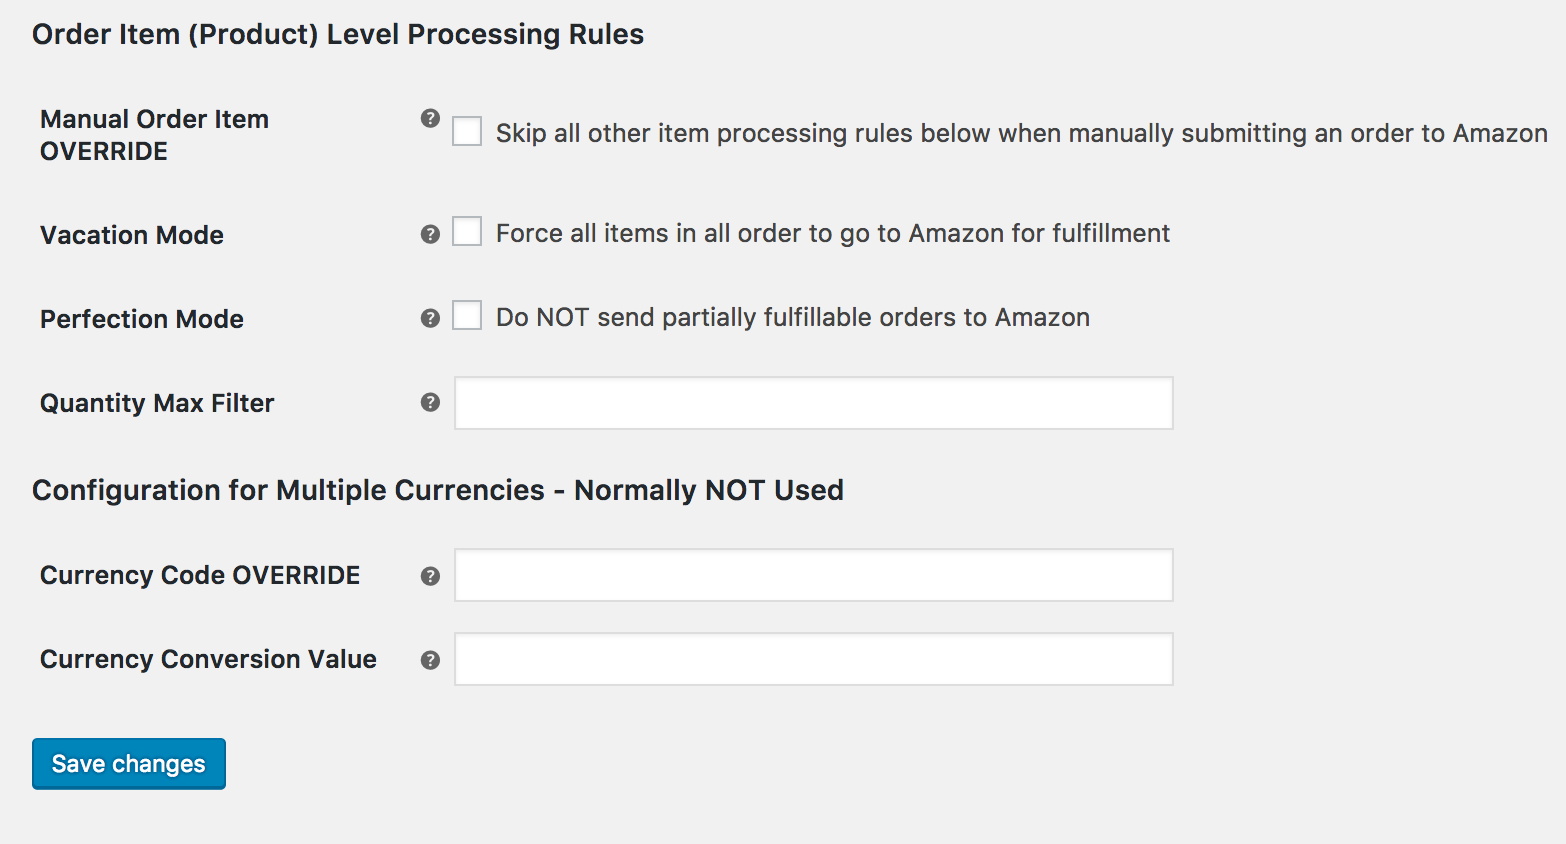
- Save changes.
Shipping settings
↑ Back to top- Understand that Amazon handles massive fulfillment quantities via contracts with numerous national and international shipping companies. If you were shipping the products yourself, you’d use UPS, USPS, FedEx, etc. But when fulfilling with Amazon, the actual shipping process is a black box. You need not be concerned with who Amazon uses to ship products to your customers.Because of this…
- Understand that you have no access to the exact “shipping rate” from Amazon carriers. Standard shipping rate calculators cannot be used in your cart to accurately quote prices on your WooCommerce store because FBA is also charging other fees for their service. Amazon posts these fees in their Multi-Channel Fulfillment Fee Structure:
- Set up and save shipping methods in your WooCommerce store. Go to WooCommerce > Settings > Shipping and see Shipping – WooCommerce to get started.
- Look at the shipping charges for your region using the Multi-Channel Fulfillment Fee Structure mentioned in step #2 and enter shipping costs accordingly. For example:
- Flat Rate Standard: This could be for FBA Standard/normal shipping and it should add the cost that FBA will charge you.
- Flat Rate Expedited: This could be for FBA Expedited, offering faster service. Create another flat rate with a higher cost
- Flat Rate Priority: This is could be for FBA Priority, offering fastest service. Create another flat rate and give it the highest cost.
- Free Shipping (optional): This could be a substitute for FBA Standard, if you wish to offer free shipping for products.
- Go to: WooCommerce > Settings > Integration > FBA Order Fulfillment Settings.
- Map one WooCommerce shipping method per Amazon FBA Shipping Speed, using the dropdown menu:
- Standard
- Expedited
- Priority
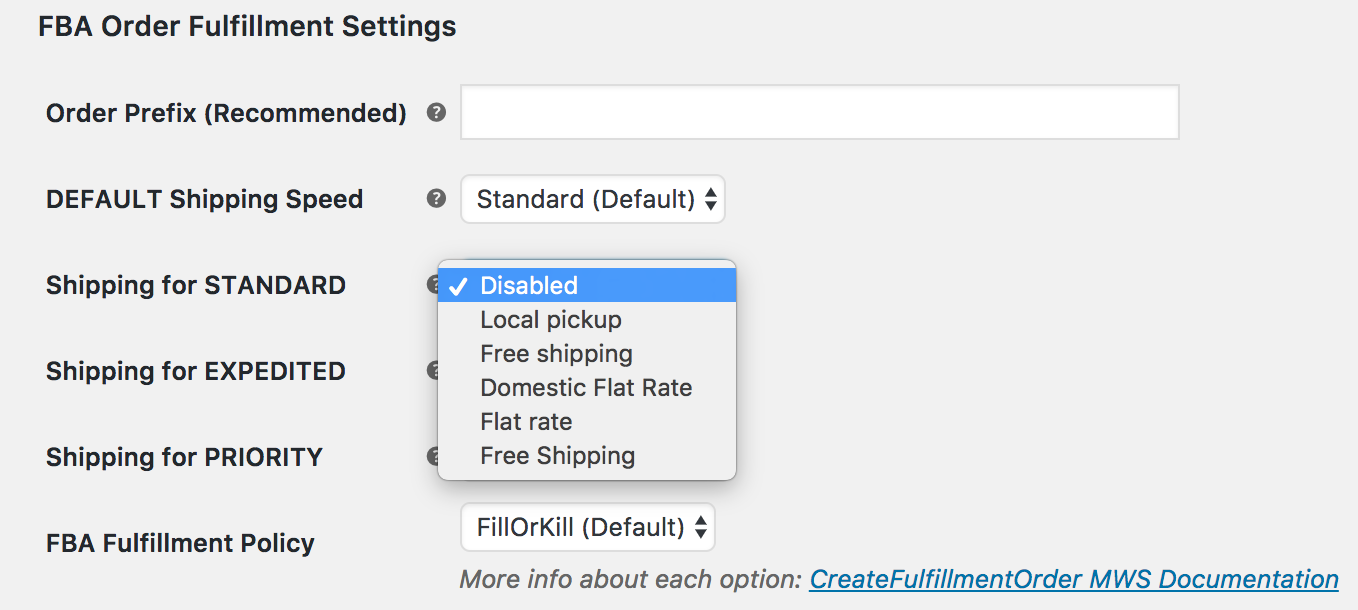
- Select a DEFAULT Shipping Speed as a fallback.Should you fail to see shipping methods you need in the dropdown menus, go to WooCommerce > Settings > Shipping and double-check your shipping methods. Shipping methods must be configured and active for the plugin to detect and allow you to map.
- Save changes.
Product settings
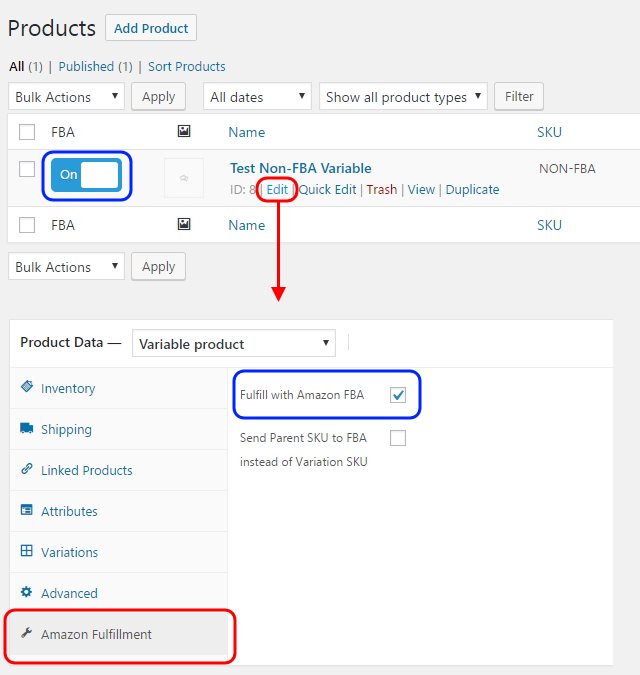
↑ Back to top- Toggle the FBA switch on/off as needed. OR
- Select Edit, and go to the Amazon Fulfillment tab under Product Data and tick the Fulfill with Amazon FBA checkbox. Click Update to save.
Test and Verify Order Fulfillment
↑ Back to topNote: These tests are only valid if all the test buttons on the settings page return successful results.
Test 1:
- Create a fake test product for a low price like $1 with a SKU that is NOT in FBA inventory and set it to fulfill with Amazon anyway.
- Purchase that and go through the full checkout process.
- Create a product and temporarily set the price to $1 or create a coupon for 99% or 100% off to use in testing.
- Purchase that product with a live payment method (gateways in test mode also work). The order will be sent to FBA and create an order shipment.
- Log into Amazon Seller Central, go to FBA orders, and cancel that fulfillment order. It might not show up right away in the list of orders in the main queue. What we usually have to do is use the advanced search to return all dates / all orders from multi-channel fulfillment to find it right away.
Troubleshooting
↑ Back to topFatal error: Can’t use function return value in write context.
↑ Back to topFatal error: Can’t use function return value in write context in /home/site/public_html/wp-content/plugins/ns-fba-for-woocommerce/lib/class-ns-fba-outbound.php on line 491
The cause is your hosting environment is using a PHP version older than 5.5. Check with your host about upgrading to 5.5 or later, or find the PHP version management tool in cPanel and set it to 5.5 or higher. PHP version 5.4 was released in March 2012 and is no longer supported by PHP as of Sept 2015. WooCommerce FBA is only compatible on PHP 5.5 or later.
Value UnexpectedValue for parameter PerUnitDeclaredValue is invalid
↑ Back to topFailed to submit order to FBA (click for full log). Error Message: Value UnexpectedValue for parameter PerUnitDeclaredValue is invalid. Reason: 1 error: The field Per Unit Declared Value has a value of EUR, was expecting GBP
This means that the currency type for the order from your store sent to FBA did not match your Seller Central account’s home region currency. The challenge with FBA and multiple currencies is that Amazon Fulfillment only allows one currency to be submitted with order data, and it must match the currency of your Seller Central account’s home region.
By default the plugin passes WooCommerce’s configured currency through to Amazon, which works fine for most sites. However, if you’re using another plugin to handle multiple currencies, FBA responds with an error like the one above. This scenario and others similar to it are exactly why the manual currency override feature/setting exists.
If your account’s home currency is GBP, set this for GBP in the Override Currency setting under WooCommerce > Amazon Fulfillment, and enter the best “middle road” conversion factor to use. Default value is 1. This is used in the “declared value” field that FBA requires. The only other option is to ensure that WooCommerce is configured to only handle payments in a single currency that matches your home region’s primary currency.
In any case, WooCommerce must always send the currency that Amazon expects because this is what your FBA account is based on. The error tells you how the currency field should be set, as it say: “…was expecting GBP.” In this case, you need to use GBP for that setting.
Note: The WooCommerce plugin doesn’t work with Multiple Currencies without the use of additional plugins.
Value for parameter SellerId is invalid
↑ Back to topFailed to submit order to FBA (click for full log). Error Message:
Value for parameter SellerId is invalid. Reason: InvalidValue.
Usually means that the value you entered as your Merchant/Seller ID is incorrect. This should be detected when testing the connection. Double-check that you have copied and pasted the correct ID.
One of SellerSKUs and QueryStartDateTime is required
↑ Back to topValue for parameter DestinationAddress.PostalCode is invalid
↑ Back to topAccess to FulfillmentOutboundShipment.CreateFulfillmentOrder is denied
↑ Back to topFAQ
↑ Back to topHow does International Shipping work?
↑ Back to topDoes it support multiple Amazon Regions and Marketplaces at the same time?
↑ Back to topHOWEVER: As of version 3.1.6, it now supports dynamic Marketplace ID selection based on customer shipping address within the EU Region only. This feature works automatically behind the scenes. If you are connected to the EU Region it will pass the Marketplace ID within the EU region which matches the customers shipping country. If there is no match, then it will use the Marketplace ID you configure in the settings.
Supporting both multiple regions and marketplaces simultaneously from a single site is something we’re considering for the future, but there are many challenges with that.
For example, every region and marketplace has different inventory levels for the same SKU but your WooCommerce product only has 1 stock level. Syncing the level with one marketplace that is out of stock would make the product unavailable to other marketplaces even if they had stock available.
For now, we recommend using International fulfillment with FBA from a single home region, or having 1 site per region to connect to unique Amazon Seller Central accounts.