Overview
↑ Back to topRequirements
↑ Back to top- Memberships v1.19+
- Teams for Memberships v1.5+, to use team functionality
Creating profile fields
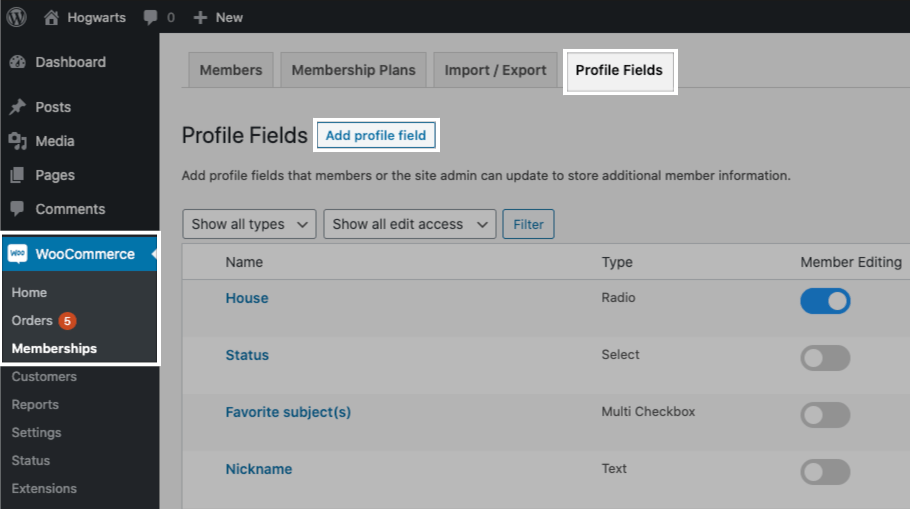
↑ Back to top- Go to WooCommerce > Memberships > Profile Fields.
- Click Add profile field.
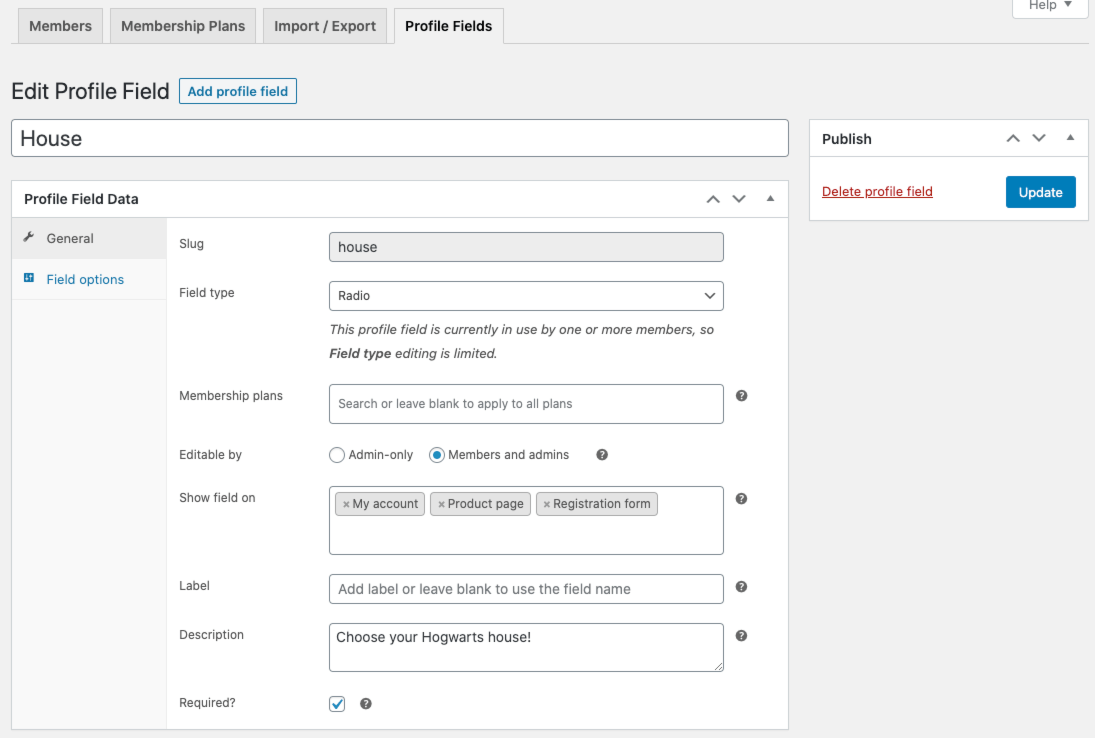
- Add a Name for the profile field. This can be an internal name, but will also be shown to members if you don’t also update the Label field.
- Update the following fields:
- Slug: Unique identifier for the profile field. The slug will be used during import / export. You can enter your own slug, or one will be created automatically upon saving.
- Field type: Select the field type. This controls what type of information the member can enter in the field.
- Default value: Only visible when Field type is set to “Checkbox”. Determine whether the checkbox should be enabled (checked) or disabled (unchecked) by default. For other field types that support defaults, the default value(s) are managed on the Field Options tab.
- Memberships plans: Select the membership plan(s) where these fields should be applied. Leave blank to apply fields to members of any plan.
- Editable by: Determine who can edit this field. If fields are admin-only, they won’t be visible or editable by members. If members can edit fields, they can do so from any of the Show field on locations.
- Show field on: Only visible when Editable by is set to “Members and admins”. Determine where members should have access to this field. Displaying the field on the product page, registration form, or team member invite is helpful for fields that should be populated when a member first joins the plan.
- Label: Only visible when Editable by is set to “Members and admins”. Optionally set a member-facing label for this profile field or leave blank to use the field’s Name instead.
- Description: Only visible when Editable by is set to “Members and admins”. Optionally set a description for the field, which will be visible to members.
- Required: Only visible when Editable by is set to “Members and admins”.
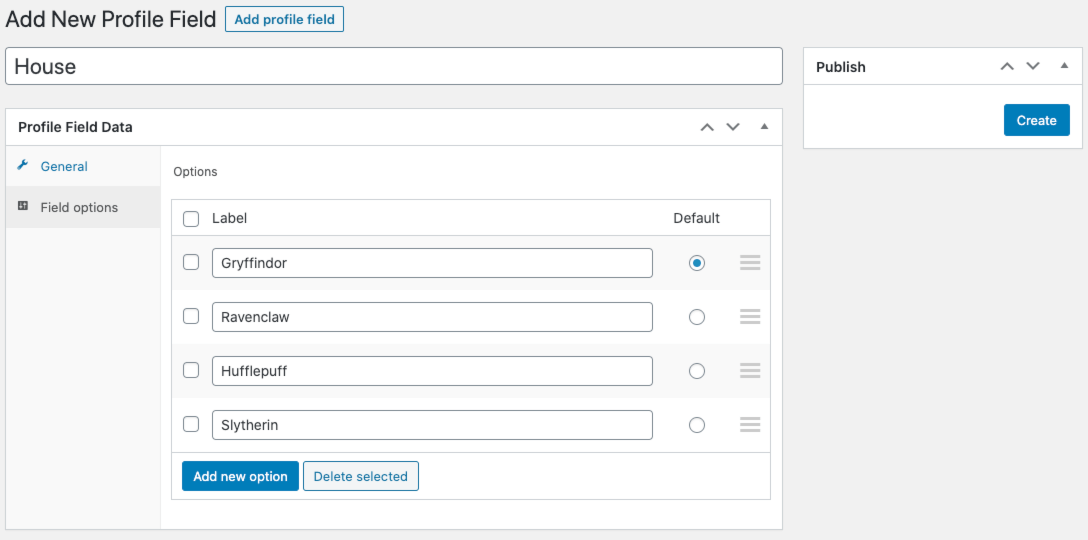
- For Multi Checkbox, Multi Select, Radio, or Select field types, go to the Field options tab. For Checkbox, File, Text, or Text Area field types, this tab is disabled so you can skip to step 7.
- On the Field options tab, use the Add new option button to add options for the profile field that members may select. You may also determine which option(s) should be selected by default. You can set multiple defaults for fields that accept multiple inputs (e.g. Multi Checkbox and Multi Select).
- Click Create to save the field.
Managing member profile fields
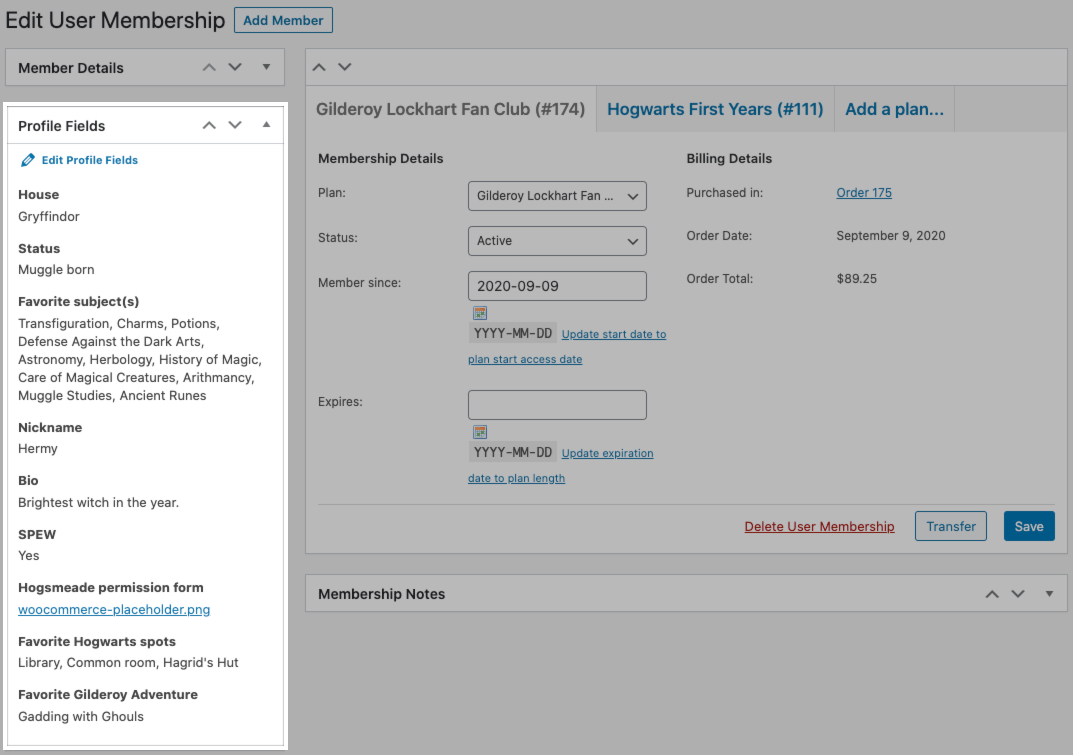
↑ Back to top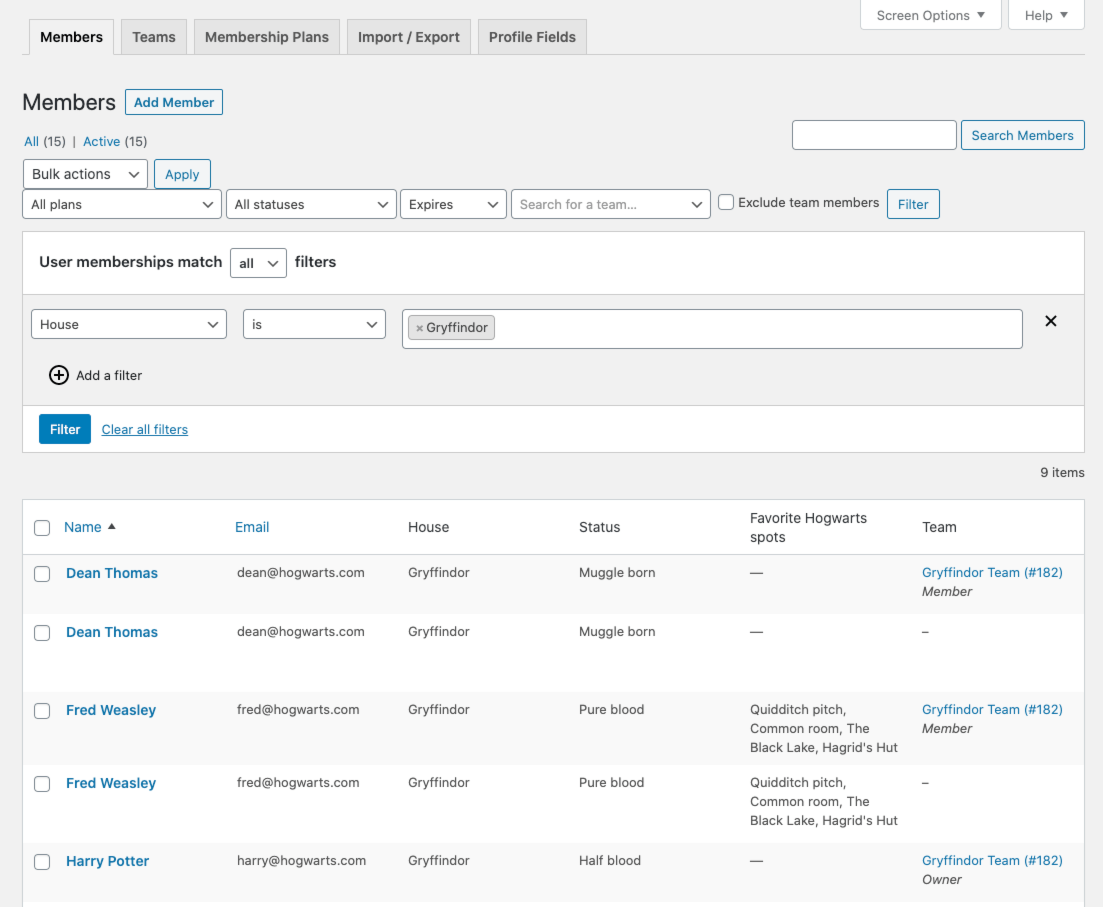 As a site admin, you can always view and edit profile fields from the Edit User Membership page (WooCommerce > Memberships > Members). If you modify a field, members may be able to see your changes based on the Editable by and Show field on settings (i.e. if profile fields are visible in the My Account area).
Import / export
↑ Back to top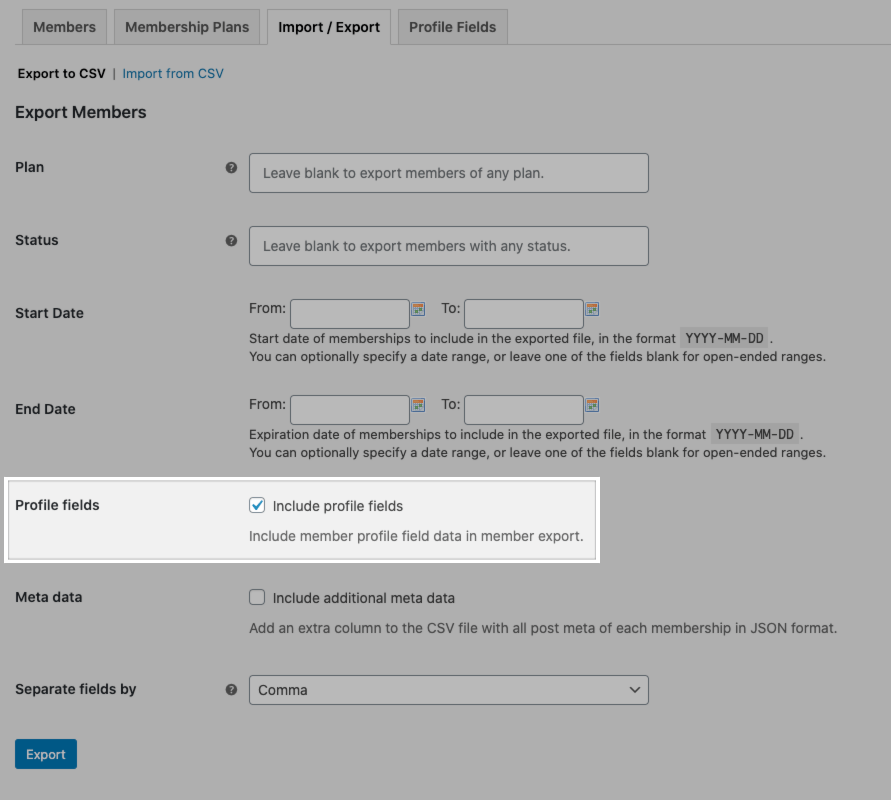 You can also import profile fields along with members to update these fields in bulk.
Please keep in mind a few things when importing profile fields:
You can also import profile fields along with members to update these fields in bulk.
Please keep in mind a few things when importing profile fields:
- The column header should use the profile field’s slug to ensure Memberships matches the content with the right profile field.
- Field values are case-sensitive, and will not be imported if they don’t exactly match listed field options (when applicable).
- When updating checkbox fields, “yes” means that the field is selected / checked and “no” means the field is not selected / unchecked.
- If you clear the contents of a required profile field, the field will retain its previous value (i.e. it will not be cleared).
Using the REST API
↑ Back to topMember experience
↑ Back to top- Setup: Set Editable by to “Admin-only”.
- Result: Admins can populate and manage profile fields, but members themselves will never see the fields.
- Field examples: Designate high-value accounts; upload internal notes.
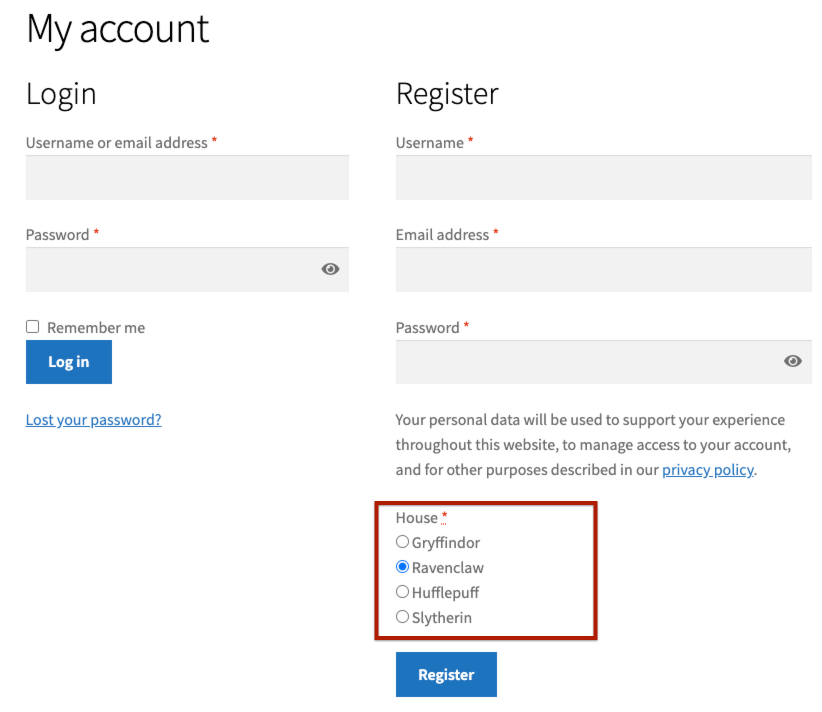
- Setup: Set Editable by to “Members and admins”; set Show field on to “Product page” and / or “Registration form”, depending on how members join your plan.
- Result: Members will see these profile fields when they view a product that grants membership access or when registering for an account, when registration grants access to a membership. You can also require profile fields to ensure prospective members can’t purchase or register without those fields populated. ⚠️ Please be careful when requiring profile fields for product purchase or registration! These should only be fields that absolutely must be populated, since you don’t want to block membership purchase or registration with complex field requirements.
- Field examples: Information that does not change over time, e.g. demographics, interests, “how did you hear about us?”, etc.
- Setup: Set Editable by to “Members and admins”; set Show field on to “Product page” and / or “Registration form”, depending on how members join your plan, and “My Account”.
- Result: Similar to the above use case, members will be asked (or required) to populate profile fields when joining a plan, but can also update those fields as needed from the My Account page.
- Field examples: Information that does change over time, e.g. number of pets, fitness details, etc.
- Setup: Set Editable by to “Members and admins”; set Show field on to “Team member registration” (only visible when Teams for Memberships is active).
- Result: When users are invited to join a team, they will see these profile fields on the registration form.
- Field examples: Company role, school grade, etc.
Populating fields during registration or purchase
↑ Back to top⚠️ Important! If profile fields are required, users cannot register / purchase without populating these fields. Please be careful about making too many profile fields required, as this could impact your conversions.
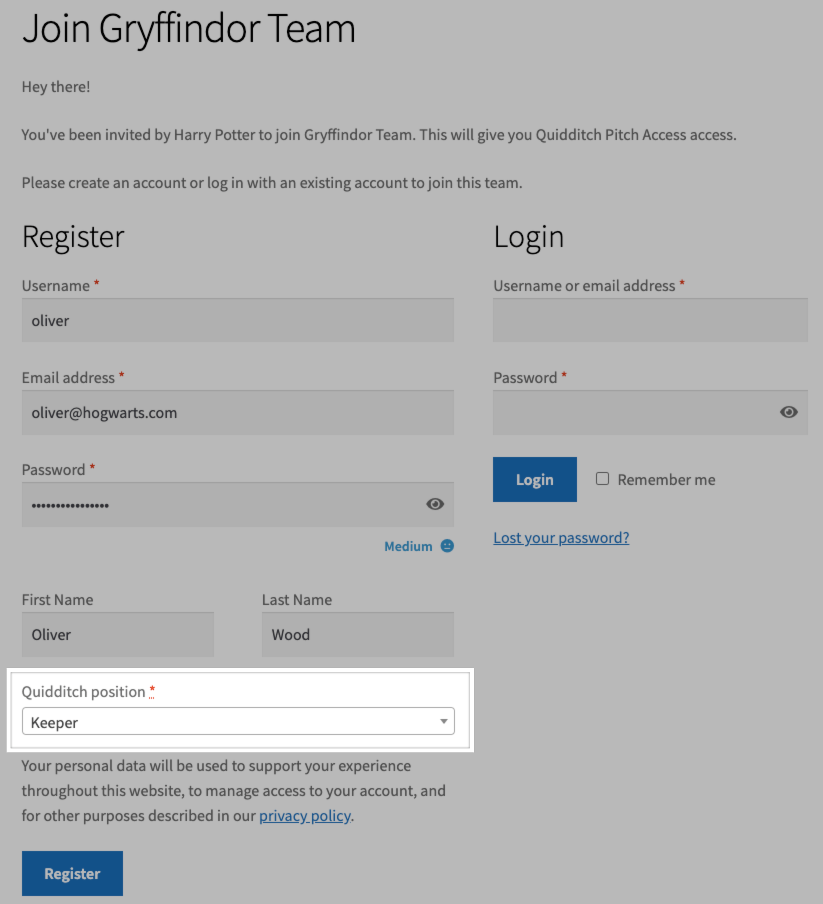
On the registration form, fields will be listed below the username / email / password fields.
 On the product page, fields will be listed near the quantity and Add To Cart buttons.

Updating fields in the My Account area
↑ Back to top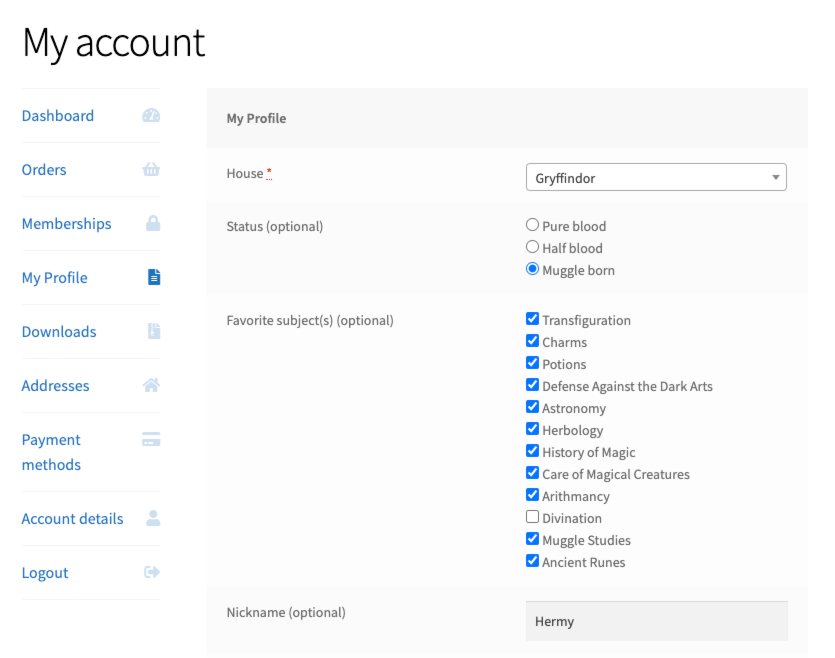
Note: You can change the endpoint for the My Profile page from its default (
profile-fields-area) from WooCommerce > Settings > Advanced.Teams for Memberships support
↑ Back to top