Accept payments from major credit cards on your WooCommerce website with NETbilling. This extension allows your customers to save their credit card and bank account to their WooCommerce account for fast and easy checkout. Includes full support for WooCommerce Subscriptions and Pre-Orders. You’re just moments away from getting the gateway setup and accepting payments! This document will show you how to setup and configure the extension.
Installation
↑ Back to top
- Download the extension from your dashboard
- Go to Plugins > Add New > Upload and select the ZIP file you just downloaded
- Click Install Now, and then Activate
- Go to WooCommerce > Settings > Payments and read the next section to learn how to setup and configure the plugin.
Setup and Configuration
↑ Back to topYour hosting provider must have the ability to open TCP port ‘1402’ outbound in your firewall in order to integrate with the NETbilling Gateway. Please confirm with your hosting provider that this is possible.
Account Setup
↑ Back to top
 That’s it! You are now ready to start accepting credit cards and eChecks via NETbilling! If you want to tweak settings and customize the checkout process, keep reading.
Extension Settings:
↑ Back to top- Enabled – This will enable the gateway to be used by customers to checkout.
- Title – This is the text shown for the payment during checkout and on the Order Received page.
- Description – This is the text shown under the title during checkout. Limited HTML is allowed. If you enable test mode, this section will also display a notice along with test credit card numbers.
- Card Verification (CSC) – Enable this to require customers to enter their CV2 (Card Security Code) when checking out. This can be useful if you have requirements in your NETbilling account for CV2 verification. This does not apply to saved cards or subscription renewals or renewals.
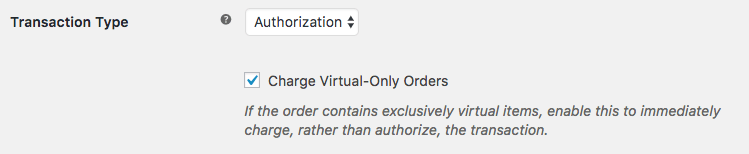
- Transaction Type – Select how transactions should be processed. “Charge” submits all transactions for settlement, while “Authorization” simply authorizes the order total for capture later.
- Charge Virtual-Only Orders – (Shown if Transaction Type is set to “Authorization”) Enable this to force charges on order containing only virtual items so they’re captured immediately instead of authorized (for example, to grant download access right away)
- Accepted Card Logos – This controls the card logos that display during checkout. This is purely cosmetic and has no affect on the cards actually accepted by your merchant account. Hold CTRL (CMD on Mac) to select multiple card types.
- Tokenization – Allows customers to securely save their payment details for future checkout. Please note that PCI storage must be enabled on your NETbilling account; see Step 6 of the Credit Card setup page.
- Account ID – This is the Account ID for your NETbilling account. Follow the steps above to get this.
- Site Tag – This can be configured from your NETbilling account and controls which email templates will be used. It also tags the site for accounting purposes if you are using the same merchant account across multiple sites.
- Debug Mode – Enable this is you are having issues correctly processing transactions. All debugging messages are cleaned of sensitive information before display, but as a best practice, please do not enable this unless you are having issues with the plugin.

Advanced Features
↑ Back to topCapture Charges from WooCommerce Order Admin
↑ Back to topManaging Payment Methods
↑ Back to topEnabling Tokenization
↑ Back to top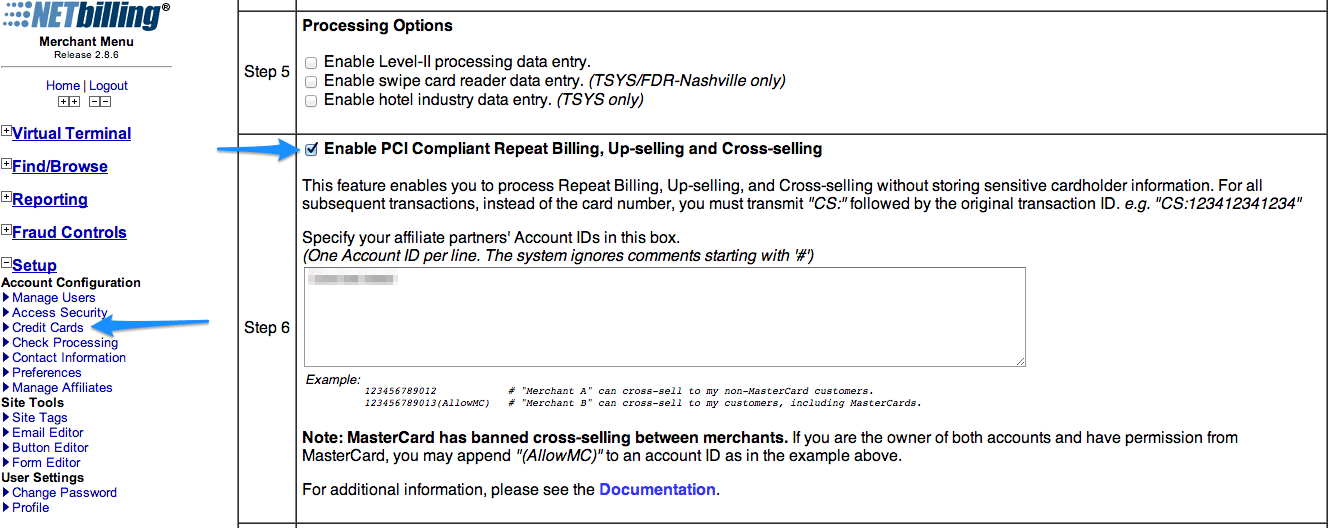
eCheck Settings
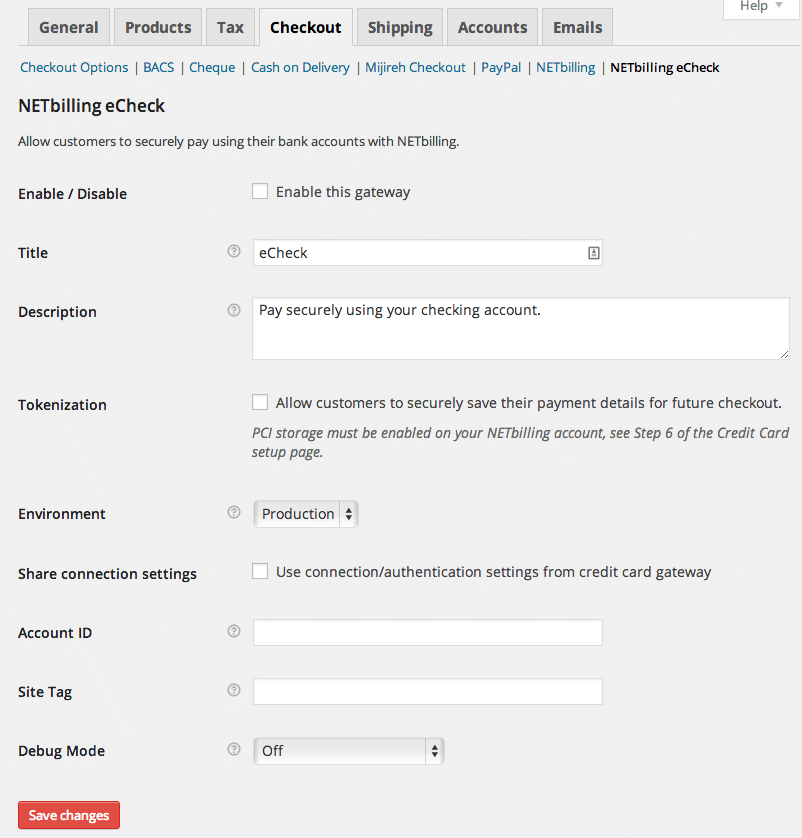
↑ Back to top- Enabled – This will enable the eCheck gateway to be used by customers to checkout. IMPORTANT – You must have eChecks enabled on your NETbilling account for this to function correctly. Follow the process below under “eCheck Issues” to get eChecks setup and enabled.
- Title – This is the text shown for the eCheck gateway during checkout and on the Order Received page. This defaults to “eCheck”.
- Description – This is the text shown under the title during checkout. Limited HTML is allowed. If you enable test mode, this section will also display a notice along with a test bank account number.
- Tokenization – Allows customers to securely save their payment details for future checkout. Please note that PCI storage must be enabled on your NETbilling account; see Step 6 of the Credit Card setup page.
- Share connection settings – Enabling this will allow you to use connection/authentication settings from credit card gateway. If this is disabled, you’ll have to enter a new NETbilling Account ID for eCheck transactions.
- Site Tag – This can be configured from your NETbilling account and controls which email templates will be used. It also tags the site for accounting purposes if you are using the same merchant account across multiple sites.
- Debug Mode – Enable this is you are having issues correctly processing transactions. All debugging messages are cleaned of sensitive information before display, but as a best practice, please do not enable this unless you are having issues with the plugin.
Troubleshooting
↑ Back to top- Check that your Account ID is correct.
- Double-check that your Account ID is correct 😉
- Enable debug mode to the checkout page and review the errors messages that NETbilling is providing.
- Submit a support ticket, with the debug log as an attachment.
eCheck Issues
↑ Back to top- Login to your NETbilling Account and go to Setup > Check Processing to apply for eCheck processing ($100 application fee applies).
- Follow the application steps listed, including faxing your application to NETbilling.
- Once your application is reviewed, your account number will automatically be entered into the system for check processing.
Other Information
↑ Back to topWooCommerce Subscriptions/Pre-Orders Support
↑ Back to topStoring Credit Cards / eChecks
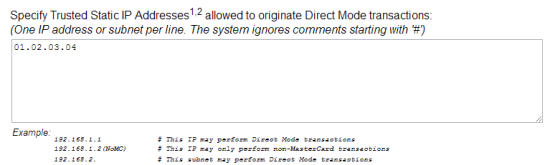
↑ Back to topTrusted Static IP Addresses
↑ Back to topfunction wc_netbilling_request_parameters_dynip_sec_code( $parameters ) {
/**
* Replace value below with Dynamic IP Security Code generated under Account Setup > Account Management > Access Security in your NETbilling account
*/
$parameters[ 'dynip_sec_code' ] = 'KAMewyfMma4yzfNZ';
return $parameters;
}
add_filter( 'wc_netbilling_request_parameters', 'wc_netbilling_request_parameters_dynip_sec_code' );