Note: This product is no longer sold on WooCommerce.com. This document was left available to you for help with configuration and troubleshooting, but is no longer updated.
The WooCommerce Branding extension lets you replace WooCommerce branding and icons with your own within the admin. Give your store’s backend a personal touch.
Installation
↑ Back to top- Download the .zip file from your WooCommerce account.
- Go to: WordPress Admin > Plugins > Add New and Upload Plugin with the file you downloaded with Choose File.
- Install Now and Activate the extension.
More information at: Install and Activate Plugins/Extensions.
Setup and Configuration
↑ Back to top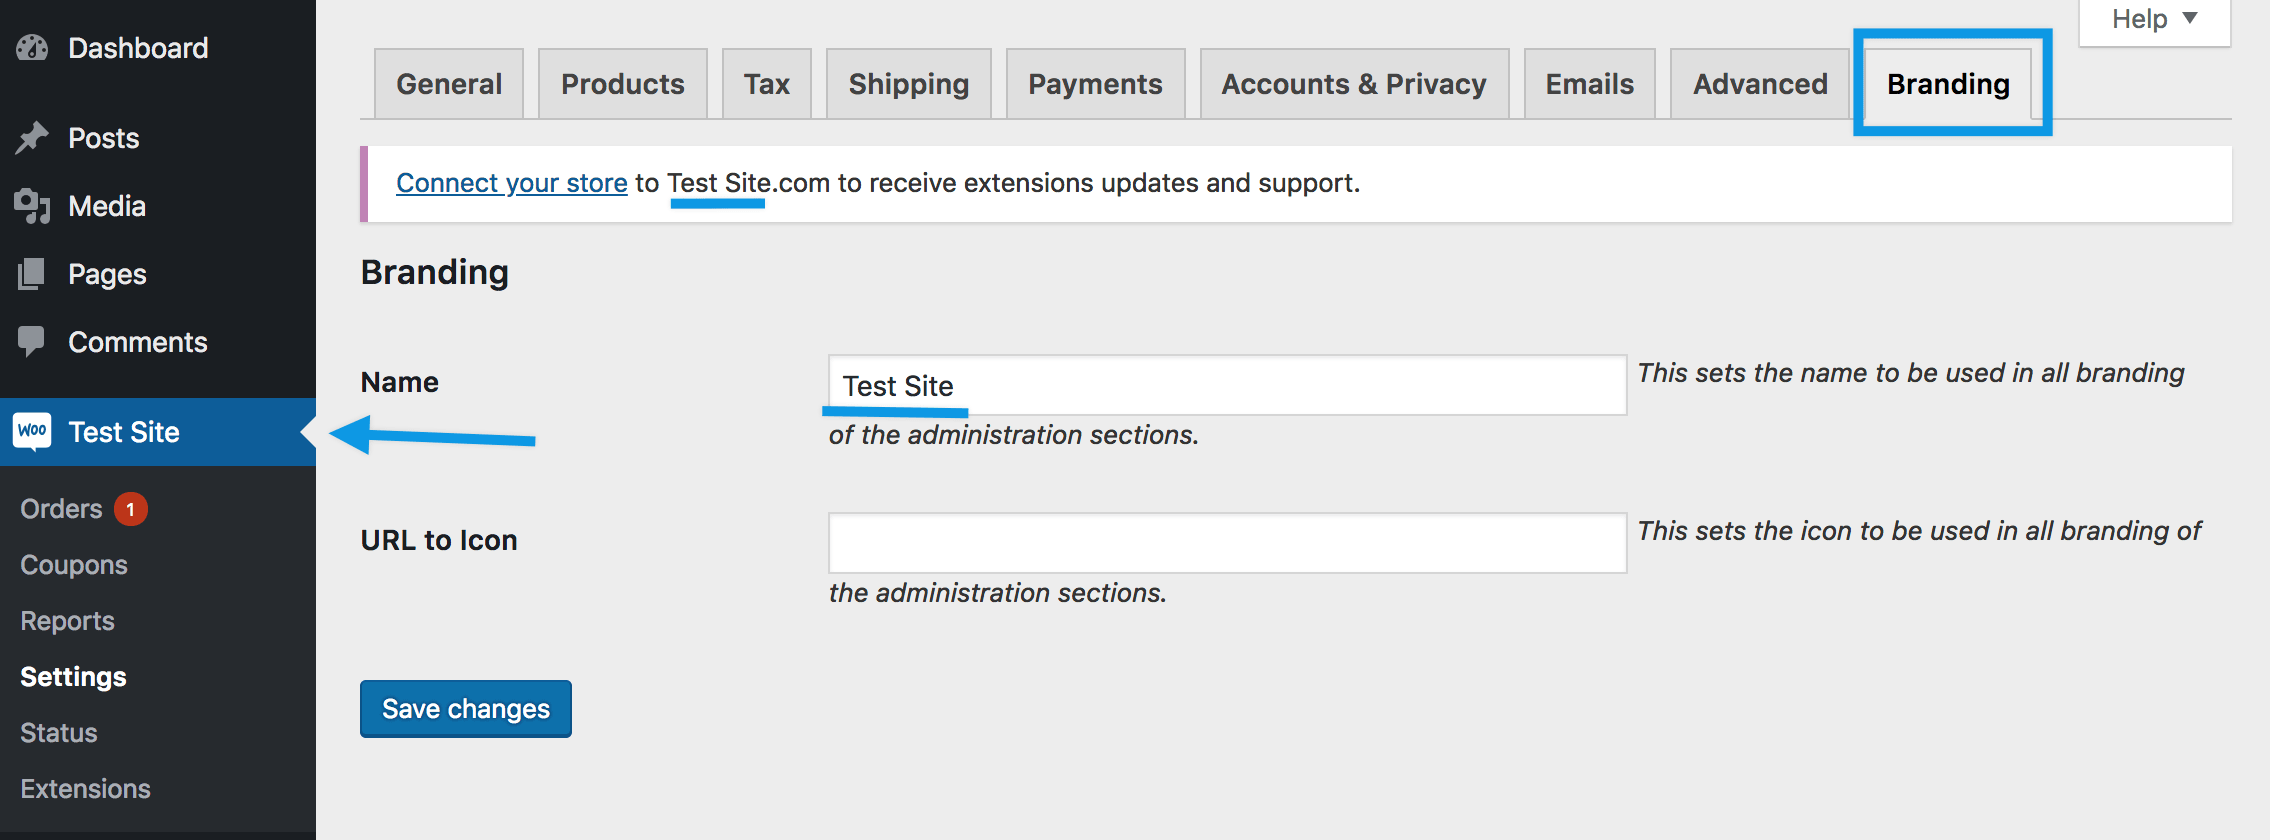
- Go to: WooCommerce (Your Site’s Name) > Settings > Branding.
- Enter your brand’s Name – This replaces all instances of ‘WooCommerce’
- Enter the URL to Icon – Use the WordPress media uploader upload an icon/logo, then copy the URL and paste here.
- Save changes.
You may need to refresh the WordPress admin screen to see changes reflected.
Known Limitations
↑ Back to topStrings that cannot be customized are:
- Shortcodes containing woocommerce
- Admin URLS containing woocommerce
- Third party themes
- Unlocalized strings
Questions and Feedback
↑ Back to topHave a question before you buy? Please fill out this pre-sales form.
Already purchased and need some assistance? Get in touch with a Happiness Engineer via the Help Desk.