EU VAT laws for digital goods changed on 1 January 2015, affecting B2C transactions only. VAT on digital goods must be calculated based on customer location, and you’re required to collect evidence of this via an IP address and/or Billing Address. In addition, you need to set up VAT rates in your WooCommerce store to charge the correct amount.
This guide is provided as-is and shows you how to set up rates specific to Digital Goods in this scenario. For general tax setup please see:
- Setting up Taxes in WooCommerce
- How to configure specific tax setups in WooCommerce
- How Taxes Work in WooCommerce
For more details and information about setting up EU VAT rates for digital products, please see the European Commission Taxation and Customs Union website for VAT MOSS (mini One Stop Shop).
The team at WooCommerce.com can help with setting up tax rates in the WooCommerce settings and how the platform handles taxes/VAT/GST based on these settings, but not when or what to charge.
We’re not tax professionals so our advice is how to use our software. For specific advice when it comes to what or when to charge tax/VAT/GST etc, we recommend consulting with a tax professional or an accountant on what may be your best options.
Each business is unique, and there’s no way we can cover every possibility.
Setting Up Your Tax Classes
↑ Back to topIf you’re only selling digital goods, VAT rates can be added under Standard rates in WooCommerce.
If you’re selling/distributing both digital and regular products, you can create and use a new Additional tax class, for example, Digital Goods.
To set up EU VAT rates in a new tax class:
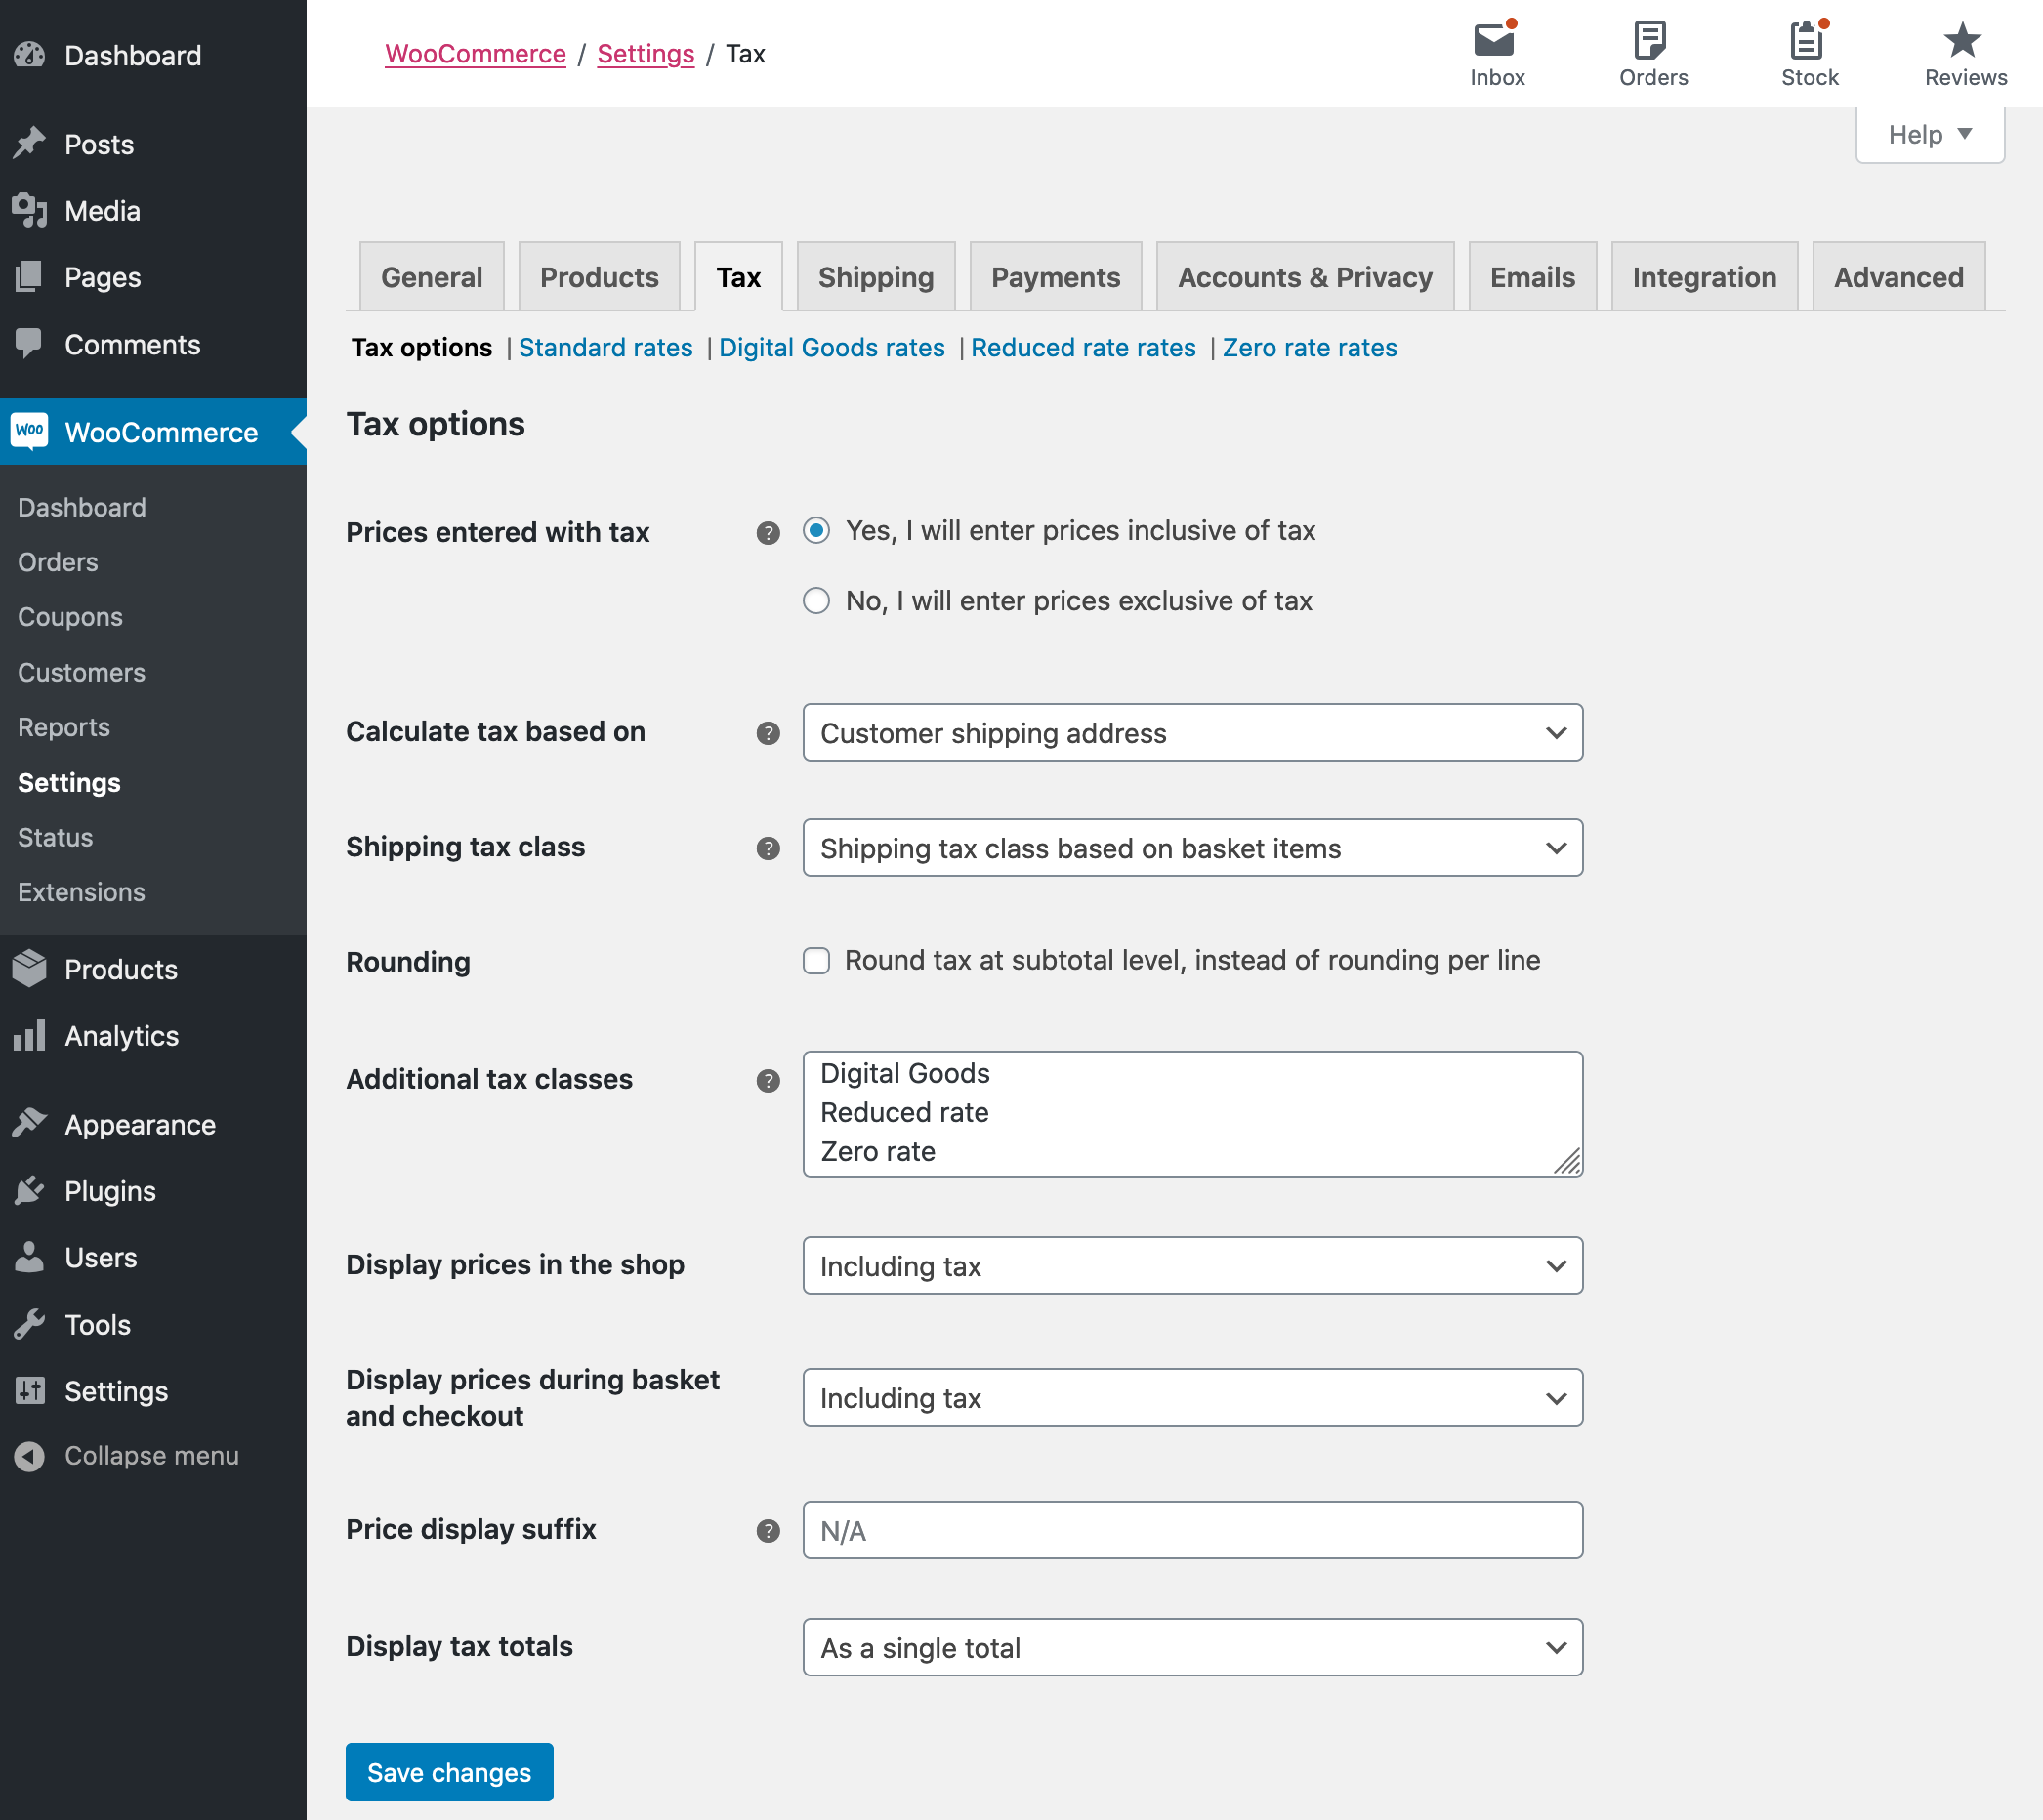
- Go to: WooCommerce > Settings > Tax.
- Select the Additional tax classes setting.
- Add a new tax class to the list, for example, Digital Goods.
- Scroll down and click Save changes.

After saving the tax options changes, tax rates need to be assigned to this tax class.
Setting Up the EU VAT Rates
The next step is to input the EU VAT Rates into WooCommerce.
Look Up the Latest VAT Rates
↑ Back to topThe latest VAT rates can be found at the Europa website. If VAT rates change, you need to update the VAT rates for your store.
Input Rates
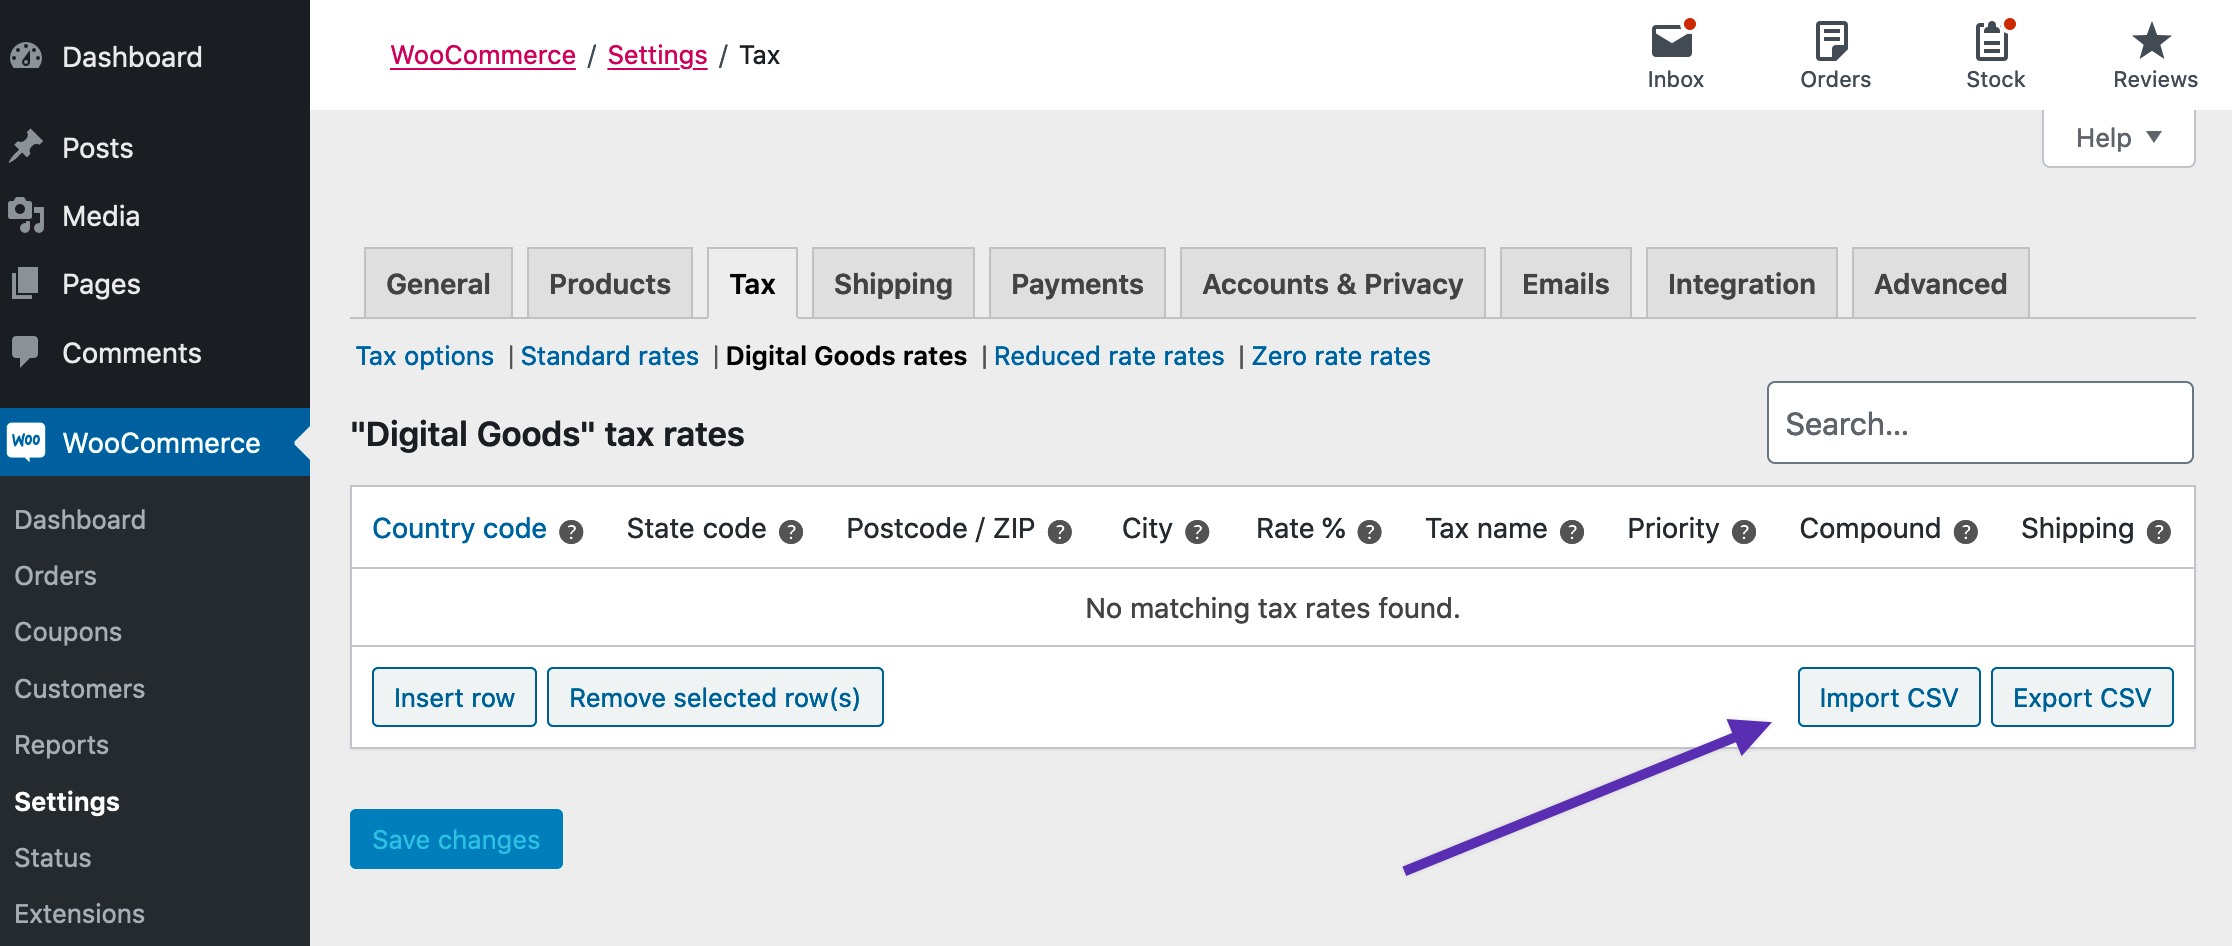
↑ Back to top- Go to: WooCommerce > Settings > Tax > Digital Goods (a new subtab after you created the new tax class).
- Enter rates for all EU member states. See our guide on Setting Up Tax Rates in WooCommerce.
At the time of the last update, Standard VAT rates are:
| Country Code | Rate % |
|---|---|
| AT | 20.0000 |
| BE | 21.0000 |
| BG | 20.0000 |
| CY | 19.0000 |
| CZ | 21.0000 |
| DE | 19.0000 |
| DK | 25.0000 |
| EE | 20.0000 |
| GR | 24.0000 |
| ES | 21.0000 |
| FI | 24.0000 |
| FR | 20.0000 |
| HR | 25.0000 |
| HU | 27.0000 |
| IE | 23.0000 |
| IT | 22.0000 |
| LT | 21.0000 |
| LU | 17.0000 |
| LV | 21.0000 |
| MT | 18.0000 |
| NL | 21.0000 |
| PL | 23.0000 |
| PT | 23.0000 |
| RO | 19.0000 |
| SE | 25.0000 |
| SI | 22.0000 |
| SK | 20.0000 |
Alternatively, if you have a CSV file in the correct format, you can import the VAT rates to save time. Here are the above rates in CSV format with tax class Digital Goods: vat_rates.csv
To import this file:
- navigate to the tax rate in this example, Digital Goods rate
- select the Import CSV button to the bottom right below the tax rates table
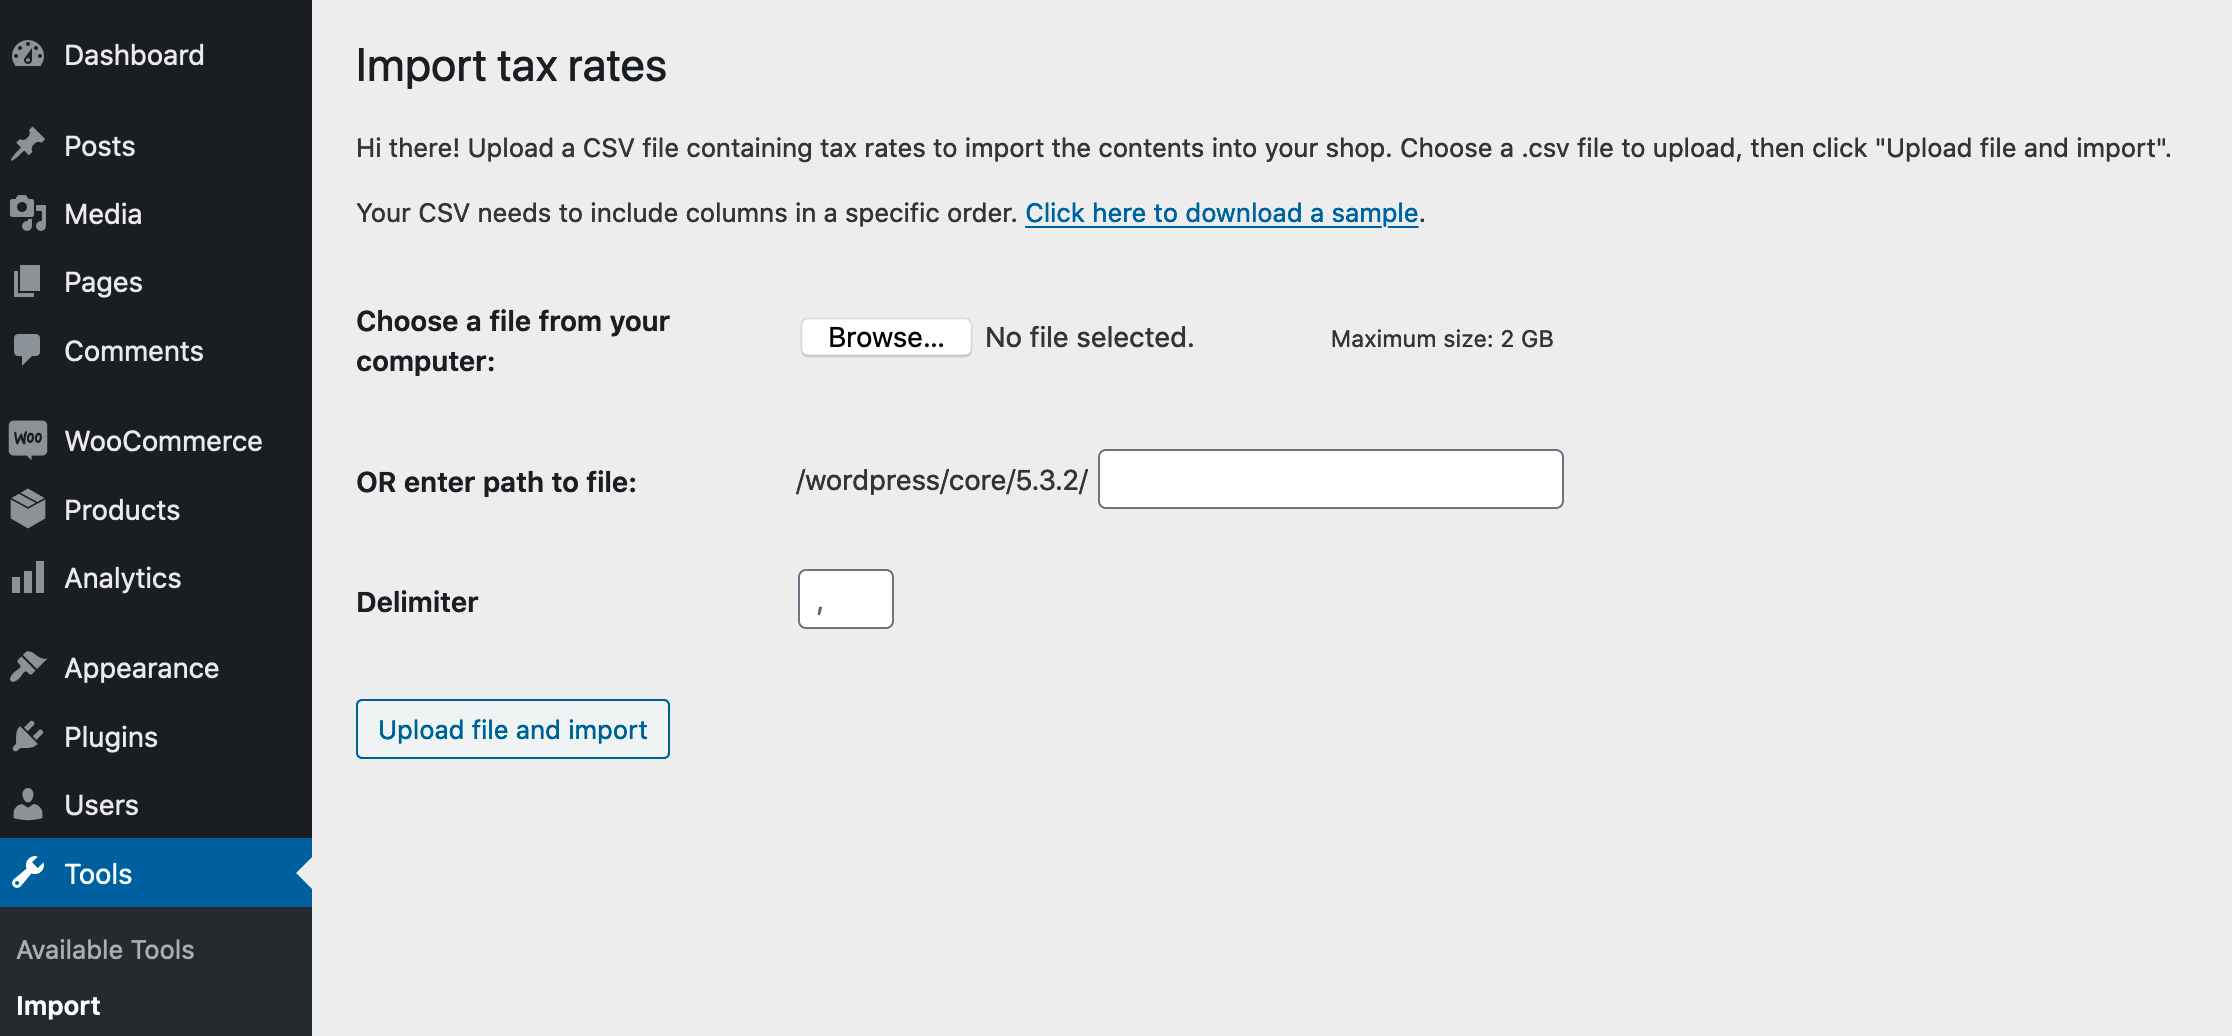
- The importer appears with a Browse… button allowing file section.
- Select the downloaded CSV file, and click the Upload file and import button
Once rates are uploaded, imported or input in the tax rate screen, the table is populated with the respective data, showing the country code in the Country code column, the respective rate in that country’s Rate % column, VAT as the Tax name, a Priority of 1, and Shipping checked for all the rates.
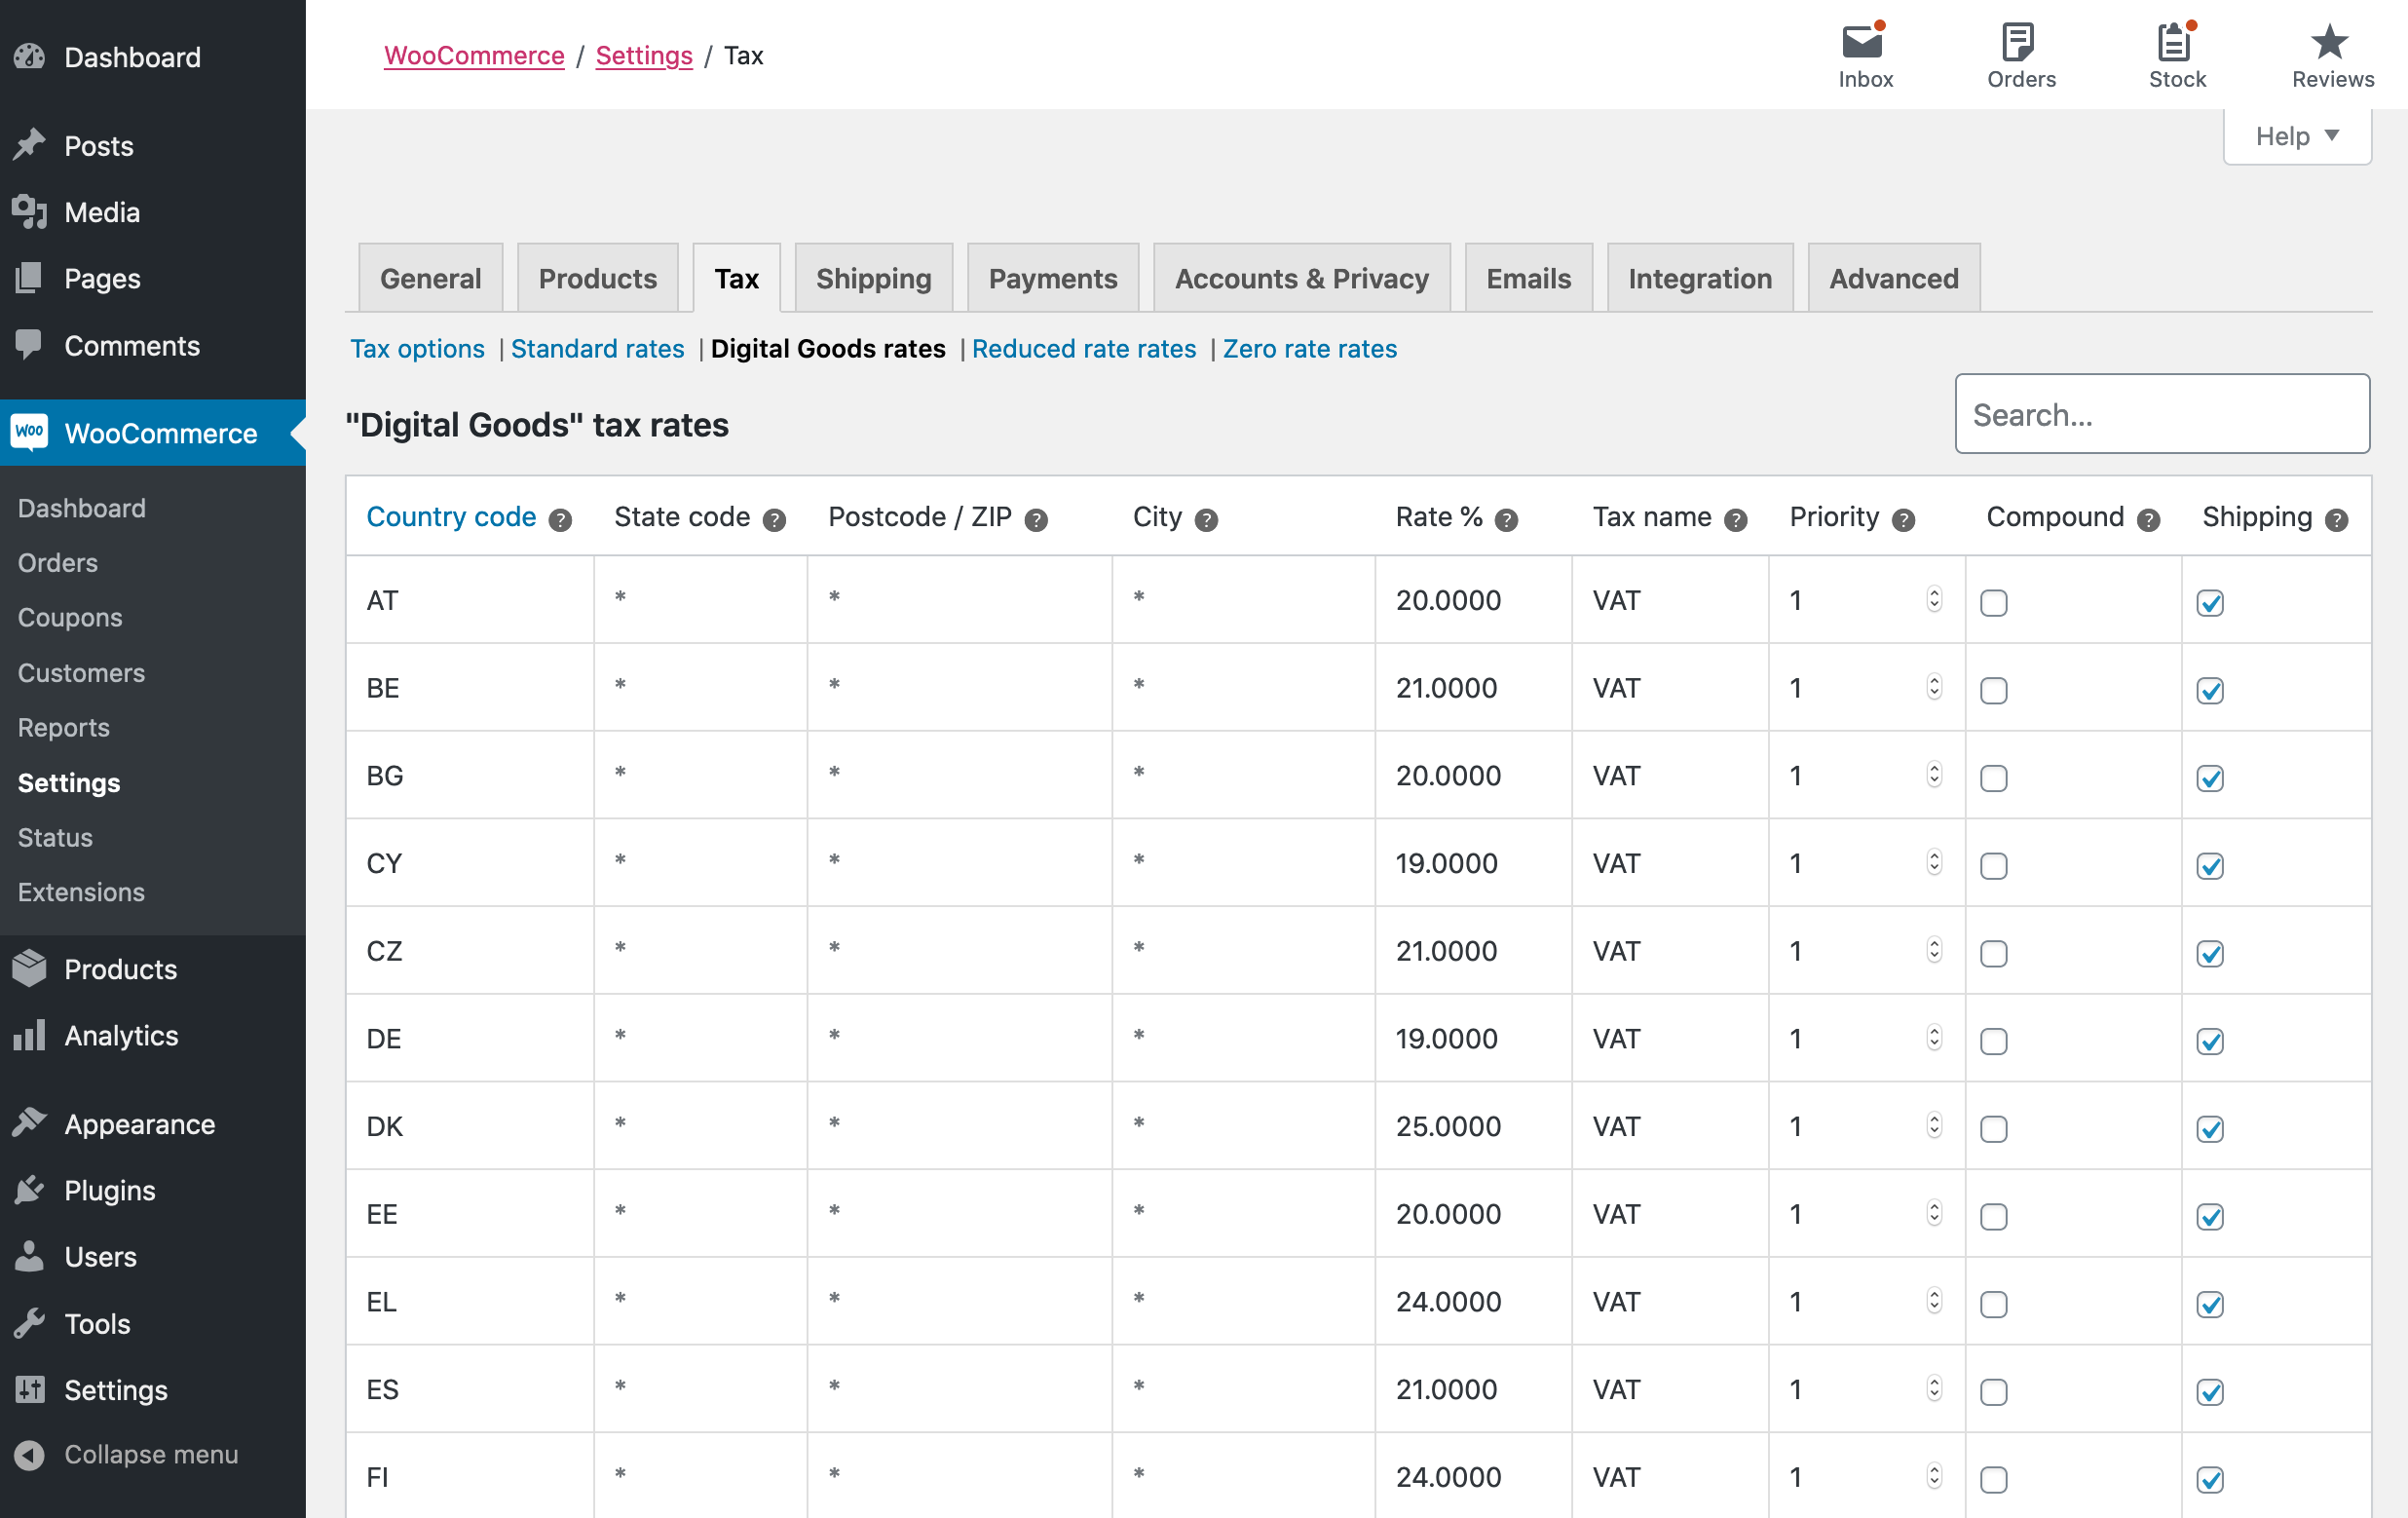
With EU VAT rates set up, customers buying a product with the Digital Goods tax class are charged tax based on their location, not the store location, provided the Tax options > Caclulate tax based on setting is set to Customer shipping address or Customer billing address..
Assigning the Tax Class to Products
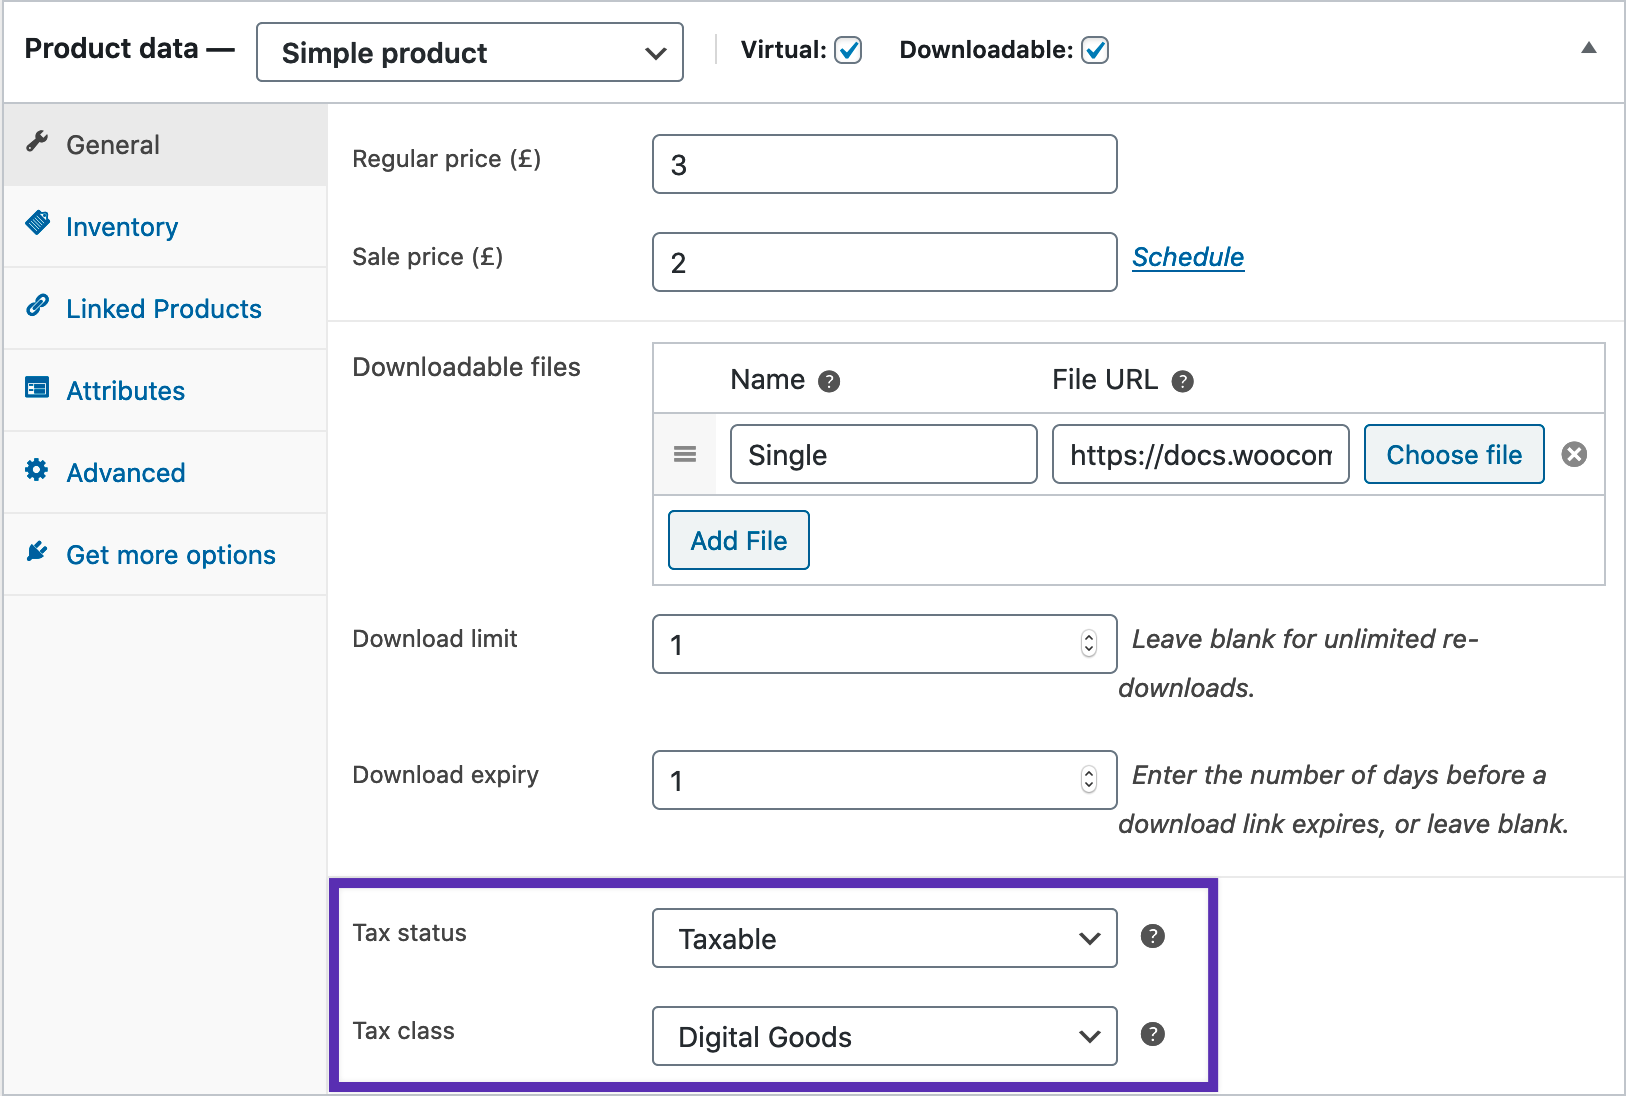
↑ Back to topTo apply this tax class to digital products in WooCommerce:
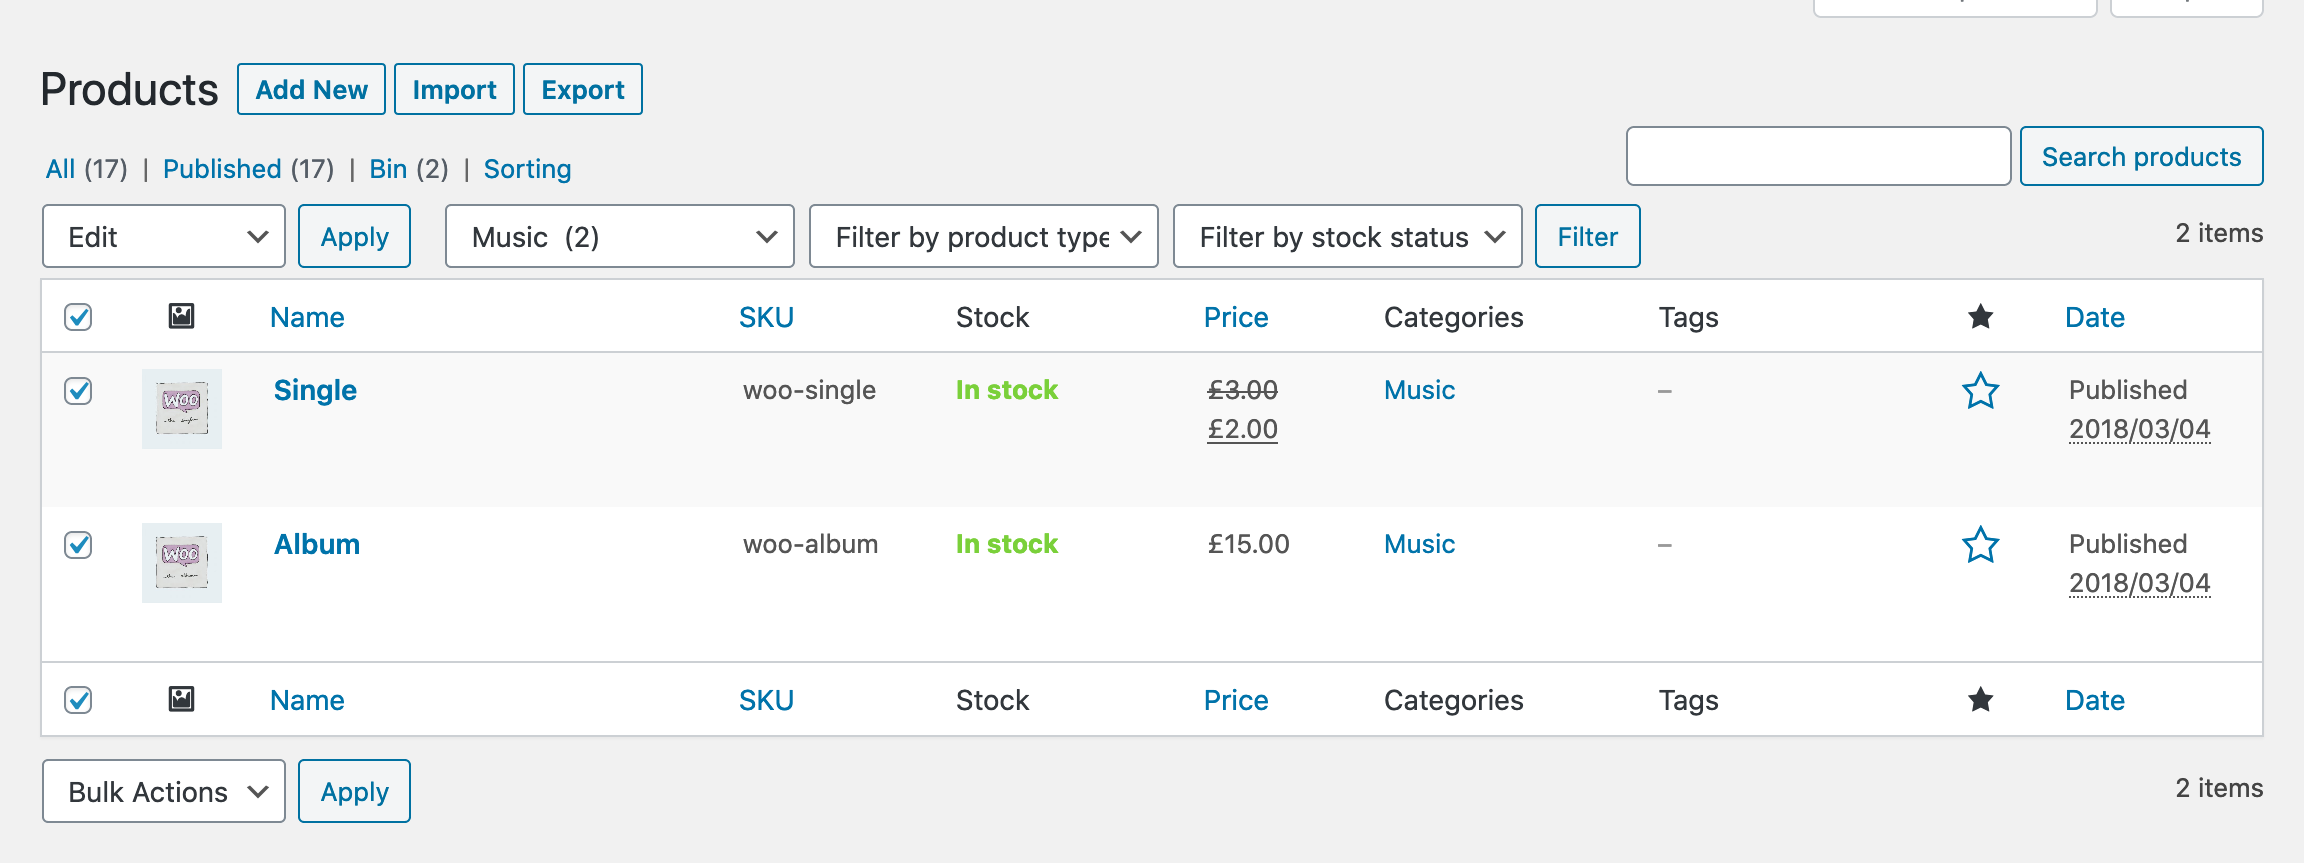
- Go to: Products > All Products.
- Edit a product.
- Go to Product data > General section > Tax class, and select the respective class from the dropdown.
- Update the product to save the change.
You can also bulk-edit products:
- Go to Products > All Products.
- Tick the box to the left of each of the products you want to bulk-edit.
- Select Edit from the bulk actions dropdown.
- Click the Apply button to the dropdown’s right.
After clicking Apply the bulk edit view appears:
- Choose the tax class from the Tax class dropdown.
- Click Update to the bottom-left of the bulk edit view to apply the tax class to the selected products.

Questions and Support
↑ Back to topDo you still have questions and need assistance?
- Get in touch with a Happiness Engineer via our Help Desk. We provide support for extensions developed by and/or sold on WooCommerce.com, and Jetpack/WordPress.com customers.
- If you are not a customer, we recommend finding help on the WooCommerce Support Forum or hiring a WooExpert agency. They are trusted agencies with a proven track record of building highly customized, scalable online stores. Learn more about WooExpert agencies.