Product CSV Import Suite can also import product variations, although it does so with a separate, for-variations CSV. Below is an example to illustrate.
Example Product and CSV files
↑ Back to topFollow along by downloading the two CSV files with minimal column headers:
- The first one is for normal products (in this example we’re using a variable type product)
- The second is specifically for child variations for variable products
This is how it will look in the back-end:

And here’s what customers will see on the front-end:

The Import Process
↑ Back to topStep 1 – Prepare the Parent Products CSV
↑ Back to topFeel free to add additional columns you require, and more products. Of the columns shown in this example the sku is important, because it is used to link the parent variable product to its child variations.

Step 2 – Prepare the Child Variations CSV
↑ Back to topWith the parent CSV prepped, create the variations CSV.

Step 3 – Upload the Parent Products CSV
↑ Back to topGo to WooCommerce > CSV Import Suite > Import Products. Notice two upload sections; Import Product CSV and Import Product Variations CSV.

- Upload the parent product first; click Import Products,
- Browse to select the CSV file, and
- click Upload file and import
- Next is the Map Fields screen. The example CSV uses default column headers, so the mapping is automatic.
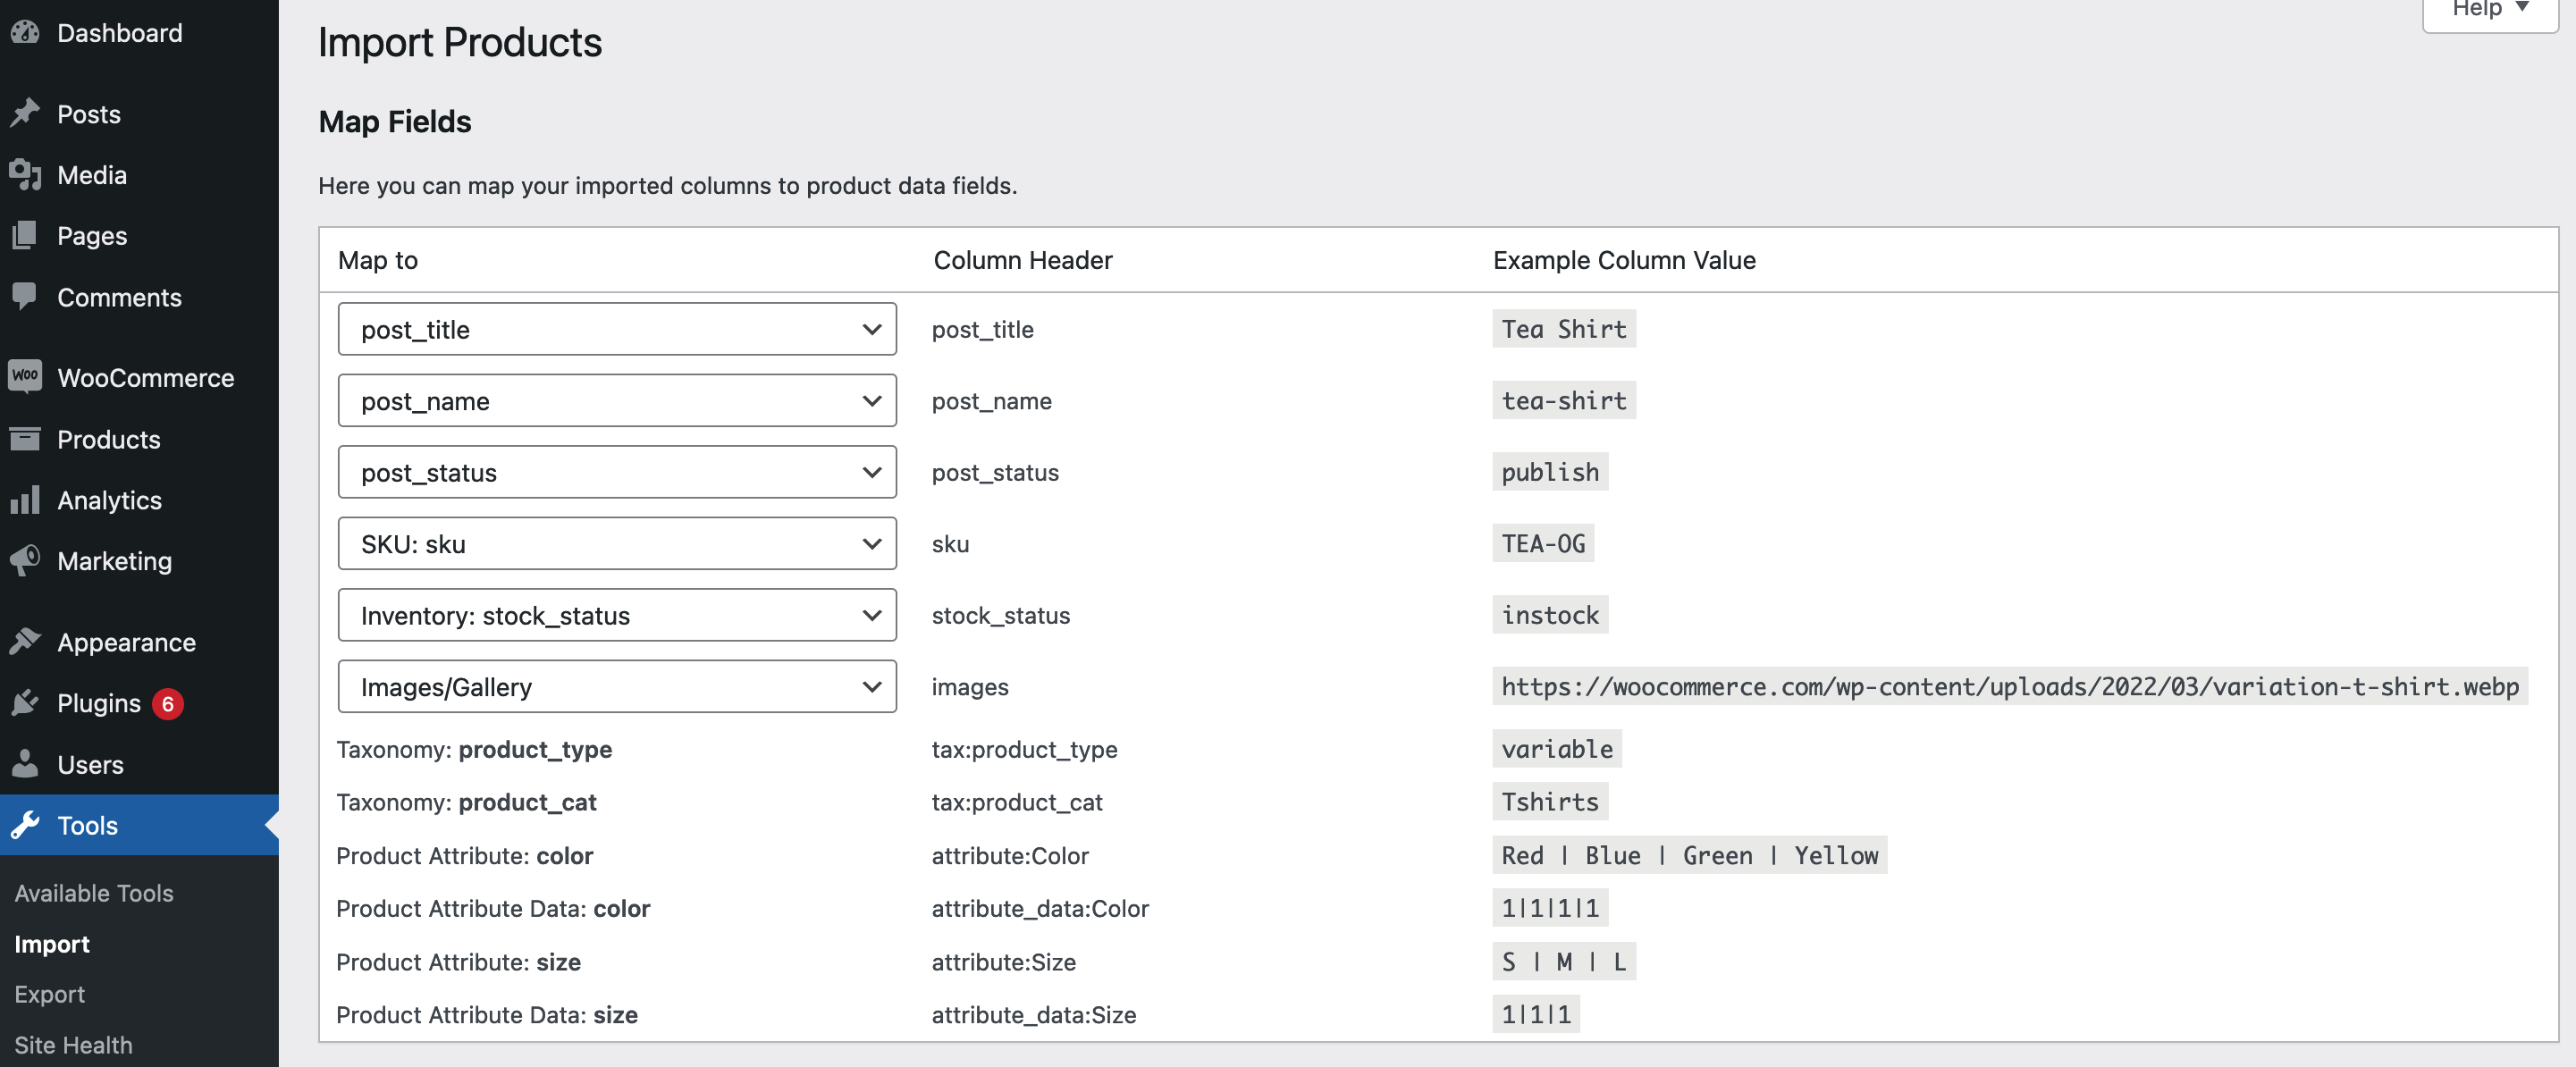
- When custom column headers are used, their names have to be selected from the dropdowns and matched to their respective default.
- When that process is complete, click Submit.

- If at this point the product is viewed at Products > All products, an almost-complete variable product is visible, but is missing its variations:

Step 4 – Upload the Variations CSV
↑ Back to top- Next, go back to WooCommerce > CSV Import Suite > Import Products.
- This time, click the button in the lower section, Import Variations.

- Browse to find the Variations/Child CSV.
- Click Upload File and import to view Map Fields.
- When you’re ready, Submit.
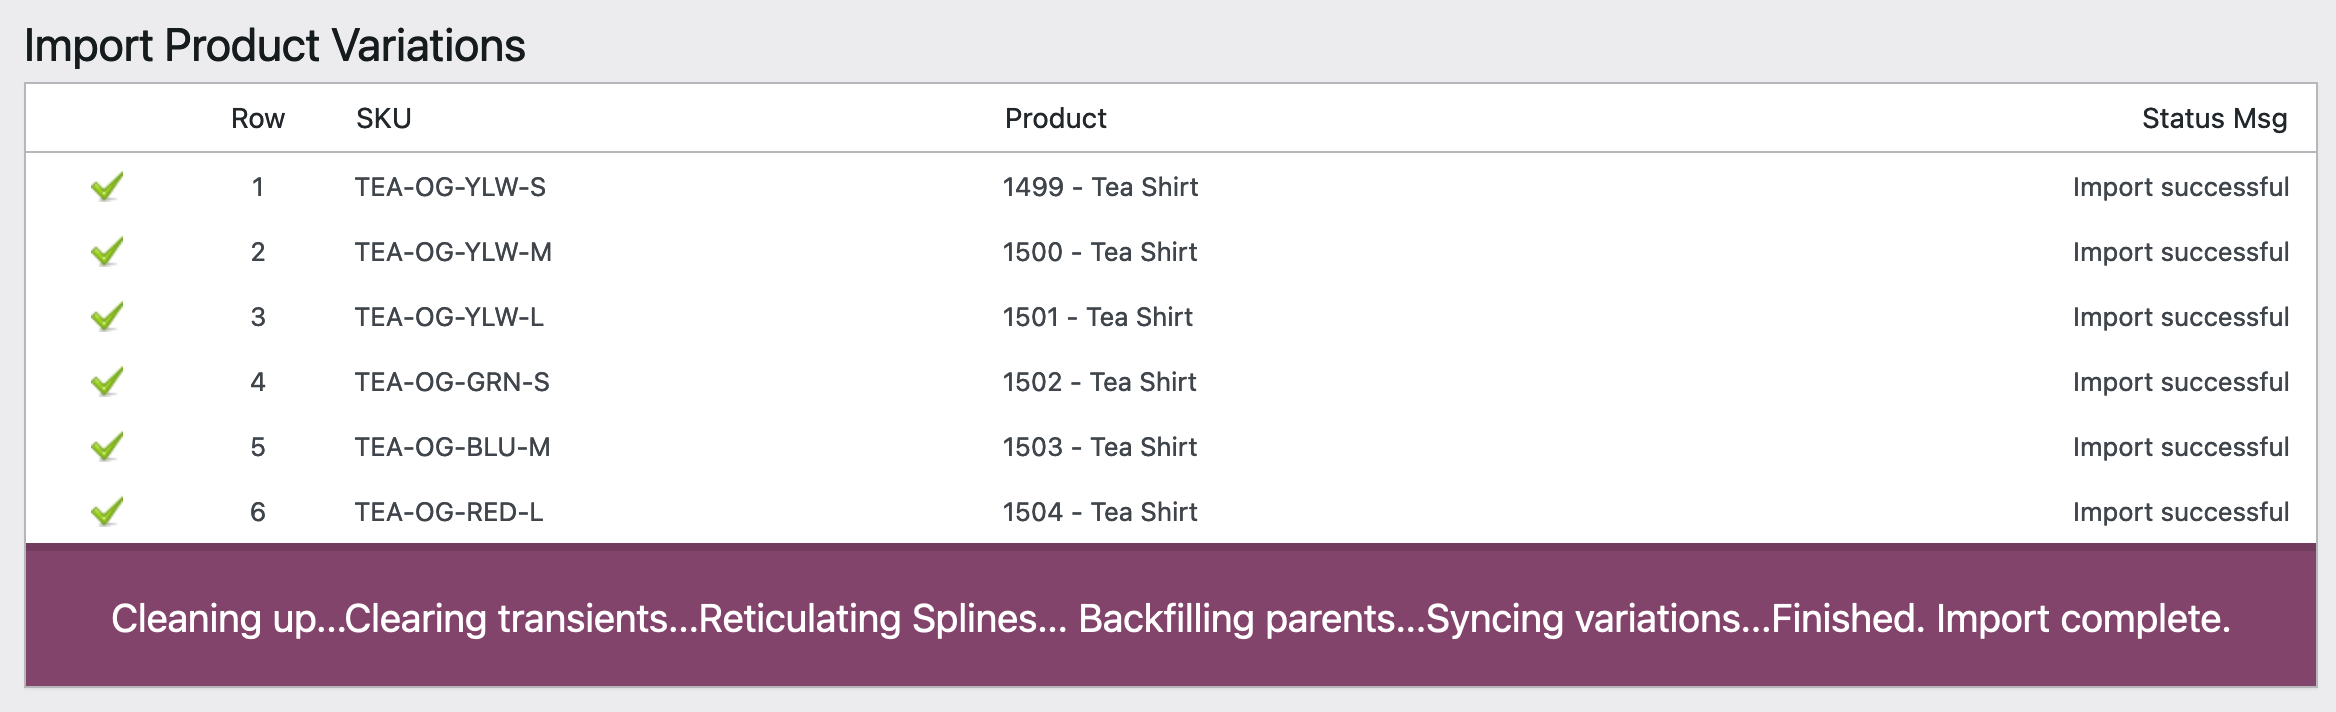
The process is complete, and you’ll notice a complete variable product amongst your inventory.

Mapping product attributes to variations
↑ Back to topVariations are mapped to certain attributes via a meta column prefixed with attribute_.
If, for example, the parent product had a ‘size’ attribute (which was global and found in Products > Attributes) you would use meta:attribute_pa_size as the column name.
For global attributes, the value would be the ‘slug‘ of the attribute. For example, a term called ‘Extra Large’ would likely be ‘extra-large’ in slug form. Use this value.
If the variation is mapped to ‘any’ attribute term, leave the value blank.
If the parent product had a ‘Color’ attribute (which was local and can be found in the product in Product > Product Data > Attributes) you would use
meta:attribute_Color as the column name (note the caps and that we are not using pa_ in the column name).
For local attributes, the value would be the regular value of the attribute. For example, a term called ‘Light Blue’ would be written exactly like ‘Light Blue’ in the CSV.
Frequently Asked Questions
↑ Back to topCan I import a variable product with one CSV?
↑ Back to topVariations are children of variable parent products. In order to import variations with Product CSV Import Suite, you must first import the parent products, and then the child variations. Two separate files and import actions are required to achieve this.
Why are attributes not importing?
↑ Back to topBefore importing your variations, the product must already have the correct attributes created in your original import. To add a global attribute, that can be used for any product, add a column titled attribute:pa_attribute replacing pa_attribute with your attribute name; e.g. attribute:pa_colour. The next column tells the importer whether to use this attribute for variations.
How to assign attributes?
↑ Back to topTo tell the importer to use an attribute for variations use the column attribute_data:pa_attribute replacing pa_attribute with your attribute name; Read the column reference’s document to know more about these columns and for usage examples.
How to set default attributes?
↑ Back to topTo set a default attribute in your original product, you should add the column attribute_default:pa_attribute; e.g. attribute_default:pa_colour, and then add the default term in the field.
If you haven’t added these fields to your original CSV, you can input them now and merge your CSV with items already imported.
What to consider when importing images?
↑ Back to topIf you are planning to import product images for your variations, be sure to read this FAQ.