FedEx Shipping Method is a premium shipping method that allows you to pull shipping rates via the FedEx API. It requires your store to use US or Canadian Dollars as its currency. FedEx works with a base country of United States or Canada and can calculate quotes for domestic and international parcels. The extension primarily works with in (inches) and lbs (pounds), but other units can be converted automatically.
You can purchase shipping labels directly from FedEx or use a label printing extension to handle that.
Installation
↑ Back to top- Download the .zip file from your WooCommerce account.
- Go to: WordPress Admin > Plugins > Add New to upload the file you downloaded with Choose File.
- Install Now and Activate.
More information at: Installing and Managing Plugins.
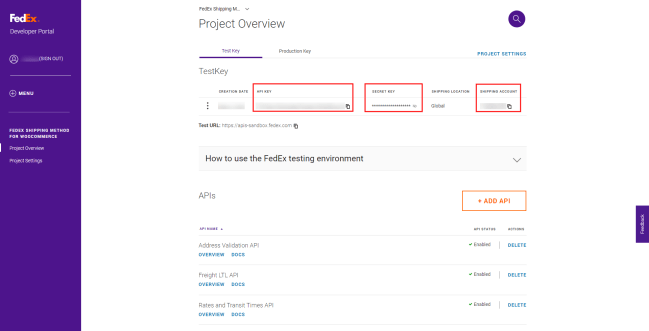
API & Debug
- Go to: WooCommerce > Settings > Shipping > FedEx.
- Debug Mode – Choose whether to enable debugging, which is helpful for troubleshooting purposes.
- API Settings – Your API access details are obtained from the FedEx website. The following links will only work when logged in.
- FedEx API Type – Select whether to use the REST API (new accounts must use this) or the SOAP (legacy) API.
- FedEx Account Number * – Provided by FedEx after signup. More info at: Open a FedEx Account.
- Production Key * – Tick this box according to the type of account (developer or production).
If REST API is selected: - FedEx Client ID * – Provided by FedEx after completing the REST API setup process.
- FedEx Client Secret * – Provided by FedEx after completing the REST API setup process.
If SOAP (legacy) API is selected: - Your server must have SOAP installed. Please contact your hosting provider for more information on SOAP installation on your server.
- FedEx Meter Number * – Provided by FedEx after signup. More info at: How Do I Get a FedEx Meter Number.
- Web Services Key * – Provided by FedEx after signup.
- Web Services Password * – Provided by FedEx after signup.
Follow the appropriate setup process depending on the selected API type:
REST API Setup:
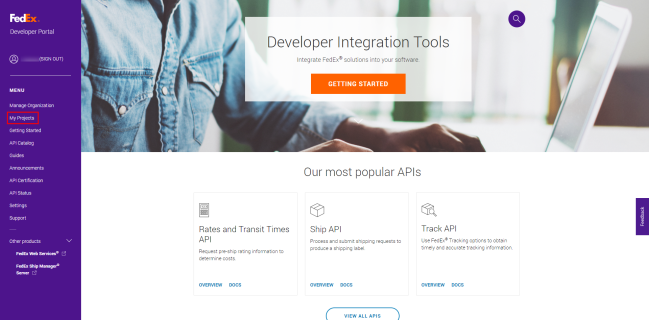
Navigate to https://developer.fedex.com/
Click “Sign Up or Log In” in the left-hand sidebar.

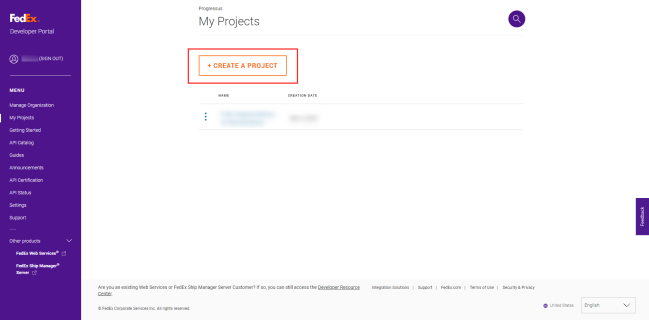
Once logged in, click “My Projects” in the left-hand sidebar.
Click “Create A Project.”
Select “I work for a company that ships with FedEx and is using a third-party software solution that has requested API keys.”
Enter “WooCommerce” in the Third-party Company field.
Enter “FedEx Shipping Method” in the Third-party Product field.
Enter “https://woocommerce.com/products/fedex-shipping-module/” in the Third-party Product Website field.
Click “Continue.”

Enter a descriptive project name (e.g “FedEx Shipping Method for WooCommerce”).
Check the following 3 APIs: “Address Validation API”, “Freight LTL API”, and “Rates and Transit Times API.”

Click “I understand.”
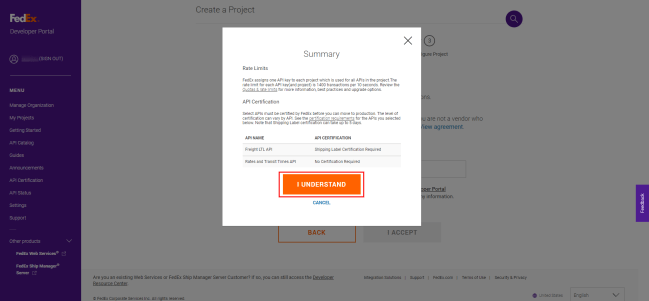
Scroll down and click “Next.”

Read all terms/agreements, type your full name as shown, check the box, and click accept.

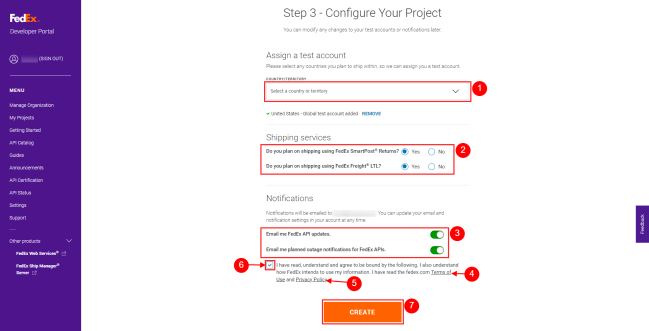
Select any countries you plan to ship within.
Select Yes/No for FedEx SmartPost Returns and FedEx Freight LTL.
Select whether you would like to receive FedEx API email notifications.
Read the Terms of Use and Privacy Policy and check the box if you agree.
Click “Create.”
You should see a success message. Click “Okay.”

If you would like to do some testing, you can use the test credentials.
Once you’re ready to move to production, click “Production Key”, create or assign a shipping account to the production key and click “Next.”
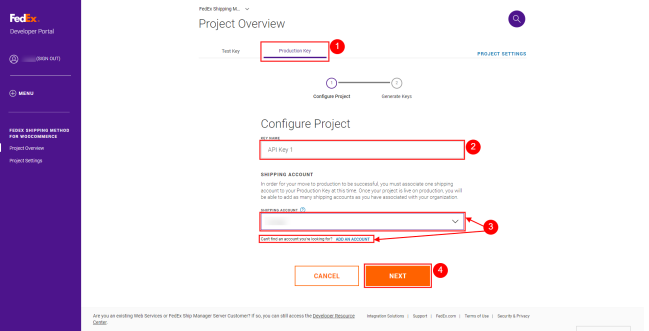
Copy and paste your production api key and secret somewhere safe and click “Done.”

The “Address Validation API” and “Freight LTL API” both require certification. Please click “Go to API Certification” and complete the steps.

Legacy SOAP API Setup:
FedEx no longer allows sign-up for the SOAP API, but if you have an existing account already, get a developer key. After testing, get a production key.
- FedEx LTL Freight – Settings for FedEx Freight rates. Tick the Enable Freight box to offer this option and fill out your full shipping address. Note: FedEx Freight rates only appear on the checkout page, as they require a recipient’s CITY.
Special Freight Note: The account number defaults to your main FedEx account number If you have a different account number for FedEx Freight ( you find this under the LTL Freight Accounts option in the Databases drop-down menu in your FedEx account screen ) then you can enter it here.
Configuration
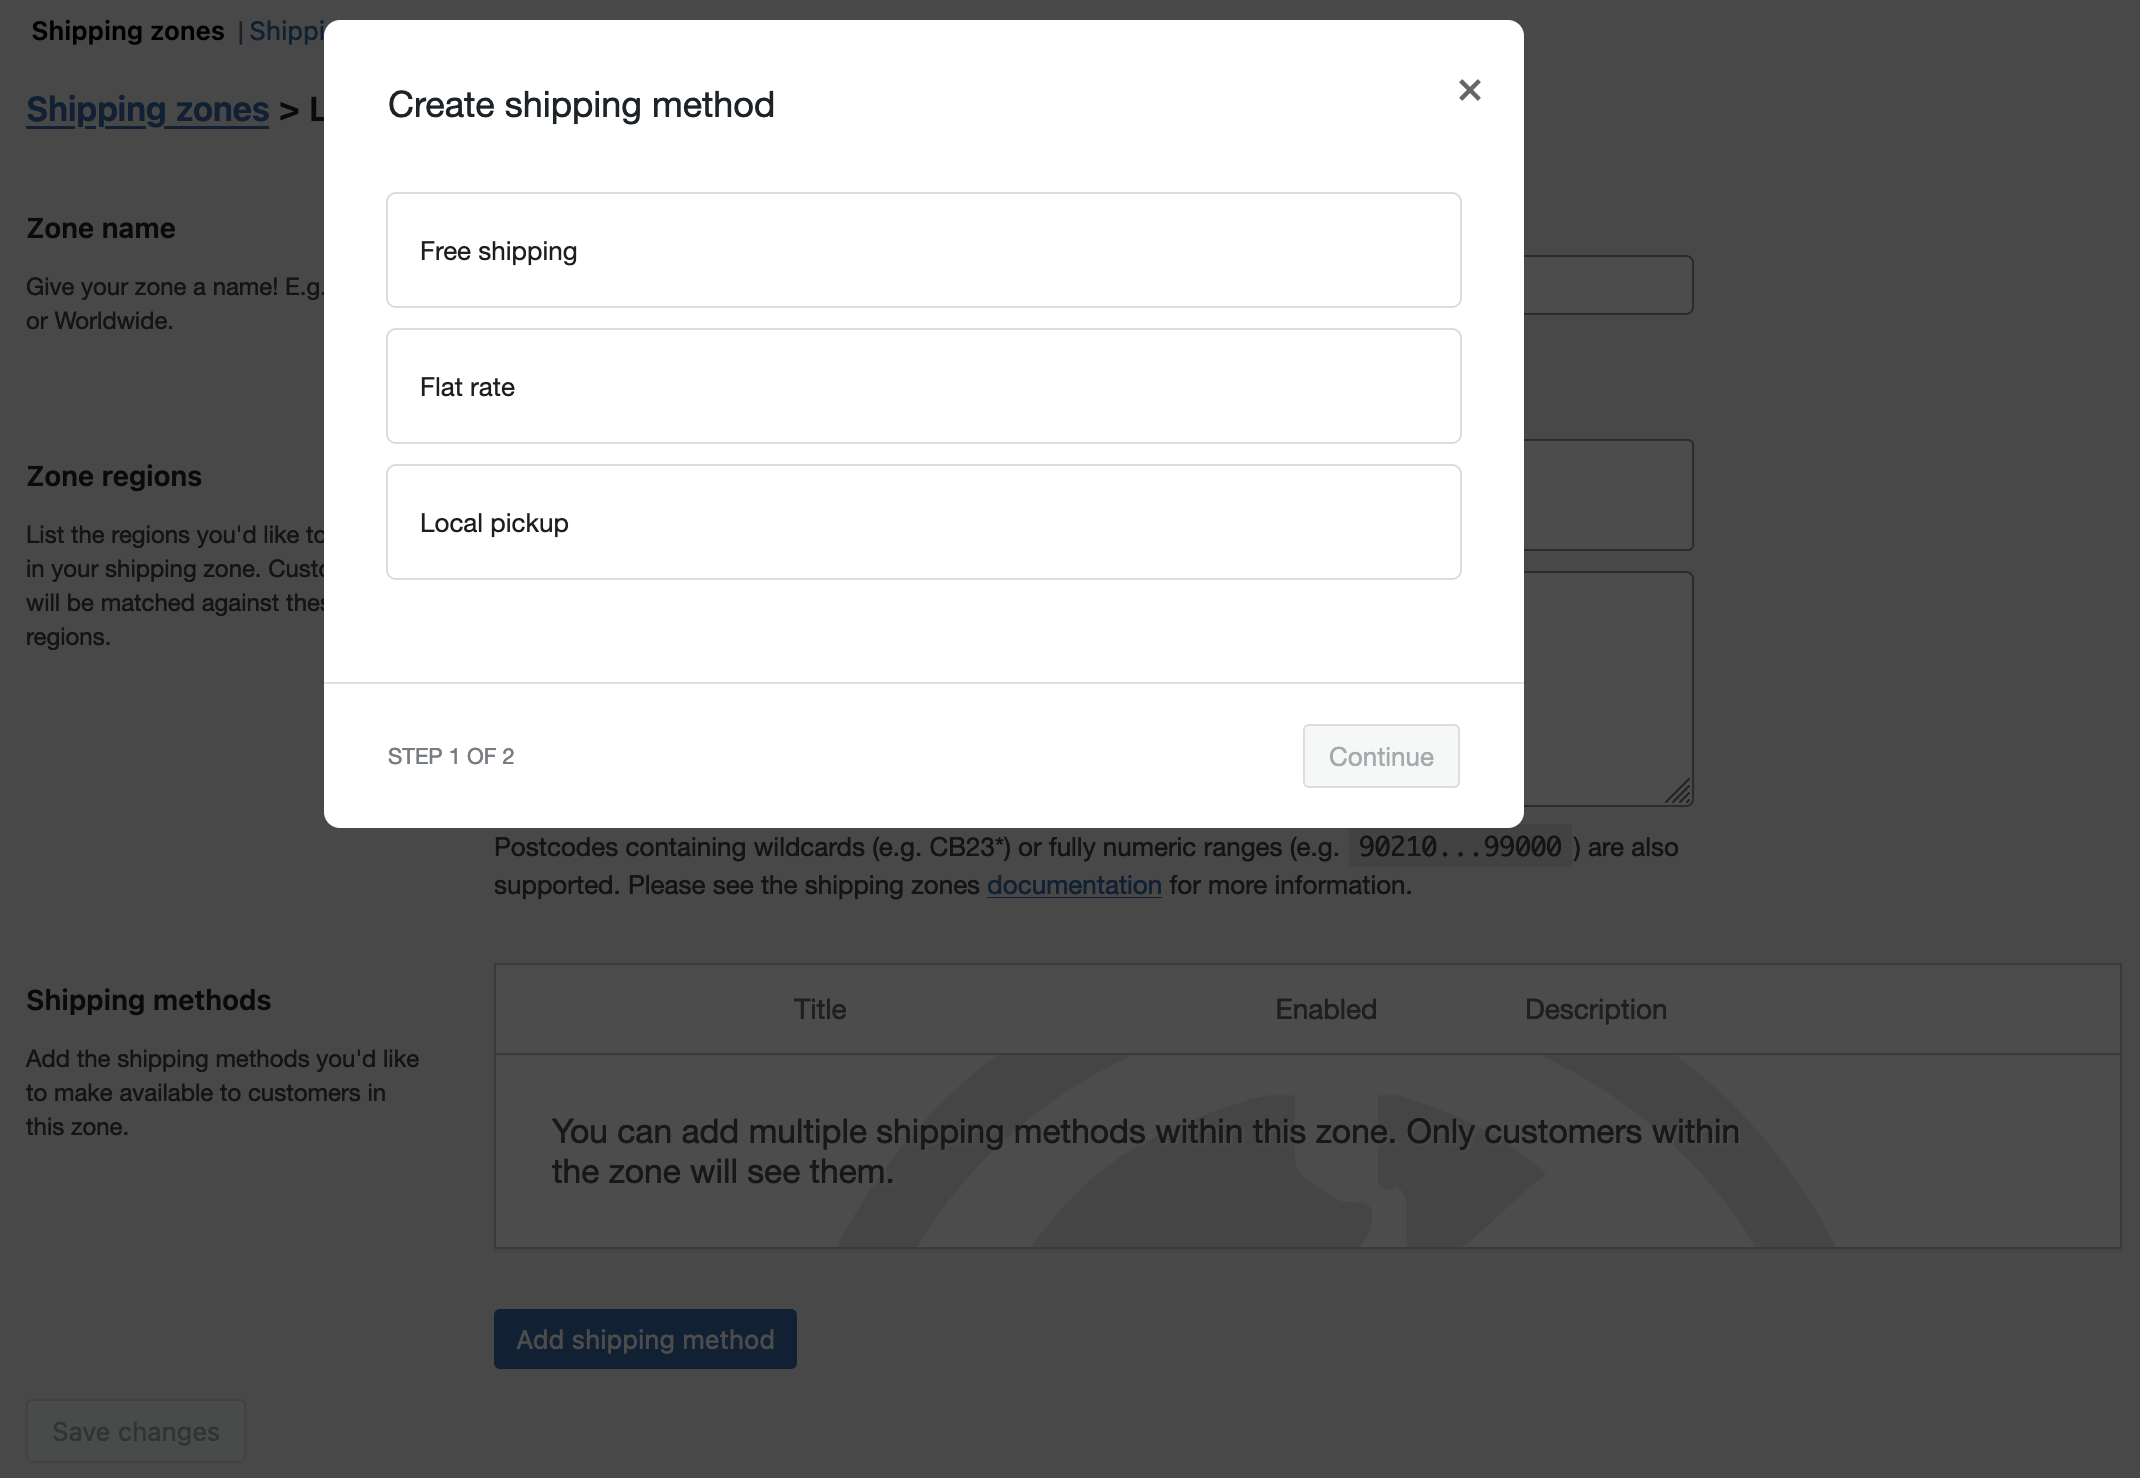
↑ Back to top- Go to WooCommerce > Settings > Shipping > Shipping zones.
2. Click the Edit button on the shipping zone where you want to offer this method.

3. Inside the shipping zone, click the Add shipping method button.

4. Then, select the shipping method and click the Continue button.
- Click the Edit button on the right side of the Shipping methods table to configure the settings:
- Method Title – Name the shipping method. This is visible to customers.
- Origin Postcode – Post/zip code from where you ship. Sent to the FedEx API.
- Packages
- Parcel Packing Method – Choose to pack items individually or pack into boxes using weight/dimensions (see more below)
- Rates and Services – Control the services and rates you offer customers.
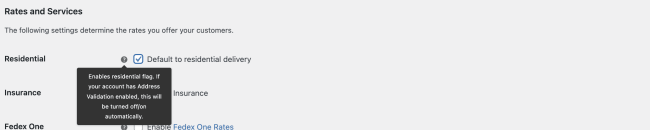
- Residential – Enables the residential flag. If your account has Address Validation enabled, this will be turned off/on automatically. (more details about Address Validation can be obtained from FedEx directly.)
- Insurance – Tick the box to get rates and insurance. Untick if using Smart Post.
- FedEx One Rate – Choose whether to enable FedEx One (flat) rates. More info at: FedEx One Rate.
- Request Type – Choose Account (get rates for your account) or List (get standard FedEx rates).
- FedEx SmartPost Hub – If using Smart Post, define your ID. Ensure that ‘Enable Insurance’ is unticked.
- Offer Rates – Choose to return all rates (allowing your customer to select) or return a single rate anonymously.
- Services – Here you can rename and change the order of FedEx shipping rates, enable methods you wish to offer, and add price adjustments. More below.
- Save Changes.
* Required fields
Parcel Packing Method
↑ Back to topThere are two packing methods with FedEx, and each affects the parcels you send to the API.
Per-Item (Default: Pack items individually)
↑ Back to topEach item in your cart (non-virtual) will be sent to the FedEx API. Quotes for all items will be combined to calculate the final cost.
Pack into Boxes (Recommended: Pack into boxes with weights and dimensions)
↑ Back to topItems will be packed into pre-defined boxes and sent to the API. We recommend this option. See Box Packing below for more information.
Box Packing
↑ Back to topIf you choose “Pack into boxes” as a parcel packing method, the area to set up box sizes will appear.
The box packer included with this shipping method lets you group items into packages for which you define height, width, length, weight, and max-weight. The packing is mainly volume-based, but also considers item size.
Setting up box sizes
↑ Back to top- Under Parcel Packing Method, select ‘Recommended: Pack into boxes with weight and dimensions’ to set up the boxes specifications.
- Select ‘Add box’ to add your own.
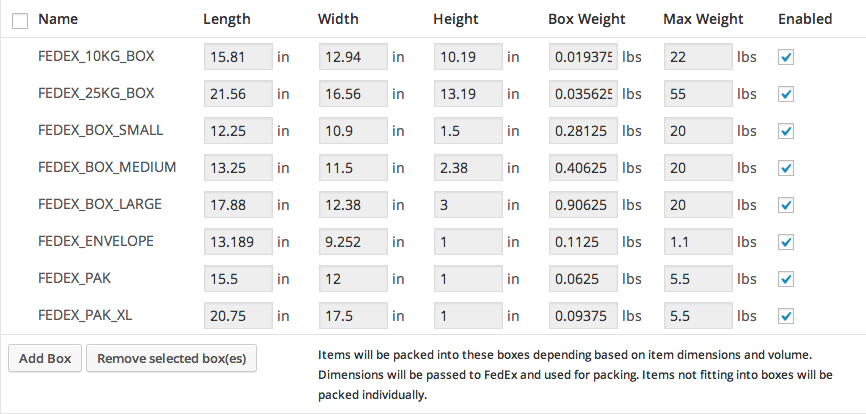
Dimensions are used for parcel dimensions and passed to the API, and are also used for packing.
Box weight is the weight of the box itself and added to the weight of contents.
Max weight is the maximum weight your box can hold. This includes the weight of contents and the box. (Note: This value should never be set to 0 , as that will result in that box not being used due to the Max Weight limitation being met before any items are packed inside.)
Enabled can be turned on and off, depending on whether you want to use the box.
You’ll notice that boxes are pre-filled with FedEx standard boxes. You can disable if you want custom box sizes.
Rearrange Shipping Options
↑ Back to topYou can manually rearrange the order of FedEx services by selecting the icon:
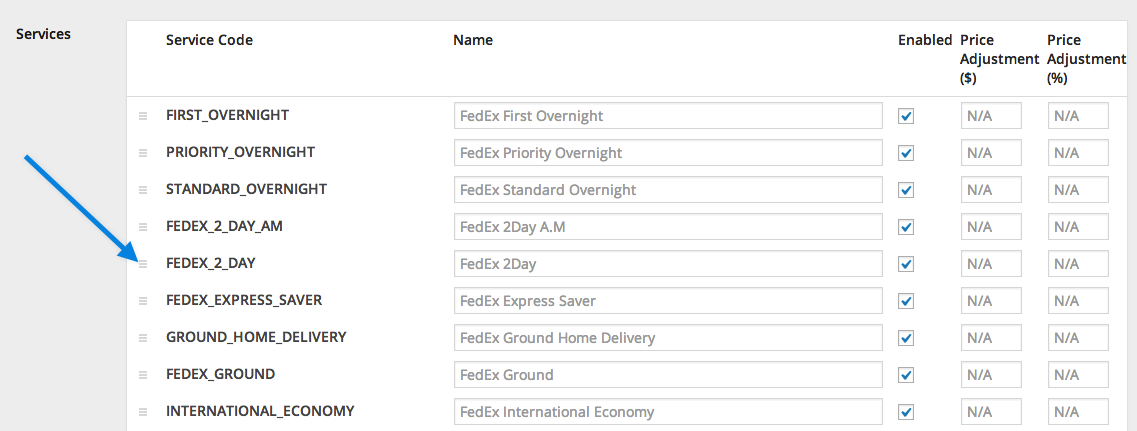
And then drag the item to where you want it to display:
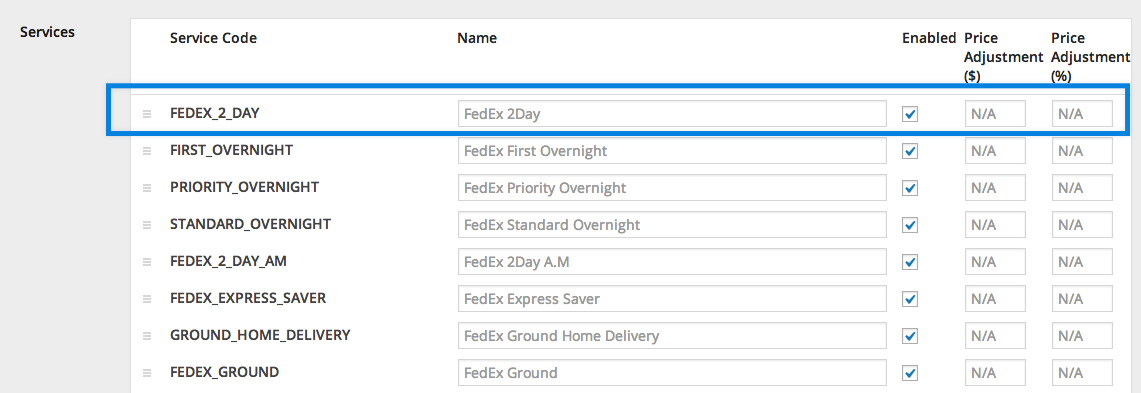
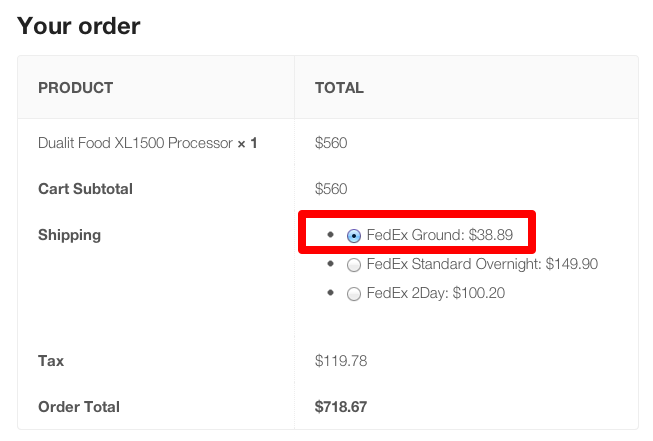
Save your settings.
This is what the customer sees on the front end:
How the calculation works
↑ Back to topThe box packer:
- Finds boxes that fit items being packed (uses H x W x D).
- Packs all items into boxes (using volume).
- Uses the smallest box fitting 100% of items *or* uses the highest % packed box, and then passes unpacked items back (and repeats the process)
- Packs unpackable items alone, using item dimensions.
- Returns all packed boxes.
Handling Fees
↑ Back to topTo add handling fees to shipping calculations, you can use a Price Adjustment column in the Services section. Each FedEx service can be increased separately using the price adjustment columns in the row.
Use the Price Adjustment ($) column to add a flat amount to the shipping quote.

Use the Price Adjustment (%) to increase the shipping quote by a percentage. In this example, the 3-Day Select and Ground shipping methods will be increased by 1% of the quote returned from FedEx.

LiftGate Service
↑ Back to topLiftgate service is an additional service offered by FedEx when picking up or delivering freight. It requires the use of a hydraulic lift (called a liftgate) installed on the back of the truck. The liftgate is used to raise material from ground level to the level of the truck bed and vice versa.
Liftgate service is only applicable as additional surcharge to FedEx LTL Freight delivery. If cart contains product with enabled liftgate service only FedEx Freight shipping options will be presented to customer. Setting liftgate service for variable product on product level is equal to enabling liftgate service for each variation.


Customer Usage
↑ Back to topCustomers can get quotes based on the address entered from two places:
- Cart page – by using the shipping calculator
- Checkout page – by filling in shipping and billing forms
Troubleshooting
↑ Back to topNo rates returned/no rates available
↑ Back to top- Enable debug mode to see debugging info on the cart page. This often reveals the problem.
- Check that the products have sizes and weights set. Without this, the calculation cannot be performed.
- Go to WooCommerce > Settings > General and verify that your store’s base country is the United States or Canada and the currency is set to US Dollars or Canadian Dollars, respectively.
- Confirm that the plugin is linked to FedEx API. It uses SoapClient.
I have enabled Smart Post, but no rates are being returned
↑ Back to topFor SmartPost rates to work, you:
- Need a FedEx account and meter number that supports SmartPost.
- Your package or item needs to weigh greater than 1 lb. Otherwise, the rate is invalid.
FedEx Ground is available when shipping from the US to Canada, and FedEx Ground International is not.
↑ Back to topAccording to FedEx terms:
You can obtain rates for FedEx Ground shipments to destinations within the US and Canada. If you are in a FedEx discount program, contact your FedEx account executive for an exact rate quote.
If your FedEx account has “International Ground Direct Distribution” enabled, be sure to check that box in the plugin settings to get the correct rates.
I do not know my Default Freight Class
↑ Back to topFedEx has developed an LTL Freight Classification tool that can guide you through a quick two-step process to obtain the best option for you.
I get an error: The address entered for FEDEX_FREIGHT is missing one or more required fields: State; ; ; ; . Please resubmit your request with all required address fields
You can get this error if the Province codes is not abbreviated correctly in the Address section.
Full state codes can be found via the FedEx Transaction Coding Reference Guide. Currently (May 2021) the US State Codes are found at Table 86, page 912-913 under U.S. State Code Table and Canada Province Codes are Table 82, page 910 under Canadian Province Codes
I get the error: The account number entered for FEDEX_FREIGHT could not be validated
↑ Back to topMake sure that your account number is matching from the LTL Freight Accounts area (as this will be a freight-specific account number, which is different than your regular account number) and that you have the correct 2 letter abbreviation for your country (US, CA).
The account number listed here defaults to your main FedEx account number. If you have a different account number for FedEx Freight ( you find this under the LTL Freight Accounts option in the Databases drop-down menu in your FedEx account screen ) then you can enter it here.
FedEx LTL Freight does not show as an option when enabled
↑ Back to topAccording to FedEx Guidelines Freight does not show until the total weight of the order exceeds 150 lbs.
Also, please note that specific freight services need to be enabled based on the shipper’s location and customer destination. If a freight rate doesn’t show, try enabling more services.
What is the difference between GROUND_HOME_DELIVERY and FEDEX_GROUND?
↑ Back to topThe GROUND_HOME_DELIVERY service is for residential addresses while FEDEX_GROUND is for commercial addresses. The FedEx integration will automatically choose the correct service(provided it is enabled) based on the address type.
FedEx Ground / FedEx Ground Home Delivery does not show as an option when enabled
↑ Back to topYou will not be able to get the FedEx Ground Shipping Rates with the FedEx One Rate enabled, as FedEx One Rate does not support ground shipments. So make sure the FedEx One Rate option is disabled.
FedEx Ground Home Delivery will also not show unless “Default to residential delivery” is enabled:
If Home Delivery is not offered, the alternative is to also have FedEx Ground enabled.
FedEx One Rate does not show as an option when enabled
↑ Back to topFor One Rate to apply, you must have valid FedEx One Rate boxes enabled. FedEx maintains a list of compatible boxes, which can be enabled in the plugin settings. At least one of the applicable service codes (i.e., FedEx Express Saver, FedEx 2Day, FedEx 2Day A.M., FedEx Standard Overnight, FedEx Priority Overnight, FedEx First Overnight) must likewise be enabled. You should also make sure that the FedEx Express Saver service is enabled as well, to ensure the cheapest delivery rates are offered to your customers.
Require a signature option.
↑ Back to topAlthough not currently possible, feel free to add your votes to the idea on our Ideas Board.
Can this plugin print labels?
↑ Back to topNo.
Questions and Support
↑ Back to topSomething missing from this documentation? Do you still have questions and need assistance?
- Have a question before you buy this extension? Please fill out this pre-sales form – please include the name of this extension in your query.
- Already purchased and need some assistance? Get in touch with a Happiness Engineer via the WooCommerce.com Support page and choose this extension name from the “I need help with” dropdown