Convenience for your customers should be a paramount priority for any eCommerce retailer. Shipping Multiple Addresses helps avoid the frustration that can occur when a customer is shopping for multiple people at the same time.
Instead of having to place multiple orders, your customers can ship individual items to different addresses from one order. This can be especially useful around the holidays, when your customers are shopping for gifts for multiple people.
Installation
↑ Back to top- Purchase the product from WooCommerce.com
- Download the ZIP file from your WooCommerce.com dashboard
- Go to Plugins > Add New > Upload and select the ZIP file you just downloaded
- Click Install Now and then Activate.
- Read on to learn how to set up and configure the product.
More information at: Install and Activate Plugins/Extensions.
Setup and Configuration
↑ Back to topIf you’ve set your site to “Force shipping to the customer billing address” this extension doesn’t offer multiple address options at checkout.
The plugin automatically creates a child page under your checkout page called Shipping Addresses. This is the page where customers can setup their multiple shipping addresses. If you’d like to change the page used you’ll find that under WooCommerce > Settings > Shipping > Shipping Options in the Multiple Shipping Address page selector. Just be sure any page set here uses the [woocommerce_select_multiple_addresses] shortcode.
Now head to WooCommerce > Settings > Shipping > Multiple Shipping to setup the extension. Below you’ll find each setting explained in detail.
Multiple Shipping
↑ Back to top- Title – This is the text your customers see at checkout.
Cart Duplication
↑ Back to top- Enable Cart Duplication – This functionality will allow your customers to duplicate the contents of their cart in order to be able to ship the exact same cart to multiple addresses instead of having to do this on an item by item basis. Imagine purchasing the same shirt and wanting to ship it to multiple people.
Checkout Fields
↑ Back to top- Delivery Notes – This will let customers add delivery notes for each address they use at checkout.
- Limit Character Input – If you’d like to set a numerical limit on the number of characters that can be used in the delivery notes.
- Date Picker – Let your customers pick a desired delivery date for each address.
- Valid Shipping Days – Pick from each day of the week that customers should be able to choose as delivery days.
- Excluded Delivery Dates – Exclude specific calendar dates from being available as delivery dates. For example, no deliveries on Christmas Day.
Gift Packages
↑ Back to top- Enable Gift Packages – This lets your customer choose that the products sent to each address are a gift. This shows up when managing your orders and could signify that your customer doesn’t want an invoice included in this shipment. They don’t want the gift receiver to see how much the gift cost.
Excluded Products & Categories
↑ Back to top- Products – Select products you don’t want to allow multiple shipping addresses on.
- Categories – Select categories you don’t want to allow multiple shipping addresses on.
Text your shoppers see when Multiple Shipping is enabled at checkout
↑ Back to topThis lets you customize how your customers are prompted to use multiple shipping addresses at checkout.
- Checkout Notification – Customize the text shown at checkout.
- Button: Item Addresses – Customize the button text shown at checkout.

Partial Order Completed Email
↑ Back to top- Send Email – Enable this to send an email to the customer when the order has been partially completed.
- Subject – Customize the email subject here.
- Message – Create the message sent in the Partial Order Completed Email.
Usage
↑ Back to topCart Page
↑ Back to topOn the cart page there is a new button added for the Duplicate Cart feature. When selected it will duplicate the products in the cart and take you to the Shipping Addresses page created by the plugin. This is useful if you wanted to send the same cart to multiple addressees. For example getting all family members the same gift for the holidays. You can adjust the quantity and address for each line item.
Once you select the Save Addresses and Continue button you are then taken the checkout page.
Checkout Page
↑ Back to topAt checkout you’ll see the Multiple Address message and button once you’re entering your shipping address. When you select the Set Multiple Addresses button you’ll then be taken to the shipping addresses page where you can choose where to send the products from your cart and can even duplicate the cart if needed. Once all is set you can select Save Addresses and Continue to head back to the checkout page to finish for your order.

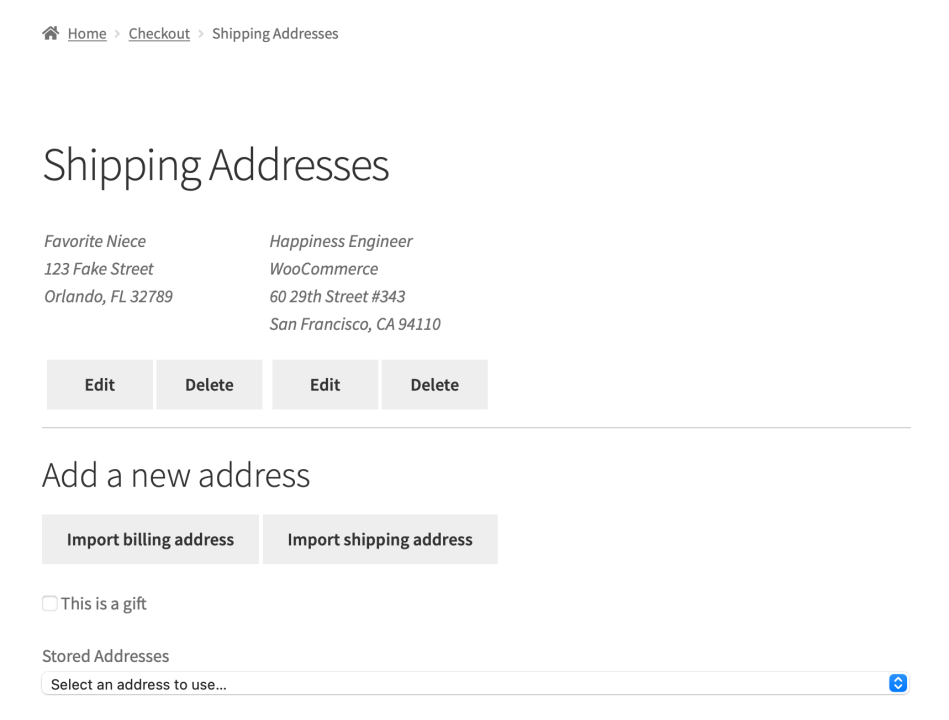
Account Address Books and Saved Addresses
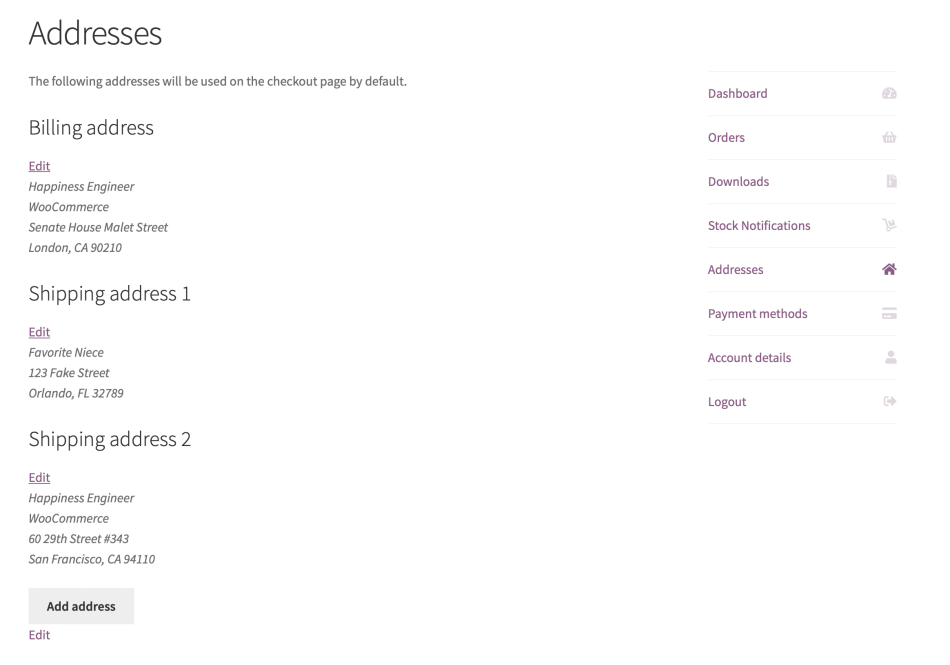
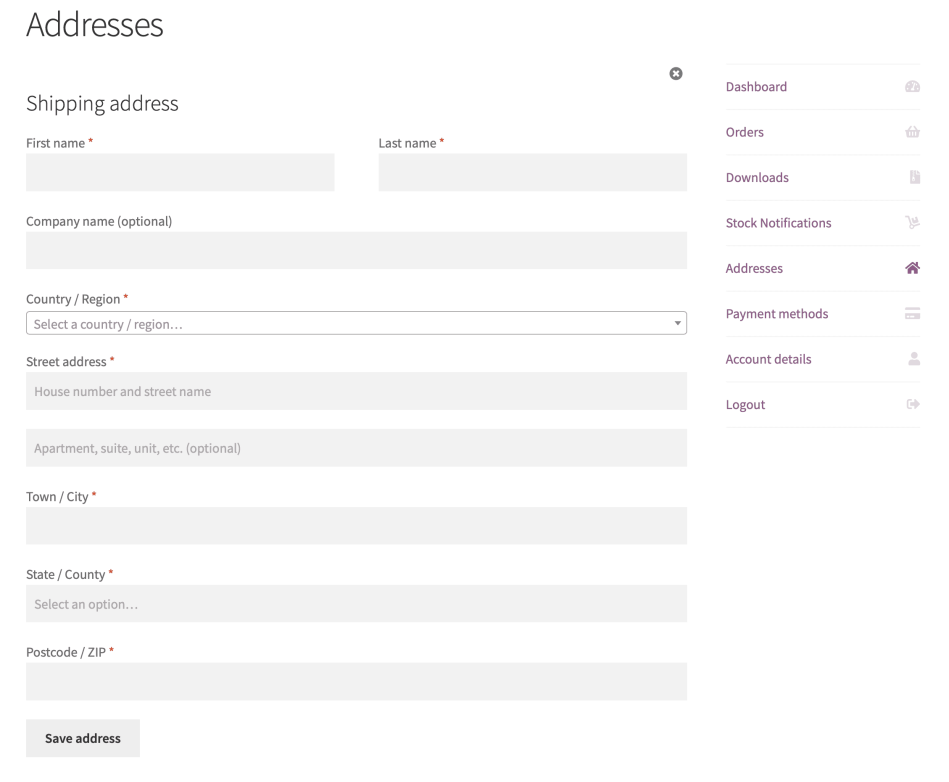
↑ Back to topFrom both the Shipping Addresses page and from My Account > Addresses you are able to save new shipping addresses to your account, but each spot looks a bit different. If you’re on the Shipping Addresses page select the Add a new shipping address link. If you’re on the My Account page head to the Addresses section.
The address form added by Multiple Shipping Addresses gives you options to edit your default billing and shipping address in addition to adding a new shipping address. When adding a new address the Import billing address & Import shipping address buttons will let you load your default information from either billing or shipping fields to then edit or modify to save as a new address.

Frequently Asked Questions
↑ Back to topHow do I edit address templates?
↑ Back to topTo override or update templates for Shipping to Multiple Addresses:
- Create a new multi-shipping directory inside your active theme’s root directory.
- Copy the template files from plugins/woocommerce-shipping-multiple-addresses/templates, and paste them into the new multi-shipping directory you just created in your theme directory.
- Edit these files as you would any template file. The plugin automatically uses the template files from the multi-shipping directory you created by default.
When will users see this option? I don’t see it in the cart.
↑ Back to topUsers are not presented with this feature until they check out. At that time, a banner appears at the top of the page offering this feature:
If you want customers to know about this feature prior to checkout, you can promote it in other ways. Note that you should have more than one item in cart to see this option.
How do customers add addresses to their order?
↑ Back to topWhen your customer selects the option to add multiple addresses, they will be taken to a new checkout screen where they will be able to add, save, re-use shipping addresses previously entered or saved to their account, for each product and quantity. To “copy” addresses from item to item, the customer should save an entered address, then select it, all during this process.
If your customer has already assigned addresses, but wants to add more or change the ones they’ve already added they click the change/modify button:
How are shipping fees calculated?
↑ Back to topShipping costs are calculated per “shipping address.”
If your customer is shipping their orders to multiple locations, they are responsible for the individual costs of each shipment because despite this being a single order to save time, they are still shipping items to multiple locations. Any shipping method you set will be available to the customer to select for each shipping address.
What do customers see on the order confirmation?
Your customer’s order receipt will be very similar except that order details will show a breakdown of the order shipping to multiple addresses:

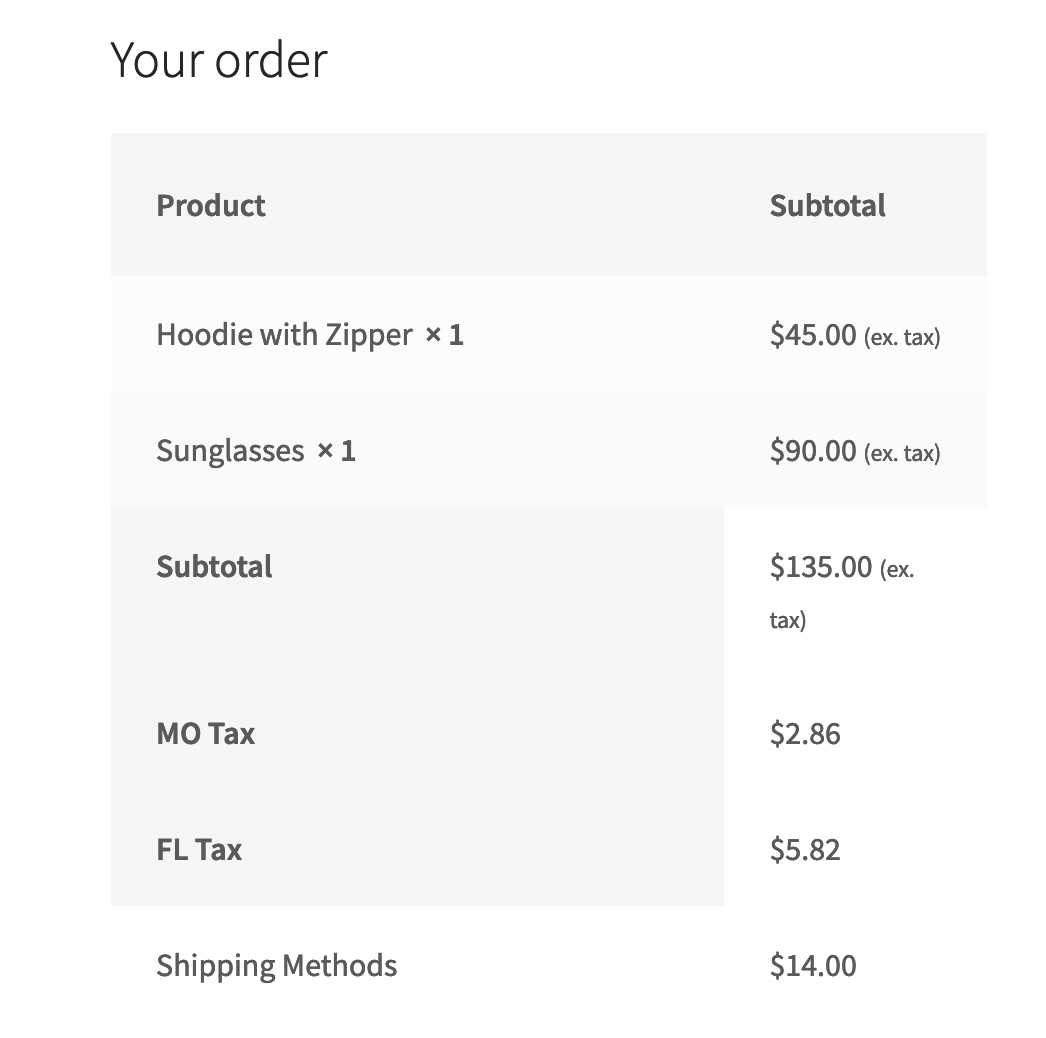
How are taxes calculated?
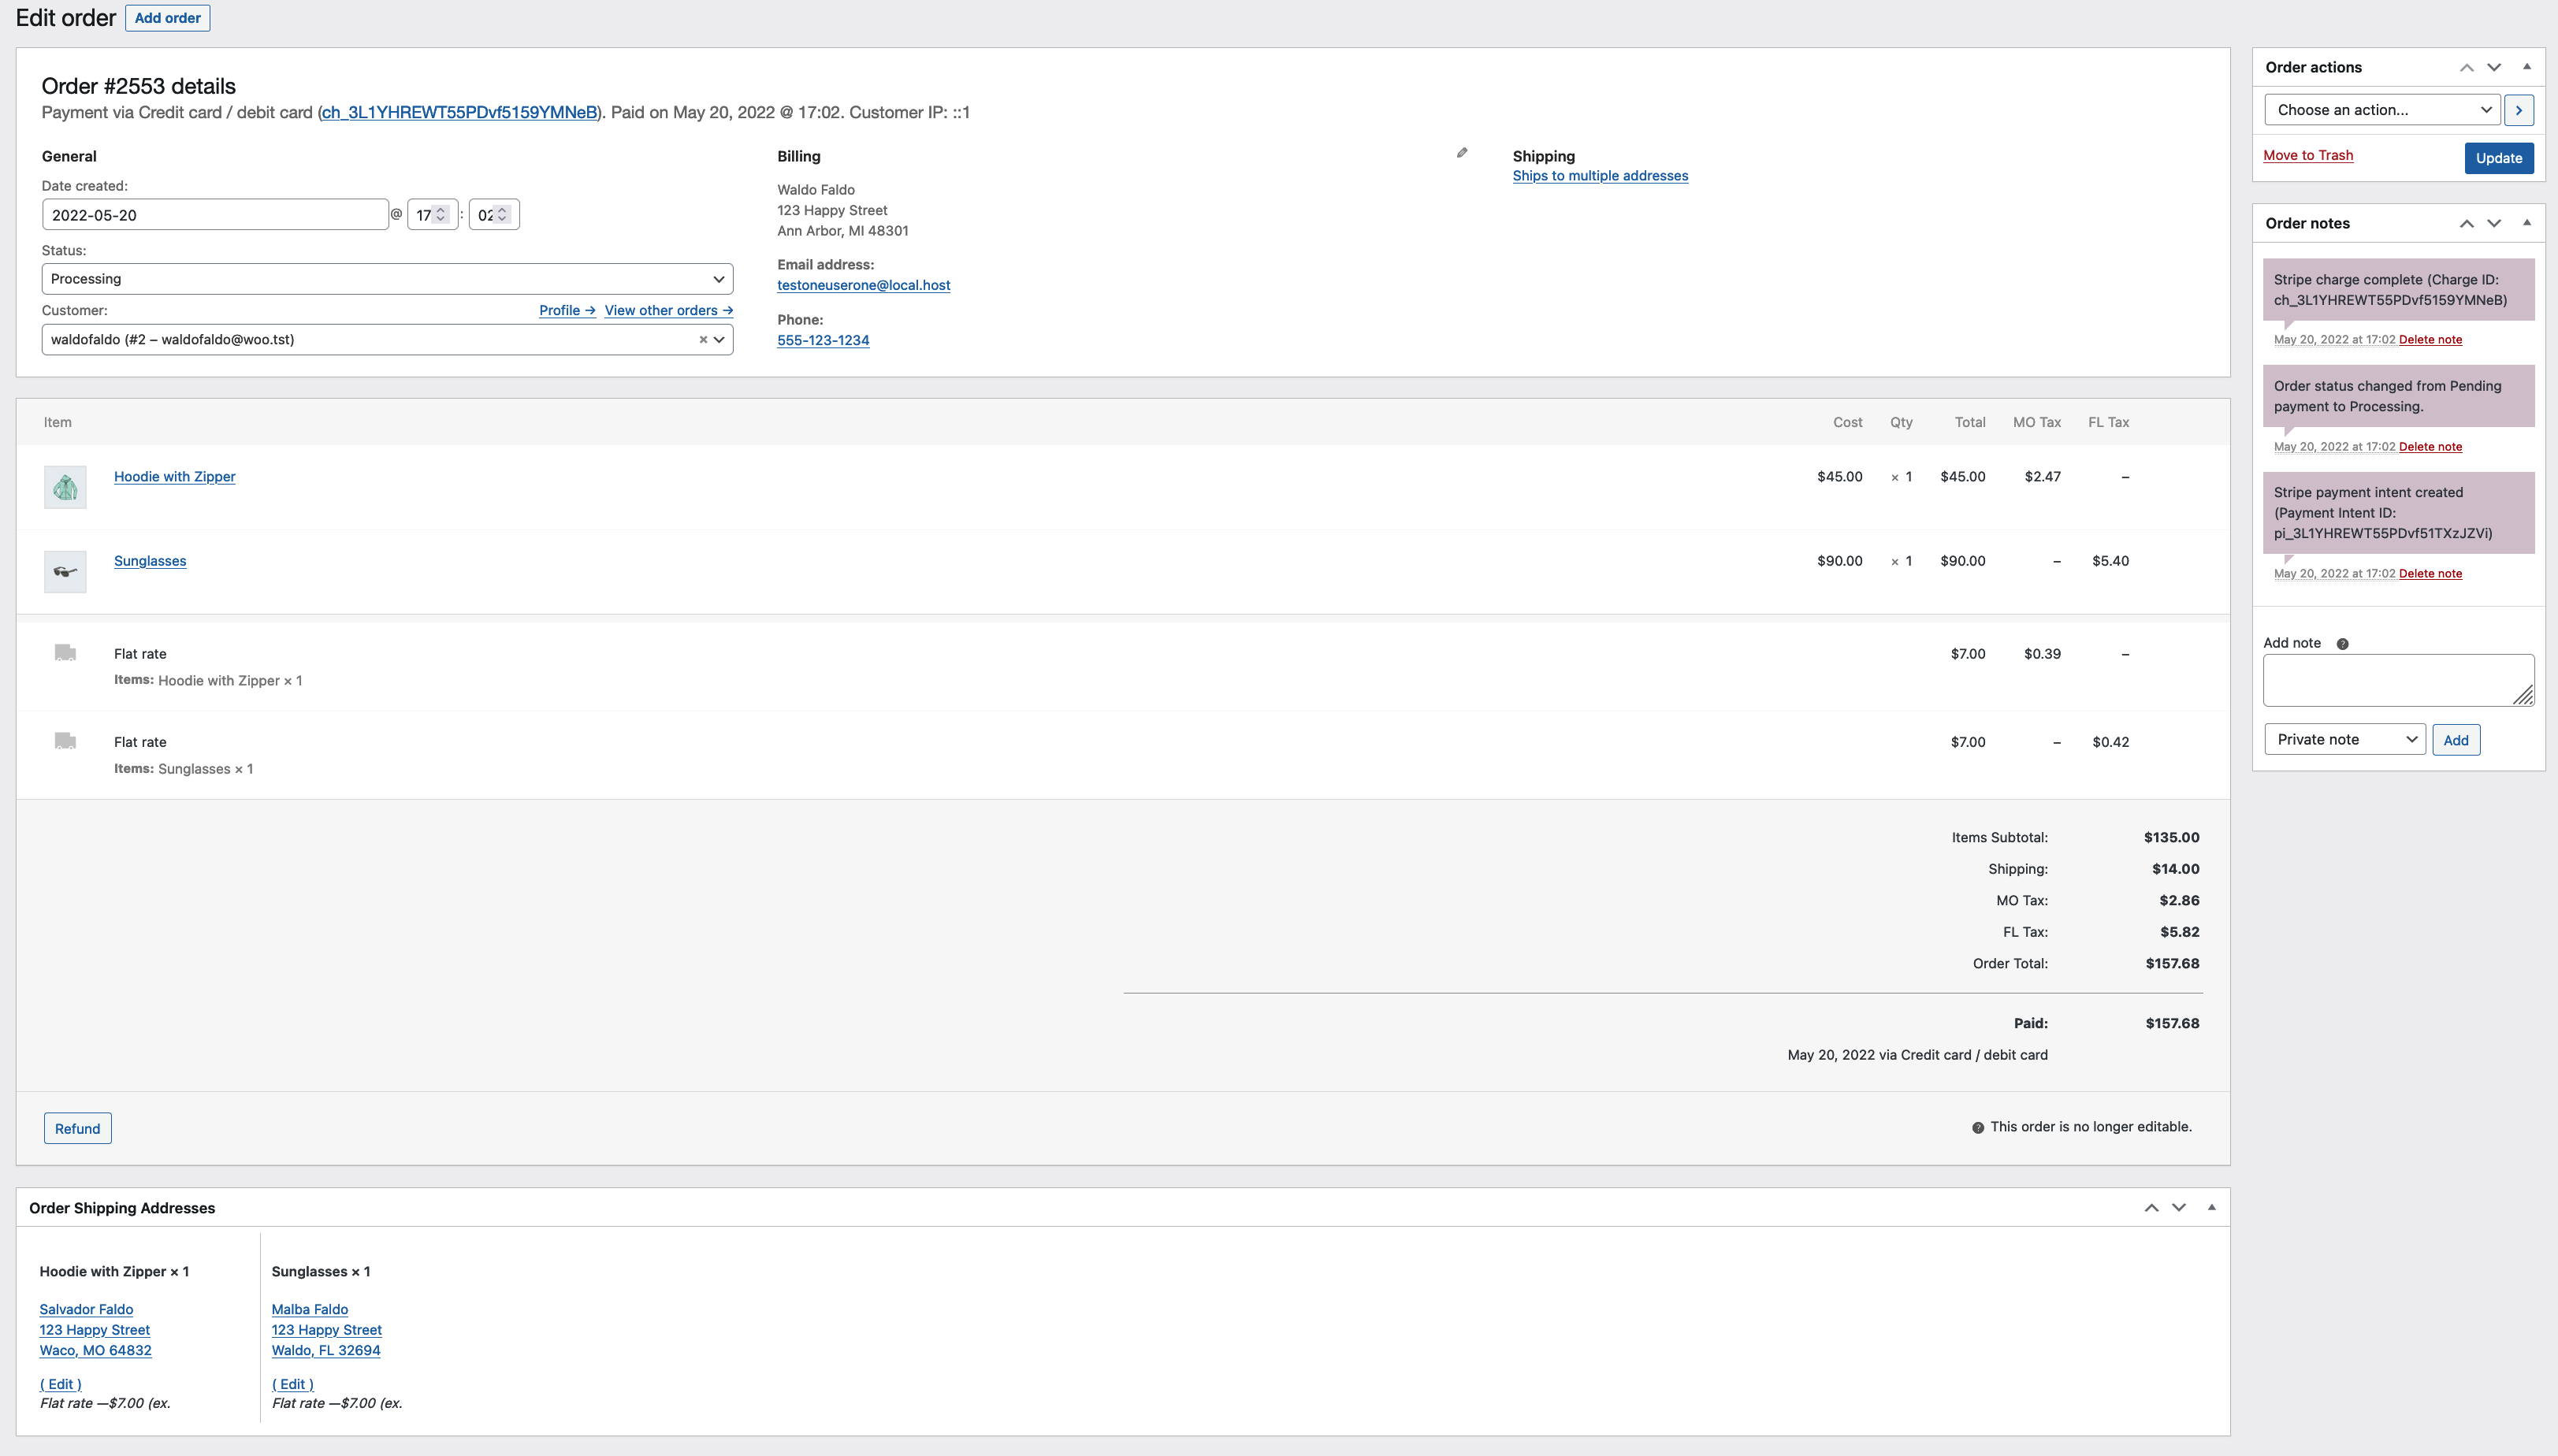
↑ Back to topLike any other purchase, taxes need to be collected according to tax rules set in WooCommerce. In the screenshot below, illustrative taxes o 6% and 5.5% were applied to the portion of goods shipping to the state of Florida and Missouri respectively. Where taxes are excluded for shipments to certain destinations, they will be omitted.
What do I see in the order overview?
↑ Back to topFollowing on from the example above, it will appear in the order overview as follow. Notice where the Shipping details would usually appear, there is a Ships to multiple addresses link to the section with more details at the bottom of the screen.
Does this plugin work with Stamps.com API integration?
↑ Back to topAt this time, the Ship to Multiple Addresses plugin and the Stamps.com API integration plugins are not compatible with each other.
Does this plugin work with ShipStation integration?
↑ Back to topAt this time, the Ship to Multiple Addresses plugin and the ShipStation integration plugins are not compatible with each other.
Does this plugin work with TaxJar?
↑ Back to topAt this time, the Ship to Multiple Addresses and the TaxJar plugins are not compatible with each other and either multiple addresses are used for shipping and no tax is calculated by TaxJar or only a single address is used and TaxJar returns the tax.
Does this plugin work with Product Add-Ons (separate purchase)?
↑ Back to topYes, it’s compatible as of version 3.6.1.
Code Snippets
↑ Back to topAdd additional fields to addresses
↑ Back to topIt is relatively simple to add custom data to the WooCommerce Ship to Multiple locations address forms. You can use the example below as a starting point, and follow the directions on Customizing checkout fields using actions and filters here.
Questions and Feedback
↑ Back to topHave a question before you download the app? Please fill out this contact form.
Already downloaded and need some assistance? Get in touch with a Happiness Engineer via the Help Desk.